Deploy an ASP.NET application to IIS using Octopus and Jenkins
In this tutorial, we show you how to build a fully-functional continuous delivery pipeline for a simple ASP.NET web application and deploy it to IIS. We use Jenkins to build the code and run tests, and we use Octopus Deploy to deploy and promote releases.
To get up and running quickly, the TestDrive VMs provide preconfigured environments demonstrating various continuous delivery pipelines documented in these guides.
Introduction
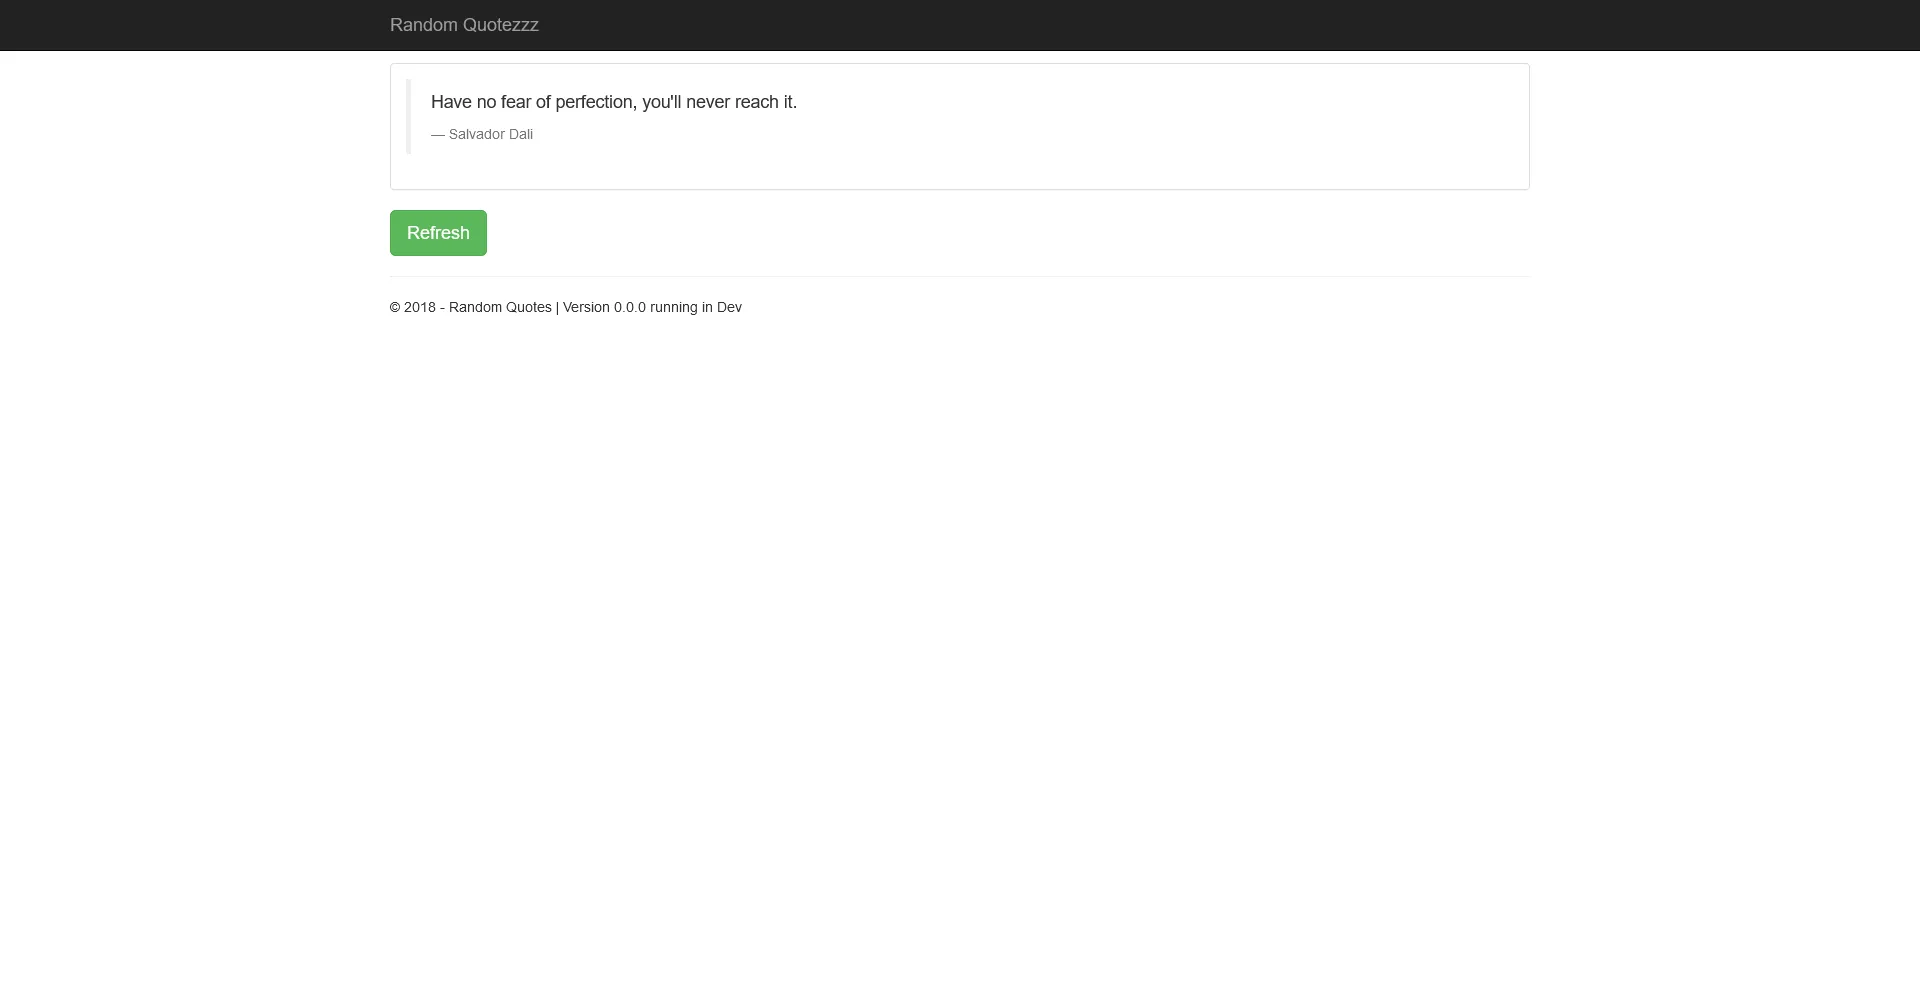
The application we'll deploy is called Random Quotes, which is a simple web application that randomly displays a famous quote each time the page loads. It consists of a web front end and a database that contains the quotes. We'll build a complete Continuous Integration/Continuous Delivery (CI/CD) pipeline with automated builds, deployments to a dev environment, and sign offs for production deployments.
Deployment pipeline
For this tutorial, we assume you use Git for version controlling changes to your source code and Jenkins to compile code and run unit tests. Octopus Deploy will take care of the deployment. Here is what the full continuous integration and delivery pipeline will look like when we are finished:
The development team's workflow is:
- Developers commit code changes to Git.
- Jenkins detects the change and performs the continuous integration build, this includes resolving any dependencies and running unit tests.
- When the Jenkins build completes, the change will be deployed to the Dev environment.
- When one of your team members (perhaps a tester) wants to see what's in a particular release, they can use Octopus to manually deploy a release to the Test environment.
- When the team is satisfied with the quality of the release and they are ready for it to go to production, they use Octopus to promote the release from the Test environment to the Production environment.
Since Octopus is designed to be used by teams, in this tutorial we also set up some simple rules:
- Anyone can deploy to the dev or test environments.
- Only specific people can deploy to production.
- Production deployments require sign off from someone in our project stakeholders group.
- We'll send an email to the team after any test or production deployment has succeeded or failed.
This tutorial makes use of the following tools:
Version control of source code
Compile code, run tests
Release management & deployments
Hosts the running web application
Octopus is an extremely powerful deployment automation tool, and there are numerous ways to model a development team's workflow in Octopus Deploy, but this tends to be the most common for small teams. If you're not sure how to configure Octopus, we recommend following this guide to learn the basics. You'll then know how to adjust Octopus to suit your team's workflow.
This tutorial takes about an hour to complete. That sounds like a long time, but keep in mind, at the end of the tutorial, you'll have a fully-functional CI/CD environment for your entire team, and you'll be ready to deploy to production at the click of a button. It's worth the effort!
Build vs. deployment
For any non-trivial application, you're going to deploy the software to multiple environments. For this tutorial, we're using the environments Dev, Test, and Prod. This means you need to choose between building your application once or building it before each deployment? To reduce the risk of a failed production deployment, Octopus strongly encourages the practice of building once, and deploying multiple times.
The following activities are a build time concern, so they will happen in Jenkins after any change to code is committed to Git:
- Check out the latest changes from Git.
- Resolve and install any dependencies from NuGet.
- Compile the code.
- Run unit tests.
- Package the application by bundling all the files it needs to run into a NuGet file.
This results in a green CI build and a file that contains the application and everything it needs to run. Any configuration files will have their default values, but they won't know anything about dev vs. production settings just yet.
Lastly, it's very important that we give this artifact a unique version number. We will produce a new artifact file every time our CI build runs, and we don't want to accidentally deploy a previous version of the artifact.
An example of a package that is ready to be deployed is:
RandomQuotes.1.0.0.nupkg
At this point, we have a single artifact that contains all the files our application needs to run, ready to be deployed. We can deploy it over and over, using the same artifact in each environment. If we deploy a bad release, we can go and find the older version of the artifact and re-deploy it.
The following activities happen at deployment time by Octopus Deploy:
- Changing any configuration files to include settings appropriate for the environment, e.g., database connection strings, API keys, etc.
- Uploading the artifacts to IIS.
- Running tasks that need to be performed during the deployment such as database migrations or taking the application temporarily offline.
Prerequisites
There are a number of tools you need to install to implement a complete CI/CD workflow. These include the Jenkins and Octopus servers, some command-line tools, and IIS to host the final deployment.
Git
The source code for the sample application is hosted on GitHub. To access the code, you need the Git client. The Git documentation has instructions to download and install the Git client.
Jenkins
Jenkins can be freely downloaded from the project's download page. Native builds are available for Windows, macOS, and various Linux distributions.
Docker images are also available from Docker Hub.
This guide makes use of the Credentials, Credentials Binding, and Plain Credentials plugins.
Octopus CLI
Jenkins calls the Octopus CLI tool to create and deploy releases in the Octopus Server. The Octopus CLI can be downloaded from the Octopus downloads page or installed from Chocolatey.
The Octopus CLI tool must be installed on the Jenkins server or any agents that will execute the Jenkins project.
NuGet
NuGet is used to download the dependencies of the sample application. The Microsoft documentation has instructions on where to download the NuGet executable. NuGet can also be installed via Chocolatey.
.NET Framework Dev Pack
The .NET Dev Pack version 4.8 or above is required to compile and run the ASP.NET sample application. The Dev Pack can be downloaded from the Microsoft .NET website.
Build Tools for Visual Studio
The MSBuild tool is used to compile .NET applications. The Build Tools for Visual Studio can be downloaded from the Microsoft Visual Studio website.
To compile web applications, the Web development build tools option must be selected.
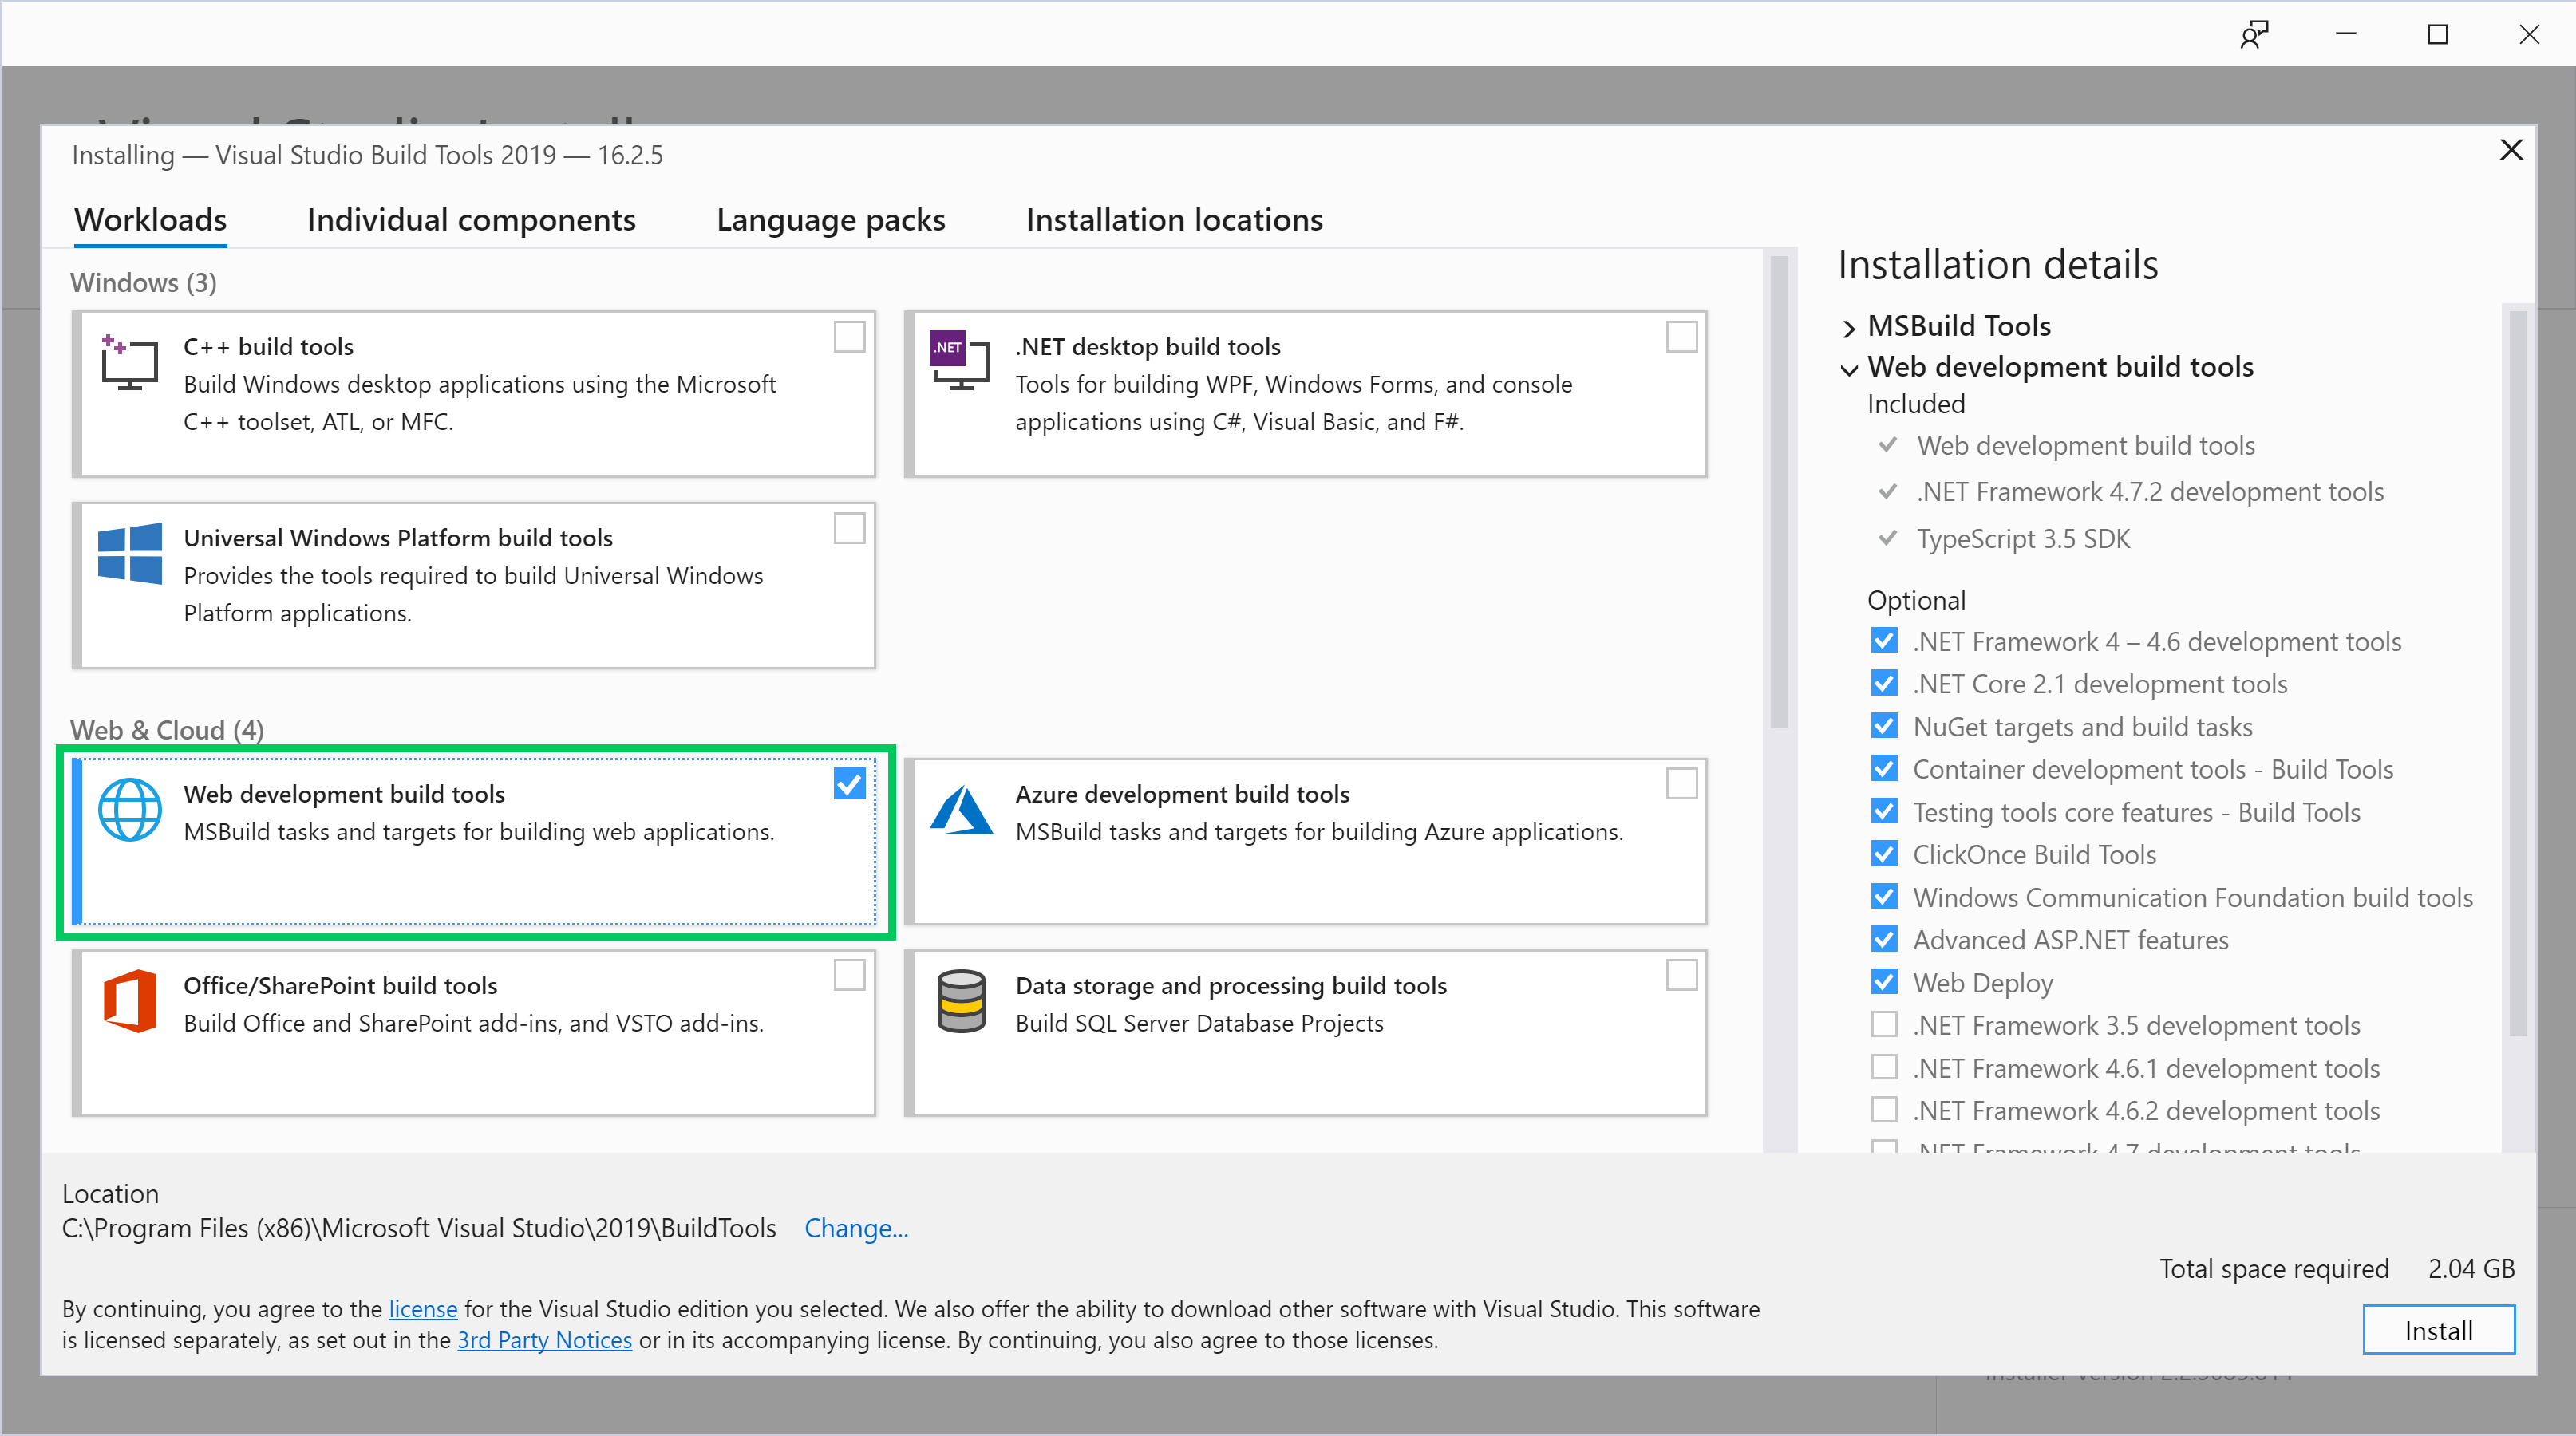
NuGet, the Build Tools for Visual Studio and the .NET Framework Dev Pack must be installed locally for development and also on the Jenkins server or any agents that will compile the application code.
Octopus Deploy
The installation file used to install Octopus Server on-premises can be downloaded from the Octopus website.
Octopus requires a Microsoft SQL Server to host the database. Microsoft SQL Server Express can be downloaded for free from the Microsoft website.
Complete the following steps to install Octopus:
- Start the Octopus Installer, click Next, accept the Terms in the License Agreement and click Next.
- Accept the default Destination Folder or choose a different location and click Next.
- Click Install, and give the app permission to make changes to your device.
- Click Finish to exit the installation wizard and launch the Getting started wizard to configure your Octopus Server.
- Click Get started... and either enter your details to start a free trial of Octopus Deploy or enter your license key and click Next.
- Accept the default Home Directory or enter a location of your choice and click Next.
- Decide whether to use a Local System Account or a Custom Domain Account.
Learn more about the permissions required for the Octopus Windows Service or using a Managed Service Account.
- On the Database page, click the dropdown arrow in the Server Name field to detect the SQL Server database. Octopus will create the database for you which is the recommended process; however, you can also create your own database.
- Enter a name for the database, and click Next and OK to create the database.
Be careful not to use the name of an existing database as the setup process will install Octopus into that pre-existing database.
- Accept the default port and directory or enter your own. This guide assumes Octopus is listening on port 80. Click Next.
- If you’re using a username and passwords stored in Octopus authentication mode, enter the username and password that will be used for the Octopus administrator. If you are using active directory, enter the active directory user details.
- Click Install.
- When the installation has completed, click Finish to launch the Octopus Manager.
IIS
Microsoft IIS is bundled with Microsoft Windows. See the Microsoft IIS website for instructions on how to install IIS in Windows.
Note that the ASP.NET 4.8 feature must be enabled.

The following command will enable the required IIS components in Windows:
Start /w pkgmgr /iu:IIS-WebServerRole;IIS-WebServer;IIS-CommonHttpFeatures;IIS-StaticContent;IIS-DefaultDocument;IIS-DirectoryBrowsing;IIS-HttpErrors;IIS-ApplicationDevelopment;IIS-ASPNET;IIS-NetFxExtensibility;IIS-ISAPIExtensions;IIS-ISAPIFilter;IIS-HealthAndDiagnostics;IIS-HttpLogging;IIS-LoggingLibraries;IIS-RequestMonitor;IIS-Security;IIS-RequestFiltering;IIS-HttpCompressionStatic;IIS-WebServerManagementTools;IIS-ManagementConsole;WAS-WindowsActivationService;WAS-ProcessModel;WAS-NetFxEnvironment;WAS-ConfigurationAPI;IIS-ASPNET45
Clone source code
The source code for the random quotes application is hosted in GitHub. The code can be cloned from https://github.com/OctopusSamples/RandomQuotes-aspmvc4.git with the command:
git clone https://github.com/OctopusSamples/RandomQuotes-aspmvc4.git
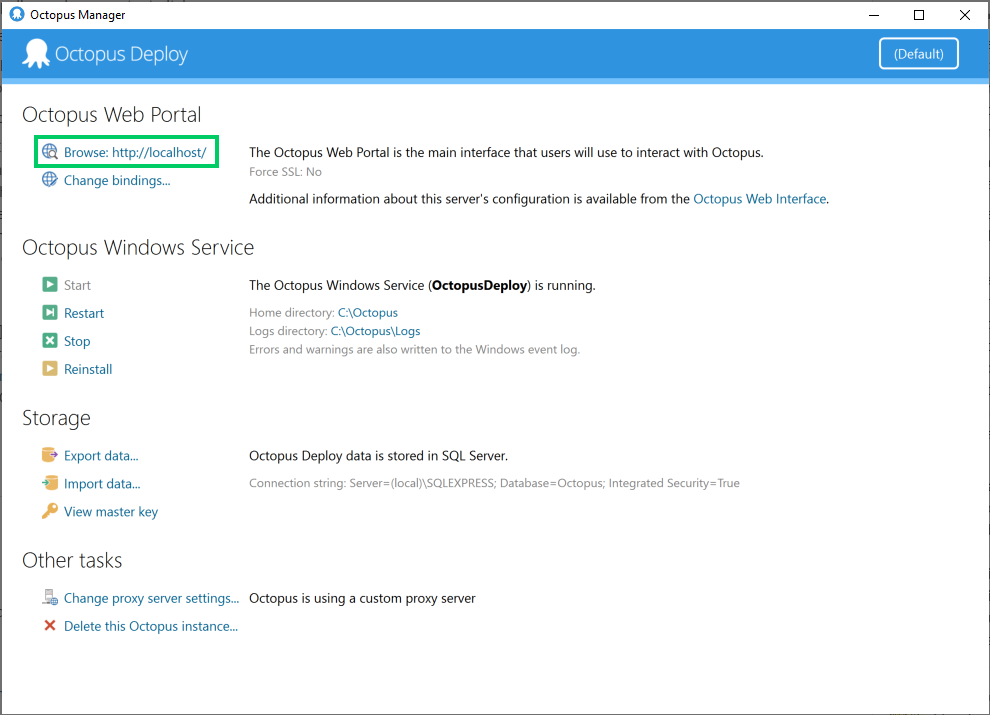
Octopus API key
In order to allow Jenkins to communicate with Octopus, we need to generate an API key. This is done in the Octopus web portal. The web portal can be opened from the Browse link in the Octopus Manager:
From the Octopus Deploy web portal, sign in, and view your profile:

Go to the API keys tab. This lists any previous API keys that you have created. Click on New API key:

Give the API key a name so that you remember what the key is for, and click Generate New:

Copy the new API key to your clipboard:

Continuous integration
Jenkins is a free and open source continuous integration server. In this tutorial, we rely on Jenkins to do the following:
- Clone the code from Git.
- Resolve and install any dependencies from NuGet.
- Compile the ASP.NET code.
- Run unit tests.
- Package the application by bundling all the files it needs to run into a NuGet file.
- Push the package to the Octopus (built-in) package repository.
Install the Octopus plugin
Jenkins pushes artifacts to Octopus and creates and deploys releases via the Octopus plugin. To install the plugin click Manage Jenkins:

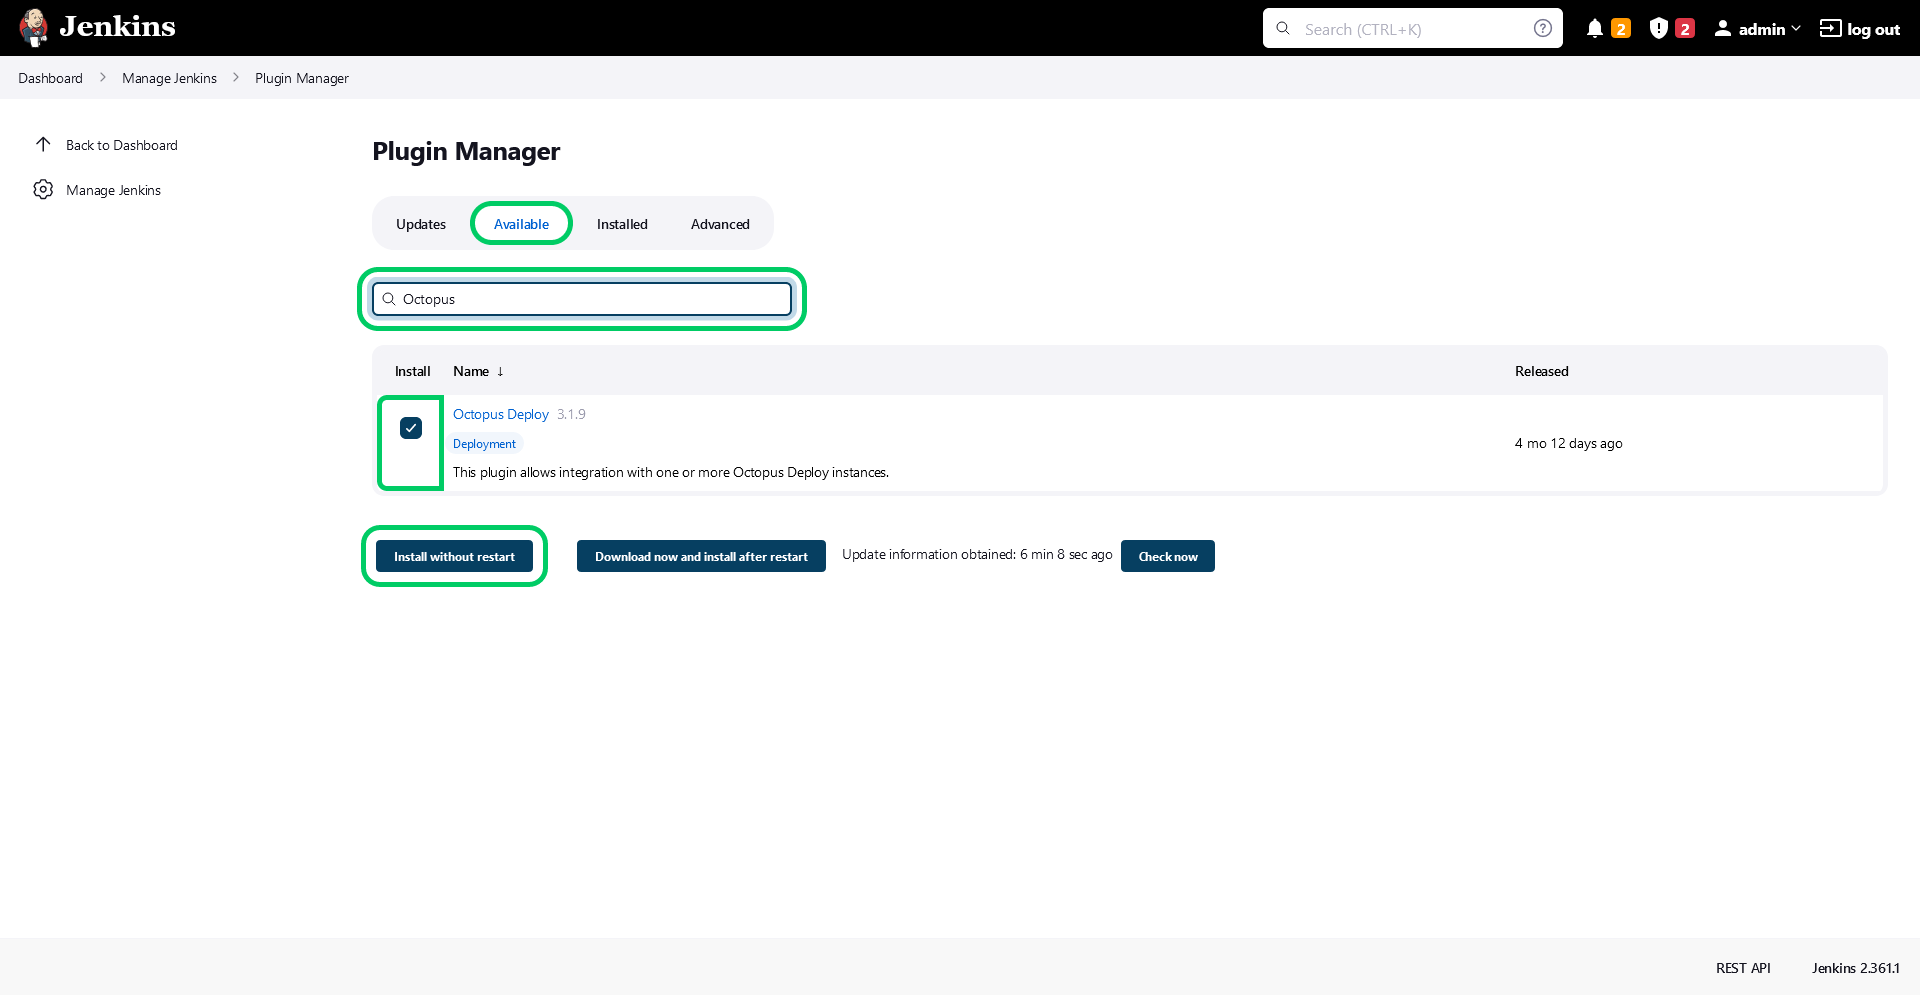
Click Manage Plugins:

Click the Available tab, enter Octopus in the search box, select the Octopus Deploy plugin, and click Install without restart:
Wait while the plugin is installed, and click Go back to the top page when the installation is complete:

Configure the Octopus plugin
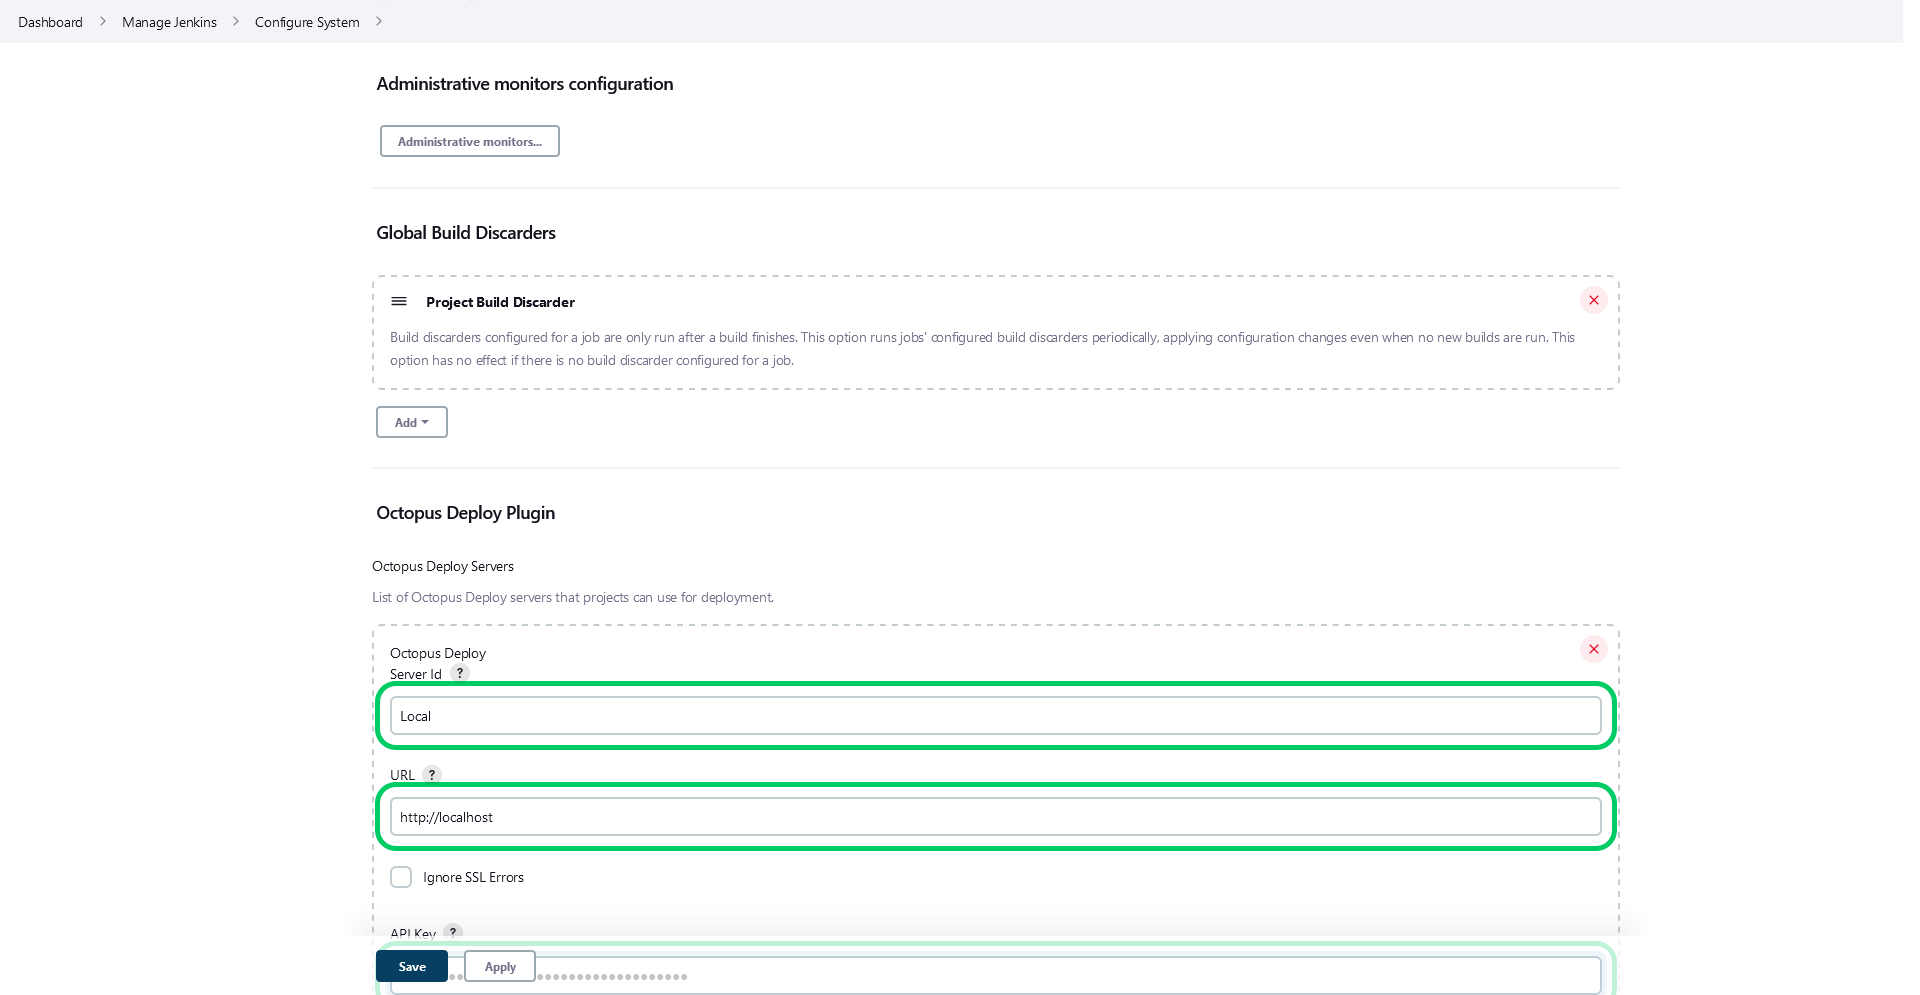
To use the Octopus steps we first need to configure the Octopus server details. Click Manage Jenkins:
Click Configure System:

Define the Server ID as Local, enter the URL and API Key, and click Save:
Configure the MSBuild Plugin
Jenkins requires additional plugins to those installed by default in order to build a ASP.NET application. The following steps install the required plugins:
Click Manage Jenkins:
Click Manage Plugins:
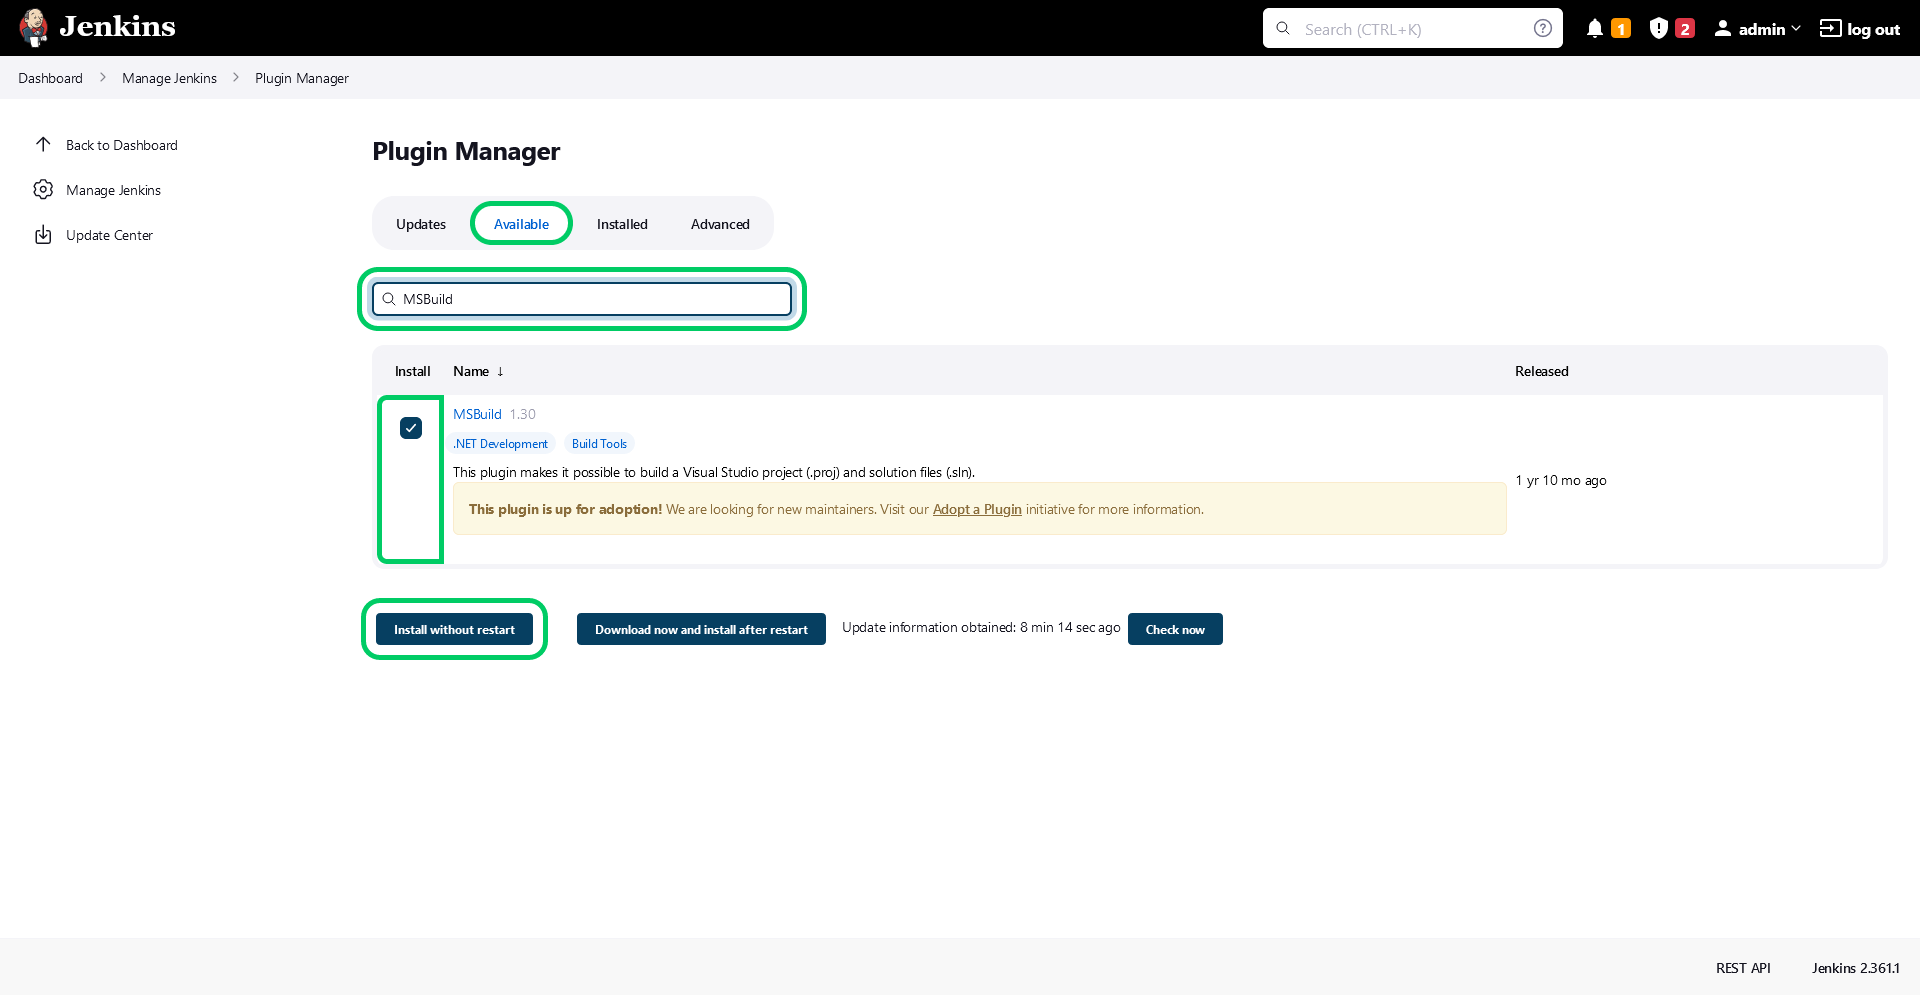
Type MSBuild into the filter, check the box next to the MSBuild plugin, and click Install without restart:
The plugins are then installed. When complete, click the Go back to the top page link:

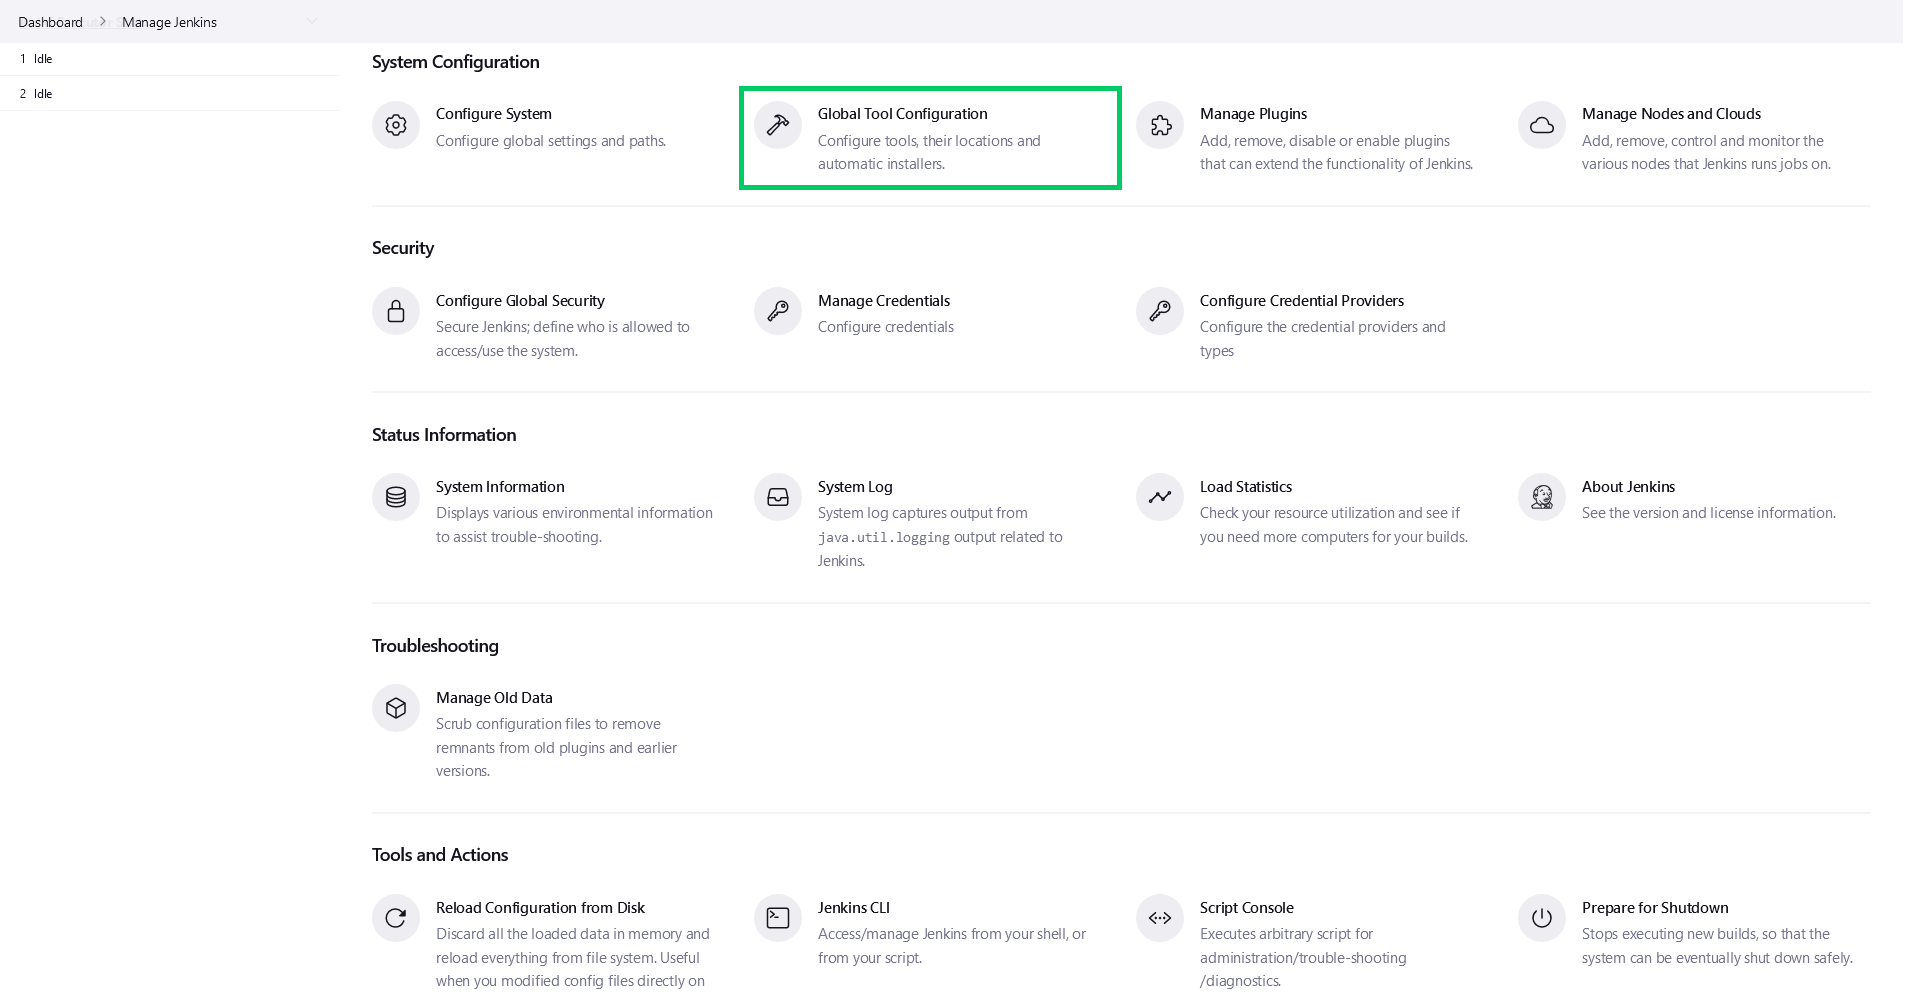
Now, we need to configure the MSBuild plugin. Click Manage Jenkins:
Click Global Tool Configuration:
Click Add MSBuild:
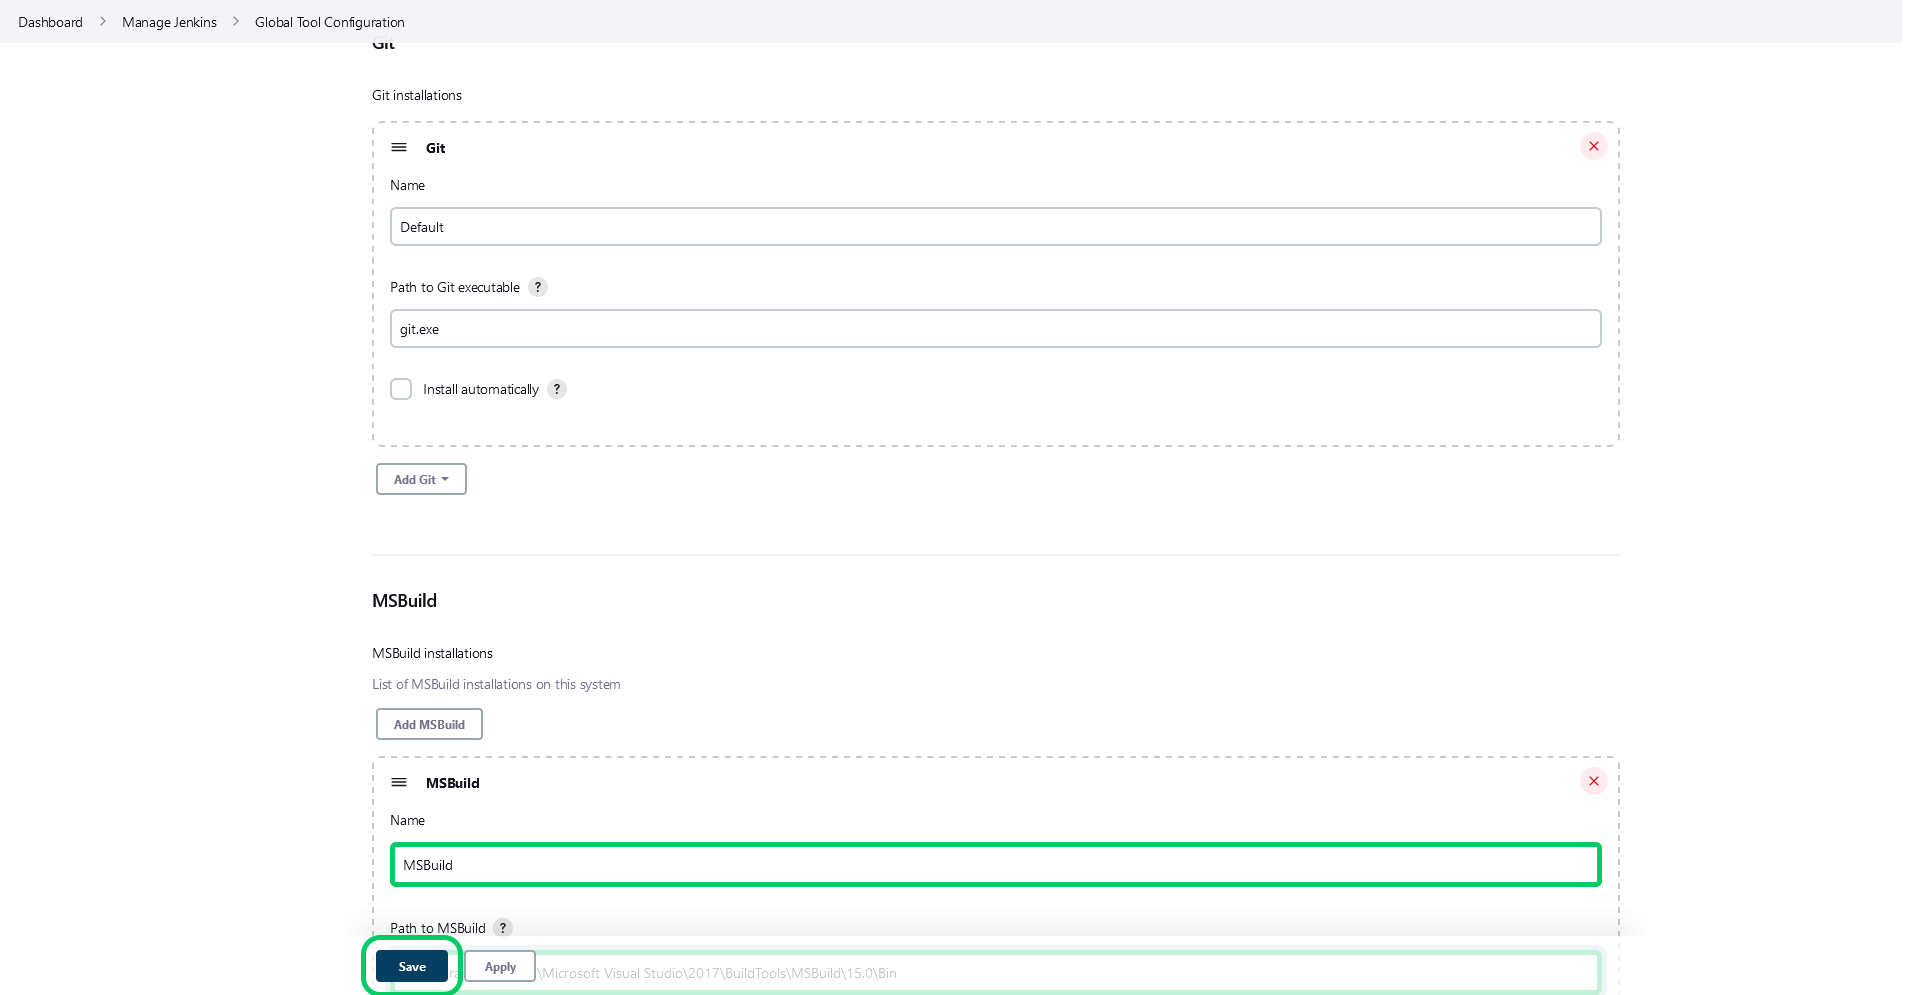
Enter MSBuild as the name, and enter the path to the local installation of the MSBuild.exe. This path is typically found under C:\Program Files (x86)\Microsoft Visual Studio\2017\BuildTools\MSBuild\15.0\Bin. Then click Save:
Create the Jenkins project
We are now ready to create a project to build and test the sample application.
Click New Item:

Enter Random Quotes as the project name, select the Freestyle project option, and click OK:

From the Source Code Management section, select the Git option, and enter https://github.com/OctopusSamples/RandomQuotes-aspmvc4.git:

In order to watch for changes to the source code, we need to poll the Git repository. From the Build Triggers section, select the Poll SCM option, and enter H/5 * * * * for the schedule. This instructs Jenkins to poll the Git repository every 5 minutes looking for changes to the code:

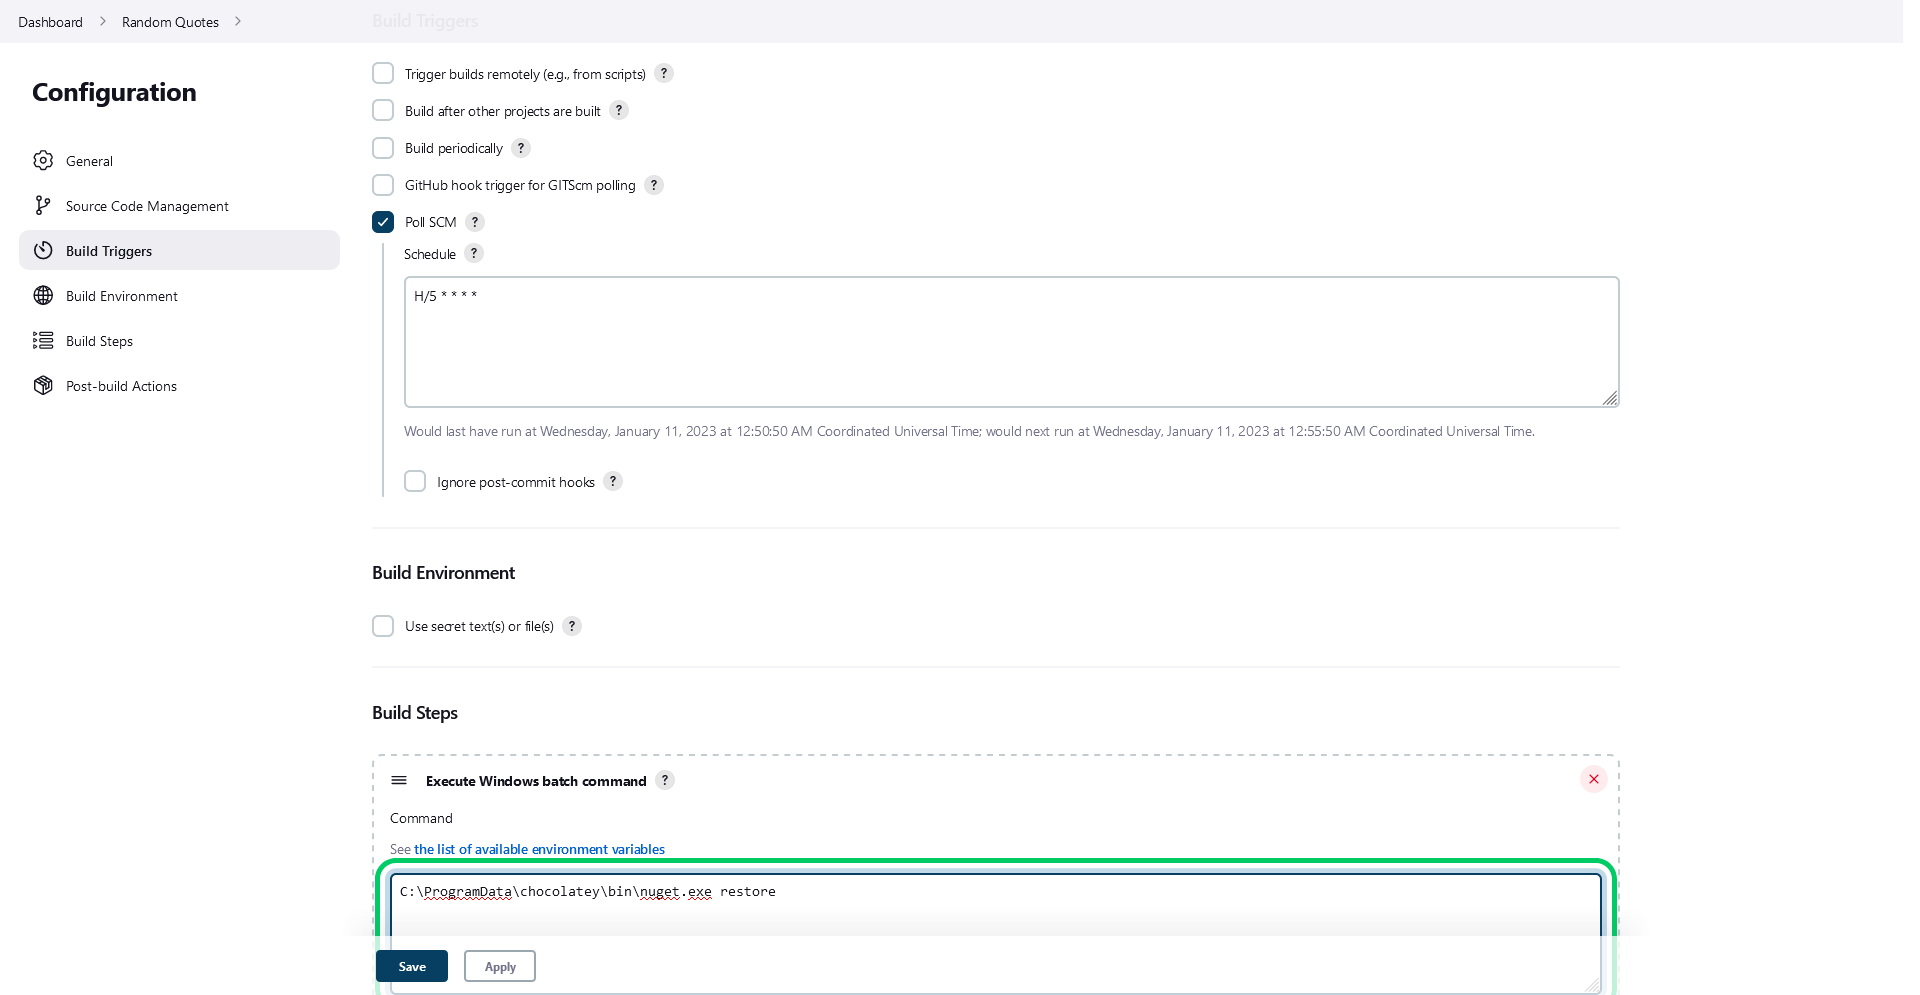
From the Build section, select the Execute Windows batch command option:

Enter nuget restore in the Command field. This will download all the dependencies of the sample application.
From the Build section, select the Build a Visual Studio project or solution using MSBuild option:

Select MSBuild as the MSBuild Version, enter RandomQuotes.sln as the MSBuild Build File, enter /p:RunOctoPack=true /p:OctoPackPackageVersion=1.0.$BUILD_NUMBER /p:OctoPackEnforceAddingFiles=true as the Command Line Arguments.
The argument /p:RunOctoPack=true runs OctoPack during the build process, which results in a nupkg file being generated in the obj\octopacked directory.
The argument /p:OctoPackPackageVersion=1.0.$BUILD_NUMBER sets the version of the nupkg file created by OctoPack, and ensures that it automatically increments with each build. The $BUILD_NUMBER environment variable is provided by Jenkins. You can find a list of these environment variables here.
The argument /p:OctoPackEnforceAddingFiles=true ensures that all the default files are packaged by OctoPack, along with the custom files specified in the nuspec file. We include a custom nuspec file to include the Roslyn compiler files in the resulting package.

From the Build section, select the Execute Windows batch command option:

Set the Command to:
.\packages\NUnit.ConsoleRunner.3.10.0\tools\nunit3-console.exe .\RandomQuotes.Tests\bin\Debug\RandomQuotes.Tests.dll
This will execute the NUnit command-line runner against the test classes that were compiled into the RandomQuotes.Tests.dll library, thus running the unit tests.
The nunit3-console.exe executable is downloaded as part of a NuGet dependency included in the test project.

From the Build section, select the Octopus Deploy: Push packages option:

Enter ${WORKSPACE}\RandomQuotes\obj\octopacked\RandomQuotes.1.0.${BUILD_NUMBER}.nupkg in the Package paths field, and click Save:

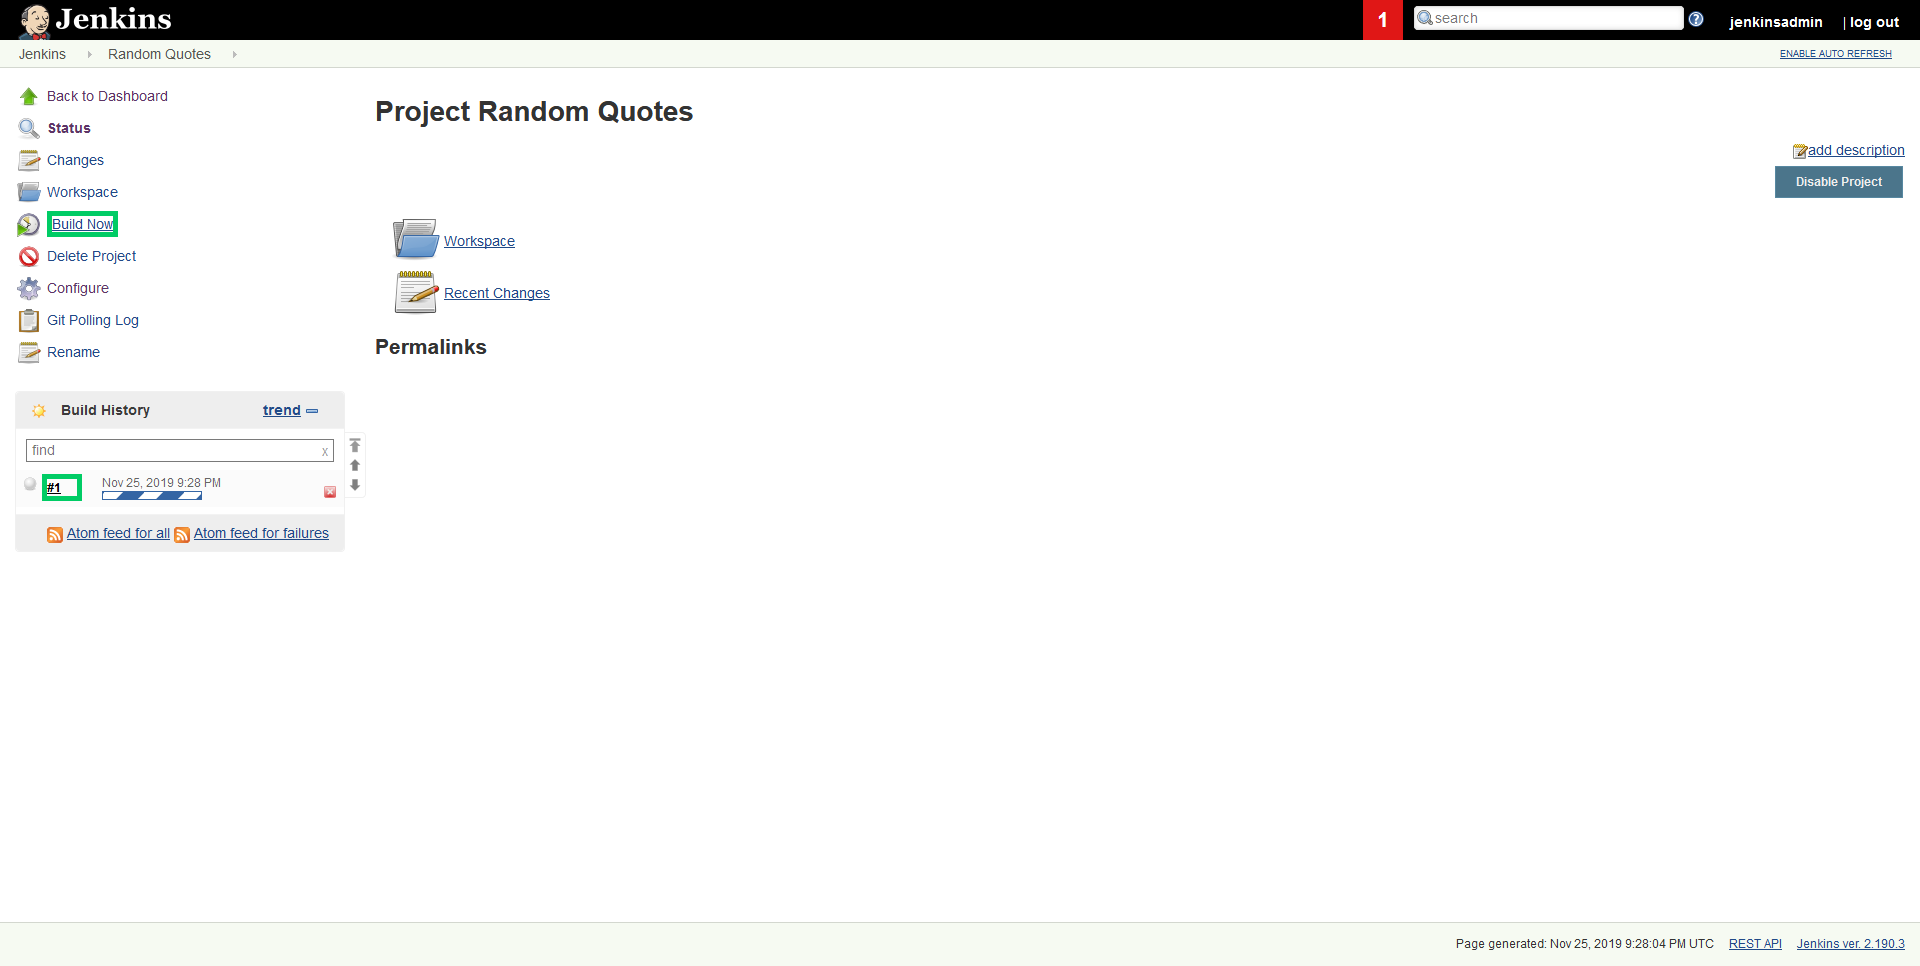
Build the project
Our project is now ready to build the sample application.
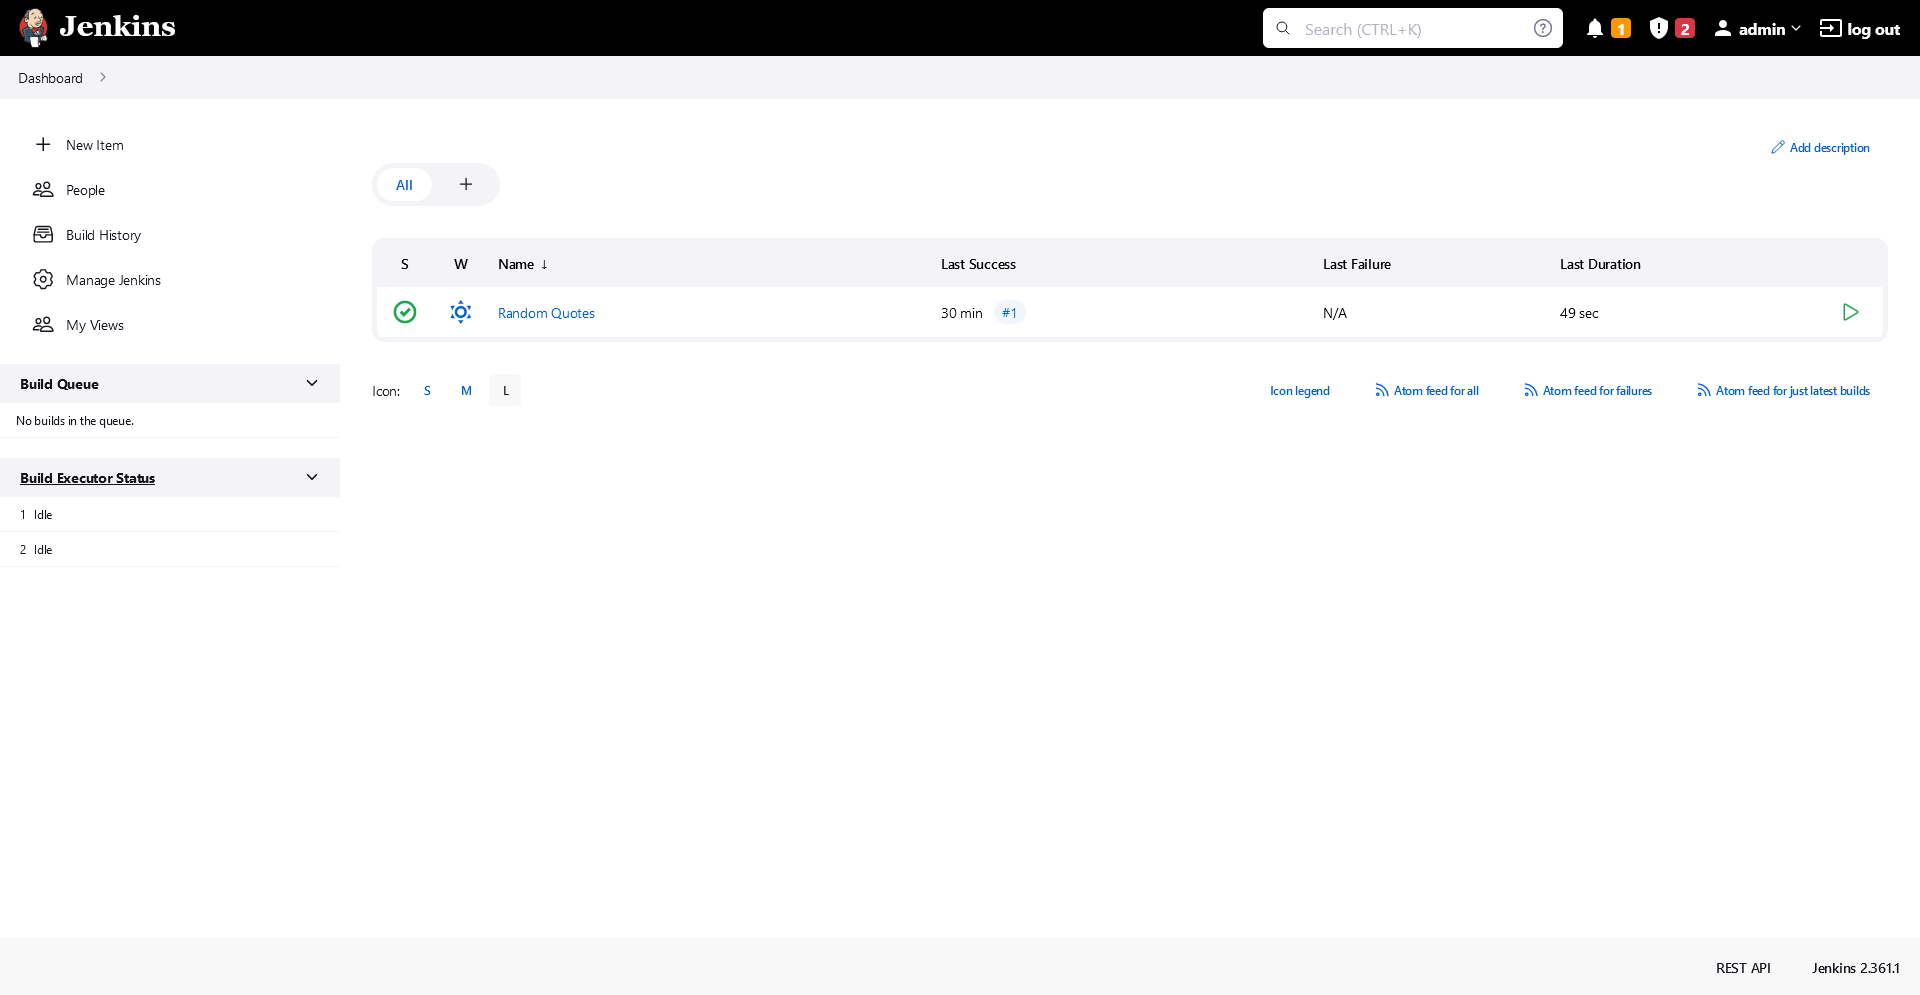
Click the Build Now link. The first build will commence. Click the #1 link to view the build:
Click the Console Output link to view the build output:
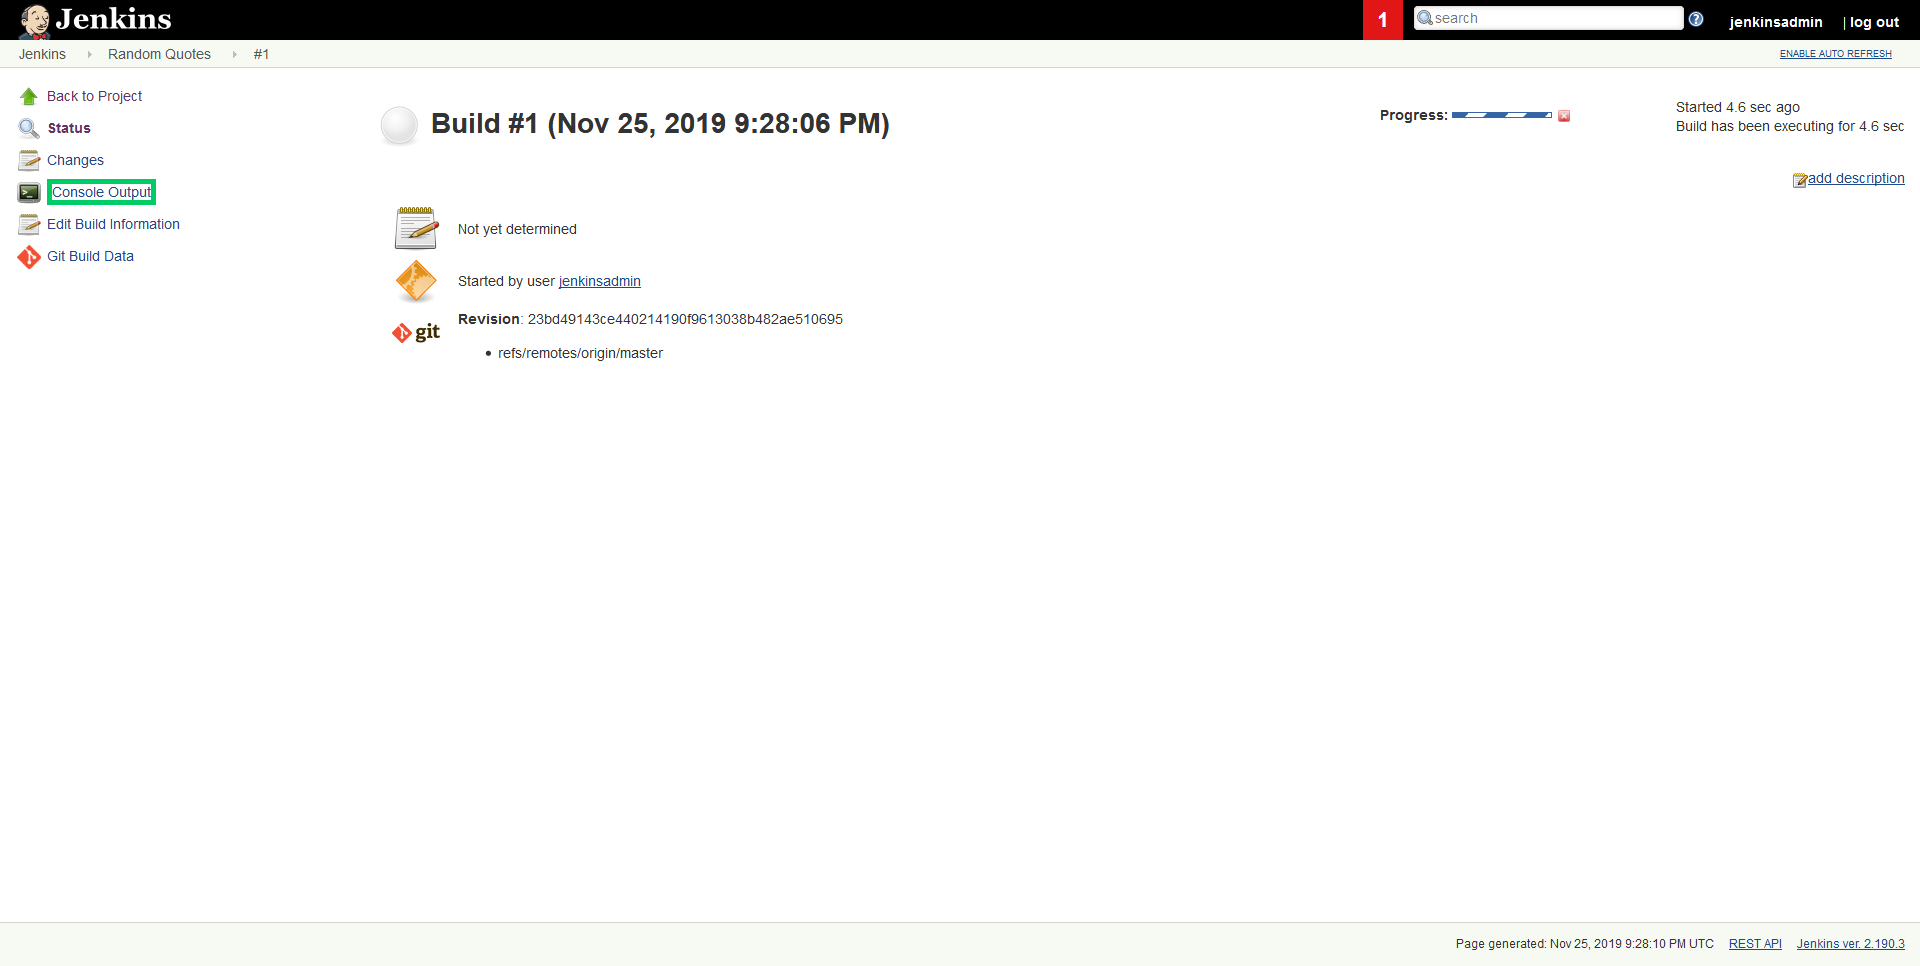
The build logs are streamed to the browser. In a minute or so, the build will complete, and the resulting package will have been uploaded to Octopus. Congratulations! You have completed the first half of the CI/CD pipeline.
Deploying with Octopus Deploy
Now that Jenkins has successfully built the application, we need to configure Octopus to deploy it into our environments.
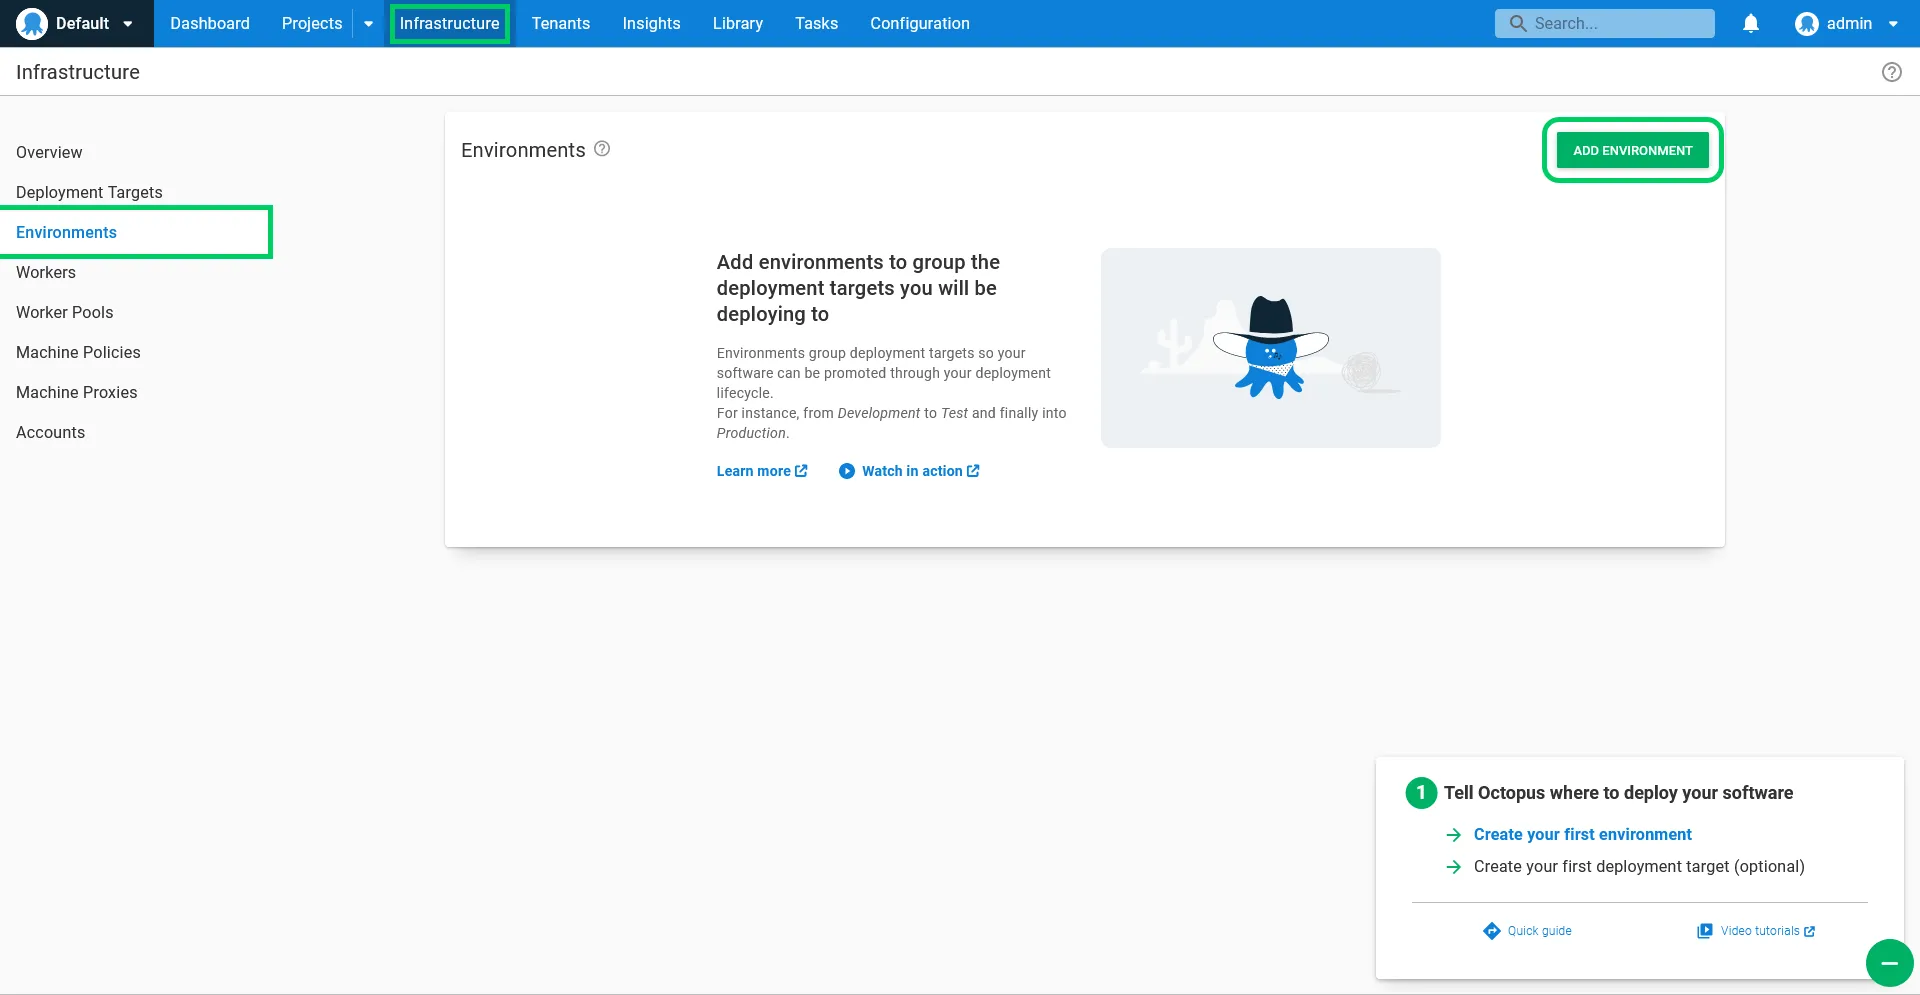
Create the environments
Environments represent the stages that a deployment must move through as part of the deployment pipeline. We'll create three environments: Dev, Test, and Prod.
Log into Octopus, and click the Infrastructure link, then the Environments link, and click ADD ENVIRONMENT:
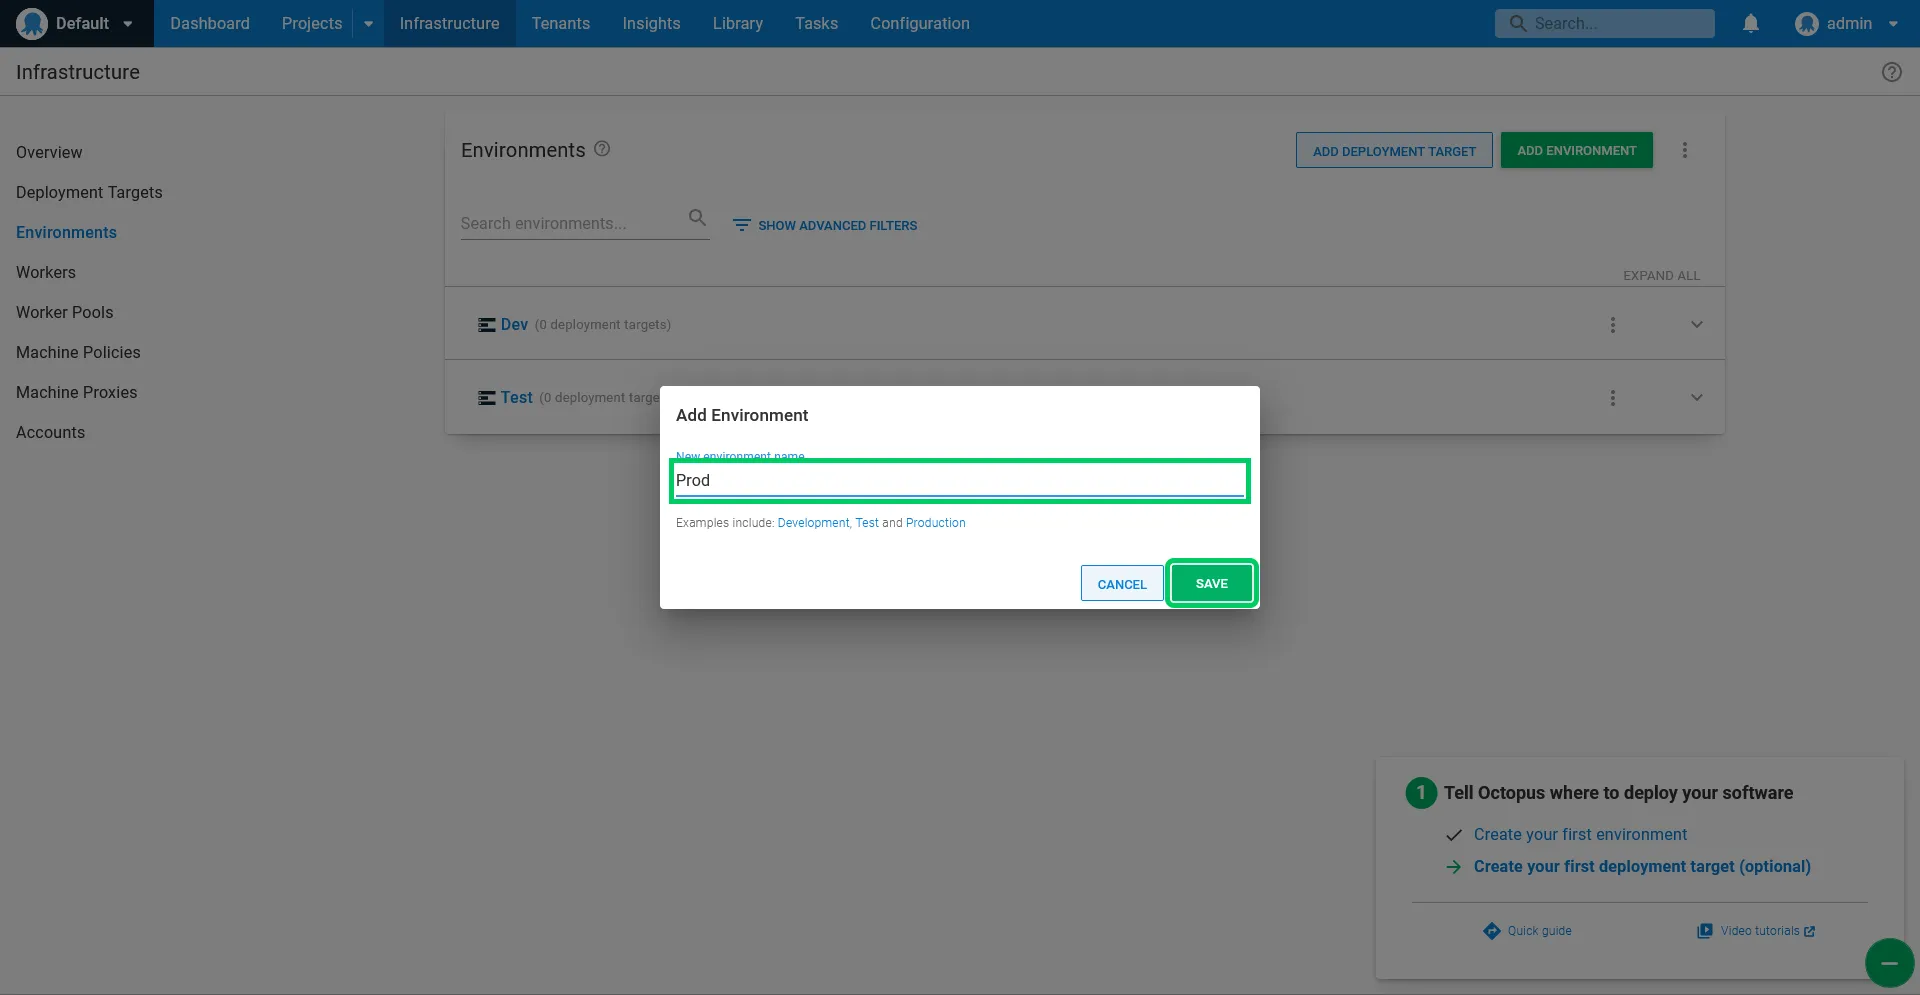
Enter Dev as the New environment name, and click SAVE:

Repeat the process for the Test and Prod environments:

Deployment Targets
In order to deploy the application, we need to configure a target. For this tutorial, we will deploy the ASP.NET applications via a polling Tentacle.
Tentacle Manager is the Windows application that configures your Tentacle. The links below provide downloads for the Tentacle Windows installer.
Once installed, you can access it from your start menu/start screen. Tentacle Manager can configure Tentacles to use a proxy, delete the Tentacle, and show diagnostic information about the Tentacle.
- Start the Tentacle installer, accept the license agreement, and follow the onscreen prompts.
- When the Octopus Deploy Tentacle Setup Wizard has completed, click Finish to exit the wizard.
- When the Tentacle Manager launches, click GET STARTED.
- On the communication style screen, select Polling Tentacle and click Next.
- If you are using a proxy see Proxy Support, or click next.
-
Add the Octopus credentials the Tentacle will use to connect to the Octopus Server:
- The Octopus URL: the hostname or IP address.
-
Select the authentication mode and enter the details:
- The username and password you use to log into Octopus, or:
- The Octopus API key created earlier.
- Click Verify credentials, and then next.
-
Give the machine a meaningful name and assign the Tentacle to all the environments (Dev, Test, and Prod) we created earlier.
For this tutorial we will use a single physical target, and therefore a single Tentacle, to host all our environments.
- Choose or create the role web.
- Leave Tenants and Tenant tags blank.
- Click Install, and when the script has finished, click Finish.
Create the Octopus deployment project
With the environments defined and a target created, we now need to create a deployment project in Octopus.
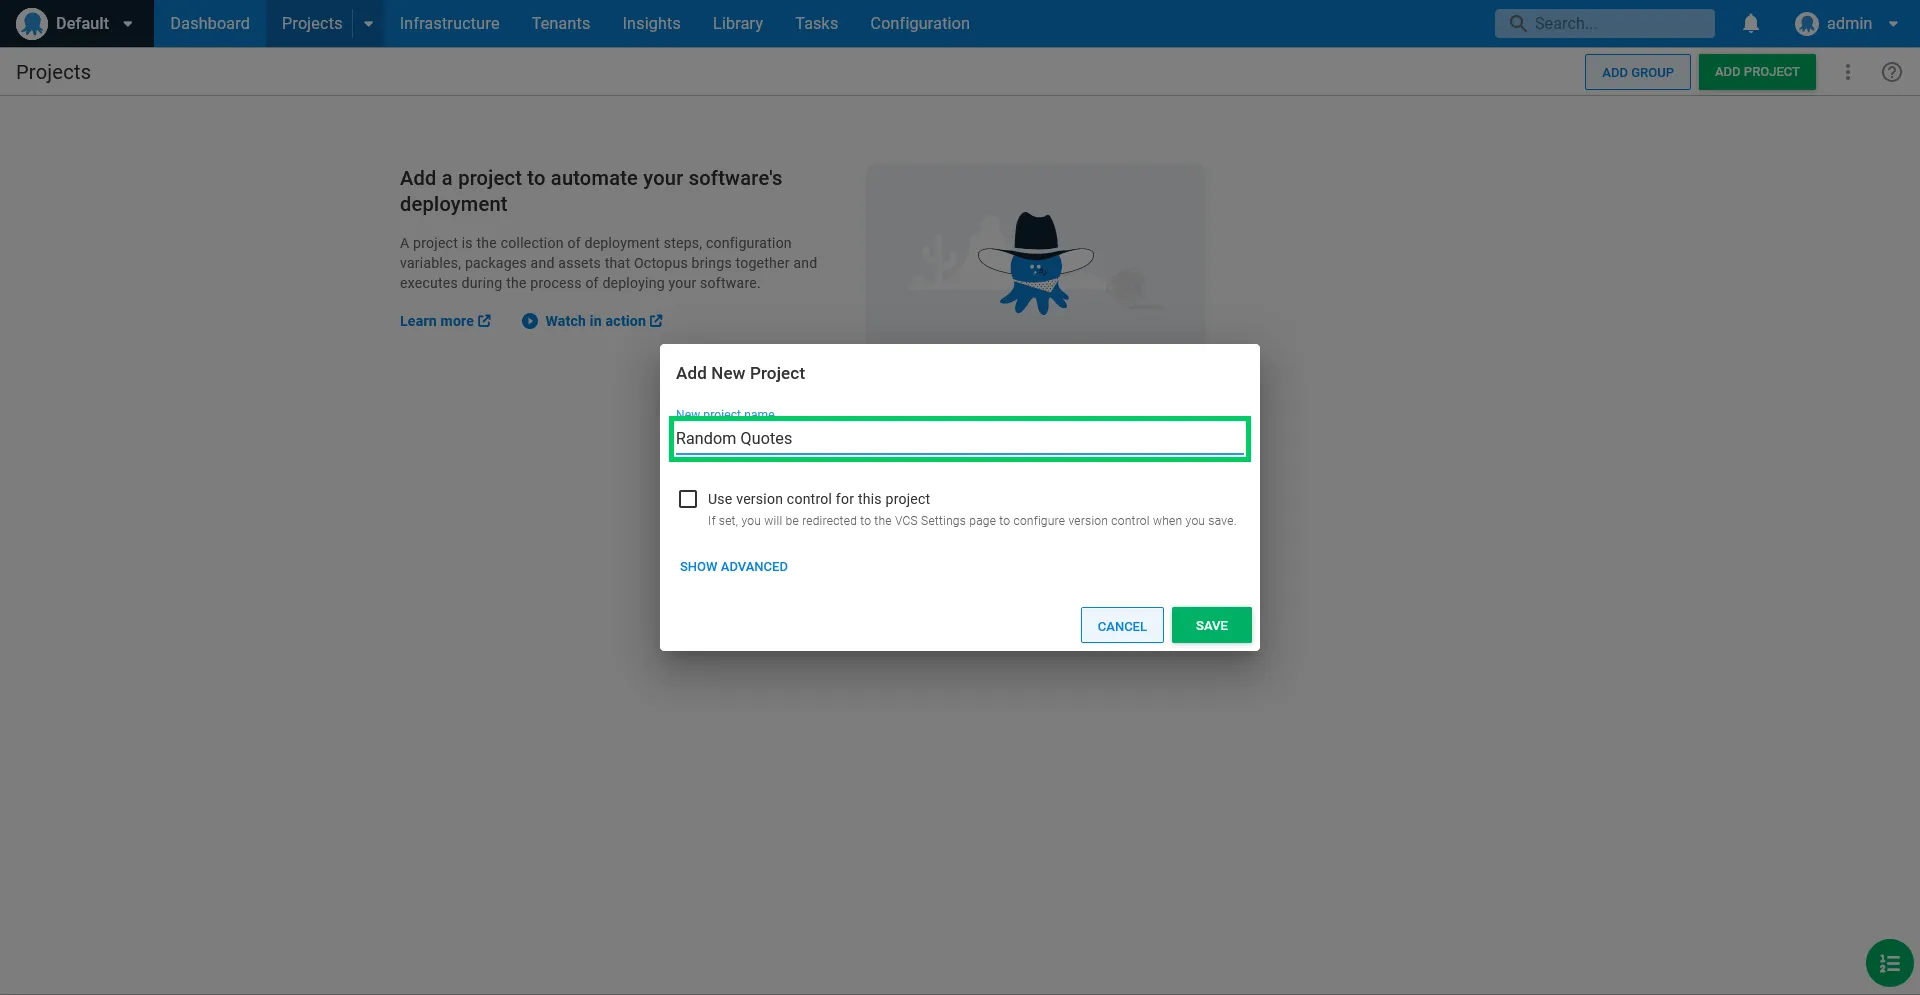
Log into Octopus, click the Projects link, and click ADD PROJECT:

Enter Random Quotes for the project name, and click SAVE:
We start by defining the variables that we will consume as part of the deployment. Click the Variables link, and then select the Project option:

The first variable we'll define is called EnvironmentName. This matches the name of a key in the Web.config file:
<configuration>
        <appSettings>
            ...
            <add key="EnvironmentName" value="DEV" />
        </appSettings>
         ...
    </configuration>
We set the value of this variable to match the name of the environment that Octopus is deploying the application
into by setting its value to #{Octopus.Environment.Name}. This variable, in conjunction with the
Configuration Variables feature, means that the config file will be updated during deployment to reflect the current environment.
This is how we can have a single, environment agnostic package, and customize it for any environment it is deployed into.
We are then going to define a variable called IIS Port with unique values bound to each environment. This means that when we deploy the project to each environment, a new port will be used to expose the application in IIS.
By exposing each environment as a unique port, we can implement multiple environments with a single physical target.
- Define a value of 8081 scoped to the Dev environment.
- Define a value of 8082 scoped to the Test environment.
- Define a value of 8083 scoped to the Prod environment.
Then click SAVE to save the changes:

We will now define the deployment process. Click Deployments link, then the Overview link, and then click DEFINE YOUR DEPLOYMENT PROCESS:

Click ADD STEP:

Enter iis into the search box:

Click ADD on the IIS tile:

Enter Deploy web app to IIS as the step name:
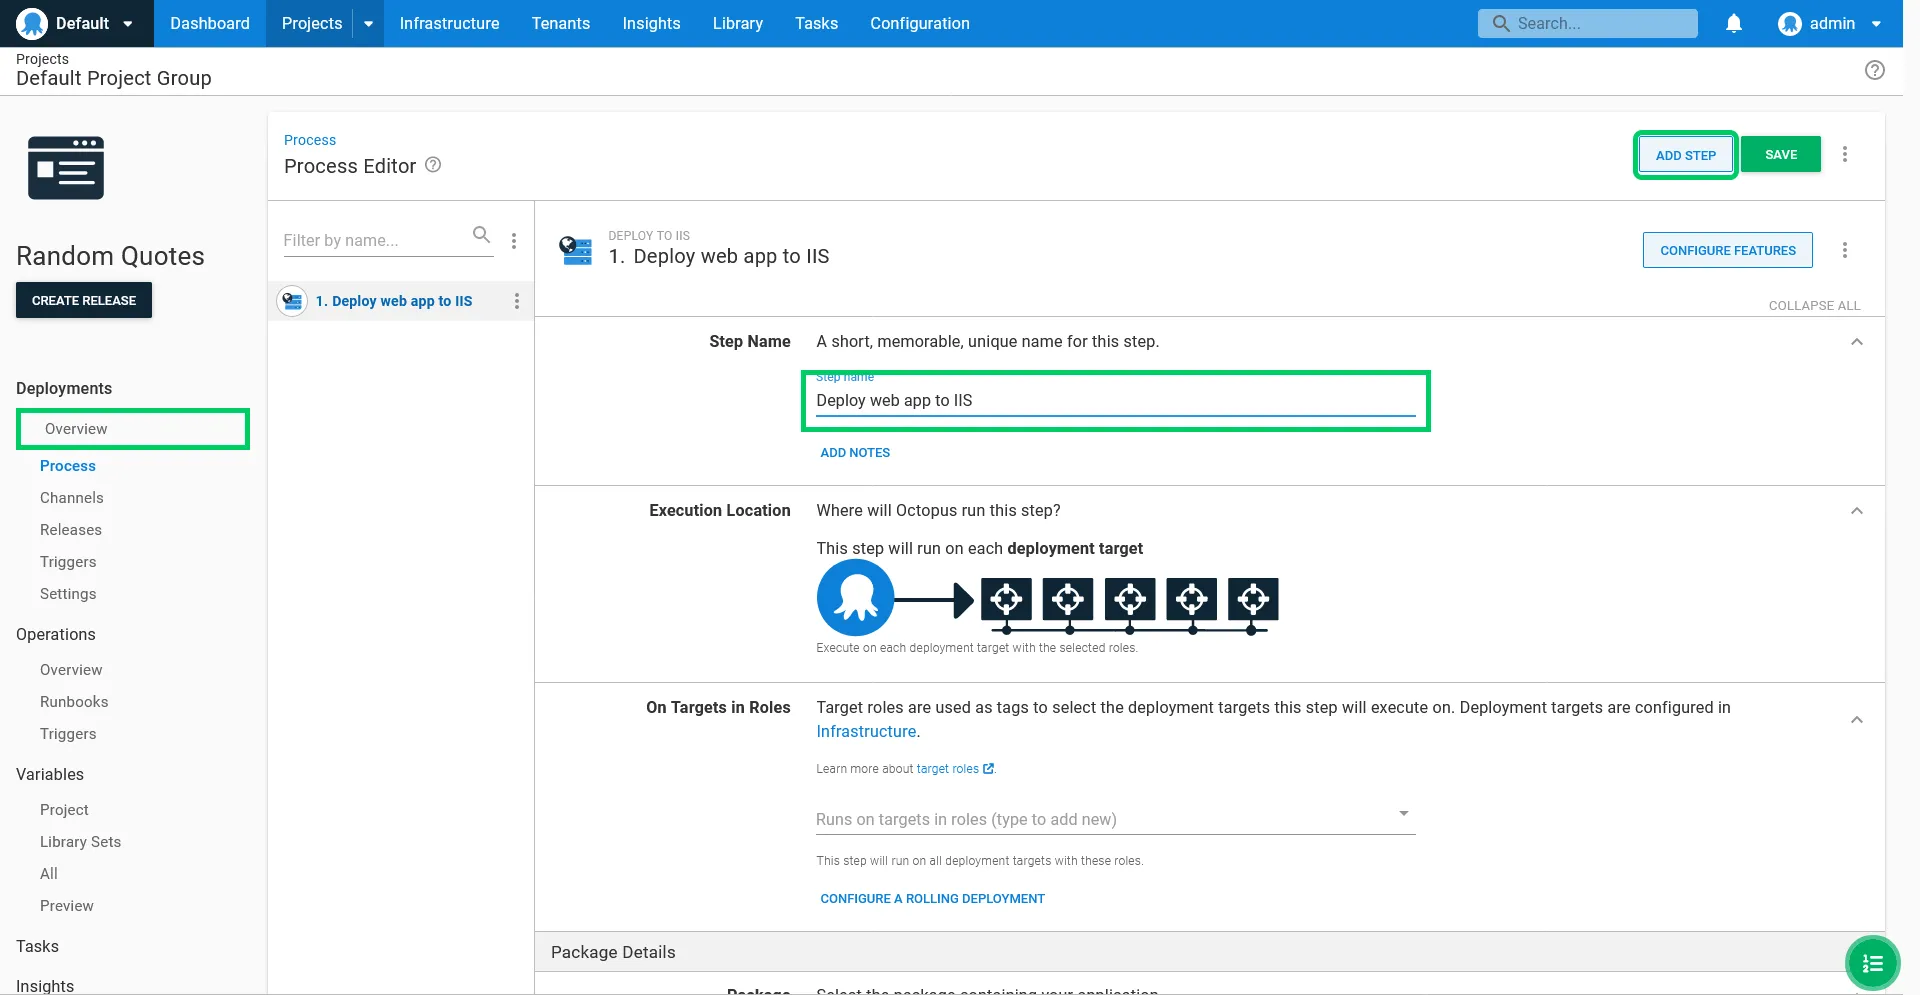
Select the web role. This role matches the role assigned to the Tentacle that was configured earlier.

Select the RandomQuotes package ID. This is the package that Jenkins pushed to the built-in feed:

Enter RandomQuotes as the web site name:

Enter RandomQuotes as the application pool name:

Because we have installed Octopus and IIS on the same host, and Octopus is listening on port 80, we need to remove the default port binding to avoid a conflict. Click the cross icon on the existing binding:

Click ADD to add a new binding:

Enter #{IIS Port} as the port. This is how we reference the IIS Port variable created earlier. Then click OK:

Select the Enable Anonymous authentication option, and unselect the Enable Windows authentication option. Then click SAVE:

Deploy!
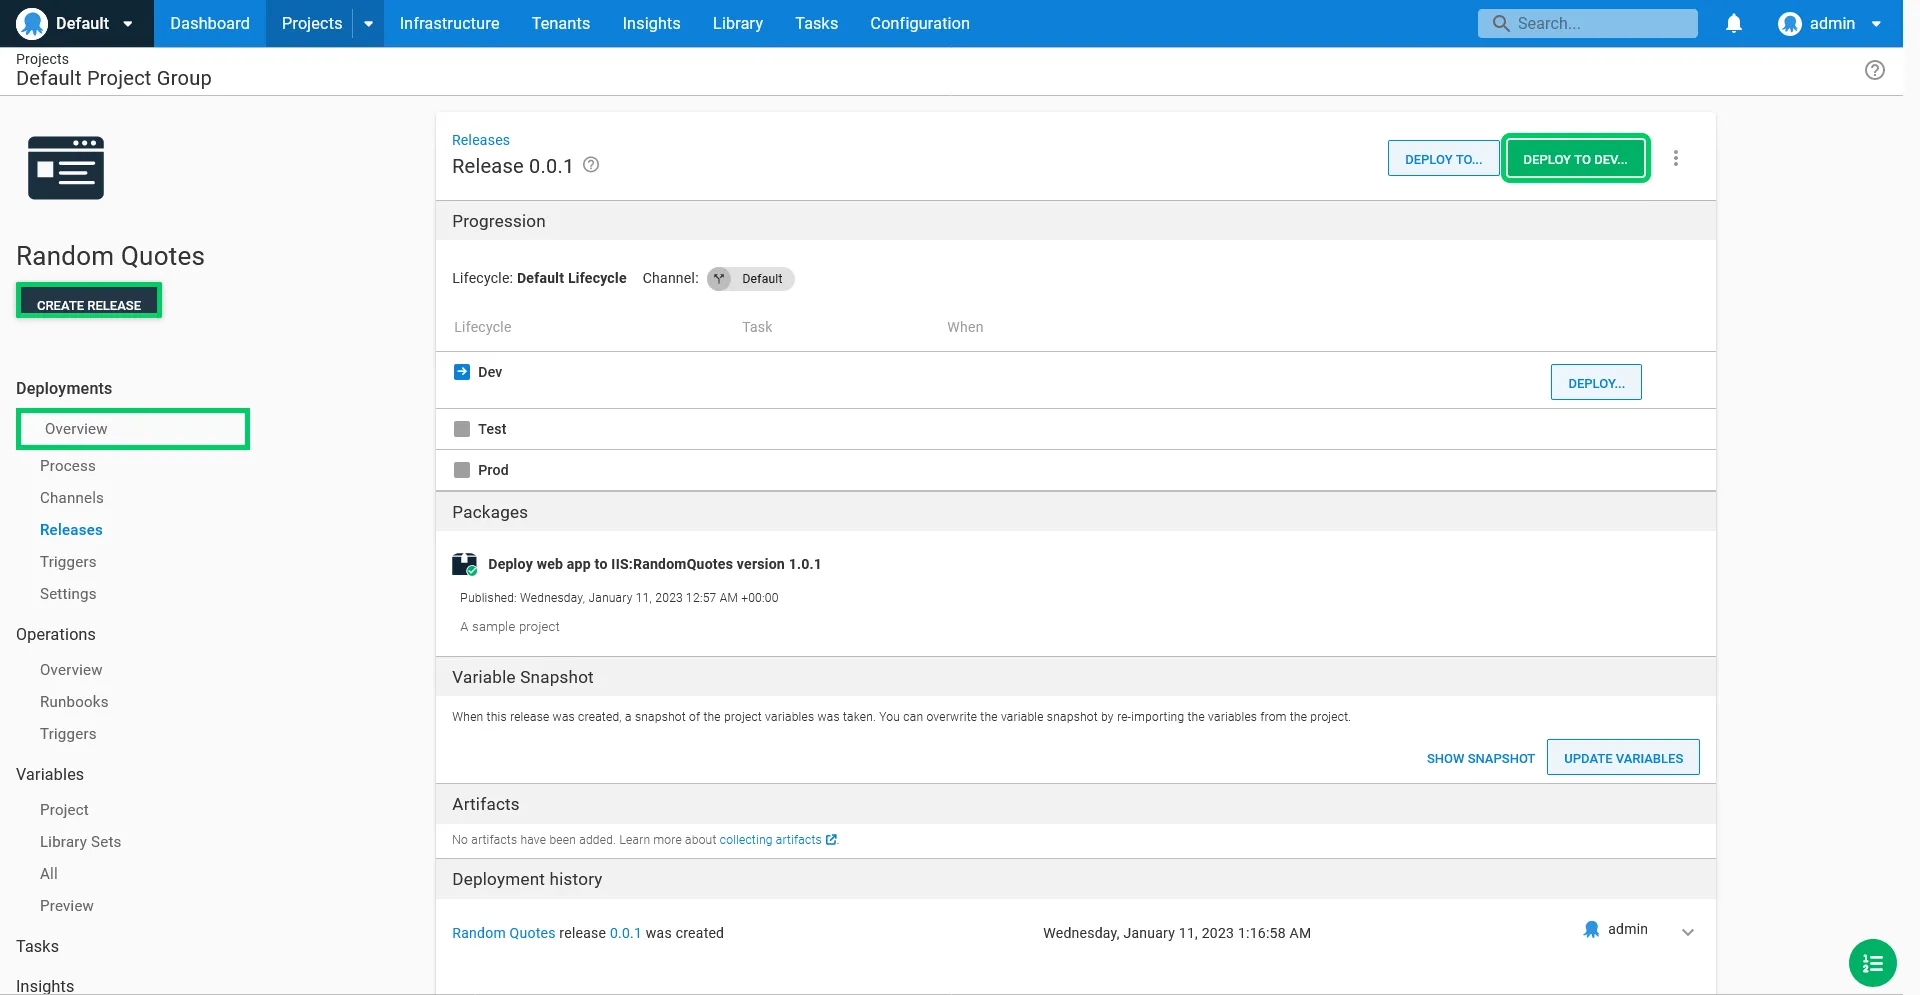
We now have a deployment project in Octopus ready to deploy our ASP.NET application to our Dev, Test, and Prod environments. The next step is to create and deploy a release.
Click CREATE RELEASE.
The release creation screen provides an opportunity to review the packages that will be included and to add any release notes. By default, the latest package is selected automatically. Click SAVE:

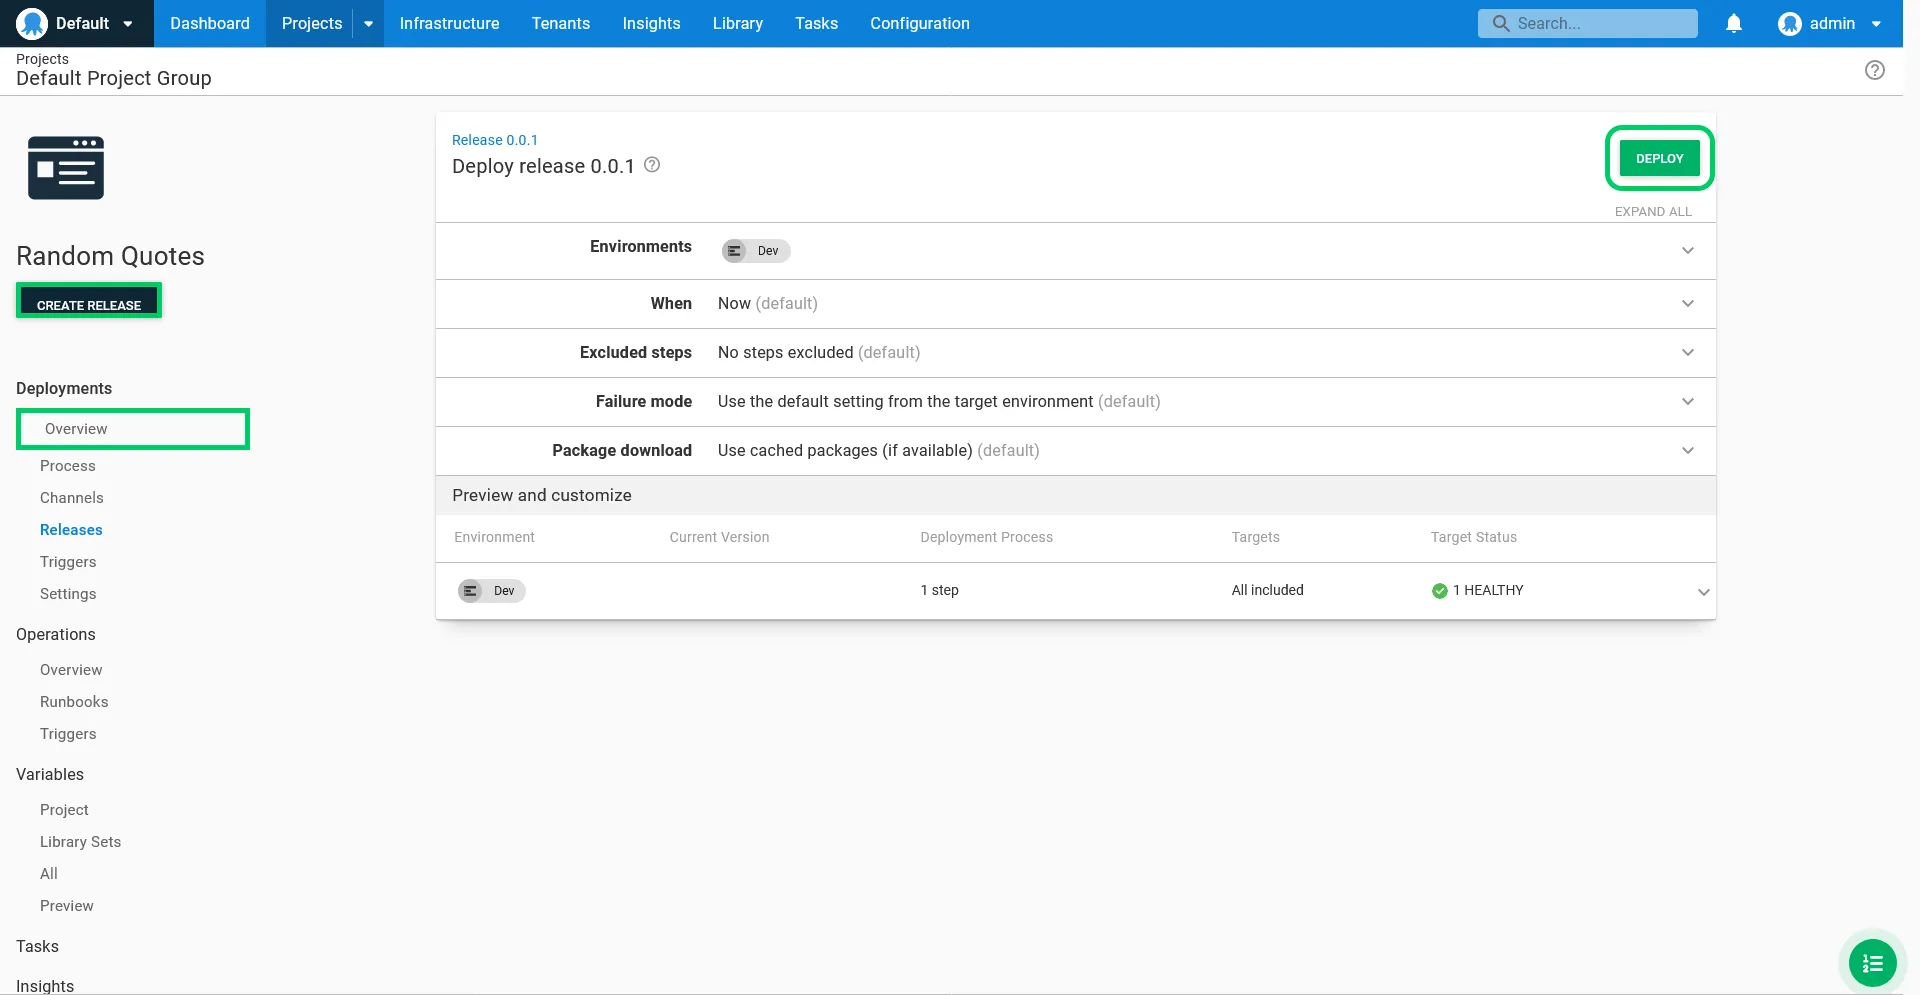
This screen allows you to select the environment that will be deployed into. Lifecycles can be used to customize the progression of deployments through environments (this is demonstrated later in the guide), however, we will accept the default option to deploy to the Dev environment by clicking DEPLOY TO DEV...:
Click DEPLOY to deploy the application into the Dev environment:
The application is then deployed:

Congratulations! You have now built and deployed your first application. Visit http://localhost:8081 in a browser to view a random quote. Note the port (8081) matches the value of the IIS Port variable we scoped to the Dev environment.
Continuous deployments
The process of deploying a successful build to the Dev environment is currently a manual one; Jenkins pushes the file to Octopus, and we must trigger the initial deployment to the Dev environment from within Octopus. Typically though, deployments to the Dev environment will be performed automatically if a build and all of its tests succeed.
To trigger the initial deployment to the Dev environment after a successful build, we will go back to the project we created in Jenkins and add an additional step to create an Octopus release and then deploy it to the Dev environment.
Add a create and deploy release step
As before, we make use of the Octopus plugin to interact with the Octopus server. In this case, we use the plugin to create and deploy a release in Octopus after the package has been pushed.
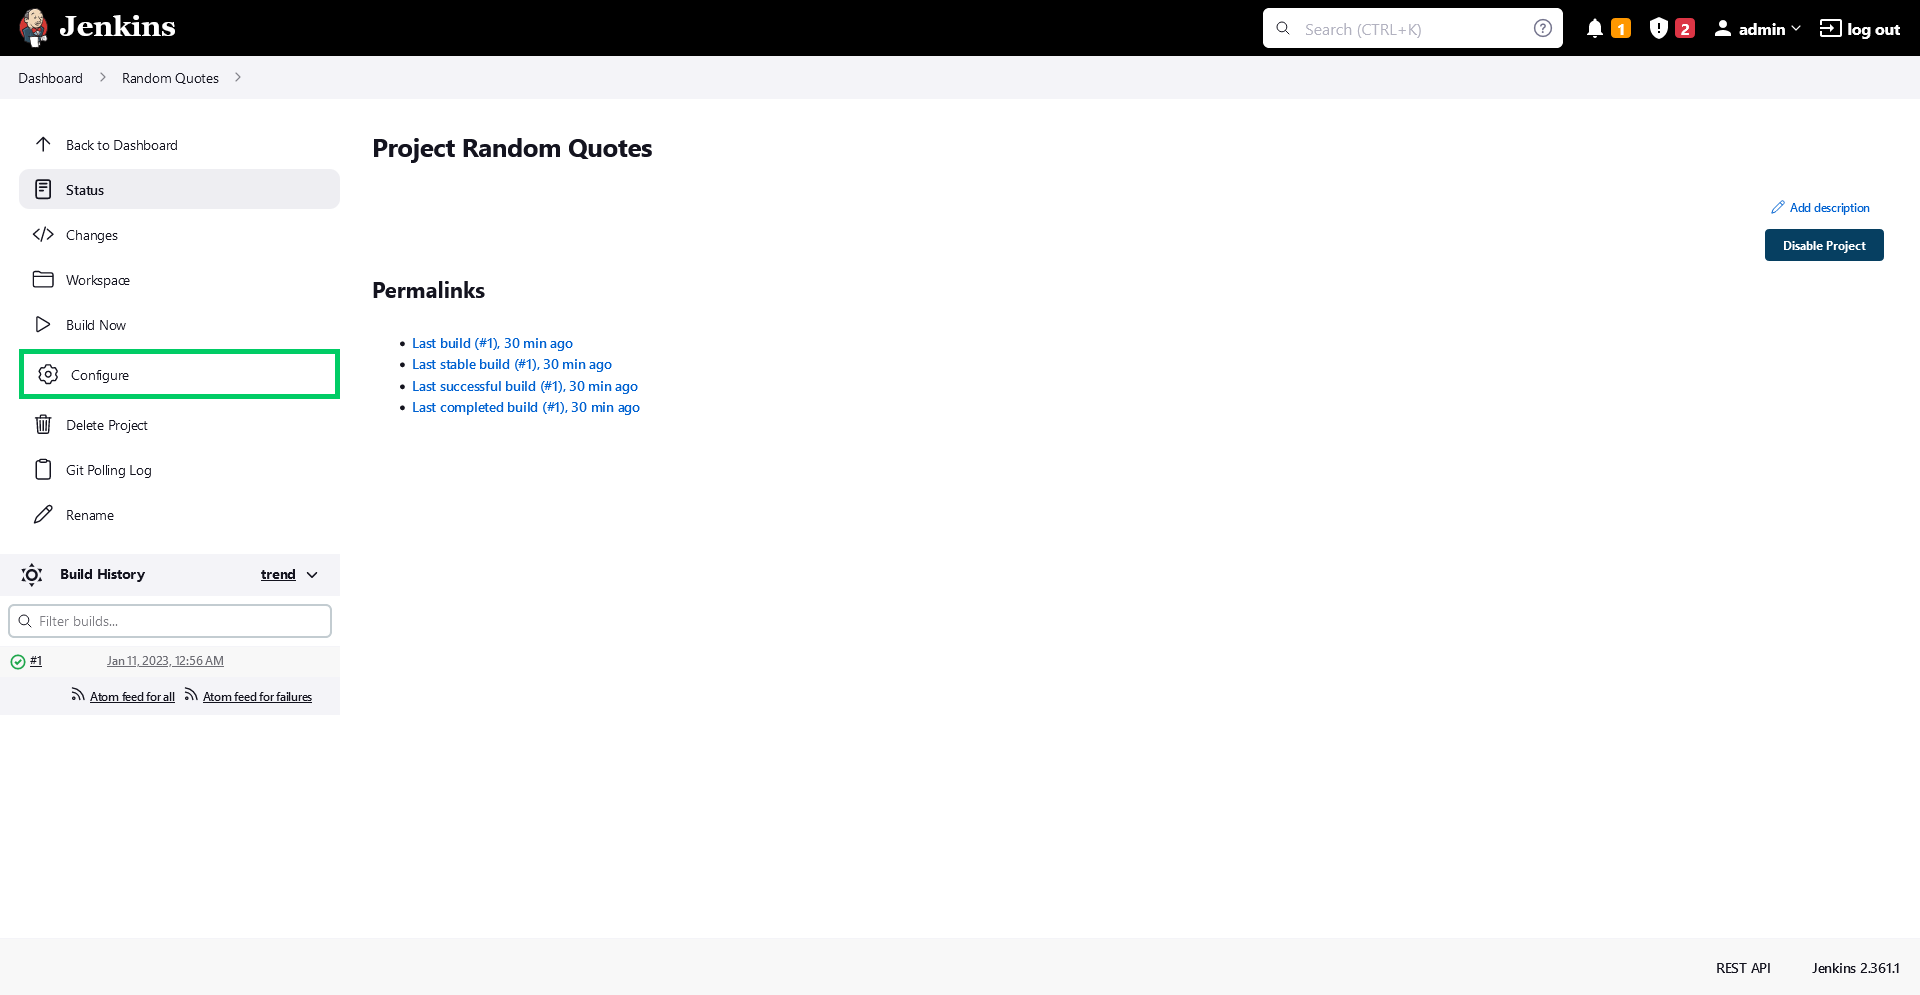
Log back into Jenkins and click the Random Quotes project link:
Click the Configure link:
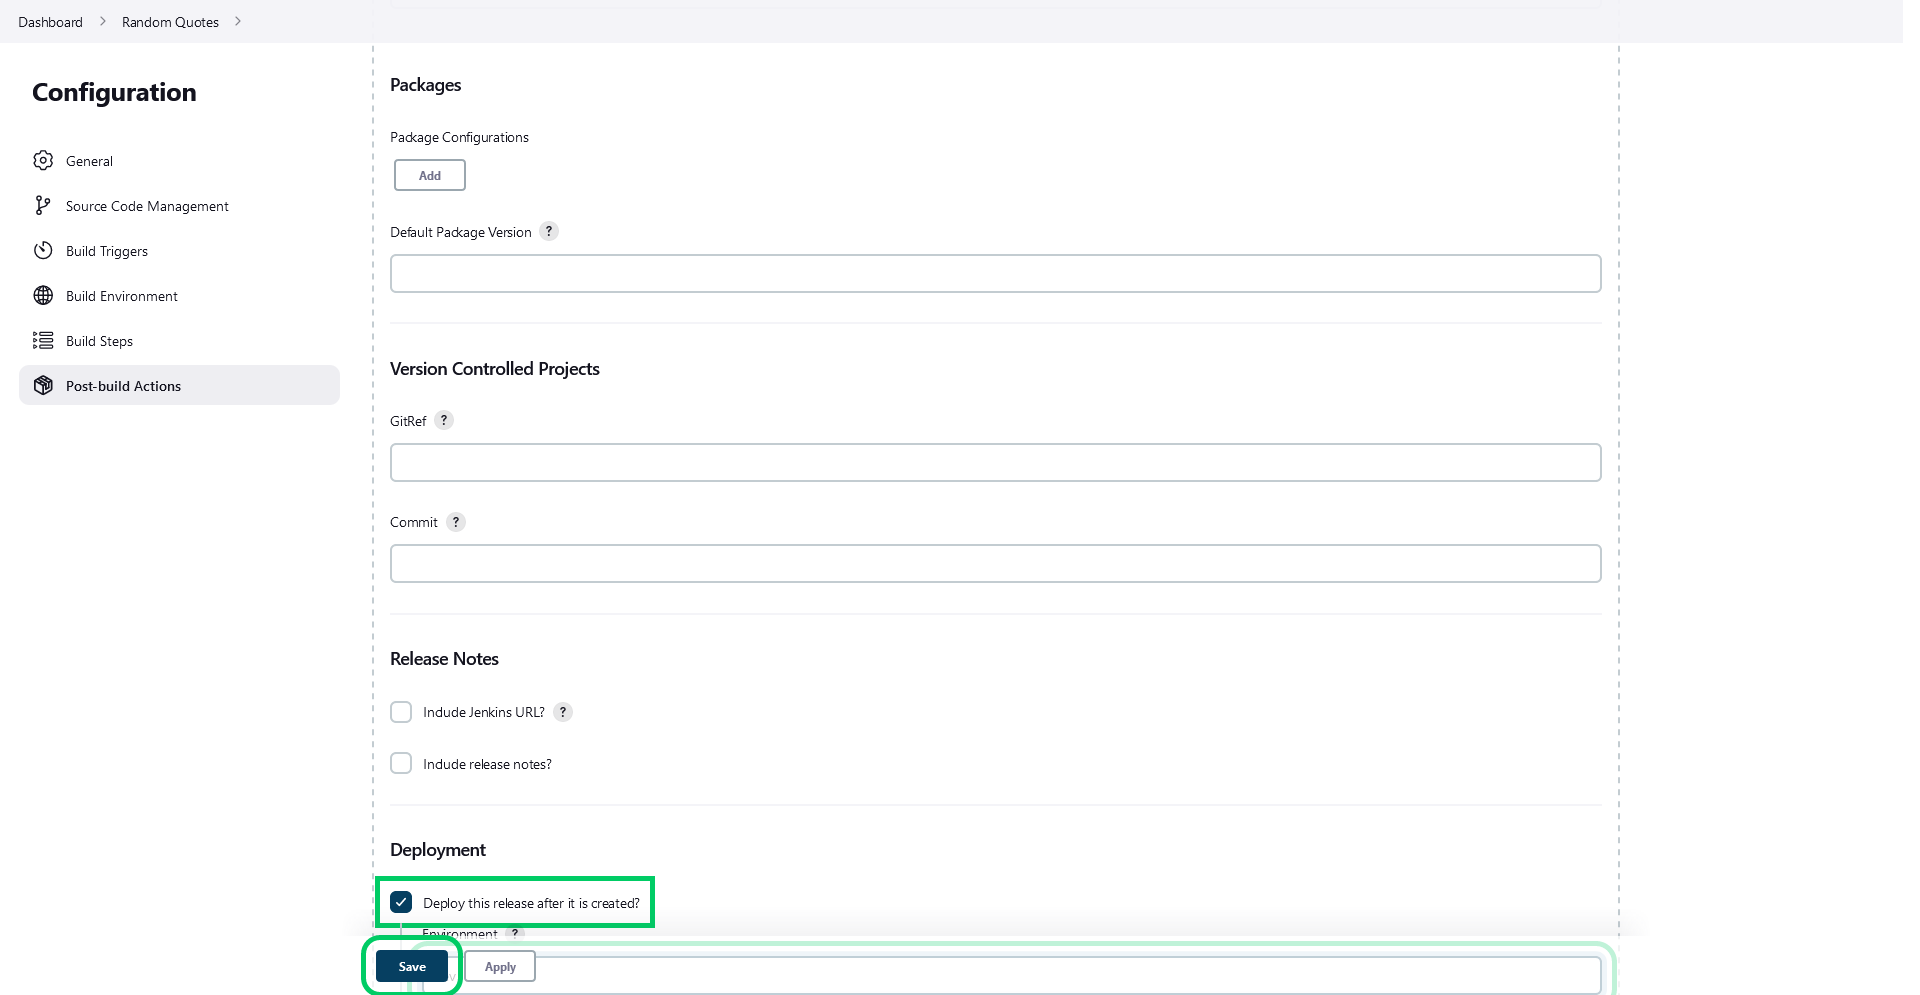
Click Add post-build action, and click the Octopus Deploy: Create Release option.

Set the Project Name to Random Quotes:

Check the Deploy the release after it is created check box, set the Environment to Dev, and check the Show deployment progress checkbox. Then click Save:
Build and deploy the project
Click Build Now. The second build will commence. Click the #2 link to view the second build:

Click the Console Output link to view the build output:

The build logs are streamed to the browser. In a minute or so, the build will complete, and Octopus will perform a deployment using the new package to the Dev environment. You can confirm this by looking for the log message that says Deploy Random Quotes release 0.0.2 to Dev: Success.
We now have a complete CI/CD pipeline! Jenkins will watch for any changes committed to the Git repository, compile the code, run any tests, and then call Octopus to deploy the result.
Additional configuration
Now we will explore some of the more advanced features of Octopus that allow us to customize the deployment progression through environments, secure deployments to production environments, add deployment sign offs, view the audit logs, and add notifications.
Lifecycles
Our project currently uses the default lifecycle, which defines a progression through all the environments in the order they were created.
A custom lifecycle allows the progression of a deployment to be further refined, by defining only a subset of environments that can be deployed to, allowing some environments to be skipped entirely, or requiring that a minimum number of environments are successfully deployed to before moving onto the next environment.
Here we will create a custom lifecycle that makes deployments to the Dev environment optional. This means that initial deployments can be made to the Dev or Test environments, but a successful deployment must be made to the Test environment before it can be progressed to the Prod environment.
Skipping the Dev environment like this may be useful for promoting a release candidate build directly to the Test environment for product owners or testers to review.
Click the Library link, click the Lifecycles link, and click ADD LIFECYCLE:

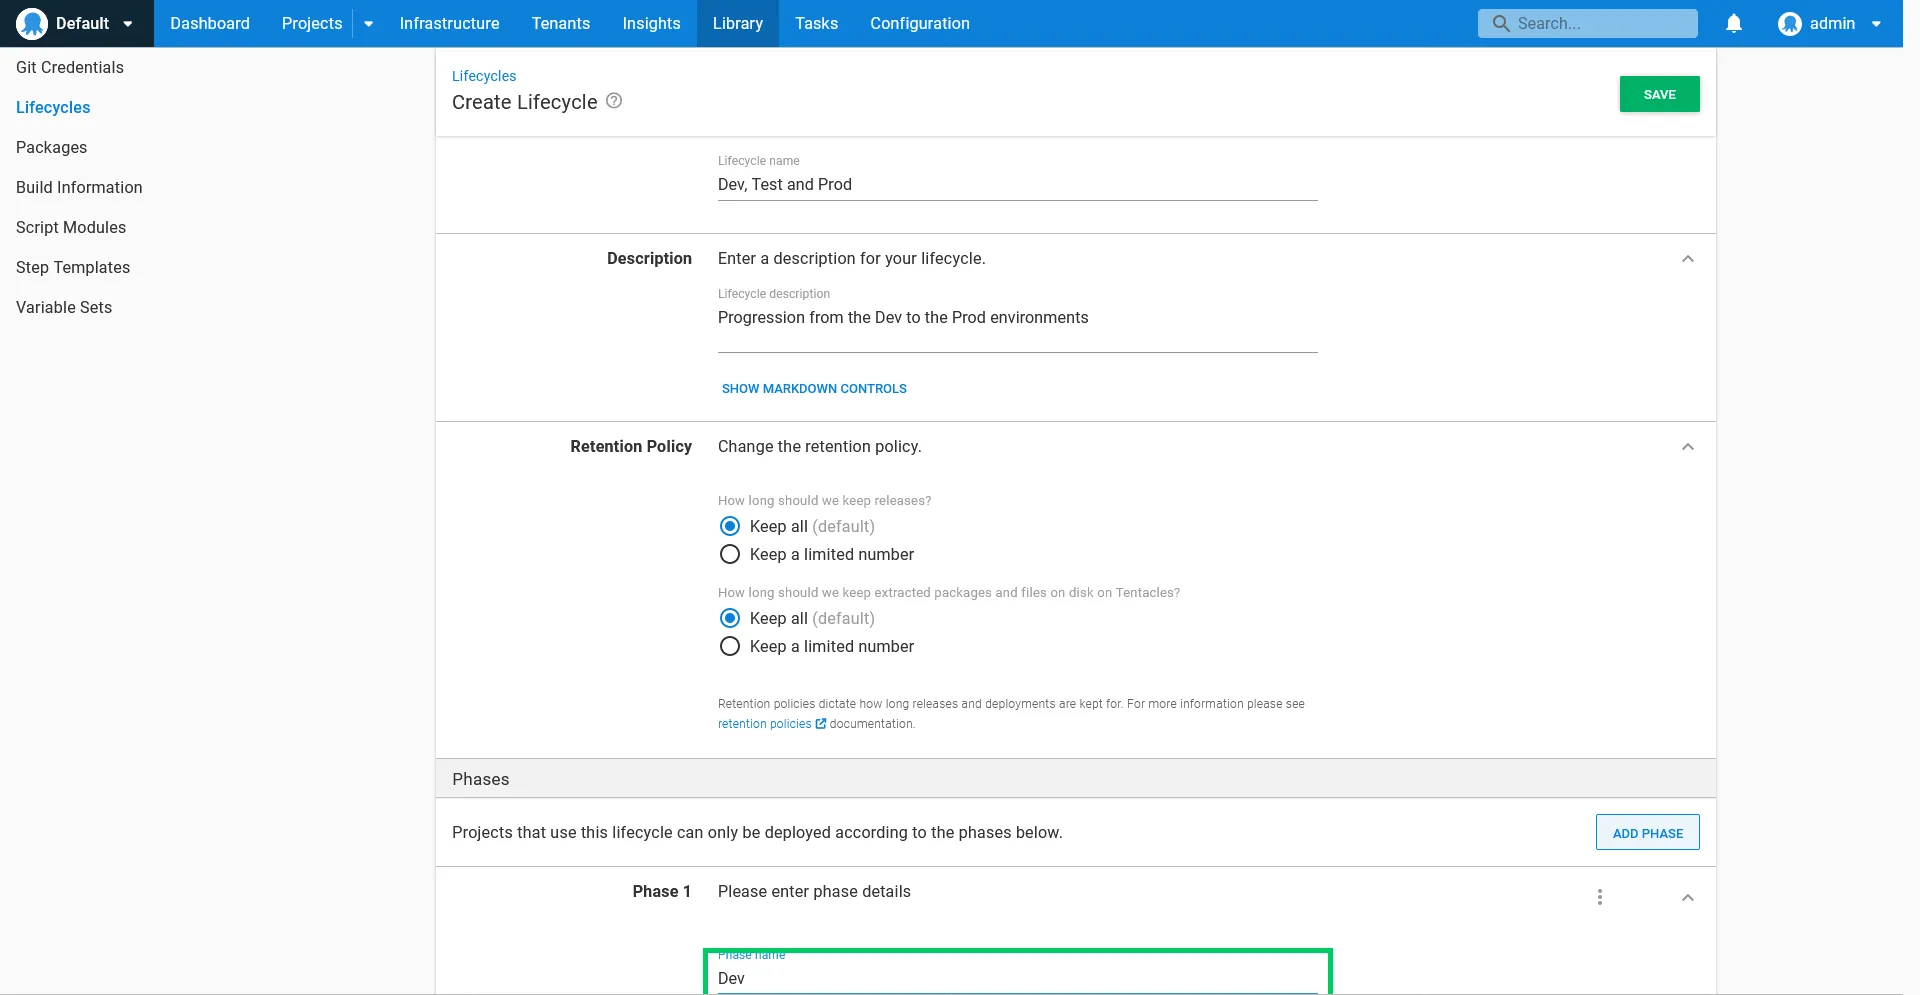
Set the lifecycle name to Dev, Test, and Prod, and the description to Progression from the Dev to the Prod environments:

Phases are used to group environments that can accept a deployment. Simple lifecycles, such as the lifecycle we are creating, have a one-to-one relationship between phases and environments.
Click ADD PHASE:

Enter Dev as the phase name, and select the Optional phase option. This means that deployments can skip this phase and any environments defined in it, and deploy directly to the next phase.
Because we are mapping each environment to its own phase, the name of the phase matches the name of the environment:
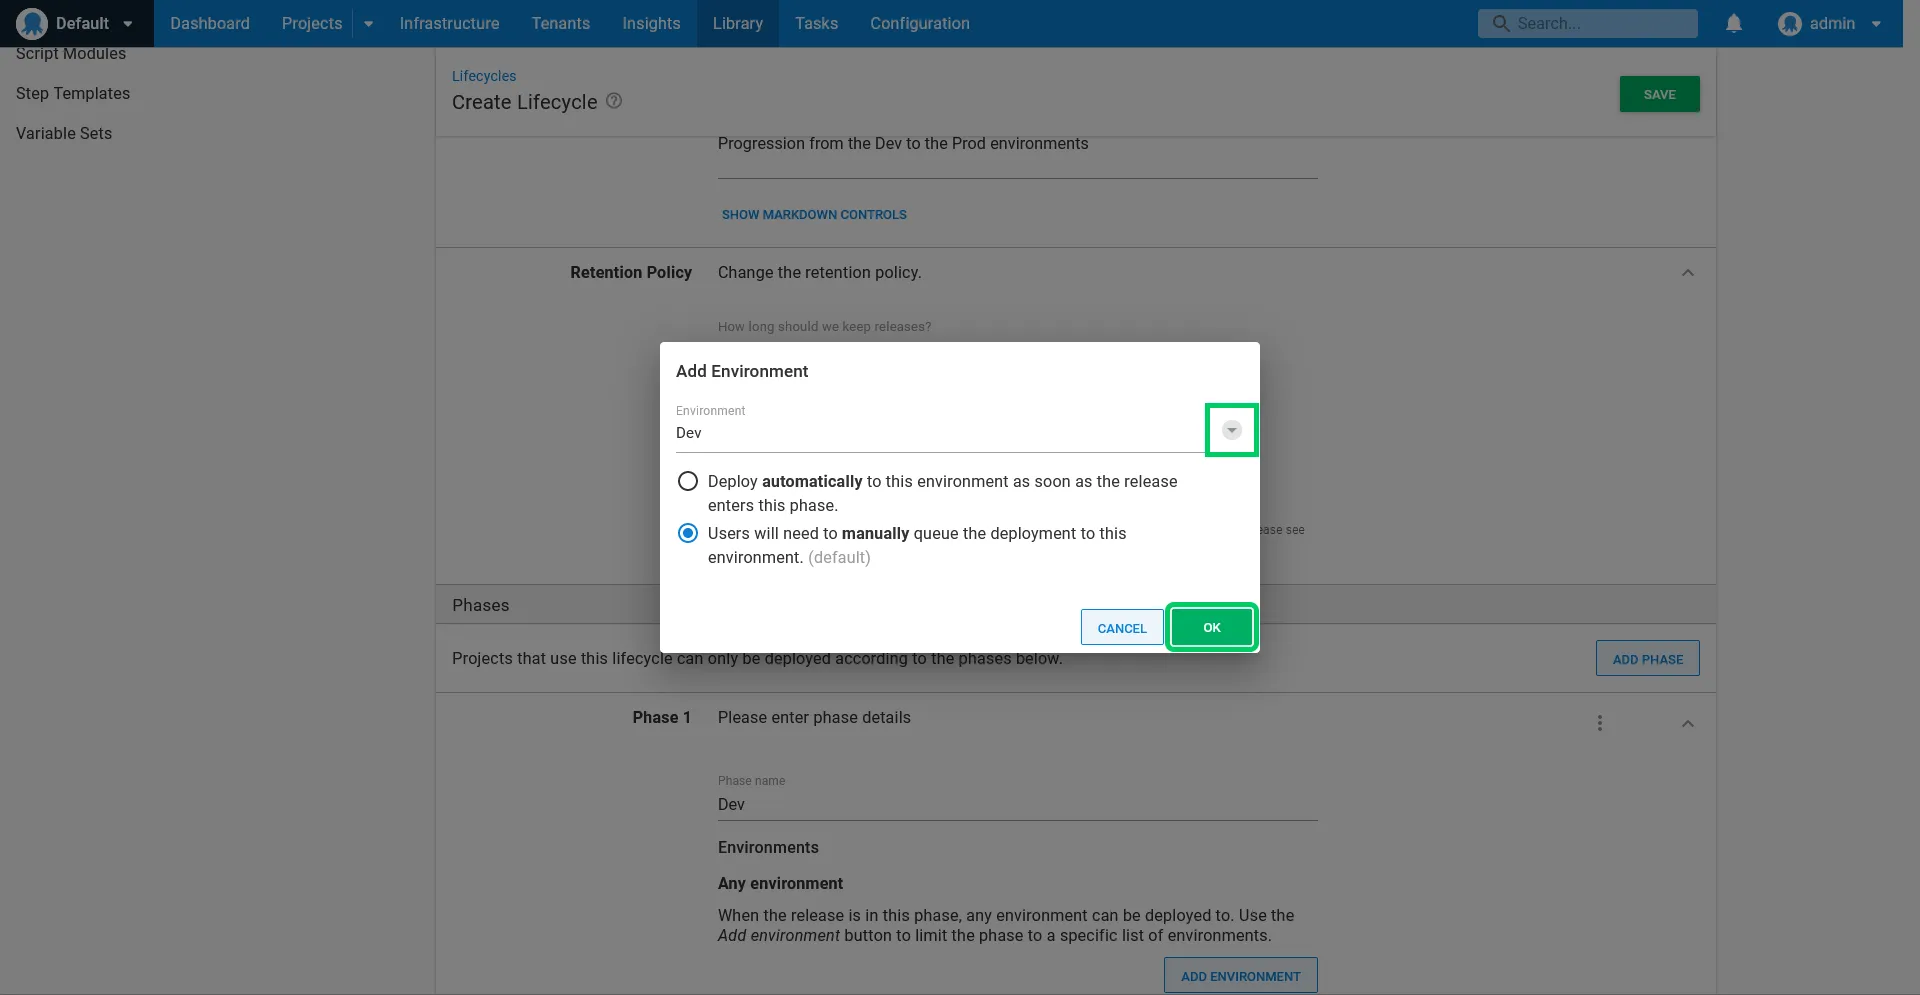
Click ADD ENVIRONMENT:

Click the dropdown arrow, select the Dev environment, and click OK:
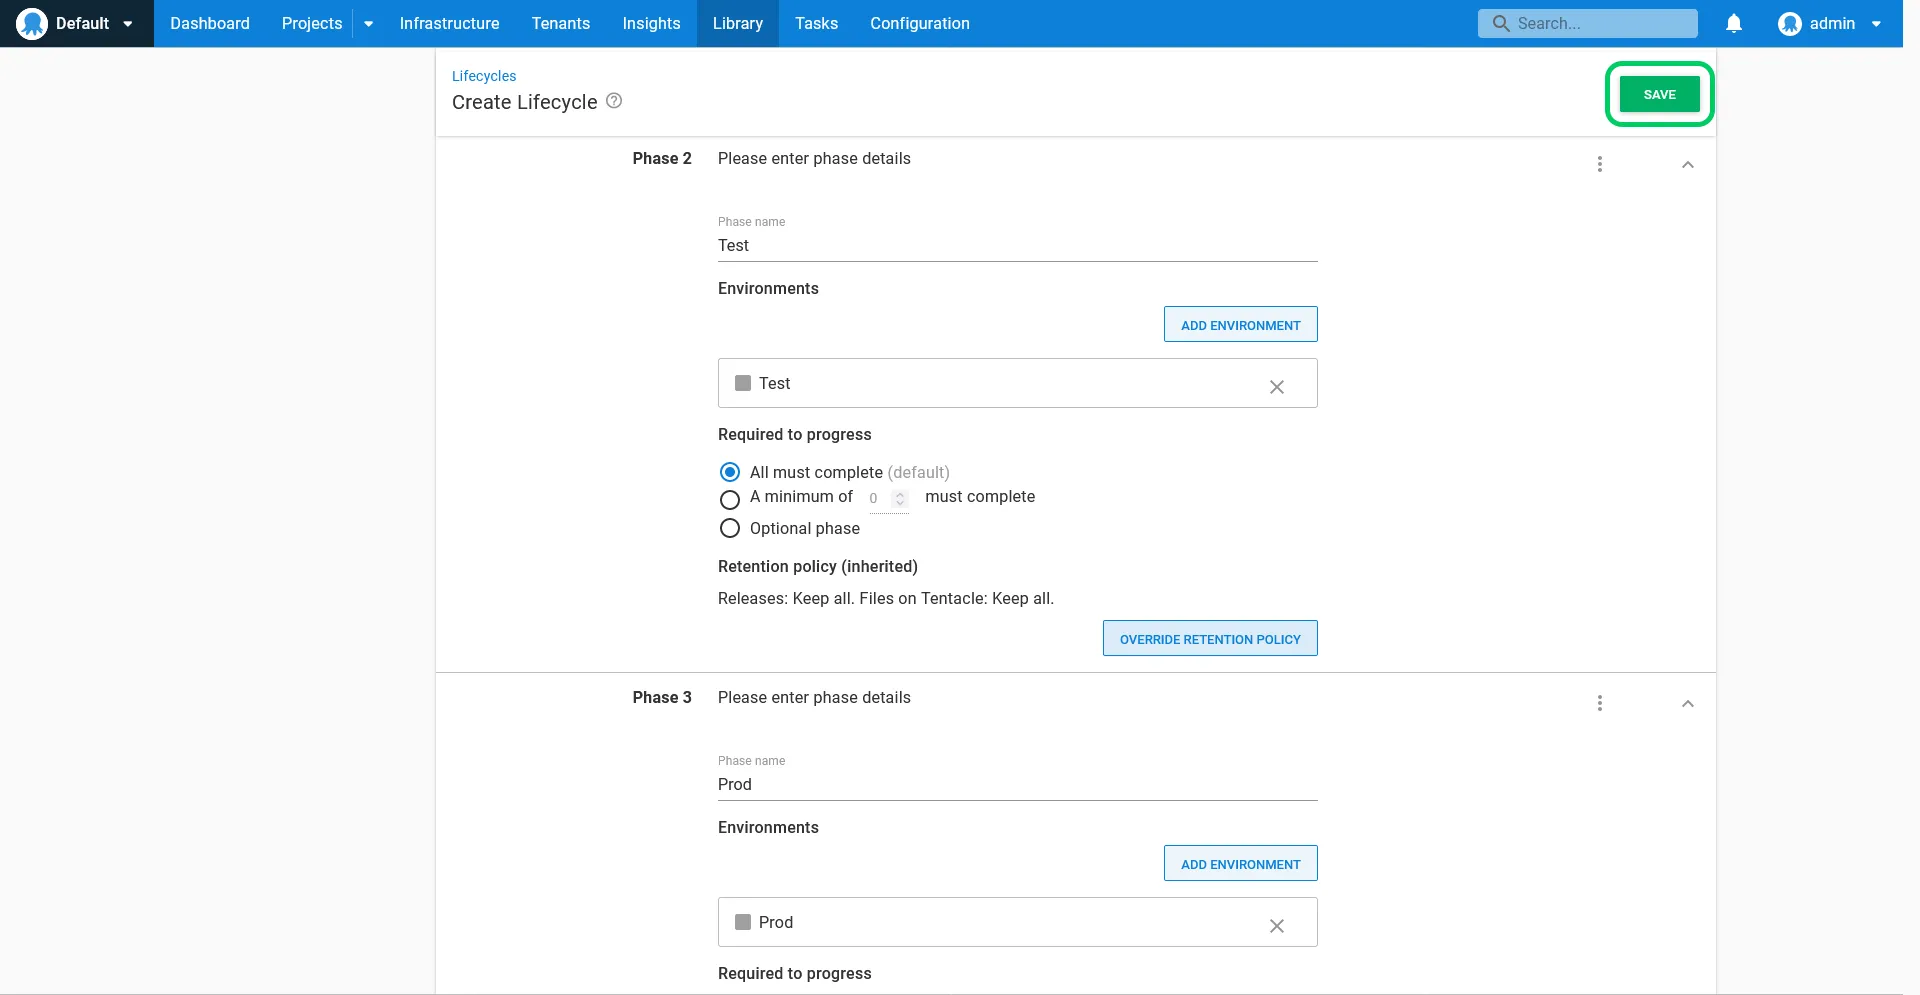
Repeat the process to add a new phase for the Test and Prod environments, leaving the default All must complete option selected:


Click SAVE:
Now, we need to switch the deployment project from the Default Lifecycle to the newly created lifecycle.
Click the Projects link, and click the Random Quotes project tile:

Click the Process link, and click CHANGE:
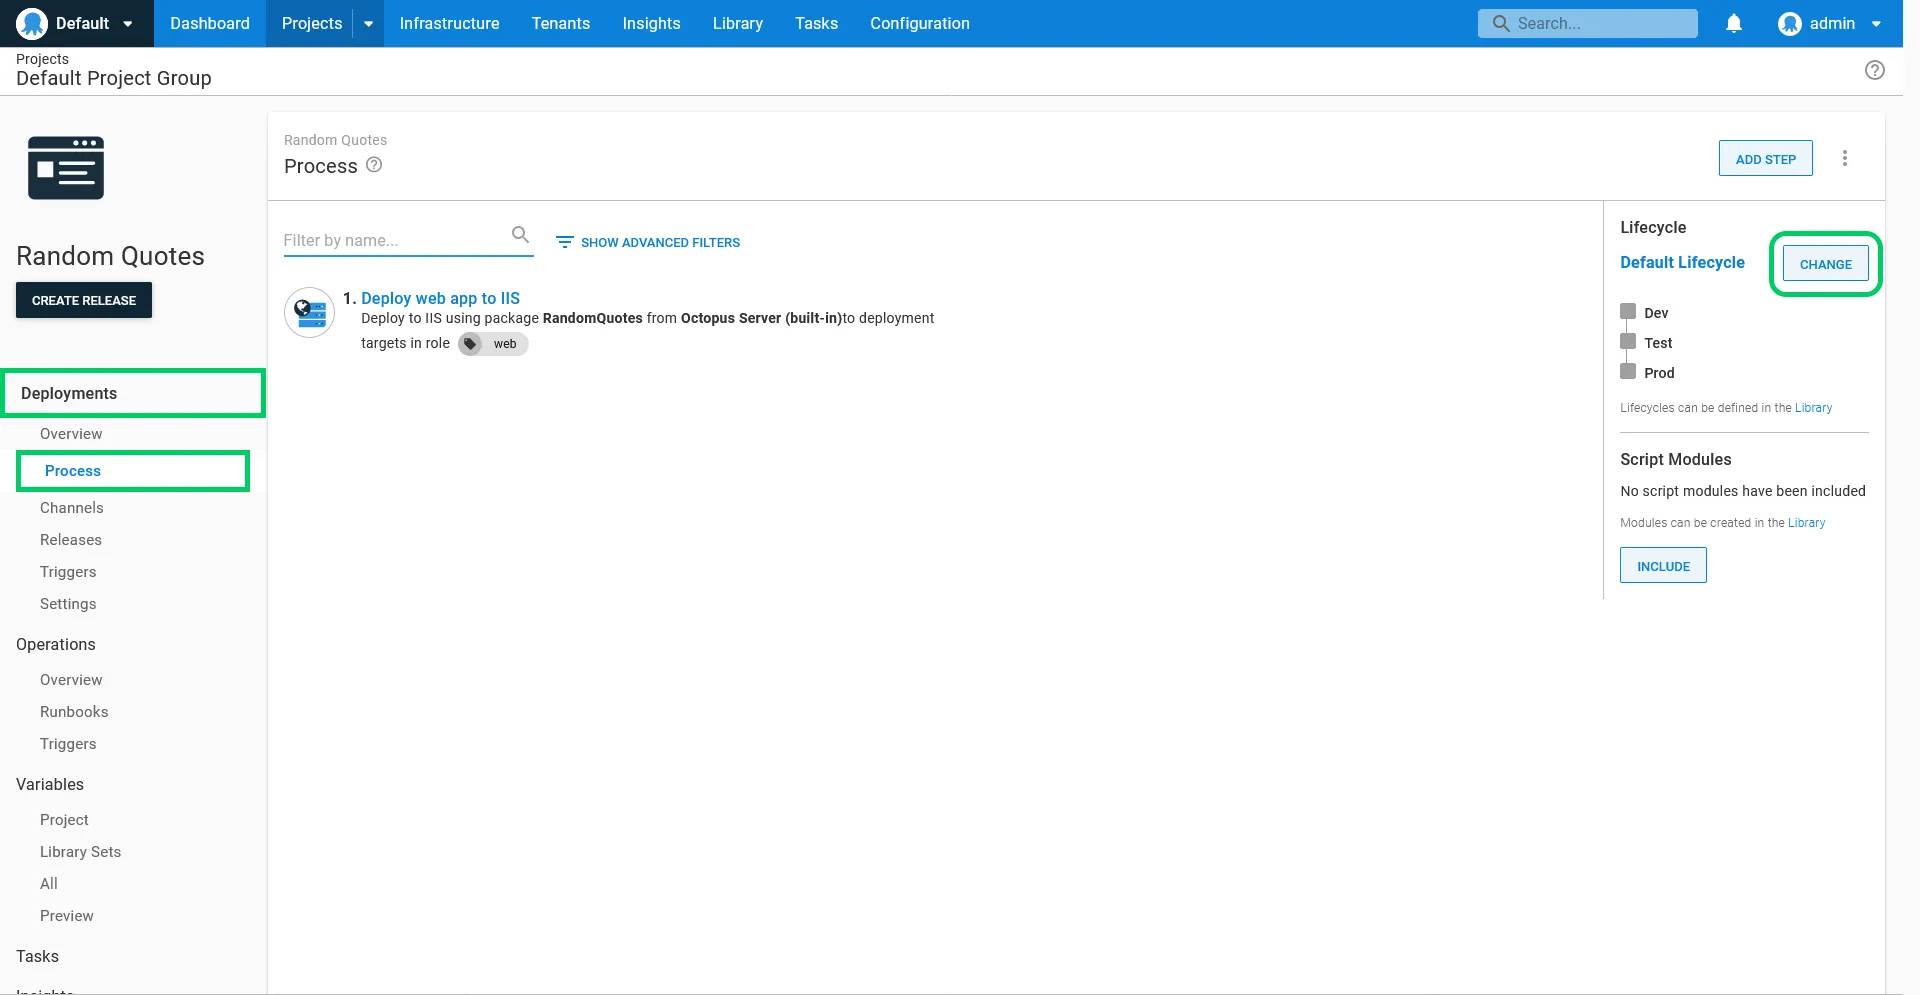
Select the Dev, Test, and Prod lifecycle. Notice the Dev environment is shown as optional.
Click SAVE:

Click CREATE RELEASE, and click SAVE to save the new release:

Because the Dev environment has been configured as optional, the initial release can be made to either the Dev or Test environments. We'll skip the Dev environment and deploy straight to Test.
Click DEPLOY TO..., and select the Test environment:

Click DEPLOY to deploy the application to the Test environment:

The deployment is then performed directly in the Test environment, skipping the Dev environment:

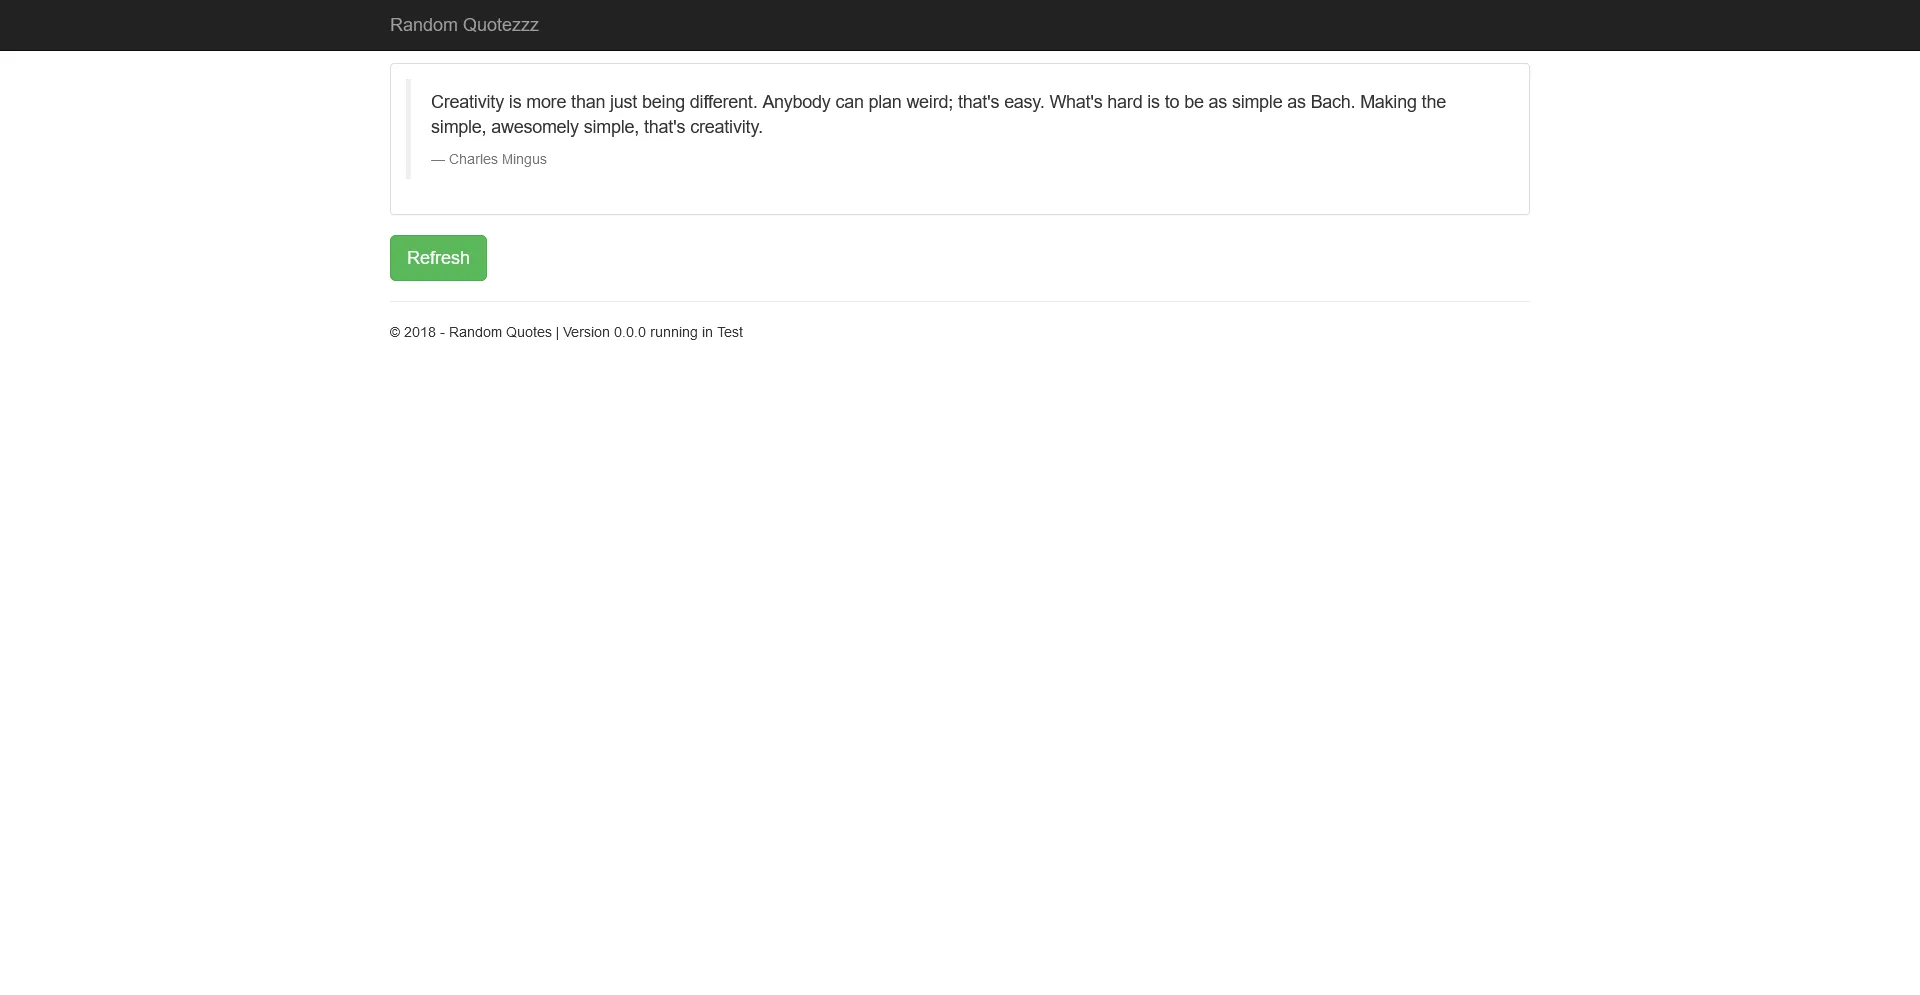
Opening http://localhost:8082 displays the copy of the Random Quotes application deployed to the Test environment. Note the port 8082 is the value of the IIS Port variable scoped to the Test environment.
Also, see the footer text that says running in Test. This is the result of the Configuration variables feature and the EnvironmentName variable replacing the initial value of DEV in the Web.config file with Test. This is an example of a single, environment agnostic package being customized for the environment it is being deployed into:
Approvals
It's a common business requirement to have testers or product owners manually verify that a particular build meets the requirements before a deployment can be considered successful.
Octopus supports this workflow through the use of manual intervention steps. We'll add a manual intervention step to the end of the deployment process, which requires a responsible party to verify the build meets the requirements.
Open the Random Quotes project, click the Process link, and click the ADD STEP button:

Search for the Manual Intervention Required step, and add it to the process:

Enter Deployment Sign Off for the Step Name:
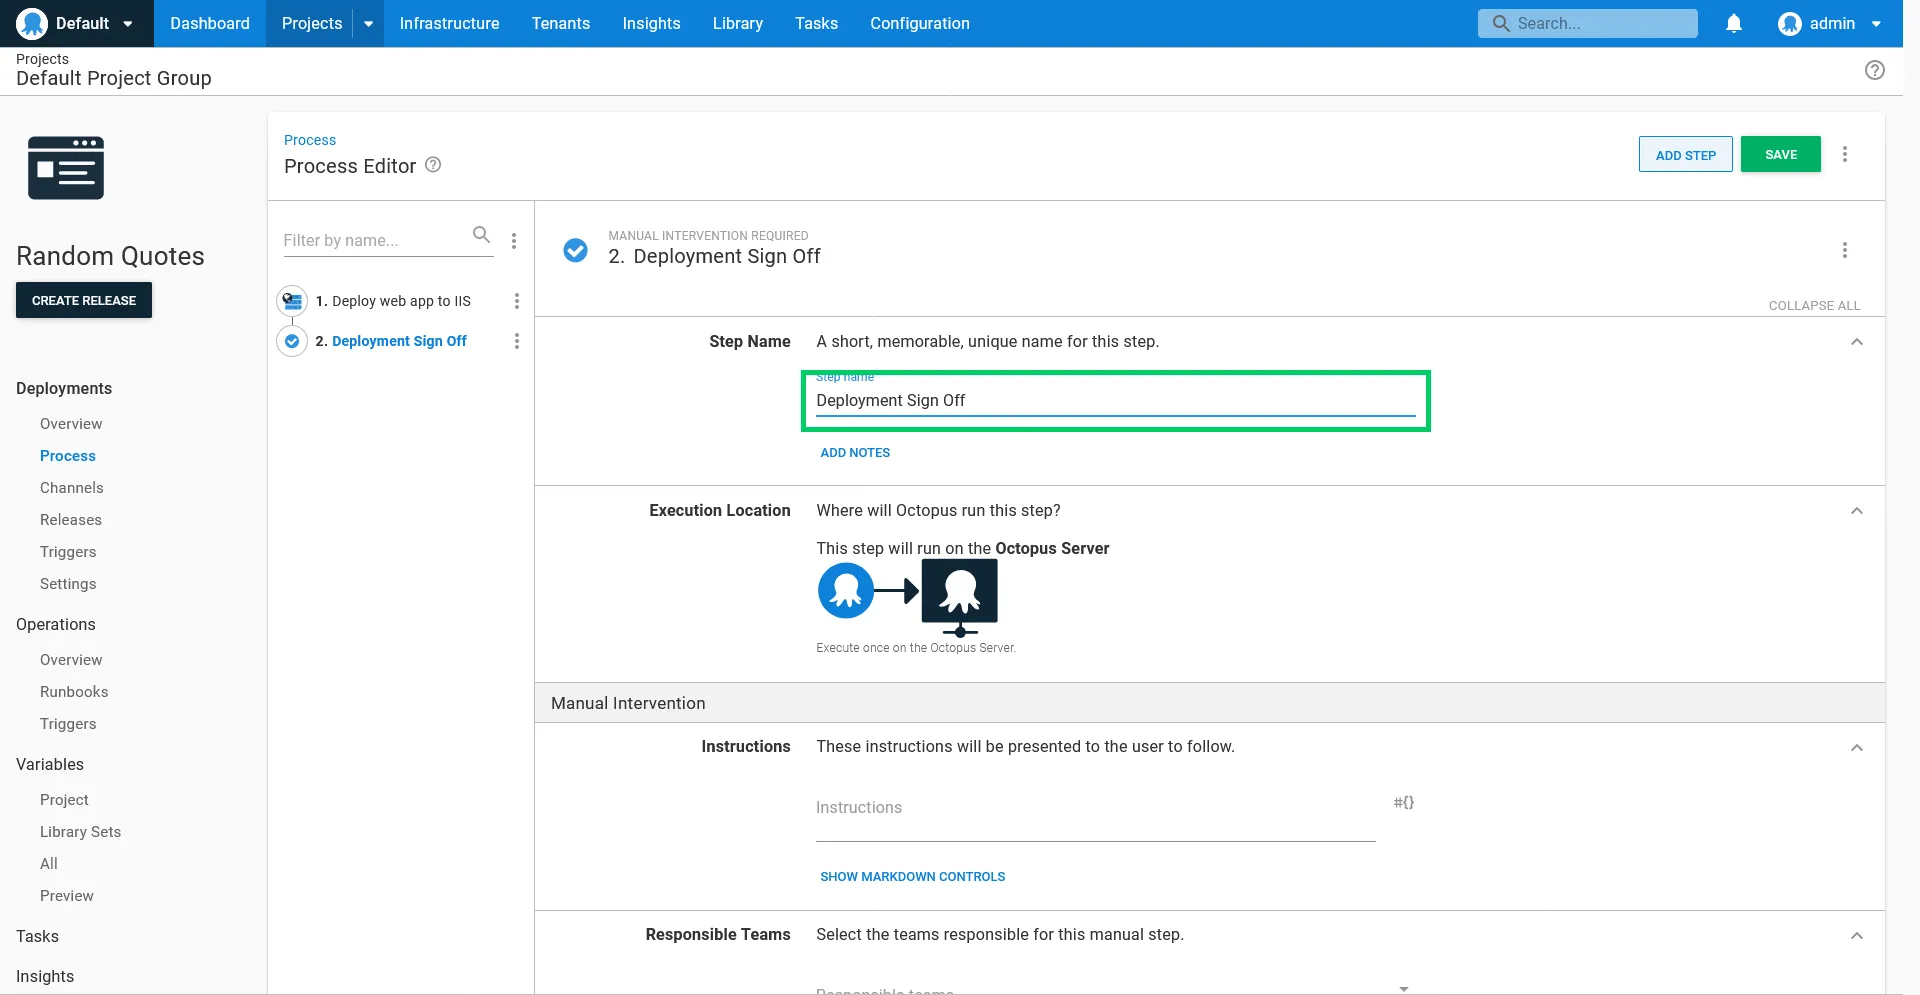
Enter the following for the Instructions:
Open the application and confirm it meets all the requirements.

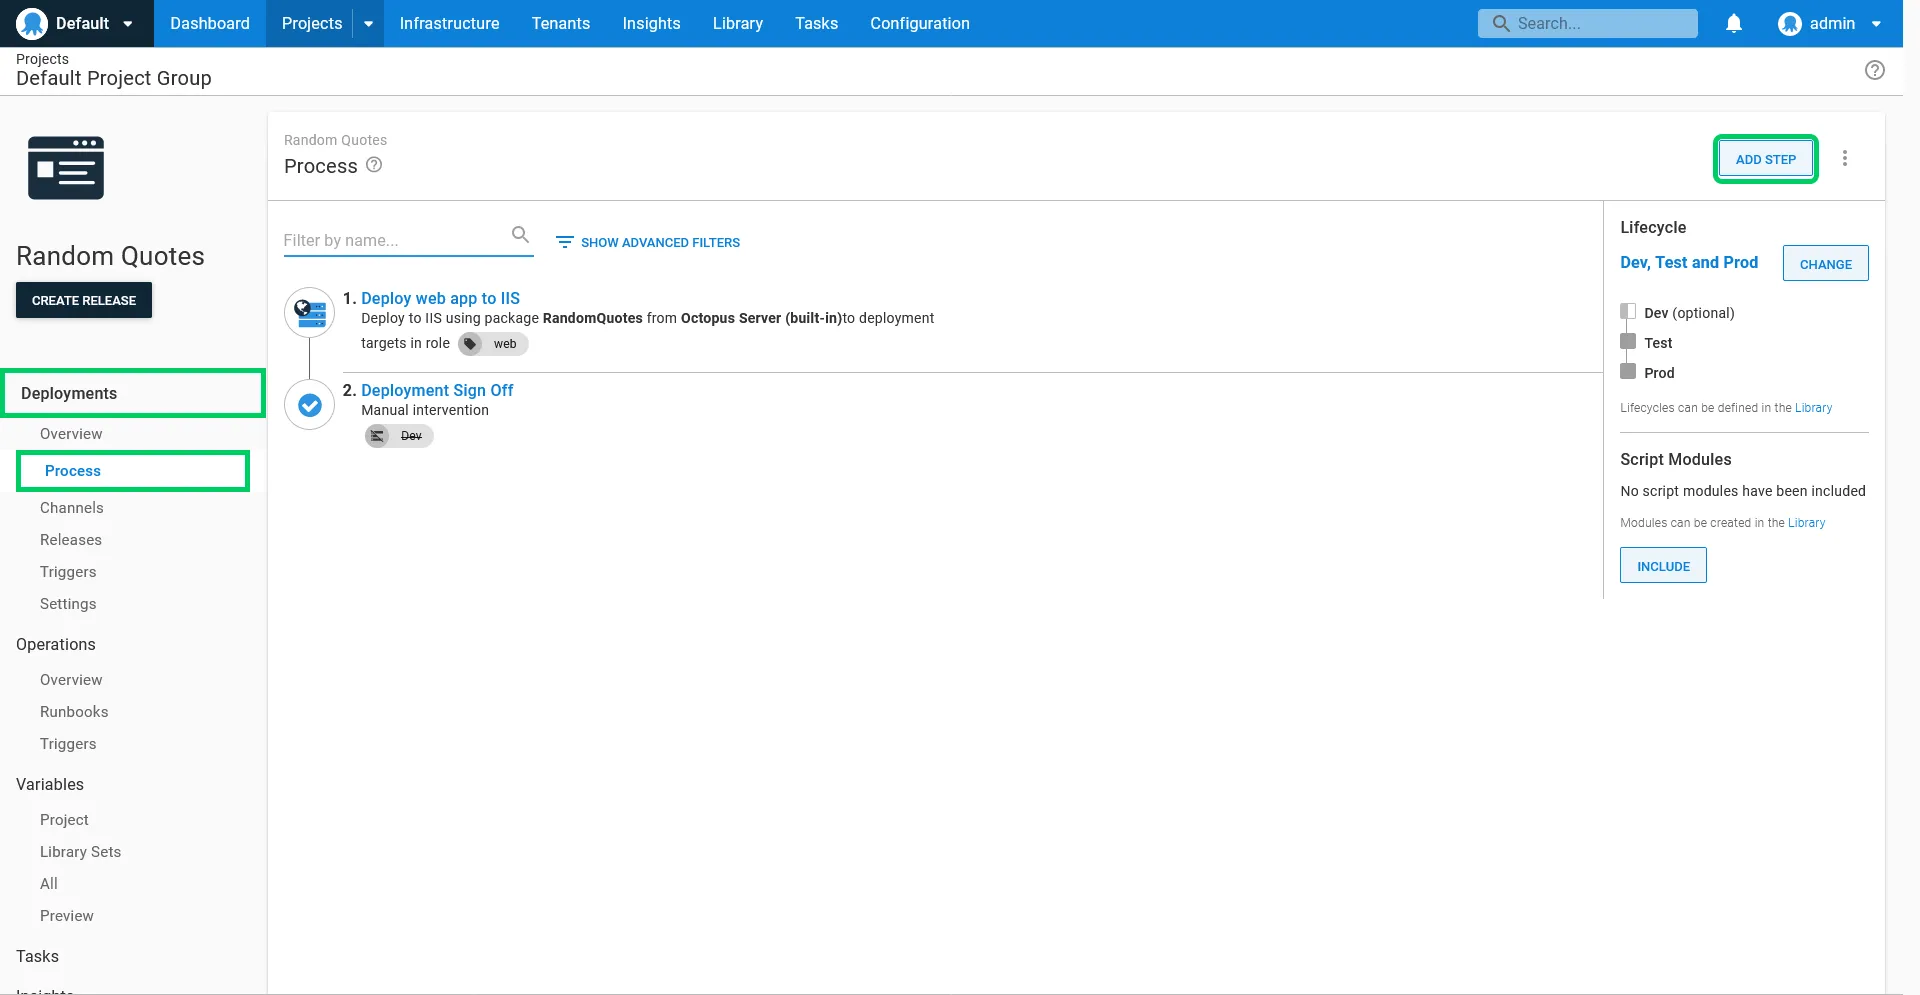
Because every build is automatically deployed to the Dev environment, it doesn't make sense to force someone to manually approve all those deployments. To accommodate this, we do not enable the manual intervention step for deployments to the Dev environment.
Expand the Environments section under the Conditions heading, select the Skip specific environments option, and select the Dev environment.
Click SAVE to save the step:

When this application is deployed to the Test or Prod environments, a prompt will be displayed requiring manual sign off. Click ASSIGN TO ME to assign the task to yourself:

Add a note in the provided text box, and click PROCEED to complete the deployment:

The deployment will then complete successfully:

Email notifications
Octopus has native support for sending email notifications as part of the deployment process. We will add a step to the deployment process to let people know when a release has been deployed to an environment.
To start, we need to configure an SMTP server to send our emails. For this guide, we'll use the free SMTP server provided by Google.
Click the Configuration link:

Click the SMTP link:

- Enter smtp.gmail.com as the SMTP Host.
- Enter 587 as the SMTP Port.
- Enable the Use SSL/TLS option.
- Enter your Gmail address as the From Address.
- Enter your Gmail address and password in the credentials.
You will enable the Less secure apps option on your Google account for Octopus to send emails via the Google SMTP server.

Open the Random Quotes project, click the Process link, and click ADD STEP:
Search for the Send an Email step, and add it to the process:

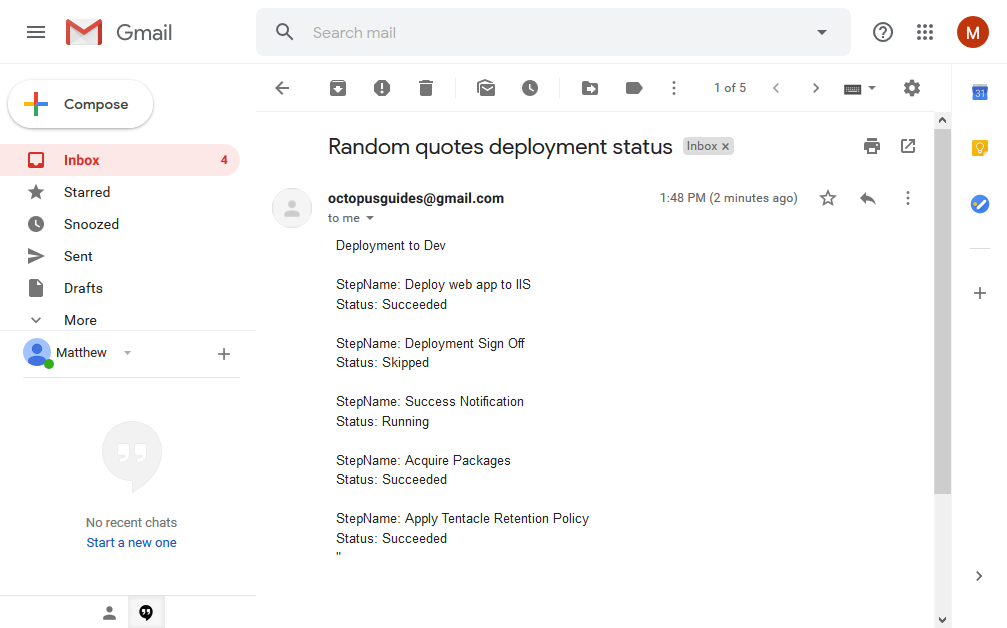
Enter Random quotes deployment status for the Step Name:

Enter the email address to receive the notification in the To field:

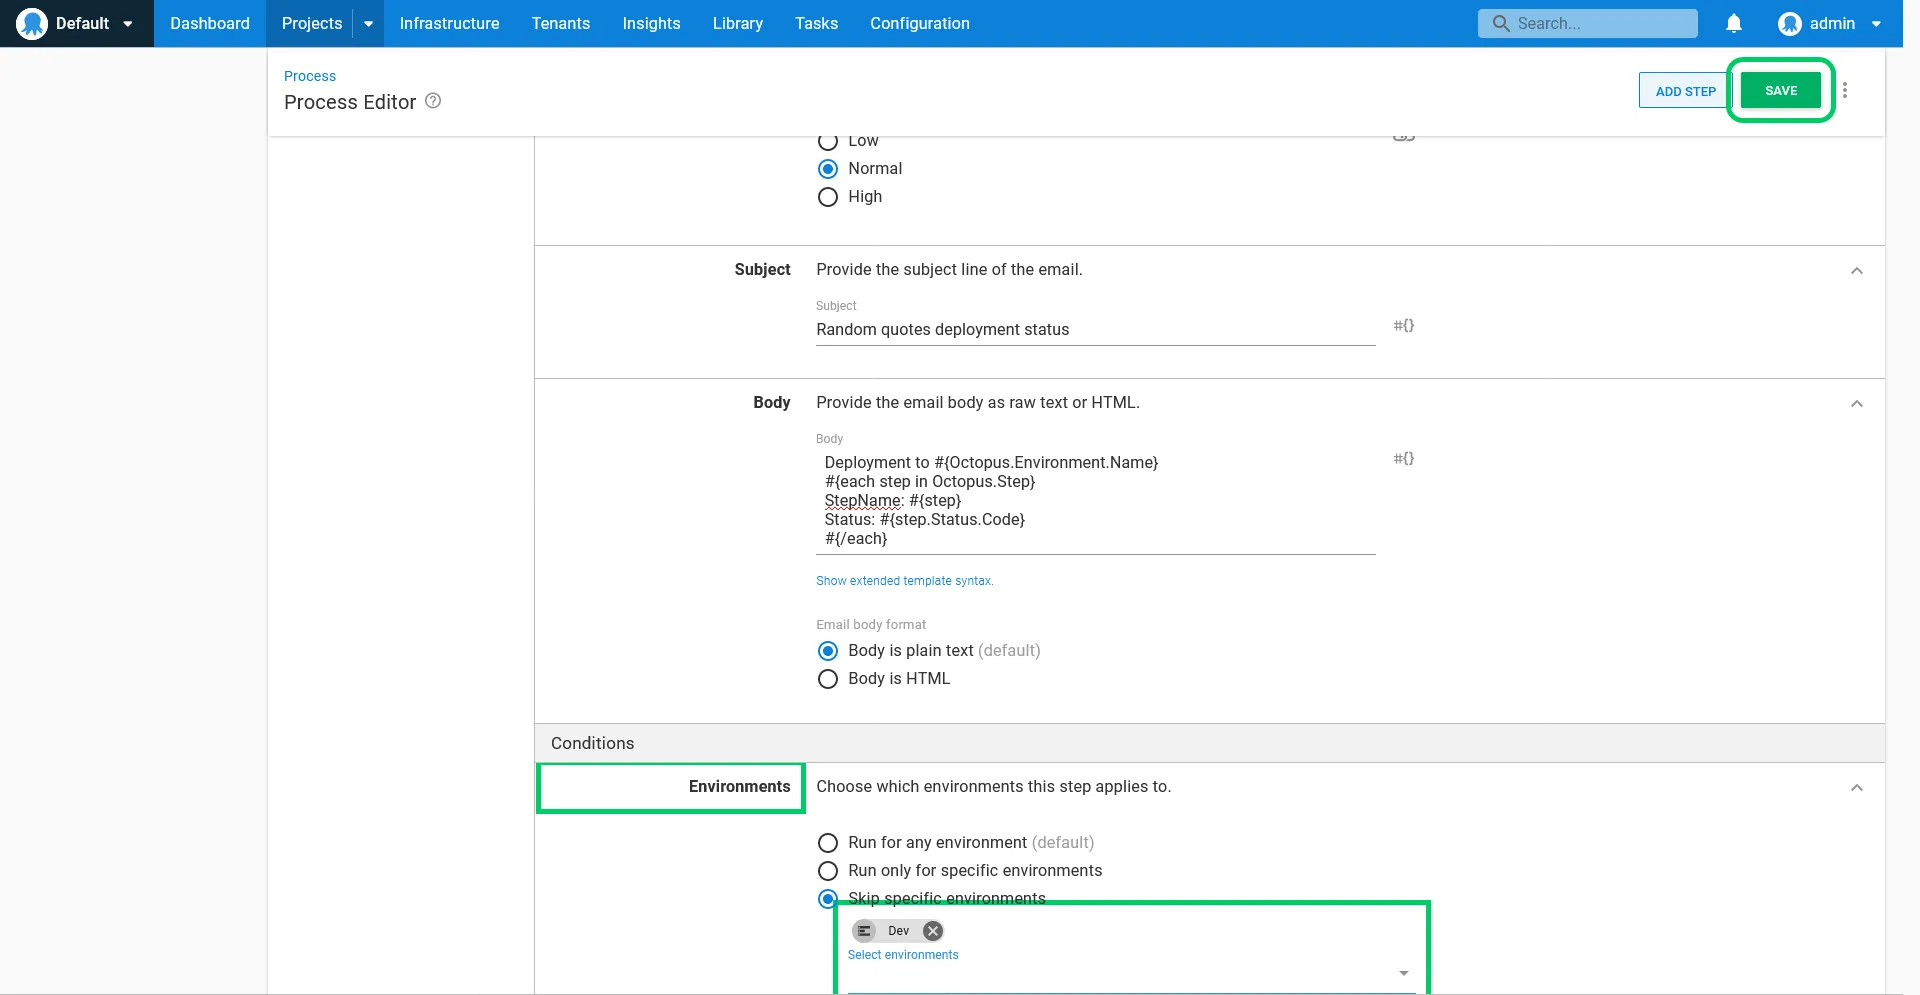
Enter Random quotes deployment status as the Subject:

Enter the following as the Body:
Deployment to #{Octopus.Environment.Name}
#{each step in Octopus.Step}
StepName: #{step}
Status: #{step.Status.Code}
#{/each}
Here we use the #{Octopus.Environment.Name} variable provided by Octopus to add the name of the environment that was deployed to, and then loop over the status codes in the #{Octopus.Step} variable to return the status of each individual step.
The complete list of system variables can be found in the Octopus documentation.

We want to be notified of the status of this deployment regardless of whether the deployment succeeded or failed. Click the Run Conditions section to expand it.
Select the Always run option, which ensures the notification email is sent even when the deployment or the manual intervention fail:

Given every change to the source code will result in a deployment to the Dev environment, we do not want to generate reports for deployments to this environment.
Click the Environments section to expand it. Select the Skip specific environments option, and select the Dev environment to skip it.
This is the last piece of configuration for the step, so click SAVE to save the changes:
Deploy the project to the Test or Prod environments. When the deployment succeeds, the notification email will be sent:
Permissions
One of the strengths of Octopus is that it models environments as first-class entities. This means the security layer can apply rules granting access only to specific environments. We'll take advantage of this ability to model and secure environments to create two users, an internal deployer who can deploy to the Dev and Test environments, and a production deployer who can deploy to the Prod environment.
We start by creating the users. Click the Configuration link:

Click the Users link:

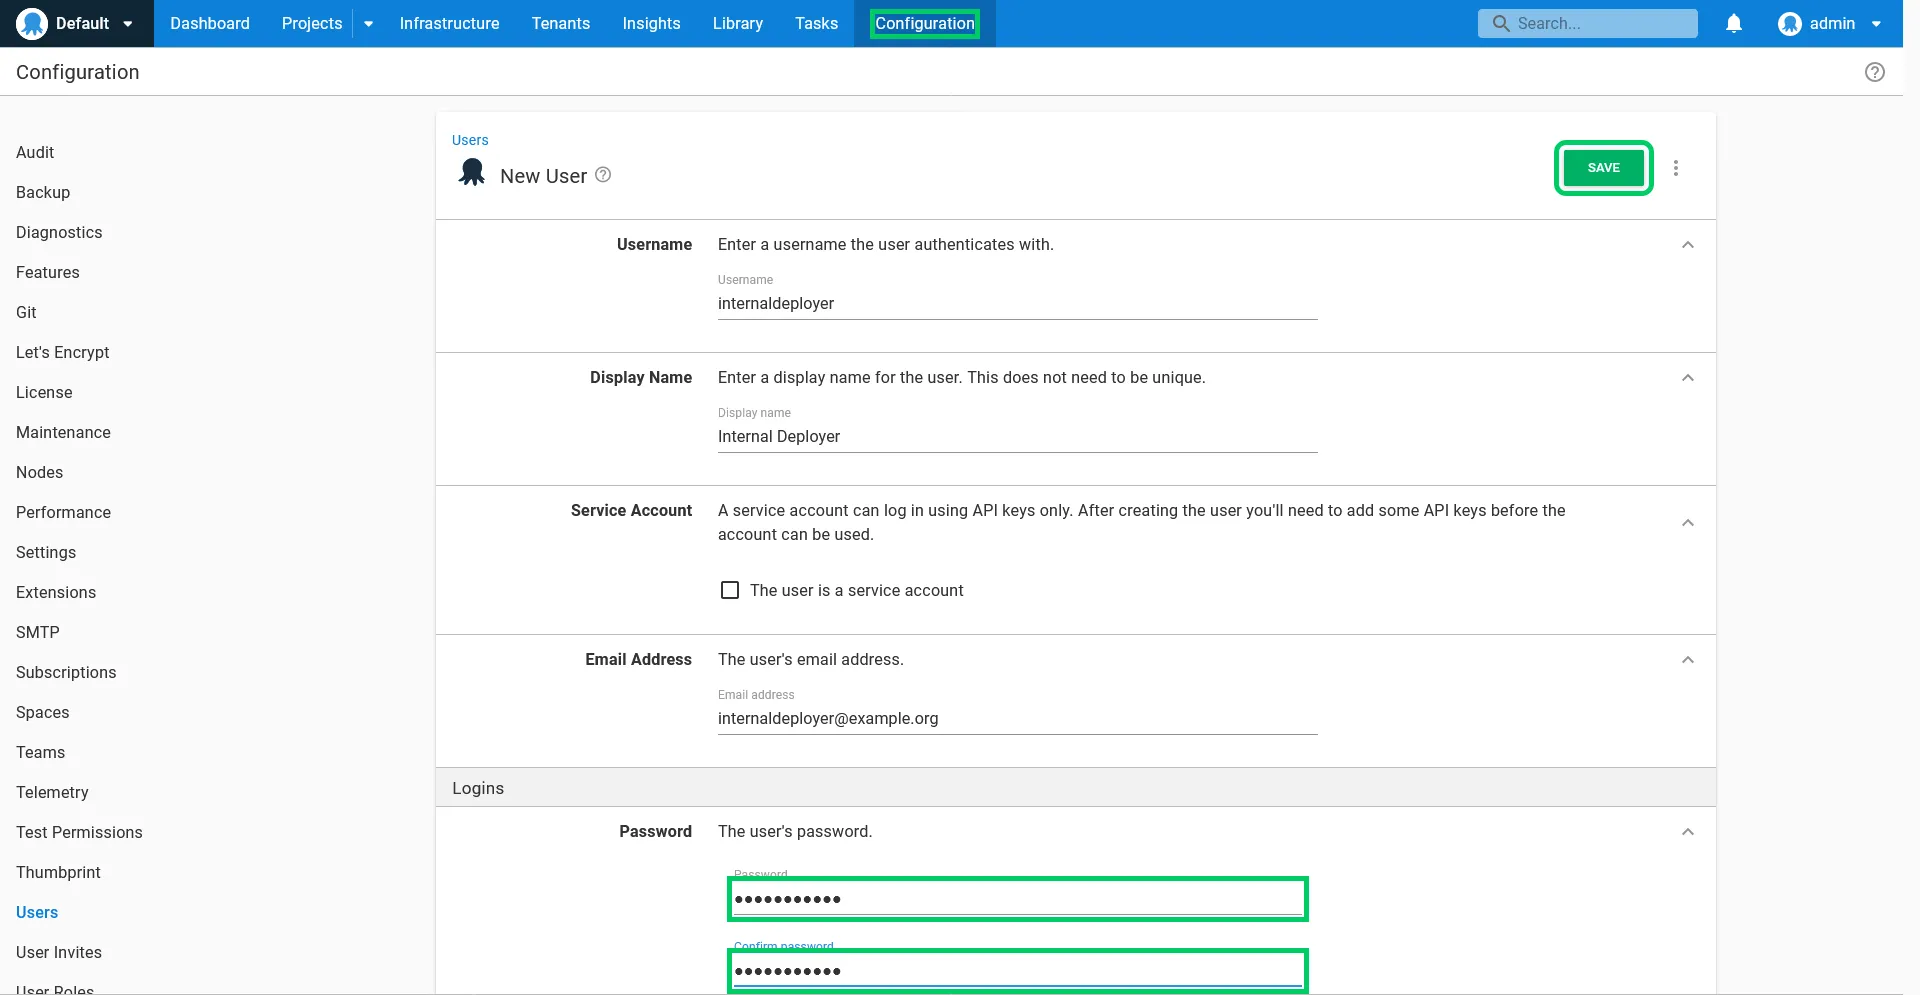
Click ADD USER:

Enter internaldeployer as the Username:

Enter Internal Deployer as the Display Name:

Enter the user's email address. We have used a dummy address of internaldeployer@example.org here:

Enter a password and confirm it. Then click SAVE to create the user:
Repeat the process for a user called productiondeployer. The summary for the productiondeployer user is shown below:

The newly created users are not assigned to any teams and have no permissions to do anything. To grant them permissions, we must first create two teams. The internal deployment team will grant access to deploy to the Dev and Test environments, while the production deployment team will grant access to deploy to the Prod environment.
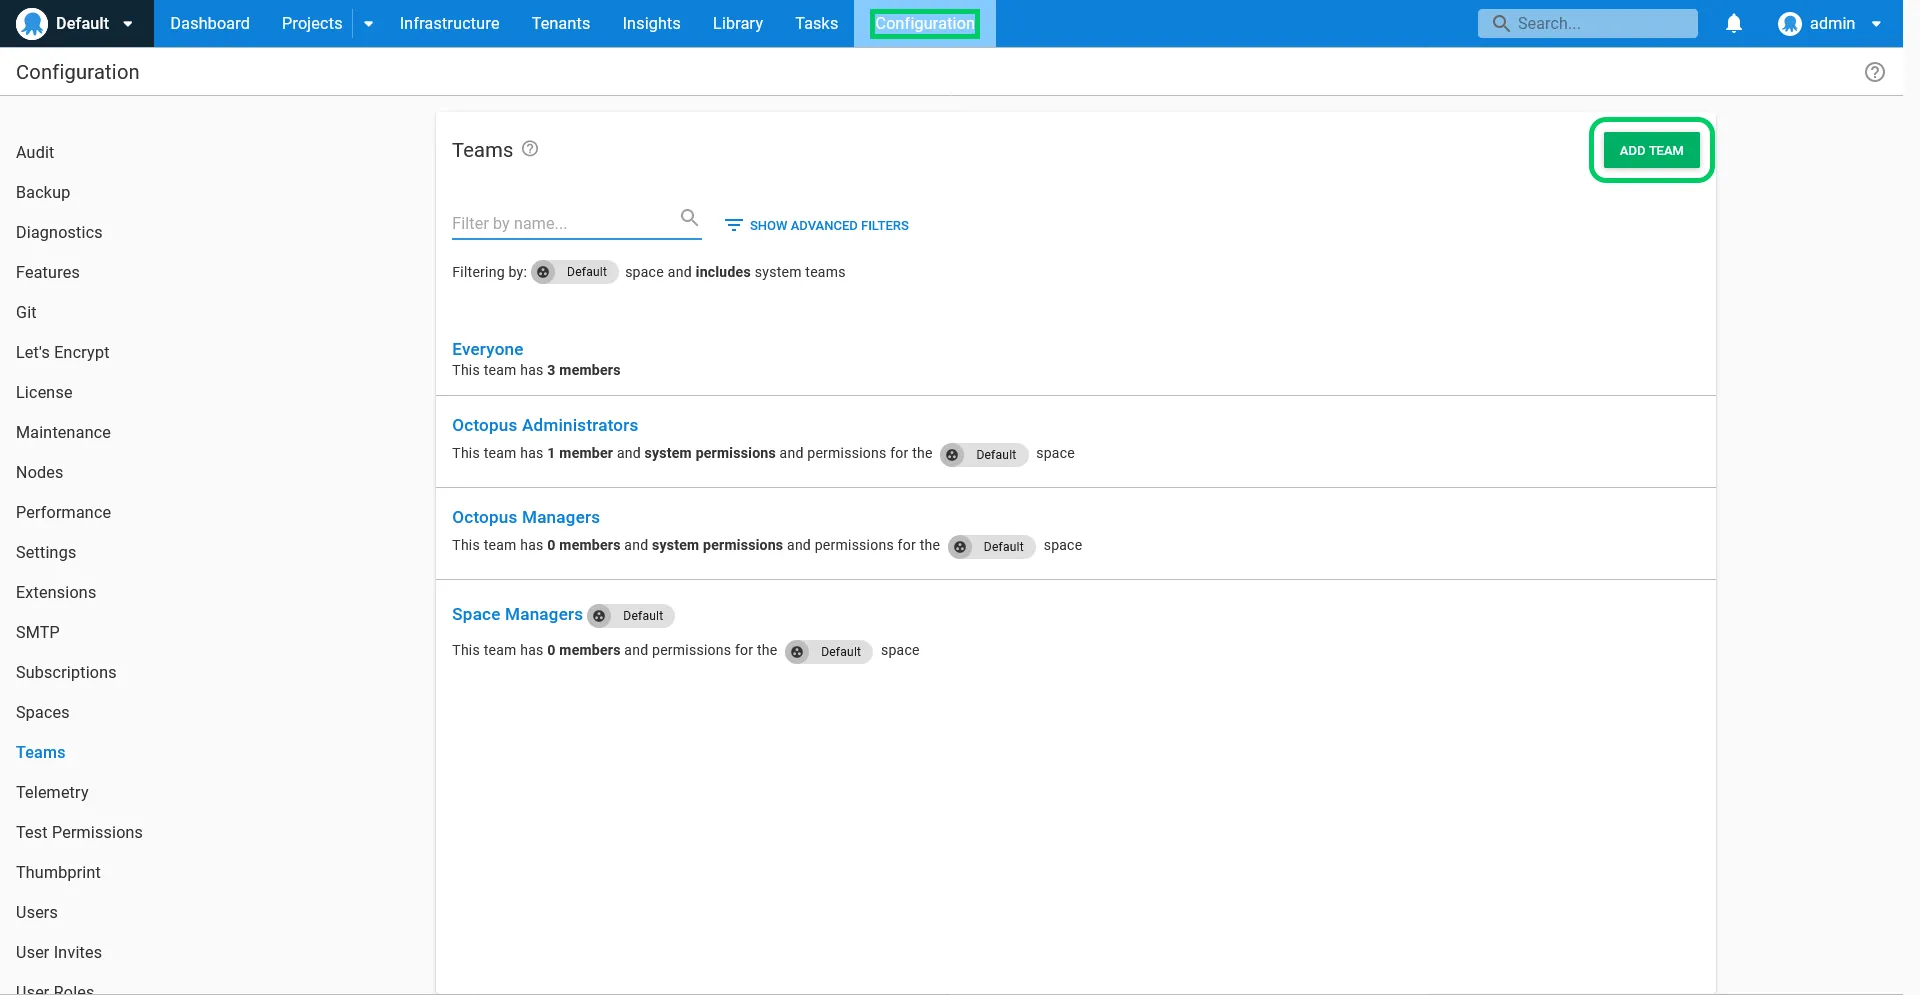
Click the Configuration link:
Click the Teams link:

Click ADD TEAM:
Enter Internal Deployers for the New team name, and Grants access to perform a deployment to the internal environments for the Team description. Click SAVE to create the team:

We need to add the internaldeployer user to this team. Click ADD MEMBER:

Select the Internal Deployer user from the dropdown list, and click ADD:

The team does not grant any permissions yet. To add permissions click the USER ROLES tab, and click INCLUDE USER ROLE:

Select the Deployment creator role from the dropdown list. As the name suggests, this role allows a user to create a deployment, which results in the deployment process being executed.
Click DEFINE SCOPE:

We only want to allow the internal deployer to deploy to the internal environments. Select the Dev and Test environments, and click APPLY:

The permissions are then applied. We need a second permission to allow the internal deployer to view the projects dashboard. Click INCLUDE USER ROLE again:

Select the Project viewer role. This role does not need to be scoped, so click the APPLY button:

Here are the final set of roles applied to the team:

Repeat the process to create a team called Production Deployers that includes the productiondeployer user, and grants the Deployment creator role scoped to the Prod environment:

When we log in as the internaldeployer user, we see that the Random Quotes project dashboard shows DEPLOY... buttons for the Dev and Test environments. Any deployments in the production environment will be visible, but they cannot be created by this user:

When we log in as the productiondeployer user, we see that the Random Quotes project dashboard shows DEPLOY... buttons only for the Prod environment. Also note that the lifecycle rules still apply, and only successful deployments to the Test environment are available to be promoted to the Prod environment:

Audit Log
Important interactions in Octopus are tracked in the audit log. This is useful for teams that have security or legislative requirements to track the changes and deployments made to their infrastructure.
To view the audit log, click the Configuration link:

Click the Audit link:

A complete list of records are shown, with filtering available to help find specific events:

Conclusion
In this guide we ran through the process of building a complete CI/CD pipeline with:
- Jenkins building and testing the source code and pushing the package to Octopus.
- Octopus deploying the package to the Dev, Test, and Prod environments.
- Email notifications generated when deployments succeed or fail.
- Manual sign off for deployments to the Test and Prod environments.
- Users with limited access to create releases in a subset of environments.
This is a solid starting point for any development team, but Octopus offers so much more! Below are more resources you can access to learn about the advanced functionality provided by Octopus:
- The Octopus documentation
- The Octopus blog
- Upcoming events and webinars
- The Octopus community slack channel
Need support? We're here to help.