

This post is part of a series about creating a Selenium WebDriver test framework.
Up until this point we have been running tests sequentially, either locally or on the Travis CI platform. However, running UI tests one after another does not scale particularly well. As more tests are added, and more combinations and edge cases are tested, it is not uncommon to find UI test suite take hours to complete.
If there is one justified criticism of UI testing, it’s that it is far slower than other forms of testing. Without a better way of running UI tests, they will become a bottleneck in the CI pipeline. So what can we do to make tests complete in a shorter period of time?
One year ago, one of our UI test suites took hours to run. Last month, it took 16 minutes. Today, it takes 39 seconds.
This is the introduction to a blog post on Amazon talking about how a development team dropped their UI testing times from hours to seconds with Chrome headless and AWS Lambda. This reduction in testing time is exactly what we are looking for, and in this post, we’ll learn how to run our UI tests at massive scale using AWS Lambda.
Lambda is a service provided by AWS that allows short-lived applications to be run at near infinite scale. Lambda takes care of provisioning the operating system and deploying your code, and you only pay for the time your application is actually running. The best feature of Lambda is that all the scaling is taken care of for you. As you make more requests to applications hosted in Lambda, the platform will scale up automatically to ensure that performance is maintained, and if requests drop off, Lambda will scale back down. This scaling is automatic and transparent to our code.
Because we can quite often run UI tests concurrently, we can achieve a significant decrease in the total time it takes to execute a test suite by having our testing application hosted by Lambda thanks to this automatic scaling.
Let’s start by looking at the AWS Lambda console. From the Services menu, click the Lambda link.

Because we have not created any Lambda functions yet, the Lambda console provides a welcome page where we can start playing with some sample code.
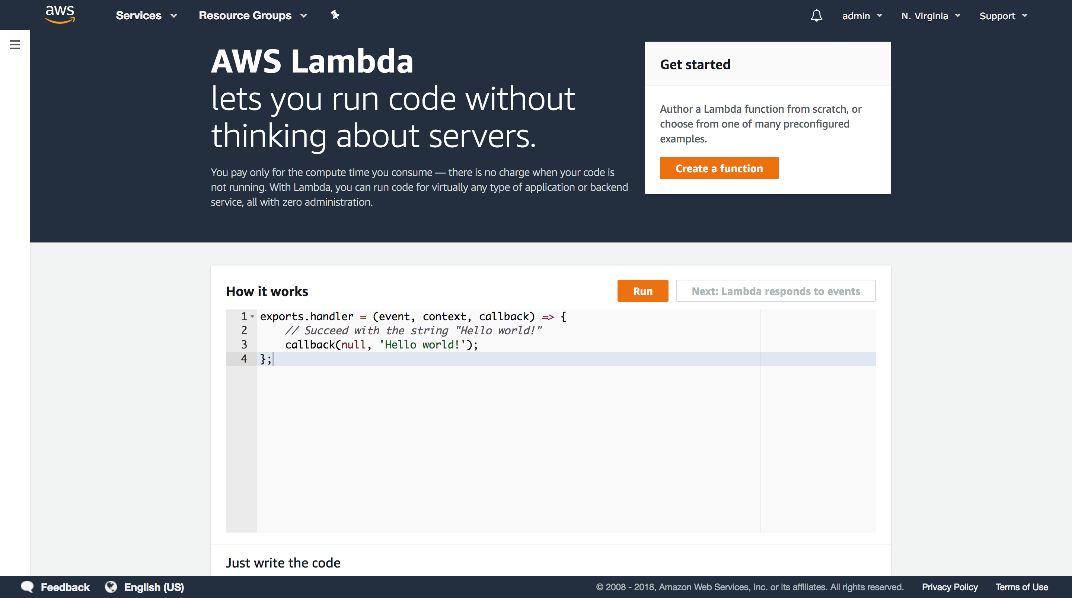
The code presented in this page is editable, and is a real Lambda function. The example here is written in JavaScript, but even if you aren’t familiar with JavaScript it is still easy enough to make simple changes and observe how they run. In the example below, the text Hello World! has been replaced with This is a test of Lambda!. Clicking the Run button then displays the output of this Lambda on the page.
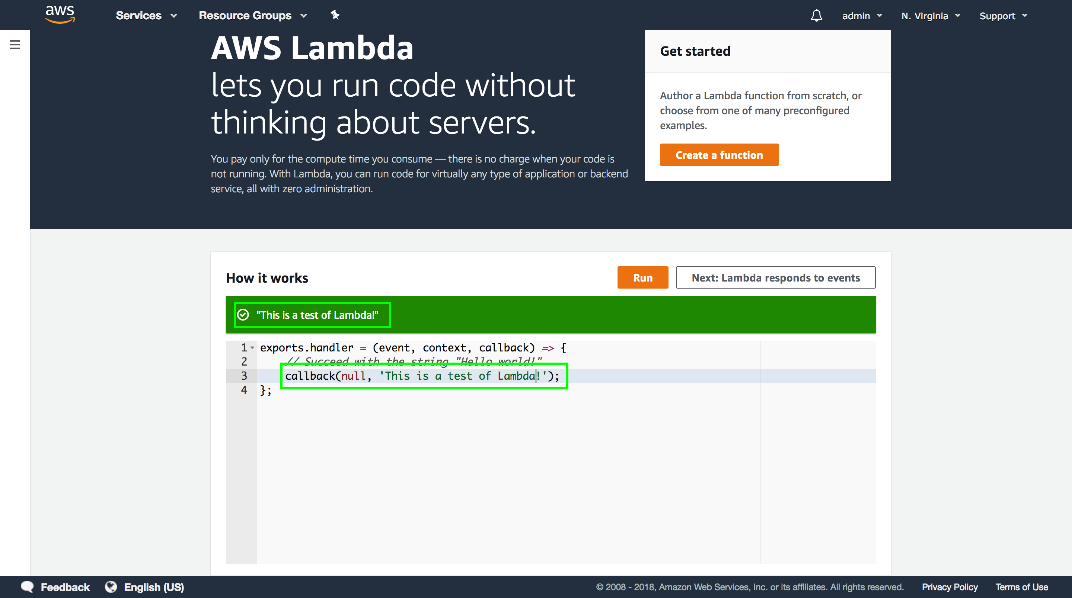
Congratulations! You have just run your first Lambda. But this is just JavaScript code, right? Maybe it is being run in the browser, which isn’t that impressive. So let’s write some code that would not run in the browser to prove that this code really is being run on a server.
Instead of changing the callback string with another string, let’s instead pass process.platform, which will return the name of the underlying operating system that the code is running on. Notice that we get linux as the result. So this code is indeed running on a Linux server and not in the browser.
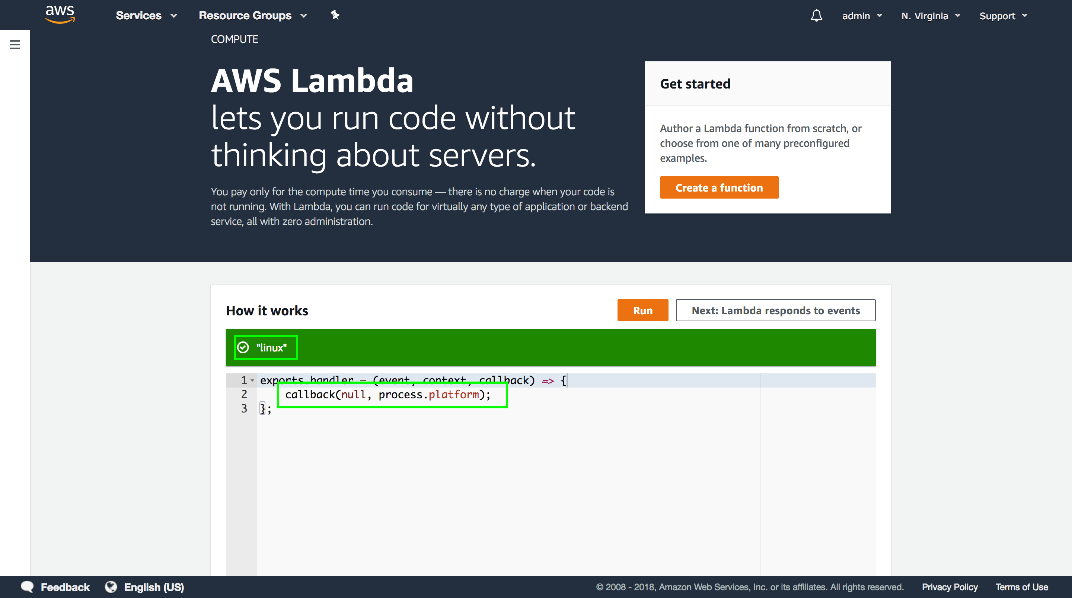
So where is this Linux server that the code is running on? This is the beauty of Lambda, we don’t need to think about servers. AWS takes care of ensuring that a server is available with no management required. All we need to do is deploy our code as a Lambda function and call it. AWS will take care of the rest.
Before we get started though, we do need to install some additional tools to make deploying Lambda functions easy.
We’ll use the Serverless platform to deploy our Lambda functions to AWS. Serverless provides us with some simple commands that take care of uploading our code, deploying to Lambda, and setting the various options required by Lambda.
Serverless is a Node.js application, which means that we need to have Node.js installed locally to use it. You can download and install Node.js from https://nodejs.org/en/download/.
You can confirm that Node.js is installed by running the command node --version from a terminal or PowerShell:
$ node --version
v8.11.2
The Serverless application is then installed with npm, which is short for Node Package Manager. This command will download and install the Serverless application to your local machine.
On a Linux or MacOS machine, you can install Serverless with the sudo command:
sudo npm install serverless -gOn a Windows PC you can install Serverless with the following command.
Note, you may need to run this command from a PowerShell or command line windows with Administrator privileges:
npm install serverless -gYou can then confirm that the serverless command is available by running serverless --version:
$ serverless --version
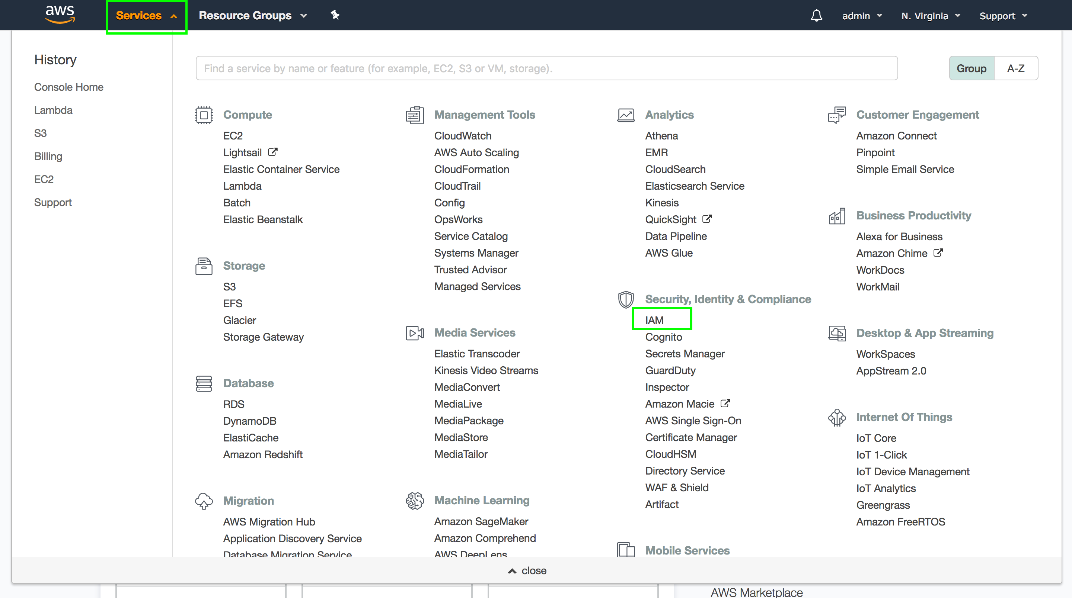
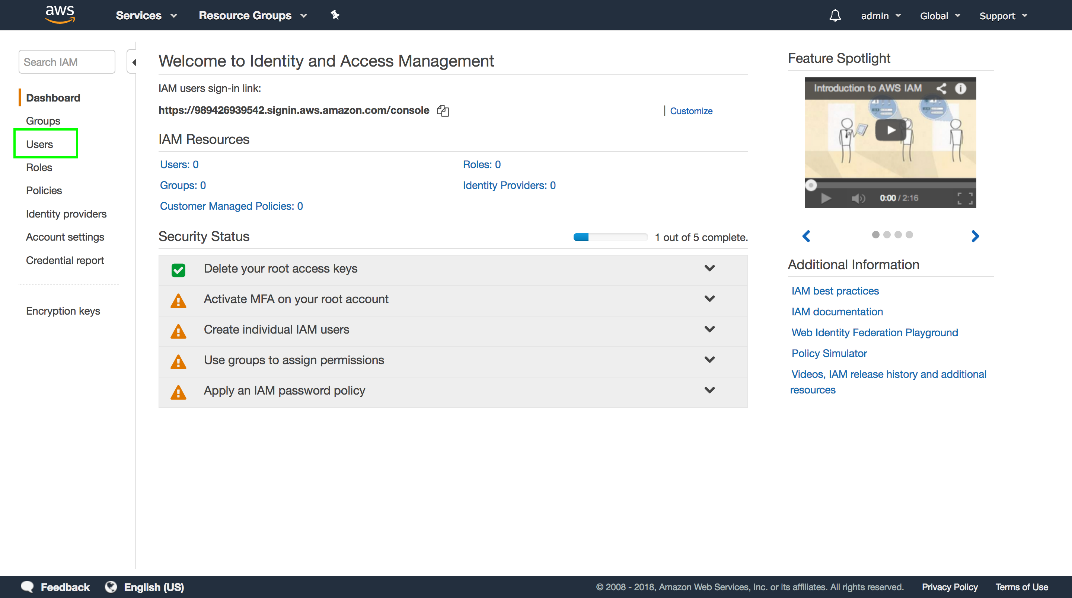
1.27.2The last task is to configure your system with the keys that Serverless will use to access AWS. To do this we need to open the IAM console. In the AWS console click the Services menu, and click the IAM link.
Click the Users link.
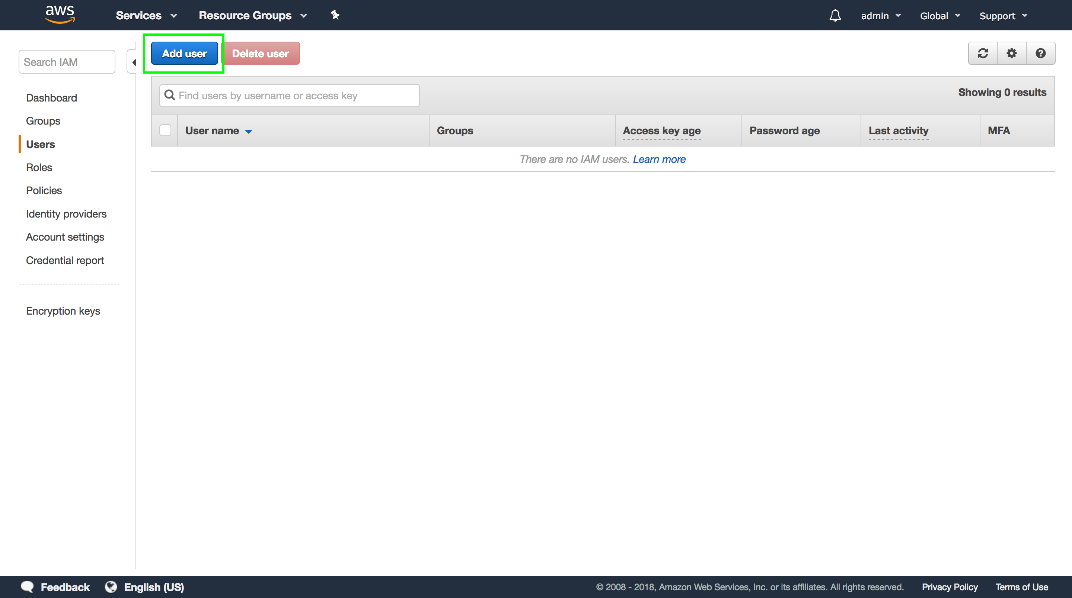
Click the Add user button.
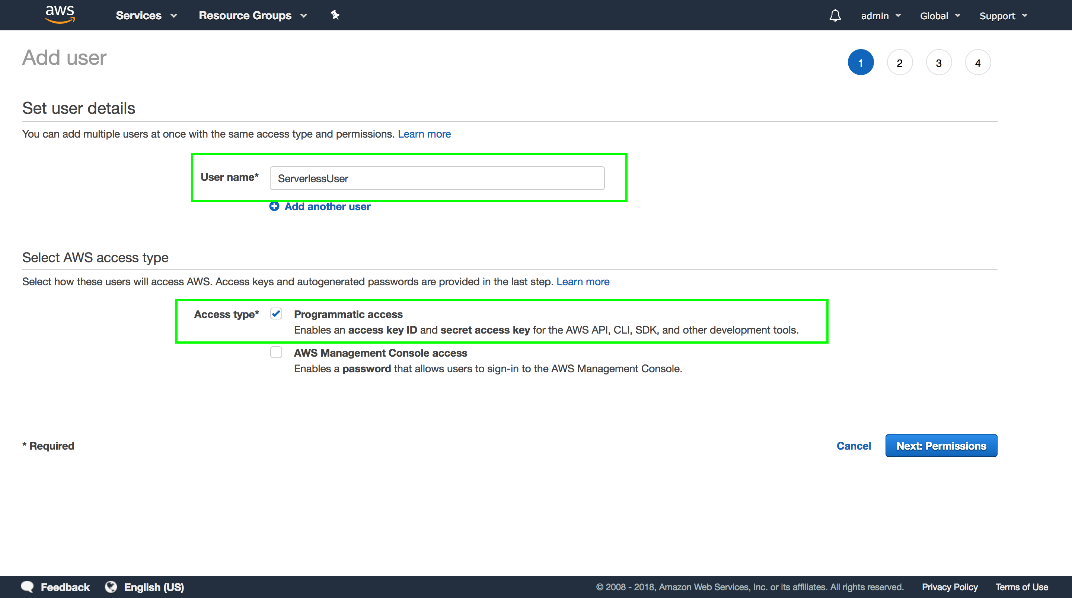
Give the new user a name in the User name field and select the Programmatic access option. This option means that the user will have the ability to generate an access and secret key, and it is this key pair which will be used by the Serverless application to deploy our code.
Click the Next: permissions button to continue.
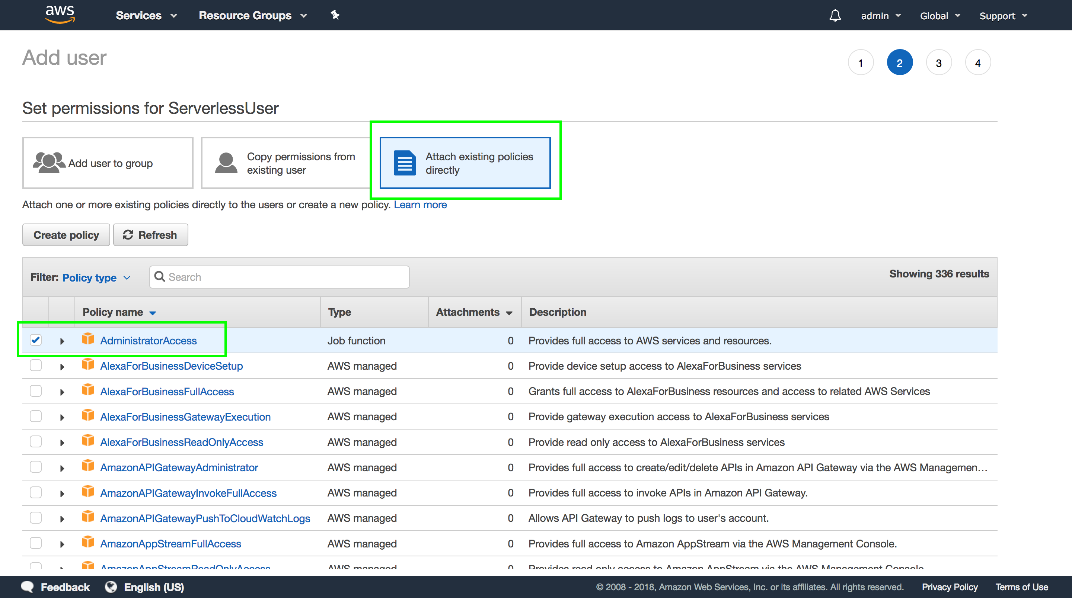
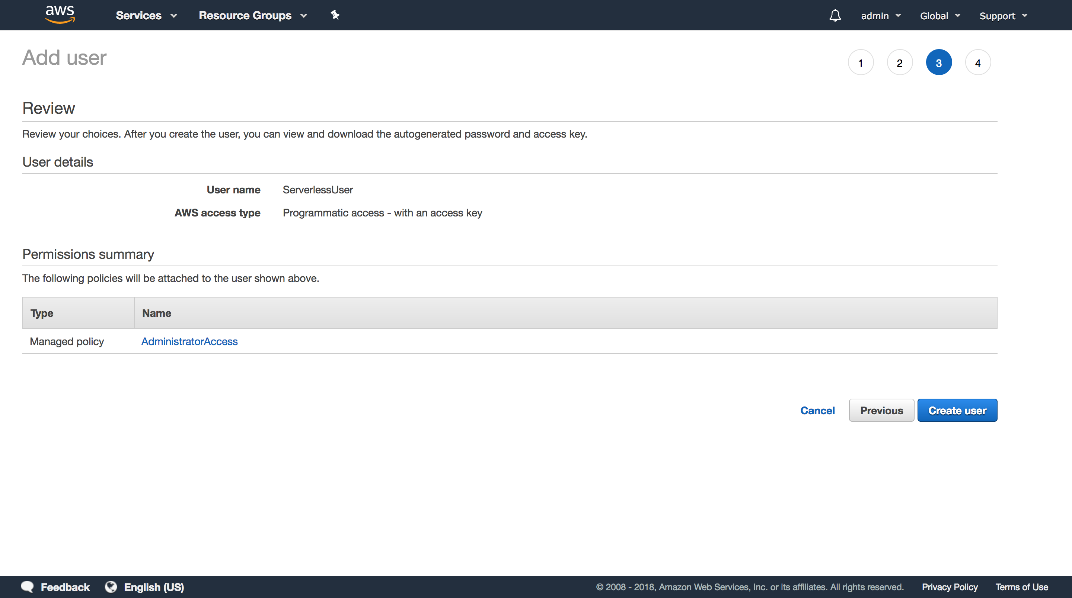
We’ll give the new user administrator permissions. To do this click the Attach existing policies directly button and select the AdministratorAccess policy.
Click the Next: review button to continue.
Click the Create user button to finish.
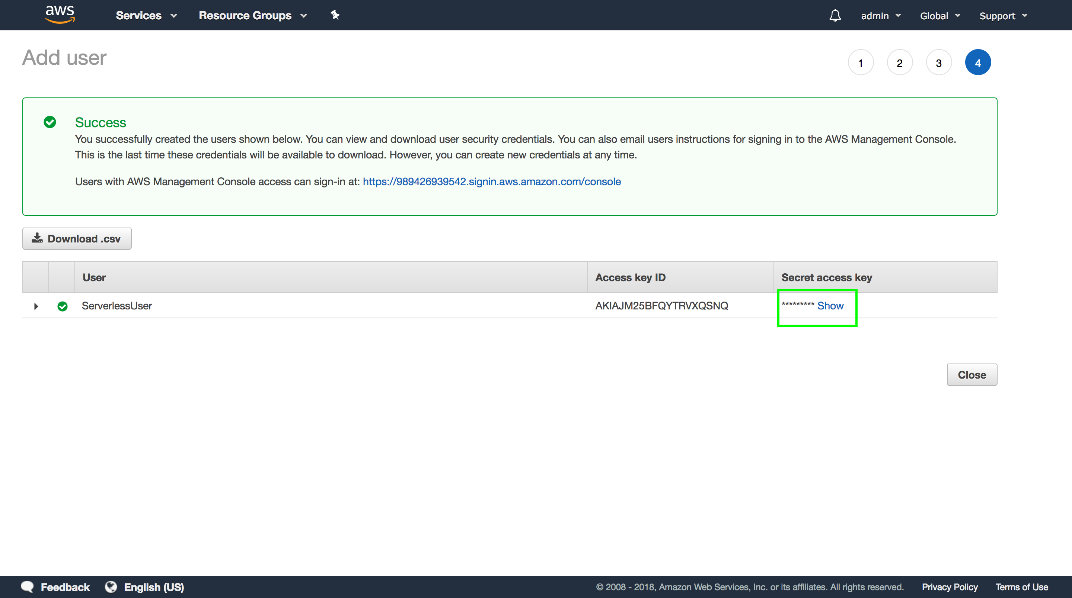
You are now shown the access and secret access keys for the new user.
This is the only opportunity you have to see the secret access key. Once this screen is closed, there is no way to view this key again, so be sure to save this key somewhere safe.
To view the secret access key, click the Show link.
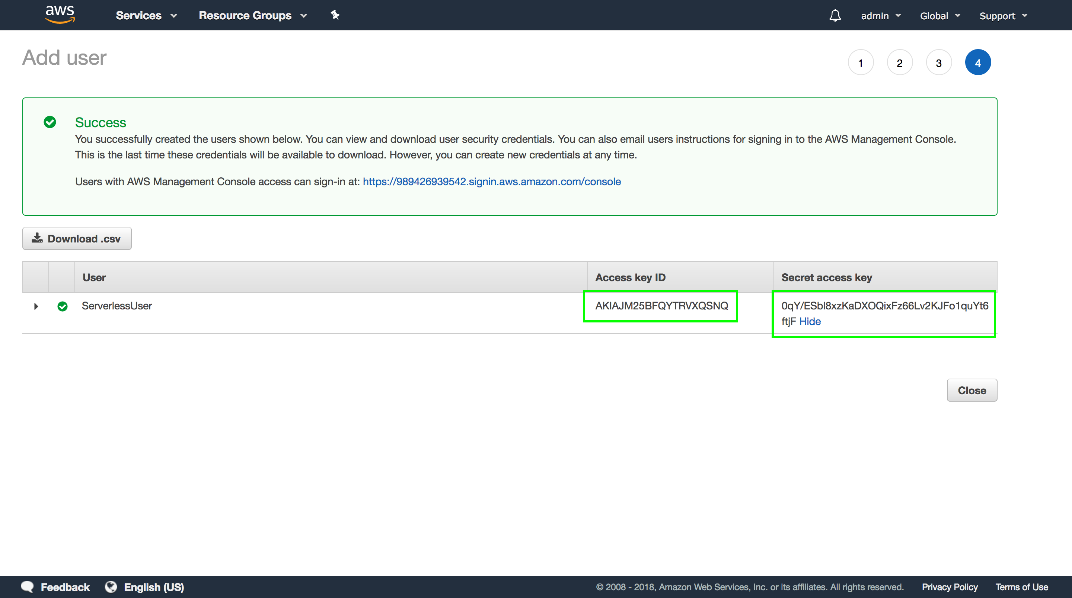
Save these keys somewhere safe so you can access them later. Alternatively, you can click the Download .csv button to download a file that includes these keys.
When you are done, click the Close button.
To allow these credentials to be used by the Serverless application, we need to create a file called .aws/credentials in our users home directory.
- In Windows, this file is saved under
C:\Users\username\.aws\credentials. - In Linux, this file is saved under
/home/username/.aws/credentials. - In MacOS, this file is saved under
/Users/username/.aws/credentials.
The contents of the file should look like this, with the value of the keys replaced with the keys for your AWS user:
[default]
aws_access_key_id = YOUR-KEY
aws_secret_access_key = 0qY/ESbl8xzKaDXOQixFz66Lv2KJFo1quYt6ftjF
We now have the Serverless application installed and the AWS credentials configured, meaning we can use the Serverless application to deploy our code to AWS. However, unlike running a standalone Java application as a Lambda function, which would work without much additional configuration, we have some additional steps that need to be completed to provide an environment where WebDriver tests can be run, which we will address in the next post.
This post is part of a series about creating a Selenium WebDriver test framework.
Tags:


