
The use of OpenID Connect (OIDC) has gained popularity as a standard for authentication and authorization. Octopus Deploy supports using OIDC for integrating with External Feeds, Accounts, and as an authentication provider. In this post, I will cover how to configure an OIDC provider as an authentication mechanism for Octopus Deploy. This post uses Auth0 as the OIDC provider.
Setting up Auth0
To get started, you’ll need to configure an Application in Auth0.
Create an Auth0 application
Auth0 makes the process of creating an Application pretty painless:
- After logging in, expand the Applications category within the Auth0 navigation
- Click on Applications
- Click Create Application
- Give the
Applicationa name (eg., Octopus Deploy) - Choose
Regular Web Application - Click Create
Configure the Auth0 application
Once the Application has been created, there are a couple of settings that need to be configured so it will work with Octopus Deploy:
-
Navigate to the Settings tab on your newly created
Application -
Scroll down to the Application URIs section
-
In the Allowed Callback URLs, enter the following:
https://<your Octopus Deploy Server URL>/api/users/authenticatedToken/GenericOidc, for example:https://shawnsesna.octopusdemos.app/api/users/authenticatedToken/GenericOidc -
(Optional) In the Allowed Logout URLs enter the following:
https://<your Octopus Deploy Server URL>/app#/users/sign-out, for example:https://shawnsesna.octopusdemos.app/app#/users/sign-out -
Click Save
Before navigating to Octopus Deploy, record the values of Domain, Client ID, and Client Secret. These values are needed to configure OIDC authentication in Octopus Deploy.
Configure OpenID Connect in Octopus Deploy
Configuration of OIDC authentication can be completed in just a few minutes:
- Navigate to Configuration (cog) in Octopus Deploy
- Click on Settings -> OpenID Connect
- Enable the integration by ticking the Is Enabled checkbox
- Set Username Claim Type to
name - Set Display Name to something meaningful (eg.
Auth0) - Set Issuer to
https://<Domain value from Auth0>/Note the trailing slash - Set Client ID to the
Client IDvalue from Auth0 - Set Client Secret to the
Client Secretvalue from Auth0 - (Optional) Tick Allow Auto User Creation to automatically create an Octopus user account when a new user logs in using OpenID Connect
- Click Save
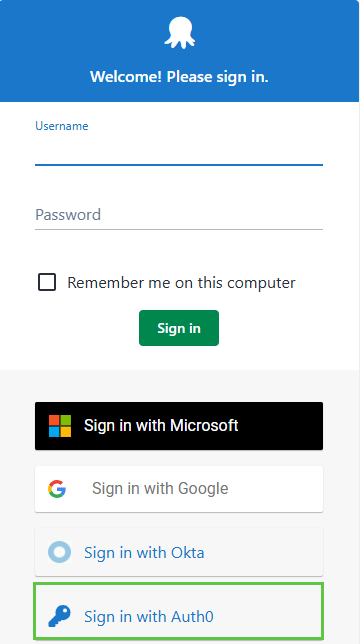
Configuration is now complete! Users will now see the OpenID Connect login option when signing into Octopus Deploy.
Including roles from Auth0
Unlike other providers such as Microsoft Entra or Okta, Auth0 does not include role assignments by default. Instead, you must insert a step into the process after login, but before the token is issued.
Create an Auth0 role
If you don’t already have roles in Auth0, creating a role in Auth0 is a straightforward process:
- Expand the
User Managementsection and clickRoles - Click the + Create Role button
- Give the role a
NameandDescription - Click on the Users tab and add some users to the role
Create an Auth0 Actions Trigger
Auth0 provides a mechanism for inserting the role information into the OIDC token called an Action. An Action can be added to a Trigger such as the post-login, which is executed after the user logs in, but before the token is issued.
-
Expand the
Actionssection and clickTriggers -
Under Sign Up & Login, choose the
post-logintrigger -
The process will consist of two steps: Start and Complete. Click on the + button next to
Add Actionand selectCreate Custom Action -
Give the
Actiona name (eg., Include Roles) -
For this example, leave the
Runtimeas the recommendedNode 22value -
Update the code to the following
exports.onExecutePostLogin = async (event, api) => {
  const namespace = 'https://shawnsesna.octopusdemos.app';
  const roles = event.authorization?.roles ?? null;


  api.idToken.setCustomClaim(`${namespace}/roles`, roles ?? []);
};
This code inserts a JSON array payload containing assigned roles into the issued token. In this case,
${namespace}/rolesacts as the key with therolesarray as the value. Thenamespacevalue is important, as this is what Octopus needs to determine where to look for role assignments. In the above example, thenamespacevalue ishttps://shawnsesna.octopusdemos.app/roles. Thenamespacecan be whatever you want; it doesn’t have to be the URL to your Octopus instance. -
Click Deploy to save the
Actionto theLibrary. -
Navigate back to
Triggers -
Under Sign Up & Login, choose the
post-logintrigger -
Your newly created
Actionwill now be listed; click and drag theActionand drop it between Start and Complete -
Click Apply
Auth0 is now configured to include role assignments with the OIDC token. This will allow you to add an Auth0 role as an external role to an Octopus Team.
Update the OpenID Connect Octopus configuration
Now that roles are included within the token, you’ll need to update the OpenID Connect configuration in Octopus to be able to “see” them.
- Navigate to Configuration (cog) in Octopus Deploy
- Click on Settings -> OpenID Connect
- Update Role Claim Type to the key from the JSON. In the above example, this value is
https://shawnsesna.octopusdemos.app/roles - Click Save
Octopus now knows where in the token to locate role membership. Assigning the name of the role to an Octopus Deploy Team will grant anyone who has the role within their token access to the resources that the Team has been granted, removing the need to add individual users to the Team.
Troubleshooting roles
OIDC token exchange takes place server-to-server, making the ability to see what was included in the JSON Web Token (JWT) difficult. Fortunately, there is an easy way to pass the token to jwt.io for debugging purposes.
- In Auth0, navigate to your
Application - Scroll to the Applications URIs section
- Add
https://jwt.ioto the Allowed Callback URLs - Open a new browser window (Incognito/InPrivate is best to ensure cache doesn’t interfere) and go to:
https://<Your Auth0 domain>/authorize?client_id=<Your Client ID>&response_type=id_token&redirect_uri=https://jwt.io&scope=openid%20profile%20email&nonce=12345You will be prompted to log in to Auth0, then redirected to https://jwt.io. Jwt.io will automatically decode the returned JWT so you can see what is included. Below is an example:
Decoded payload
{
  "https://shawnsesna.octopusdemos.app/roles": [
    "Demo-Argo-CD-Apps"
  ],
  "nickname": "joe.dirt",
  "name": "joe.dirt@fake.com",
  "picture": "https://s.gravatar.com/avatar/30daab2c90a676d8ab323d0eab8c8f45?s=480&r=pg&d=https%3A%2F%2Fcdn.auth0.com%2Favatars%2Fjo.png",
  "updated_at": "2026-09-17T19:04:13.380Z",
  "email": "joe.dirt@fake.com",
  "email_verified": true,
  "iss": "https://[Your Auth0 domain]/",
  "aud": "<Your Client ID>",
  "sub": "<Your User ID>",
  "iat": 1789671854,
  "exp": 1789707854,
  "sid": "<Your SID>",
  "nonce": "12345"
}
From our example, you can see that the key https://shawnsesna.octopusdemos.app has been assigned the value of the roles the user joe.dirt@fake.com belongs to: Demo-Argo-CD-Apps. The user joe.dirt@fake.com will gain access to any resource where the Octopus Deploy Team has included the external role Demo-Argo-CD-Apps.
Conclusion
This post covered how to add Auth0 as a generic OpenID Connect authentication provider for Octopus Deploy. Some of the steps were specific to Auth0; however, the overall instructions will work for any OpenID Connect provider.
Happy deployments!
Tags: