Update February 2020 Out of the box support for Linux ARM and Linux ARM64 SSH targets was included in Octopus Server 2019.11.2 and 2020.2.0, respectively.
This post was originally published in February 2018, but a few things have changed since, and this is an updated version of the original post.
.NET Core has come a long way in the last few years, and Octopus Deploy has too. We recently added support for running Calamari without Mono, and in this post I will you through how to deploy .NET Core applications on to a Raspberry Pi 3+ without Mono.
In this post, I will show you that it is possible to deploy and run .NET Core applications on the Raspberry Pi 3+, and I’ll also describe some of the different ways you can interact with your Octopus Deploy server.
Requirements before you start
- Editor: Visual Studio, Visual Studio Code, Rider.
- Octopus Command Line.
- Octopus Server and an API key.
- .NET Core: Windows or Macos.
- A Raspberry Pi 3+ running Raspbian with .NET core 2.0 or later Runtime installed:
- Download link: Linux ARM (armhf).
- For Angular or React applications:
- node and npm on your development machine, if your chosen application requires it (angular or react).
- nodejs on your Pi.
- Curl
ASP.NET includes NodeServices in its bundle, which requires Node to be installed before it can serve any requests. When you install Node.js on the Raspberry Pi, it installs version 4.x and the executable is called nodejs, but NodeServices is looking for node in your path. You can fix this by creating a symlink:
sudo ln -s /usr/bin/nodejs /usr/bin/nodeBuild the application
Create a basic .NET Core application
dotnet new angularModify the application to listen for external requests
By default, an ASP.NET Core application will only serve requests to http://localhost:5000. To allow the web host to serve requests to your local network, add the following after the .UseStartup<Startup>() in Program.cs:
.UseKestrel(options => {
    options.Listen(System.Net.IPAddress.Any, 5000);
})
For more information on configuring the Kestrel Web Host, check the docs.
Build the application
npm install
dotnet build
mkdir publish
dotnet publish -o publish --self-contained -r linux-arm
replace linux-arm with linux-arm64 if you are targeting a distribution which supports 64-bit on the Raspberry Pi
Package the application
The simplest way to create a package of a .NET Core application is using the Octopus CLI tool.
Create an artifacts directory and then use the octo pack command to create the package:
mkdir artifacts
octo pack --id core4pi --version 1.0.0 --format zip --outFolder artifacts --basePath publish
Using the Octopus CLI again, push the package to the server:
octo push --server http://octopus/ --apikey API-ABCDEF123456 --package artifacts\core4pi.1.0.0.zipBuilding a service definition
To get the application to run as a service, see Microsoft’s documentation for hosting .NET Core on Linux.
Create a file called core4pi.service containing the following text:
[Unit]
Description=core4pi

[Service]
WorkingDirectory=#{Octopus.Action[deploy web site].Output.Package.InstallationDirectoryPath}
ExecStart=/usr/local/bin/dotnet "#{Octopus.Action[deploy web site].Output.Package.InstallationDirectoryPath}/core4pi.dll"
Restart=always
RestartSec=10
User=pi
Environment=ASPNETCORE_ENVIRONMENT=Production
Environment=DOTNET_PRINT_TELEMETRY_MESSAGE=false

[Install]
WantedBy=multi-user.target
The [deploy web site] strings in the core4pi.service text above, represents the name of the step that deploys the package.
This output variable will contain the path to the newly installed service. This will ensure when the service is installed it is looking at the latest version.
Create a package for the service definition and push it to the Octopus Server:
octo pack --id core4pi.service --version 1.0.0 --format zip --outFolder artifacts
octo push --server http://octopus/ --apikey API-ABCDEF123456 --package artifacts\core4pi.service.1.0.0.zip
Create infrastructure
If you don’t already have an Octopus environment configured for your Raspberry Pi, create one either at the command line:
octo create-environment --server http://octopus/ --apikey API-ABCDEF123456 --name "Pi Dev"Or using the web interface via {{Infrastructure > Environments > Add Environments}}.

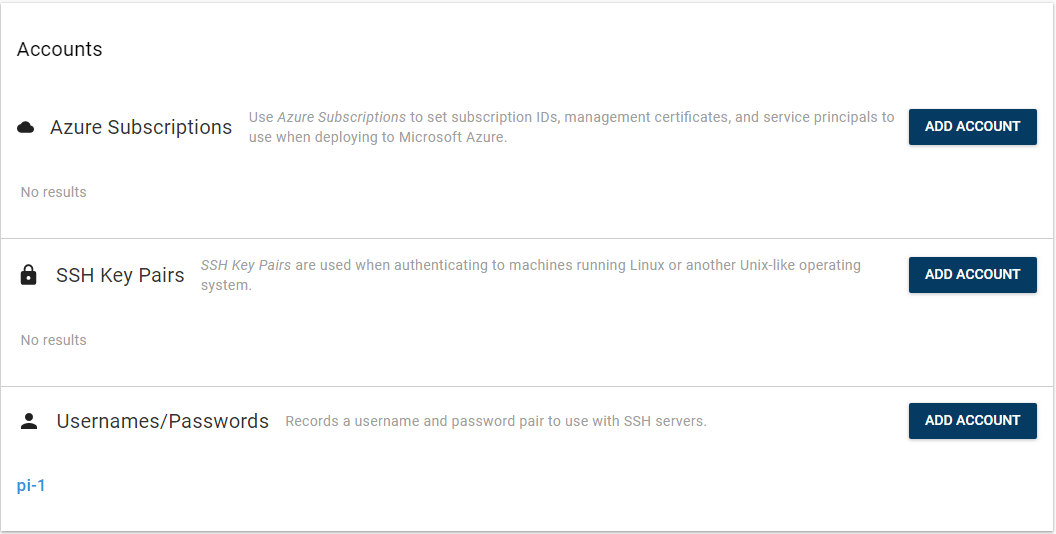
Next, create an account to access the Pi, this can either be a Username/Password account or an SSH Key in the **{{Infrastructure > Accounts}}**section in the Octopus web portal.
Finally, create a deployment target under {{Infrastructure > Deployment Targets > Add Deployment Target}} as an SSH target.
Set the targets role to something that represents the responsibility of the target, e.g, PiWeb.
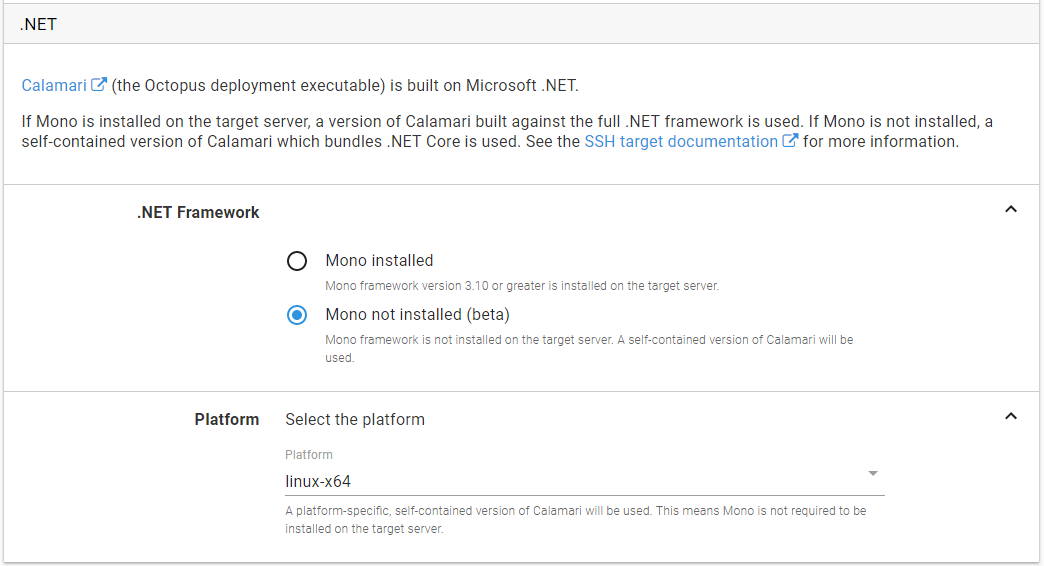
After adding the details (IP Address or DNS name, SSH port, and account), under the .NET section, ensure you select Mono not installed, and select linux-arm or linux-arm64 as the platform.
Create the deployment project
Create a new project via the Projects section in the Octopus web portal or with the command line:
octo create-project --server http://octopus/ --apikey API-ABCDEF123456 --name "PiWeb" --projectgroup "All projects" --lifecycle "Default Lifecycle"Create a deployment step for the application
In the new PiWeb project, define your deployment process.
Add a Deploy a Package step, called deploy web site.
The step name here will allow the values in the service definition file to be updated correctly.
Set the Environment to the Pi Dev environment.
Set the Role to the PiWeb role.
Under the Package section, select the package you pushed to the server: core4pi.
We don’t need to complete the other options so save the step.
Create a deployment step for the service definition
Add another Deploy a Package step. This one will install a service on the target to run the application.
For the package selection, select the core4pi.service package from the Octopus Server (built in) package feed.
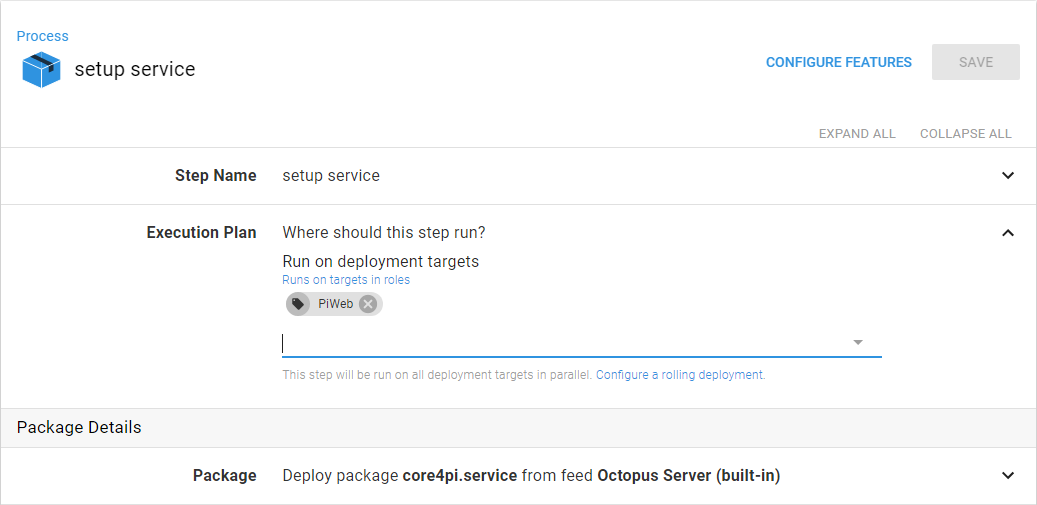
You will need to Configure Features for this step:
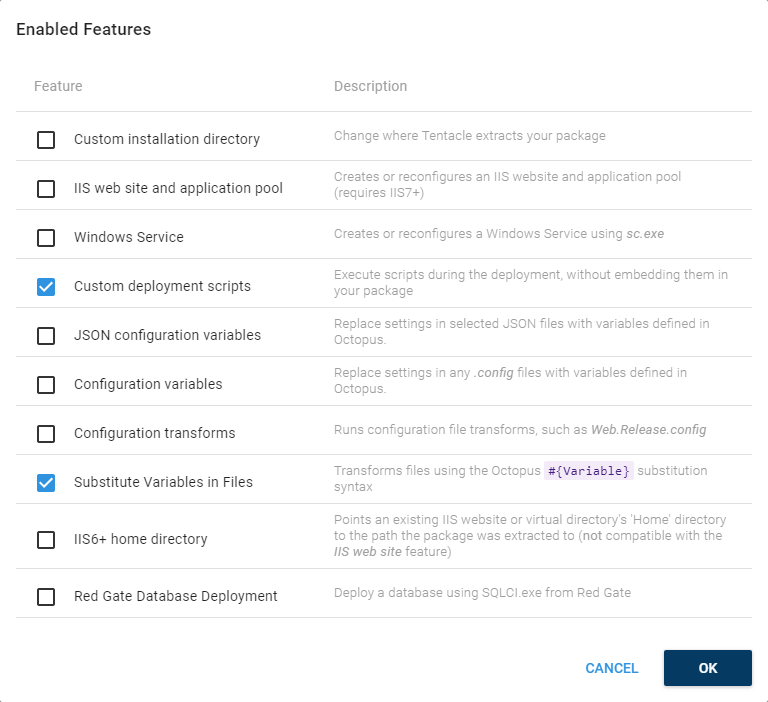
In the Substitute Variables in Files feature add the name of the service definition file core4pi.service:

Under the Configuration Scripts feature, select Bash, paste the script below into the Deployment Script section:
#!/bin/bash
if [ -e /lib/systemd/system/core4pi.service ]
then
    echo stopping service
    sudo systemctl stop core4pi.service
fi

echo installing service
sudo cp core4pi.service /lib/systemd/system/
sudo chmod 644 /lib/systemd/system/core4pi.service
sudo systemctl daemon-reload
sudo systemctl enable core4pi.service
echo starting service
sudo systemctl start core4pi.service
This script performs the service installation and will be executed during the step execution. It will require the user you are using to connect to the Raspberry Pi to have sudo rights.
Deploy it
From the Project navigation menu, select Create Release.
The Create Release page will allow you to set a version number for the release, you can just leave the default. It will also allow to pick which versions of the packages you want to deploy, by default it will pick the latest version.
Press Save and then press Deploy to PI Dev and then Deploy to start the deployment process.
Create Release can also be performed from the command line:
octo create-release --server http://octopus/ --apikey API-ABCDEF123456 --project "PiWeb"
octo deploy-release --server http://octopus/ --apikey API-ABCDEF123456 --project "PiWeb" --deployto="Pi Dev" --version "0.0.1"
The first time you deploy, Octopus Server will update Calamari on the target machine, this may take a couple of minutes.
Test it
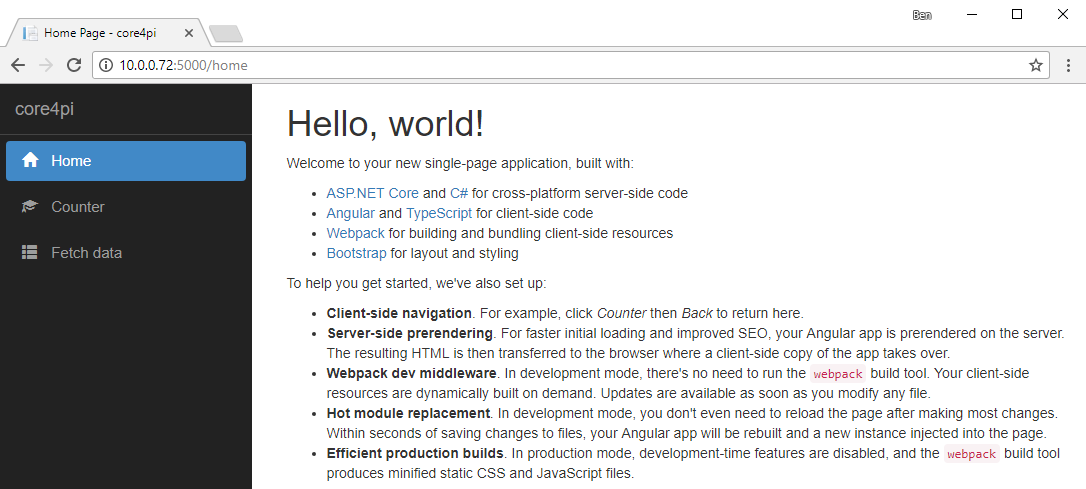
After the deployment has finished, navigate to the IP address or DNS name of your Raspberry Pi on port 5000, and you should see the application:
Conclusion
With the alignment of a number of different technologies, deploying .NET to a Raspberry Pi is supported, and Octopus Deploy makes it painless. Throughout this post, you have also seen a number of different ways that you can integrate with your Octopus Server, including the command line and the web portal.


