Most teams say they can roll back, but far fewer have actually tried it.
When they actually do, the plan is typically a runbook in a wiki, or the fact that, in theory, we can always revert to the last working commit. When you run Kubernetes, Argo CD is instrumental in keeping your resources in sync.
Argo CD is good at reconciling whatever’s in your Git repo to your cluster. When a deploy goes sideways, “roll back” turns into “revert the right commit, in the right repo, without breaking the other applications syncing alongside it”, which is fine on paper and miserable in practice.
In this post, we’ll explore how to manage releases in Octopus Deploy, how it integrates with Argo CD, and discuss, as well as implement, a rollback.
What Argo CD doesn’t do (and why it matters)
Argo CD is great at one job: take whatever’s in your Git repo and reconcile a cluster to match it. It’ll show you what’s drifted, when it last synced, and which resources are unhealthy.
However, what it deliberately doesn’t do is anything above the cluster.
There’s no concept of a release. Each Application is an independent entity, and its current state is whatever commit HEAD happens to be on. If Tuesday’s image tag turns out to be a regression, your options are: revert the commit in Git and wait for the next reconcile, or open the Argo CD UI and sync to a previous revision by hand.
More importantly, the processes around what constitutes a release that can be synced are something Argo simply wasn’t built for.
How Octopus manages releases with Argo CD
A release in Octopus is a versioned snapshot of three things:
- the deployment process (the steps it runs)
- the variables those steps use, and
- the package or image versions they reference.
Once a release is created, it’s frozen. You can promote 0.0.2 through Development, then Staging, then Production, and each environment receives the same release, not whatever happens to sit at HEAD when you trigger the deployment.
With the Argo CD integration, that release model integrates into your existing GitOps setup. When you deploy a release in Octopus, you can have an Argo CD step that rewrites the image tags in your repo, commits the change with the credentials you’ve attached, then asks Argo CD to sync. Argo CD keeps doing the reconciliation while Octopus keeps the lifecycle.
Prerequisites
This tutorial assumes you have:
- A working Kubernetes cluster (any flavour)
kubectlinstalled and pointed at the cluster- The GitHub CLI (
gh) installed and authenticated (gh auth login). We’ll use it to create the demo repo in one command - An Octopus Cloud (or self-hosted) instance, with the Argo CD Gateway installed in the cluster and an Argo CD instance already registered against Octopus. If you haven’t done that yet, follow the Connecting AWS EKS Argo CD to Octopus Cloud guide first; the same flow works for any cluster.
- A Git Personal Access Token (PAT) scoped to your demo repository, Octopus will use it to push image-tag commits back
Step 1: Create the Octopus project
-
Sign in to Octopus and head to Projects > Add Project.
-
Give it a name (we’ll use
argo-demo), pick Kubernetes as the deployment target, and answer Yes to Are you using Argo CD? -
Leave the lifecycle on
Default Lifecycle.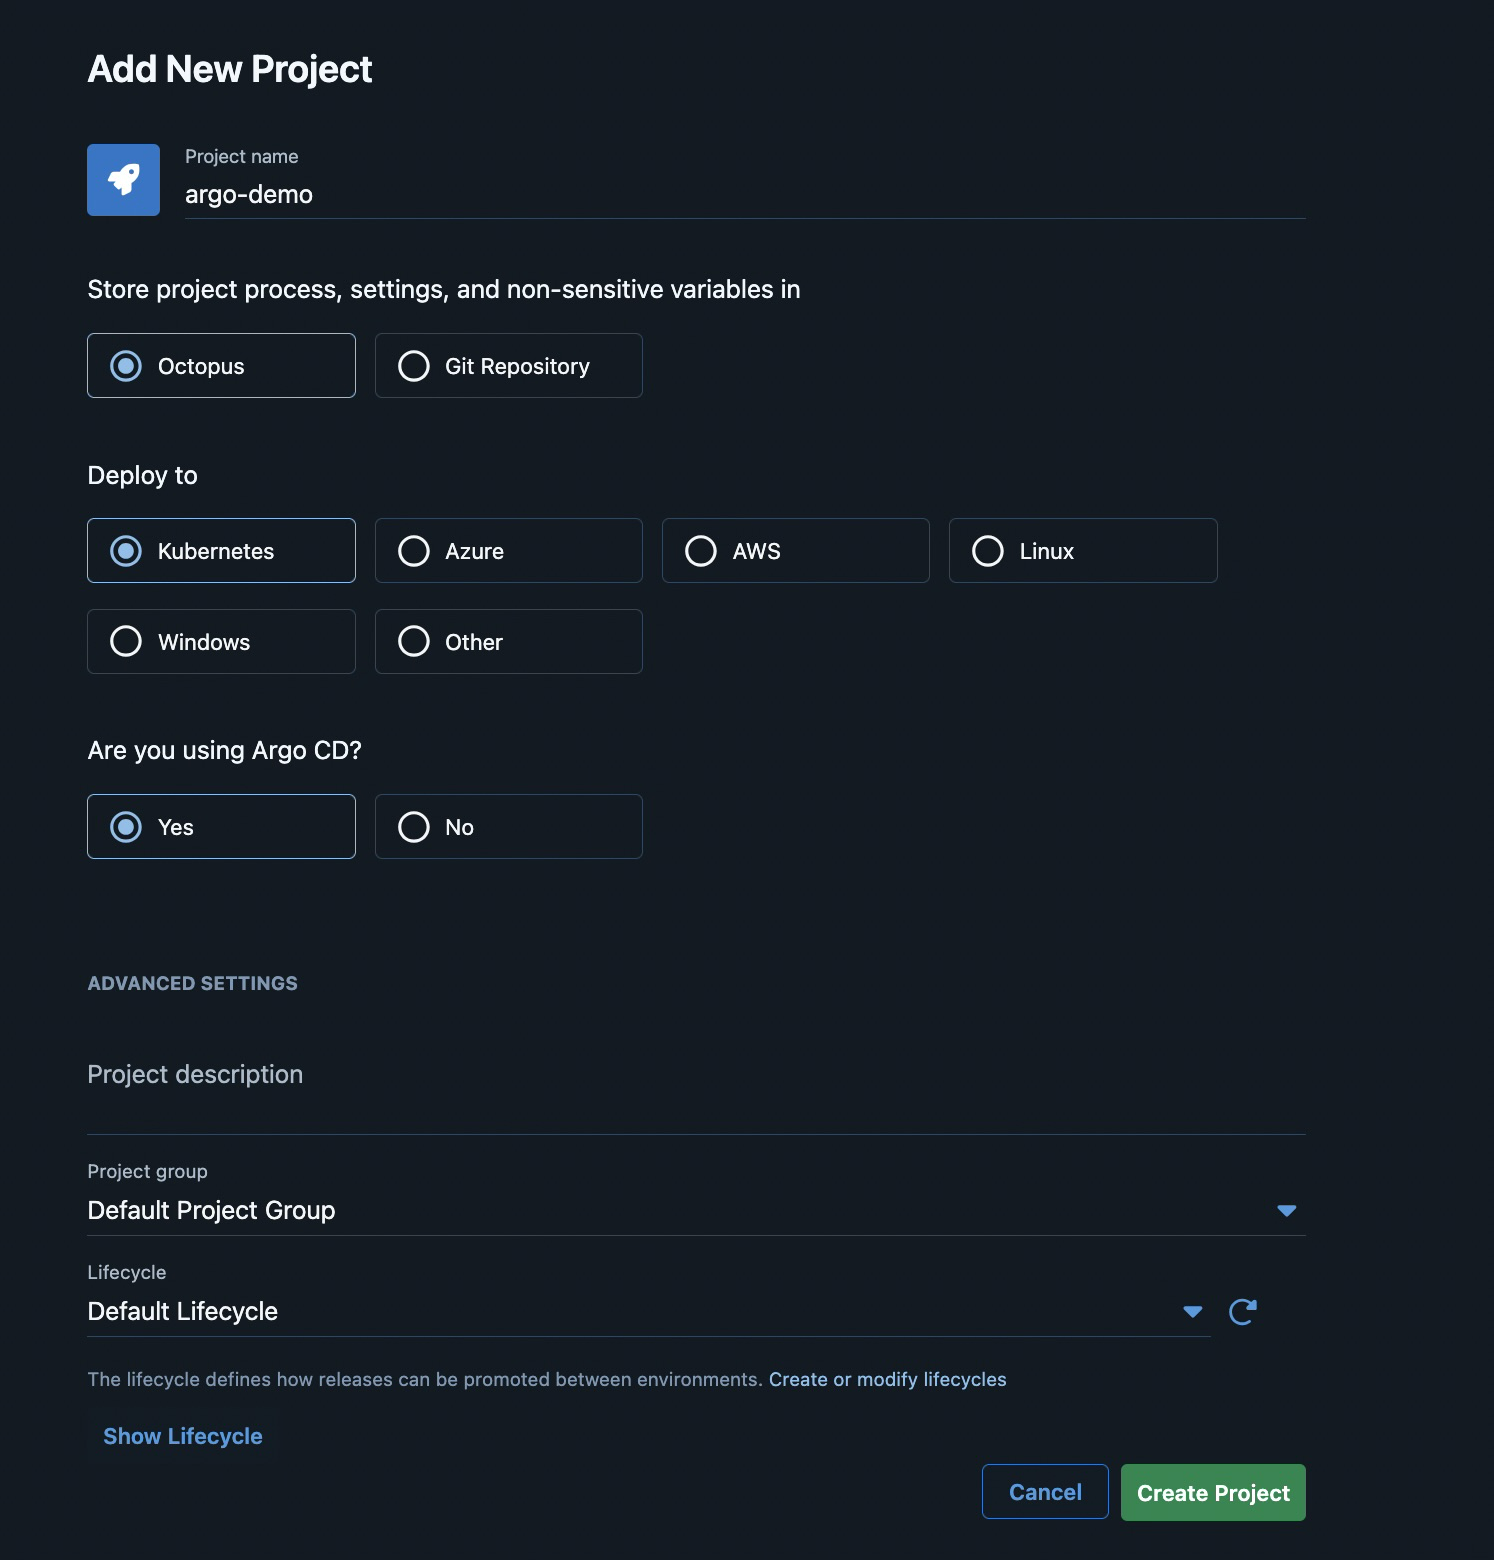
Creating the argo-demo project. -
Hit Create Project.
Step 2: Add the Argo CD step
You’ll land on the Process editor.
- Click Add Step and filter by Containers and Orchestration > Argo CD in the left sidebar. You’ll see two installed step templates:
- Update Argo CD Application Image Tags, which updates an image tag in your manifests and commits the change for Argo CD to sync
- Update Argo CD Application Manifests, which generate manifests from templates using Octopus variables, and commit those.
We’ll use the first one for this walkthrough.

Step 3: Set up the manifests repository
Argo CD syncs from Git, and Octopus pushes image-tag updates back to that same repo, so before either side has anything to do, we need a repository with a workload manifest in it.
We’ll keep the layout small: one Deployment, one Service, and the Argo CD Application that wires the two systems together.
argocd-octopus-demo/
├── application.yaml      \# the Argo CD Application (apply once to the cluster)
└── manifests/
└── app.yaml \# workload Argo CD reconciles from this repo-
Create the directory locally:
mkdir -p argocd-octopus-demo/manifestscd argocd-octopus-demo -
Write the workload manifest. We’re using
nginxdemos/hello:plain-text, a tiny nginx that responds with a text page naming the pod that served the request. It’s a single-container app with no state, perfect for proving reconciliation worked end-to-end.cat > manifests/app.yaml <<'EOF' apiVersion: apps/v1 kind: Deployment metadata: name: hello labels: app: hello spec: replicas: 2 selector: matchLabels: app: hello template: metadata: labels: app: hello spec: containers: - name: hello image: nginxdemos/hello:plain-text ports: - containerPort: 80 resources: requests: cpu: 25m memory: 32Mi --- apiVersion: v1 kind: Service metadata: name: hello spec: type: ClusterIP selector: app: hello ports: - port: 80 targetPort: 80 protocol: TCP EOF -
Initialize the repo, create a public GitHub repo from it, and push the first commit:
git init -b maingit add .git commit -m "chore: init"gh repo create <your-org>/argocd-octopus-demo \
--public \
--description "Argo CD + Octopus Deploy demo manifests" \
--source=. \
--pushWith the repo live, we can write the Argo CD Application that points at it.
Step 4: Scope the Argo CD Application with annotations
The Octopus gateway pulls the full list of Argo CD Applications from your cluster, but it doesn’t yet know which of them belong to this Octopus project. You can tell it with three annotations on the Argo Application:
argo.octopus.com/project[.<source-name>]argo.octopus.com/environment[.<source-name>]argo.octopus.com/tenant[.<source-name>]
The .<source-name> suffix matches spec.source.name on the Application, which lets you scope different sources of a multi-source Application to different Octopus projects.
For our argo-demo project and Development environment, an annotated Application looks like this:
apiVersion: argoproj.io/v1alpha1
kind: Application
metadata:
  name: argo-demo
  namespace: argocd
  annotations:
    argo.octopus.com/project.argo-demo-source: argo-demo
    argo.octopus.com/environment.argo-demo-source: development
spec:
  project: default
  source:
    repoURL: https://github.com/<your-org>/argocd-octopus-demo.git
    targetRevision: HEAD
    path: manifests
    name: argo-demo-source
  destination:
    server: https://kubernetes.default.svc
    namespace: default
  syncPolicy:
    automated:
      prune: true
      selfHeal: true
The two annotations there tie this Application to the argo-demo Octopus project, scoped to the development environment. The suffix .argo-demo-source matches the spec.source.name field below it.
Apply it:
kubectl apply -f application.yamlWithin a few seconds, the Octopus gateway picks up the new annotations, and the Application appears in the project’s deployment preview.
Step 5: Preview the deployment
Back in Octopus, in the Process tab, click on the step you just added.
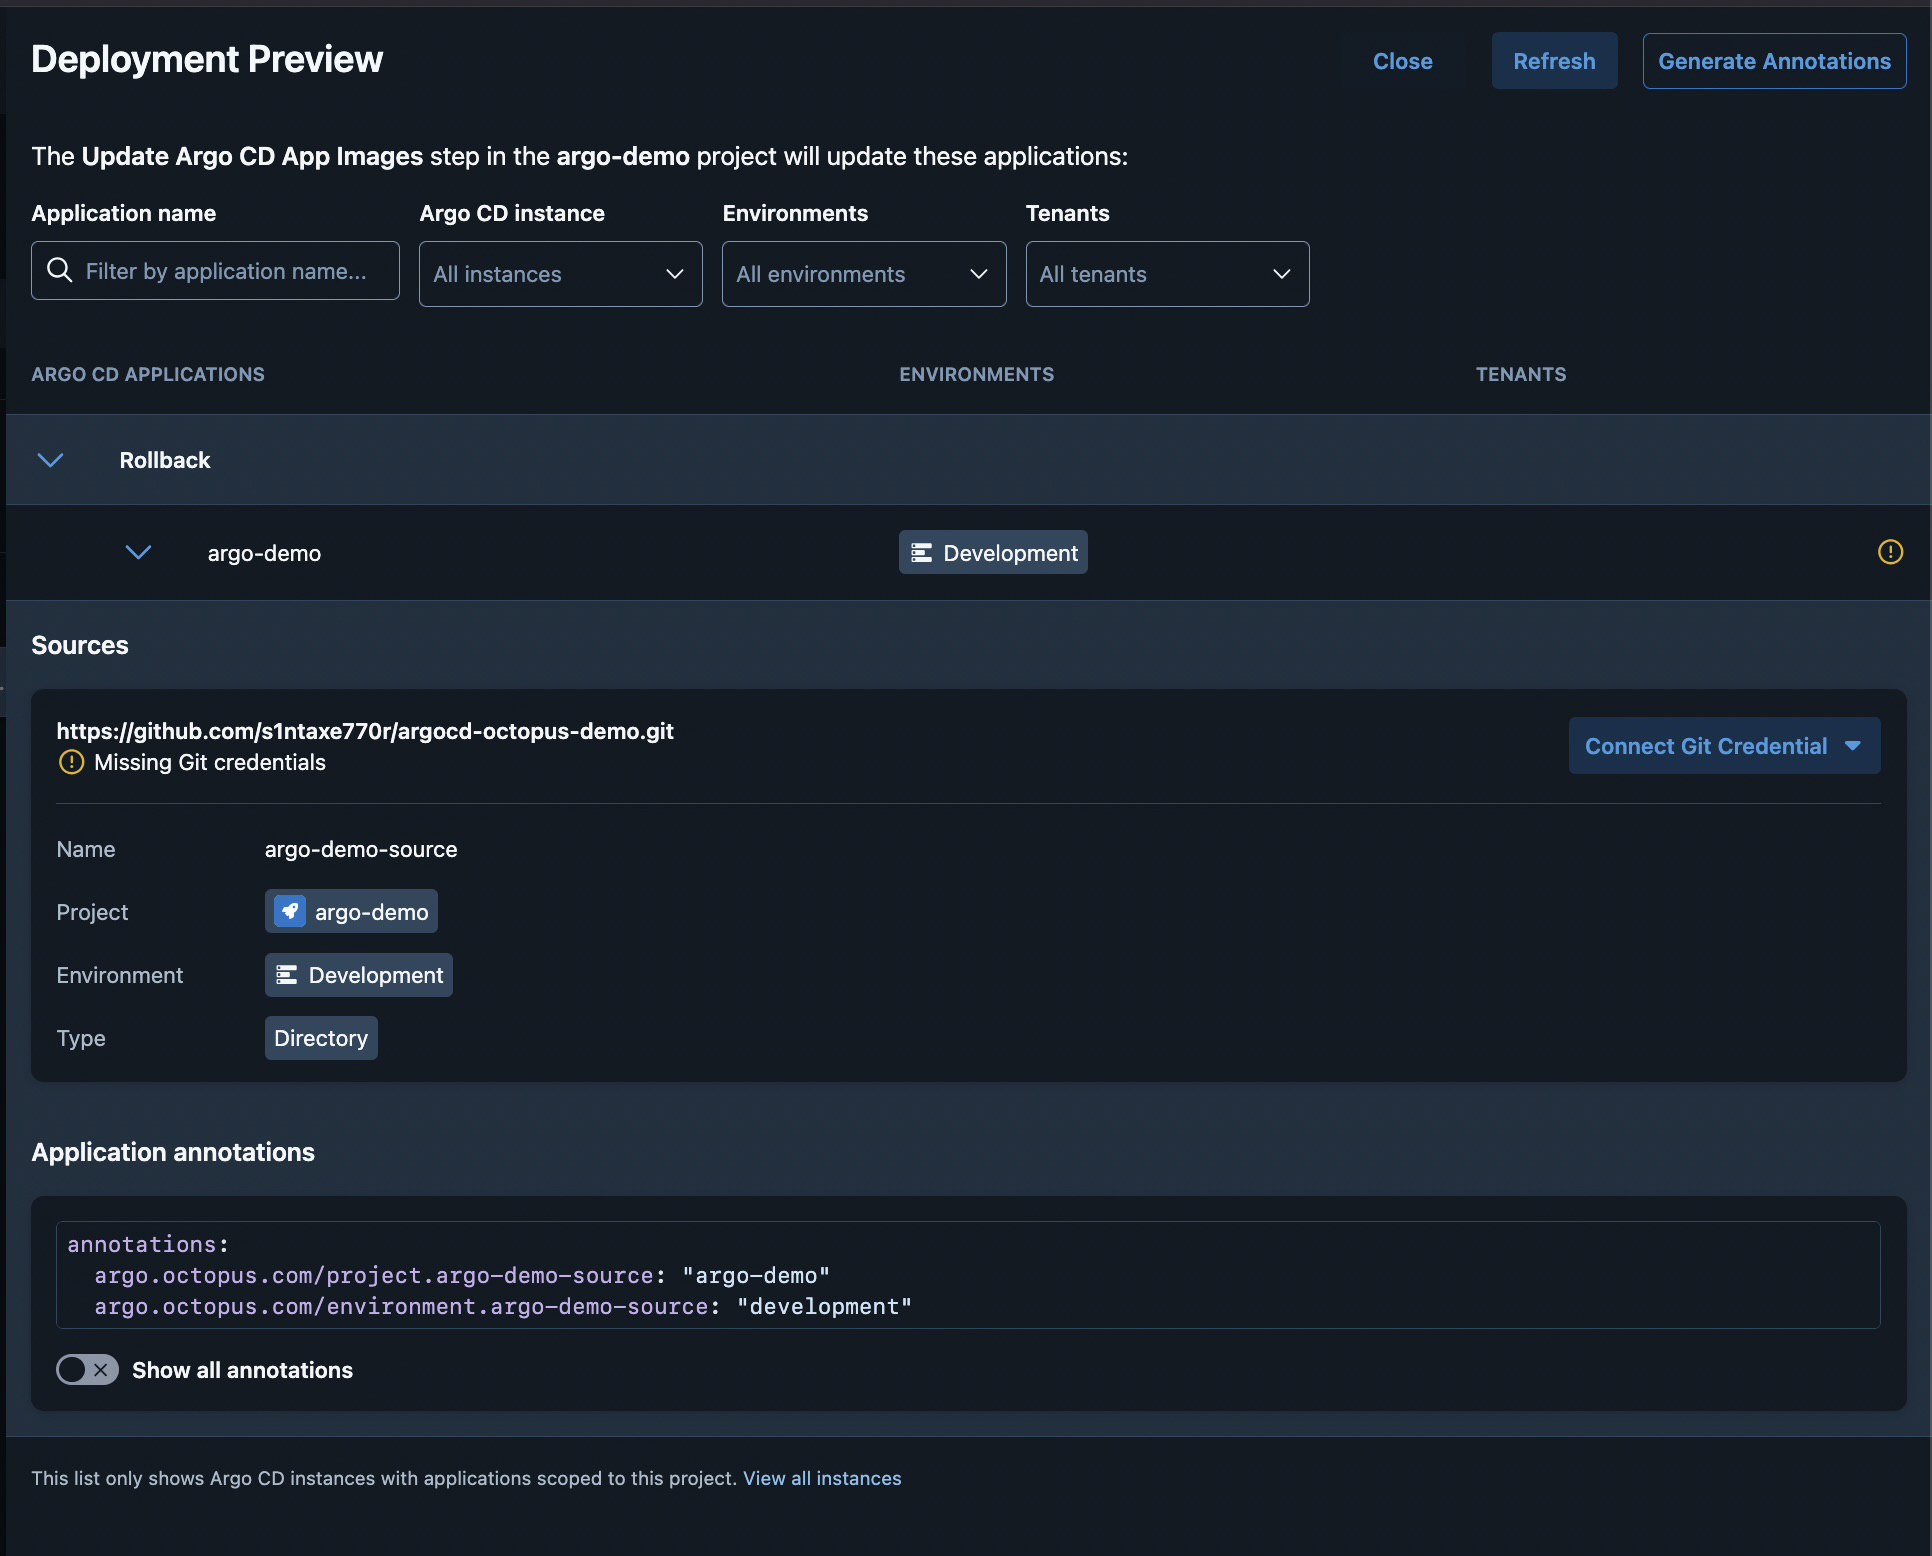
Annotations have been discovered, but flags that the source repo is missing Git credentials. Click View Applications to see what was matched.
The deployment preview opens. You should see the argo-demo application listed under the Rollback Argo CD instance, scoped to the Development environment, with the source repo URL underneath.
Step 6: Connect Git credentials
Octopus needs Git credentials so the step can push the new image-tag commit.
-
Click the Connect Git Credential dropdown next to the repo URL.
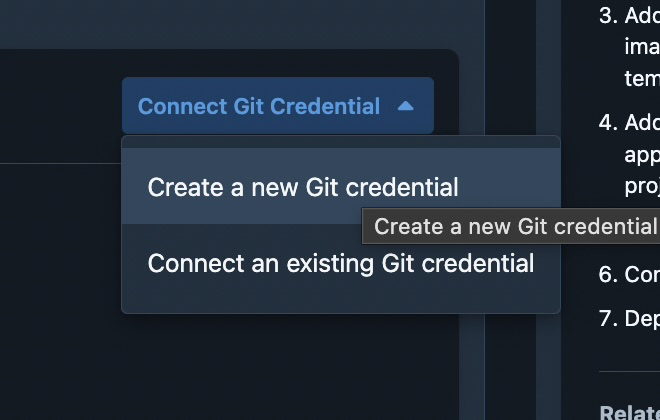
Two paths: spin up a new credential in Octopus from a PAT, or reuse one you’ve already attached to this space -
Pick Create a new Git credential (or Connect an existing Git credential if you’ve already added one to the space).
Once the credential is attached, the warning on the deployment preview clears and the source shows up as ready to update.
Step 7: Configure the step
Back on the step, fill in the rest:
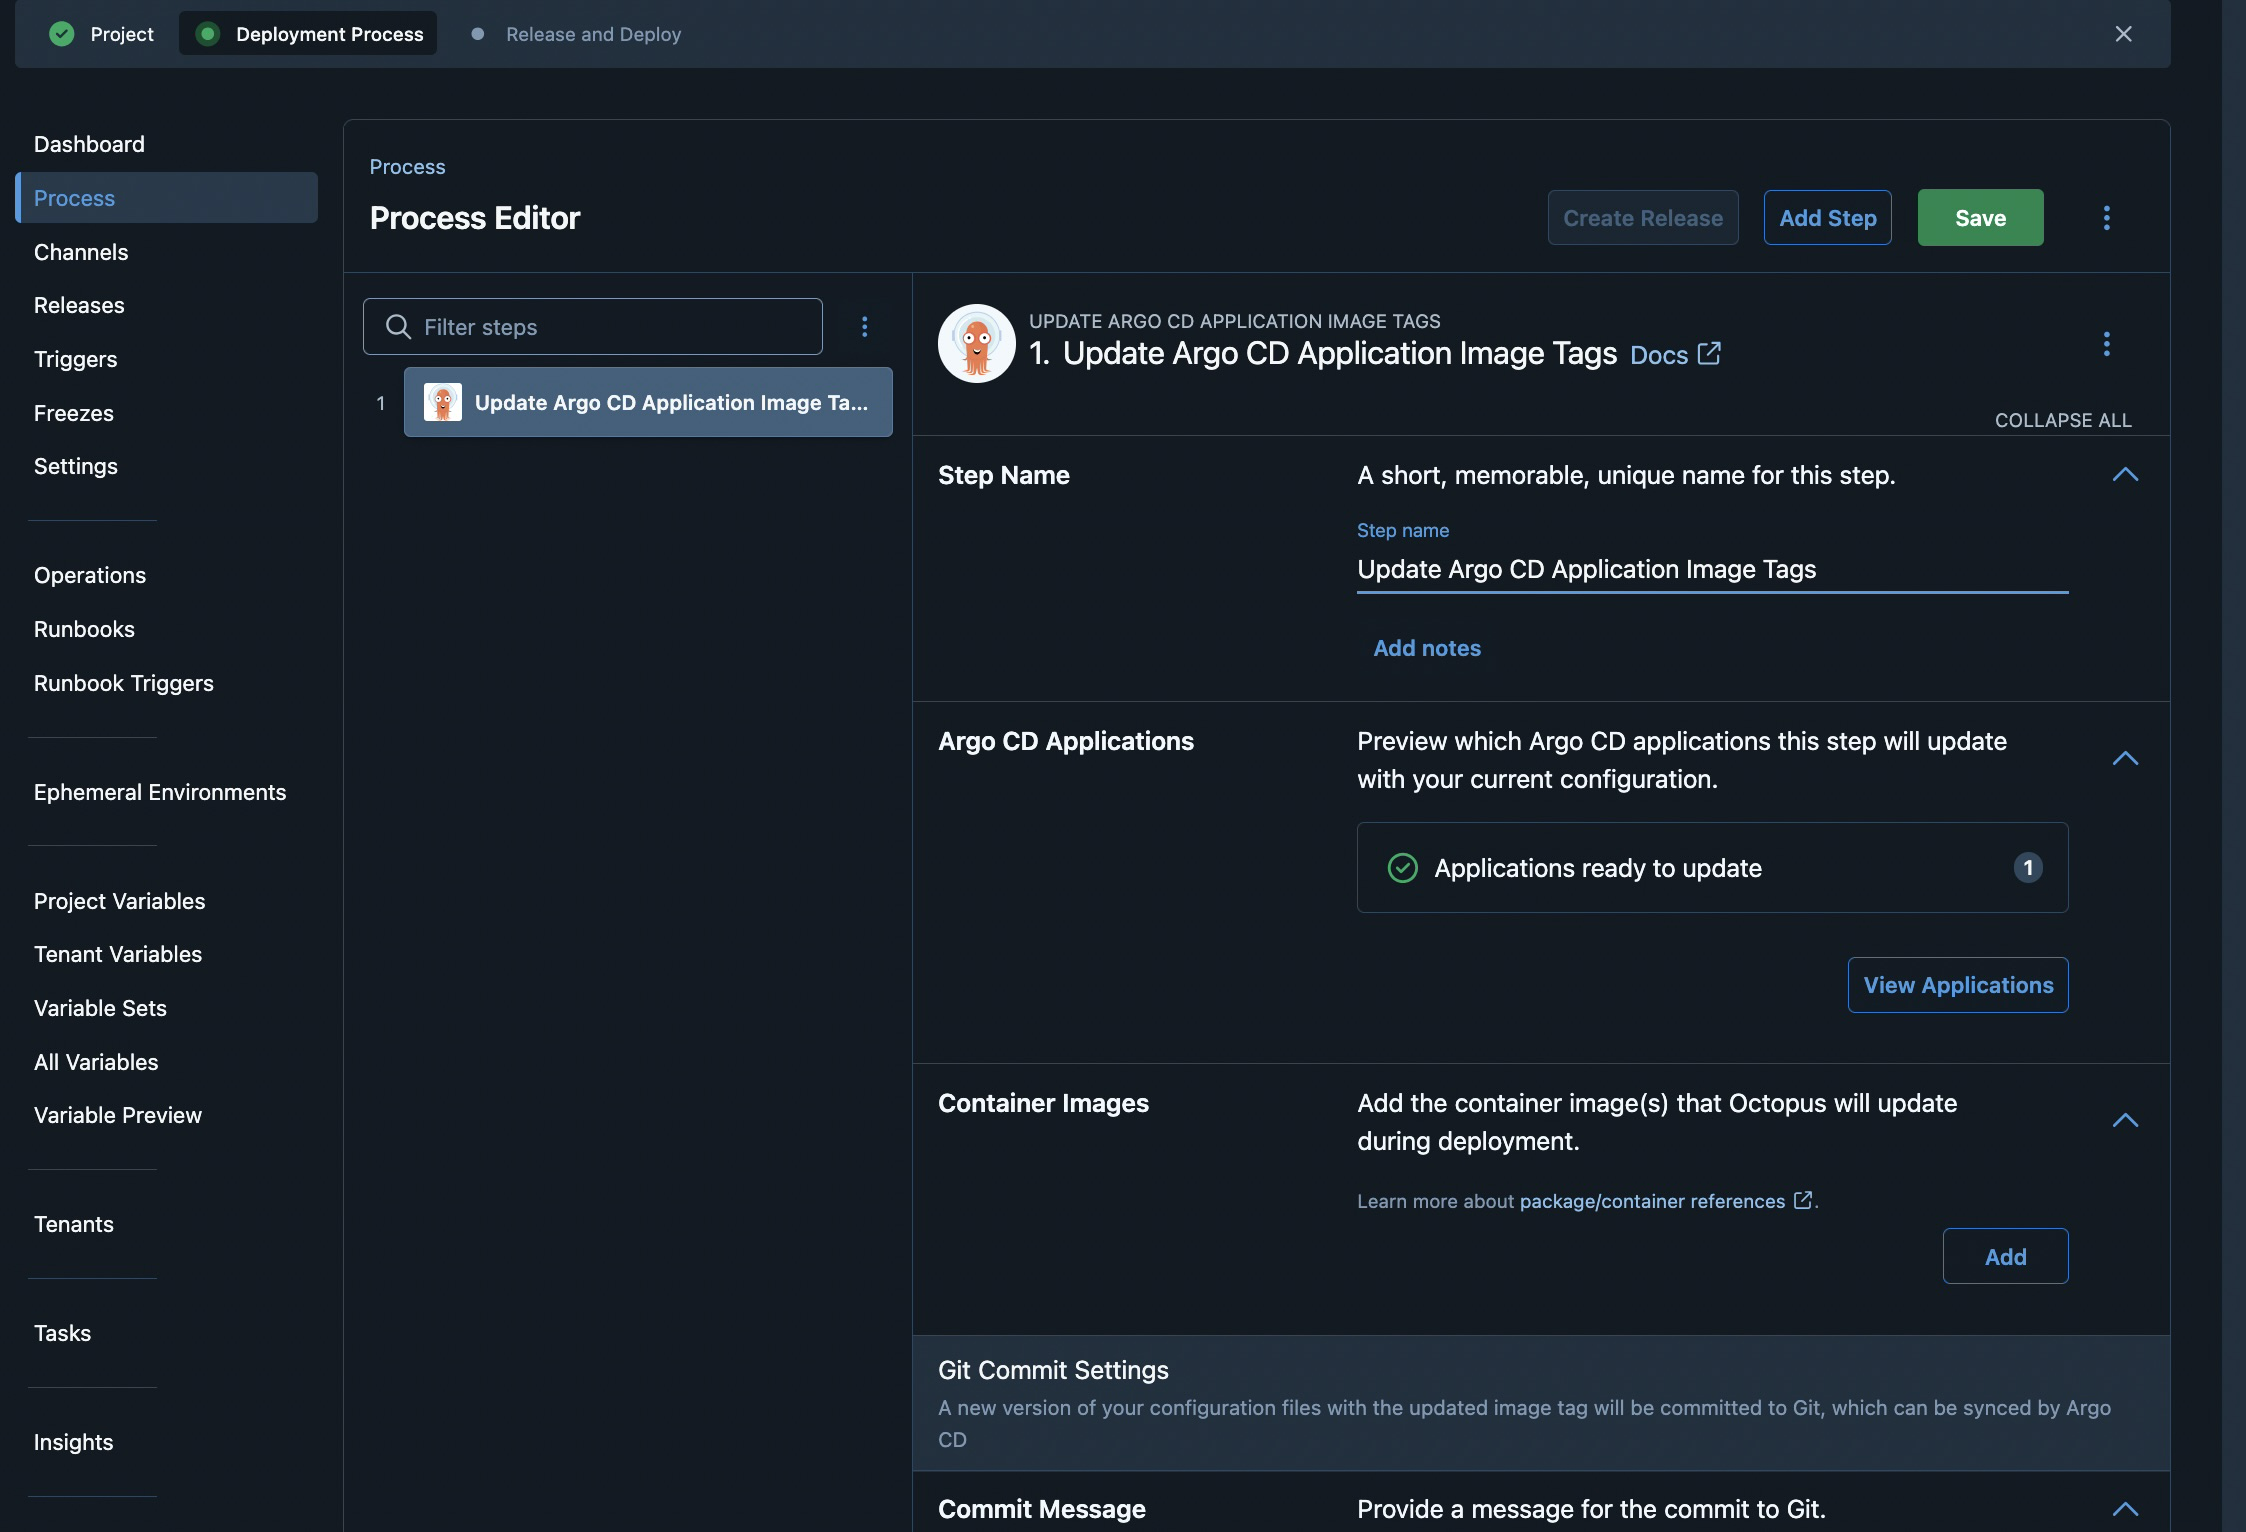
The key fields:
- Step Name, leave as the default unless you have multiple Argo CD steps in one process.
- Container Images, click Add to declare which container image(s) this step should bump. You’ll point it at a package/container reference so Octopus knows which image and which feed to pull tags from.
- Git Commit Settings, the commit author/email Octopus uses when it pushes the tag update.
- Commit Message, supports Octopus variables, so something like
chore: bump image to #{Octopus.Action.Package[hello].PackageVersion}is a good default.
Save the step.
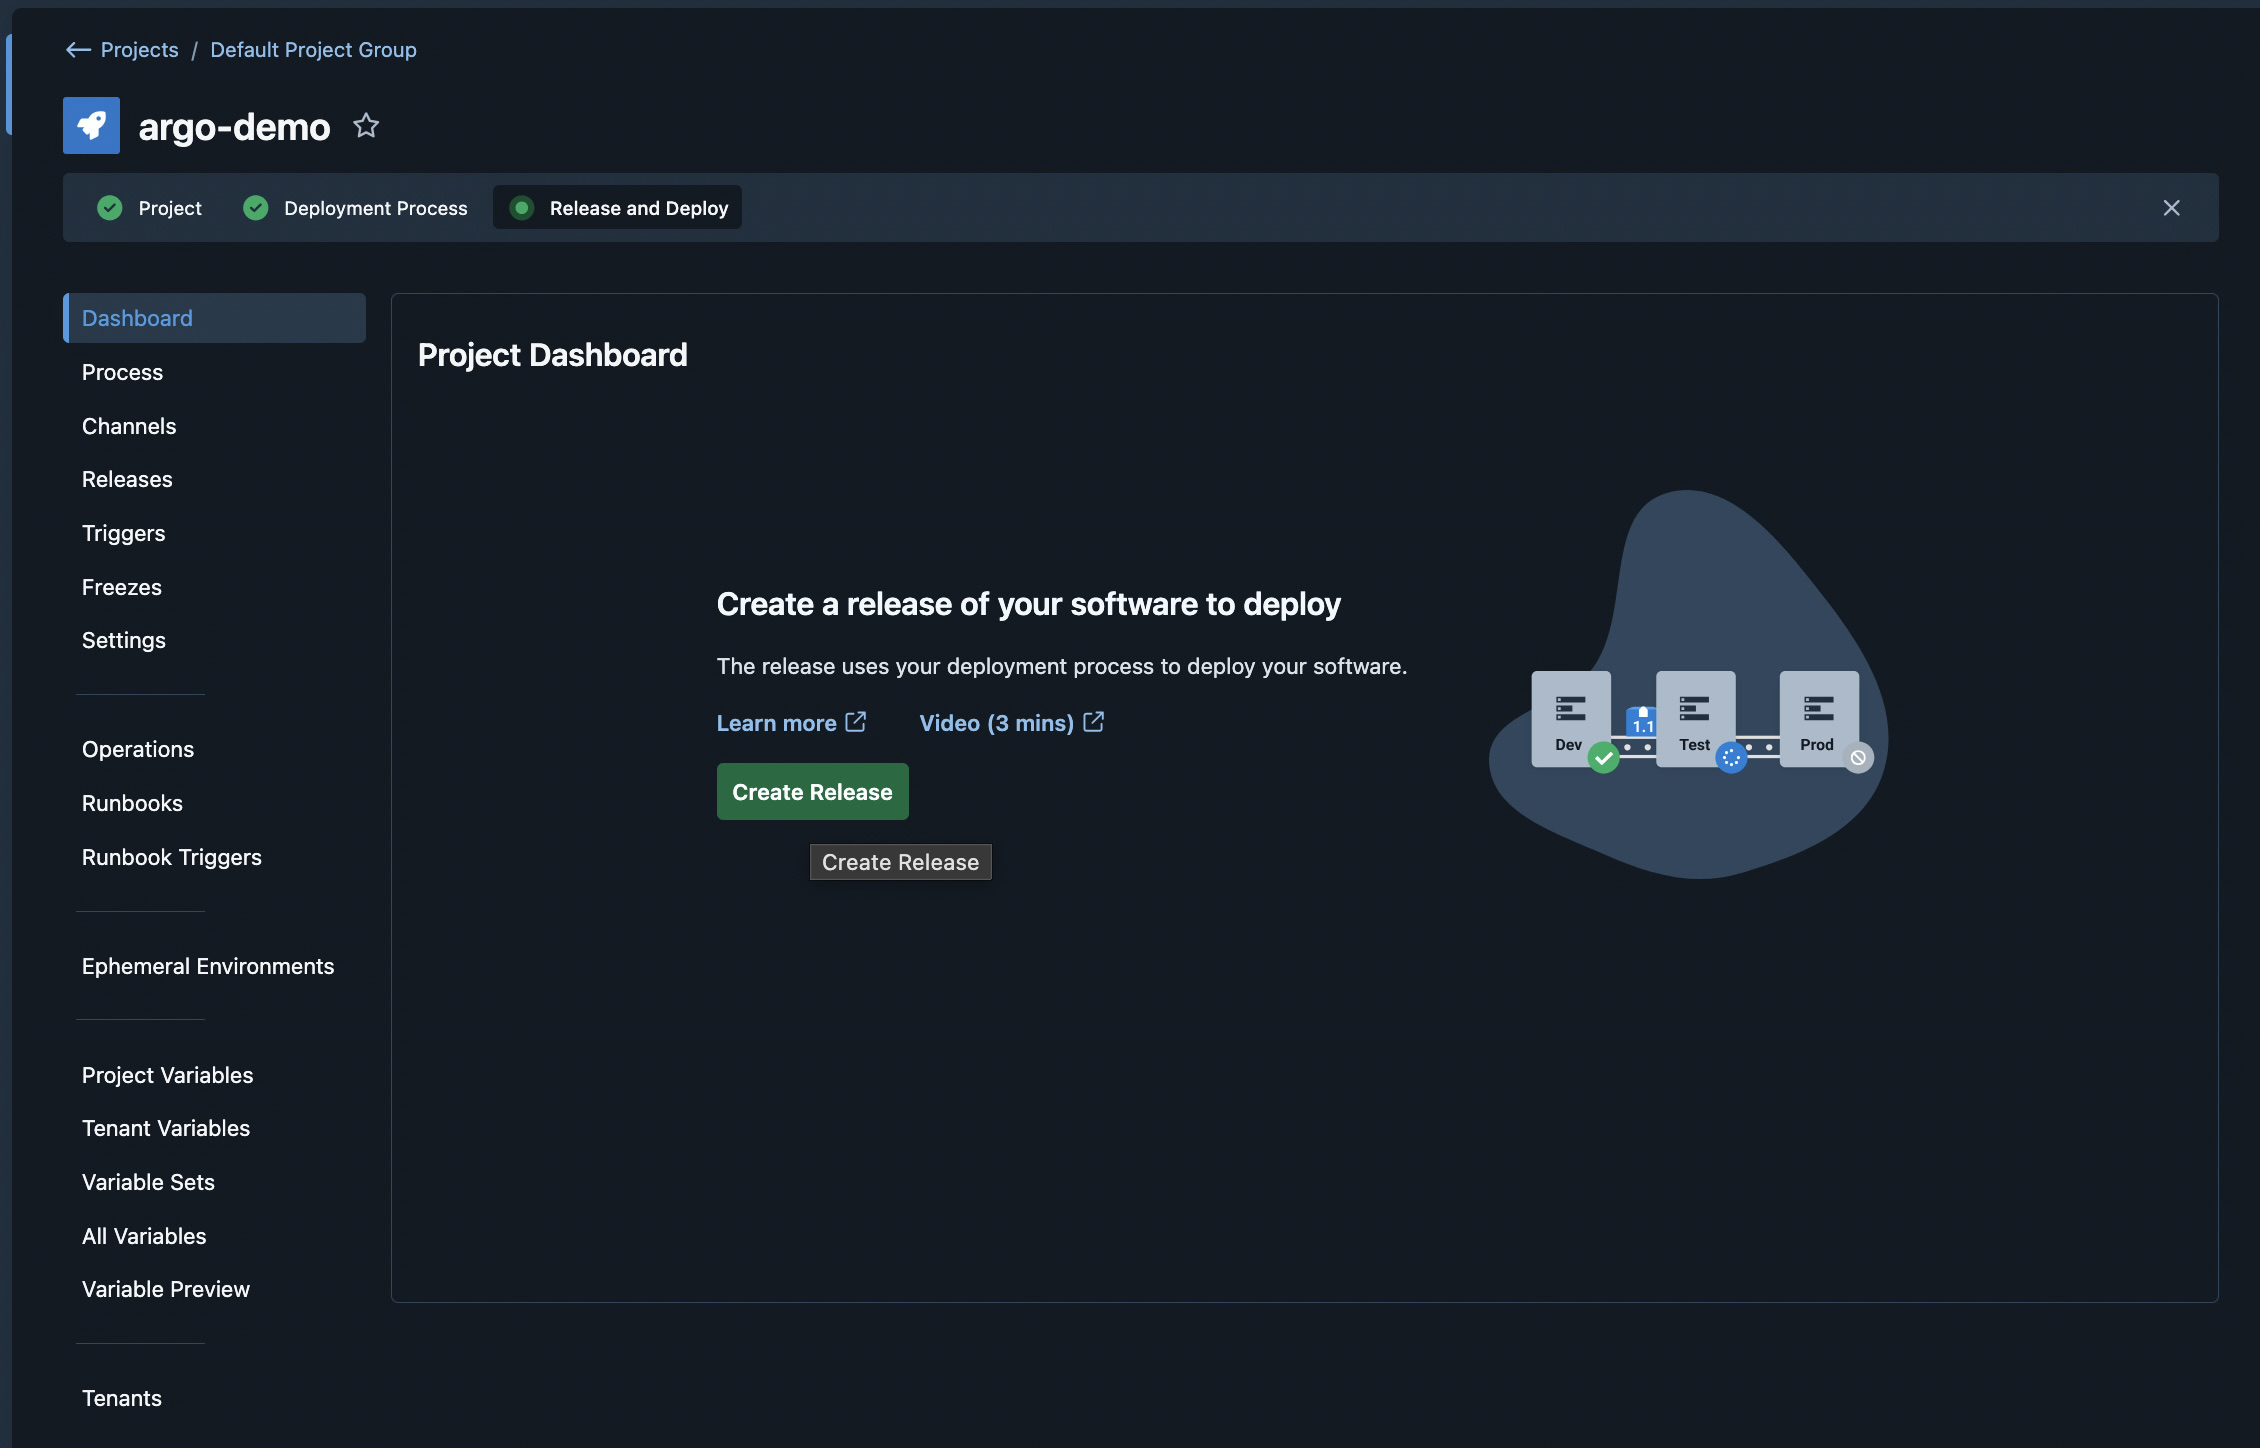
Step 8: Create a release
Head to the project dashboard, and you should now see the Create Release prompt.
On the release form, give it a version (Octopus auto-suggests 0.0.1) and click Save.
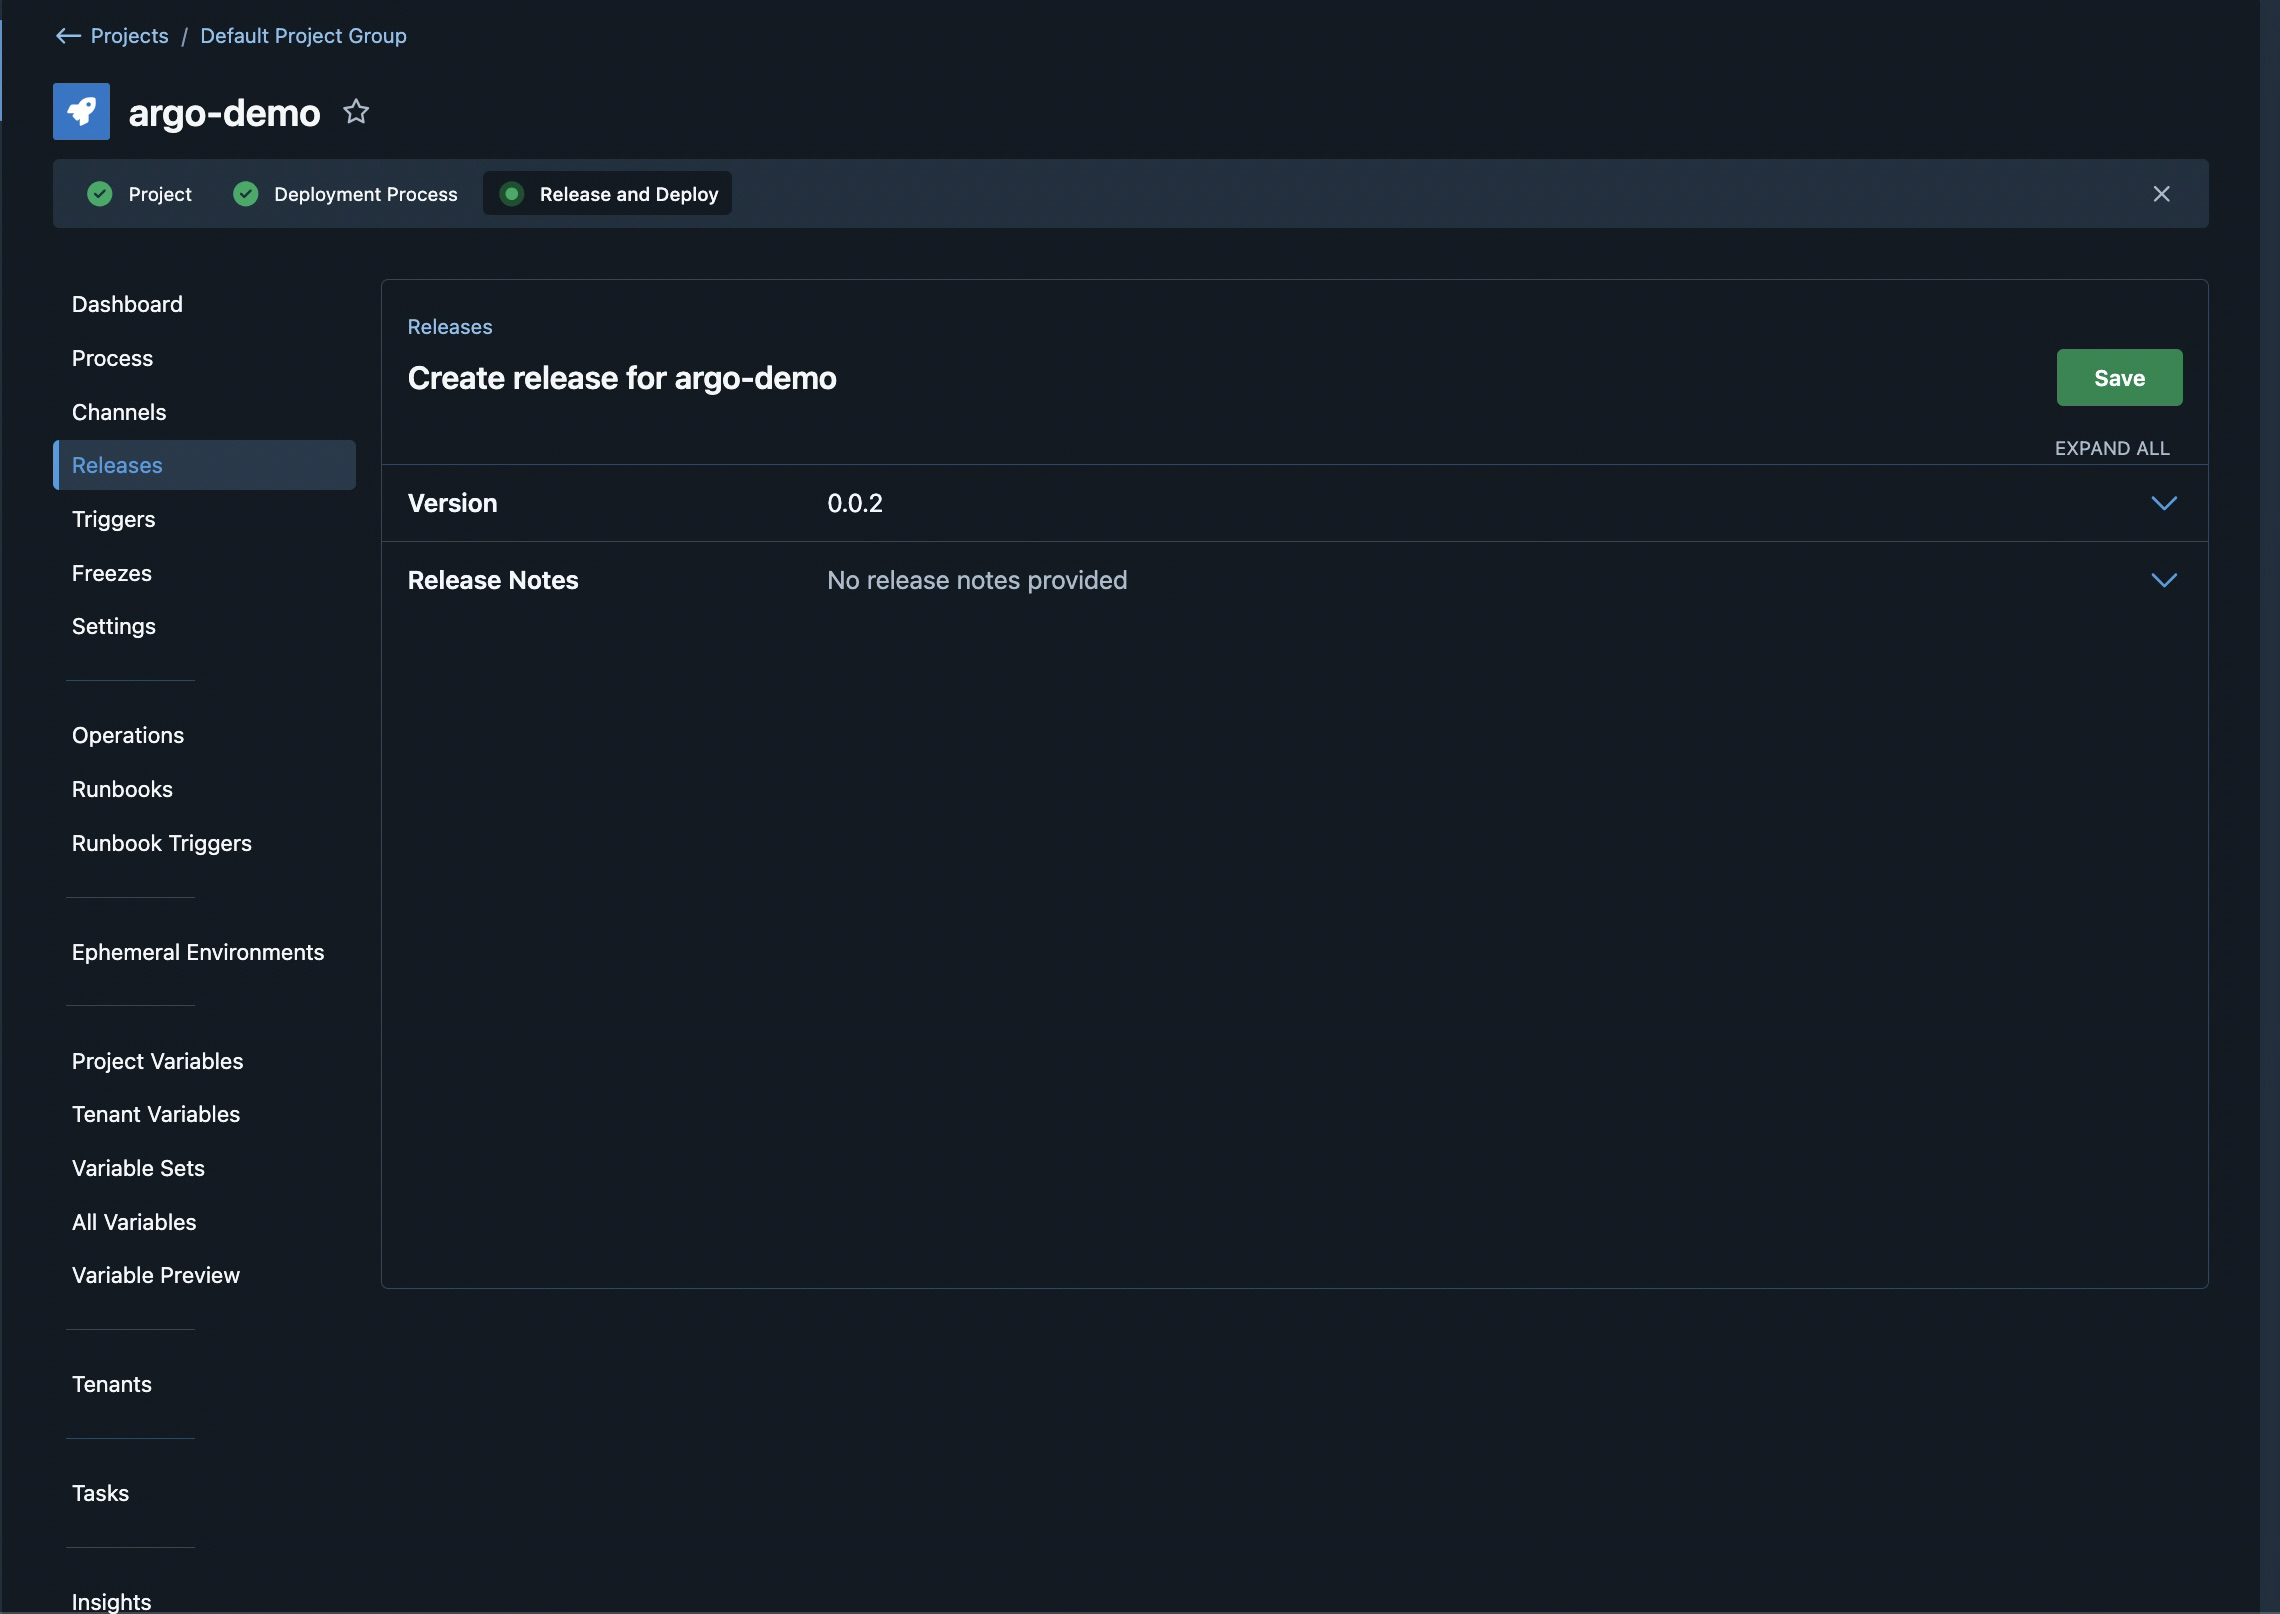
Release notes are optional but recommended for anything you’d want a changelog entry for later.
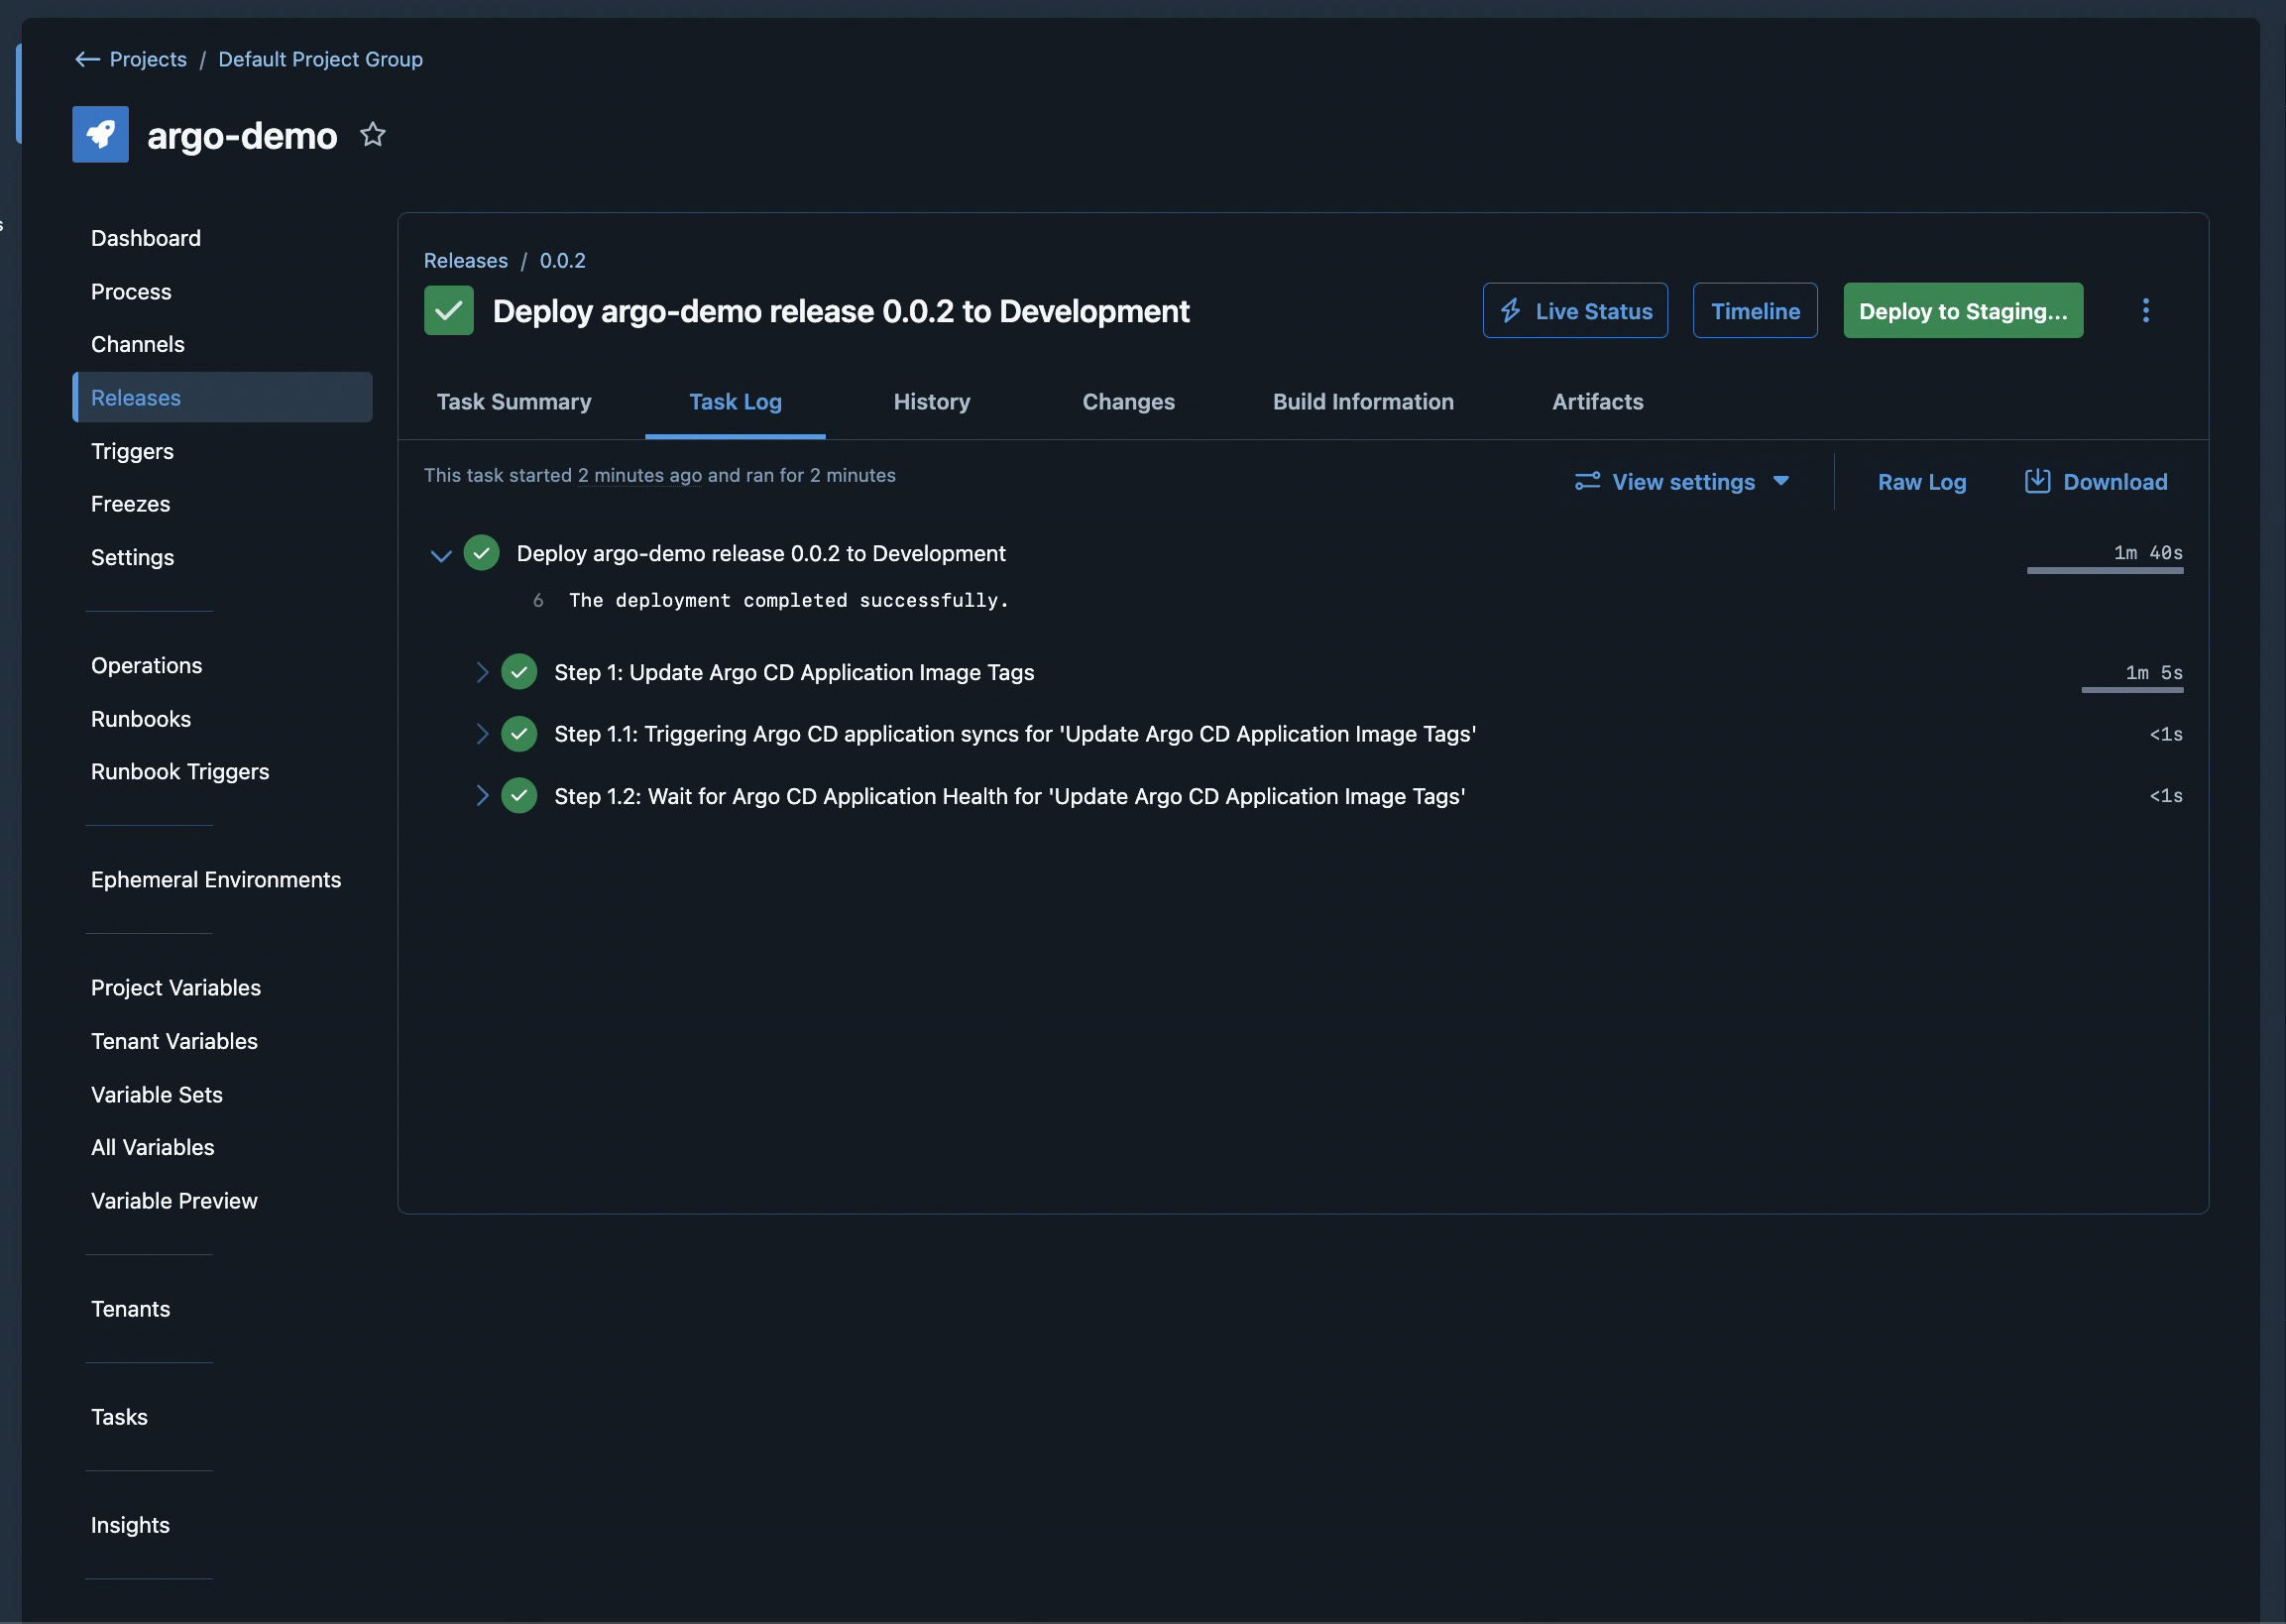
Step 9: Deploy to Development
Pick Deploy to Development on the release page. Octopus kicks off the deployment, and the task log streams the three sub-steps in real time:
- Update Argo CD Application Image Tags, Octopus rewrites the image tag in the manifest and pushes the commit
- Triggering Argo CD application syncs, Octopus asks Argo CD to sync the Application
- Wait for Argo CD Application Health, Octopus polls the Application until it reports Healthy
When all three turn green, you’ll see a completion line in the task log, and a Deploy to Staging… button appears at the top right, ready for the next environment in the lifecycle.
You can verify the rollout landed on the cluster side too:
kubectl -n default get deploy hello -o
jsonpath='{.spec.template.spec.containers[0].image}{"\n"}'
Step 10: Rolling back: redeploying a previous release
The deploy half of the demo is done. The other half is the one that actually earns its keep: a release that turns out to be bad, and how Octopus takes you back to the previous one without anyone opening a terminal.
To simulate it, hit Create Release again, save as 0.0.3, and deploy it to Development. Imagine the new image is broken (regression, missing env var, whatever). To roll back, head to Releases in the project’s left sidebar.
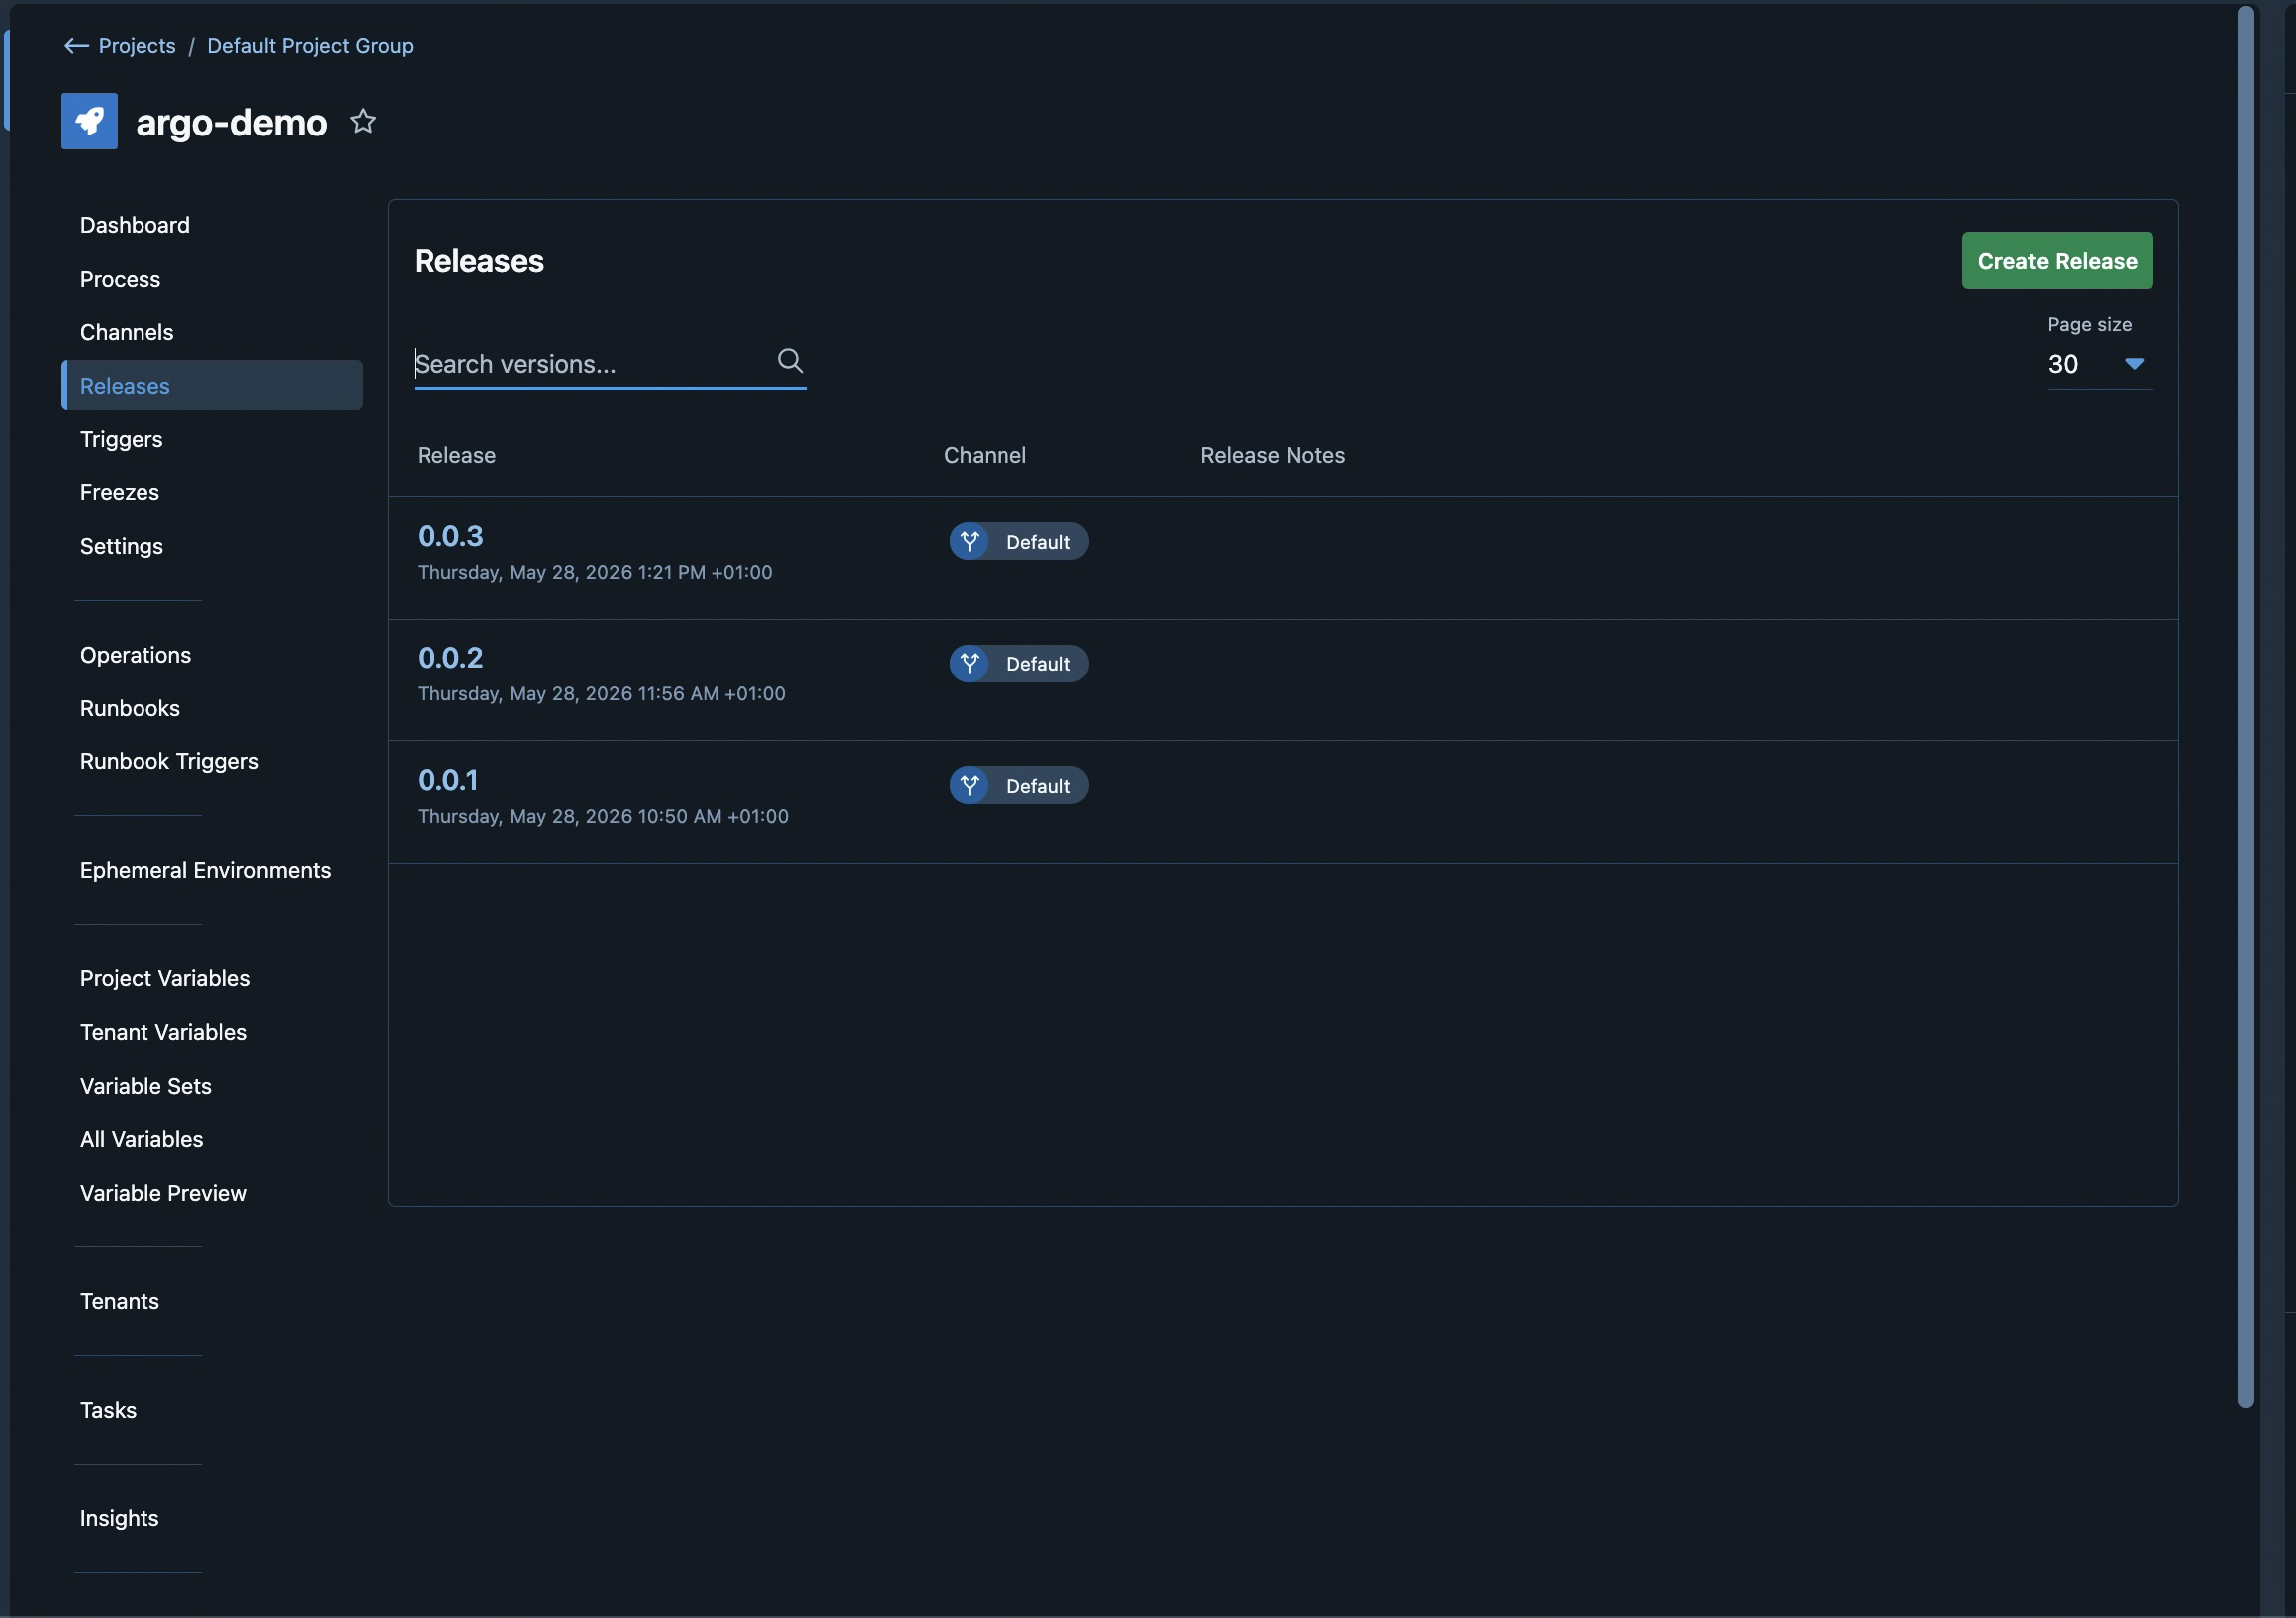
Click 0.0.2 to open it, then look at the lifecycle table. The Development row will show its previous deployment with a Redeploy… button.
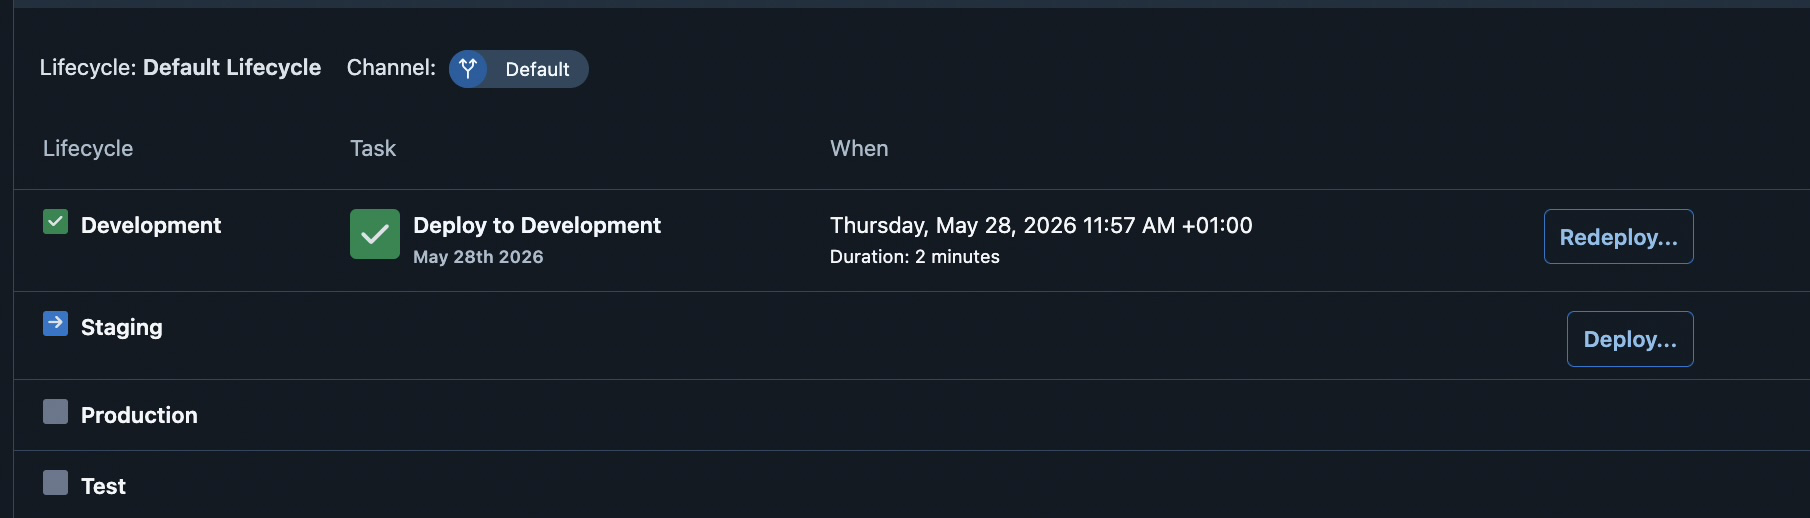
Click Redeploy…, confirm, and the same three sub-steps run again.
Octopus rewrites the image tag in Git back to the one 0.0.2 used, commits it, asks Argo CD to sync, then waits until the Application reports Healthy.
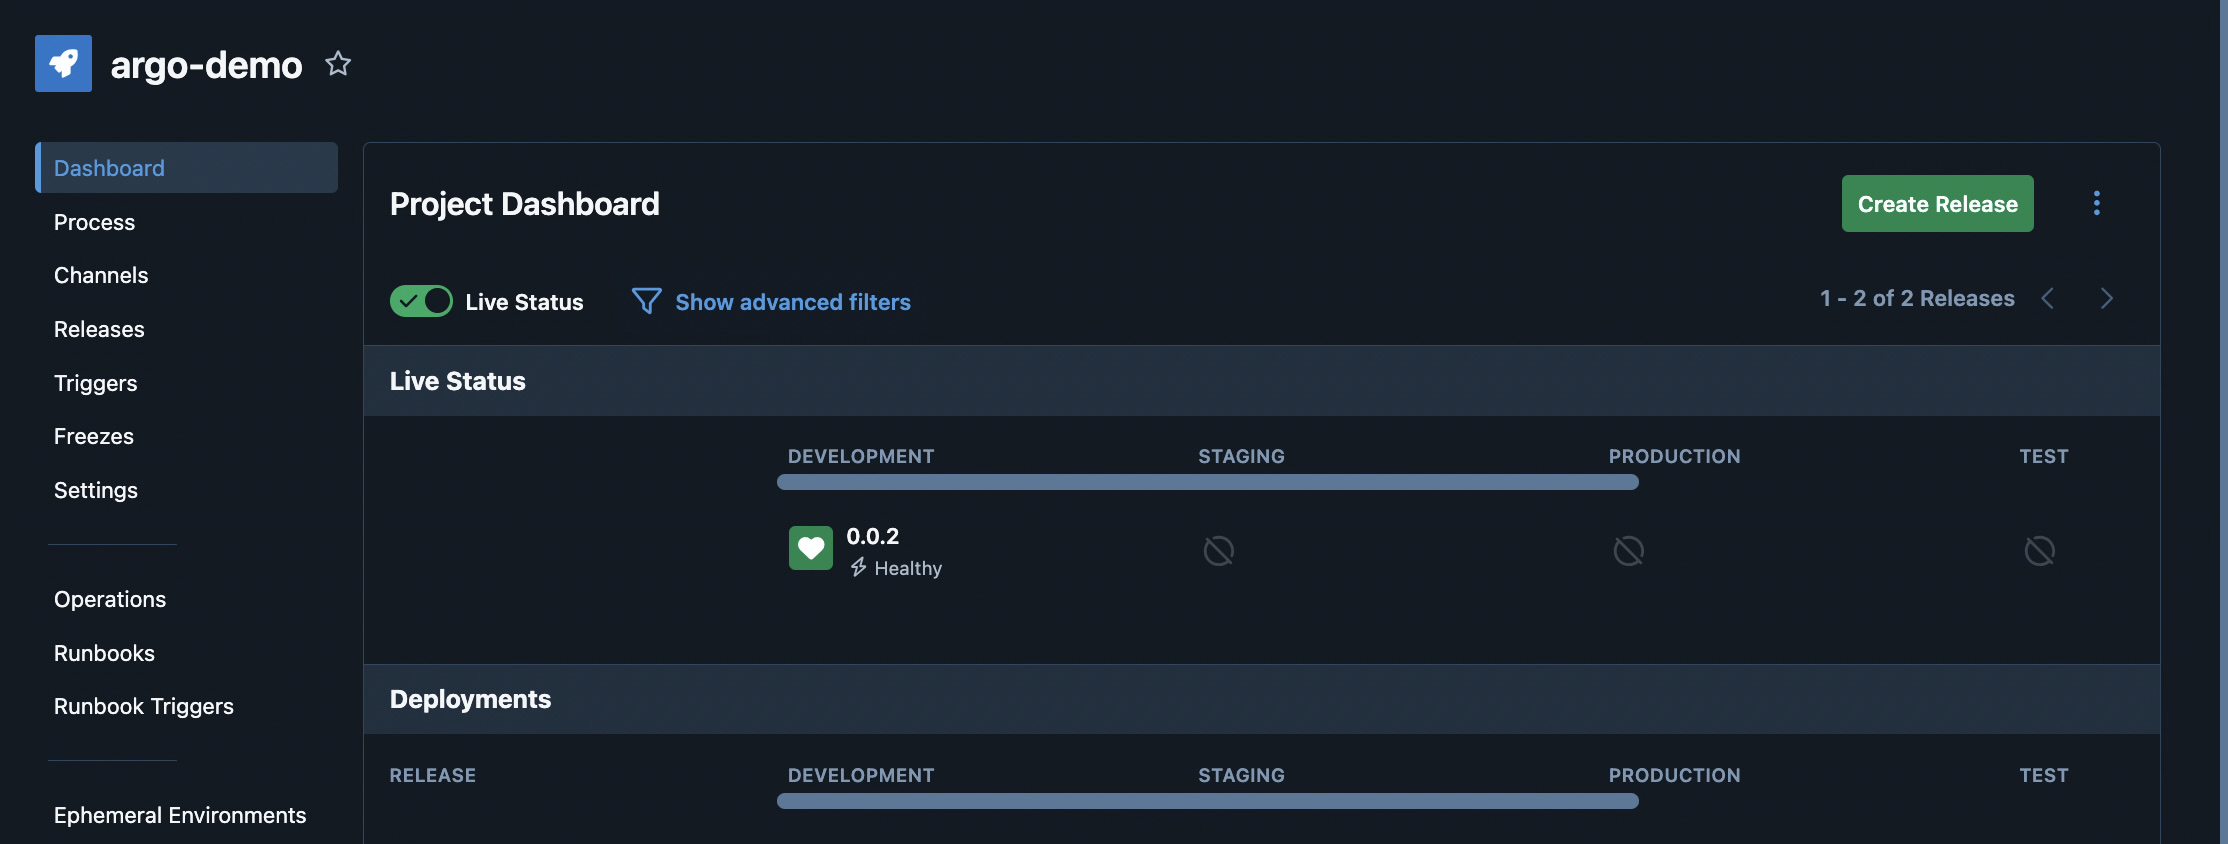
When the task completes, the project dashboard shows 0.0.2 back in Development.
When to roll back vs when to roll forward
For this demo, rolling back was a single click. That doesn’t mean rolling back is always the right call. Rollbacks have a way of failing that isn’t always talked about.
They assume the rest of the system is in a state that the old version can still talk to. Most of the time it is. Sometimes it very much isn’t.
Take, for instance, a database. If a bad release adds a new column and your users have been generating data through that path for an hour, rolling the application code back doesn’t unwind the schema or the data. The old app meets the new schema and either ignores fields it doesn’t know about (best case) or crashes on them (worst case)
Refactoring databases buys you flexibility. If schema changes go in through additive, backward-compatible migrations (add columns nullable, write to both old and new fields for a release cycle, then drop the old in a later release), rollbacks stay safe much longer.
Make rollbacks boring
If you made it this far, you’ve got the full loop: an Argo CD Application scoped to an Octopus project with annotations, a deploy that flows from a click down through Git into your cluster, and a redeploy that takes you back to a known-good release the same way.
Argo CD keeps reconciling, your manifests stay the source of truth, and Octopus wraps versioning, approvals, audit, and that redeploy button around them. The rollback nobody had tested becomes a button two engineers know how to press.
Beyond manual rollbacks, Octopus enables you to build out full lifecycles on your deployments, so this can all be automated conditionally.
Extend the pipeline to your real environments using the Argo CD integration docs, or if you don’t have an Octopus instance yet, start a free trial and run this end-to-end on your own cluster.
Tags: