TFS Preview is Microsoft’s new cloud-hosted Team Foundation Server as-a-service solution (TFSaaS?). You get a Team Foundation Server instance, with Team Build (continuous integration) and work item tracking.
Microsoft market TFS as more than just a source control system, but rather as an application-lifecycle-management solution. That’s nicely summarized by this image from the TFS Preview homepage:

The arrow on the right represents “deployment” to different channels - after all, “application lifecycle management” really ought to include some kind of deployment capability. The problem, however, is that in the case of TFS Preview, the arrow really just means “automatic deployment to Azure”. That’s definitely a cool feature, but what if your target servers aren’t running on Azure? What if you are using Amazon EC2, or you have services that need to run on some local servers in a data center?
Never fear, Octopus is here to put the “deployment” in application lifecycle management. We’re going to extend the image to look like this:
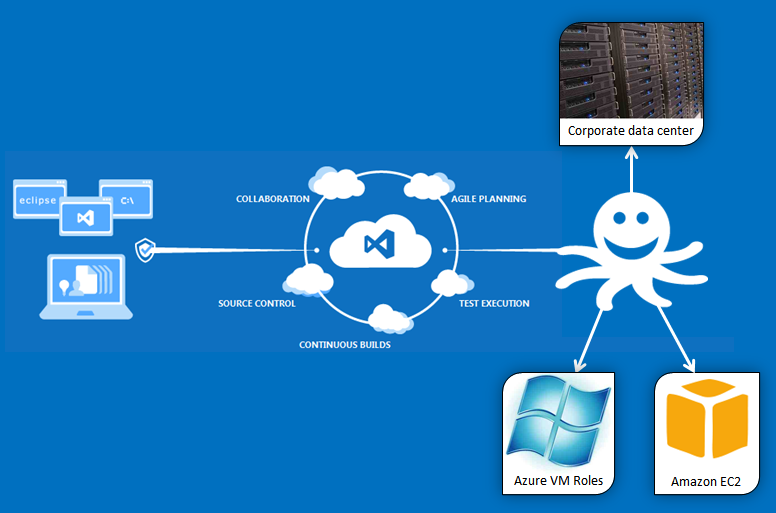
In this post, I’m going to take an ASP.NET website, and get it building under TFS Preview. I’ll need to do a few things:
- Create a TFS Preview account
- Create a MyGet account. We’ll be using MyGet to host our NuGet packages.
- Create the ASP.NET site, and use OctoPack to package it
- Set up a Team Build to build the packages and publish them to MyGet
- Configure Octopus to use MyGet and to deploy the application
While I’ll be using TFS Preview in this example, most of these steps (or similar) will also work with internal TFS installations.
Step 1: Creating the project
Visit the TFS Preview homepage, and register an account. This is free, and only takes a few minutes, which is quite nice. When it’s done, you’ll be taken to an account dashboard:
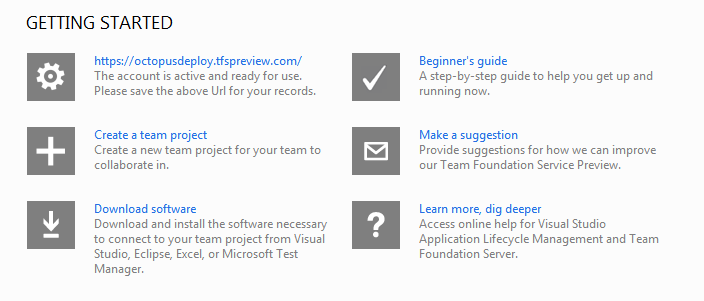
I’ll create a new team project:
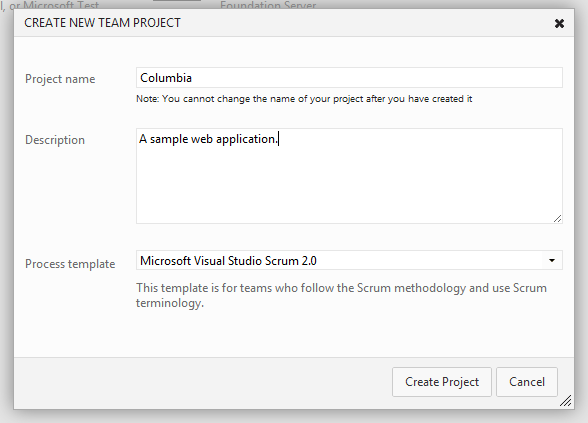
It takes about a minute for the project to create, after which you’ll be presented with the project home page:
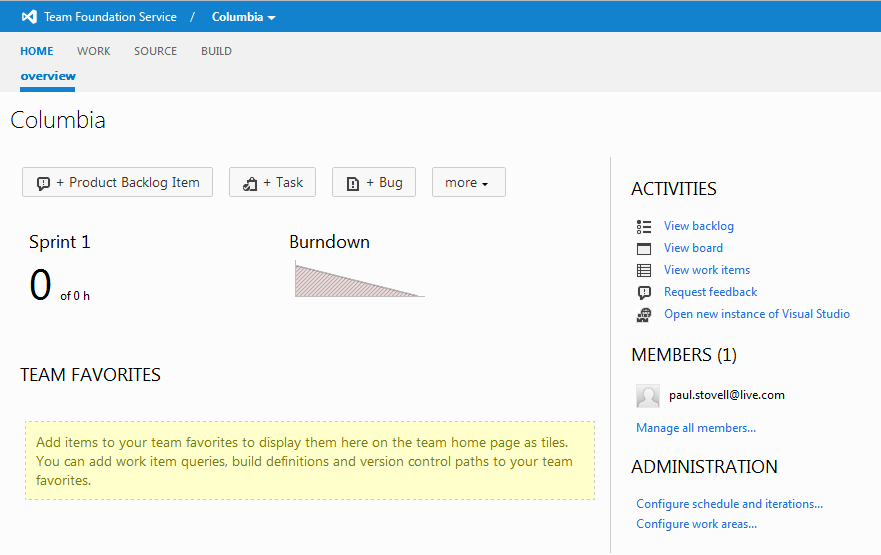
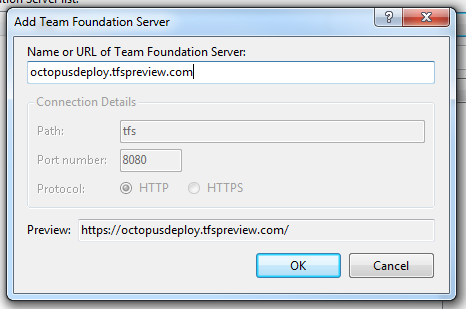
Next I’ll add the TFS server to my Visual Studio Team Explorer:
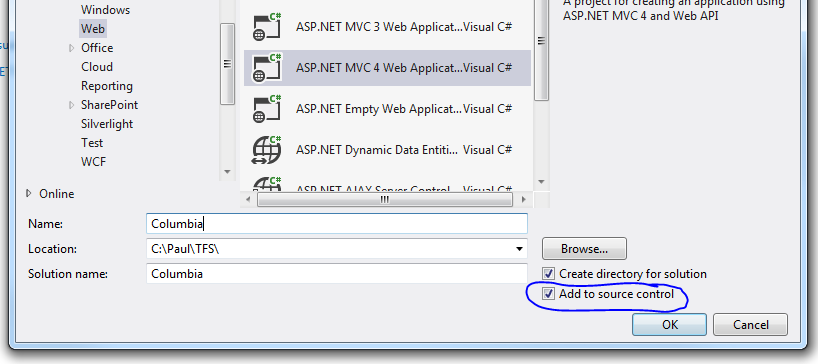
Now, I’ll create an ASP.NET MVC 4 project, and tick ‘Add to source control’. I’ll use the Internet template, and I’ll add a unit test project too.
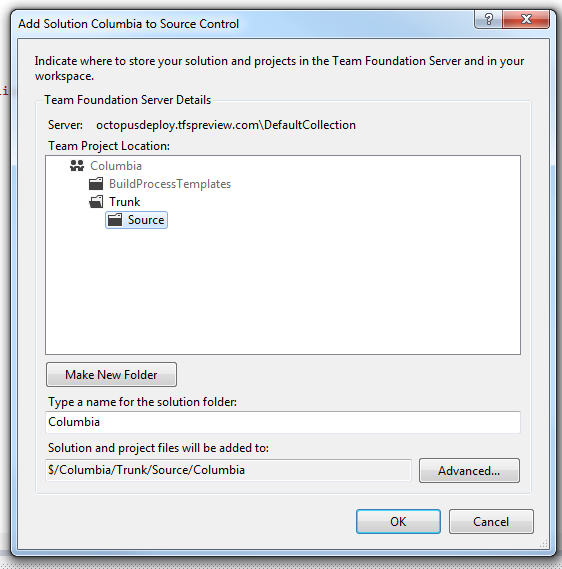
After the project is created, I’ll be asked where the code should live in TFS. I added a Trunk\Source folder:
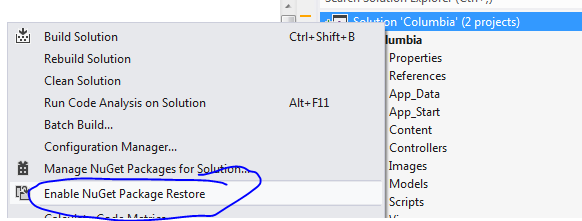
Before I check in, I’m going to enable NuGet package restore on the solution, so that I don’t have to check in all my NuGet packages:
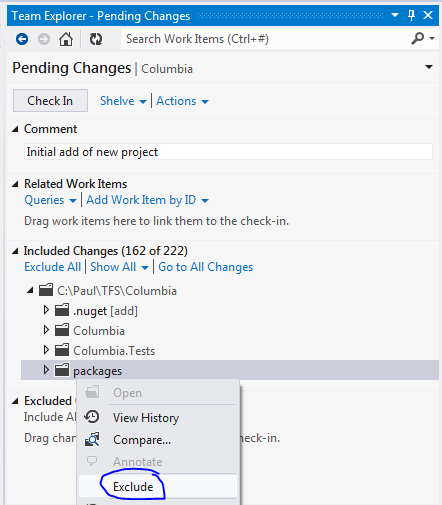
From the pending changes window, I’ll then exclude the packages directory, and check in my code:
The check in is surprisingly quick over the internet. I’ve had bad experiences using TFS 2010 over the internet in the past, but this is quite snappy.
Step 2: Continuous Integration
With my initial code checked in, it’s time to set up a Team Build. I’ll create a new Team Build definition named “CI”. On the Trigger tab, I’ll choose the CI option:

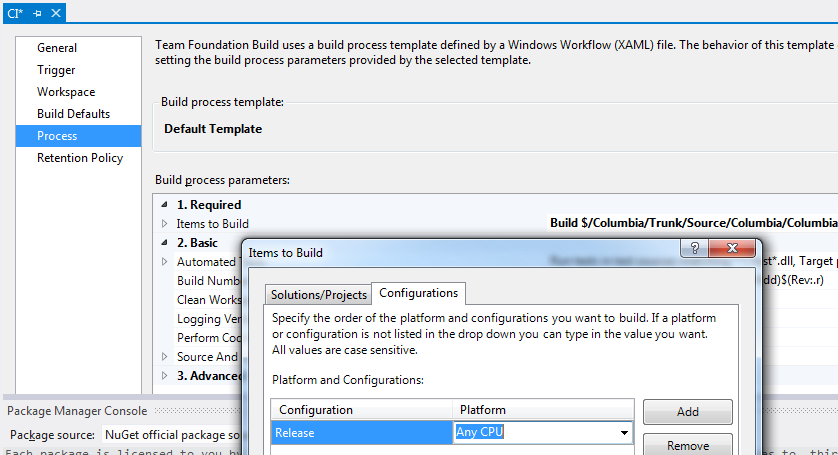
On the Process tab, Team Build automatically finds my solution. The only change I’ll make is to specify the Release configuration explicitly:
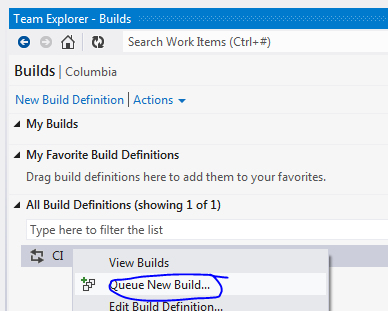
I’ll save that build configuration, and then queue it up to run:
The build sat in the queue for about a minute before it ran, presumably a build machine was being provisioned or something. The actual build took about 2.5 minutes, and completed successfully:

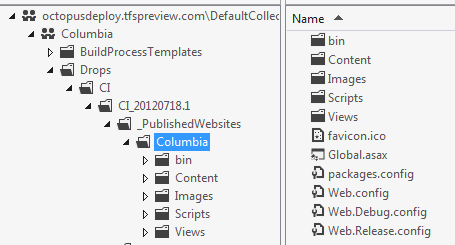
If I use the Source Explorer window in Visual Studio, I can see the output of the build. Under a _PublishedWebsites directory is a directory for my project, which contains all of the files I need to run my ASP.NET web site.
This is a feature of TFS, and it’s nice, but what am I supposed to do with it? Manually download the files and FTP them somewhere like it’s 1998? No, we can do better!
Step 3: Packaging the site
So far, I have an ASP.NET site that is being built using Team Build, and the contents of the site are being published to the _PublishedWebsites folder. Now, I’ll zip that folder up into a NuGet package, so that I can deploy it using Octopus Deploy.
To do this, I’ll be using OctoPack, a special NuGet package which will take care of this for me. I’ll issue the install-package OctoPack command in the Package Manager Console, taking care to select my website as the target project:
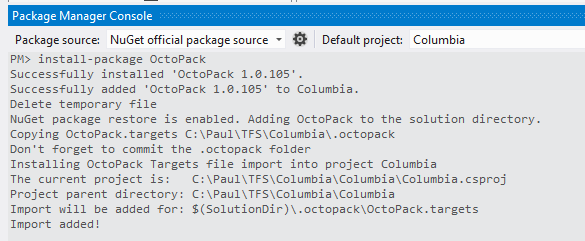
OctoPack modifies the .csproj file of the website to add a link to a special targets file. This targets file will take care of the packaging after a Release build completes.
Since I’m using NuGet package restore, OctoPack adds a .octopack folder at the root of my solution, next to the .nuget folder, and that’s where the targets file is kept. Annoyingly this doesn’t appear in the Pending Changes window of Team Explorer, so I’ll add it manually using the Source Explorer.
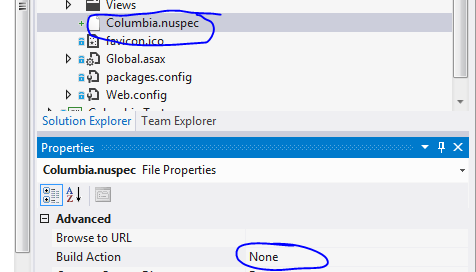
I’ll also add a .nuspec file to my project, which is required by OctoPack. This will serve as a manifest for my package.
<?xml version="1.0"?>
<package xmlns="http://schemas.microsoft.com/packaging/2010/07/nuspec.xsd">
  <metadata>
    <id>Columbia</id>
    <title>A sample web application</title>
    <version>1.0.0</version>
    <authors>Paul Stovell</authors>
    <owners>Paul Stovell</owners>
    <licenseUrl>http://octopusdeploy.com</licenseUrl>
    <projectUrl>http://octopusdeploy.com</projectUrl>
    <requireLicenseAcceptance>false</requireLicenseAcceptance>
    <description>A sample project</description>
    <releaseNotes>This release contains the following changes...</releaseNotes>
  </metadata>
</package>
This is added to the root of my web project, and I’ll set the Build Action to None:
Finally, I’ll commit that change, again making sure not to add the NuGet packages folder (I think Pending Changes needs a ‘permanently ignore’ button).

After checking in, my team build is automatically triggered. I made a mistake while preparing this demo (forgetting to add the .nuspec), which is why there is a bar representing a previous failed build. Adding it fixed the build:

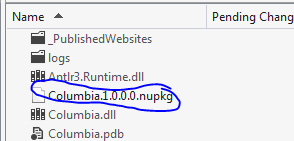
Now, if I inspect the drops folder, I’ll find a Columbia.1.0.0.0.nupkg file:
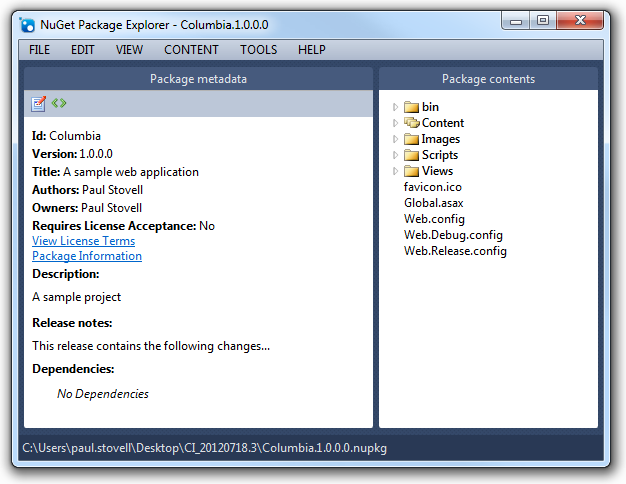
If I use the NuGet Package Explorer, I can see that it contains the files I need to run the website, plus the manifest information from my .nuspec:
Step 4: Incrementing the version number
The NuGet package gets its version number from the [assembly: AssemblyVersion] attribute of the output assembly for the project, which by default is set to 1.0.0.0. We can change this in the AssemblyInfo.cs file to give each package a unique version number:
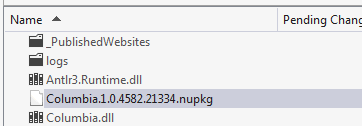
[assembly: AssemblyVersion("1.0.*")]I’ll check that in, and let the CI build run again, and a few minutes later I have a new drops folder with a new package:
Step 5: Hosting the NuGet packages
My CI build is now producing Octopus-compatible NuGet packages. Before I can deploy them, I’ll need to host the NuGet packages somewhere that Octopus can access them. Unfortunately TFS Preview doesn’t double as a NuGet Package Repository, so we’ll have to look outside.
Octopus supports any NuGet repository, so one option is to manually copy each package to a local file share that the Octopus can reference. This might be an OK option if we are only going to do deployments occasionally, but it’s not exactly automated.
Another option is to publish our package to a NuGet server. We could host it ourselves by setting up a VM running the NuGet Gallery, but that takes some effort. A much simpler way is using MyGet.org, a “NuGet-as-a-service” solution.
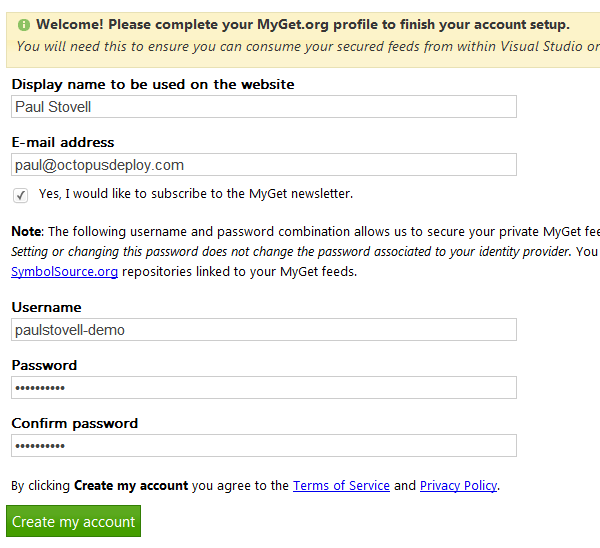
I’ll create an account by using my Live ID and then filling in the registration page:
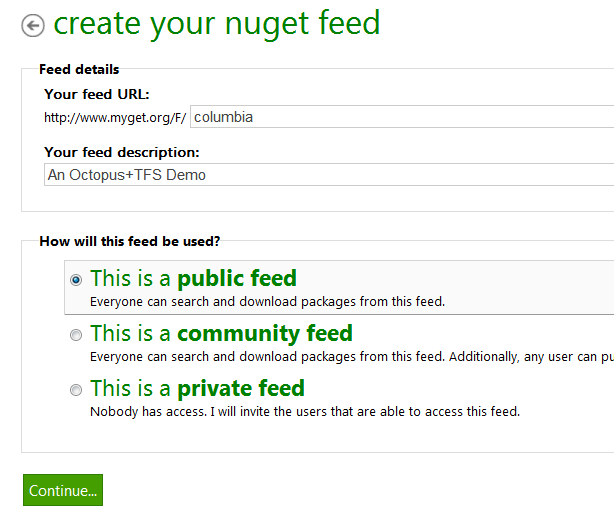
Next, I’ll create a NuGet feed which MyGet will host. I’ll use a public feed for this example, but you can also choose to use a private feed:
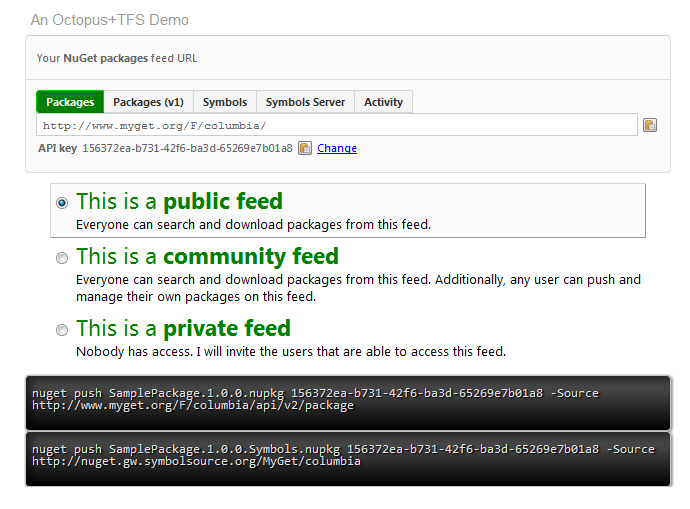
With my feed created, I can use the MyGet Feed Details tab to grab the information for the feed:
Step 6: Pushing the packages to MyGet
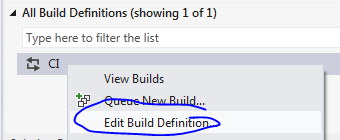
Now, I’m going to set up Team Build to automatically push my package over to the MyGet feed. I’ll start by editing the Team Build definition:
On the Process tab, I’ll expand the Advanced section and set the MSBuild Arguments property:

I’ve set it to:
/p:OctopusPublishPackageToHttp=http://www.myget.org/F/columbia/api/v2/package /p:OctopusPublishApiKey=156372ea-b731-42f6-ba3d-65269e7b01a8Note: these variables have changed in OctoPack 2.0 - they are now Octo**Pack**PublishPackageToHttp and Octo**Pack**PublishApiKey.
I’m using two properties which were introduced into OctoPack a few days ago. The first sets the URI to publish to - in this case, my MyGet feed - and the second is the API key to use. I got both of these values from the MyGet.org Feed Details page.
Queuing my build again, it passes:

And if I check the MyGet Packages tab:

Woohoo!
Step 7: Adding the MyGet feed to Octopus
Let’s recap where we are:
- We have a website
- We have a CI build
- We have the website packaged
- We have the package published to a NuGet server
- Now we need to deploy the package
I have an Octopus Deploy server already installed (see the installation guide for details on how to do that), and I have three servers, all running on Amazon EC2. One server is in a staging environment, and the other two are in a production environment:
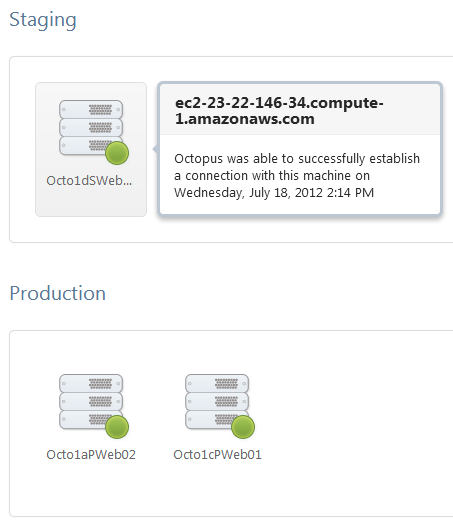
The machines are Amazon EC2 Windows Server 2008 R2 images, and I’ve installed the IIS components along with Tentacle, the Octopus deployment agent which runs locally. I’ve set up a trust relationship using Octopus’s built-in public key encryption support, which allows me to securely push the packages from my Octopus server to my machines.
In the Octopus web portal Configuration area, I’ll go to the NuGet tab, and add a new feed, pasting in the details of my MyGet feed:
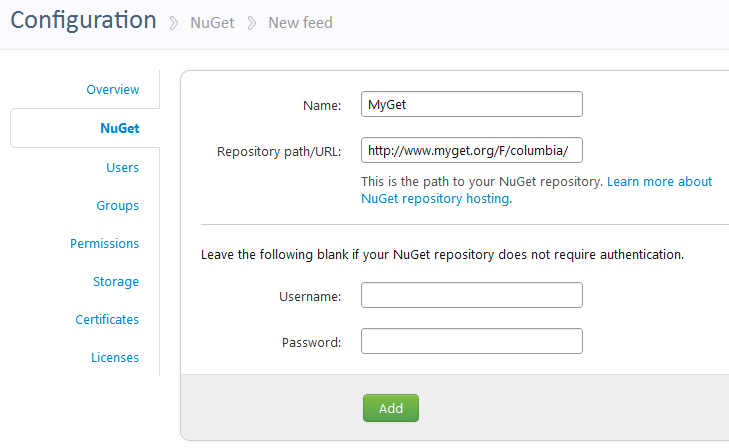
If I was using a private MyGet feed, or a TeamCity feed, I would add a username/password in the boxes below. In this case I am using a public feed, so I’ll leave them blank.
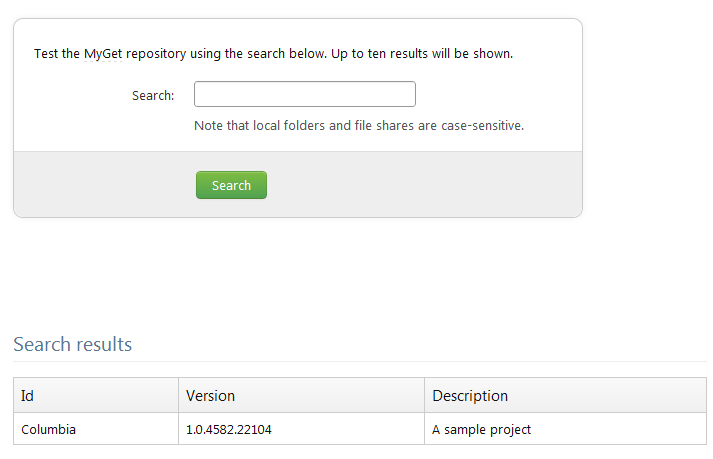
After adding the feed, I can verify that it works by clicking Test, and performing a search to list the packages:
Step 8: Defining the project in Octopus
Next, I’ll create a new project in the Octopus UI:
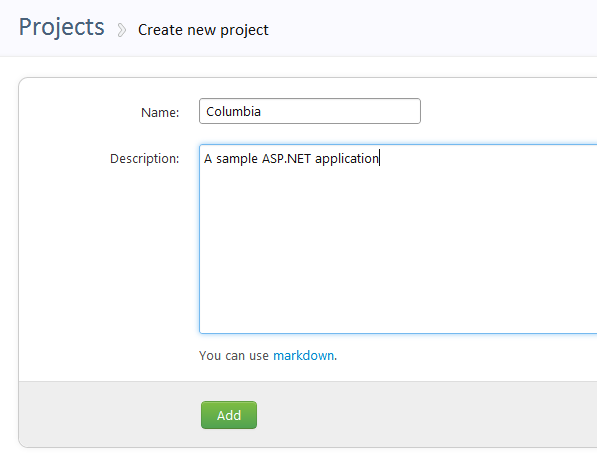
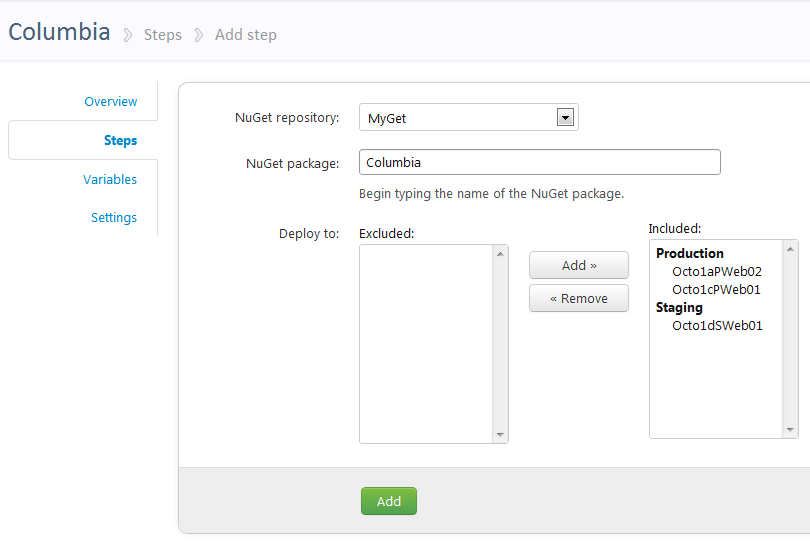
On the Steps tab, I’ll click Add package step. On this page, I’ll enter the ID of my NuGet package, choose the feed, and choose which machines it should be deployed to:
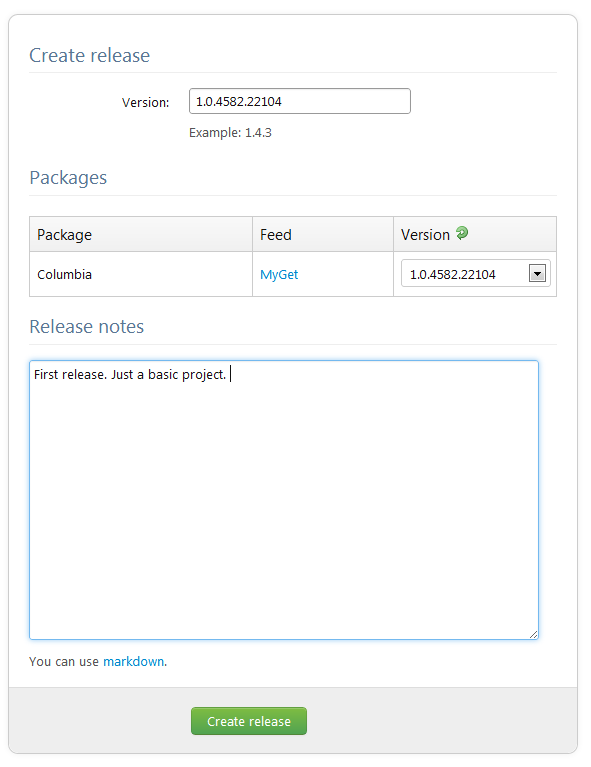
With my project defined, I’ll create a new release, choosing the version of the NuGet package to deploy:
On the release details page, I have a central place where I can see my release notes, and information about the NuGet packages included in the release.
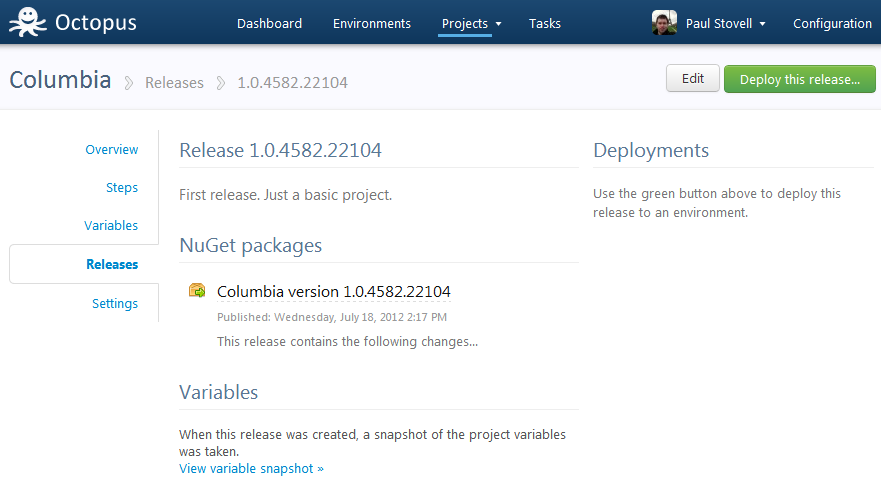
Next, I’ll click Deploy this release… and choose the environment to deploy to:
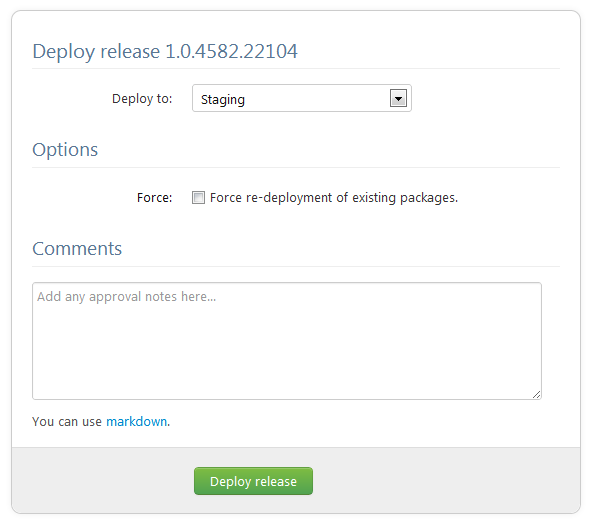
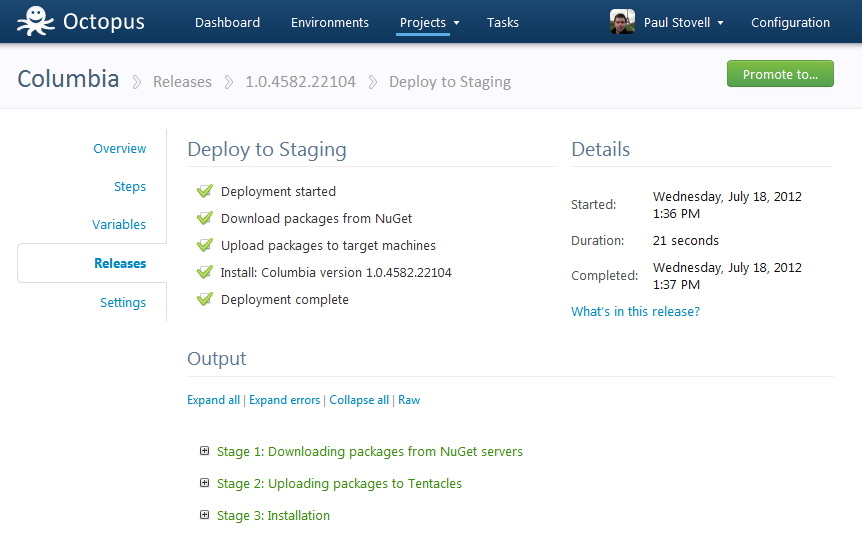
The deployment will run. At this stage Octopus works through a few steps:
- It downloads the package from the MyGet feed, and verifies the hash
- It uploads it to the target machine(s)
- It tells the deployment agent on the target machine to install the package
The deployment was successful:
Step 8: Configuring IIS
Octopus extracted the NuGet package, but it hasn’t modified IIS. If I browse the deployment log, I will see:
WARN Could not find an IIS website or virtual directory named ‘Columbia’ on the local machine. If you expected Octopus to update this for you, you should create the site and/or virtual directory manually. Otherwise you can ignore this message.
At this stage, I have two options. I could remote desktop onto all three of my machines, and create a new IIS site named Columbia, with the right application pool settings. Octopus would then automatically find this IIS site (because it shares the same name as the NuGet package) and change the home directory to point to the path it extracted the NuGet package to.
However, I am lazy. So I am going to add a PostDeploy.ps1 file to my project. This is a PowerShell script, and because it is named PostDeploy.ps1, the Tentacle agent running on the remote machines will automatically execute it for me. I don’t need to mess around with PowerShell remoting, and my machines don’t need to be on the same Active Directory domain; it’s automagic!
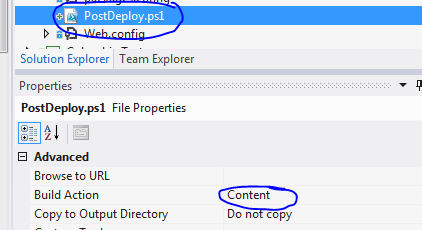
I’ll create the file in my project within Visual Studio, so that developers on my team can see it. I’ll also mark it as Content, so that it is included in the list of files in the NuGet package:
The script will look like this:
# Define the following variables in the Octopus web portal:
#
#   $ColumbiaIisBindings = ":80:columbia.octopusdeploy.com"
#
# Settings
#---------------
$appPoolName = ("Columbia-" + $OctopusEnvironmentName)
$siteName = ("Columbia - " + $OctopusEnvironmentName)
$siteBindings = $ColumbiaIisBindings
$appPoolFrameworkVersion = "v4.0"
$webRoot = (resolve-path .)

# Installation
#---------------
Import-Module WebAdministration

cd IIS:\

$appPoolPath = ("IIS:\AppPools\" + $appPoolName)
$pool = Get-Item $appPoolPath -ErrorAction SilentlyContinue
if (!$pool) {
    Write-Host "App pool does not exist, creating..."
    new-item $appPoolPath
    $pool = Get-Item $appPoolPath
} else {
    Write-Host "App pool exists."
}

Write-Host "Set .NET framework version:" $appPoolFrameworkVersion
Set-ItemProperty $appPoolPath managedRuntimeVersion $appPoolFrameworkVersion

Write-Host "Set identity..."
Set-ItemProperty $appPoolPath -name processModel -value @{identitytype="NetworkService"}

Write-Host "Checking site..."
$sitePath = ("IIS:\Sites\" + $siteName)
$site = Get-Item $sitePath -ErrorAction SilentlyContinue
if (!$site) {
    Write-Host "Site does not exist, creating..."
    $id = (dir iis:\sites | foreach {$_.id} | sort -Descending | select -first 1) + 1
    new-item $sitePath -bindings @{protocol="http";bindingInformation=$siteBindings} -id $id -physicalPath $webRoot
} else {
    Set-ItemProperty $sitePath -name physicalPath -value "$webRoot"
    Write-Host "Site exists. Complete"
}

Write-Host "Set app pool..."
Set-ItemProperty $sitePath -name applicationPool -value $appPoolName

Write-Host "Set bindings..."
Set-ItemProperty $sitePath -name bindings -value @{protocol="http";bindingInformation=$siteBindings}

Write-Host "IIS configuration complete!"
This script looks long, but is pretty simple when you read it - it checks whether the application pool exists and then creates or updates it, and then it does the same thing for the web site. This is all done using the IIS PowerShell modules.
The script uses two variables. The first is $OctopusEnvironmentName, which is passed by the Tentacle deployment agent to the script automatically, and in this example it will be “Staging” or “Production” (by the way, you can create as many environments as you like in Octopus Deploy).
The second variable is a custom one, $ColumbiaIisBindings. I use my web servers to host multiple sites, so I’m going to configure the IIS bindings to only listen on one host name.
- In Production, I’ll use
"columbia.octopusdeploy.com" - In Staging, I’ll use
"staging.columbia.octopusdeploy.com"
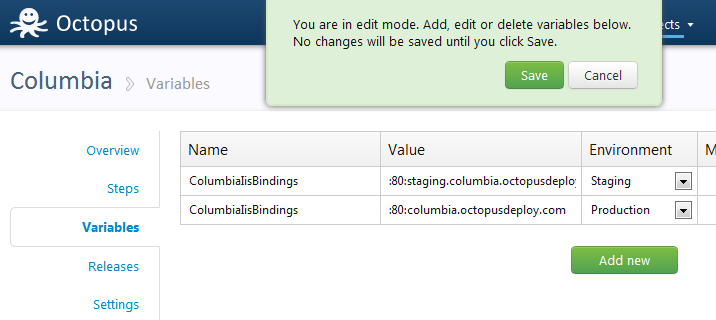
In the PowerShell script, you’ll notice I haven’t actually set a value for this PowerShell variable. Since it’s going to be different for each environment, how will I set it? The answer is Octopus variables.
I’ll define the two variables in the Octopus UI, setting the environment for each:
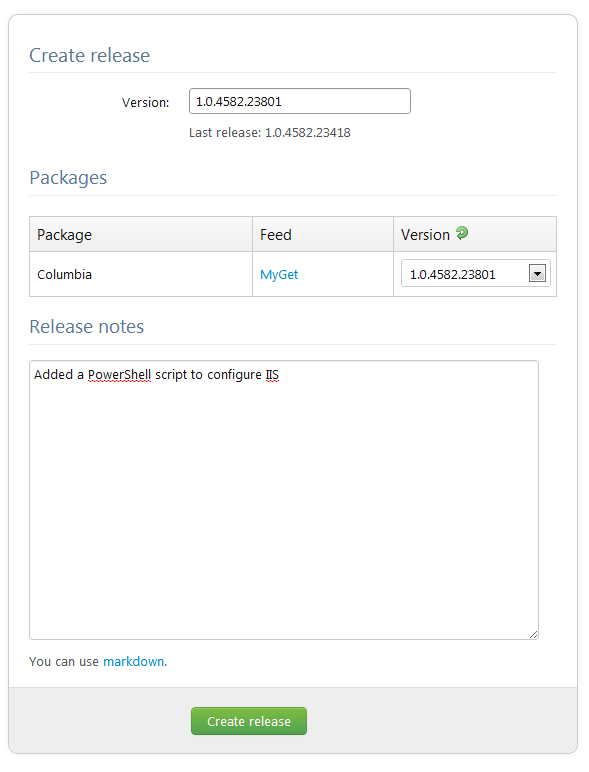
Finally, I’ll create a new release, and select the new package version:
Step 9: Re-deploy to staging
I’ll deploy it to staging again:
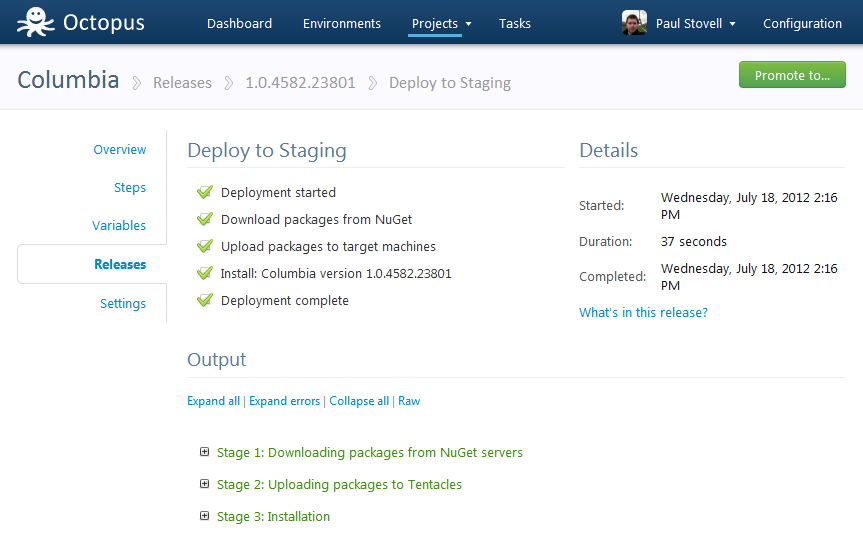
Expanding the deployment log, I can see the output of the PowerShell script:
2012-07-18 13:05:22 INFO   Calling PowerShell script: 'C:\Apps\Staging\Columbia\1.0.4582.23418\PostDeploy.ps1'
2012-07-18 13:05:37 DEBUG  Script 'C:\Apps\Staging\Columbia\1.0.4582.23418\PostDeploy.ps1' completed.
2012-07-18 13:05:37 DEBUG  Script output:
2012-07-18 13:05:37 DEBUG  App pool does not exist, creating...

Name                     State        Applications
----                     -----        ------------
Columbia-Staging         Started
Set .NET framework version: v4.0
Set identity...
Checking site...
Site does not exist, creating...

Name         : Columbia - Staging
ID           : 2
State        : Started
PhysicalPath : C:\Apps\Staging\Columbia\1.0.4582.23418
Bindings     : Microsoft.IIs.PowerShell.Framework.ConfigurationElement

Set app pool...
Set bindings...
IIS configuration complete!
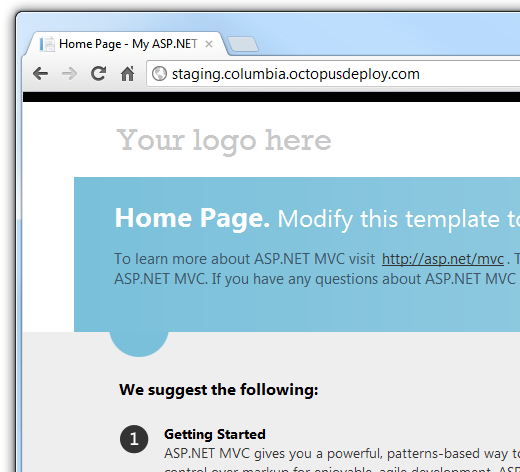
And if I browse the website, I’ll see:
Step 10: Deploy to production
Now that we’ve verified that the staging deployment works, let’s deploy it to production. When a deployment to one environment finishes, a promotion button appears:
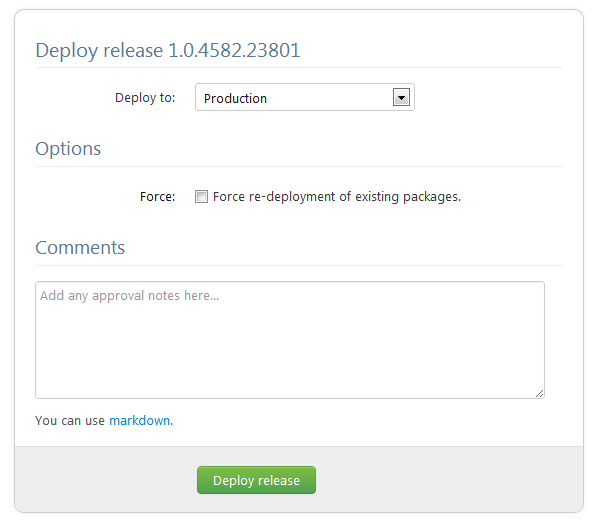
Clicking on it, let’s choose Production:
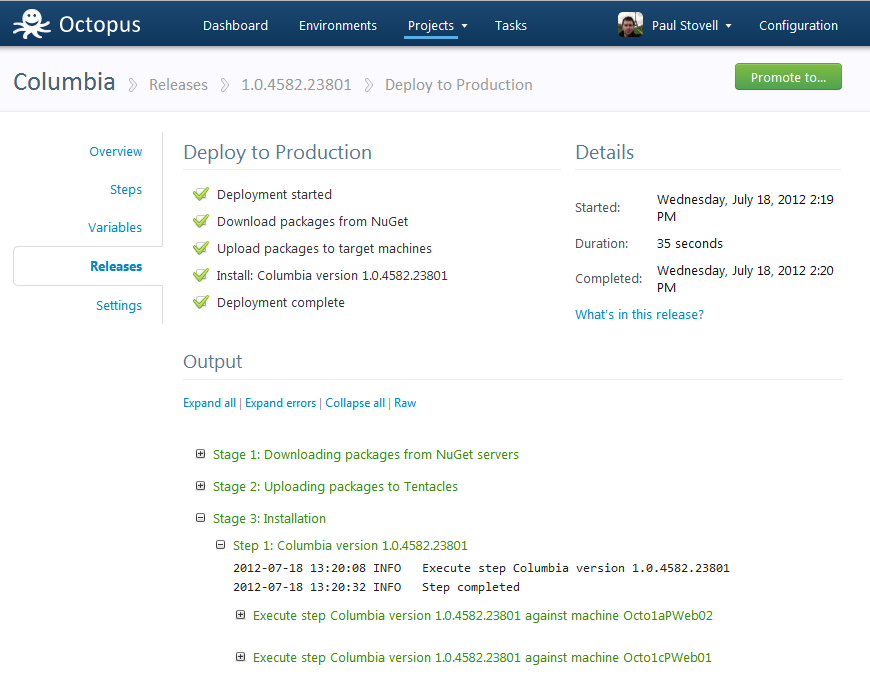
When the deployment completes, we can expand the third step to see that the package was in fact deployed to two machines, which sit behind an Amazon load balancer:
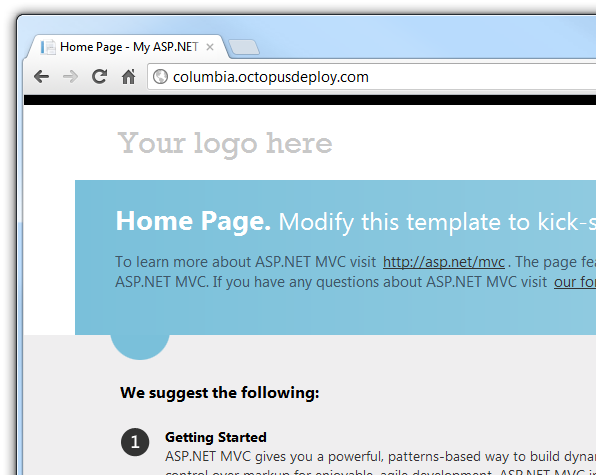
Let’s check out the production site:
Summary
In this post, I created an ASP.NET MVC 4 site, and checked it in to my hosted TFS Preview instance. Then, I used OctoPack to create NuGet packages from Team Build, using MyGet to host the packages. Finally, I configured Octopus to deploy the application to a staging machine, and two production machines.

Tying it back to my earlier image, we’ve extended TFS Preview to deploy to EC2 using Octopus. But it doesn’t stop there. Octopus was designed to be able to deploy to VM’s in the cloud, in private data centers, and even to machines under your desk. We’ve extended ALM to mean more than just “deploy to Azure web roles”. We’re now able to deploy to virtual machines hosted anywhere, and promote our releases across environments. Now that is continuous delivery.
Final thoughts on TFS Preview
As I said, I’ve used hosted versions of TFS 2010 before, and the experience was not good. However, TFS Preview has come a long way. There have been big improvements to the source control, and once I got used to the UI, it was really nice to work with. I’ll probably continue to use GitHub and TeamCity for most of my personal work, but I think Microsoft have created a really nice solution for enterprise developers. Give it a try.


