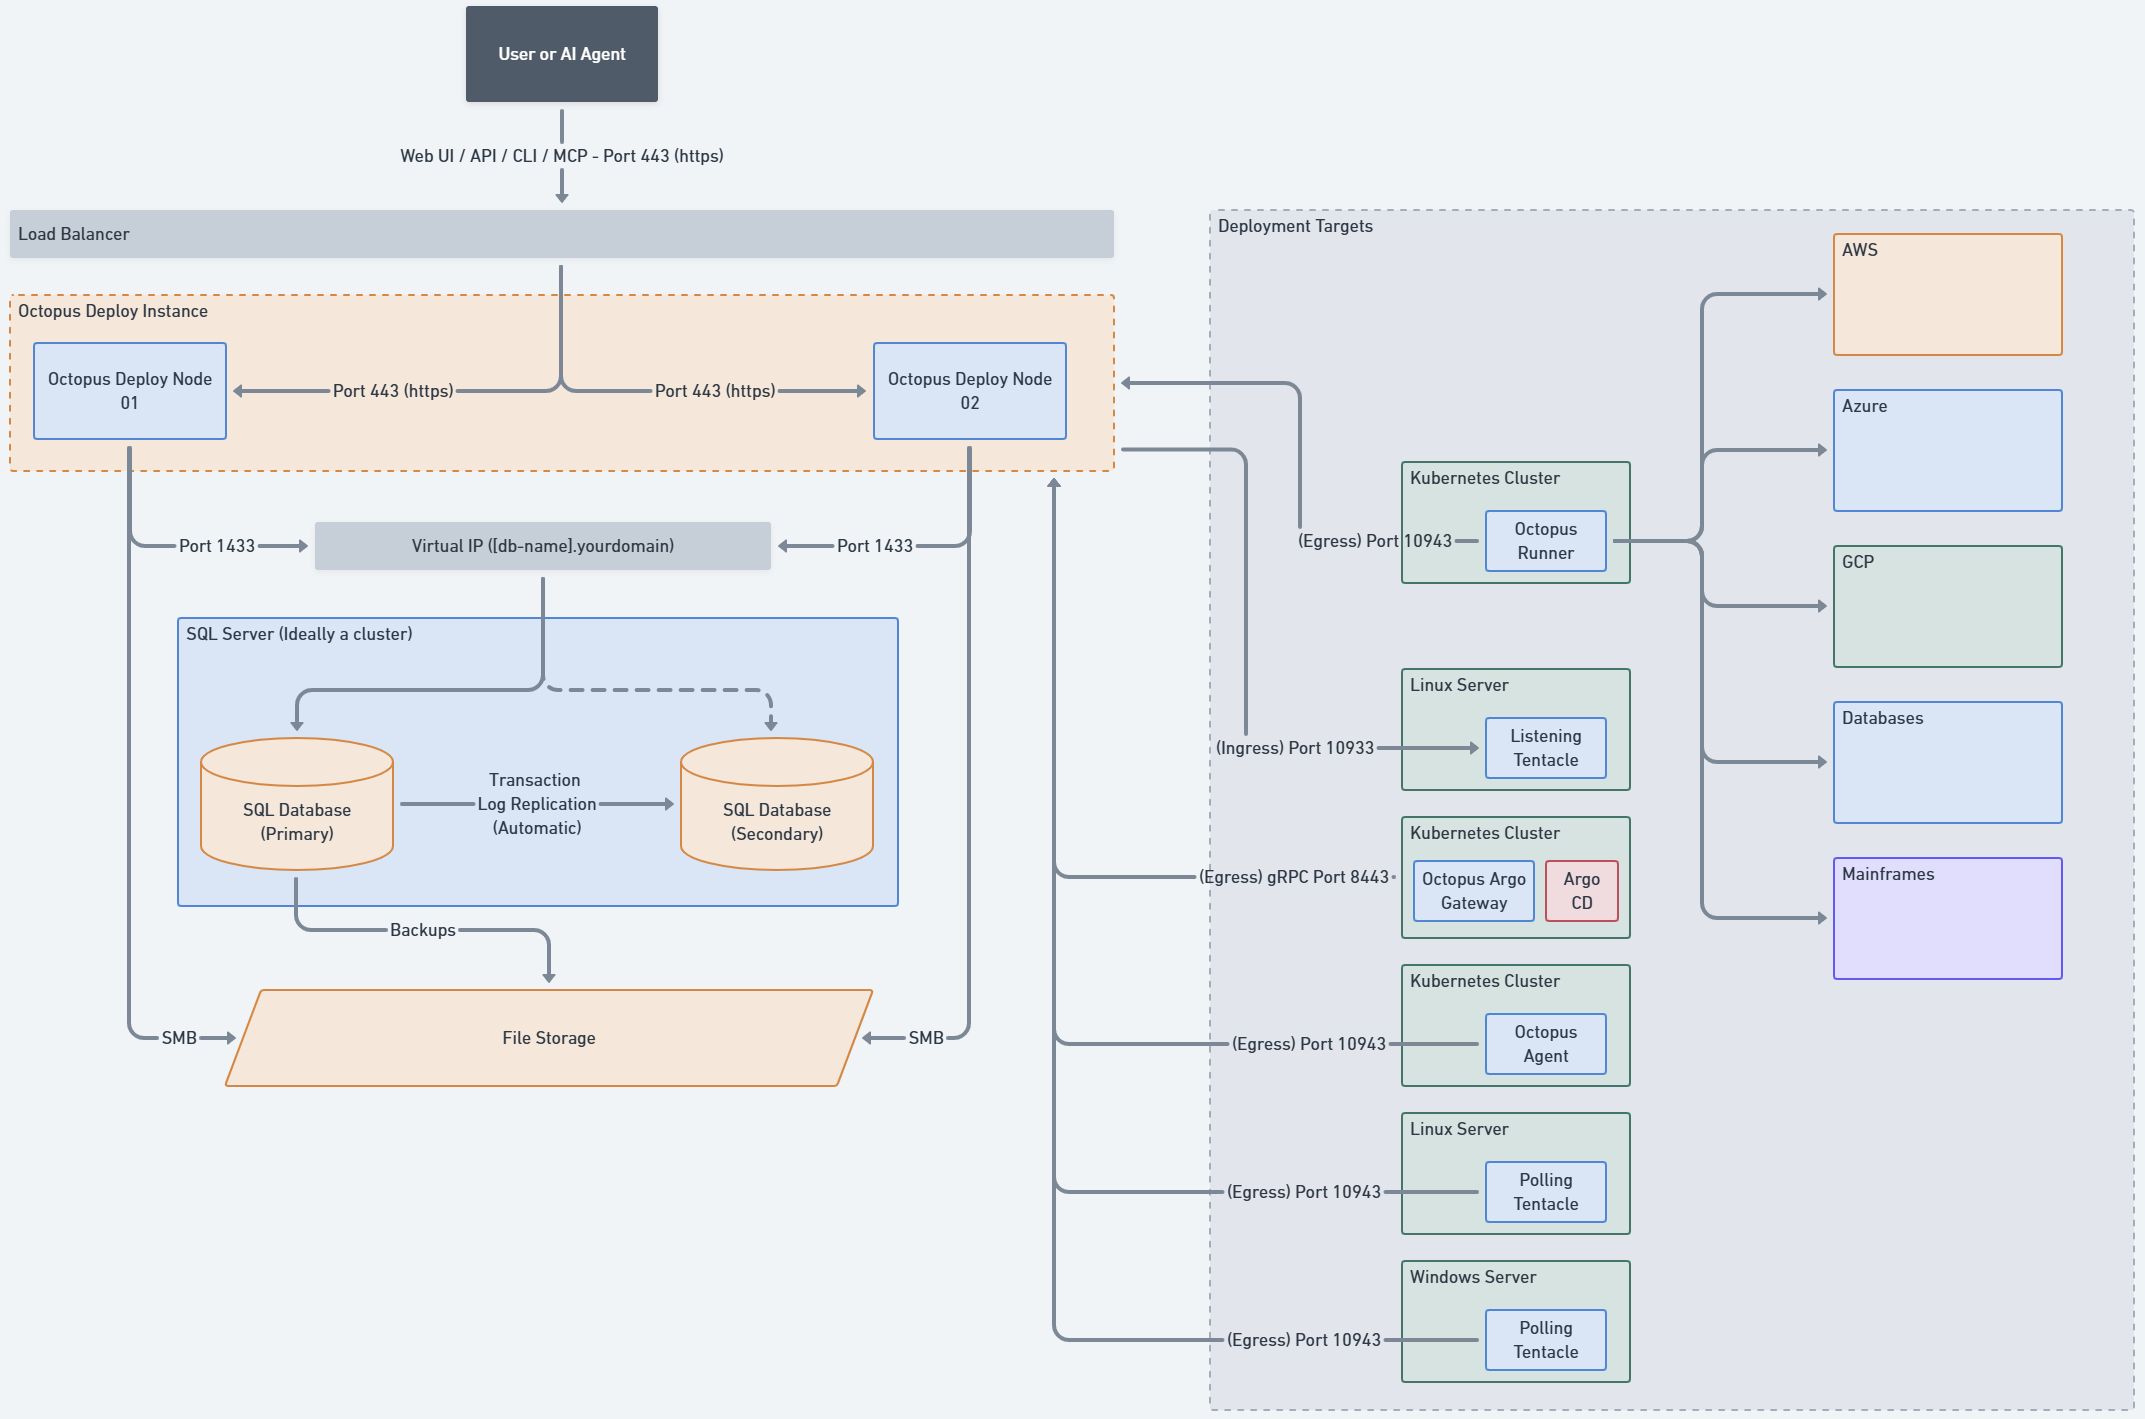
The Octopus Server is the deployment automation server where you define your deployment processes and runbooks and manage the releases of your software.
The Octopus Server includes the Octopus Rest API and the Octopus Web Portal.
You can use the Octopus REST API or the Octopus Web Portal to design your deployment processes and your releases, connect to the servers, services, and accounts where your software will be deployed, and to use runbooks to automate routine maintenance and emergency operations tasks like infrastructure provisioning, database management, and website failover and restoration.
Octopus Components
There are three components to an Octopus Deploy instance:
- Octopus Server Service This service serves user traffic and orchestrates deployments. Octopus Deploy supports running the service on Windows Server or as a Linux Container.
- SQL Server Database Most data used by the Octopus Server nodes is stored in this database. SQL Server 2016+ or Azure SQL is required.
- Files or BLOB Storage Some larger files - like packages, artifacts, and deployment task logs - aren’t suitable to be stored in the database and are stored on the file system instead. This can be a local folder, a network file share, or a cloud provider’s storage.
Relevant ports include:
- Inbound port 443/80 (http/https): Web Traffic UI / CLI / API / MCP Server
- Inbound port 8080: Container Host - service / load balancer to container
- Inbound port 443/80 (http/https): Windows Host - load balancer to Windows Server
- Inbound port 10943: Polling tentacles (Octopus Deploy agents) running on application hosts or runners (workers).
- Inbound port 8443 (gRPC): Octopus Deploy Argo CD Gateway and Kubernetes Live Object Status
- Outbound port 10933: Listening tentacles (Octopus Deploy agents) running on application hosts or runners (workers).
- Outbound port 22 (SSH): For application hosts or runners (workers).
When running Octopus Deploy as a container it is required to configure a load balancer or service to facilitate user web traffic to the user. All web traffic going to the container must be routed to port 8080.
When running Octopus Deploy on a Windows Server, the load balancer is optional, but highly recommended for production instances. For Windows Server hosts, leveraging a load balancer offers numerous benefits, including redirecting users to a maintenance page while the instance is down for upgrading, as well has making it easier to configure High Availability later. All web traffic going to Windows Servers can remain on the standard 443 or 80 ports. Or, another port can be selected.
Self-hosted Octopus Server
When installed, the self-hosted Octopus Server:
- Runs
- As a Windows Service called OctopusDeploy, installed via an MSI.
- In a Linux container.
- Stores its data in an SQL Server Database. (SQL Server Express is an easy way of getting started.)
- Includes an embedded HTTP server which serves the Octopus REST API and the Octopus Web Portal that you will use to manage your infrastructure, deployments, runbooks, and coordinate your releases.
Before you install Octopus Deploy, review the software and hardware requirements, and make sure you have access to an instance of SQL Server Database that you can use with Octopus Deploy.
Supported Octopus Deploy Server Versions
Each self-hosted major.minor release of Octopus Deploy will receive critical patches and support for a period of six months. For example, 2025.4 was released in December 2025 and will be supported through May 2026.
All new releases of Octopus Deploy will run in Octopus Cloud first for at least one quarter. As a result, Octopus Cloud is always at least one version ahead of the self-hosted version.
Because of that, we always recommend using the latest available release for your self-hosted installation of Octopus. Please see the Octopus.com/downloads to download the latest version of Octopus Deploy.
For more details, please refer to our blog post announcement from 2020, when we introduced this release cadence.
Install Octopus as a Windows Service
- Download the Octopus installer.
- Start the Octopus Installer, click Next, accept the Terms in the License Agreement and click Next.
- Accept the default Destination Folder or choose a different location and click Next.
- Click Install, and give the app permission to make changes to your device.
- Click Finish to exit the installation wizard and launch the Getting started wizard to configure your Octopus Server.
- Click Get started… and either enter your details to start a free trial of Octopus Deploy or enter your license key and click Next.
- Accept the default Home Directory or enter a location of your choice and click Next.
- Decide whether to use a Local System Account or a Custom Domain Account.
Learn more about the permissions required for the Octopus Windows Service or using a Managed Service Account.
-
On the Database page, click the drop-down arrow in the Server Name field to detect the SQL Server Database. Octopus will create the database for you which is the recommended process; however, you can also create your own database.
-
Enter a name for the database, and click Next and OK to create the database.
Be careful not to use the name of an existing database as the setup process will install Octopus into that pre-existing database.
-
Accept the default port and directory or enter your own and click Next.
-
If you’re using username and passwords stored in Octopus authentication mode, enter the username and password that will be used for the Octopus administrator. If you are using active directory, enter the active directory user details.
You can configure additional Authentication Providers for the Octopus Server after the server has been installed.
-
Click Install.
When the installation has completed, click Finish to launch the Octopus Manager.
Octopus Manager
Before you launch the Octopus Web Portal, it’s worth taking note of the other settings such as controlling the Octopus Windows Service, importing and exporting the data Octopus stores in the SQL server, and viewing the Master Key.
You can launch the Octopus Web Portal from the Octopus Manager, by clicking Open in Browser.
Save your Master Key
Under the storage section, you will see a link to View Master Key.
When Octopus is installed, it generates a Master Key which is a random string that is used to encrypt sensitive data in your Octopus database. You will need the Master Key if you ever need to restore Octopus.
Make a copy of the Master Key and save it in a secure location.
Warning
If you don’t have a copy of your Master Key and your hardware fails, you will not be able to recover the encrypted data from the database. Make a copy of the Master Key and save it in a secure location. Hopefully you will never need it, but you’ll be glad you have it if you ever do. Learn about Recovering After Losing Your Octopus Server and Master Key.
Run Octopus Server in a Container
Running Octopus Server inside a container lets you avoid installing Octopus directly on top of your infrastructure and makes getting up and running with Octopus as simple as a one line command. Upgrading to the latest version of Octopus is just a matter of running a new container with the new image version.
We are confident in the Octopus Server Linux Container’s reliability and performance. Octopus Cloud runs the Octopus Server Linux Container in AKS clusters in Azure. But to use the Octopus Server Linux Container in Octopus Cloud, we had to make some design decisions and level up our knowledge about Docker concepts.
We recommend the use of the Octopus Server Linux Container if you are okay with all of these conditions:
- You are familiar with Docker concepts, specifically around debugging containers, volume mounting, and networking.
- You are comfortable with one of the underlying hosting technologies for Docker containers; Kubernetes, ACS, ECS, AKS, EKS, or Docker itself.
- You understand Octopus Deploy is a stateful, not a stateless application, requiring additional monitoring.
We publish linux/amd64 Docker images for each Octopus Server release and they are available on DockerHub.
This section includes information about different options to run the Octopus Server Linux Container.
- Octopus Server Linux Container
- Migrating to the Octopus Server Linux Container
- Octopus Server Container in Kubernetes
- Octopus Server Container with Docker Compose
- Octopus Server Container with systemd
Launch the Octopus Web Portal
Click Open in browser to launch the Octopus Web Portal and log in using the authentication details you set up during the configuration process.
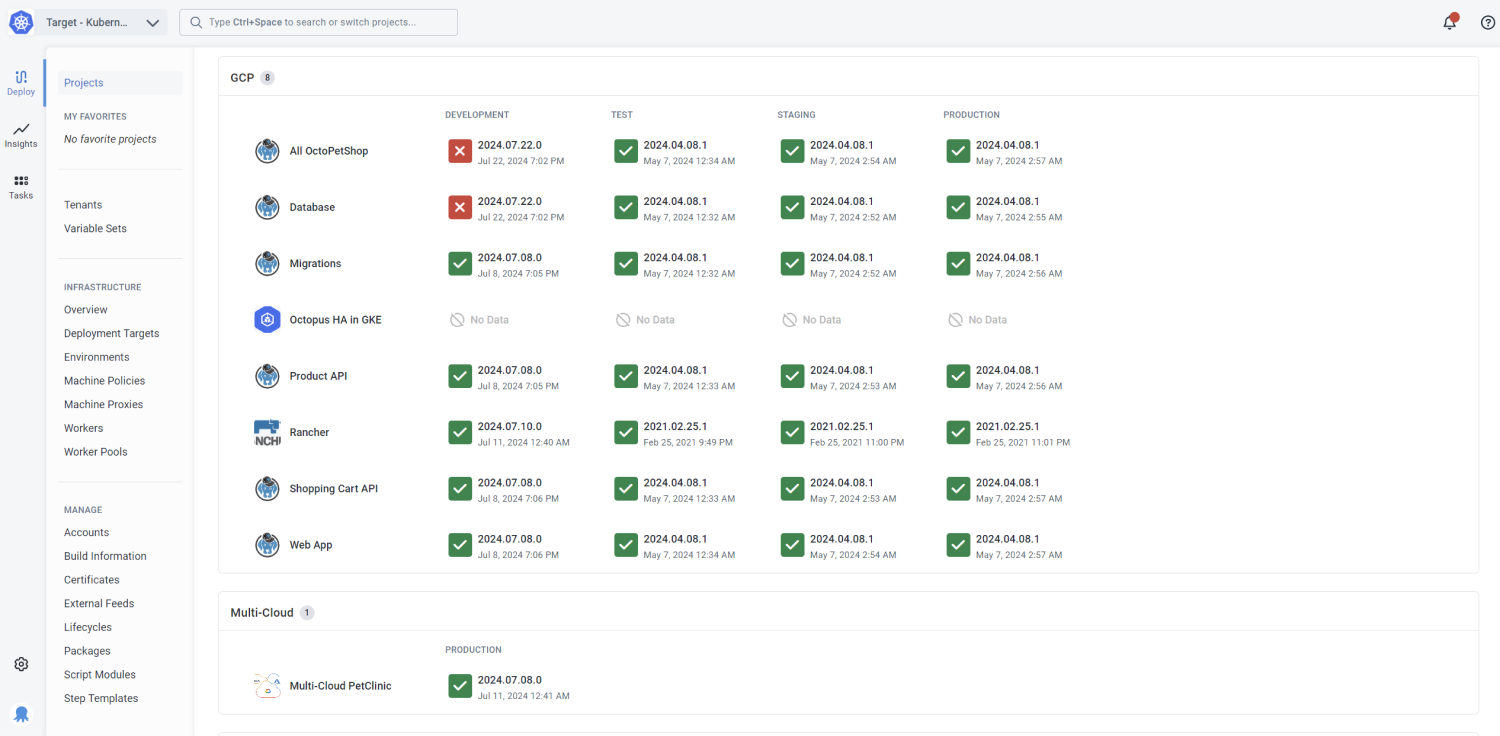
The Octopus Web Portal is where you’ll manage your infrastructure, projects, deployment process, access the built-in repository, and manage your deployments and releases.
Learn more
- Troubleshooting the Octopus installation
- Configure your infrastructure
- Upgrading guide
- Automating Octopus installation
Help us continuously improve
Please let us know if you have any feedback about this page.
Page updated on Wednesday, June 10, 2026