This page covers how to use tags with tenants. For general information about tag sets, types, and scopes, see Tag sets. From Octopus Cloud version 2025.4.3897 we’ve introduced SingleSelect and FreeText tag set types.
Tenant tags allow you to:
- Find tenants faster using tag filters.
- Group a project’s deployments overview by tag set.
- Deploy to multiple tenants at the same time.
- Customize deployment processes for tenants.
- Scope project variables to tenant tags.
- Design a multi-tenant hosting model - read more in our tenant infrastructure section.
- Design a multi-tenant deployment process for SaaS applications, regions and more - for further details, see our guides.
- Control which releases can be deployed to tenants using channels - read more in our tenant lifecycle section.
Tag-based filters
Once you have defined some tag sets and tags you can start leveraging those tags to tailor your environments and deployments.
Combinational logic
When filtering tenants, Octopus will combine tags within the same tag set using the OR operator, and combine tag sets using the AND operator.
Let’s take a look at an example:
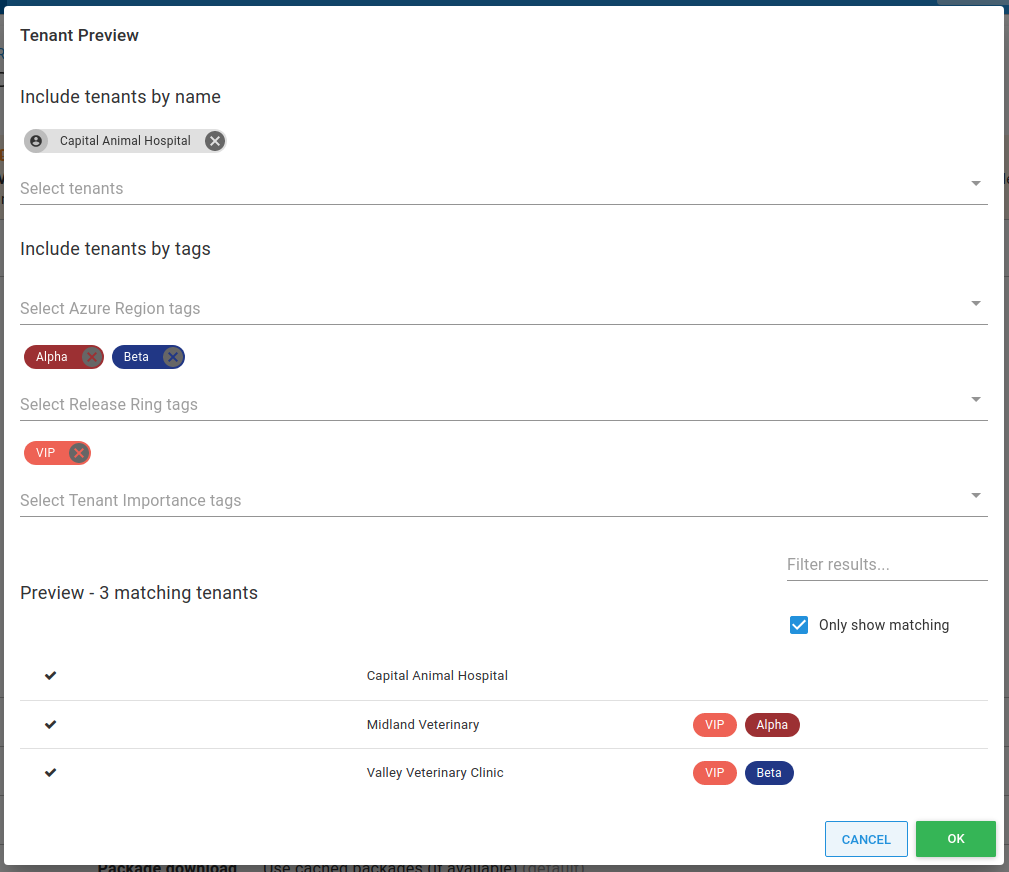
In this example Octopus will execute a query like the one shown below:
TenantsNamed("Capital Animal Hospital") UNION TenantsTagged(VIP AND (Alpha OR Beta))When paired with a well-structured tag design, this logic will enable you to tailor your tenanted deployments in interesting and effective ways.
Tips for working with tenant filters
- Only specify a tenant “by name” (explicitly) if you absolutely want that tenant included in the result, otherwise leave it blank
- A filter with tags in the same tag set will be more inclusive since they are combined using
OR - A filter with tags across different tag sets will become more reductive since they are combined using
AND
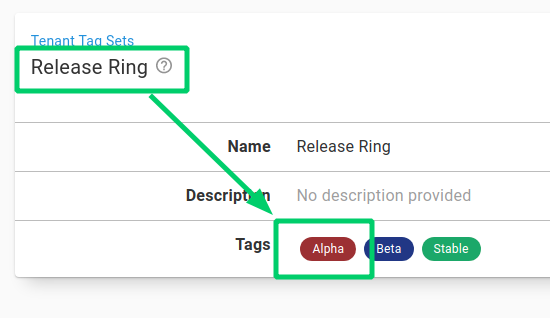
Referencing tenant tags
If you want to use tenant tags to automate Octopus Deploy you should use the canonical name for the tag which looks like this: Tag Set Name/Tag Name
Consider an example deploying a release to the tenants tagged with the Alpha tag in the Release Ring tag set.
# Deploys My Project 1.0.1 to all tenants tagged as in the Alpha ring
octopus release deploy --project "My Project" --version "1.0.1" --tenant-tag "Release ring/Alpha"
You can use tenant tags when:
- Deploying releases using build server integrations or the Octopus CLI.
- Scoping a deployment target to one or more tenants when registering a new Tentacle - read more in our tenant infrastructure section.
- Automating Octopus via the Octopus REST API.
For more information about canonical names and how to reference tags, see Tag sets.
Deploying to multiple tenants using tags
You can create tag sets specifically to help with deployments and rolling out upgrades. Often, you want to deploy targeted releases to your testers, and once they’ve finished testing, prove that upgrade with a smaller group of tenants before rolling it out to the rest of your tenants. This is also useful to split up a large number of tenants into smaller groups for deployment. We’ve outlined the steps to design this process using tenant tags:
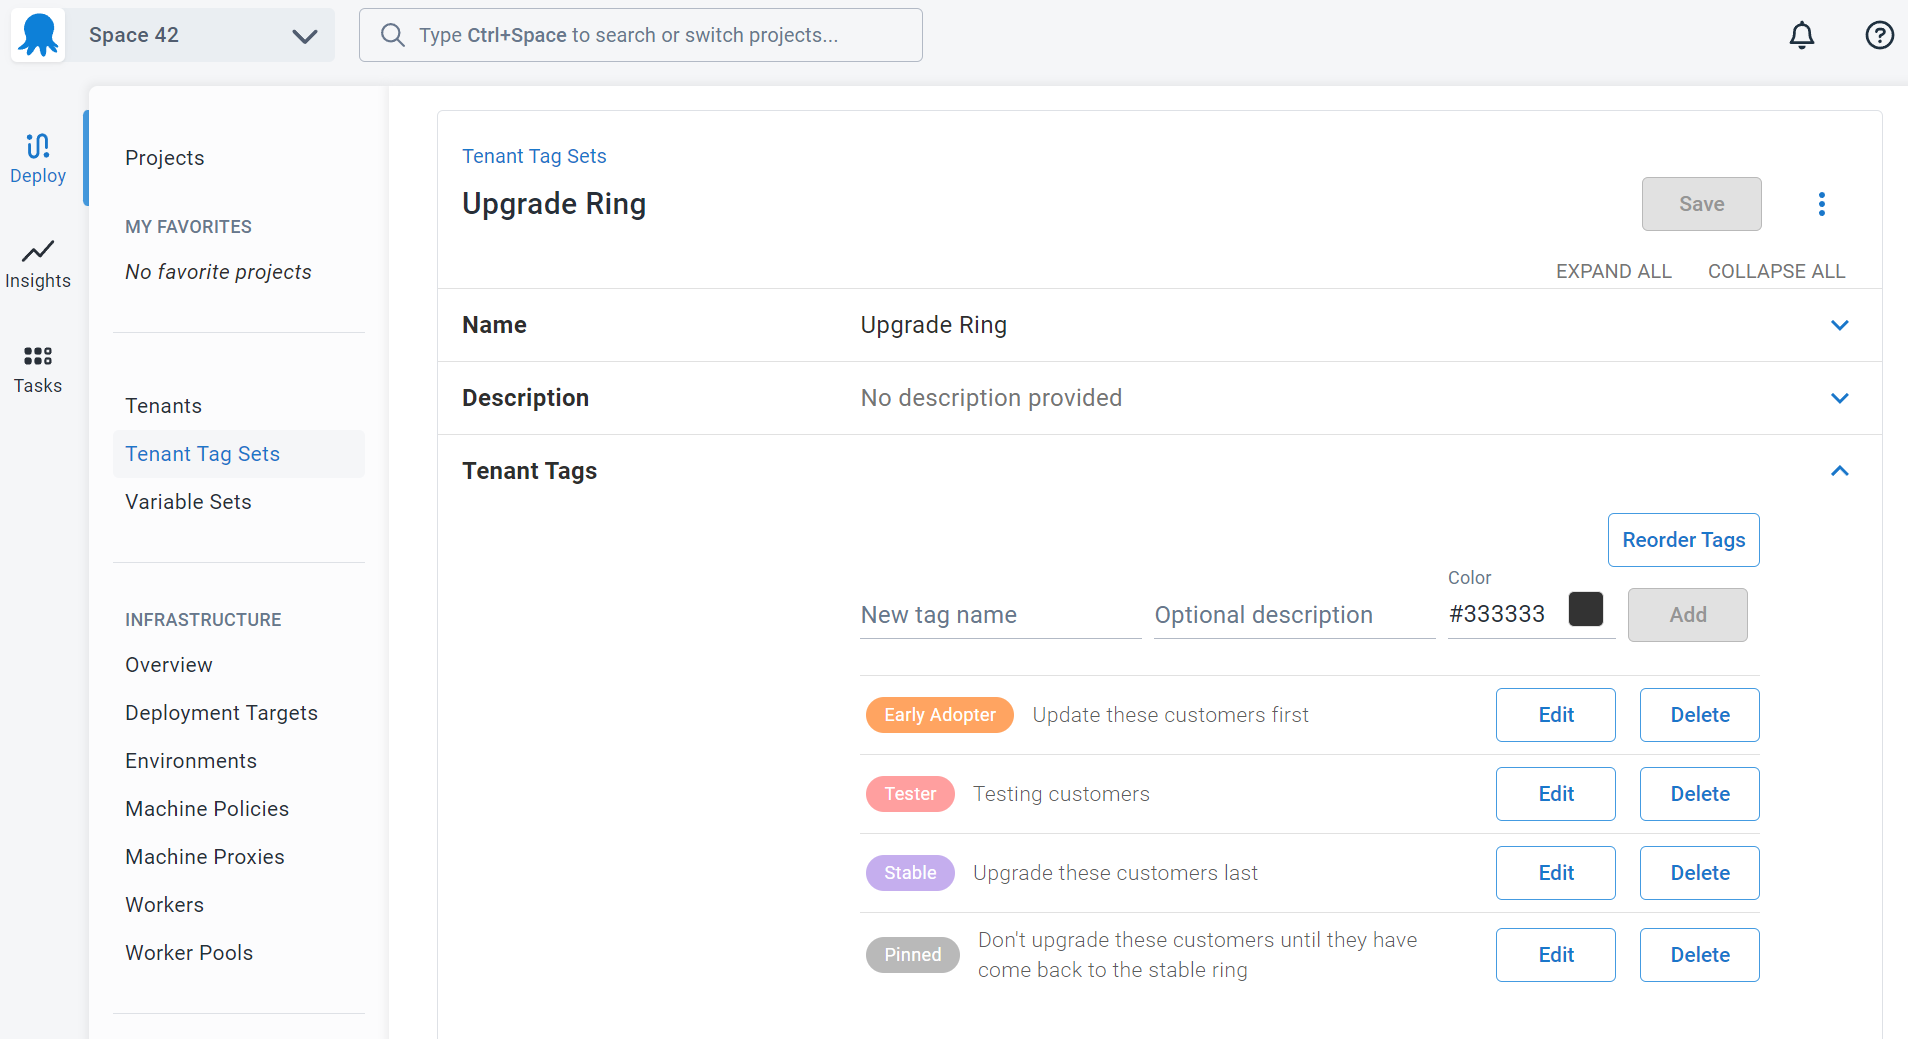
Step 1: Create a tag set called Upgrade Ring
First, create a tag set called Upgrade Ring with tags that allow each tenant to choose how early in the development/test cycle they want to receive upgrades.
- Go to Deploy ➜ Tag Sets and create a new tag set called Upgrade Ring.
- Add tags for Tester, Early Adopter, and Stable.
- Choose colors that highlight different tenants.
Learn more about creating and managing tag sets.
Step 2: Configure a test tenant
Either create a new tenant or configure an existing tenant. Tag your test tenant(s) with Tester - this tenant will receive upgrades before any other configured tenants.
Step 3: Configure some early adopter tenants and stable tenants
Optionally, configure some external tenants as opting into early or stable releases to see the effect. Find or create some tenants and tag them as either Stable or Early Adopter.
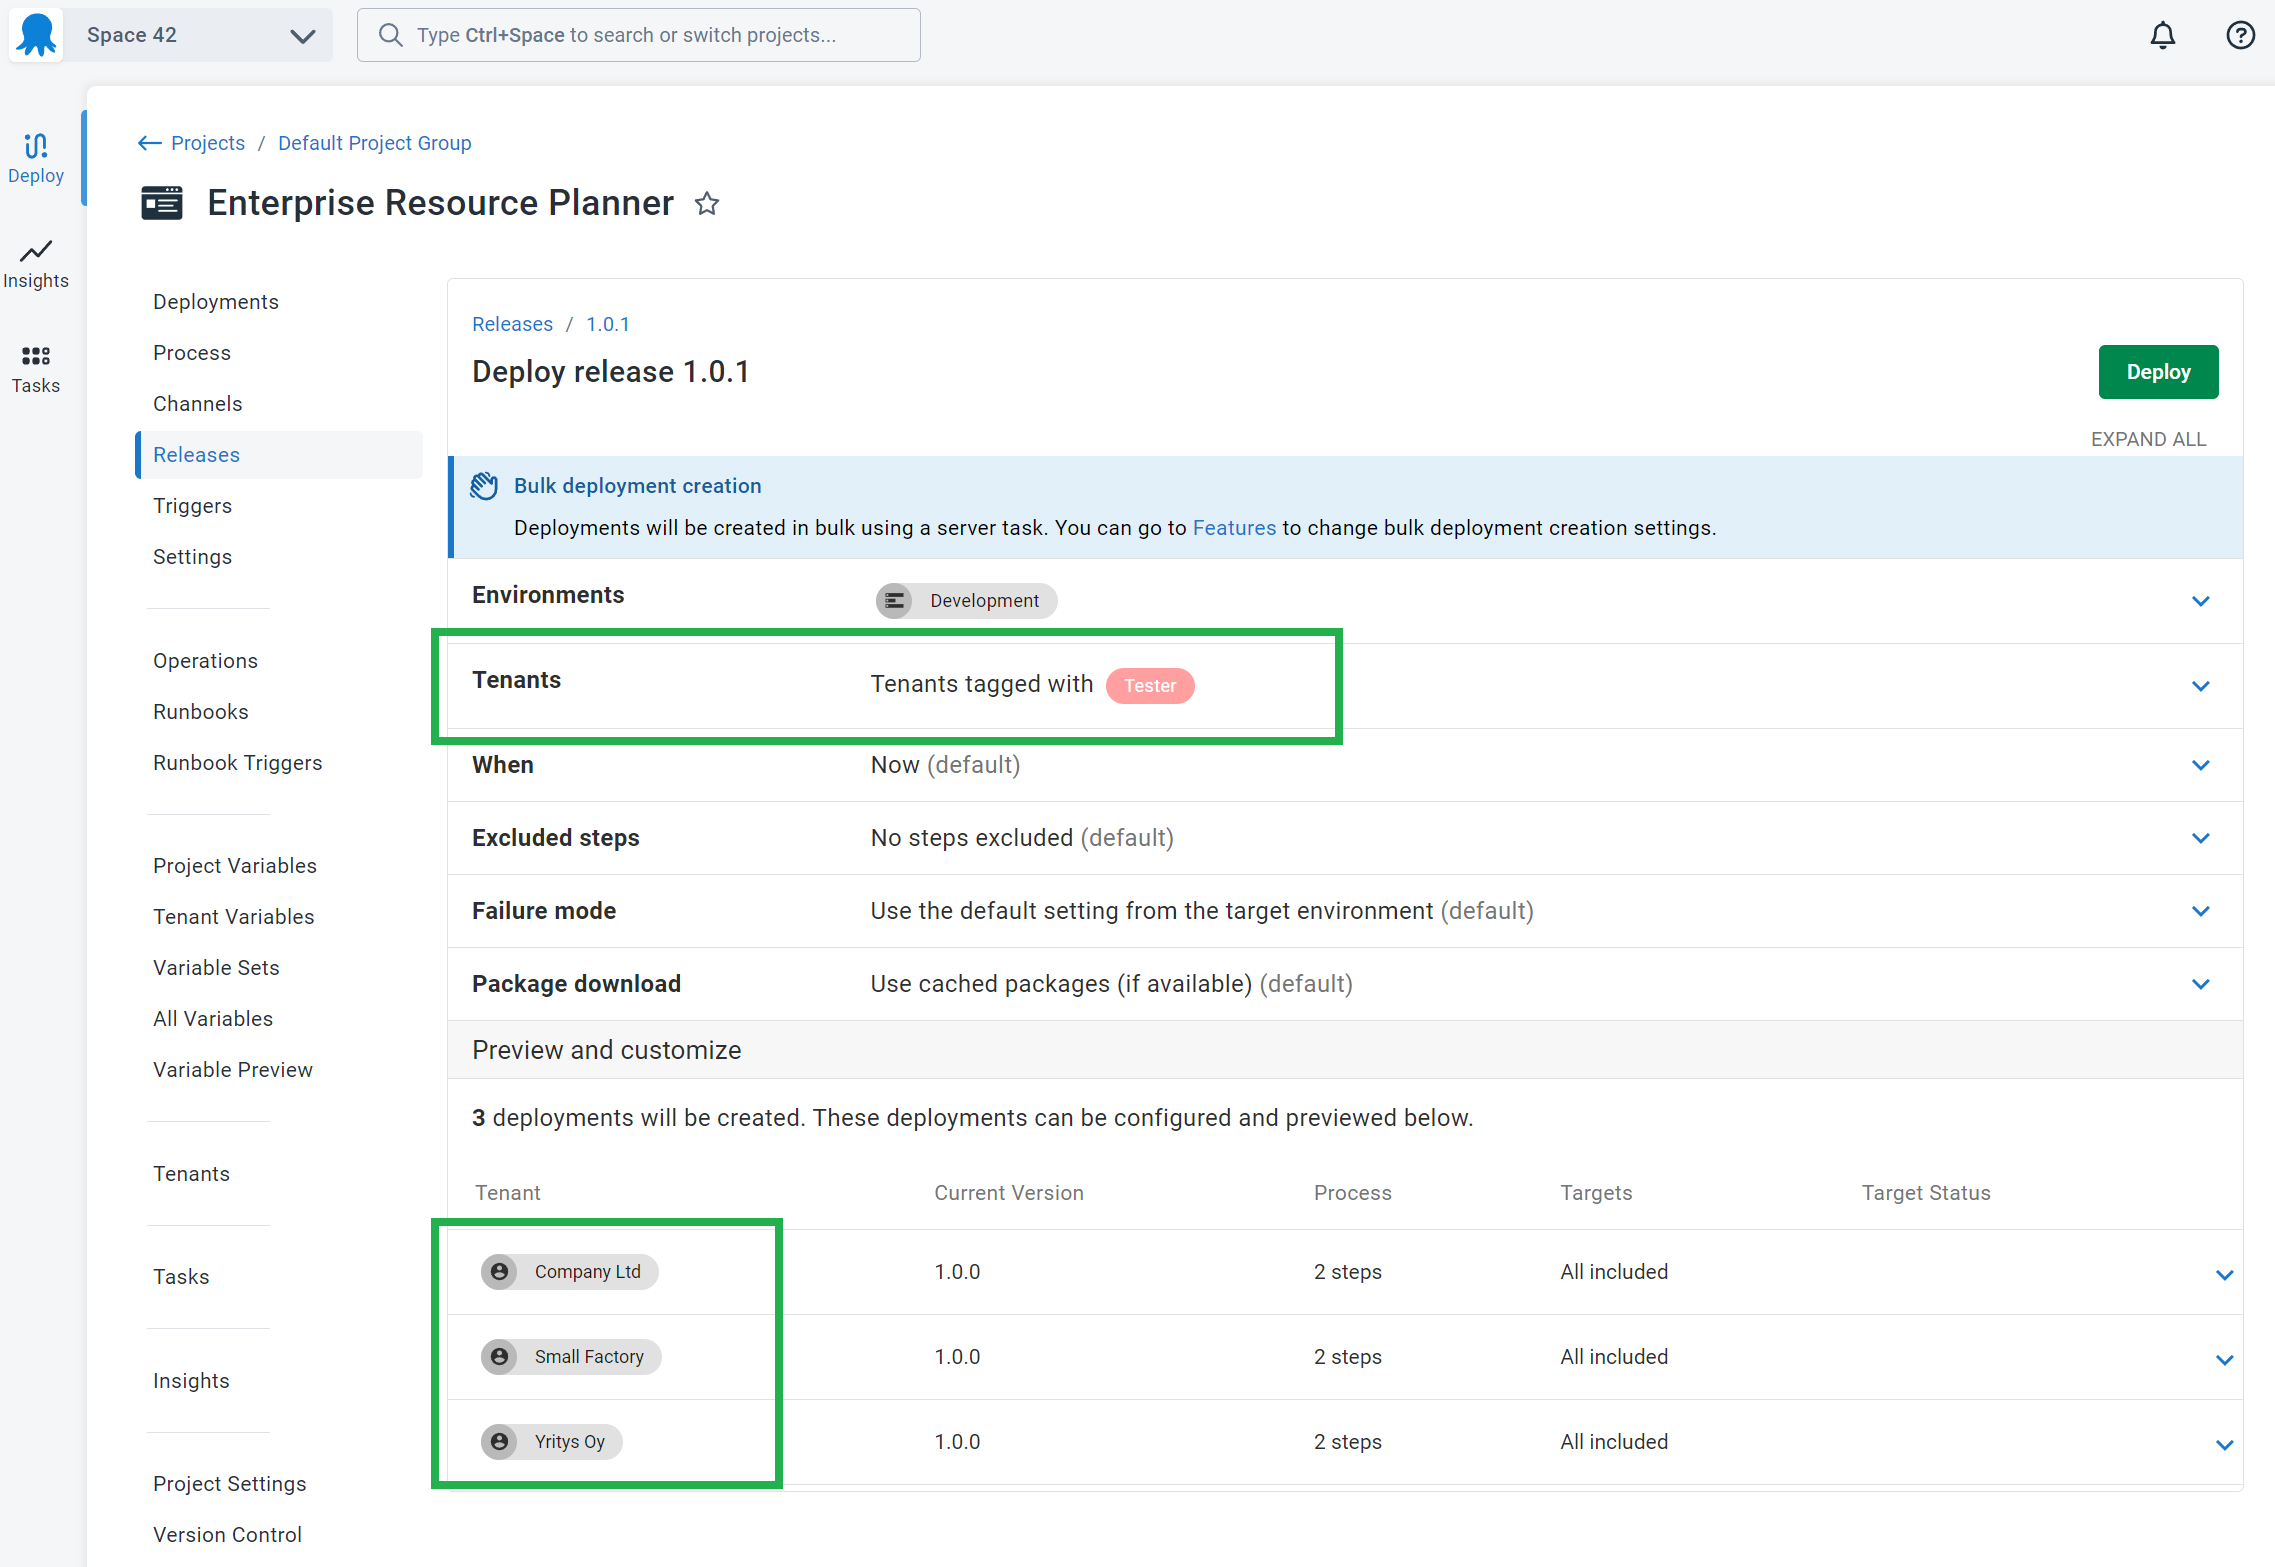
Step 4: Deploy
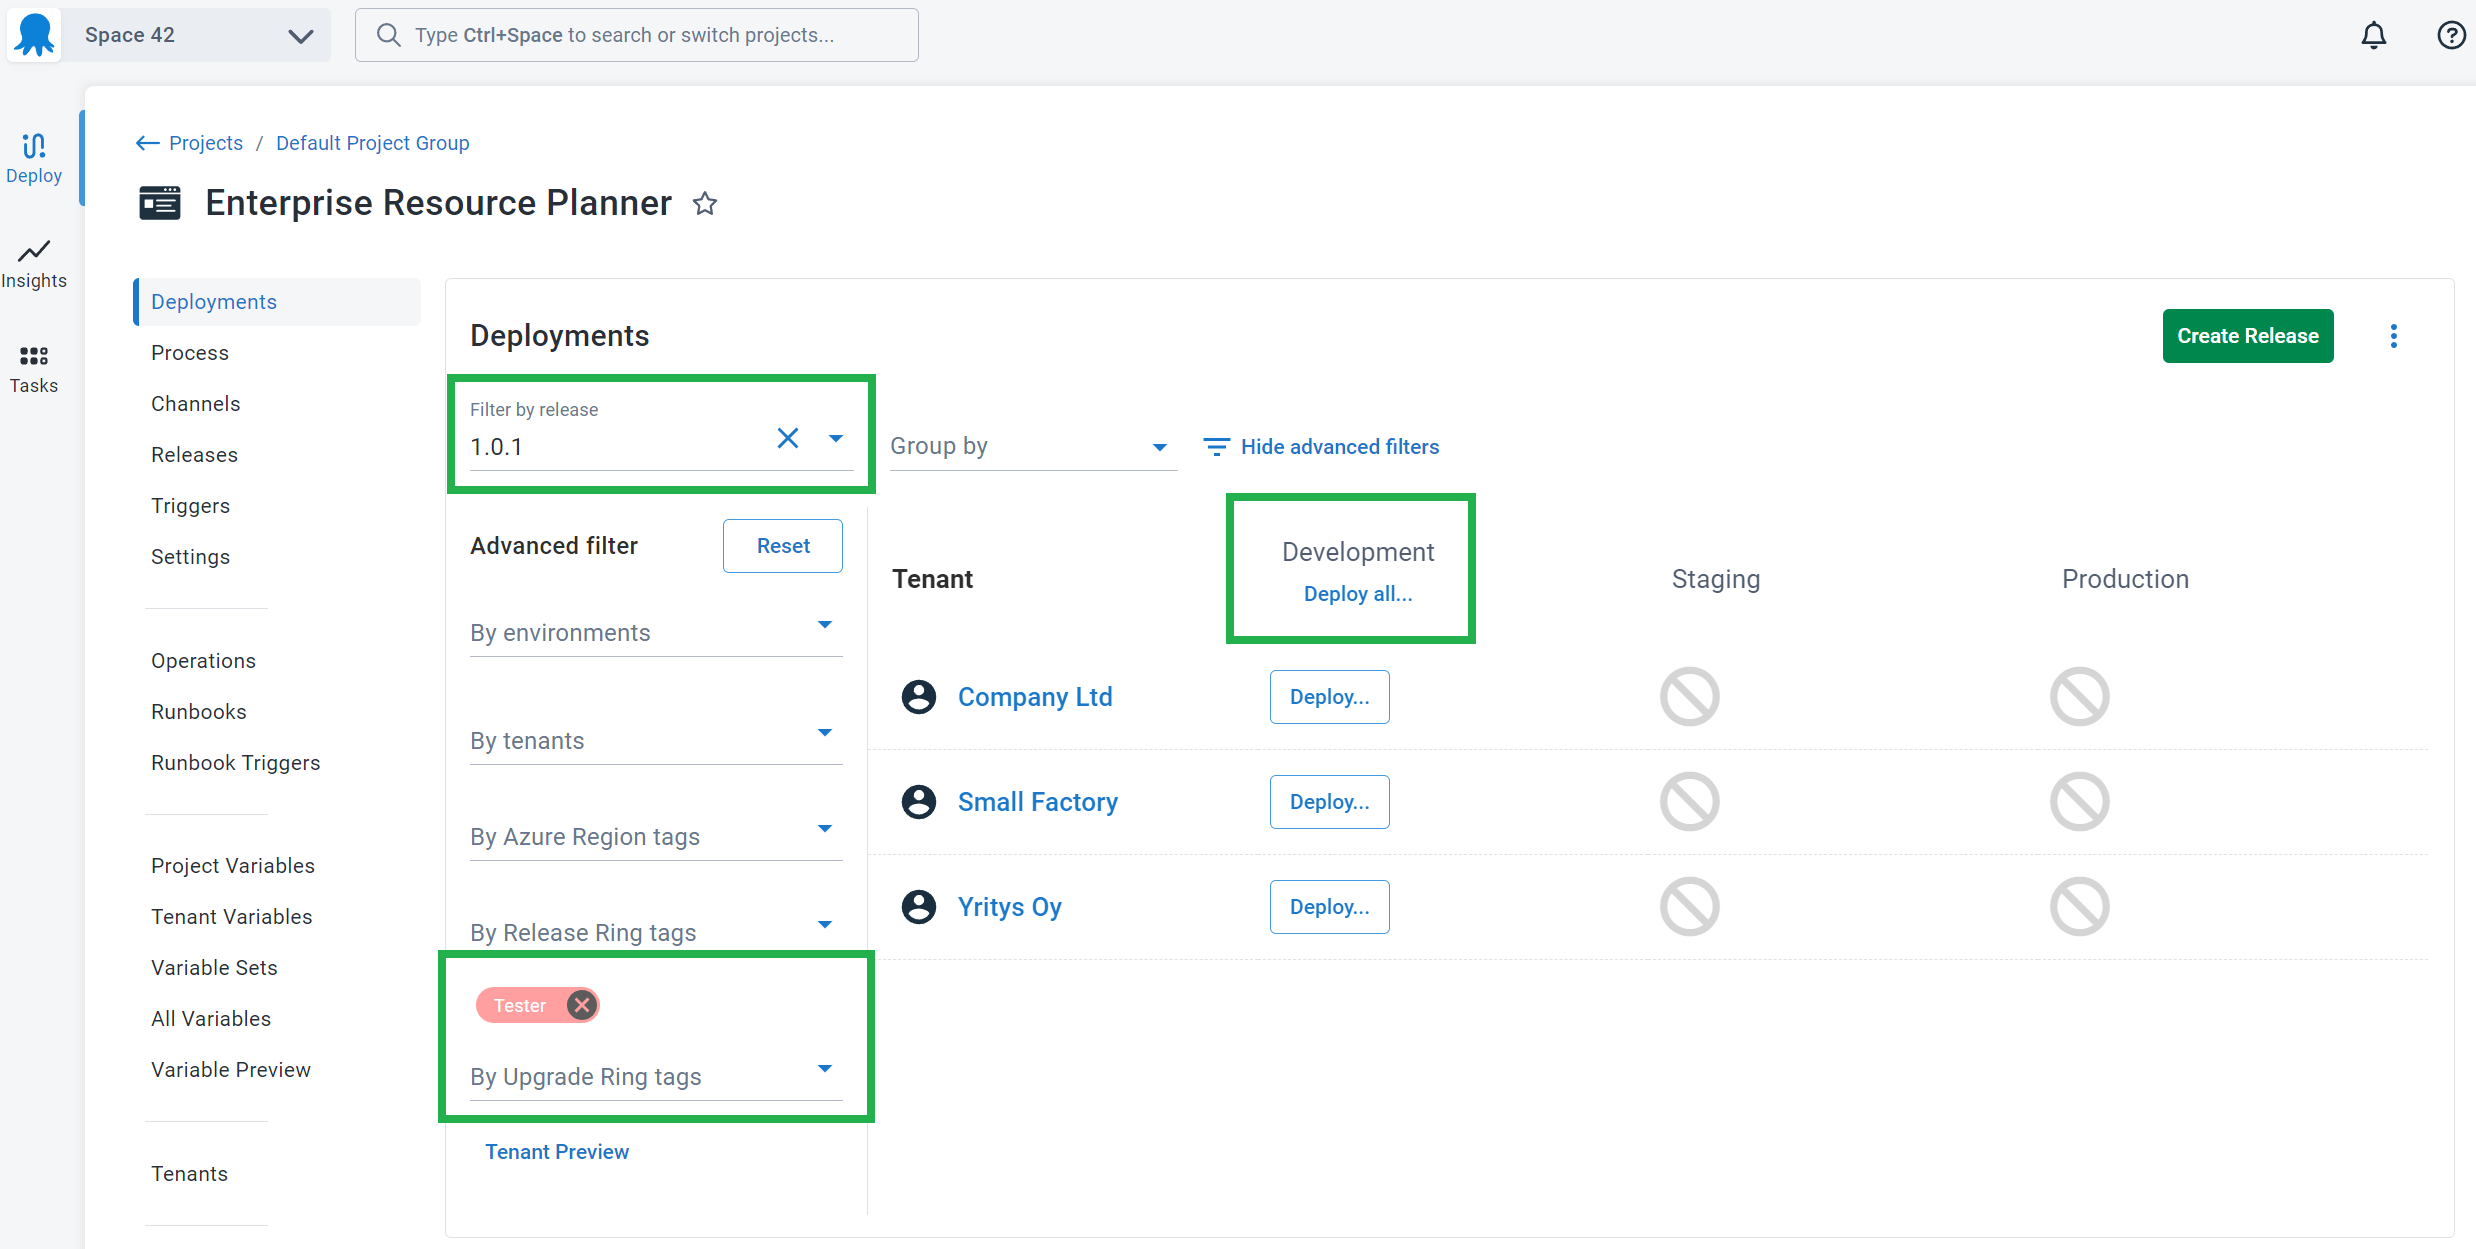
Now it’s time to deploy using tenant tags as a way to select multiple tenants easily. In this example, we will deploy version 1.0.1 to all tenants tagged with Tester who are connected to the Test environment. You can use multiple tags and complex tag queries to achieve other interesting scenarios.
You can also use the project overview to deploy to groups of tenants by grouping the dashboard, selecting a release, and clicking the Deploy all… button.
Learn more
- Tag sets - General information about tag sets, types, and scopes
- Deployment patterns blog posts
Help us continuously improve
Please let us know if you have any feedback about this page.
Page updated on Wednesday, October 8, 2025