This guide walks through the process of packaging a Node.js project into a tarball and deploying the application to a Linux based deployment target over an SSH connection.
The examples in this guide can be used with an AWS AMI instance of Ubuntu 14.04 LTS or an Azure VM running Ubuntu 14.04 LTS. Different base instances may require different configuration steps.
Configure your Linux deployment target
Your Linux deployment target needs to be configured to accept projects being deployed over SSH.
Install Mono
Starting with a fresh instance of Ubuntu 14.04, update the package repository and install mono-complete to get the latest stable version.
For the most up-to-date guide to installing mono see the mono documentation.
sudo apt-key adv --keyserver hkp://keyserver.ubuntu.com:80 --recv-keys 3FA7E0328081BFF6A14DA29AA6A19B38D3D831EF
echo "deb http://download.mono-project.com/repo/debian wheezy main" | sudo tee /etc/apt/sources.list.d/mono-xamarin.list
sudo apt-get update
sudo apt-get install mono-complete
Add user
Create a custom user account for the purpose of deployments.
Using a custom user account makes it easy to revoke the user’s credentials without affecting other users who access the machine. The following steps are intended to provide a basic level of security. You should familiarize yourself with the security features of the specific distribution you are using.
In this example we are going to create a simple user account with a password which will be used for both the deployment process and running the application process itself. You may want to use different accounts for each task.
sudo useradd -m octopus
echo octopus:<your-password> | sudo chpasswd
By default, the AWS Ubuntu AMI only allow authentication via SSH keys and not passwords. Passwords are typically less secure, but for the purposes of this guide we are going to enable passwords:
sudo sed -i.bak -e s/'PasswordAuthentication no'/'PasswordAuthentication yes'/g /etc/ssh/sshd_config
sudo restart ssh
Install the application dependencies
Install the dependencies your application requires. We will install Node.js, npm, and pm2 which are required to host the sample application.
Install Node.js and create the symlink /usr/bin/node so that it can be invoked with the command “node”:
sudo apt-get install nodejs
sudo ln -s /usr/bin/nodejs /usr/bin/node
To help manage the web process when it runs on the machine, we will install the pm2 library. The pm2 library is a node module and we will install it as a global module. This library is available in the npm repository which, if not already available, also needs to be installed:
sudo apt-get install npm
sudo npm install pm2 -g
Create and push a Node.js project
In this section we will package and publish a Node.js application to your Octopus Server from your development workstation.
You need Node.js and Git installed on your development machine with an Octopus Server instance available.
The sample project for this guide is a Node.js app that hosts the expressjs web server to serve some static content as well as return config variables that will be used by the client. There are several npm modules that you can use in a Node.js process to package your project and push it to an Octopus Deploy instance.
- @octopusdeploy/octopackjs: A module that packages resources into a number of package formats that can be saved to disk or returned as a stream.
- @octopusdeploy/gulp-octo: A gulp wrapper for octojs to integrate into Gulp based tasks.
- @octopusdeploy/grunt-octo: A grunt wrapper for octojs to integrate into Grunt based tasks.
To avoid confusion with the other octo themed npm packages and to provide guidance on those supported directly by Octopus Deploy, we’ve published these packages as scoped packages.
Scoped packages require npm version 2.7.0 or greater. The npm getting started guide provides further information.
Use the following command to verify which version of npm you’re currently running:
npm -vDownload and run the template
Download the sample project from the public GitHub repo and checkout the gulp branch:
git clone https://github.com/OctopusDeploy/octofxjs.git
cd octofxjs/
git checkout gulp
npm install
Build and start the process to ensure the site runs correctly:
npm run build
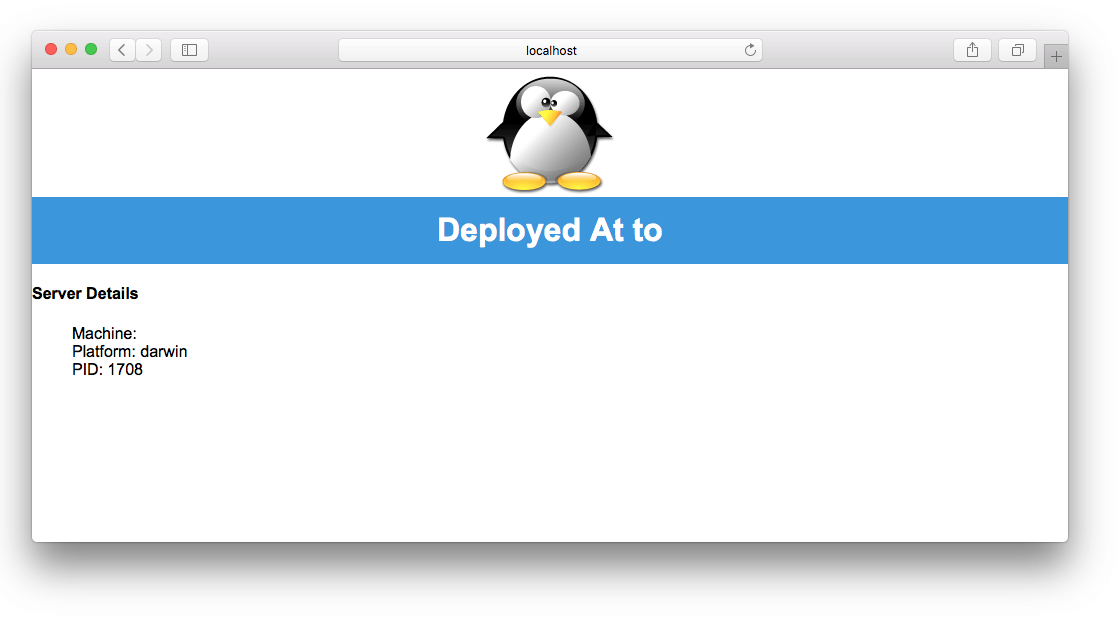
npm startIf the site runs correctly, when you navigate to http://localhost:8081 you should see a page with words that appear to be missing. These will be populated in the config files during the deployment.
Configure the publish task
Using the task runner of your choice, pick one of the following steps that you are most comfortable with:
Option 1 - Gulp publish task
Ensure you have checked out the gulp branch with the initial build tasks already configured, and install the gulp-octojs package that will package and push the application.
Install the external gulp-bump library to increase the patch version number before each publish. That way the server will retain previous builds, and we can easily manage and deploy each version in Octopus Deploy independently:
git checkout gulp
npm install
npm install --save-dev gulp-bump @octopusdeploy/gulp-octo
Modify the gulpfile.js file to add the following gulp tasks. Substitute the correct host address for your Octopus Server and an apiKey. See how to create an API Key.
var bump = require('gulp-bump');
var octo = require('@octopusdeploy/gulp-octo');

 ...

gulp.task('bump', function(){
  return gulp.src('./package.json')
      .pipe(bump({type: 'patch'}))
      .pipe(gulp.dest('./'));
});

gulp.task('publish', ['bump', 'build'], function () {
  return gulp.src(['**/*', '!bin{,/**}', '!src{,/**}', '!gulpfile.js'])
      .pipe(octo.pack())
      .pipe(octo.push({apiKey: 'API-YOUR-KEY', host: 'http://10.0.0.134'}));
});
Note, you are packaging the resources that are needed to run the application, and the node_modules directory, but you can ignore source and build files. We recommend including the node_modules directory so that you are not relying on external repositories to return the same packages during deployment that you used during development.
Add the gulp publish script to the package.json scripts section:
"scripts": {
    ...
    "publish": "node ./node_modules/gulp/bin/gulp.js publish"
  },
You can now execute the publish command directly through npm even if the task runner or arguments change.
Option 2 - Grunt publish task
Ensure that you have checked out the grunt branch with the initial build tasks already configured, and install the grunt-octojs package that will package and push the application.
Install the external grunt-bump library to increase the patch version number before each publish. That way the server will retain previous builds and we can easily manage and deploy each version in Octopus Deploy independently.
We will also install the grunt-contrib-clean library to clean the build output directory to avoid pushing the same packages on each publish:
git checkout grunt
npm install
npm install --save-dev grunt-bump grunt-contrib-clean @octopusdeploy/grunt-octo
Modify the gruntfile.js file to add the following grunt tasks. Substitute the correct host address for your Octopus Server and an apiKey. See how to create an API Key.
grunt.initConfig({
	...
	"octo-push": {
		options: { host: 'http://10.0.0.134', apiKey: 'API-YOUR-KEY'	},
		src: ['./bin/**/*']
	},
	"octo-pack": {
		prod: {
			options: { dst: './bin' },
			src: ['**/*', '!bin{,/**}', '!src{,/**}', '!gruntfile.js']
		}
	},
	bump: {
		options: { files: ['package.json'], commit: false, createTag: false, push: false }
	},
	clean: { pkg: ['./bin/**/*'] }
});

grunt.loadNpmTasks('@octopusdeploy/grunt-octo');
grunt.loadNpmTasks('grunt-contrib-clean');
grunt.loadNpmTasks('grunt-bump');
grunt.registerTask('publish',  ['bump', 'build', 'clean:pkg',  'octo-pack:prod', 'octo-push']);

...
Add the npm publish script using the grunt task runner:
"scripts": {
    ...
    "publish": "node ./node_modules/grunt-cli/bin/grunt publish"
  },
You can now execute the publish command directly through npm even if the task runner or arguments change.
Option 3 - Bespoke
Using the octopackjs npm module you can write your own Node.js scripts to package and push your projects to the Octopus Server (both the Gulp and Grunt tasks leverage this module). Alternately, package your files into the format of your choice and push to the API over a HTTP call using whatever framework or language best suits you.
Publish package
Next, publish the project package to the Octopus Server with the following command:
npm run publishThe command can be run as many times as you like. With each invocation the minor version will be bumped up and a new package will be ready to be deployed from the built-in package feed in your Octopus Deploy instance.
While this guide executes the publish task from your local machine, we recommend configuring your build server to automate the process.
Configure Octopus Deploy project
Next, you need to configure your Octopus project to deploy a Node.js application to your Linux deployment target.
Configure an environment
- Navigate to Infrastructure ➜ Environments, and create an Environment called prod.
Configure account and target
- Navigate to Deploy ➜ Manage ➜ Accounts, click Add Account, select username/password from the drop-down menu, and add the username credentials for the Linux deployment target you configured earlier.
- Navigate to Infrastructure ➜ Environments, select the prod environment, click Add deployment target, and select SSH Connection.
- Enter the IP address of the machine that is accessible to the Octopus Server. In our case below it’s the public IP provided by Azure/AWS.
- Click Discover to automatically pre-populate the SSH fingerprint for the remote server.
- Continue to fill out the rest of the details, selecting the account you created above.
More information about working with Linux deployment targets see SSH Targets or Linux Tentacles.
Create deployment project
The next step is to create a project that will extract the package.
- Navigate to the Projects page via Projects ➜ All and then click Add Project.
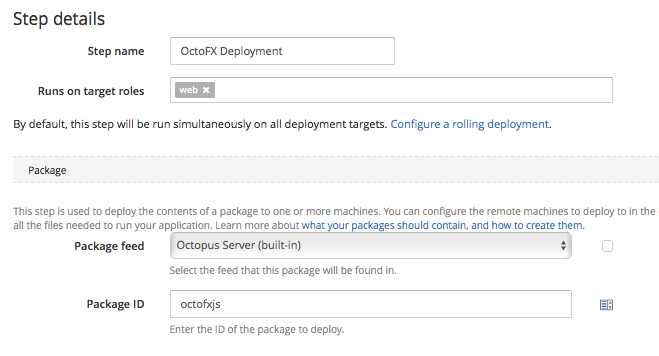
- Give the new project an appropriate name, save the project, and navigate to the project’s Process page and click Add Step ➜ Deploy a Package.
Ensure the target tag matches the target tag that was associated with the machine in the previous step and select octofxjs as the Package ID. This Package ID is derived from the first section of the package that was previously uploaded.
Variable substitution
- Click the Configure features link on the step.
- Disable the two configuration steps that are selected by default.
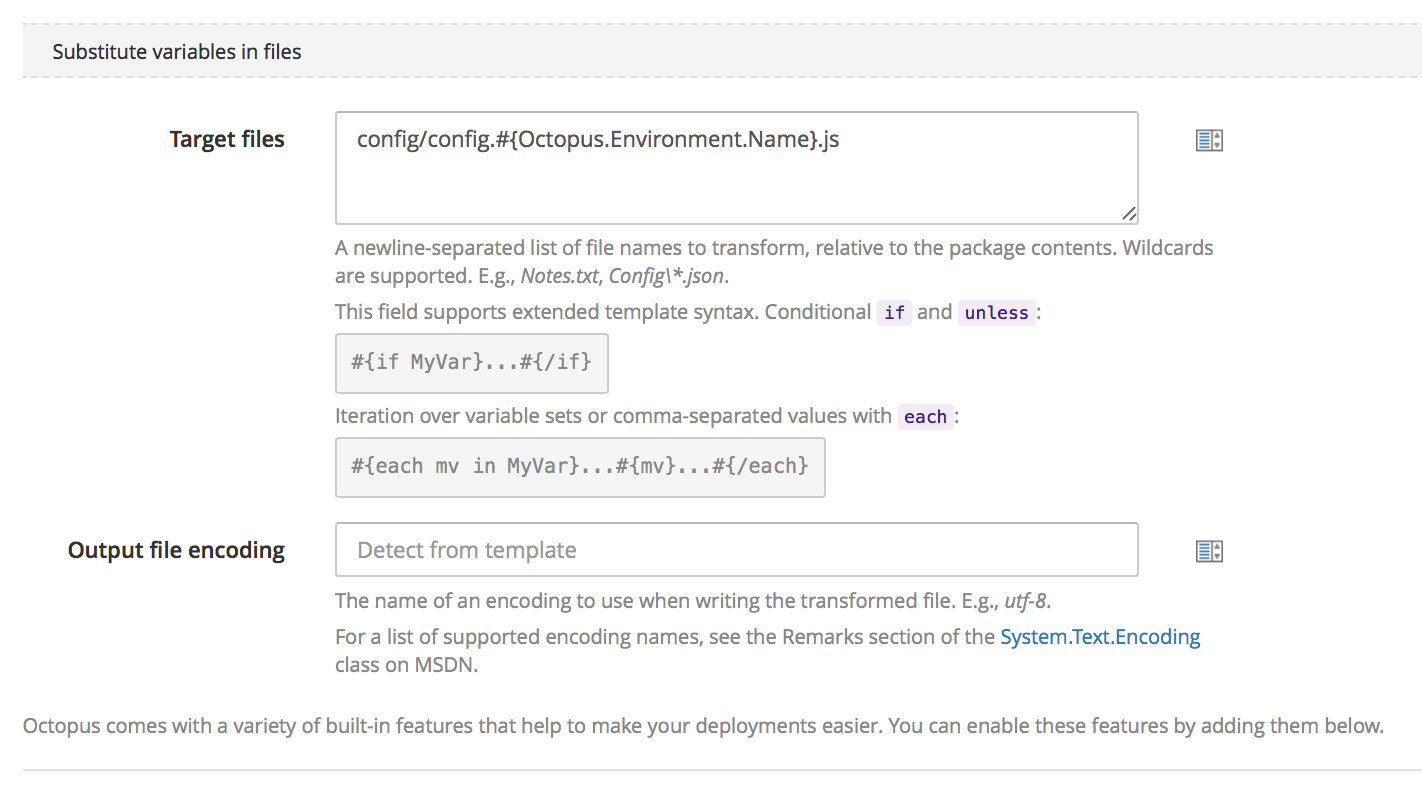
- Enable the Substitute variables in templates feature.
- Enter
config/config.#{Octopus.Environment.Name}.jsas the substitution target file.
- Navigate to the Variables section and add a new variable named projectVariable with some text to appear underneath the title bar on the web page, but leave the variable un-scoped, and click Save.
Starting and managing the process
To avoid having to manually start and stop the Node.js process every time you deploy a new version of the package, install and use a process manager, such as pm2, StrongLoop, or forever, which keep the process alive and provide other features, such as monitoring resource usage and clustering. For the purposes of this example we are using pm2 to demonstrate how the web process might be hosted.
- Click the Configure features link in the step and enable the Custom deployment scripts feature.
- Add the following code as a bash script for the post-deployment phase:
# Check if process is running from previous deployment
# and if so then remove so new version can be added
pm2 show "#{Octopus.Project.Name}" 1>/dev/null 2>1
rc=$?; if [[ $rc -eq 0 ]]; then
    echo Killing Old Process
    pm2 stop "#{Octopus.Project.Name}"
    pm2 delete "#{Octopus.Project.Name}"
fi
echo Starting New Process
NODE_ENV="#{Octopus.Environment.Name}" pm2 start server.js --name="#{Octopus.Project.Name}"
While this code is not the ideal solution, it does demonstrate how you might leverage pm2 to start and stop new versions of your project as it is deployed. Check the pm2 documentation for best practices and more advanced topics like restarting after a server reboot, clustering, and monitoring.
Deploy
- Create a new release and deploy it to the prod environment.
The package will be uploaded to the server and unpacked, and the environment specific variables will be replaced in the appropriate config file. With the custom post-deployment script, the service will then be started, passing in the correct environment to ensure the relevant config is loaded. Assuming you have followed the previous steps to this guide you can now make changes to your website, publish directly to Octopus and have it deploy as many times as you like.
Navigating to the host machine after deploying to the prod environment will result in a page similar to:
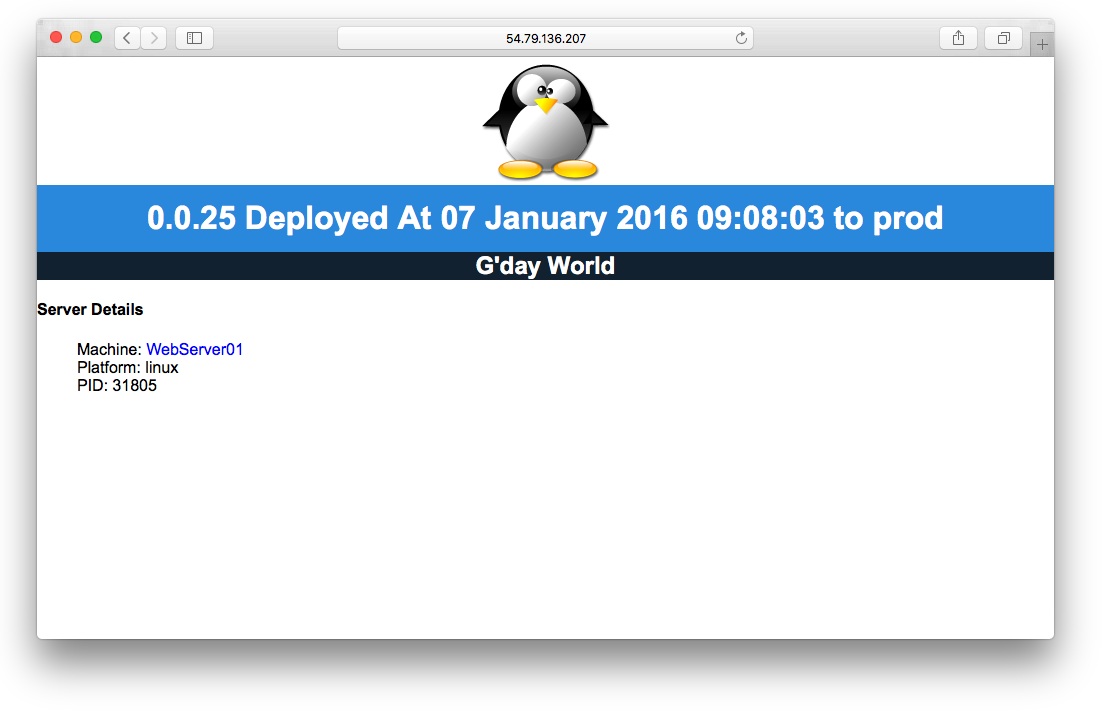
Trouble browsing to your site? You may need to allow inbound network traffic over Port 80 which isn’t normally allowed by default in either Azure or AWS.
Learn more
- Generate an Octopus guide for Node and the rest of your CI/CD pipeline.
Help us continuously improve
Please let us know if you have any feedback about this page.
Page updated on Thursday, June 27, 2024