The Deploy a VHD step requires the target Machine to be running Windows Server 2012 or newer, and the Tentacle service to have Administrator privileges.
Octopus Deploy has built-in support for deploying Virtual Hard Drives. The feature allows you to deploy a package containing a VHD while taking advantage of Octopus features such as variable substitution in configuration files or running .NET configuration transforms on files within the VHD. Octopus can then optionally attach the VHD to an existing Hyper-V virtual machine.
Adding a VHD step
To deploy a Virtual Hard Drive, add a Deploy a VHD step. For information about adding a step to the deployment process, see the add step section.
Configuring the step
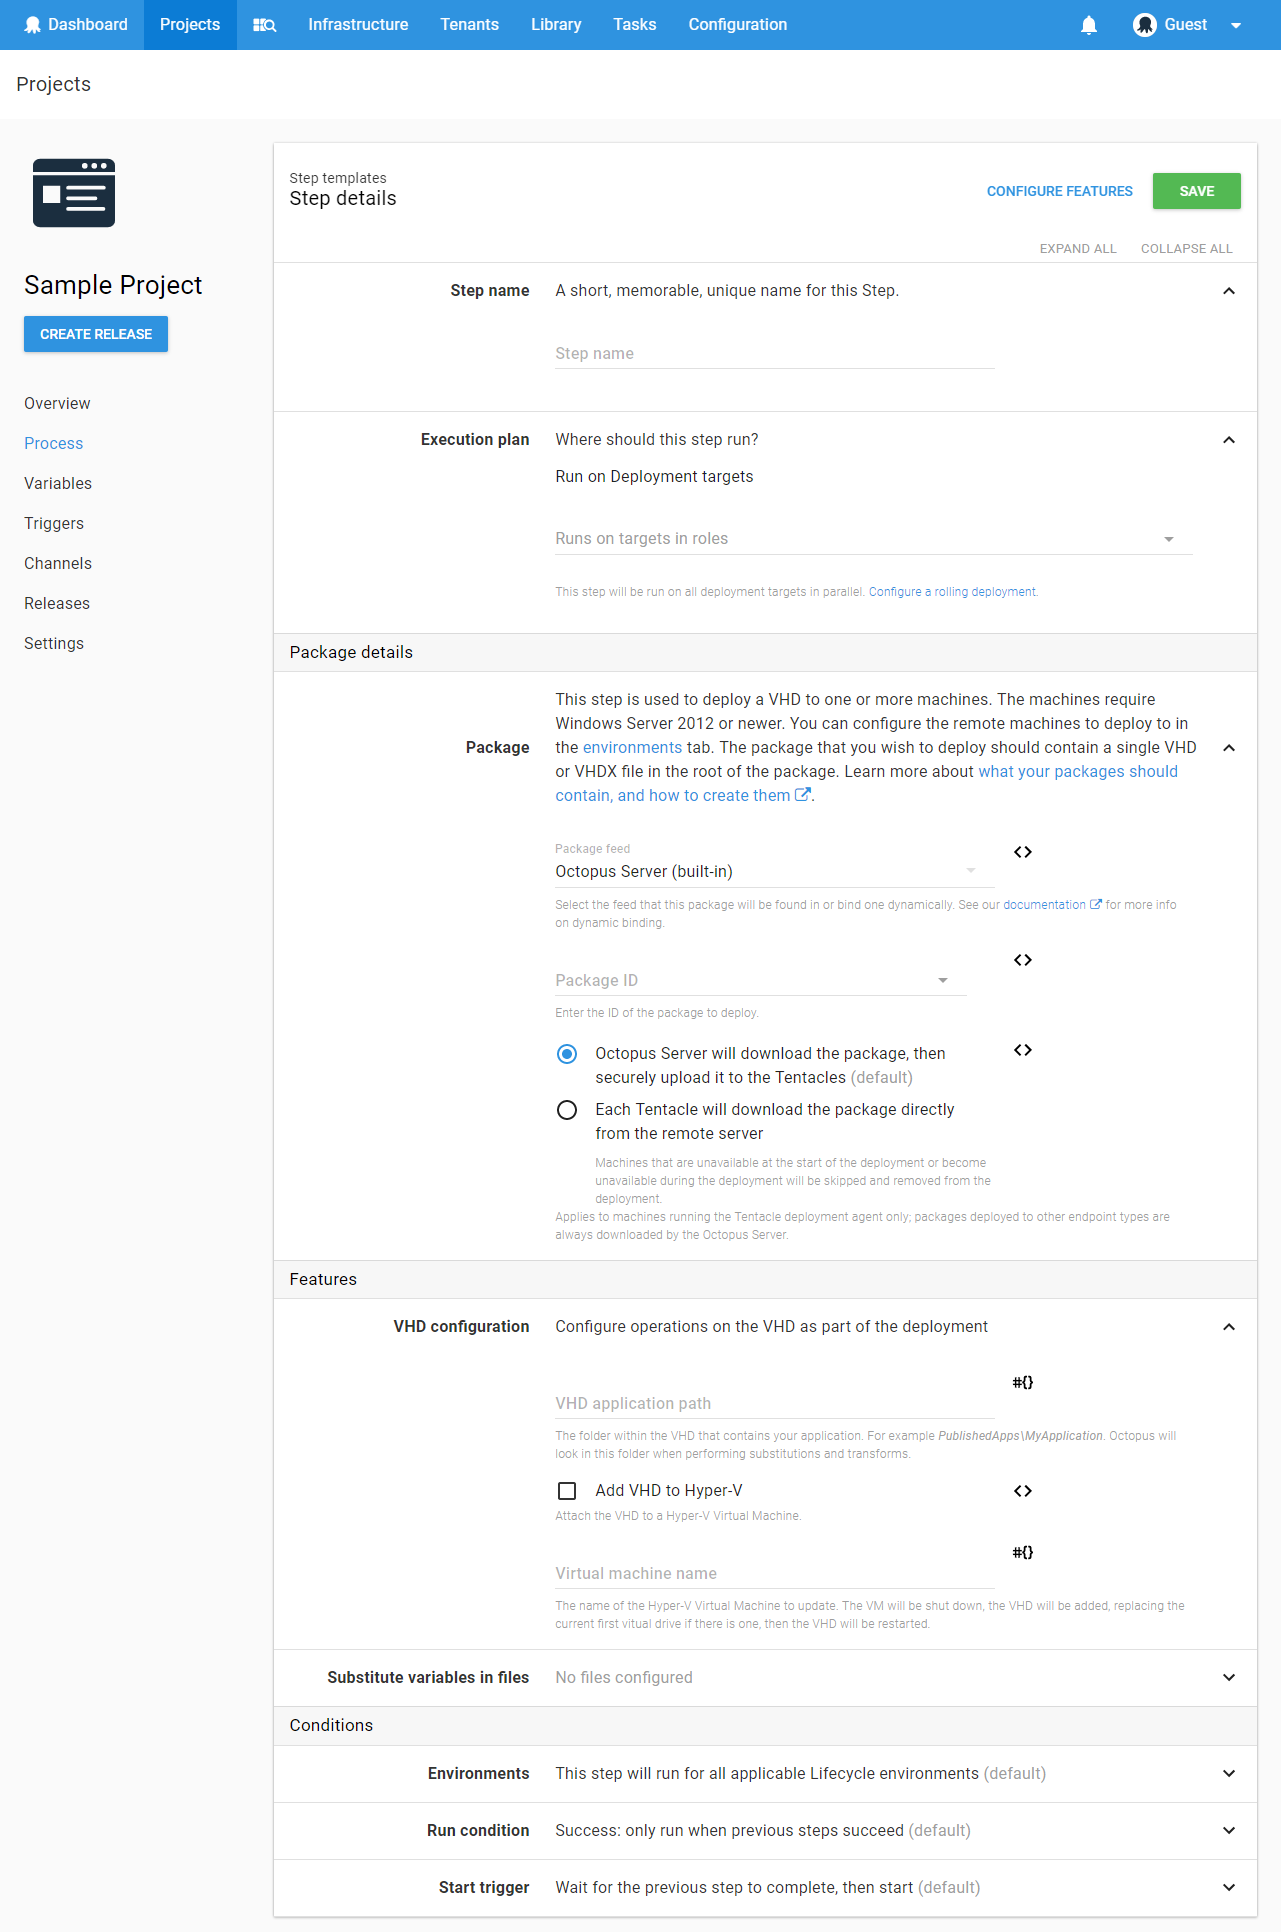
Step 1: Select a package
Use the Package Feed and Package ID fields to select the package containing the Virtual Hard Drive (*.vhd or *.vhdx) to be installed. There must be a single VHD in the root of the package. The package may contain deployment scripts and other artifacts required by those scripts, but only a single VHD.
Step 2: Configure VHD options
| Field | Meaning |
|---|---|
| VHD application path | The relative path to your application within your VHD. Octopus will use this to run deployment features, such as config transforms and variable substitution in files, only on this folder, rather than on the entire VHD. Examples: MyApplication and PublishedApps\MyApplication |
| Add VHD to Hyper-V | Attach the VHD to an existing Hyper-V virtual machine. Octopus will shutdown the virtual machine, add the VHD (replacing the current first virtual drive if there is one) then restart the virtual machine. |
| Virtual Machine Name | The name of the virtual machine to add the VHD to. |
Accessing the VHD in deployment scripts
When a VHD is deployed the following steps take place:
- The package is extracted to a newly created folder.
- The VHD from the package is mounted. The mount point is available in deploy scripts using the
OctopusVhdMountPointvariable (for example$OctopusVhdMountPointin PowerShell). - Any
PreDeployscripts in your package are run. - Enabled step features such as structured configuration variables, .NET configuration transforms and substituting variables in transforms are run against the package folder and the application path within the mounted VHD.
Deployscripts are run.- The VHD is unmounted.
- If enabled, the VHD is attached to a Hyper-V virtual machine. The step waits for the virtual machine to reboot, so you should be able to interact with the running virtual machine in your
PostDeployscripts. PostDeployscripts are run.
VHDs with multiple partitions
If you have a VHD with multiple partitions, in step 2 above all partitions are mounted, and the mount-points are available to your scripts in OctopusVhdMountPoint_0, OctopusVhdMountPoint_1, etc. The OctopusVhdMountPoint variable will contain the mount-point of the first partition that was actually mounted (see below to not mount all partitions).
To change the behavior when there are multiple partitions create Octopus Variables against your project indexed to the partition (starting at 0). If you have more than one deploy VHD step you will need to scope the variables to each step.
| Octopus Variable | Value | Meaning |
|---|---|---|
| OctopusVhdPartitions[0].Mount | false | Do not mount this partition |
| OctopusVhdPartitions[0].ApplicationPath | A relative path | Override the VHD application path from the “Configure VHD options” section for just this partition |
Help us continuously improve
Please let us know if you have any feedback about this page.
Page updated on Tuesday, April 23, 2024