Octopus Cloud is the easiest way to run Octopus Deploy. It has the same functionality as Octopus Server, delivered as a highly available, scalable, secure SaaS application hosted for you. You get the best Octopus experience from the experts in hosting, maintaining, scaling, and securing Octopus Deploy.
We recommend Octopus Cloud over Octopus Server for the following reasons:
Minimize downtime and increase resilience
- We take care of any issues that arise so you don’t have to worry about downtime, data loss, or disruptions.
- Our 24x7 monitoring and alerting and proactive issue detection means problems get addressed before they impact your operations.
- Automatic recovery with comprehensive disaster recovery procedures means your data is safe and quickly recoverable in case of a failure.
Secure and compliant out-of-the-box
- Peace of mind with internationally recognized security standards, ensuring business compliance and protecting your reputation.
- ISO 27001 and SOC II certifications with regular audits, ensuring your deployments and data are safe and secure.
- Data and application layer isolation per customer, so there are no noisy neighbors or cross-talk.
- OpenID Connect (OIDC) support so you can integrate with other services securely and without needing to manage credentials.
- Network security and static IP addresses.
- Flexibility of hosting region choices.
- With IP allow listing, you can control who can reach Octopus Cloud, securing your entry points and enhancing compliance. With Azure Private Links, communication is routed via a secure, private network path, ensuring the data doesn’t traverse the public internet. When combined, these controls eliminate external exposure, reduce attack surface, and align with stringent compliance and security policies.
Increase team efficiency
- Stay ahead of the competition with less time maintaining software and more time shipping new features.
- Automatic upgrades to the latest version of Octopus, including improvements, bug fixes, security enhancements, and new features before they’re released on Octopus Server.
- Expert support by experienced Octopus Support and Cloud Operations teams who swiftly resolve issues and provide regular maintenance.
Effortlessly scale your deployments
- Your teams can scale their use without the hassle of resource management and additional infrastructure costs.
- We provide appropriate resources and automatic scaling for seamless performance.
- Ample bandwidth and storage resources to handle your data and traffic without additional costs.
- Windows and Linux dynamic workers provide flexible and scalable deployment options.
When you’re ready, start a free account to explore Octopus.
Are there any differences between Octopus Cloud and Server?
In providing Octopus as a service, some configuration and diagnostic functions in Octopus Cloud differ from the Octopus Server. These include disabling specific items related to the cloud server’s provisioning and management. You can learn more on the migration page.
Where is Octopus Cloud hosted?
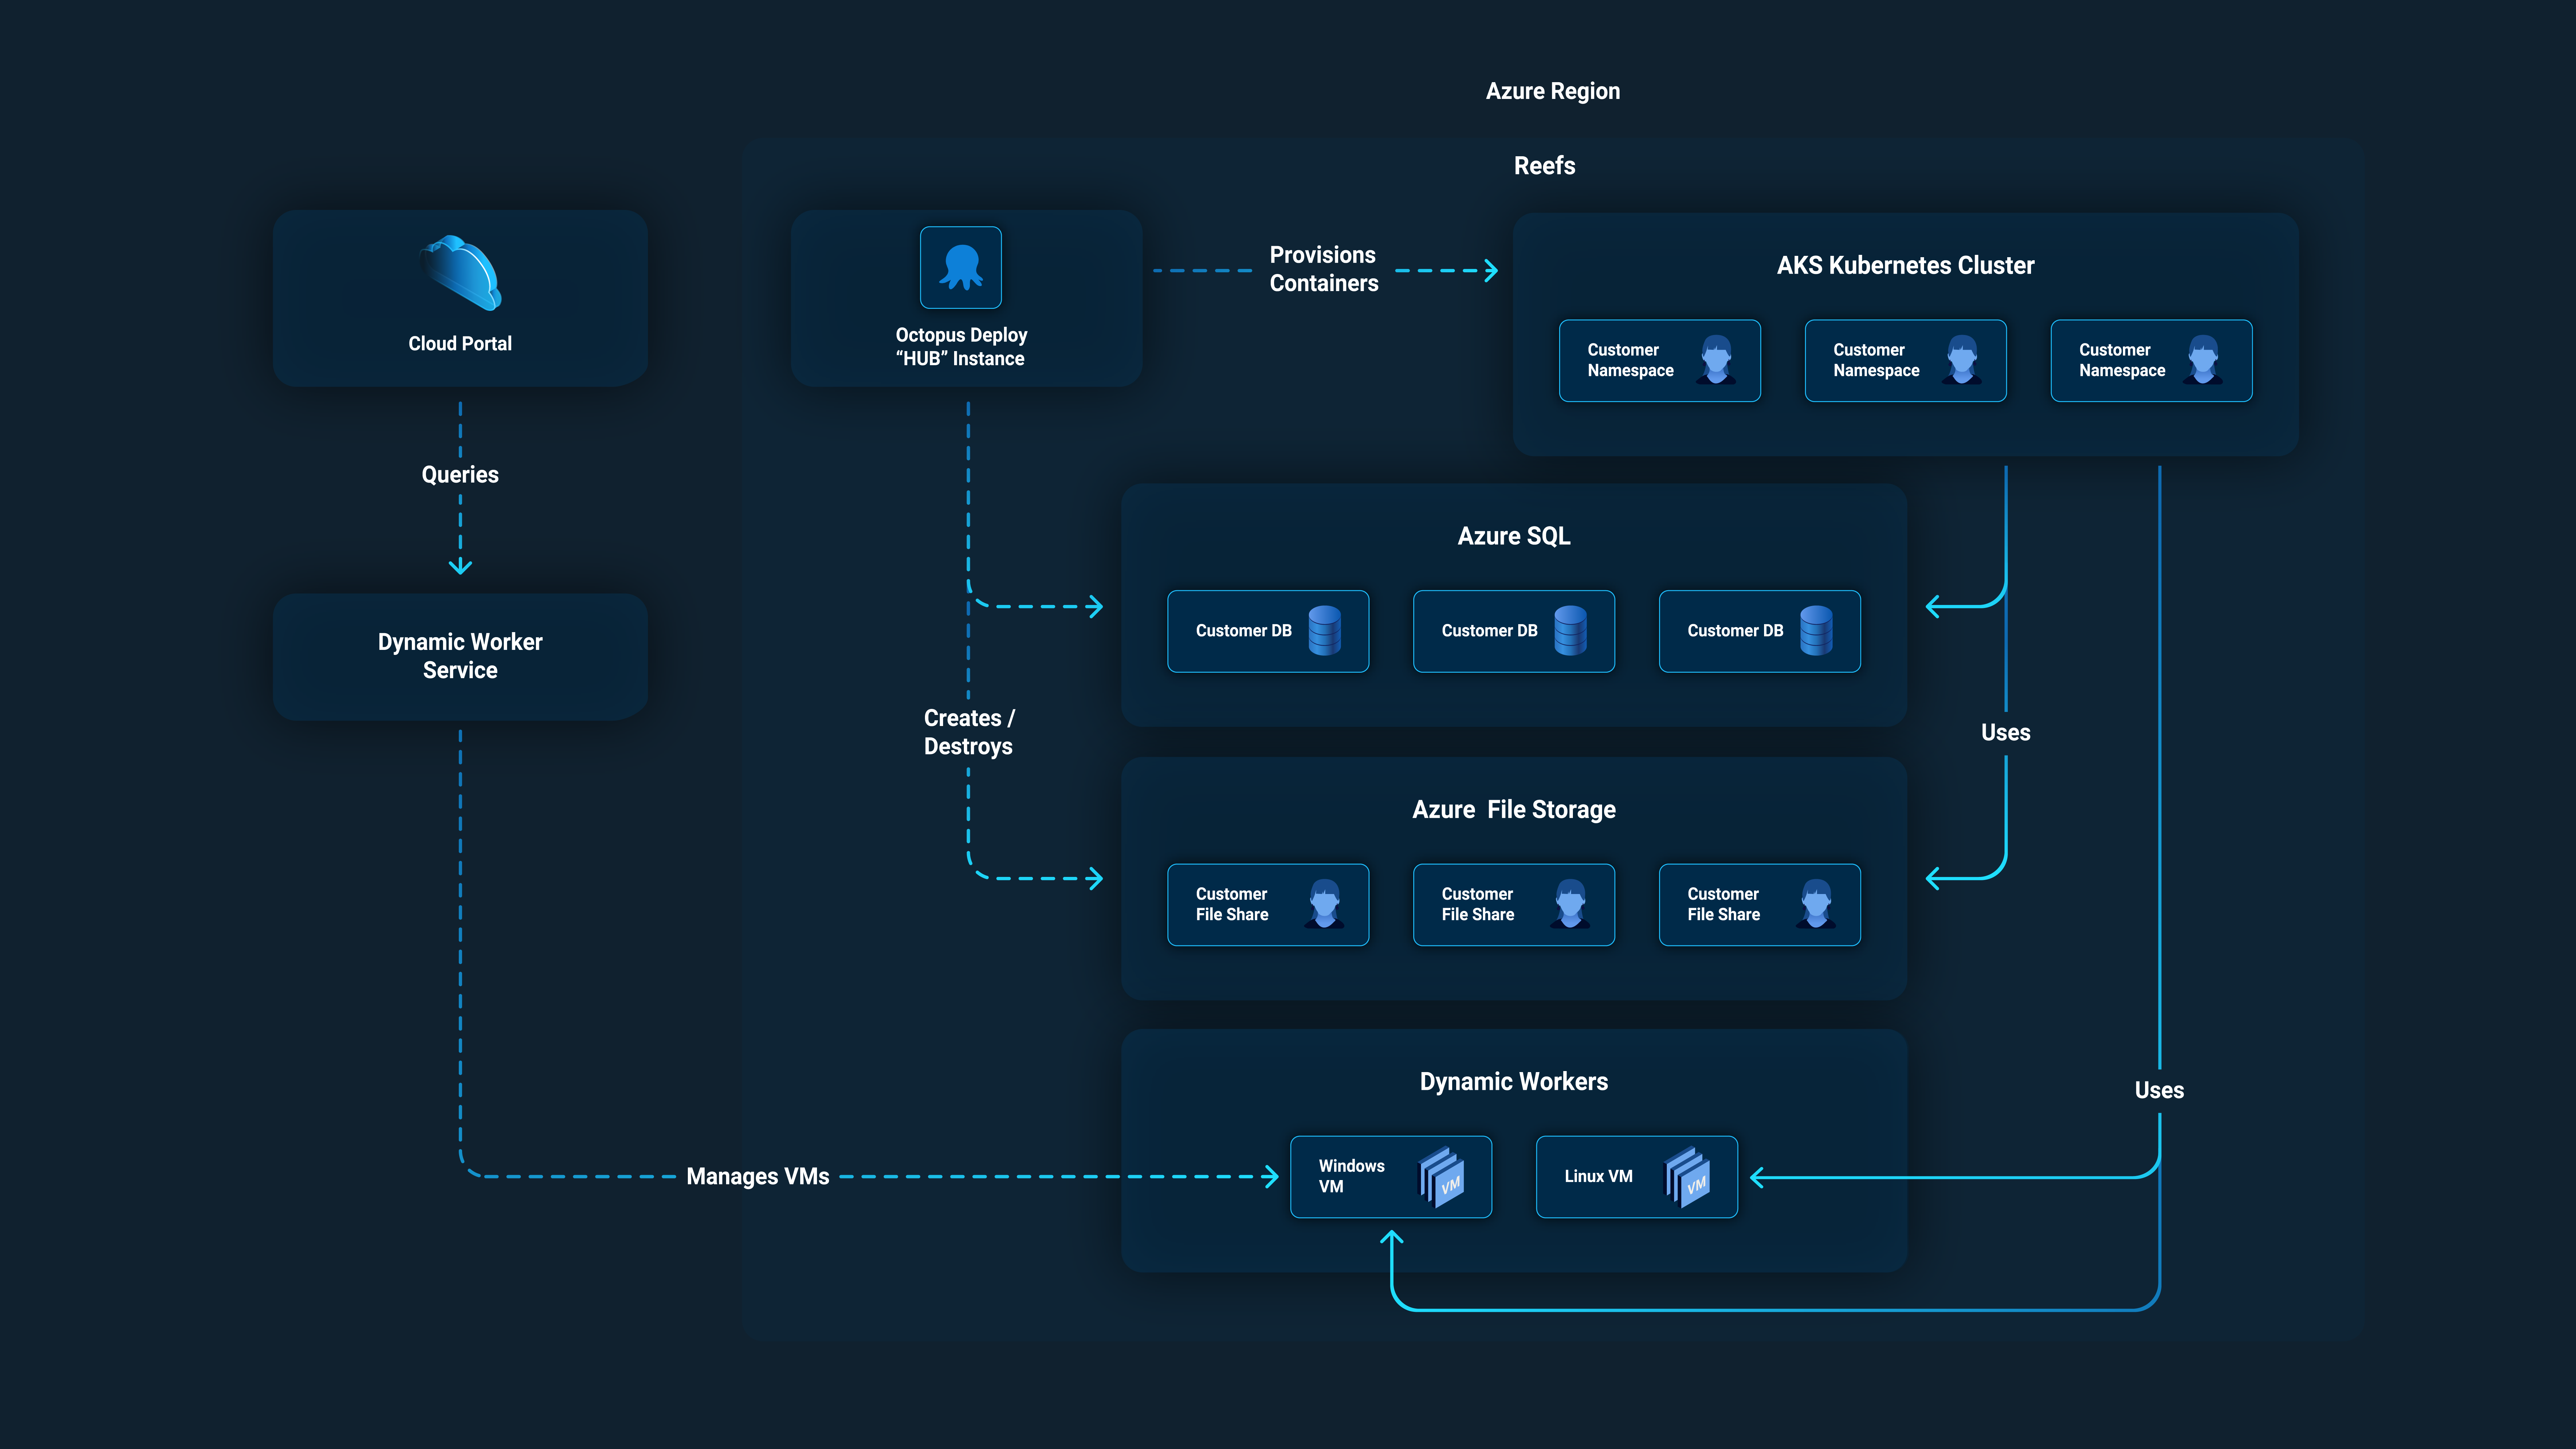
Octopus Cloud runs in the Microsoft Azure cloud. When you create an Octopus Cloud instance, we provision a Linux container to run the Octopus Server in, along with all the other resources we need to provide Octopus as a service. We deploy this to one of our Kubernetes clusters.
We host Octopus Cloud in the following Azure regions:
- West US 2
- West Europe
- Australia East
If you’d like to move an existing Octopus Cloud instance to one of the other regions or request a new region, please contact us.
Octopus Cloud storage thresholds
Octopus Cloud instances are subject to storage thresholds.
- Maximum file storage for artifacts, task logs, packages, package cache, and event exports is limited to 1 TB.
- Maximum database size for configuration data (for example, projects, deployment processes, and inline scripts) is limited to 100 GB.
- Maximum size for any single package is 5 GB.
- Retention policies default to 30 days, but you can change this figure as needed.
If you think you will exceed these thresholds, please contact our Sales team.
Please see our Cloud pricing FAQ for further details.
Learn more
- Octopus Cloud FAQs
- Octopus Cloud pricing FAQs
- Octopus pricing page
- Getting started with Octopus Cloud
- Migrating to Octopus Cloud
- Octopus Cloud blog posts
- Trust center
Help us continuously improve
Please let us know if you have any feedback about this page.
Page updated on Friday, June 6, 2025