By connecting tenants to projects, you can control which projects will be deployed into which environments for each tenant.
-
Navigate to your tenant.
-
Click on the CONNECT PROJECTS button.

-
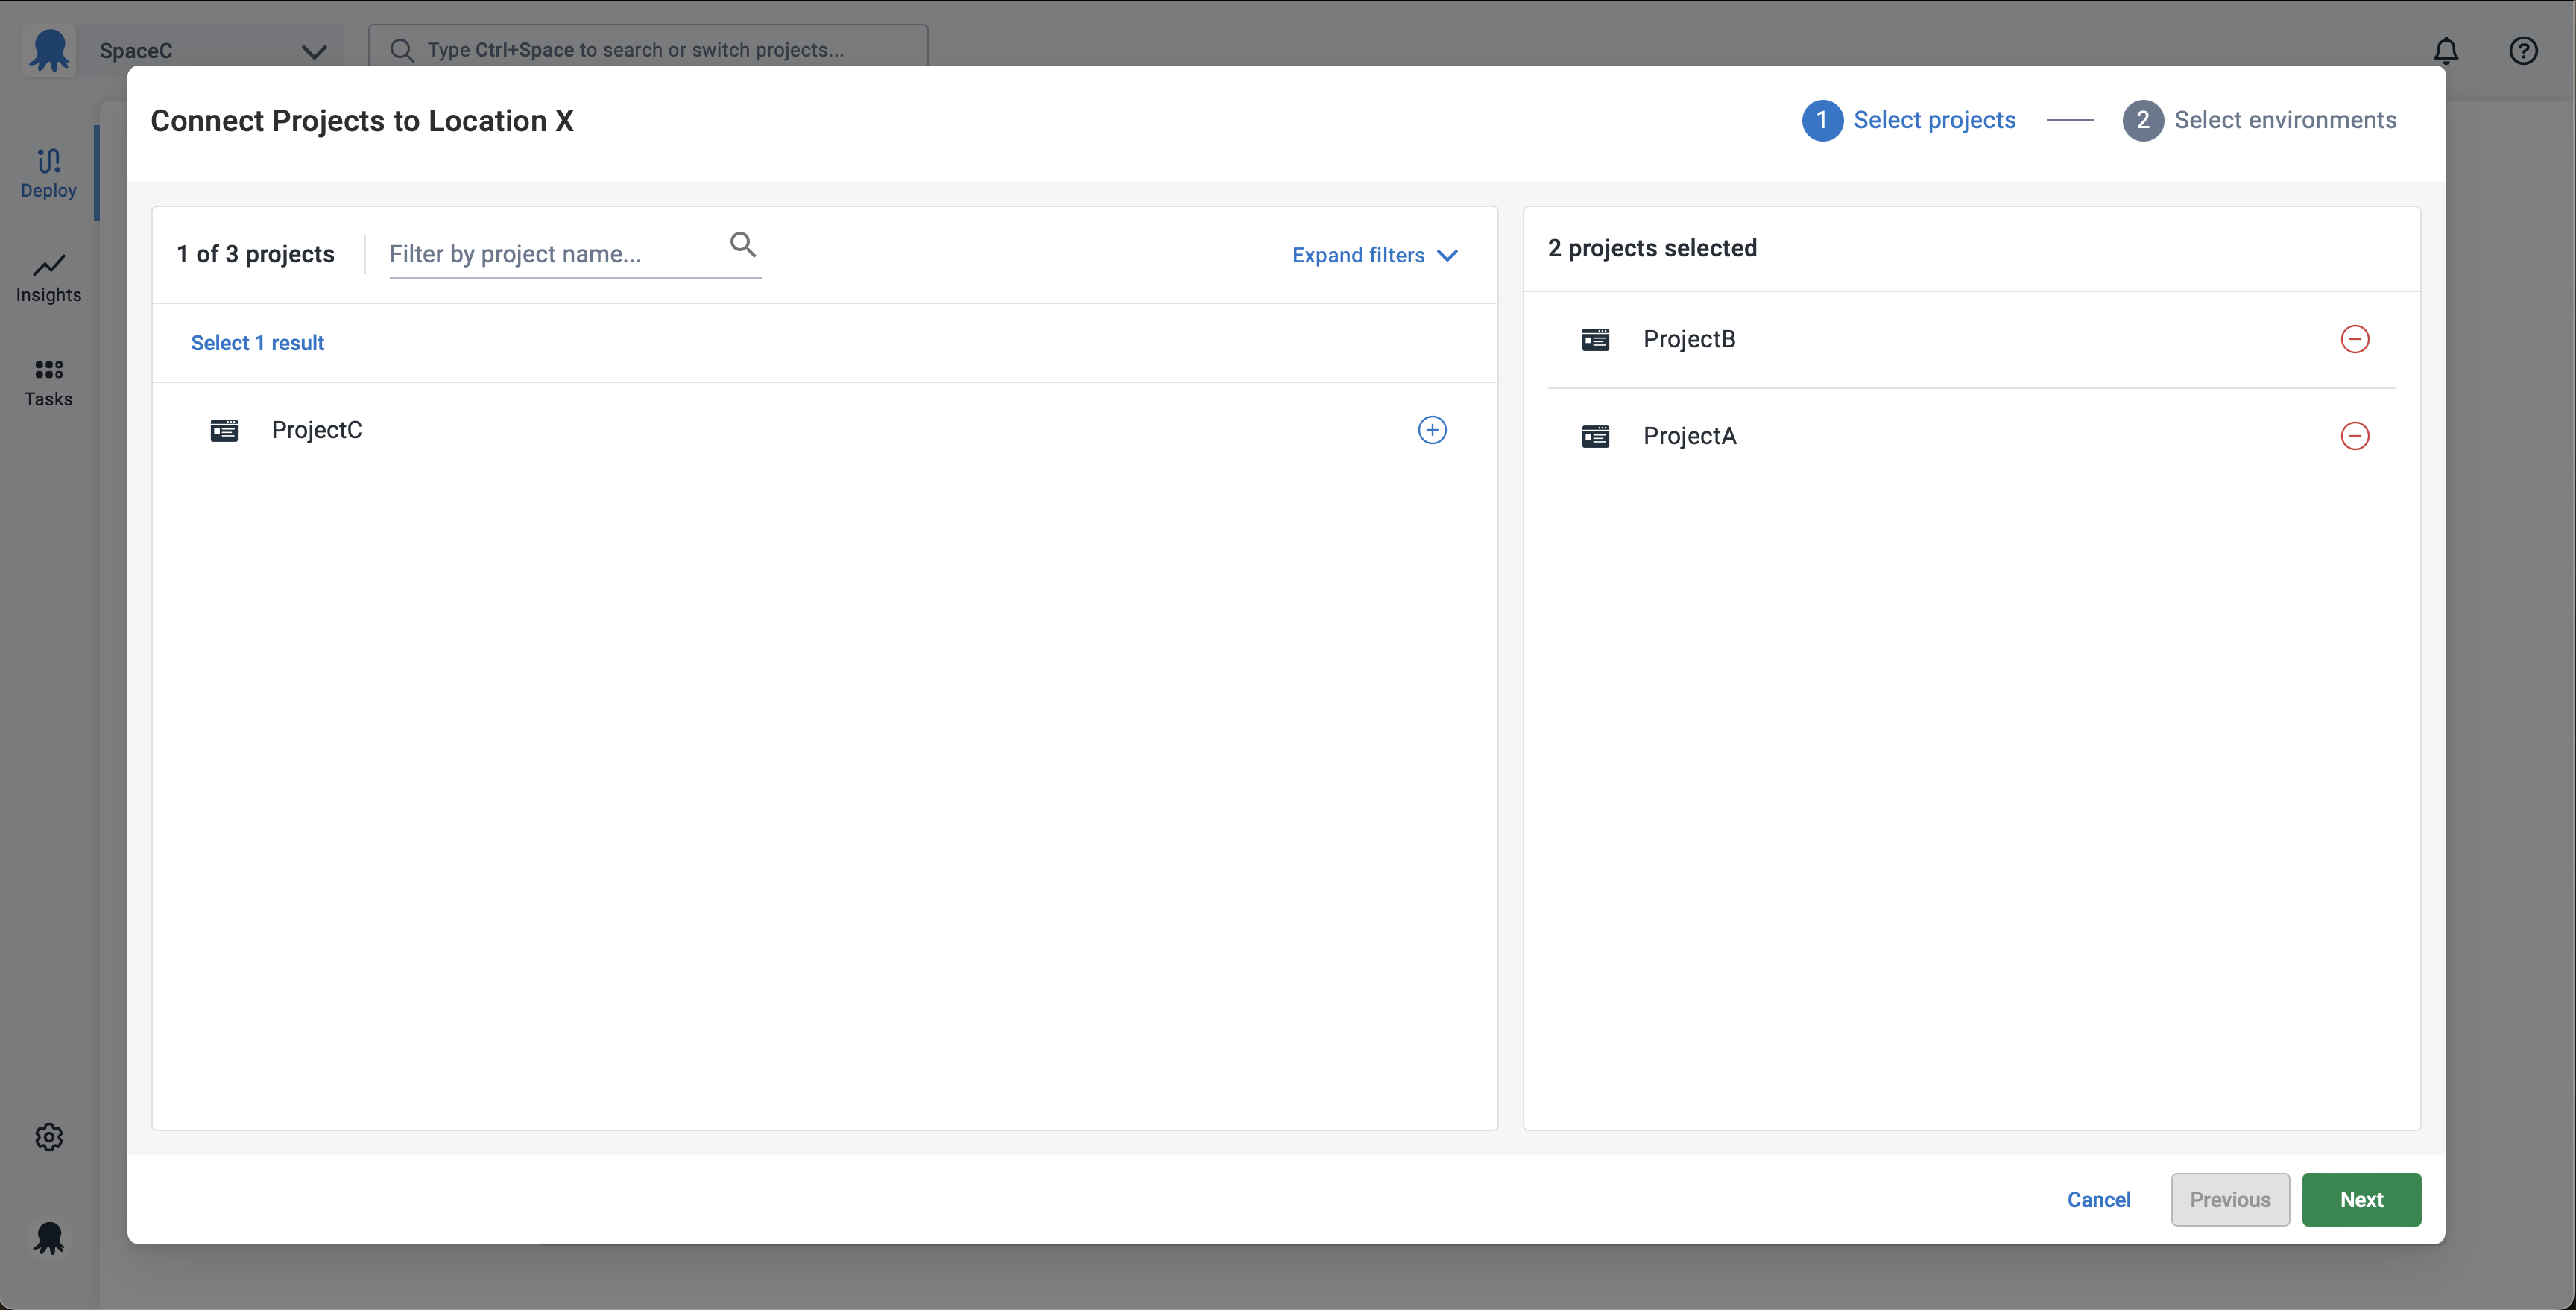
Choose the projects you want to connect to your tenant, by clicking any project in the left-hand panel of the wizard. Click the - button of a project in the right-hand panel to deselect that project.
-
Once you have selected the projects you want to connect, click NEXT.
-
Choose the environments you want the tenant to be connected to for each project. You can select just one or two from the drop-down menu, or click Assign all available environments to select all available environments.
Not seeing the environment you want? Make sure at least one lifecycle used by your project includes that environment.
-
A preview of the selected projects and environments is shown in the connection preview panel. The selected environments will be assigned to each project based on whether they are part of any lifecycle in the project. If an environment is not part of any lifecycle in the project, it will not be assigned to the project.

-
Click CONNECT PROJECTS
You can connect each tenant to any number of projects and, for each project, any combination of environments that each project can target. This gives you the most flexibility when designing your multi-tenant deployments.
- You can offer specific projects to some tenants and not to others.
- You can also provide most of your tenants with a single environment while offering specific customers extra environments. For example, you could give particular customers a test/staging/acceptance environment where they can test new releases before upgrading their production environment.
Older versions
The project connection feature was updated to allow bulk selection in Octopus Deploy 2023.4. If you are running an older version of Octopus the dialog will only allow selecting a single project at a time.
Help us continuously improve
Please let us know if you have any feedback about this page.
Page updated on Monday, August 12, 2024