Flyway is a popular open source migrations-based database deployment tool supported by Redgate. It’s a command-line utility that uses Java to execute script files against several database technologies such as Microsoft SQL Server, MySQL, MariaDB, and PostgreSQL. There is a free Community edition, and paid Pro and Enterprise versions available. This guide demonstrates how to use Flyway with a MySQL database.
Include Flyway with your project
To add Flyway to your project:
- Download the archive file.
- Extract the archive to disk.
- Move the files into your project directory structure.
The Flyway download comes with everything it needs to execute, including a version of the Java Runtime Environment (JRE):
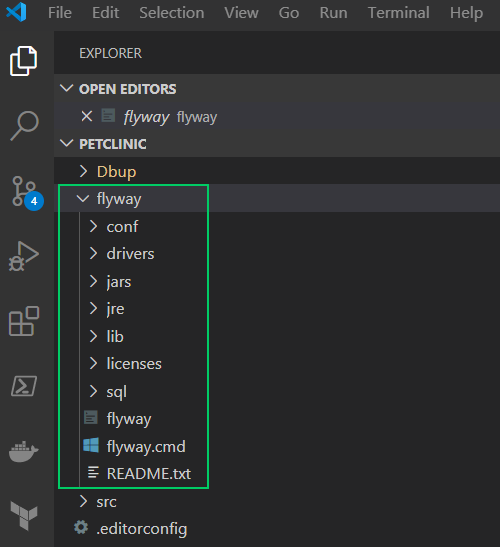
If Flyway doesn’t find Java installed on the machine (detected by the presence of the JAVA_HOME environment variable), it will fall back to the included JRE. The included version of the JRE has the .exe and .dll files located within a bin subdirectory. It is often the case that source control will ignore any directory with the name bin, so be careful when including a Flyway project and you need the included JRE.
Add scripts to your Flyway project
Within the Flyway directory structure is a directory called sql. This directory is where your scripts belong. To control the execution order, the documentation states the files must be named in a specific way. Flyway is capable of doing versioned migrations, undo migrations, and repeatable migrations. All script files follow this naming structure:
- Prefix: V for versioned, U for undo, and R for repeatable (this guide will focus on versioned migrations).
- Version: Numbers with dots or underscores as separators.
- Separator: Two underscores.
- Description: A meaningful name with underscores or spaces to separate the words.
- Suffix: Usually
.sql.
Example filenames are:
V1__initDB.sqlV1_1__populateDb.sqlV1.1__populateDb.sql
Execute a migration
Flyway is a command-line utility that was originally designed to be cross-platform so the downloadable archive will work on either Windows or Linux. For Windows, the flyway.cmd file is used when executing. For Linux, the file flyway is a Bash script for execution.
Both OS methods use the same arguments for deployment.
Including Flyway in your build
Flyway itself is already compiled, so there’s no need to do anything for building. However, it can still be included in a build process to package it up for deployment with Octopus Deploy. This guide uses Jenkins as the build platform.
Add a package step
Within a Jenkins project, navigate to Build Environment, and in the Build section, click Add Build Step and choose Octopus Deploy Package application.
The Octopus Deploy Jenkins plugin needs to be installed to use these templates. You also need to download the Octopus CLI on to the Jenkins build agent(s).
Fill in the inputs:
- Package ID: A unique name for this package like
petclinic.mysql.flyway. - Version Number: The unique version number for this package.
- Package format: Zip or nuget.
- Package base directory:
${WORKSPACE}\flyway. - Package include paths:
- Package output directory:
${WORKSPACE}.
Jenkins build number formatting
To configure Jenkins to produce build numbers in a format like yyyy.mm.dd.hhmmss (2020.03.25.145344), install the following plugins:
- Build Name and Description Setter.
- Date Parameter Plugin.
Once the plugins are installed, configure your Jenkins project to be parameterized by navigating to the General tab and checking the This project is parameterized checkbox.
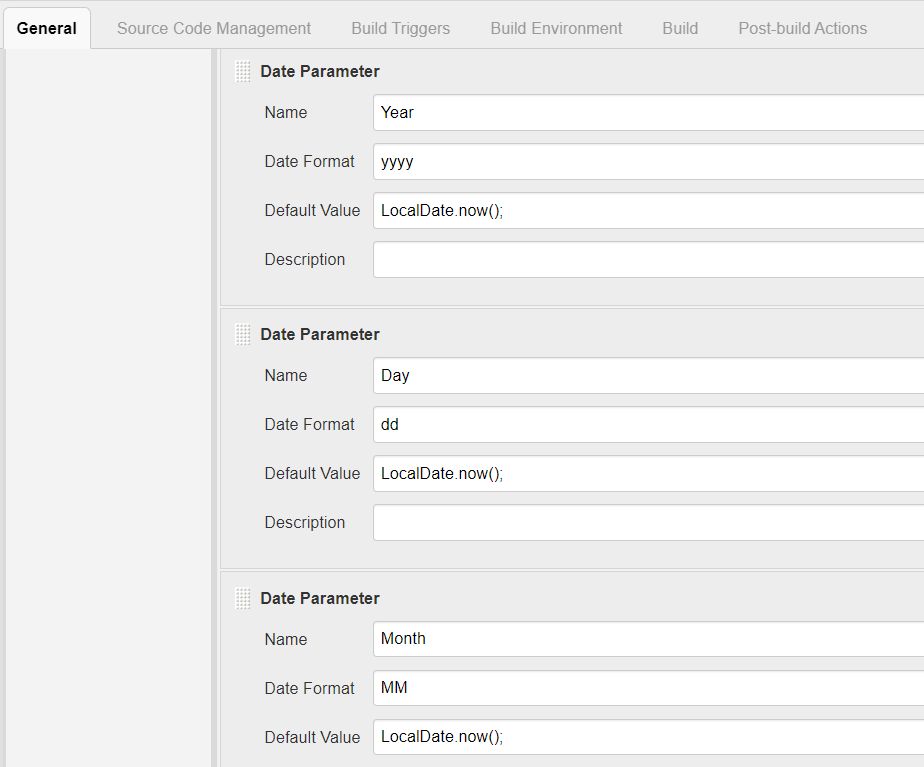
Then use the Date parameter to create some parameters:
- Date parameter
- Name: Year
- Date Format: yyyy
- Default Value: LocalDate.now();
- Date parameter
- Name: Day
- Date Format: dd
- Default Value: LocalDate.now();
- Date parameter
- Name: Month
- Date Format: MM
- Default Value: LocalDate.now();
Lastly, set the build name in the Build Environment section, by checking the Set Build Name checkbox and adding the build name, for instance:
${Year}.${Month}.${Day}.${Time}
Add a push step
Add an Octopus Deploy Push step to your build by navigating to the Build tab, click the Add build step drop-down list and select Octopus Deploy: Push packages, and complete the following fields:
- Octopus Deploy Server: The values for the drop-down for this come from the Jenkins server configuration. To configure this, navigate to Jenkins home screen ➜ Manage Jenkins ➜ Configure System, and then scroll down to the Octopus Deploy Plugin section:
- Space: Select the space to deploy to. You can leave this blank for the Default space
- Package paths:
/*.nupkg - Overwrite mode: Fail if exists.
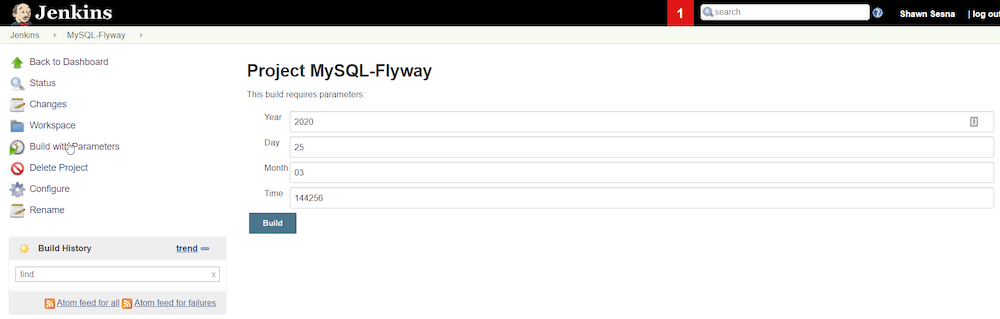
Those are the only two steps that are needed to package and push a Flyway project to Octopus Deploy. After saving, click on Build with Parameters.
The generated Date parameters will display. Click Build to continue:
When the build is complete, you should have something like this:
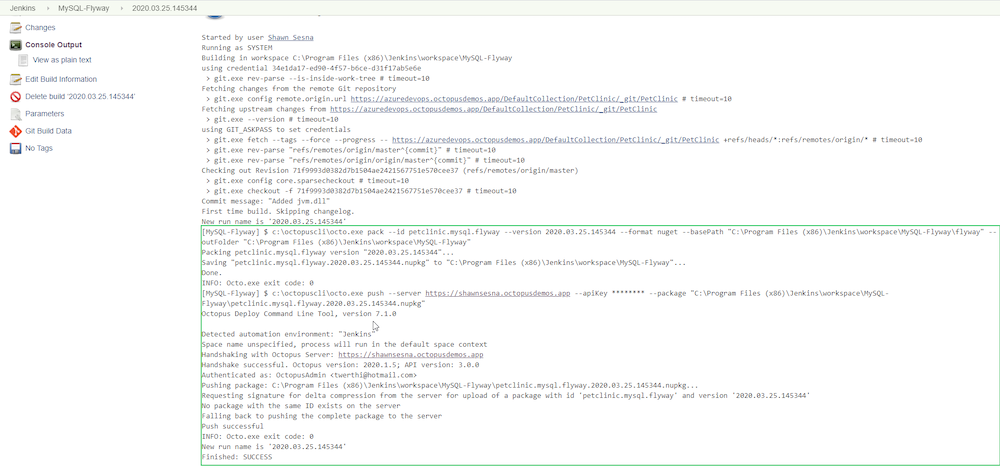
Now that the build is complete, it’s time to configure the Octopus Deploy project.
Octopus Deploy
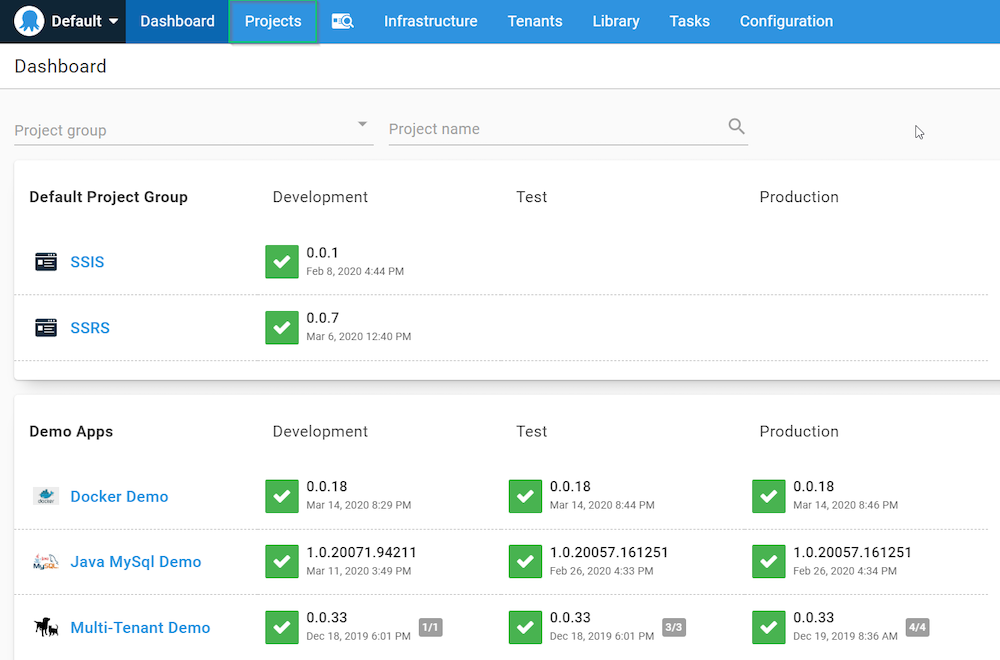
From the Octopus Web Portal, navigate to the Projects tab:
Select the Project Group and click the ADD PROJECT button.
Give the project a unique name, a description, select the Project Group and the Lifecycle. If you’ve clicked on the ADD PROJECT button on a specific project group, this selection will be pre-populated.
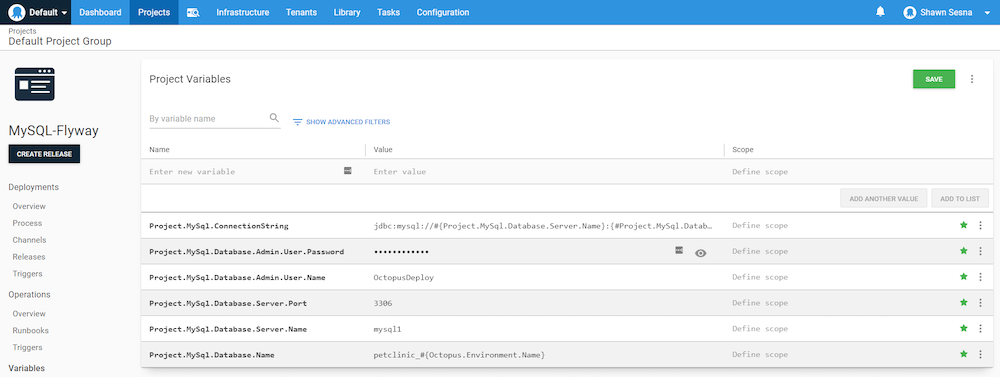
Variables
In the new project, click Variables to configure the following variables:
Project.MySql.Database.Name: The name of the database.Project.MySql.Database.Server.Name: The name or IP address of the database server.Project.MySql.Database.Server.Port: The port that MySql is listening on.Project.MySql.Database.Admin.User.Name: The user account with elevated permissions on the database.Project.MySql.Database.Admin.User.Password: The password for the user account.Project.MySql.ConnectionString:jdbc:mysql://#{Project.MySql.Database.Server.Name}:#{Project.MySql.Database.Server.Port}/#{Project.MySql.Database.Name}?useUnicode=true.
Deployment process
With variables defined, we can use them in the deployment process. Click on the Process tab, and ADD STEP.
Filter the steps by entering flyway into the search box.
Flyway info from a referenced package
This template will compare the scripts in the scripts directory against the ones that have already been run and display the status of each script using a package parameter. This template is available for both PowerShell and Bash.
Flyway migrate
This template performs the Flyway migrate command and applies any scripts that haven’t been run to the database and records which ones were applied so they won’t be run again. It also includes the ability to run Redgate SQLCompare to run a drift check. This template is available for both PowerShell and Bash.
Flyway migrate from a referenced package
This template is similar to the Flyway migrate step but uses a package parameter instead of a feed ID and package ID. This is only available in PowerShell at this time.
Configure the step
Choose the Flyway Info from a Referenced Package for whichever OS you intend to deploy. This guide uses the Bash version for use with Linux Tentacles:
Fill in the fields:
- Relative path to flyway.cmd (optional): Use if your flyway bash file isn’t within the root of the package.
- Locations (relative path, optional): Use if your
sqldirectory is not off the root directory. - Target -url (required): Connection string to MySql -
#{Project.MySql.ConnectionString}. - Target -user (required): User account with elevated rights -
#{Project.MySql.Database.Admin.User.Name}. - Target -password (required): Password for the user account -
#{Project.MySql.Database.Admin.User.Password}. - Flyway package: The package for deployment.
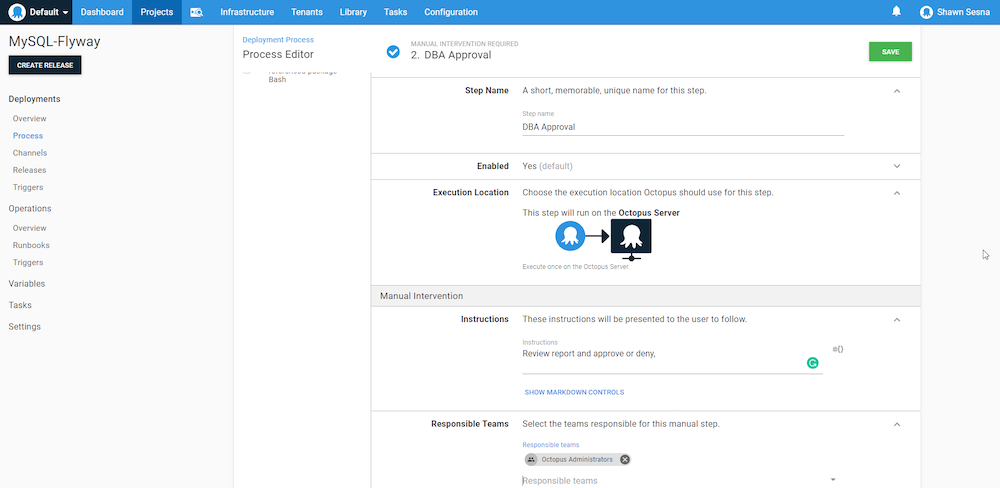
Add a Manual Intervention step and scope it to the Production environment. This will pause the deployment so you can review what will be executed and determine whether or not to proceed when deploying to Production.
Add the Flyway Migrate step. The fields for this are identical to the Flyway Info step that was added previously:
- Relative path to flyway.cmd (optional): Use if your flyway bash file isn’t within the root of the package.
- Locations (relative path, optional): Use if your
sqldirectory is not off the root directory. - Target -url (required): Connection string to MySql -
#{Project.MySql.ConnectionString}. - Target -user (required): User account with elevated rights -
#{Project.MySql.Database.Admin.User.Name}. - Target -password (required): Password for the user account -
#{Project.MySql.Database.Admin.User.Password}. - Run pre-deploy drift check: Used if you have Redgate SQLCompare.
- Path to Redgate comparison tool (required for drift-check): Path to the SQLCompare executable.
- Shadow -url (required for drift-check): Connection string to shadow database.
- Shadow -user (required for drift-check): Shadow database user account.
- Shadow -password (required for drift-check): Password for shadow database user.
- Flyway package: The package to deploy.
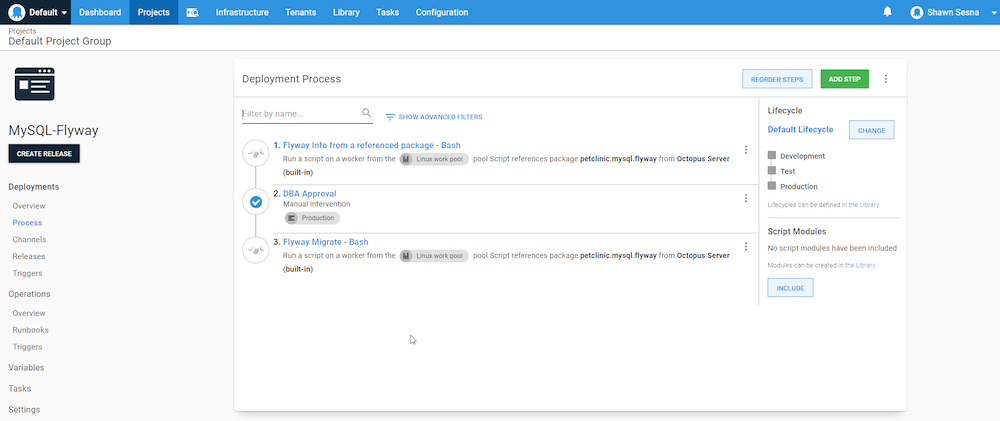
When complete, the deployment process will look like this:
Creating the release
With the deployment process defined, the project can create a release for deployment. Click CREATE RELEASE and click SAVE.
With the release created, click DEPLOY TO… and select the environment, then click DEPLOY.
Troubleshooting
If you receive an error message like the following:
/etc/octopus/default/Work/20200326224917-19880-127/FlyWayPackage/flyway: line 17: $'\r': command not found
/etc/octopus/default/Work/20200326224917-19880-127/FlyWayPackage/flyway: line 20: syntax error near unexpected token `$'in\r''
/etc/octopus/default/Work/20200326224917-19880-127/FlyWayPackage/flyway: line 20: ` case "`uname`" in
Your build server has converted line endings from LF to CRLF. This typically happens on Windows-based build servers.
Workarounds are:
- Run the following command on your build agent
git config --global core.eol lf - Set the
text eol=lfsetting within the.gitattributesof the git repo
Help us continuously improve
Please let us know if you have any feedback about this page.
Page updated on Sunday, January 1, 2023