The Jira Service Management (JSM) Integration is available from Octopus 2022.3 onwards and requires an enterprise subscription. Contact us to request access to this feature.
Overview
The Octopus Deploy/JSM integration allows users to block the execution of specifically configured deployments unless they have a corresponding approved JSM Change Request (aka issue).
To enable this behavior, both the Octopus Project and Environment you are deploying to must be configured and the JSM configuration is set up before deployments can be managed.
Deployments
| Project | Environment | Outcome |
|---|---|---|
| Change controlled | Change controlled | Approval required for deployment |
| Not Change controlled | Change controlled | No approval required |
| Change controlled | Not Change controlled | No approval required |
Runbooks
| Project | Environment | Runbook | Outcome |
|---|---|---|---|
| Change controlled | Change controlled | Enabled | Approval required |
| Change controlled | Change controlled | Not Enabled | No approval required |
| Not Change controlled | Change controlled | Enabled | No approval required |
| Change controlled | Not Change controlled | Enabled | No approval required |
Getting started
The JSM integration requires Octopus 2022.3.12101 or later and an Octopus license with the JSM Integration feature enabled.
Before you can use the Octopus Deploy/JSM integration, you’ll need to:
- Create a service account in JSM for use by Octopus
- In Jira, create or use an existing project of the IT service management type.
- Request and install a new Octopus license required to enable the JSM feature.
- Configure a connection from Octopus to JSM.
- Configure which deployments require an approved CR.
Configuring Jira Service Management
The instructions in this section will require a JSM Administrator.
The Octopus Deploy/JSM integration requires security configuration in your target JSM instance.
The integration will require a user account in JSM. The recommendation is to create a service account specifically for Octopus.
Take note of the password assigned or generated for this user.
Licensing
For the JSM approval checks to be performed as part of the deployment process, an appropriate Octopus license must be configured in your Octopus instance.
A JSM enabled Octopus license must be requested from Octopus directly, and cannot be managed through the self-service process. To request a license register for the JSM Early Access Program
Once you have received your feature-enabled license, you can install it by navigating to Configuration ➜ License.
An enabled license will include a block similar to below:
<Features>
  <JiraServiceManagement>
    <ValidTo>...</ValidTo>
  </JiraServiceManagement>
</Features>
Configuring JSM connections
The instructions in this section will require an Octopus Deploy Manager or Administrator
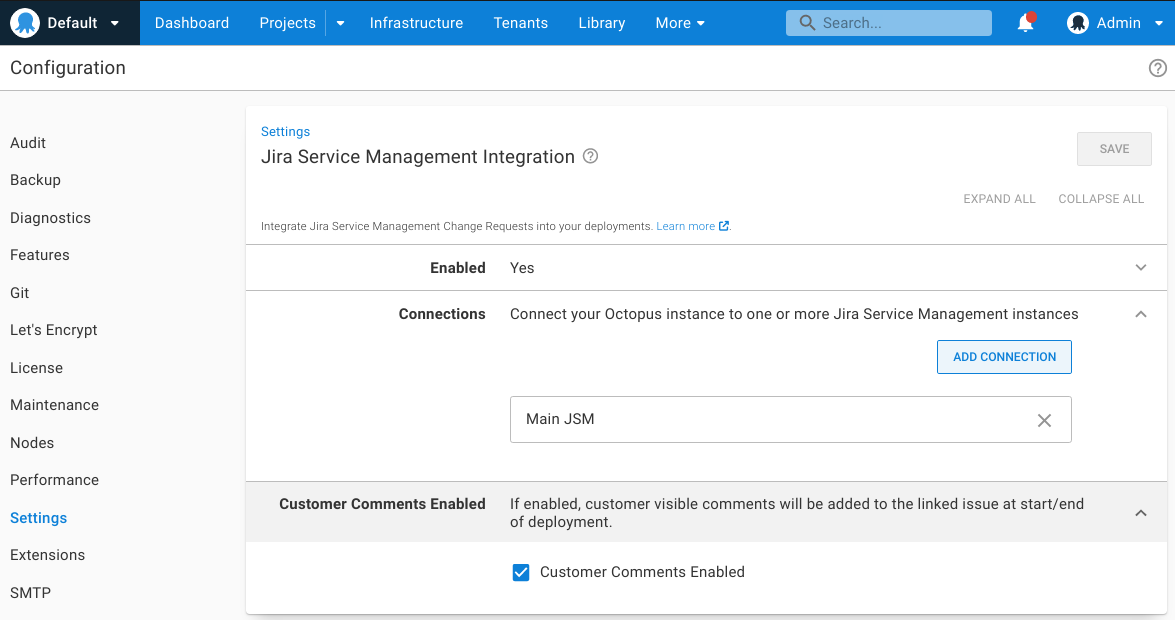
To connect your Octopus Deploy instance to JSM, navigate to Configuration ➜ Settings ➜ Jira Service Management Integration.
Check the Enabled option
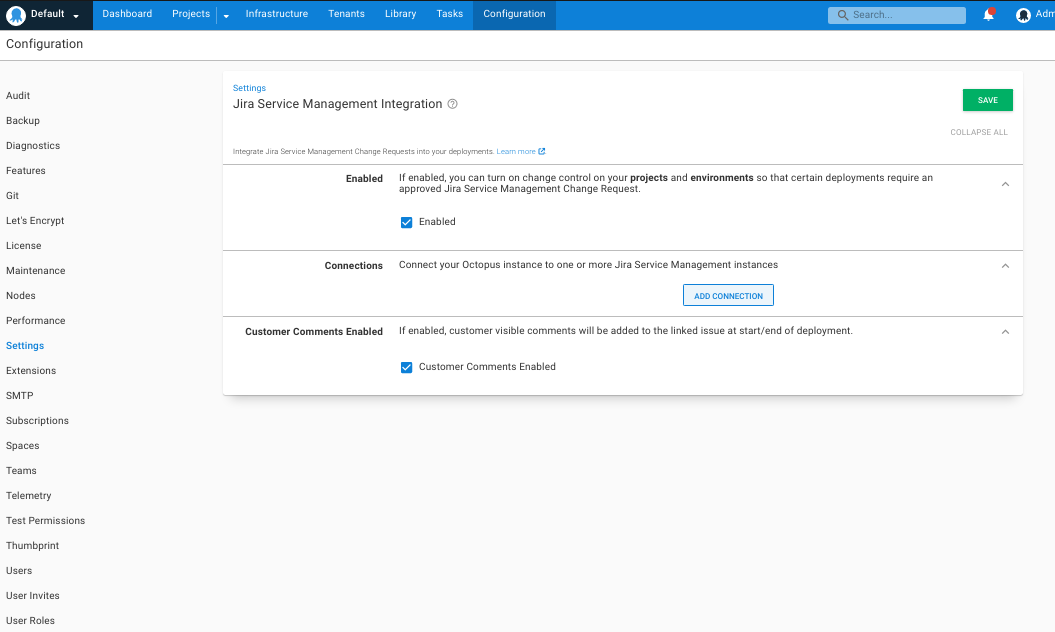
Click on ADD CONNECTION and fill out the details.
The JSM Base Url should be the root URL and include the protocol e.g. https://
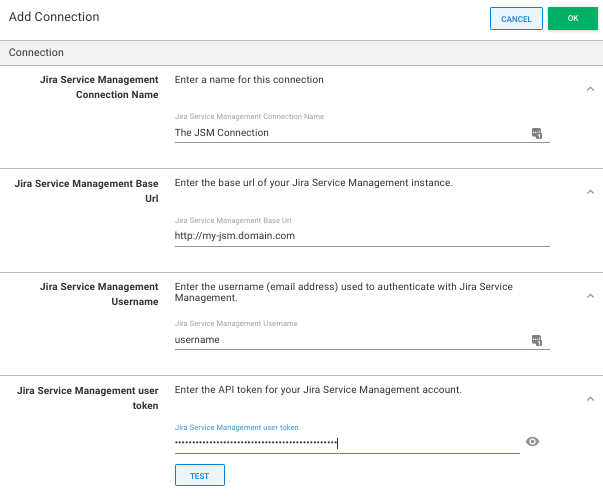
Press TEST to ensure that the connection details are working.
Multiple JSM connections are supported, however, each project can only use one JSM connection.
Configuring Issue Comments
The instructions in this section will require an Octopus Deploy Manager or Administrator
If enabled, this feature will result in a linked change request having one or more Comments added during the deployment lifecycle, which record details about the deployment and its execution status. Comments include the project name, environment, and version. From 2026.2, the tenant name and tags are also included for tenanted deployments.
To enable this feature navigate to Configuration ➜ Settings ➜ Jira Service Management Integration, click the Customer Comments Enabled checkbox show below then click Save.
Configuring approvals
Setting up deployments for CR approval
To enforce a deployment to require an approved CR, the Change Controlled setting needs to be enabled in both the project and the environment it is being deployed to.
To enable a project to enforce a requirement for an approved CR:
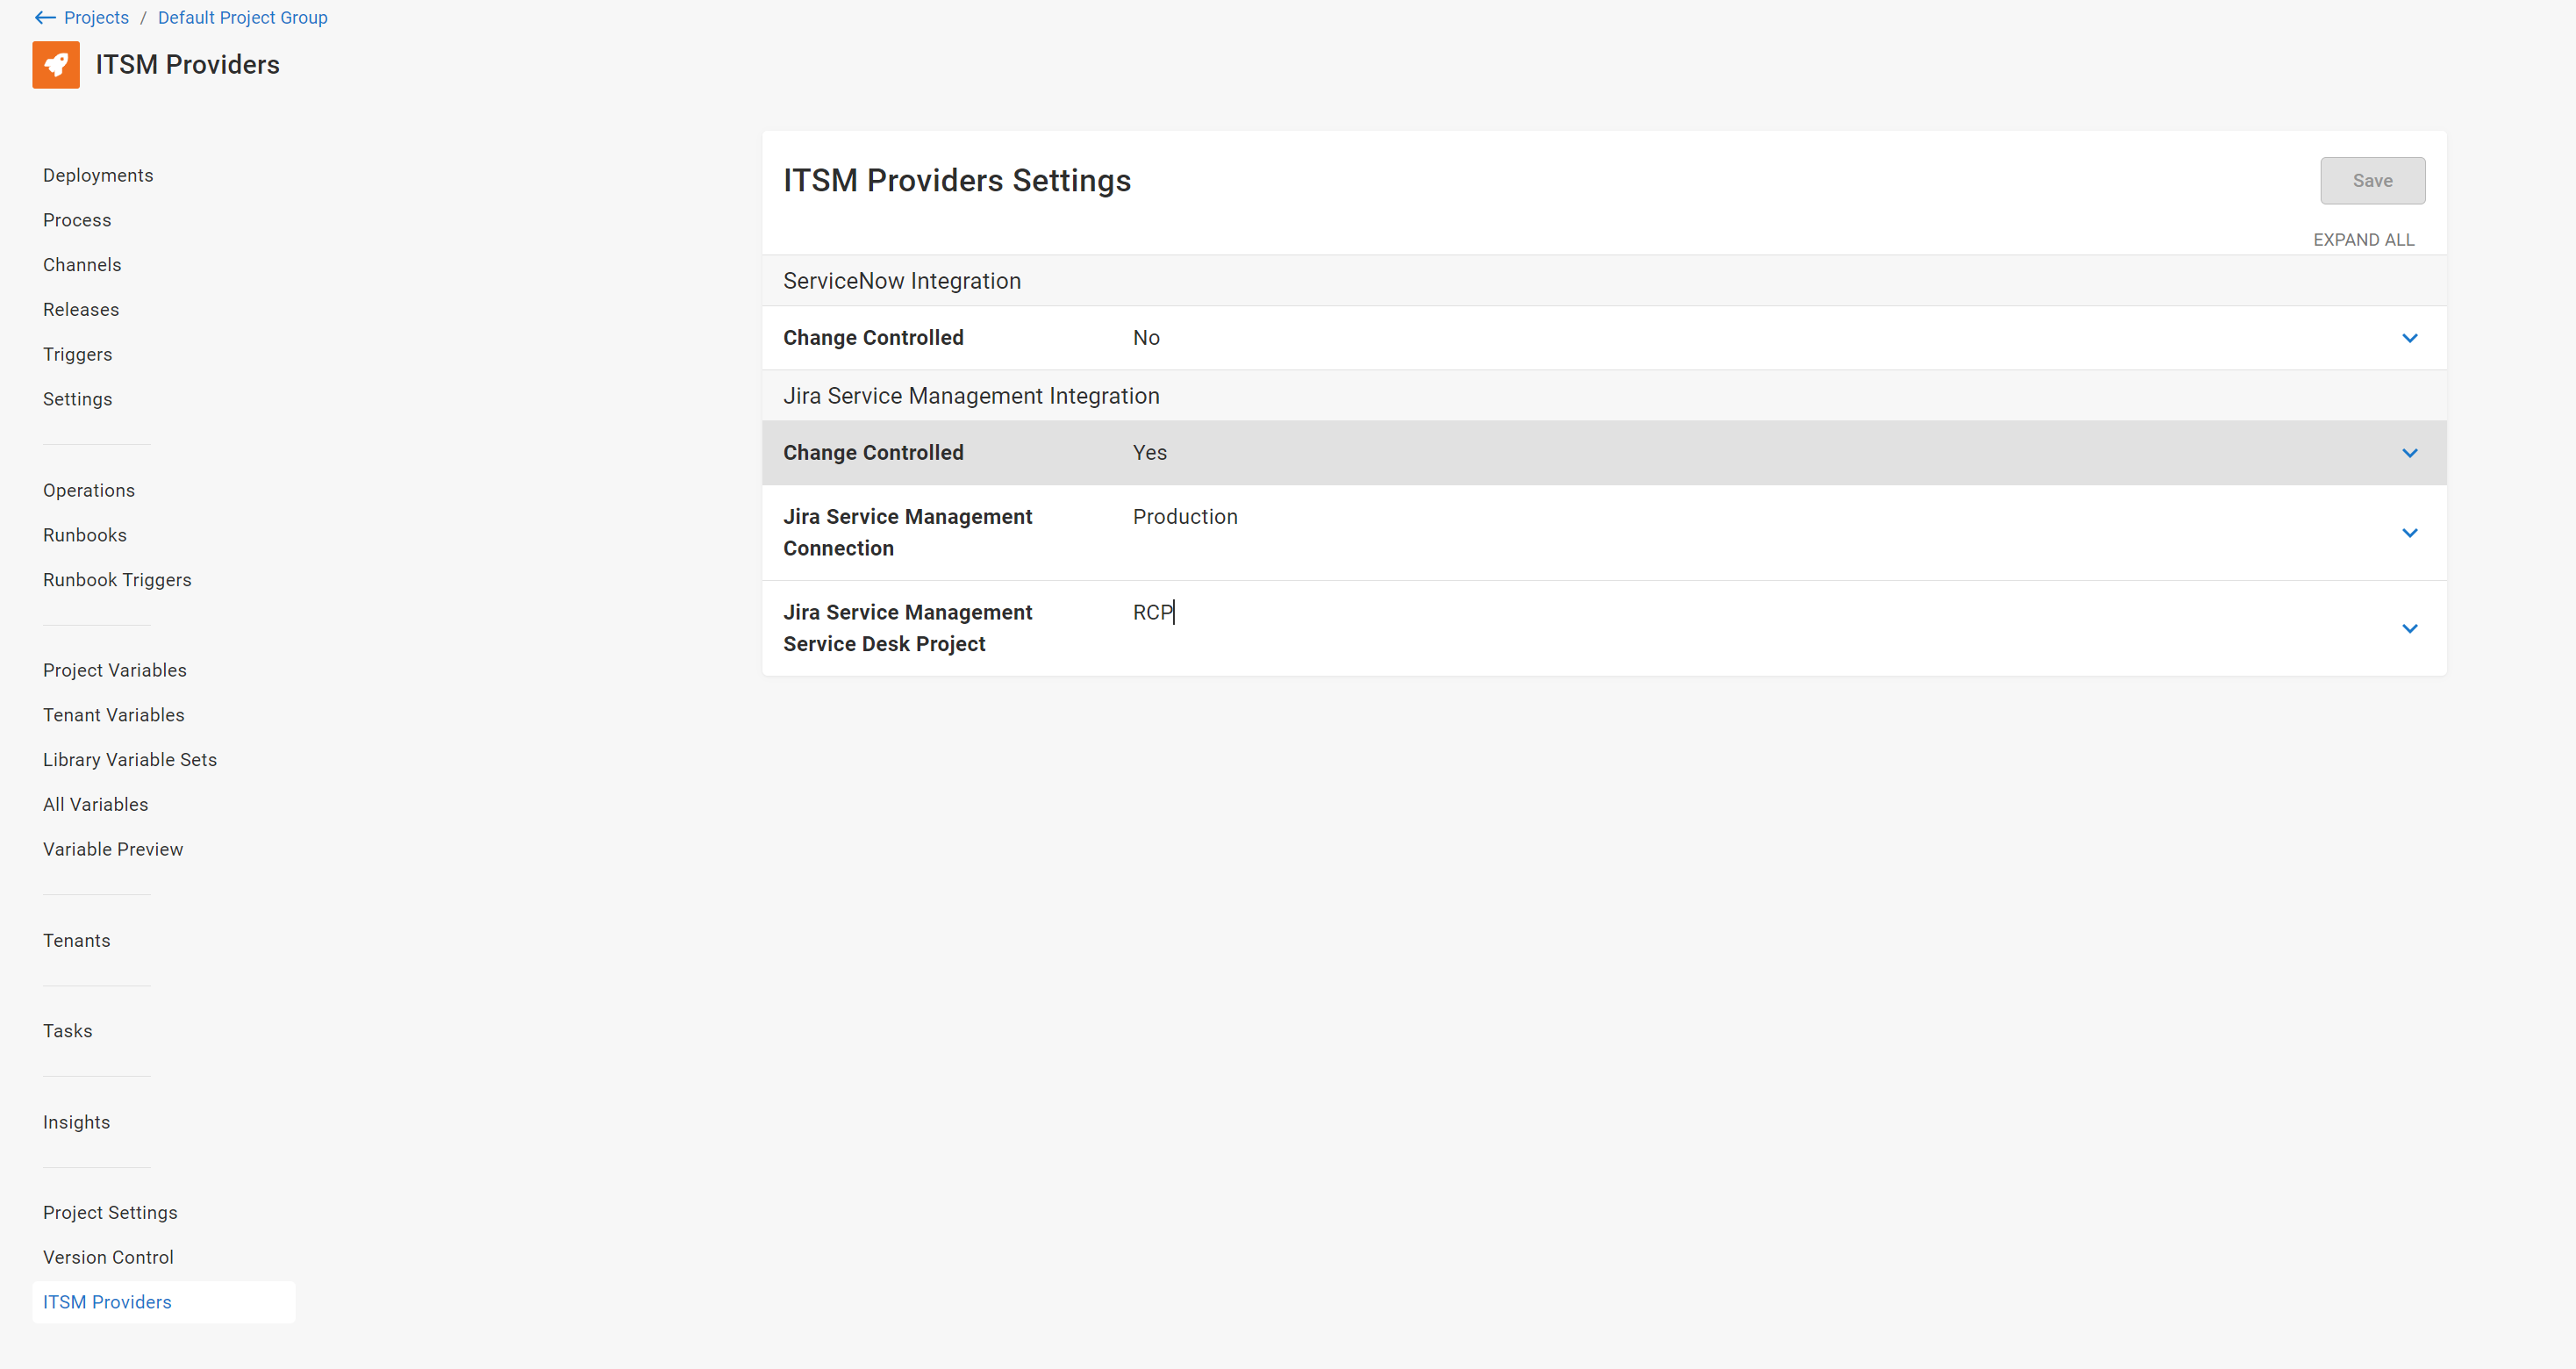
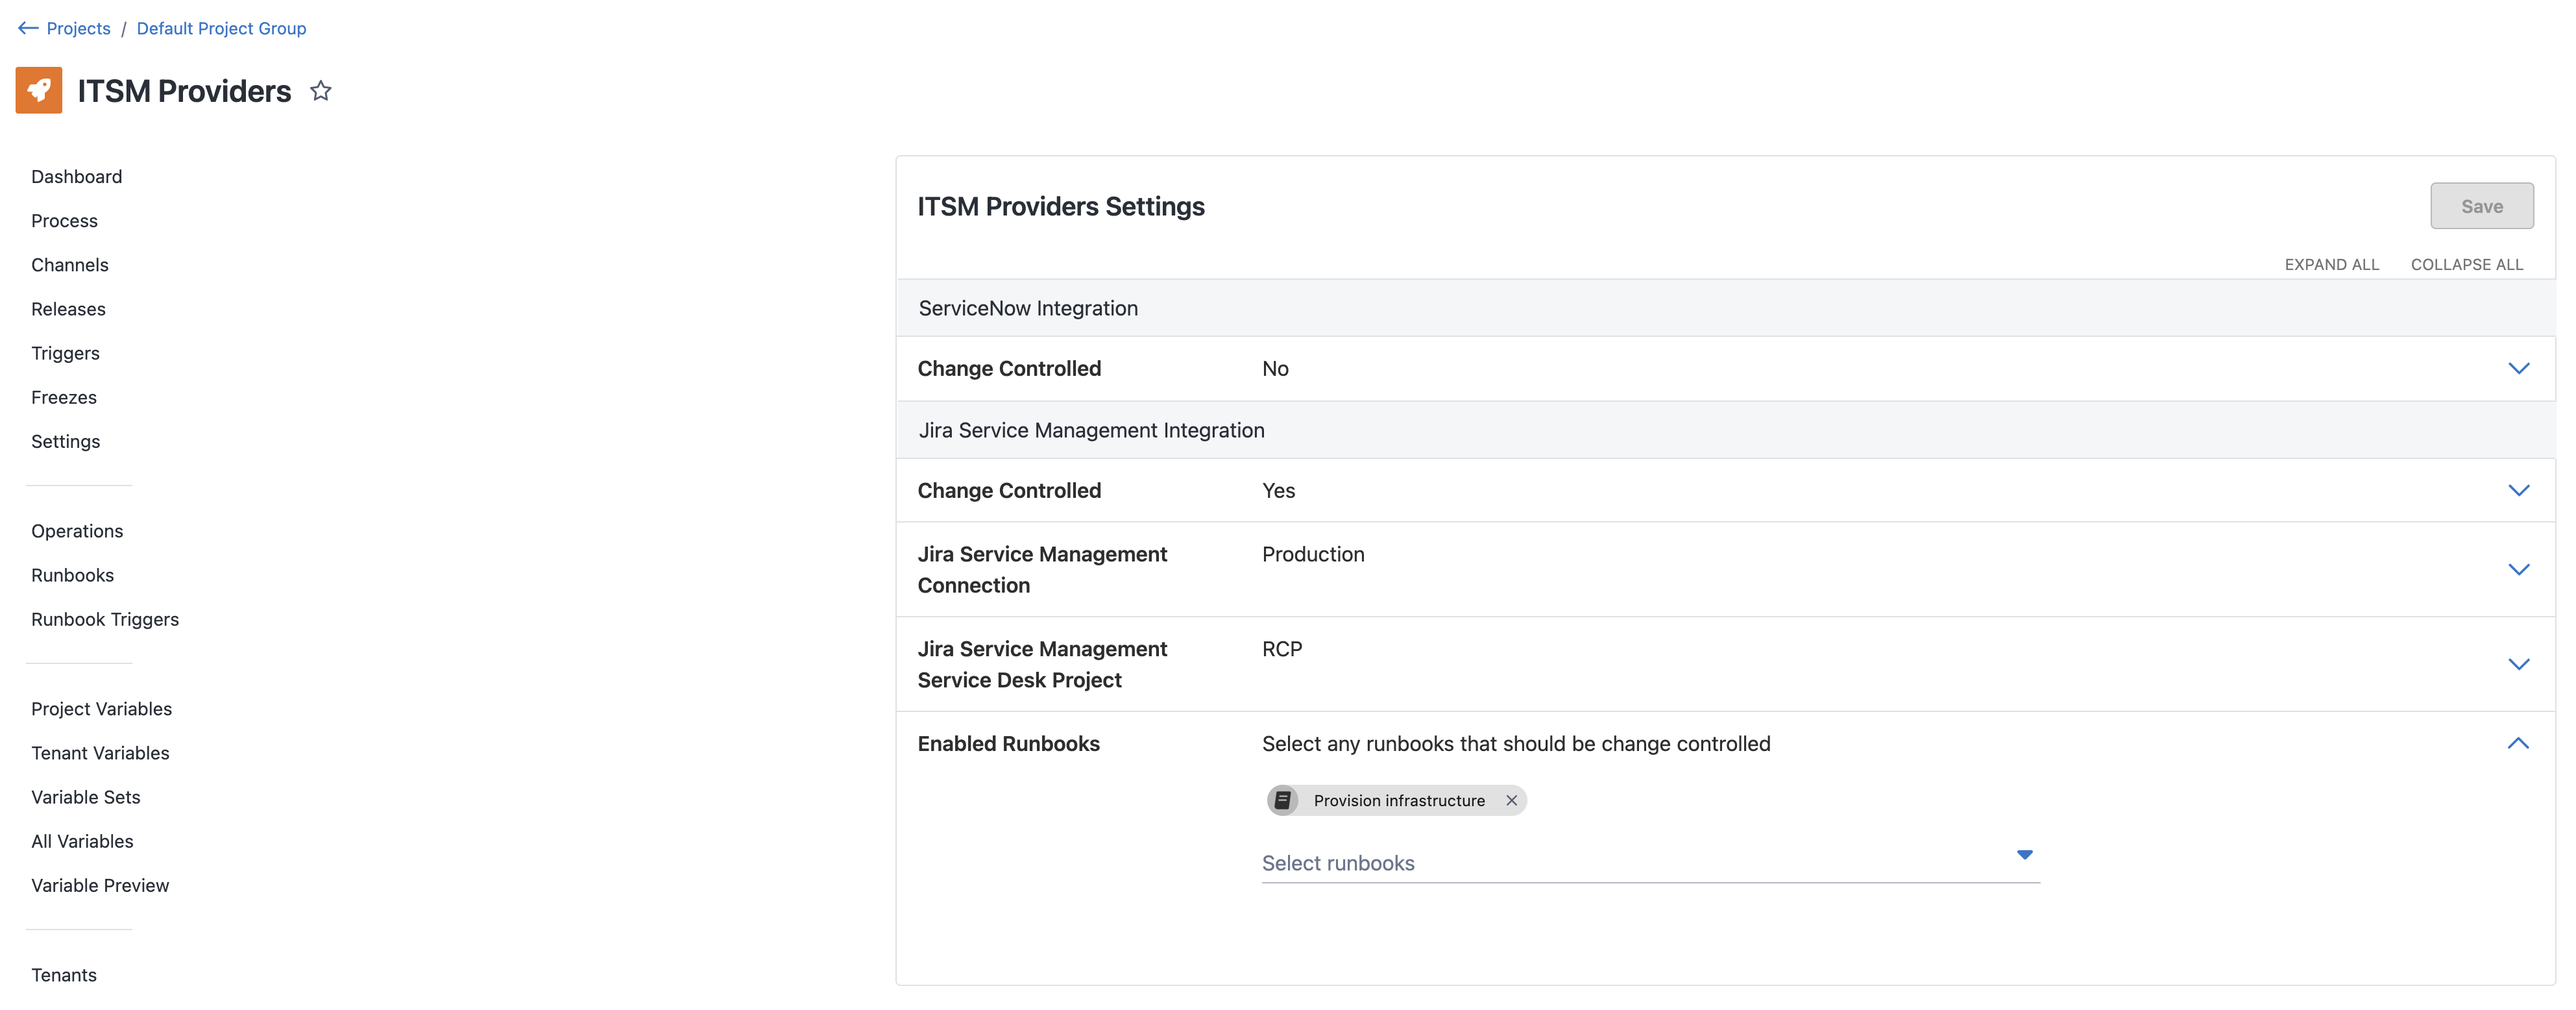
- Navigate to the project and then Settings ➜ ITSM Providers.
- Check the Jira Service Management Integration ➜ Change Controlled setting.
- Select your JSM connection in the Jira Service Management Connection setting and click SAVE.
Setting up runbooks for CR approval
This feature is only available for version 2025.2.7878 and later
To enforce a runbook run to require an approved CR, the runbook needs to be included in the Enabled Runbooks setting and the Change Controlled setting also needs to be enabled in both the project and the environment the runbook is run in.
To enable a runbook to enforce a requirement for an approved CR:
- Navigate to the project and then Settings ➜ ITSM Providers.
- Check the Jira Service Management Integration ➜ Change Controlled setting.
- Select your JSM connection in the Jira Service Management Connection setting.
- Select the runbooks you want to require an approved CR in the Enabled Runbooks setting, and then press SAVE
Default behavior
Deployments and runbook runs resulting in a CR creation will produce an issue with a Request Type of Request a change
Supplying the CR number to a deployment
If you add a variable to your project named Octopus.JiraServiceManagement.ChangeRequest.Number,
then an Issue will not be created, and instead, the supplied number will be used during the
approval check. This variable can also be scoped or configured as a Prompted variable.
From 2025.2 on this can be set under the Jira Service Management Issue settings section on the deployment or runbook run creation page. Setting the Issue number at the deployment or runbook run level will override any predefined variable.
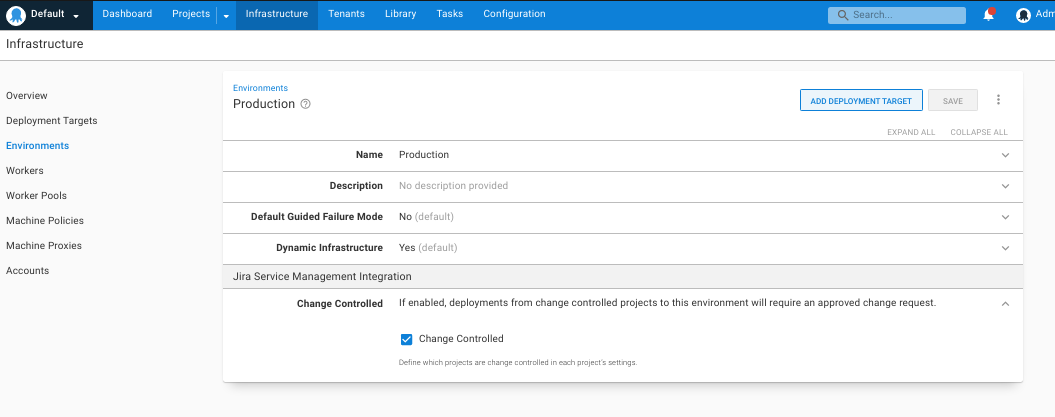
Setting up environments for CR approval
To enable an environment to enforce a requirement for an approved CR, navigate to { {Infrastructure,Environments}}, edit the environment via the overflow menu and check the Jira Service Management Integration ➜ Change Controlled setting, and then press SAVE.
How it works
Deployments where both the project and environment have Change Controlled enabled, will query JSM for an approved Issue before execution can begin.
When a Change Controlled deployment is evaluated for approval, the following checks are performed:
- If a specific CR number is available, via a variable named
Octopus.JiraServiceManagement.ChangeRequest.Number, then only this CR will be checked. - If there is an existing CR with the specifically formatted Short Description available. See Title text matching for more information, then this CR will be evaluated.
- Create a new CR.
- This will be a `Request a change” type Issue
- An Issue created by Octopus will have a Short Description in the format outlined in Title text matching.
When re-deploying a previous deployment, the same Issue will be used if it is still open. If it is closed the above process will be followed again.
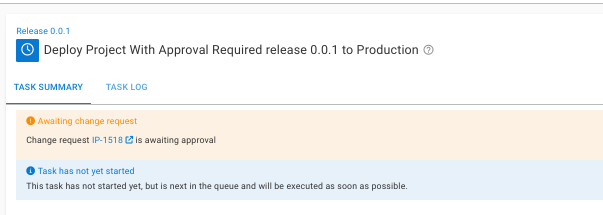
Once an Issue has been found, the deployment will only proceed if the State of the CR is
Implementing. If the State is either Preview, Planning, Authorize, or Awaiting Implementation the deployment will wait. Any other State will cause the deployment task to fail. For deployments using Highly Available (HA) Octopus, the logs will be written to the server logs instead of the task logs.
The only supported states are those defined in the default Issue lifecycle
The number of the Issue created or found will appear in the Task Summary tab of the executing Octopus deployment task. Clicking on the CR number in the message will navigate you to the CR in JSM.
Title text matching
Octopus supports matching a CR by setting the Summary of the CR to a well-known format:
Octopus: Deploy "{project name}" version {release version number} to "{environment name}"
e.g Octopus: Deploy "Web Site" version 1.0.1-hotfix-001 to "Dev"
The title must match the format exactly, including the double-quotes.
Populating CR fields through Octopus
This feature is only available for version 2025.4.9247 and later
To control the content of the CRs the variable Octopus.JiraServiceManagement.Field[jsm_field] can be set at the project level. These are contributed to the create CR body as a dictionary allowing any field to be set.
For example, to set a custom Summary or Due Date:
| Field | Variable | Example Value |
|---|---|---|
| Summary | Octopus.JiraServiceManagement.Field[summary] | Custom Summary with #{SomeVariable} #{Octopus.Deployment.Id} |
| Due Date | Octopus.JiraServiceManagement.Field[duedate] | 12-12-2025 |
Setting a Summary will override the auto-generated Octopus summary. Title text matching means this will automatically progress the deployment unless the resolved summary is unique. This can be done by including variables like the deployment or environment Id.
Custom fields can also be set once your custom field ID is obtained for each field. For example, to set a Labels custom field, Number custom field, or Multi-select custom field:
| Field | Variable | Example Value |
|---|---|---|
| Labels | Octopus.JiraServiceManagement.Field[customfield_1023] | [“yourUserDefinedLabel”,“anotherLabel”] |
| Number | Octopus.JiraServiceManagement.Field[customfield_1024] | 235 |
| Multi-select | Octopus.JiraServiceManagement.Field[customfield_1025] | [{“value”:“yourFirstSelection”},{“value”:“yourSecondSelection”}] |
When adding Multi-line text custom fields, add line breaks using the plainText value editor dialog:

For a full list of available fields and values refer to the JIRA docs.
Respecting change windows
In addition to a change request being approved, a change must also be in its schedule change
window in order for the deployment to execute. The change window is controlled by the Planned start and Planned end on the linked Issue.
The following list assumes the linked change is in an approved state.
- If no
Planned startandPlanned endare specified there is no change window and the deployment will execute. - If only a
Planned startis set the deployment will execute on or after the defined date. - If only a
Planned endis set the deployment will execute on or before the defined date. - If
Planned startandPlanned endare specified the deployment will execute on or between the defined dates.
If at any time a Planned end is exceeded and the linked change request is not approved, the deployment will be terminated.
Available Variables in a Deployment or Runbook
The following variables are only available in version 2025.4 and later
| Variable | Notes |
|---|---|
Octopus.JiraServiceManagement.ChangeRequest.Number | The number of the matched or created change request |
Octopus.JiraServiceManagement.ChangeRequest.Id | The system identifier of the matched or created change request |
Octopus.JiraServiceManagement.Connection.Id | |
Octopus.JiraServiceManagement.Connection.Name | |
Octopus.JiraServiceManagement.Connection.BaseUrl | |
Octopus.JiraServiceManagement.Connection.Username | |
Octopus.JiraServiceManagement.Connection.Token |
Known issues and limitations
- Once an Issue is deemed to be related to a deployment, then only this Issue will be evaluated for the deployment to proceed. If the Issue is incorrect, you will need to cancel the deployment, close the CR and try the deployment again.
- Each project only supports a single JSM connection.
Older versions
- Prior to version 2025.2.7878 runbooks did not support JSM approvals.
Help us continuously improve
Please let us know if you have any feedback about this page.
Page updated on Wednesday, June 3, 2026