Create an Octopus account
An Octopus account lets you manage your Octopus Cloud instances. You can register an account at octopus.com/register.
You can sign up with your existing Google, Microsoft, or GitHub account, or create a unique login for Octopus:
- Enter your name.
- Provide your email address and create a password.
- On the next screen, verify your email address.
- After you verify your email, you’ll be signed into your Octopus account.
After you create an Octopus account, you can create a new Octopus Cloud instance.
Create a Cloud instance
To create a new Octopus Cloud instance, make sure you’re signed in to your Octopus account:
- Go to octopus.com/free-signup.
- Enter the URL you’d like to use to access your instance. If that URL isn’t available, try another one.
- Select the region where you’d like to host your instance.
- Add your company name.
- Review the terms of our customer agreement, privacy policy, and acceptable usage policy.
- Click Start using Octopus.
You’ll see the account provisioning screen. Your Octopus Cloud instance should be ready within a minute. We’ll also email you when it’s ready to use.
Access your Octopus Cloud instance
You can access your Octopus Cloud instance using the URL you chose during registration. In this example URL, your-url is the part of the URL you provided:
https://your-url.octopus.app/app#/users/sign-inManage user access
Invite users via Control Center
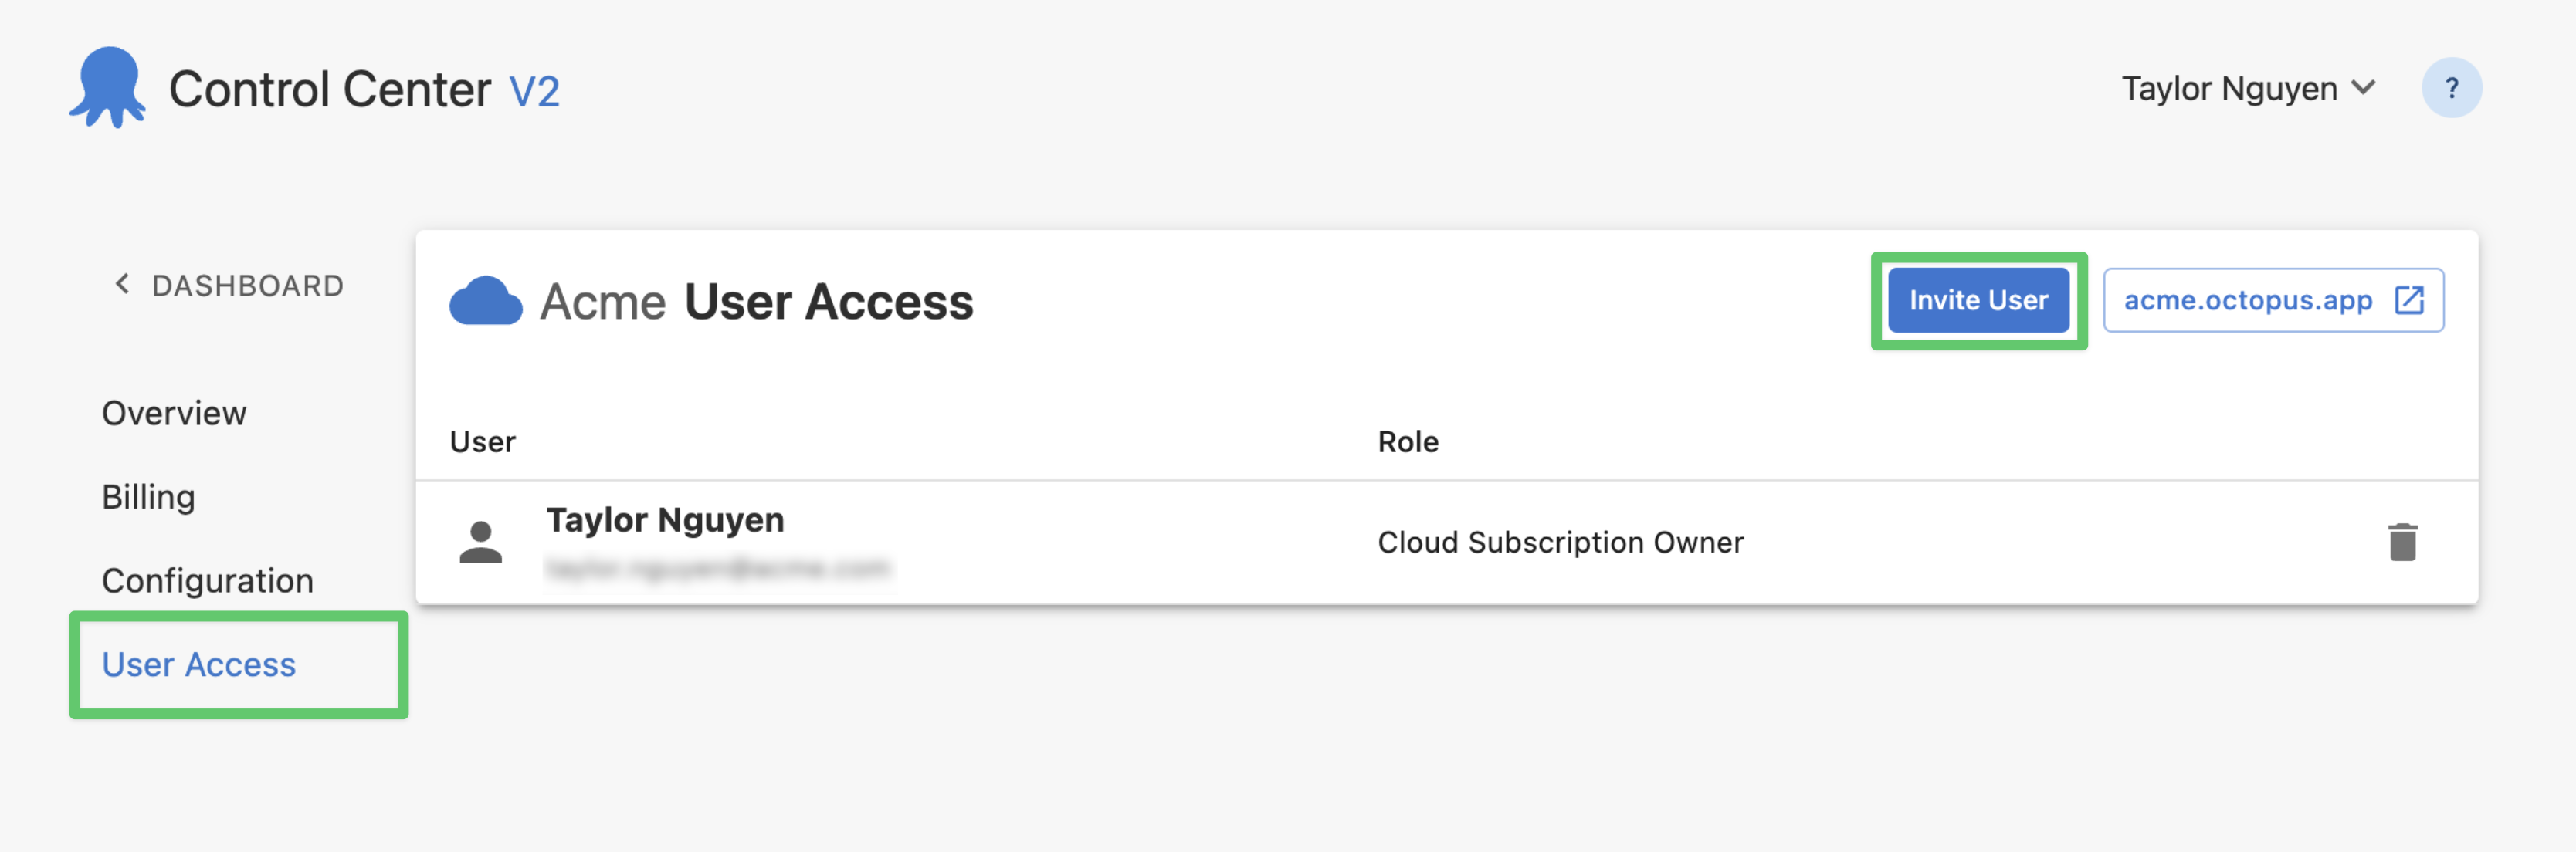
To invite a user to your Octopus Cloud instance:
- Navigate to your Cloud instance in Control Center.
- Click User Access in the left sidebar.
- Click Invite User.
- Enter the user’s details.
- Select which role to give the user (see role permissions below).
- Click Invite.
Email invitation
The invited user will receive an email invitation.
If they already have an Octopus ID (Octopus Deploy account), they just need to click Accept invite in the email to gain access to the subscription and then click Sign in to view the Octopus instance.
Otherwise, they will first need to Register a new account using the email address the invitation was sent to.
Role permissions
| Cloud Subscription Owner | Cloud Subscription User (Contributor) | Cloud Subscription User (Base) | |
|---|---|---|---|
| Control Center (billing.octopus.com) | View Overview Manage Billing Manage Configuration Manage User Access | View Overview | View Overview |
| Octopus Instance (example.octopus.com) | “Octopus Managers” team By default, the user has full permissions across all spaces. | “Space Managers” team By default, the user has full permissions in the “Default” space only. If you delete the “Default” space, the user will be added to the “Everyone” team. | “Everyone” team By default, the user can sign in but can’t view or do anything. |
Manage user permissions in Octopus Cloud
Invited users are only added to an Octopus Cloud instance after their first sign-in. To manage a newly invited user’s permissions, you will need to ask them to sign in to your Octopus Cloud instance first.
Octopus uses teams and user roles to manage permissions. After the invited user first signs in, they are automatically assigned to one of these teams:
- “Octopus Managers” team (Cloud Subscription Owner)
- “Space Managers” team (Cloud Subscription User (Contributor))
- “Everyone” team (Cloud Subscription User (Base))
By default, the “Everyone” team includes no user roles, so users assigned to this team can sign in to your Octopus Cloud instance but won’t have permission to see or do anything.
To give an “Everyone” team user (Cloud Subscription User (Base)) the correct permissions, you can do one or both of the following in your Octopus Cloud instance:
- Edit the “Everyone” team to include the minimum permissions all users need.
- Add the user to other teams with the correct permissions after they first sign in.
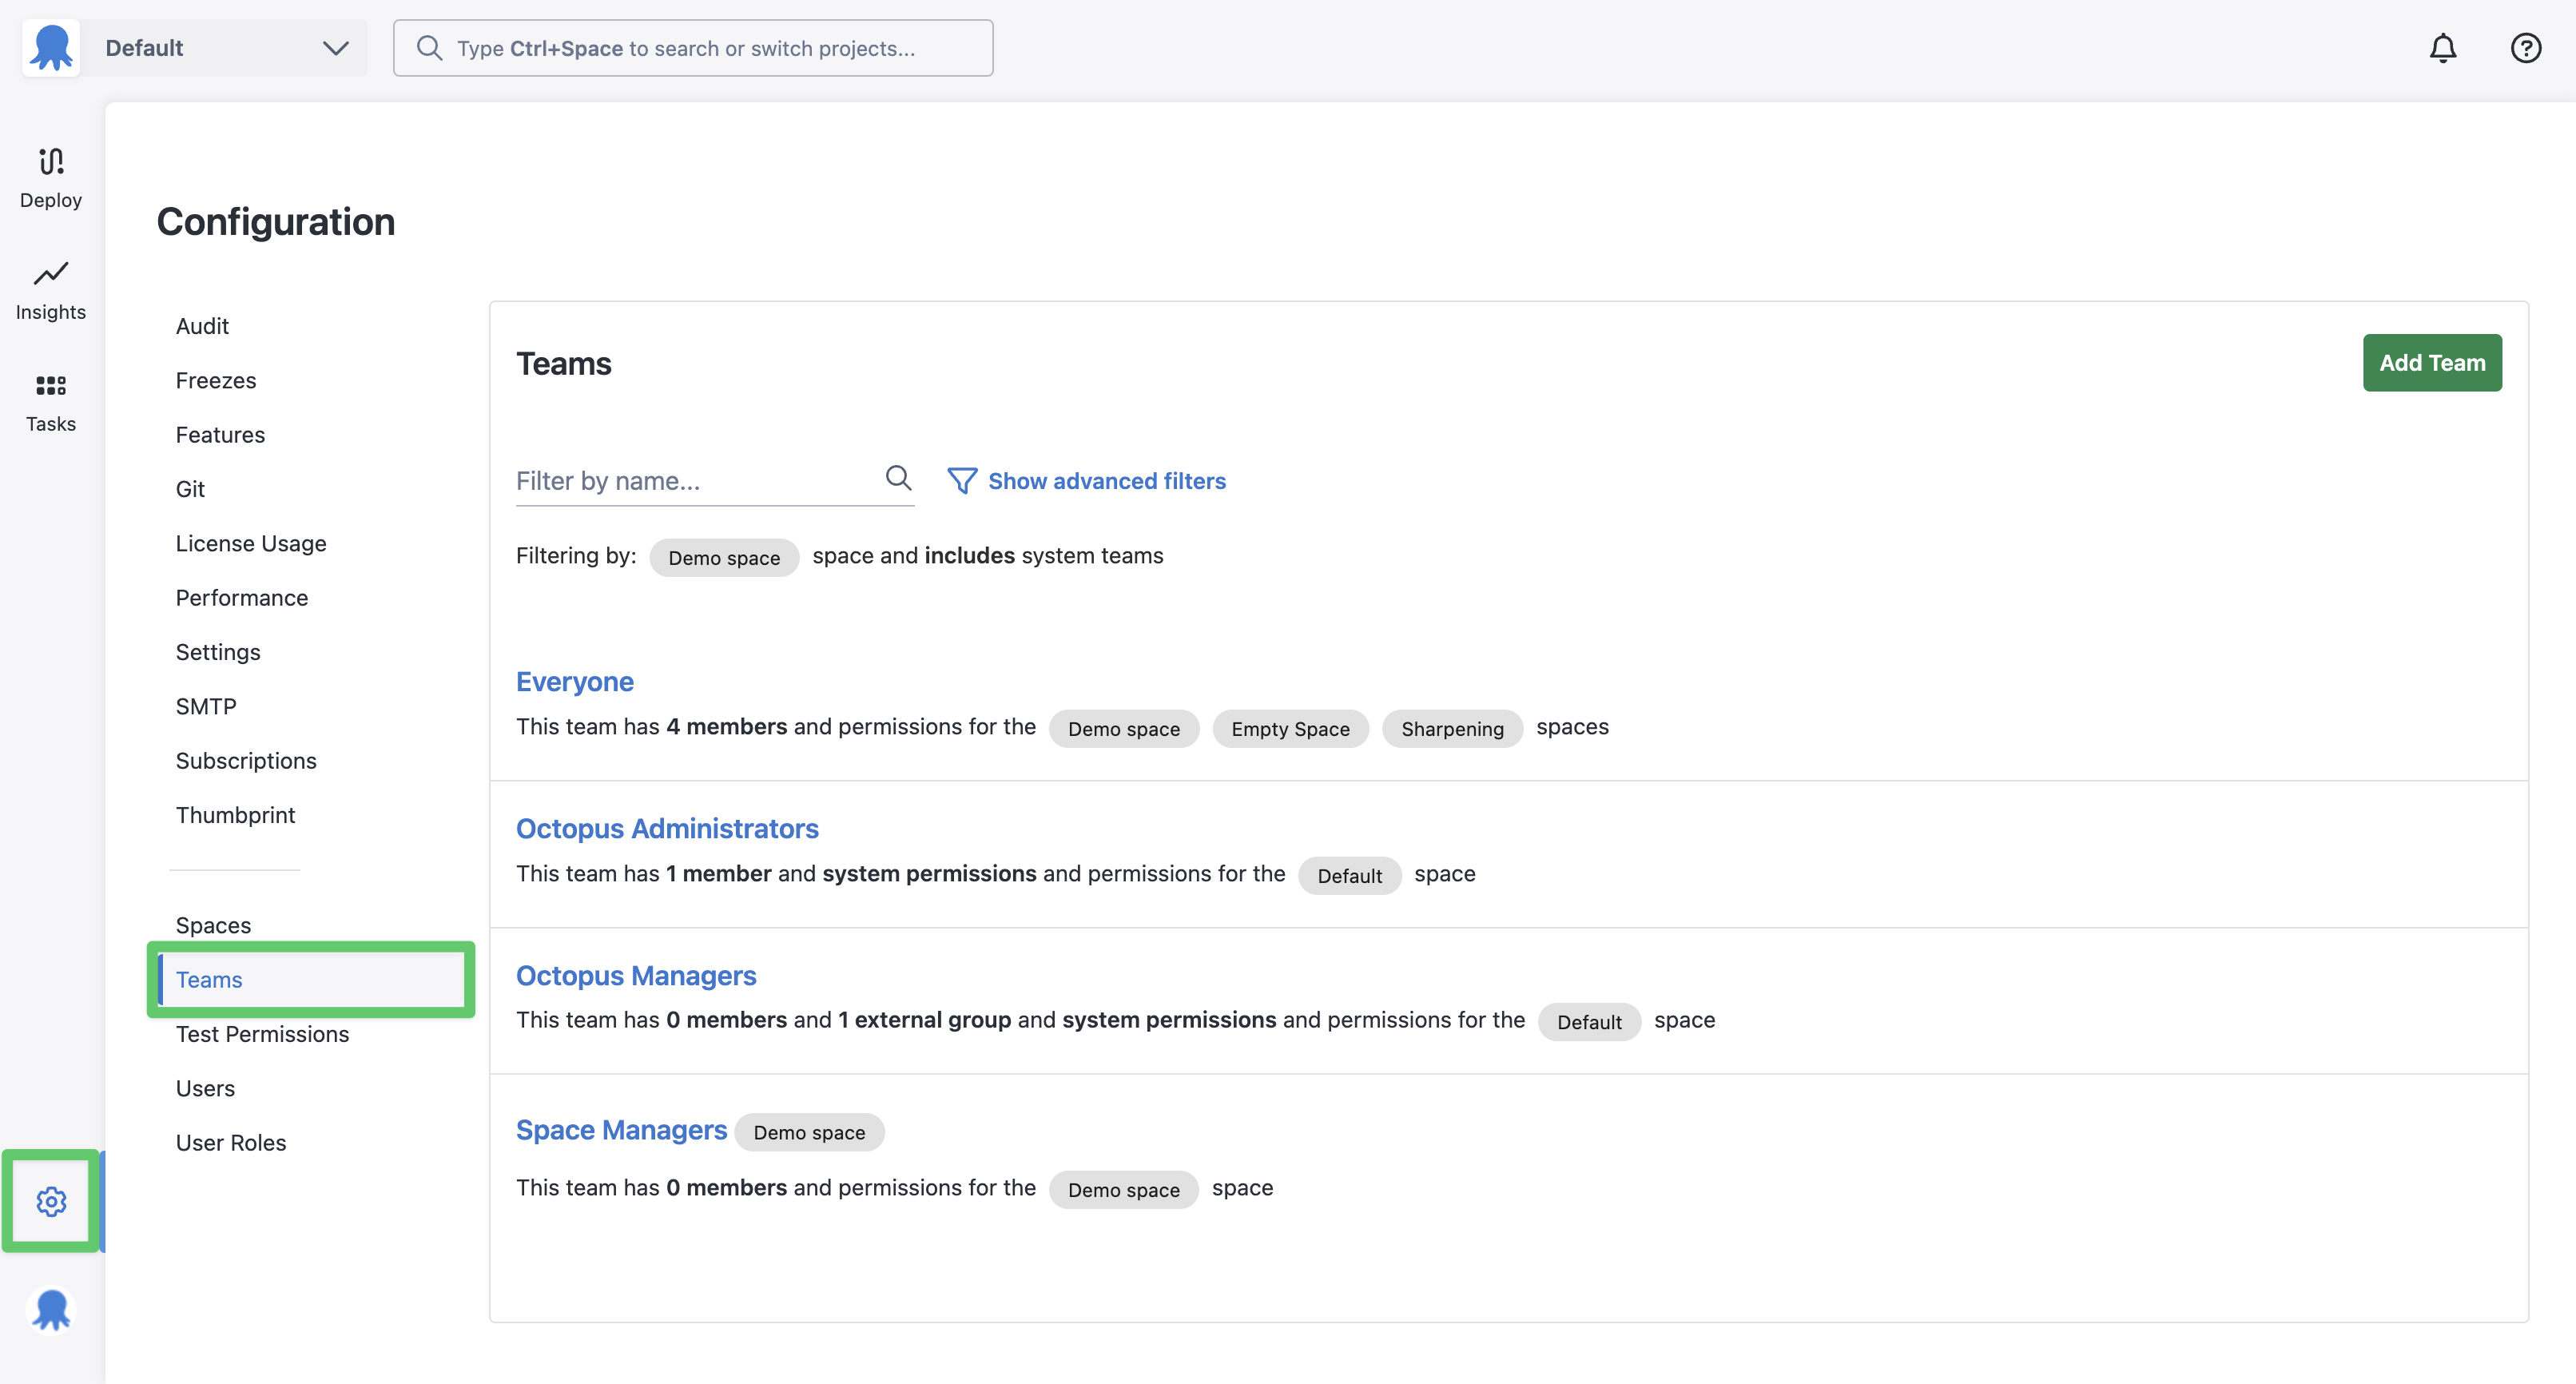
To adjust a user’s permissions, you can add them to other teams:
- In your Octopus Cloud instance, go to Configuration (the cog icon in the bottom left sidebar).
- Select Teams.
- Create a new team or select an existing one, such as Space Managers.
- Select Add Member.
- Select the user from the dropdown list.
- Click Add, then Save.
Learn about best practices for users, roles, and teams.
Set the maintenance window
To keep Octopus Cloud running smoothly, we use outage windows to perform updates. To minimize disruptions to your deployments, please pick a two-hour maintenance window outside of your regular business hours.
- Navigate to your Cloud instance in Control Center.
- Click Configuration.
- Locate the Maintenance Window section and click Change Window.
- Select a two-hour window.
- Click Submit to save your new maintenance window.
Change your password
To change your password for the Octopus instance and Octopus account:
- Navigate to Control Center.
- In the top-right corner, click the dropdown menu next to your username.
- Click Profile.
- Click Change Password.
- Enter your new password.
- Confirm the new password, and click Change password.
Reset your password
To reset your password:
- Go to octopus.com/signin.
- Click Forgot your password?
- Reset your credentials and sign into your Octopus account.
Find your Octopus Cloud version
Octopus Cloud is always up to date with the latest version of Octopus Deploy. To check which version your instance is running:
- Sign in to your Octopus Cloud instance.
- In the bottom-left corner, look for the Octopus logo or your Gravatar (if set up).
- Click the Octopus logo (or Gravatar) to open the menu.
- The version appears under your name.
Learn more
Learn more about managing Octopus subscriptions.
Help us continuously improve
Please let us know if you have any feedback about this page.
Page updated on Friday, June 13, 2025