Git settings are configured per project and are accessed via the Settings ➜ Version Control link in the project navigation menu. This page will walk through how to convert a project to Git.
Creating a new version-controlled project
To get a feel for the config-as-code feature, you may want to create a new project that you can test before committing to permanently converting an existing project. This project’s deployment process, deployment settings, runbook processes, and non-sensitive variables will be stored in a Git repository when configured.
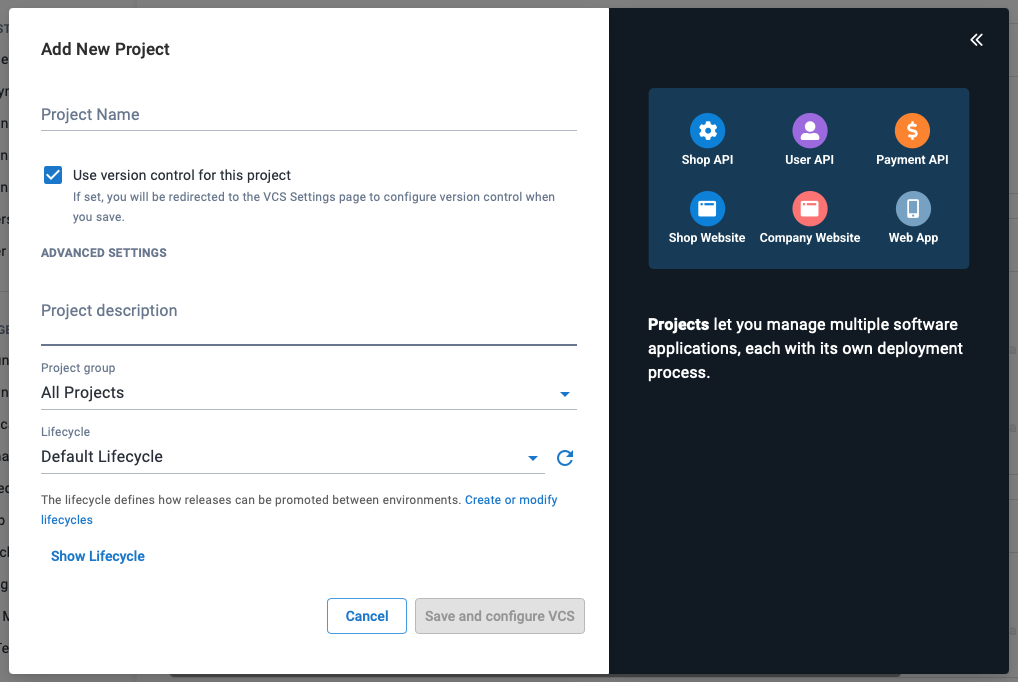
Click the New Project button and select Use version control for this project.
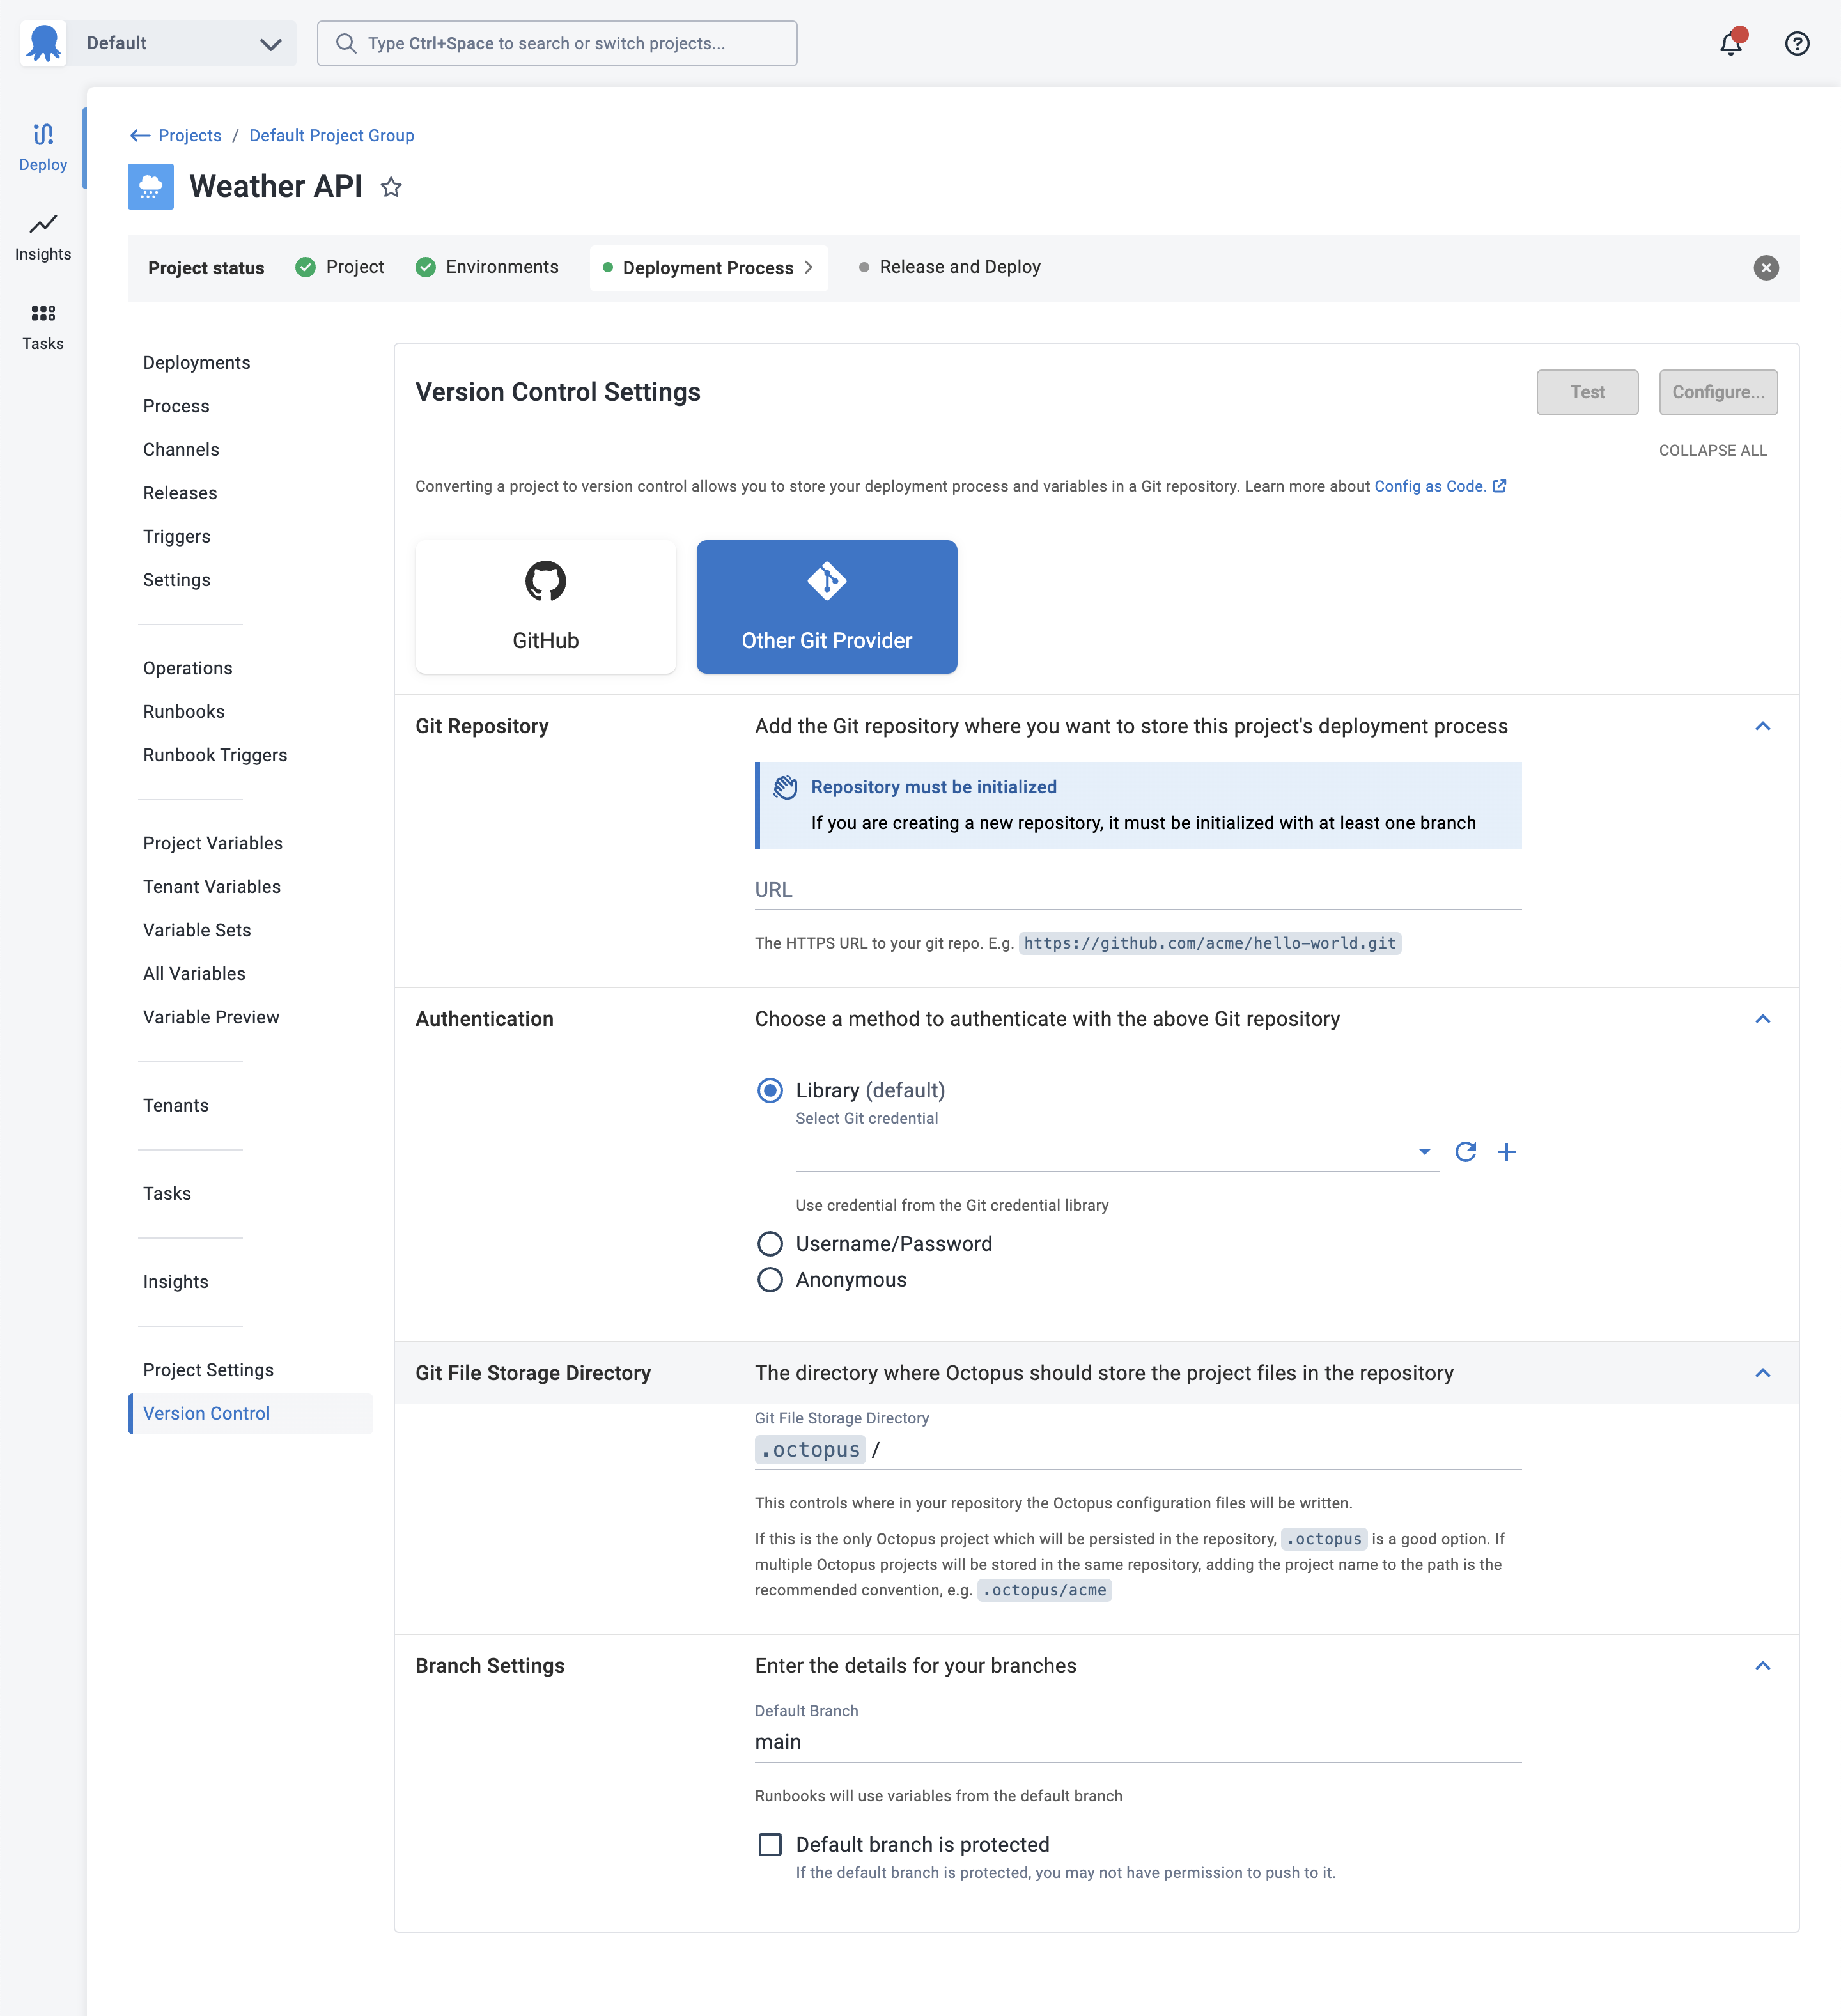
Once you click the Save button, you’ll be sent to the version control screen to configure your version control settings. Enter the URL for your Git repository, your username and password / personal access token.
Different VCS providers require different URL formats for the Git repository, some (e.g. GitLab) require the URL include .git at the end while others (e.g. Azure DevOps) does not support this. GitHub supports either format.
The best option to get the correct URL is to go to the repository in your provider and copy the URL used for cloning the repository from there.
Learn more about Git credentials in Octopus Deploy.
Next, add the directory you would like Octopus to store the project configuration. You can connect multiple projects to the same repository if they all use a different subdirectory (e.g. .octopus/acme and .octopus/another-project).
You can have multiple deployment processes in the same repository if they all use a different subdirectory.
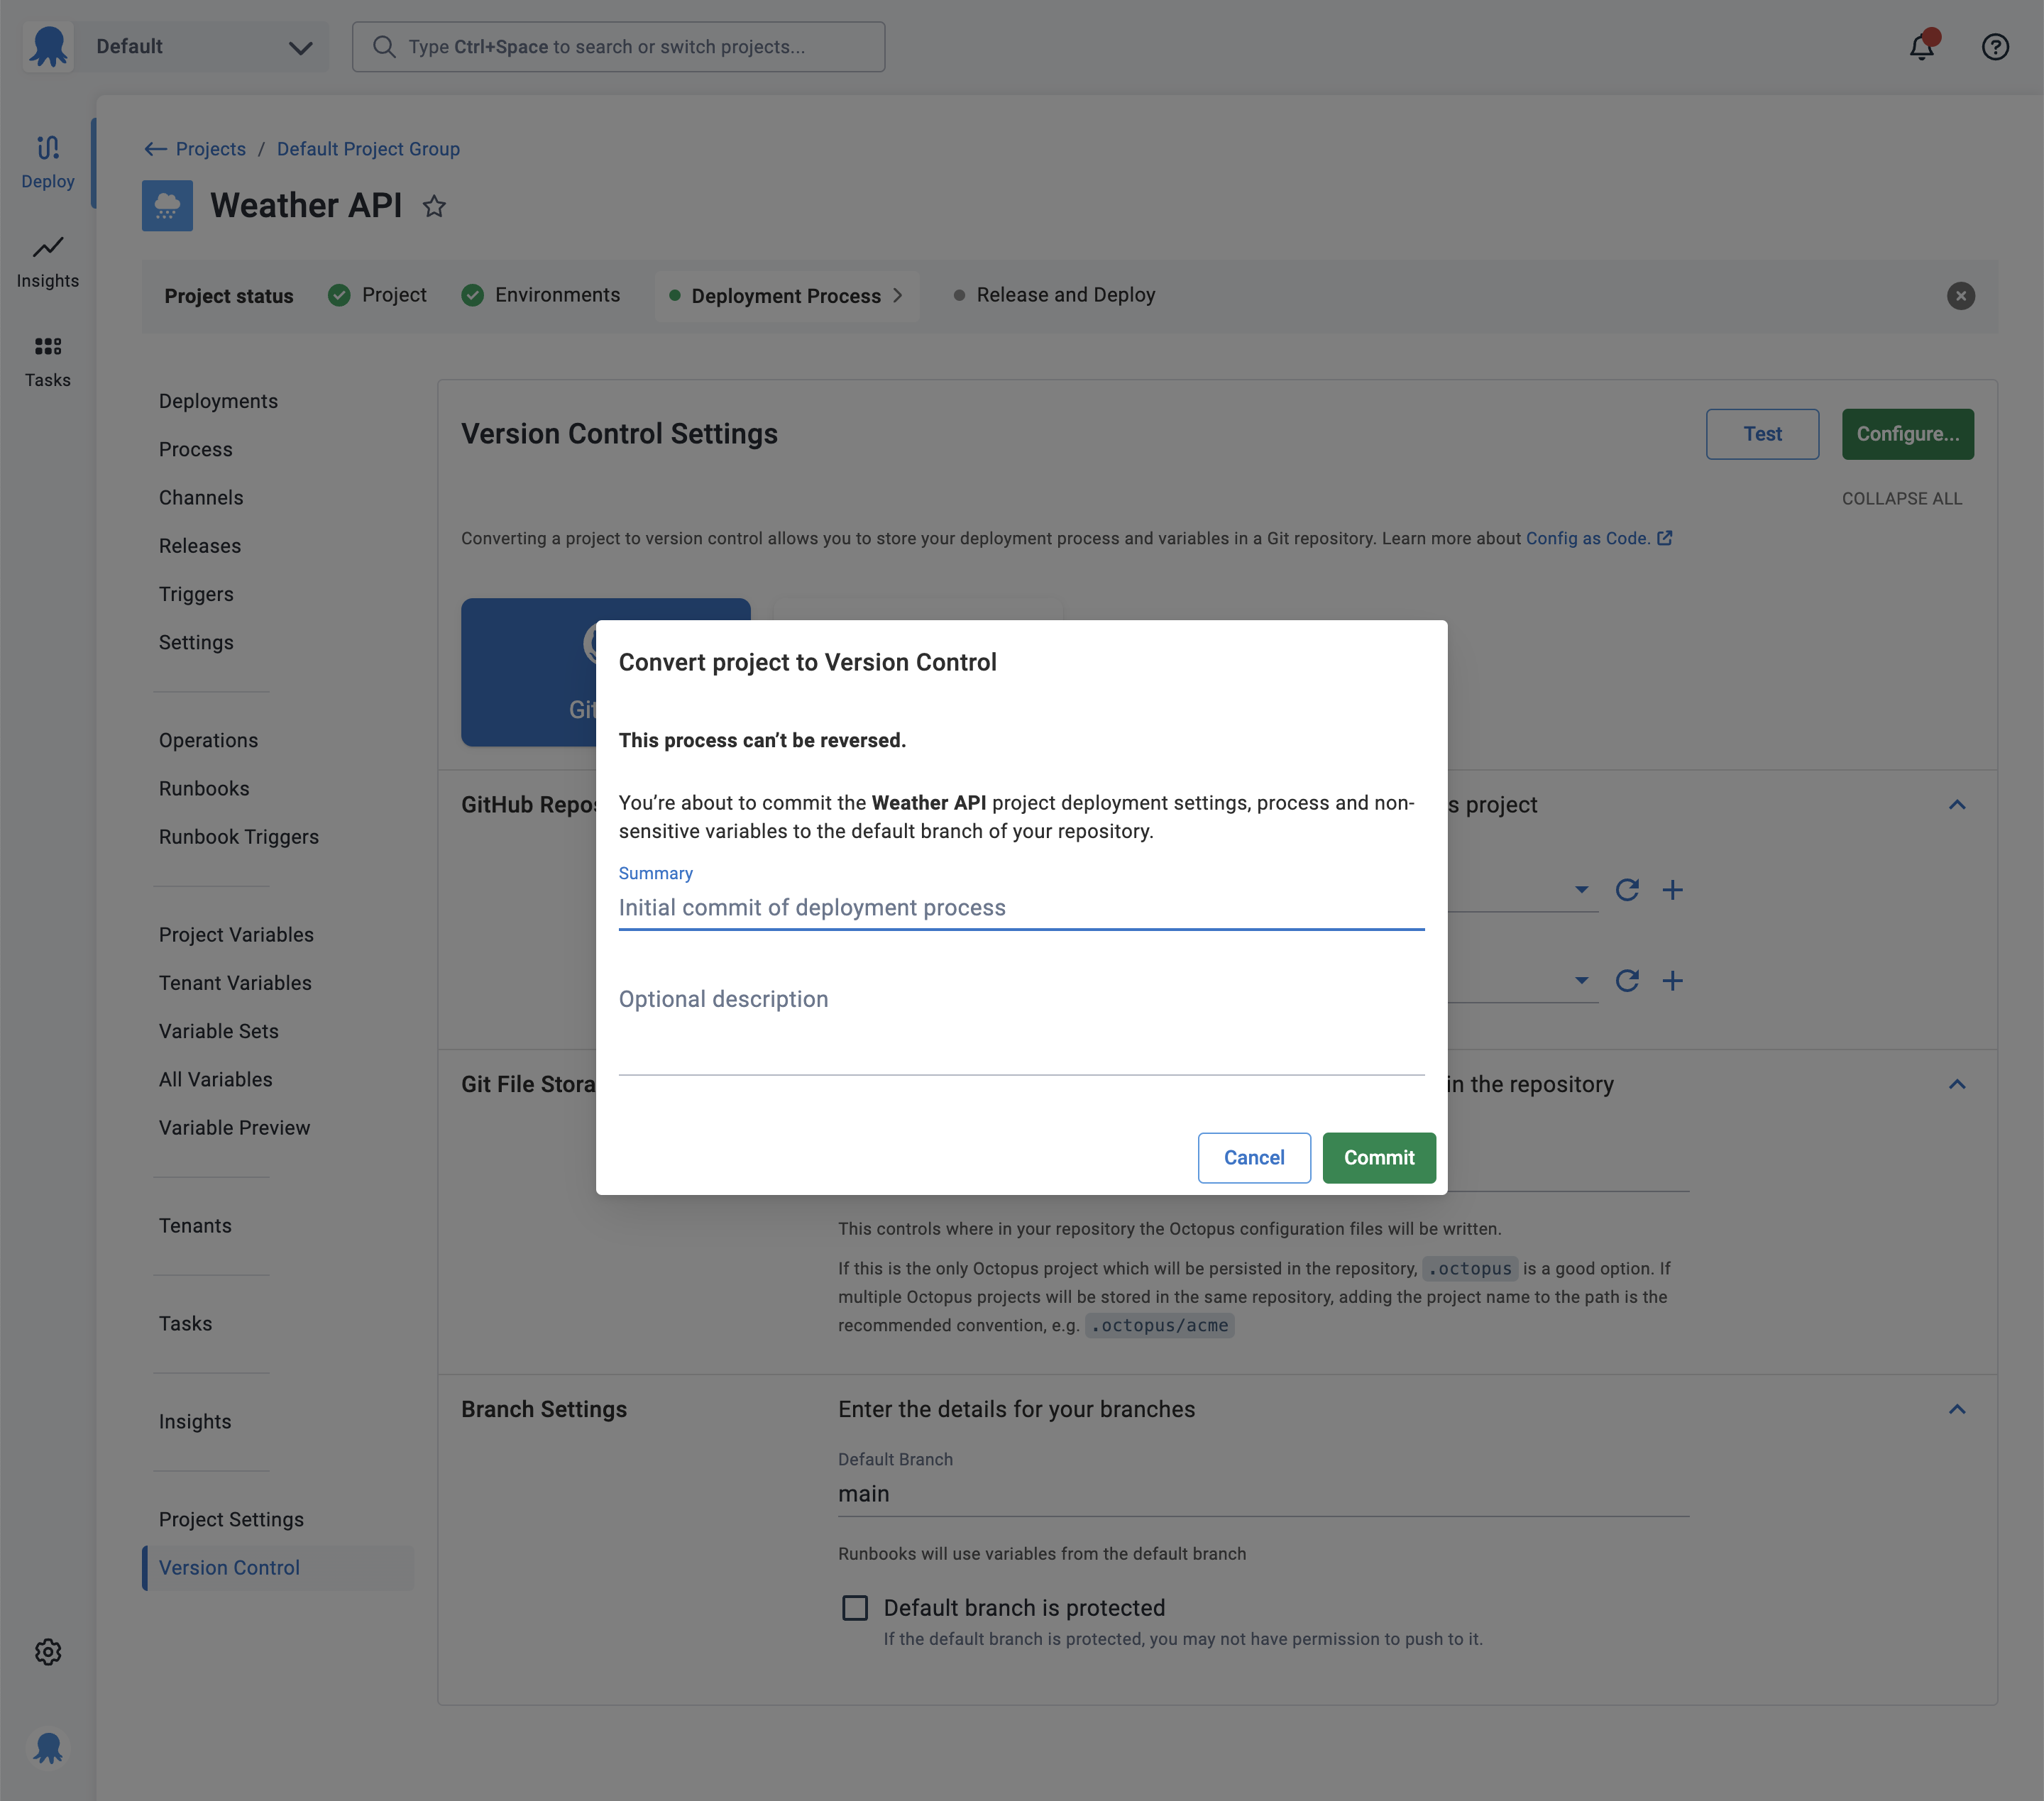
Finally, add your default branch name in Branch Settings and click Configure. Once you press the Configure button, a modal window will appear to confirm this change and give you the option to provide a summary and description for the first commit or cancel the conversion.
Your project is now configured with Version Control. You can see this change reflected on the left navigation of the page, where you can change branches. You can also confirm this in your Git repository. The .octopus directory will now be created, and it should contain the following files and folders:
- deployment_process.ocl
- deployment_settings.ocl
- variables.ocl
- schema_version.ocl
- runbooks/
The runbooks/ directory will contain runbook-name.ocl files for any published runbooks.
If your repository has branch protection setup, see Setting up in a repository with protected branches.
Configuring an existing project to use Git
Converting a project to use Git is a one-way change. Once you convert a project Git, you cannot convert it back. Please make sure you want to do this, and consider cloning your project to test how it works, so you know what to expect before converting important projects.
Using config-as-code, you can perform a one-way conversion of existing projects to leverage Git.
Select the project you would like to convert and click on the Settings ➜ Version Control link on the project navigation menu. Enter the connection information for your Git repository. You need to provide:
- The URL for your Git repository
- A username and password / personal access token (or anonymous for a public repository)
- The directory you would like Octopus to store the deployment process in
- The name of the default branch
Learn more about Git credentials in Octopus Deploy.
You can have multiple deployment processes in the same repository if they all use a different subdirectory.
Once you press the Configure button, a modal window will appear to confirm this change and give you the option to provide a summary and description for the first commit or cancel the conversion.
Your project is now configured with Version Control. You can see this change reflected on the left navigation of the page, where you can change branches. You can also confirm this in your Git repository. The .octopus directory will now be created, and it should contain the following files and folders:
- deployment_process.ocl
- deployment_settings.ocl
- variables.ocl
- schema_version.ocl
- runbooks/
The runbooks/ directory will contain runbook-name.ocl files for any published runbooks.
If your repository has branch protection setup, see Setting up in a repository with protected branches.
Setting up a repository with protected branches
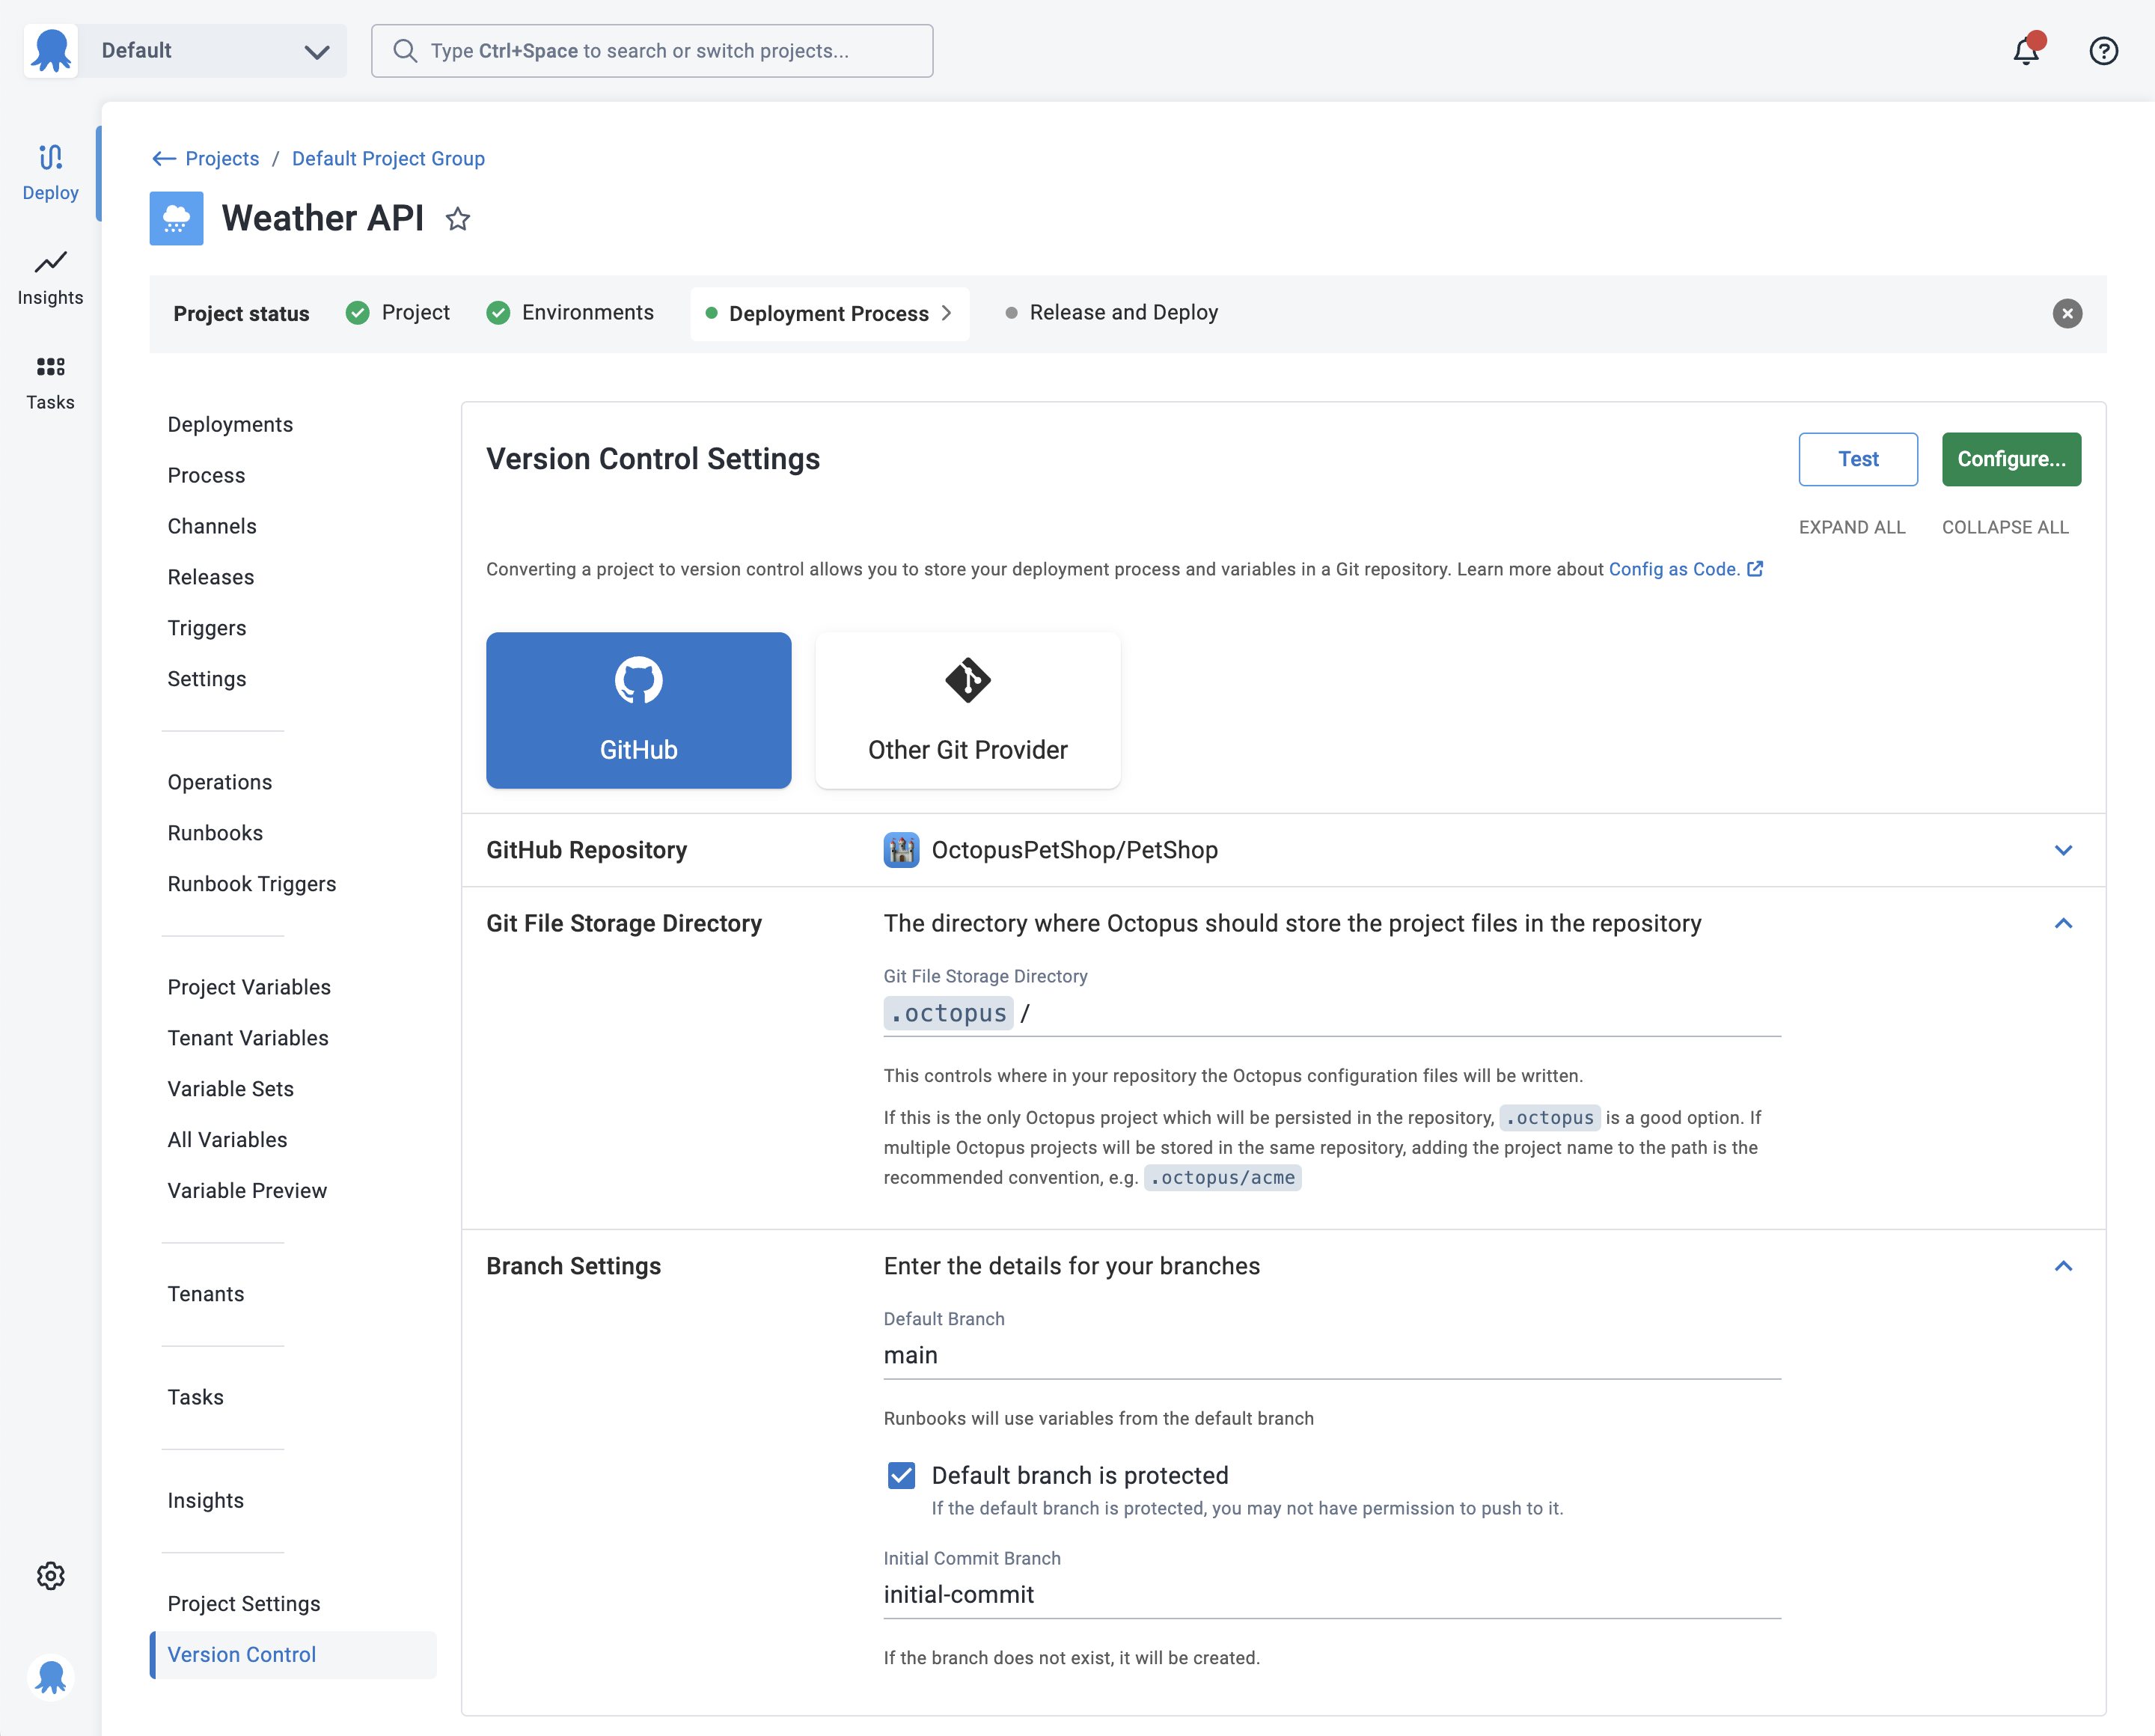
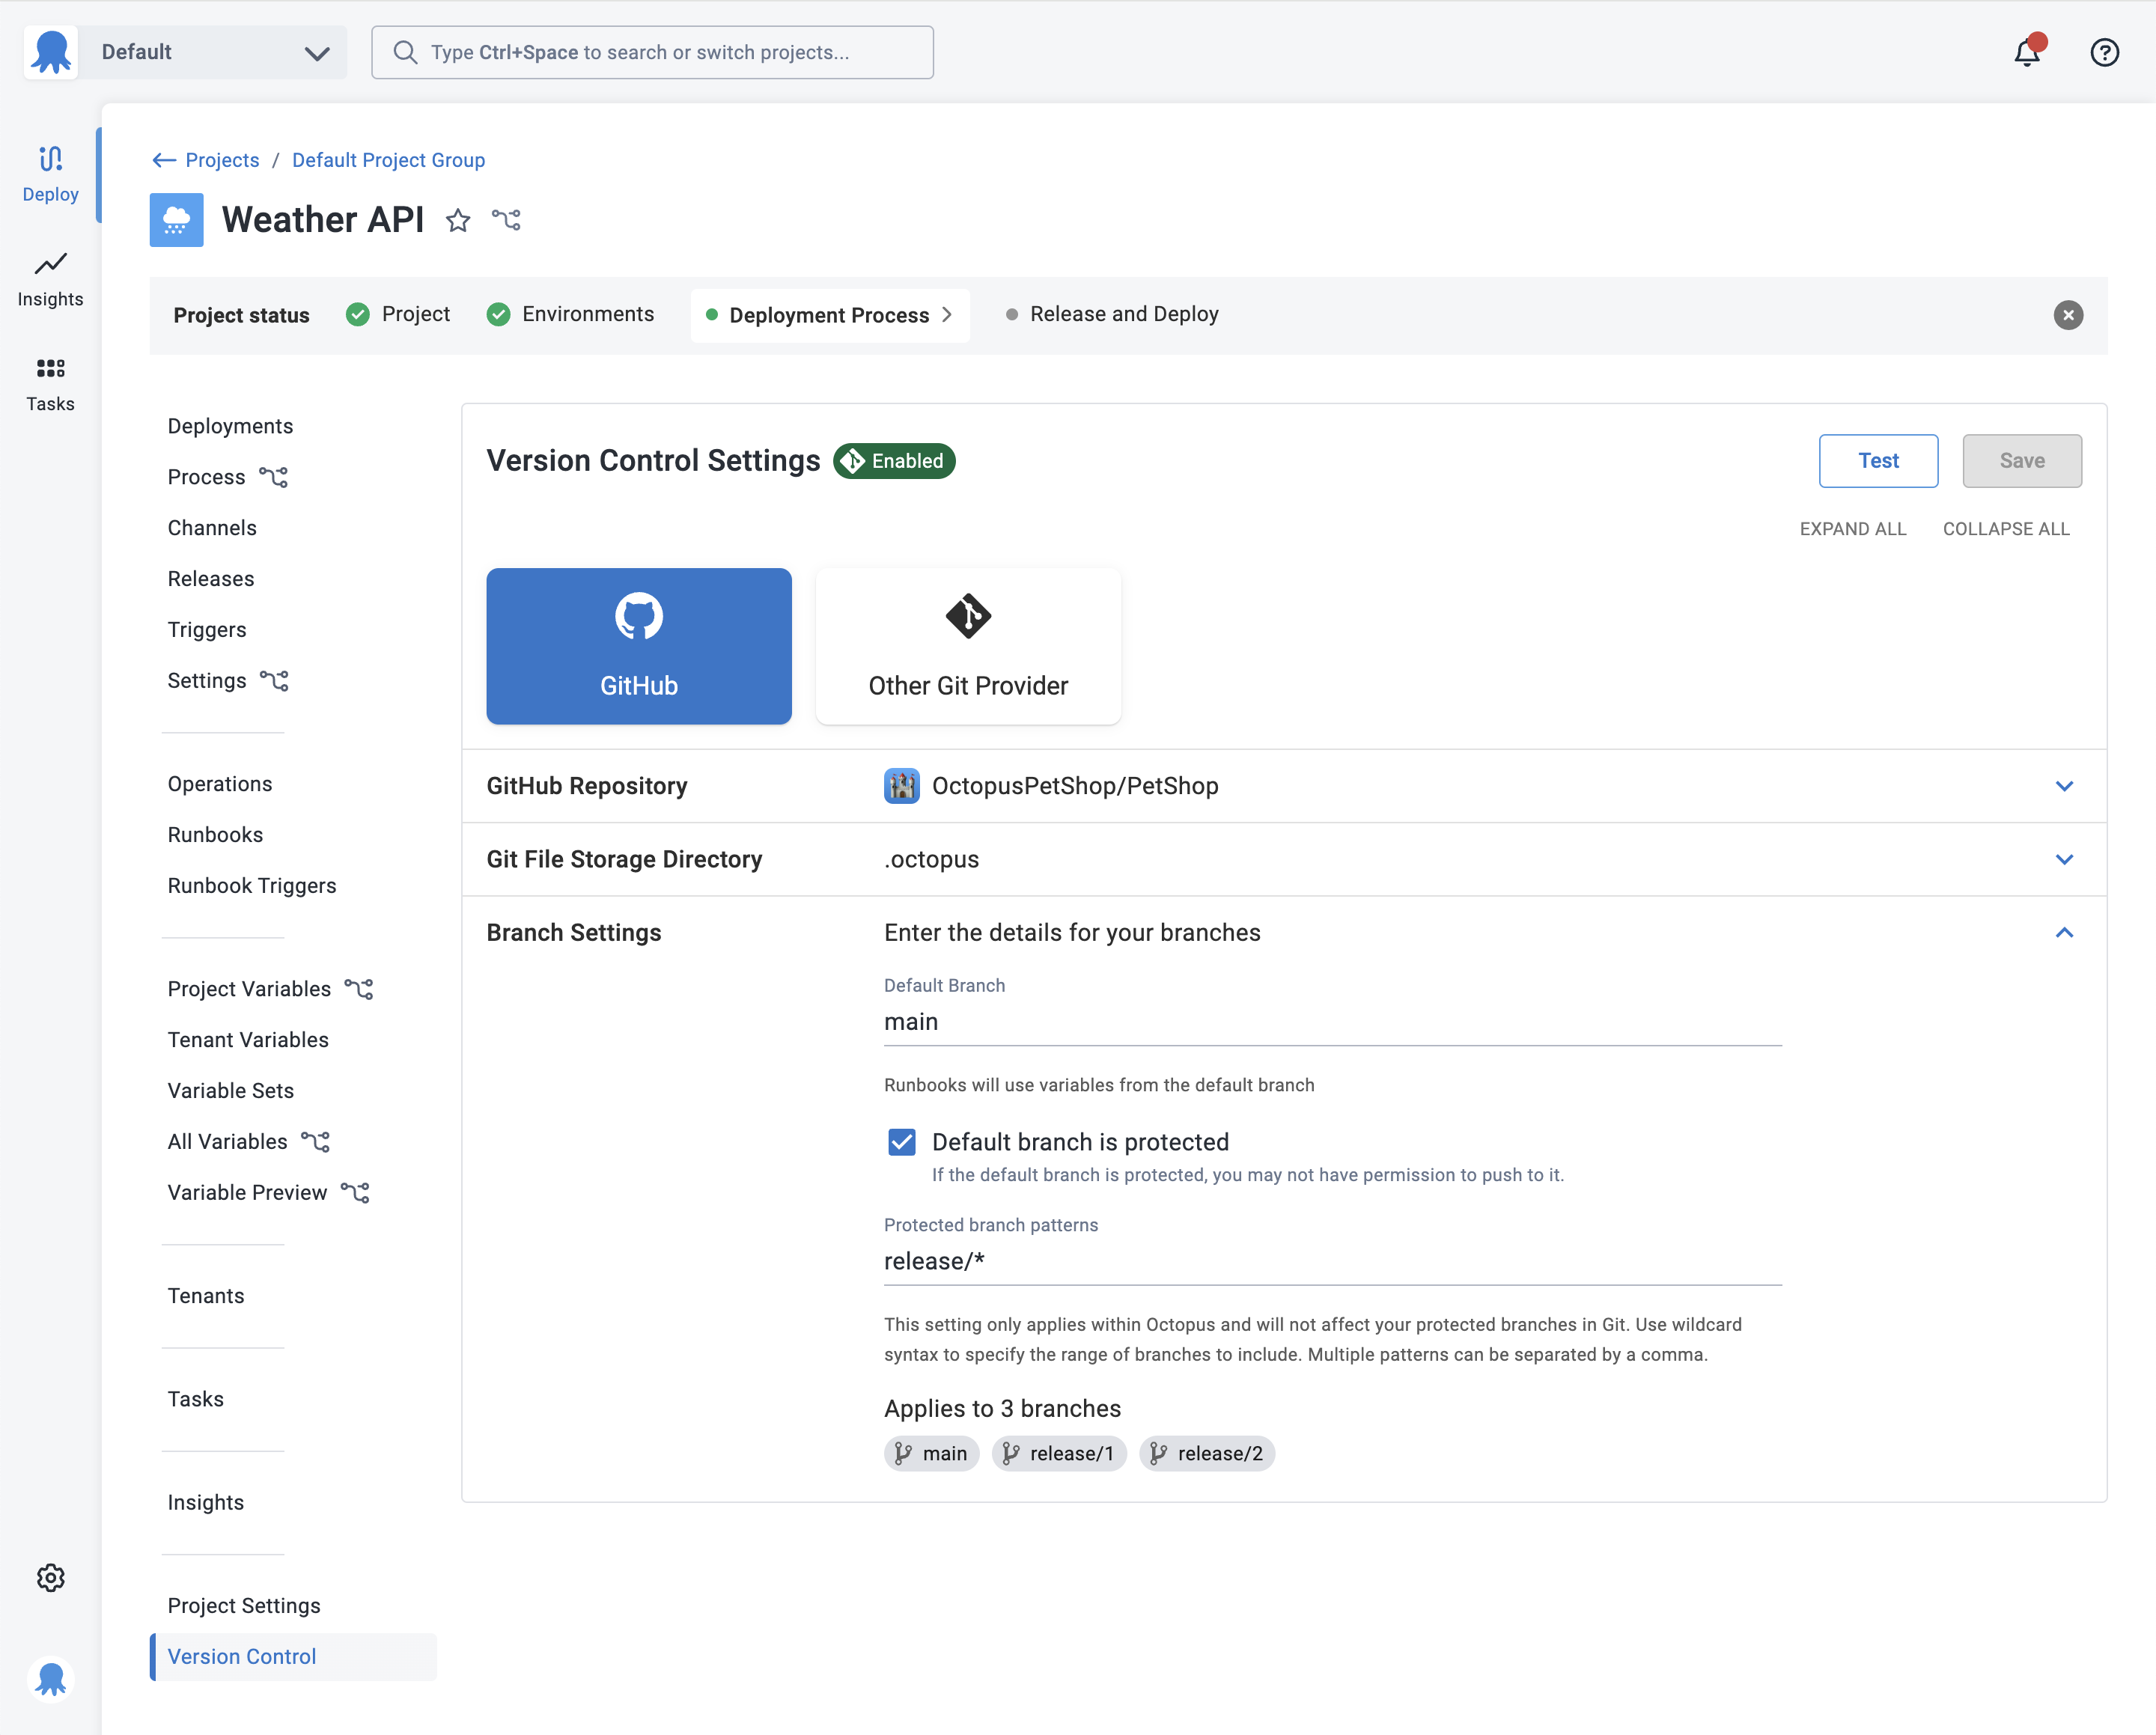
If your default branch is protected, you can select that option under Branch Settings. You will need to provide a different branch name for the initial commit. If the branch doesn’t exist, it will be created. Once you click the Configure button, Octopus will commit the OCL file to the initial commit branch.
Next, you will need to merge your changes into the default branch in your Git provider using your usual workflow. You will not be able to use the default branch within the project until you have merged your changes from the initial commit branch to the default branch. However, you can continue to make changes to the initial commit branch until then.
Optionally, you can also nominate protected branches for your Project. This will prevent users from committing directly to the nominated branches from the Octopus UI and encourage them to create a new branch instead. To nominate protected branches, type in the name or a wildcard pattern in the Protected Branches Pattern field under Branch Settings. This will apply to all existing and future branches.
Note that this is independent of your branch protection rules in your Git Provider and does not offer any protection outside of the Octopus UI.
Migrating to config-as-code runbooks on an existing Git project
Projects which converted to Git before the introduction of config-as-code runbooks can be easily updated.
You can migrate an existing version controlled project to use config-as-code runbooks by clicking on the ‘Store Runbooks in Git’ banner at the top of the Runbooks page of your project.
Migrating variables on an existing Git project
Since the initial public release of config-as-code, we’ve added support for additional project configuration in Git. You can now migrate non-sensitive variables to Git.
Not everything is saved to version control
The Configuration as Code feature is per-project. Currently, the deployment process, runbook processes, settings, and non-sensitive variables are saved to version control.
A number of project-level and instance-level settings will not be stored in version control.
Learn more about what is stored in version control.
Using a project with version control enabled
In general, modifying a project via the Octopus UI with version control enabled is the same as modifying a project configured to save changes to SQL Server. However, there are some minor differences.
Learn more about Editing a project with version control enabled.
Help us continuously improve
Please let us know if you have any feedback about this page.
Page updated on Monday, September 16, 2024