Octopus Deploy supports automated deployment of Azure Web Apps (formerly known as Azure Web Sites). The below guide explains how to add a step to your deployment process to deploy an application to an Azure Web App.
Understanding Azure web apps
The Azure web apps you build, and how you might want to deploy them, are becoming increasingly complex as the Azure team provide more features to the platform. The best place to stay abreast of changes, and how they might affect your deployments is the Azure Web App Documentation, the many and varied ways you can deploy Web Apps (including Octopus Deploy). There is also the hidden gem of the Project Kudu GitHub repository where you will find many of the hard to find facts about Web Jobs (like the settings.job file, configuring a Continuous Web Job as a Singleton, configuring the Schedule for Scheduled Jobs, how shadow copying enables in-place deployments, and how to shut down gracefully).
Web apps are deployed using web deploy
Deploying an Azure Web App with Octopus Deploy behaves very similarly to the Visual Studio publish wizard and uses Web Deploy to synchronize the files in your package to the Azure Web App. Similarly to Visual Studio you can change how Octopus Deploy invokes Web Deploy using the following options in your deployment steps which enable the most common deployment scenarios. All of these options are discussed below where we describe how to configure the Azure Web App step.
Defaults match Visual Studio The default values for these variables were chosen to match Visual Studio following the principle of least surprise. You will typically need to adjust these values depending on your specific circumstances.
Step 1: Packaging
See the packaging application docs
Step 2: Create an Azure account
If you haven’t already, create an Azure Account to grant Octopus Deploy access to your Azure Subscription.
If instead you want to dynamically create you account during your deployment, check our documentation on how to do so
Step 3: Configure your Azure web app step
- Add a new Deploy an Azure Web App step to your project’s deployment process.

- On the Execution Location section, select the target tags that match the Azure Web App Targets you want to deploy to. Remember that you can create these targets using any of the following approaches:
-
Manually before running your deployment. See documentation.
-
Dynamically during the deployment using scripts. See documentation
- On the Package section, select your Package Feed and Package ID.
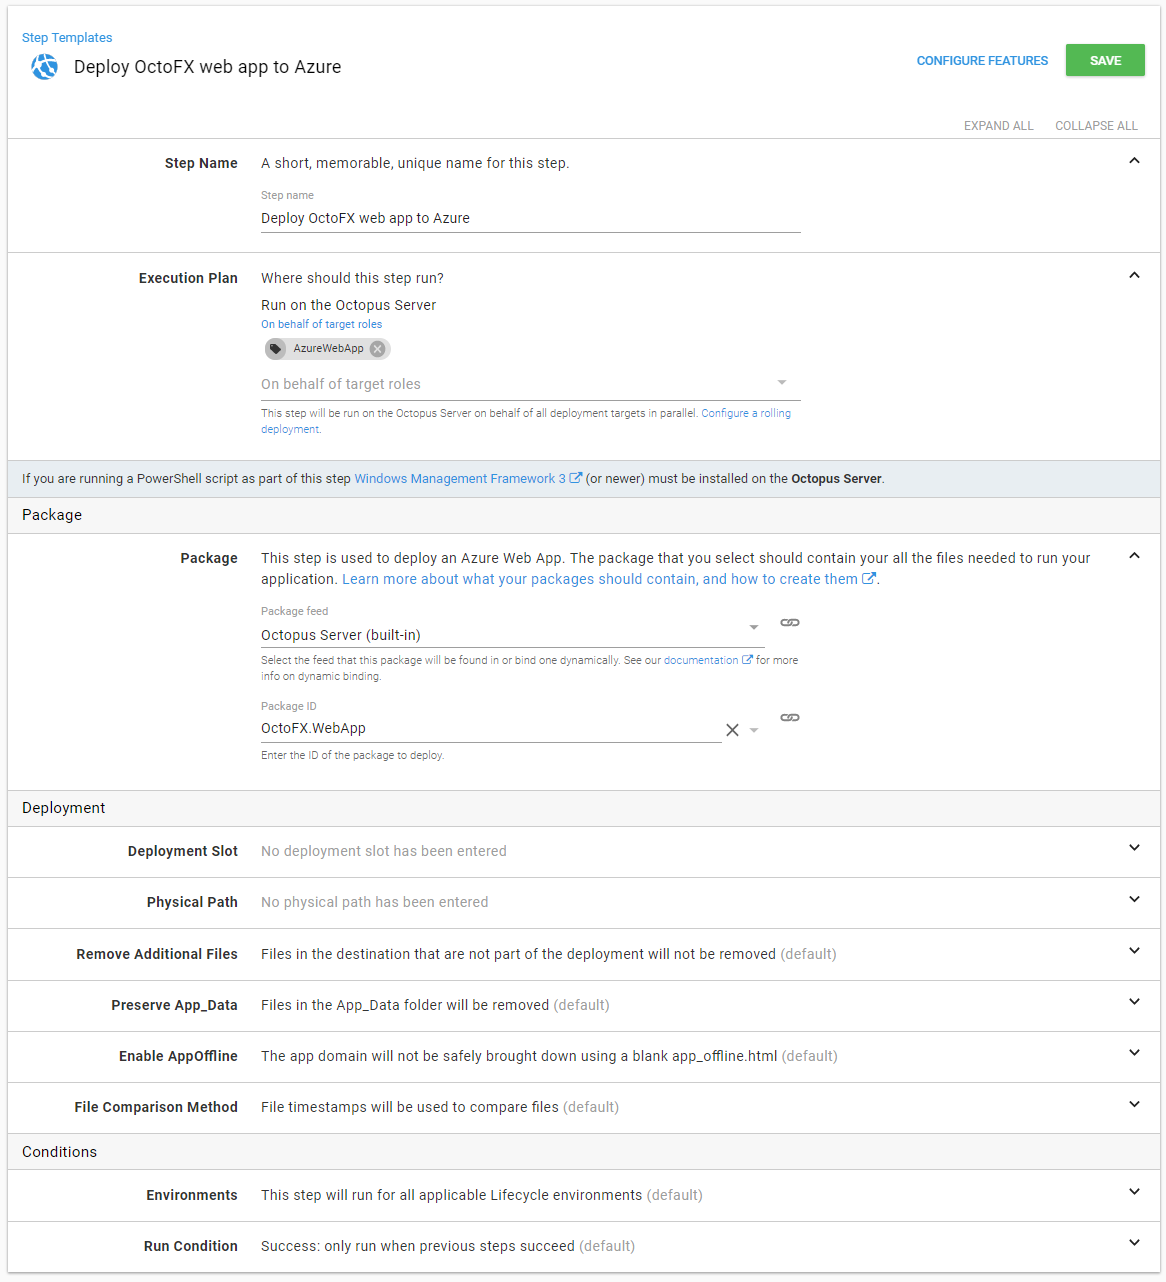
- On the Deployment section you can configure any of the below settings which are related to how your files are going to be pushed to Azure.
| Setting | Default | Description |
|---|---|---|
| Deployment Slot | The target slot to deploy the application to. Requires a Standard or Premium App Service Plan. | |
| Physical Path | The physical path relative to site root on the web app host. e.g. ‘foo’ will deploy to ‘site\WWWRoot\foo’. Leave blank to deploy to root. | |
| Remove additional files | False | When True instructs Web Deploy to delete files from the destination that aren’t in the source package |
| Preserve App_Data | False | When True instructs Web Deploy to skip Delete operations in the App_Data directory |
| Enable AppOffline | False | When True instructs Web Deploy to place app_offline.htm in root deployment directory to safely bring down the app domain. Click here for more details. |
| File comparison method | Timestamp | Can be timestamp or checksum and instructs web deploy to use the selected algorithm to determine which files to update. Note: There have been some issues with checksum in earlier versions of web deploy, and we’ve written about that in detail here. |
Use variable binding expressions Any of the settings above can be switched to use a variable binding expression. A common example is when you use a naming convention for your different web apps, like MyApp_Production and MyApp_Test - you can use environment-scoped variables to automatically configure this step depending on the environment you are targeting.
Deployment features available to Azure web app steps
The following features are available when deploying a package to an Azure Web App.
- Custom scripts
- Configuration variables
- .NET Configuration transforms
- Structured configuration variables
- Substitute variables in templates
Please note these features actually run on the Octopus Server prior to executing web deploy to synchronize the resultant files to the Azure Web App slot. They don’t execute in the Azure Web App host you are eventually targeting.
Using custom scripts
Custom scripts typically rely on specific tools being available when they execute.
It is best that you control the version of these tools - your scripts will rely on a specific version that they are compatible with to function correctly.
The easiest way to achieve this is to use an execution container for your step.
If this is not an option in your scenario, we recommend that you provision your own tools on your worker.
Using the Azure tools bundled with Octopus Deploy is not recommended. Octopus bundles versions of the Azure Resource Manager PowerShell modules (AzureRM) and Azure CLI. These were originally provided as convenience mechanisms for users wanting to run scripts against Azure targets. The versions bundled are now out of date, and we will not be updating them further.
From Octopus 2021.2, a warning will also appear in the deployment logs if the Azure tools bundled with Octopus Deploy are used in a step.
We recommend you configure Octopus Deploy to use your own version of the Azure PowerShell cmdlets and version of the Azure CLI.
If the Azure PowerShell module is available, it will be loaded for your convenience, and the subscription from the account associated with the target will be selected. This means you don’t have to worry about loading the Azure PowerShell module nor authenticating with Azure yourself.
You can write very straightforward scripts like the example below which is from our guide on using deployment slots with Azure Web Apps:
# Swap the staging slot into production
Switch-AzureWebsiteSlot -Name #{WebSite} -Slot1 Staging -Slot2 Production -Force
See the Azure PowerShell documentation for more information.
What happens when the step is executed?
When the Deploy an Azure Web App step gets executed, the below actions will happen (in order):
- Download the package from the package repository.
- Extract the package on the Octopus Server to a temporary location.
- Any configured or packaged
PreDeployscripts are executed. - Substitute variables in templates(if configured).
- .NET XML configuration transformations (if configured) are performed.
- .NET XML configuration variables (if configured) are replaced.
- Any configured or packaged
Deployscripts are executed. - Push your package content to the Web App in Azure.
- Any configured or packaged
PostDeployscripts are executed.
Simple and advanced deployment scenarios
Deploying to multiple geographic regions
When your application is deployed to more than one geographic region, you are likely to need per-region configuration settings. You can achieve this result in many different ways, but the two most popular methods we have seen are:
- Cloud Regions: enable rolling deployments across multiple geographic regions.
- Environment-per-region: by creating an environment per region you can leverage lifecycles to create a strict release promotion process.
The example we’ve discussed here is the most common scenario for deploying Azure Web Apps: a single package that contains an ASP.NET Web Application and some Web Jobs in the same release cadence. It is possible to implement more complex deployment scenarios where the ASP.NET Web Application and each Web Job follow independent release cadences. In this case you would build multiple packages using the folder structure expected by the Azure Web App hosting framework discussed earlier. Once you’ve done that you can simply reuse the same Azure Web App Deployment Target to deploy each package when they are released.
Deploying to a Linux Azure web app
Octopus currently uses web deploy for azure web app deployments, which requires you to disable the SCM endpoint in order for deployments to work for linux web apps. In order to achieve this the WEBSITE_WEBDEPLOY_USE_SCM app setting should be
to the Azure portal with a value of false. If you have multiple slots, this setting needs to be applied for each slot. If you do not add this setting, web deploy will be unable to find the appropriate endpoint for deployment.
Learn more
- Generate an Octopus guide for Azure and the rest of your CI/CD pipeline.
Help us continuously improve
Please let us know if you have any feedback about this page.
Page updated on Thursday, June 27, 2024