This guide assumes familiarity with Octopus Deploy. If you don’t already know how to set up projects, install Tentacles and configure basic deployment processes it may be helpful to review the Getting Started pages before beginning this guide. Familiarity with the concepts in Elastic and Transient Environments would be an added bonus.
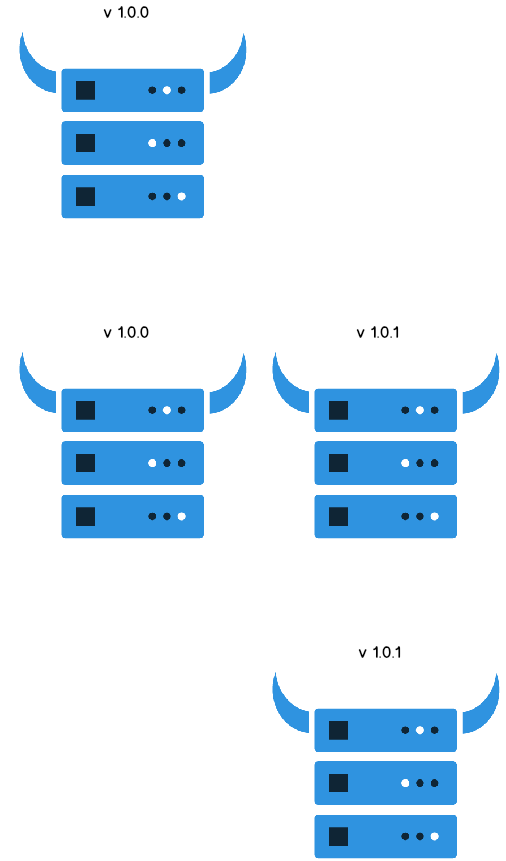
The features in Elastic and Transient Environments make it easier to deploy infrastructure in addition to applications. This guide focuses on deploying immutable infrastructure. Traditionally the infrastructure that hosts applications is mutable: it is constantly changing. The changes that infrastructure could experience include things like: new firewall rules, operating system updates and patches to your own deployed applications. Immutable infrastructure, as the name suggests, does not change after the initial configuration. In order to apply changes, a new version of the infrastructure is provisioned and the old infrastructure is terminated:
In this example we will create an infrastructure project and an application project. The infrastructure project will provision new Tentacles and terminate the old ones. The application project gets deployed to the Tentacles. We will then automate deploying our application to brand new infrastructure with each release.
Machine policy
The Tentacles provisioned in this guide belong to the Immutable Infrastructure machine policy. For now, create a new machine policy called Immutable Infrastructure and leave all settings at their default value.
Application project
For this demonstration, let’s create a project called Hello World that will run a script echoing “Hello World” to each of our Tentacles. In practice, this would be the project that deploys your application to the Tentacles.
- Create a project called Hello World.
- Add a script step that outputs “Hello World” on each Tentacle:
Infrastructure project
The infrastructure project runs a script that provisions two new Tentacles and removes any old Tentacles in the environment we are deploying to. In practice this project would create your new infrastructure, add it to your load balancer and terminate your old infrastructure.
-
Download the HelloWorldInfrastructure.1.0.0.0.zip package that contains the scripts that run in this project and make any modifications required by your Octopus installation.
-
Upload the package to your Octopus package feed.
-
Install Tentacle on the same machine as your Octopus Server (there is no need to configure a Tentacle instance).
-
Create a project called Hello World Infrastructure.
-
Add a step that runs the script called Provision.ps1 from the package HelloWorldInfrastructure on the Octopus Server.
-
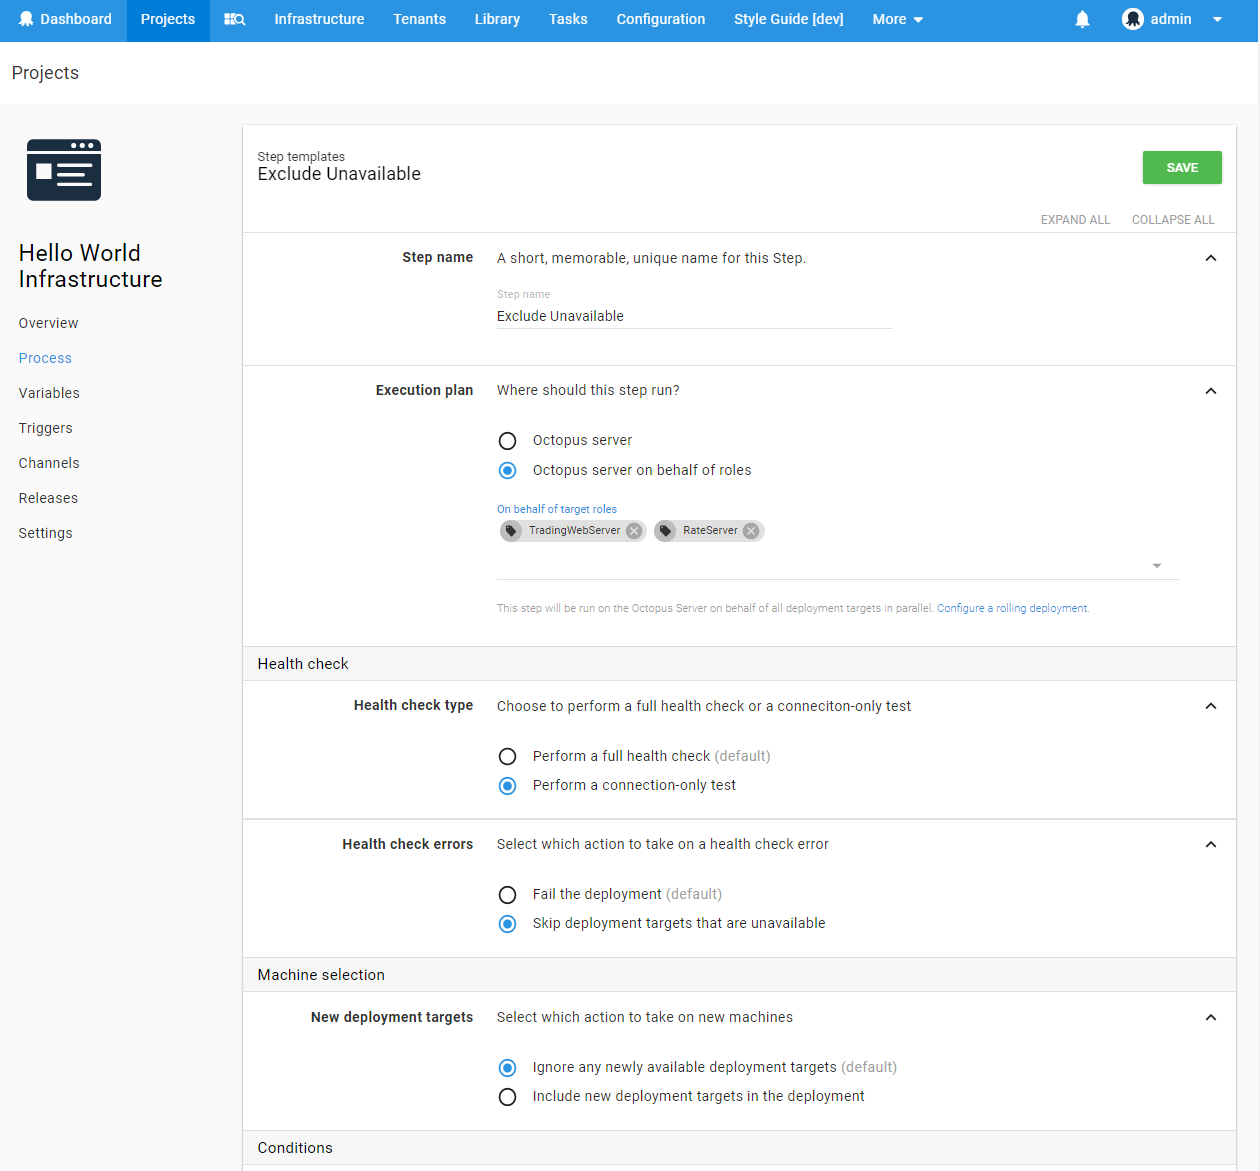
Add a step that performs a health check, excluding unavailable machines from the deployment:
-
Add a step that runs Terminate.ps1 from the package HelloWorldInfrastructure on the Octopus Server on behalf of all target tags.
Intermission
At this stage you should be able to provision new Tentacles by creating a release of the Hello World Infrastructure project and deploying it to an environment. If you create another release of the project and deploy it, the Tentacles for the previous release will be stopped but will remain in the Octopus environment.
You could also create and deploy a release of the Hello World project to your shiny new Tentacles, but it requires a lot of button clicking.
Automating all the things
Imagine a developer makes a change to Hello World and would like to deploy it. At this stage, they would need to create and deploy a release of the Hello World Infrastructure project, wait for the new infrastructure to become available and then create and deploy a release of Hello World. It is possible but clunky. Also, someone would be required to remove all orphaned deployment targets left in Octopus when new Tentacles are provisioned.
Cleaning machines
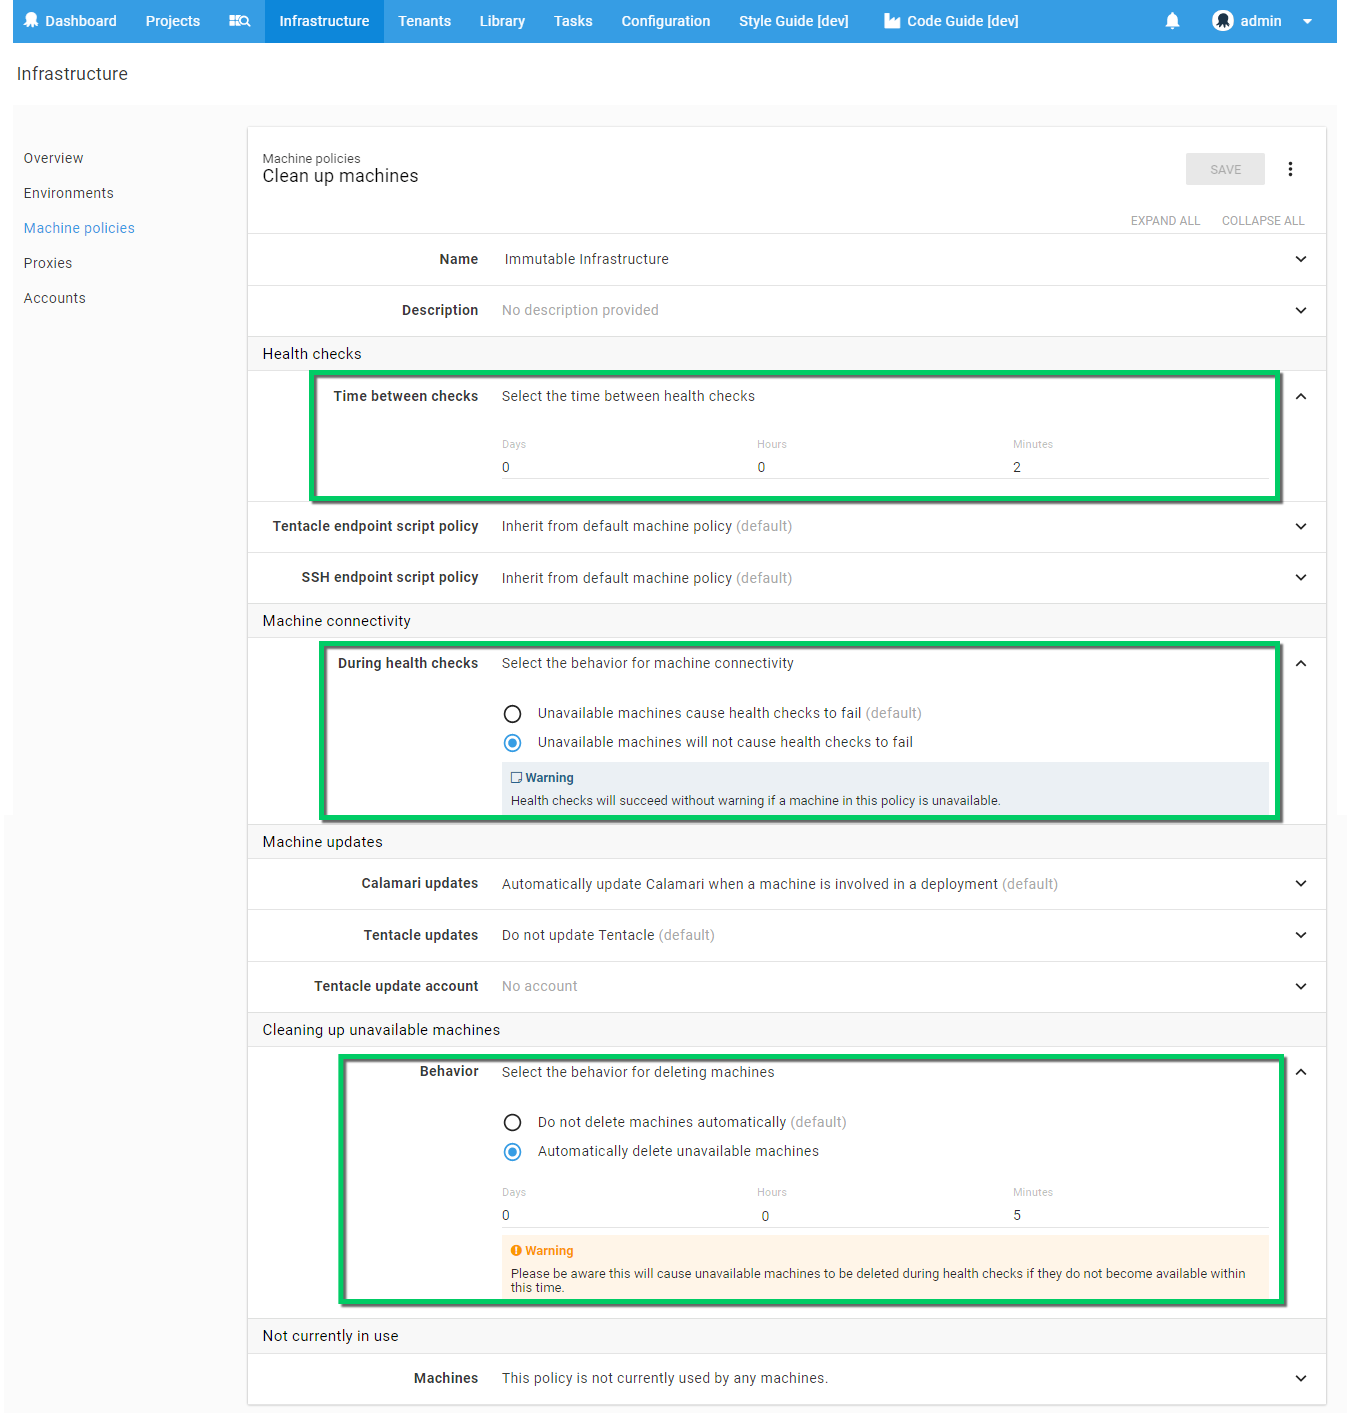
Cleaning up old Tentacles can be accomplished through the use of machine policies. The Immutable Infrastructure machine policy that we created earlier can be edited so that it performs health checks more frequently, doesn’t mind if machines are unavailable during that health check and automatically removes unavailable machines after a period of time. This is perfect for ensuring the Tentacles that we terminate are automatically cleaned up in a timely manner.
- Edit the Immutable Infrastructure machine policy.
- Change “Time between checks” to 2 minutes.
- Select “Unavailable machines will not cause health checks to fail”.
- Select “Automatically delete unavailable machines”.
- Change “Time unavailable” to 5 minutes.
Automatically deploying
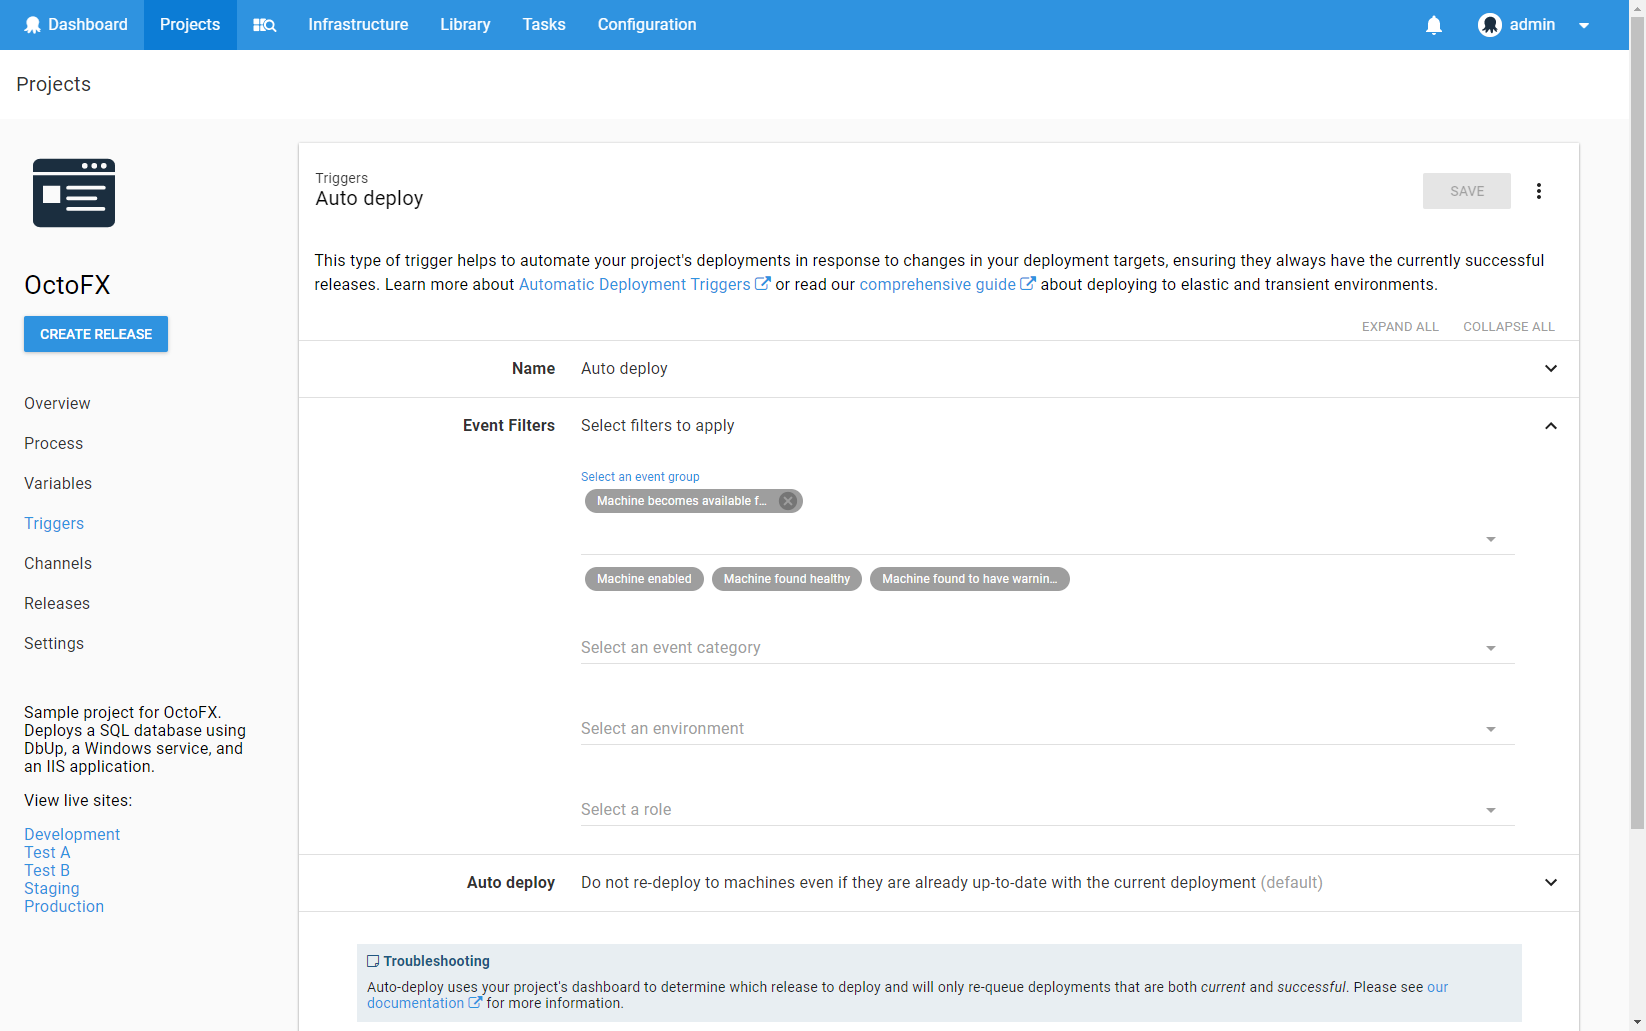
The Hello World project can be configured to automatically deploy when a new deployment target becomes available. Once this has been configured, any Tentacles created when Hello World Infrastructure is deployed will automatically receive the current successful deployment of the Hello World project.
-
Create a new trigger for the Hello World project.
-
Select the event “New deployment target becomes available”.
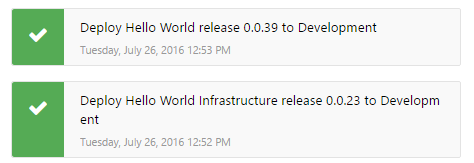
Create and deploy a new release of Hello World Infrastructure. You should notice that immediately after new Tentacles are provisioned, Hello World is automatically deployed to those Tentacles:
We are almost there! Next we need to bump the version of Hello World and automatically deploy it.
Automatically deploying a new release
Octopus will automatically deploy the current successful deployment for a project. That means if you deploy release 1.0.0 and then create release 1.0.1, the version 1.0.0 will continue to be deployed until 1.0.1 has been manually deployed. This is not ideal for immutable infrastructure, because we do not want to deploy 1.0.1 to our old infrastructure, so we have no way to indicate to Octopus that it should start deploying release 1.0.1. Enter auto deploy overrides. By creating both a new release and an auto deploy override when our infrastructure is provisioned, we can indicate to Octopus that the new release should be deployed to the new infrastructure.
- Create an auto deploy override using the Octopus C# Client:
Add-Type -Path 'Octopus.Client.dll'

$octopusURI = 'https://your-octopus-url'
$apiKey = 'API-YOUR-KEY'

$endpoint = New-Object Octopus.Client.OctopusServerEndpoint $octopusURI, $apiKey
$repository = New-Object Octopus.Client.OctopusRepository $endpoint

$project = $repository.Projects.Get("Projects-1")
$environment = $repository.Environments.Get("Environments-1")
$release = $repository.Releases.Get("Releases-1")

$project.AddAutoDeployReleaseOverride($environment, $release)
$repository.Projects.Modify($project)
Magic
Wouldn’t it be amazing if a developer checked in some changes to Hello World and new immutable infrastructure was created with their changes on it? With a few lines of script, your build server can tell Octopus to automatically deploy new infrastructure and deploy the latest release of your project to that infrastructure when it comes online and becomes available to Octopus. Here is an example that could be adapted to your projects and build server:
Add-Type -Path 'Octopus.Client.dll'

$octopusURI = "https://your-octopus-url"
$apiKey = "API-YOUR-KEY"

$endpoint = New-Object Octopus.Client.OctopusServerEndpoint $octopusURI, $apiKey
octopus login --server $octopusURI --api-key $apiKey
$repository = New-Object Octopus.Client.OctopusRepository $endpoint

octopus release create --project "Hello World Infrastructure" --package-version "1.0.0.0"
$infraProject = $repository.Projects.FindByName("Hello World Infrastructure")
$infraRelease = $repository.Projects.GetReleases($project).Items | Select-Object -first 1
octopus release deploy --project 'Hello World Infrastructure' --version $infraRelease.Version --environment 'Development' --no-prompt

octopus release create --project "Hello World"

$project = $repository.Projects.FindByName("Hello World")
$release = $repository.Projects.GetReleases($project).Items | Select-Object -first 1
$environment = $repository.Environments.FindByName("Development")
$project.AddAutoDeployReleaseOverride($environment, $release)

$project.AddAutoDeployReleaseOverride($environment, $release)
$repository.Projects.Modify($project)
Learn more
Help us continuously improve
Please let us know if you have any feedback about this page.
Page updated on Wednesday, September 3, 2025