The Octopus Web Portal is the main interface that your team will use to interact with the Octopus Server. During installation, you’ll choose a port number for the server to listen on, and it uses HTTP by default. However, Octopus can also be configured to run on HTTPS. You can force all traffic to use HTTPS and even enable HSTS if desired. Octopus supports different types of SSL certificates, with built-in support for Let’s Encrypt to make HTTPS as simple as possible.
Choosing an SSL certificate
Octopus can use any valid SSL certificate, whether it is from a Certificate Authority, managed by Let’s Encrypt, or even a self-signed certificate. The easiest way to get started with HTTPS is to use Let’s Encrypt which is trusted and free to use forever in production systems.
Use Let’s Encrypt to manage your SSL certificate
Let’s Encrypt is the best way to get started with HTTPS in Octopus. It is a trusted and free service, which automatically renews your SSL certificate so you don’t need to worry about expiry. We have built a wizard to do all the hard work so you can get up and running with HTTPS in a couple of minutes. Get started with Let’s Encrypt.
Bring your own SSL certificate
You can use your own SSL certificate which could be signed by any trusted Certificate Authority. If the certificate you intend to use doesn’t exist in the Windows certificate store already, you’ll need to import it from a PFX file containing both the public certificate and private key. The following steps will show you how to import your certificate:
-
Launch an empty Microsoft Management Console shell by running mmc.exe from the start menu, command line or Win+R run dialog.
-
From the File menu, click Add/Remove Snap-in…
-
Add the Certificates snap-in, and when prompted, choose the Computer account scope:
-
On the “Select Computer” page of the Wizard, select the Local computer, then click Finish. Click OK to close the Add/Remove Snap-ins dialog.
-
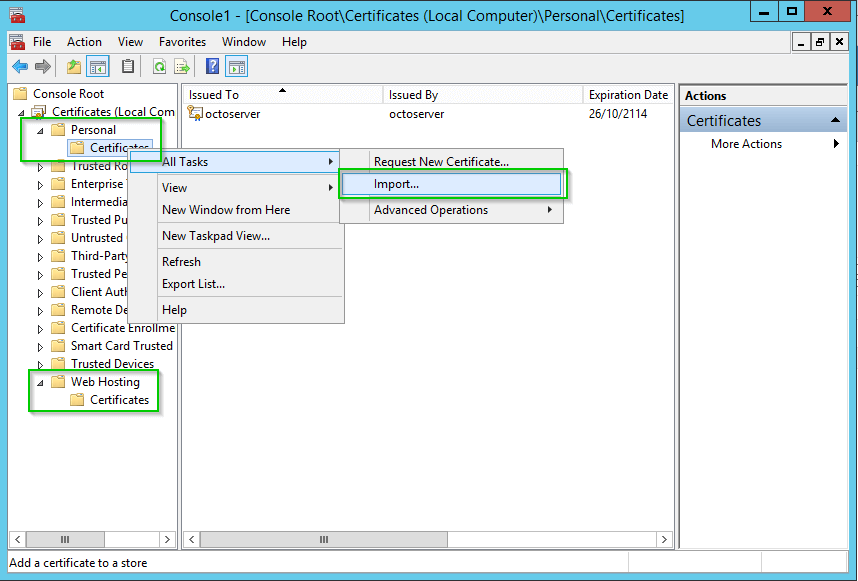
You can either import the certificate to the Personal store, or the Web Hosting store (this store may or may not exist on your server). Expand to the Certificates directory, then open the import wizard:
-
Follow the steps in the wizard to import your certificate. Your certificate will normally be in a .PFX file, and it should include both the public X.509 certificate, and the private key for the certificate.
-
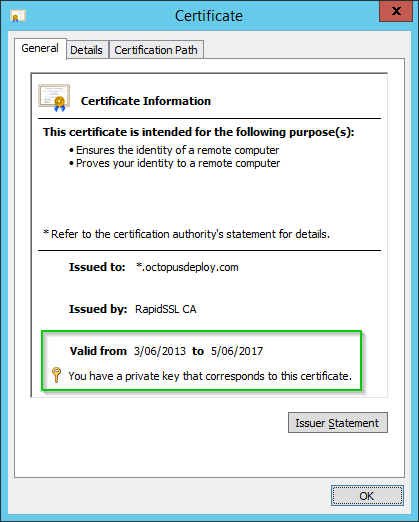
Once the certificate is imported, double click the certificate to bring up the properties. You should see an icon indicating that the private key has also been imported:
-
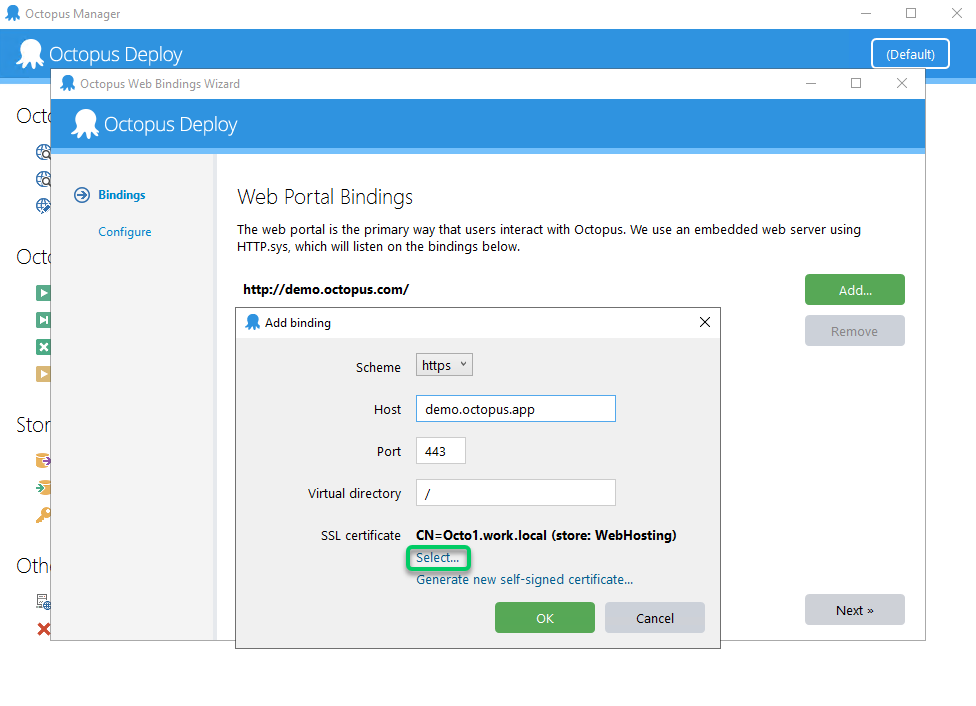
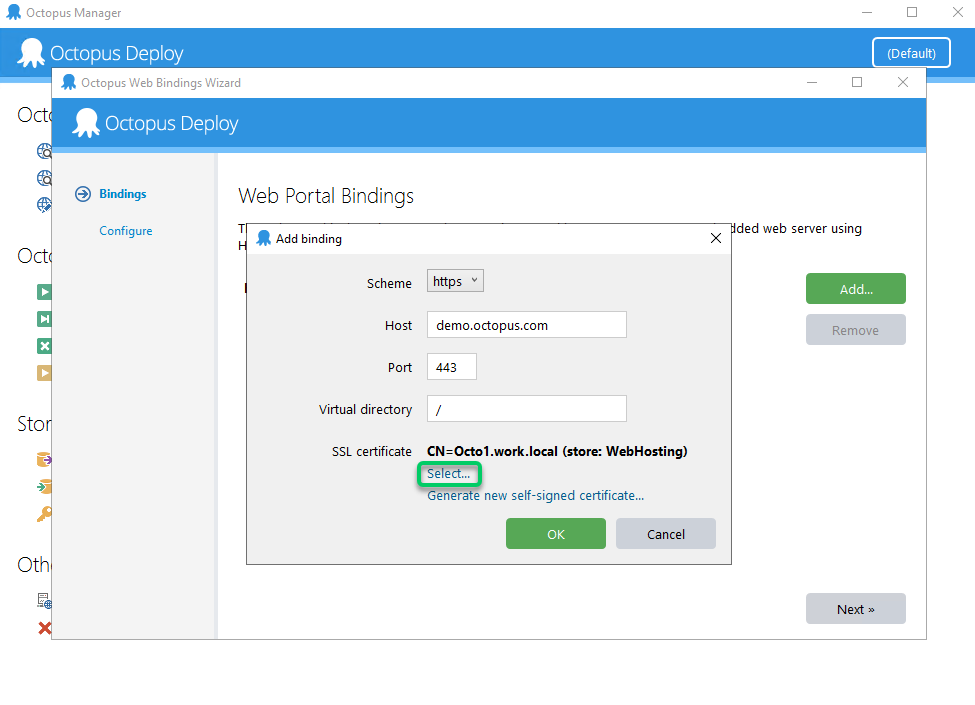
If all these requirements have been met (private key imported, either the Web Hosting or Personal stores, in the Local Computer scope), the certificate should appear when you select to use an existing certificate when adding your HTTPS binding:
Let Octopus generate a self-signed certificate
If you are testing Octopus, and don’t want to use an existing certificate nor Let’s Encrypt, Octopus can generate a self-signed certificate for you. This certificate will not be trusted by your web browser, but it will let you test Octopus over a secure HTTPS connection.
- Follow the steps below to set up an HTTPS binding, and click the Generate new self-signed certificate link in the wizard.
- Select that self-signed certificate for your HTTPS binding.
- You will need to ignore any messages in your browser about being an untrusted SSL certificate and continue to the site.
Changing your web portal bindings manually
If you are bringing your own SSL certificate, or want to configure a complex set of HTTP/HTTPS bindings, the easiest way to do this is using the Octopus Server Manager.
-
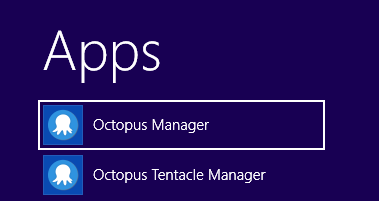
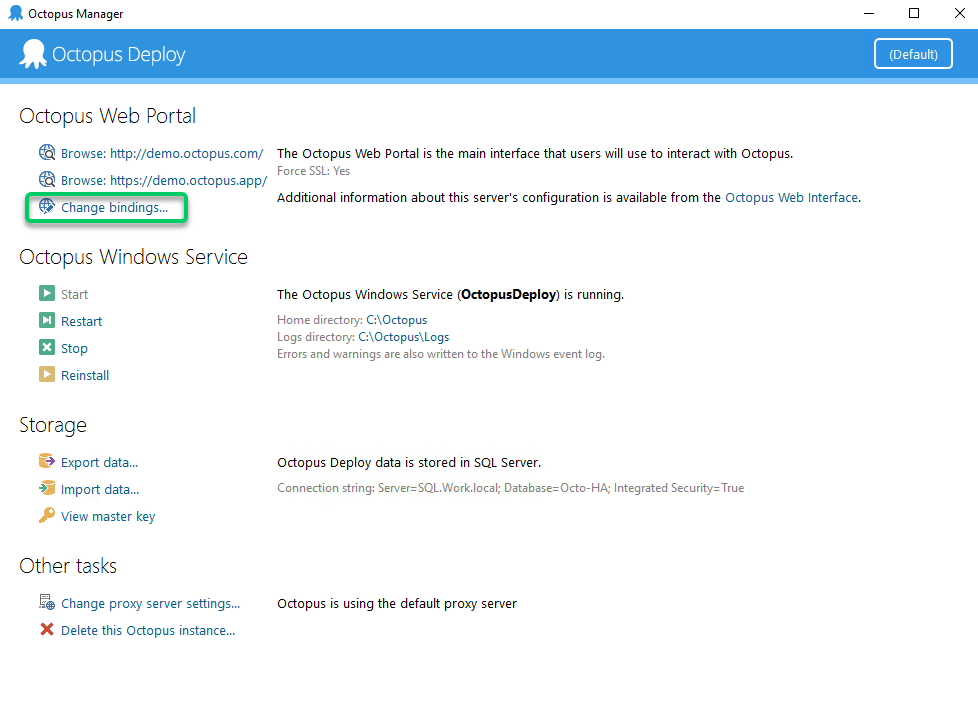
Open the Octopus Manager application on the Octopus Server. You’ll find this in the start menu.
-
From Octopus Manager, you can launch a wizard to modify the bindings that are associated with the Octopus Web Portal:
-
In the Web Bindings wizard, click Add… to add a new binding, and choose the HTTPS scheme. Other options such as the port can also be configured here.
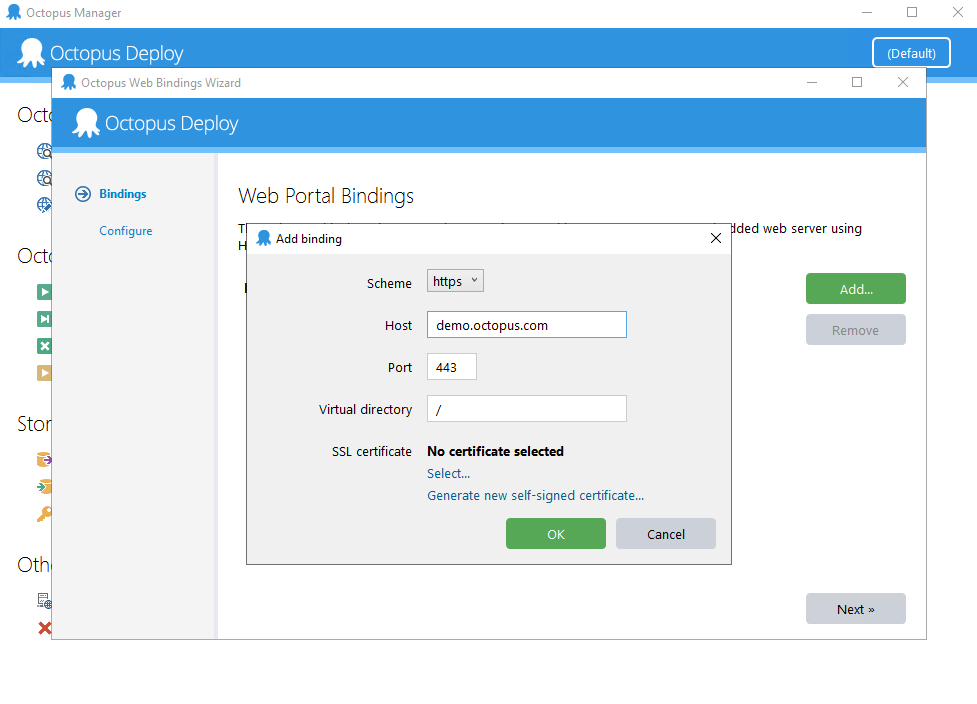
Since HTTPS requires an SSL certificate, you can either choose to generate a new, self-signed (untrusted) certificate, or to select an existing certificate. Self-signed certificates are useful for testing or to achieve encryption without trust, but for production use we recommend using a trusted SSL certificate.
-
Follow the rest of the Wizard steps to add the binding and reconfigure the Octopus Server.
Updating the SSL certificate of an existing web portal binding
The approach for updating an existing binding requires that we take a slightly different approach.
-
Open the Change bindings… screen, as in Changing Your Web Portal Bindings Manually steps 1 & 2.
-
Select the binding that you are interested in updating the SSL Certificate for and click Add… to open the details. Note these details and click OK to return to the binding list.
-
Click Remove and then Add… to recreate the binding, using the details from the previous step. When selecting the SSL Certificate, select the desired certificate. Click OK to return to the bindings list.
At this point, the bindings have not changed yet, as we haven’t yet applied this change to the server.
-
To apply this change to the server, follow the rest of the Wizard steps to add the binding and reconfigure the Octopus Server. Once the Apply button is clicked, a script is generated to update the Web Portal Binding with your new SSL certificate. You can review this script, prior to running it, by clicking on the Show script link.
Forcing HTTPS
A common scenario when hosting the Octopus Server is to redirect all requests initiated over HTTP to HTTPS. With this configuration you can navigate to the Octopus Server using either the http:// or https:// scheme, but have Octopus automatically redirect all http:// requests to use the equivalent https:// route.
-
Configure binding(s) for
http://- this allows browsers to initiate their request over HTTP so Octopus can then redirect to HTTPS. -
Configure SSL binding(s) for
https://using the correct SSL certificate. -
Test you can use Octopus with either
http://orhttps://schemes without being redirected (the scheme stays the same) - this proves both endpoint bindings are working as expected. -
Configure Octopus to
Redirect HTTP requests to HTTPS- you can do this using the Octopus Server Manager application where you configure the bindings as soon as you have configured an HTTPS binding.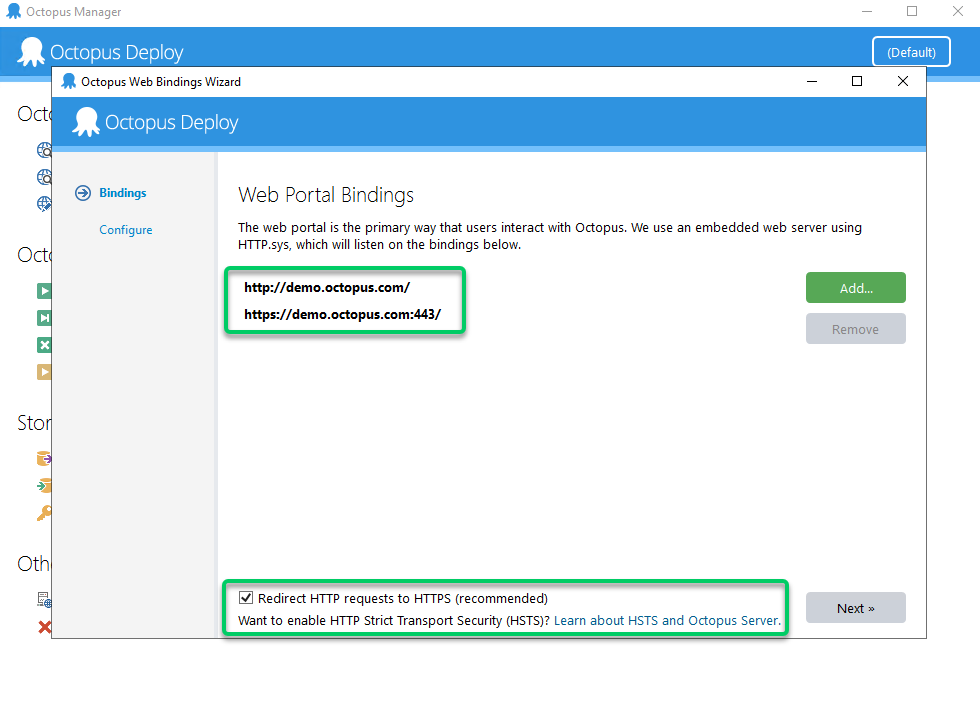
HTTP strict transport security (HSTS)
HTTP Strict Transport Security is an HTTP header that can be used to tell the web browser that it should only ever communicate with the website using HTTPS, even if the user tries to use HTTP. This allows you to lessen the risk of a man-in-the-middle (MITM) attack or a HTTP downgrade attack. However, it is not a panacea - it still requires a successful connection on first use (ie, it does not resolve the Trust-On-First-Use (TOFU) issue).
Octopus 3.13 and above can send this header, but due to the potential pitfalls, it is opt-in. To switch it on, run the following commands on your Octopus Server:
PS \> Octopus.Server.exe configure --hstsEnabled=true --hstsMaxAge=31556926
PS \> Octopus.Server.exe service --stop --start
This will send the header on every HTTPS response, telling browsers to enforce HTTPS for 1 year (31556926 seconds) from the most recent request.
We highly recommend using a short value for hstsMaxAge, like 1 hour (3600 seconds) until you are comfortable that it works in your environment. This way you can disable HSTS and browsers will return to normal after 1 hour.
Please note that enabling HSTS comes with its own challenges. For example:
- Untrusted / self-signed certificates will not work with HSTS - the certificate chain needs to be fully trusted by the browser.
- Your Octopus Server must be hosted on standard ports - HTTP on port 80 and HTTPS on port 443.
- Reverting from HTTPS to HTTP will not be simple - each browser will need to be manually reconfigured to remove the HSTS entry.
Help us continuously improve
Please let us know if you have any feedback about this page.
Page updated on Sunday, January 1, 2023