Azure Web App deployment targets allow you to reference existing Web Apps in your Azure subscription, that you can then reference by target tag during deployments.
From version 2022.1 Octopus can discover Azure Web App targets using tags on your Web App cloud resource template.
Requirements
-
You need an Azure Service Principal account that references your Azure subscription.
-
Once your Azure account is setup, you need an existing Azure Web App / App Service setup within your Azure subscription. To learn more about App Services, see the Azure App Services documentation that can help you get started. If you are dynamically creating the web app during your deployment, check our section about discovering web app targets or creating Web App targets by scripts using service messages.
Discovering web app targets
Octopus can discover Azure Web App targets as part of your deployment using tags on your resource.
From Octopus 2022.3, you can configure the well-known variables used to discover Azure Web App targets when editing your deployment process in the Web Portal. See cloud target discovery for more information.
To discover targets use the following steps:
- Add an Azure account variable named Octopus.Azure.Account to your project.
- Add tags to your Azure Web App so that Octopus can match it to your deployment step and environment.
- Add a
Deploy an Azure App ServiceorDeploy an Azure Web App (Web Deploy)step to your deployment process. During deployment, the target tag on the step will be used along with the environment being deployed to, to discover Azure Web App targets to deploy to.
From Octopus 2022.2, deployment slots within an Azure Web App can also be discovered separately from the Web App it is a part of by adding tags to the slot. Any deployment slot discovered during deployment will be created as a separate target in Octopus.
The name of discovered Azure Web Apps has changed in Octopus 2022.2 to include additional information about the resource group. Any Web App targets discovered in Octopus 2022.1 while this feature was in Early Access Preview will need to be deleted and will be rediscovered during the next deployment.
See cloud target discovery for more information.
Creating web app targets
Once you have an App Service configured within your Azure subscription, you are ready to map that to an Octopus deployment target.
To create an Azure Web App target within Octopus:
- Navigate to Deploy ➜ Infrastructure ➜ Deployment Targets ➜ Add Deployment Target.
- Select Azure tab and then select Azure Web App from the list of available targets and click Next.
- Fill out the necessary fields, being sure to provide a unique target tag (formerly target role) that clearly identifies your Azure Web App target.
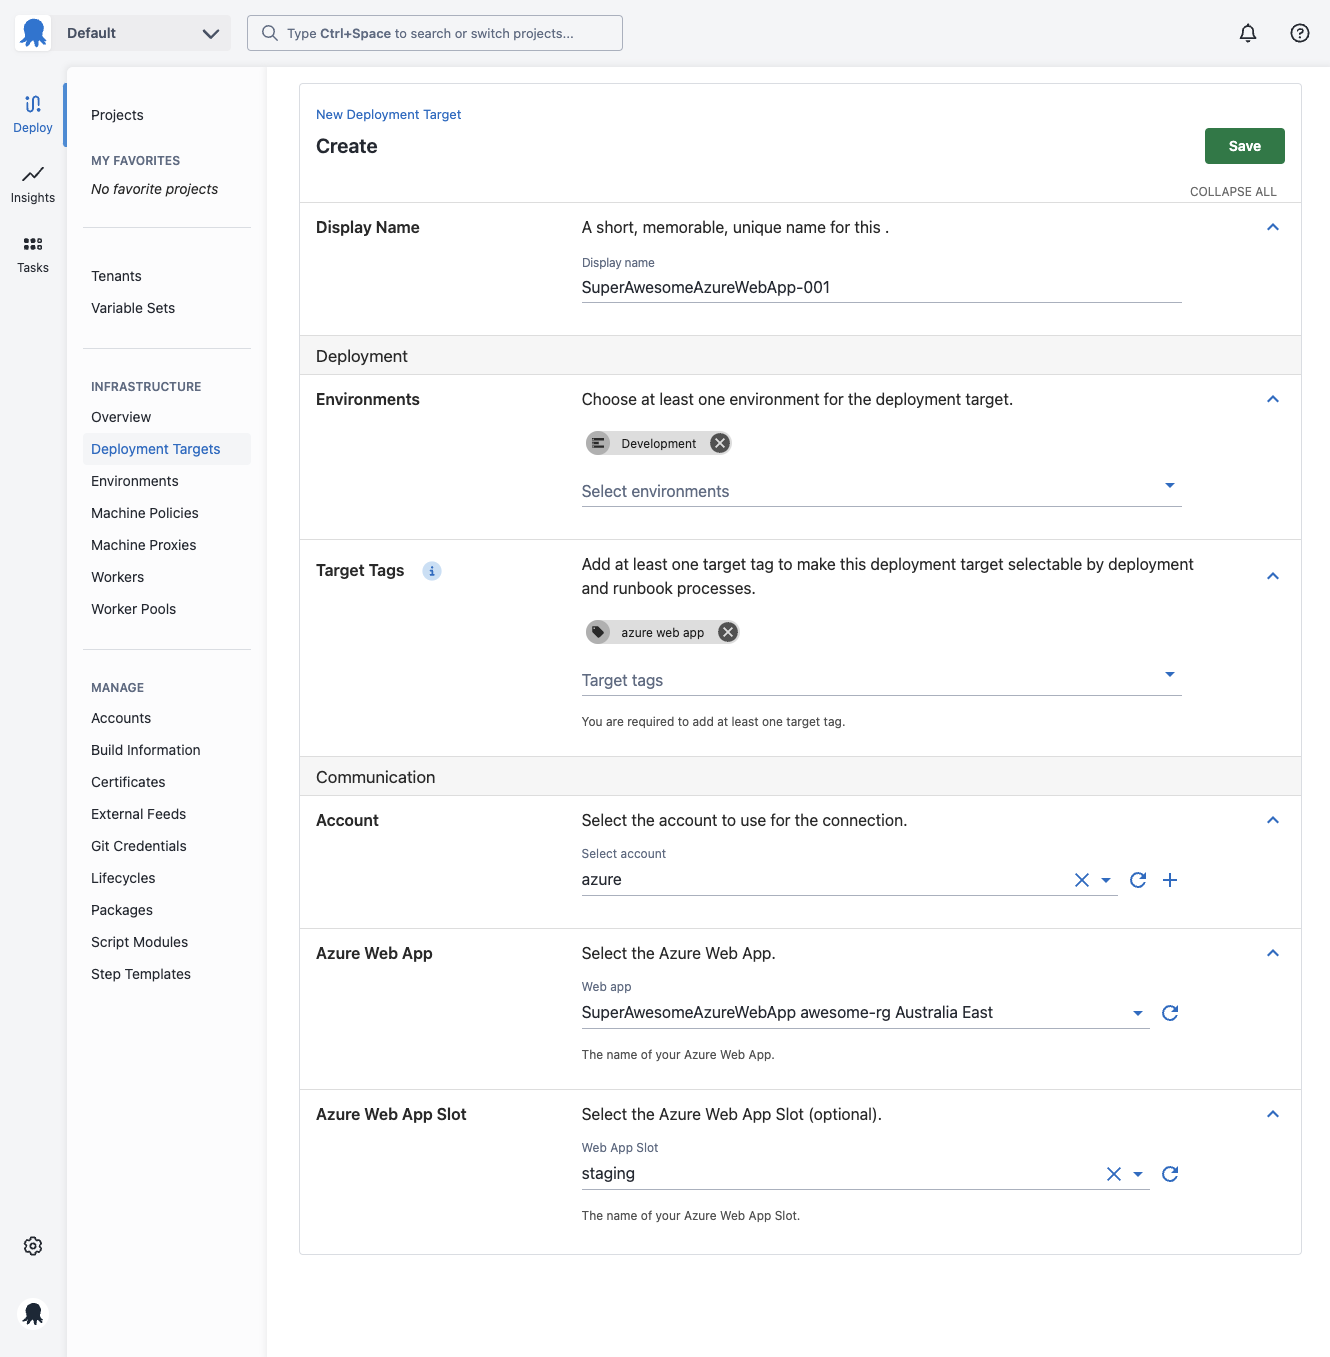
If you are using a Standard or Premium Azure Service Plan, you can also select a specific slot as your target. The Azure Web App Slot field will allow you to select one of the slots available on the Web App. If there are no slots, this will be empty.
You can also leave the slot selection blank and specify the slot, by name, on the step too. The slot selected on the step will take precedence over a slot defined on the deployment target.
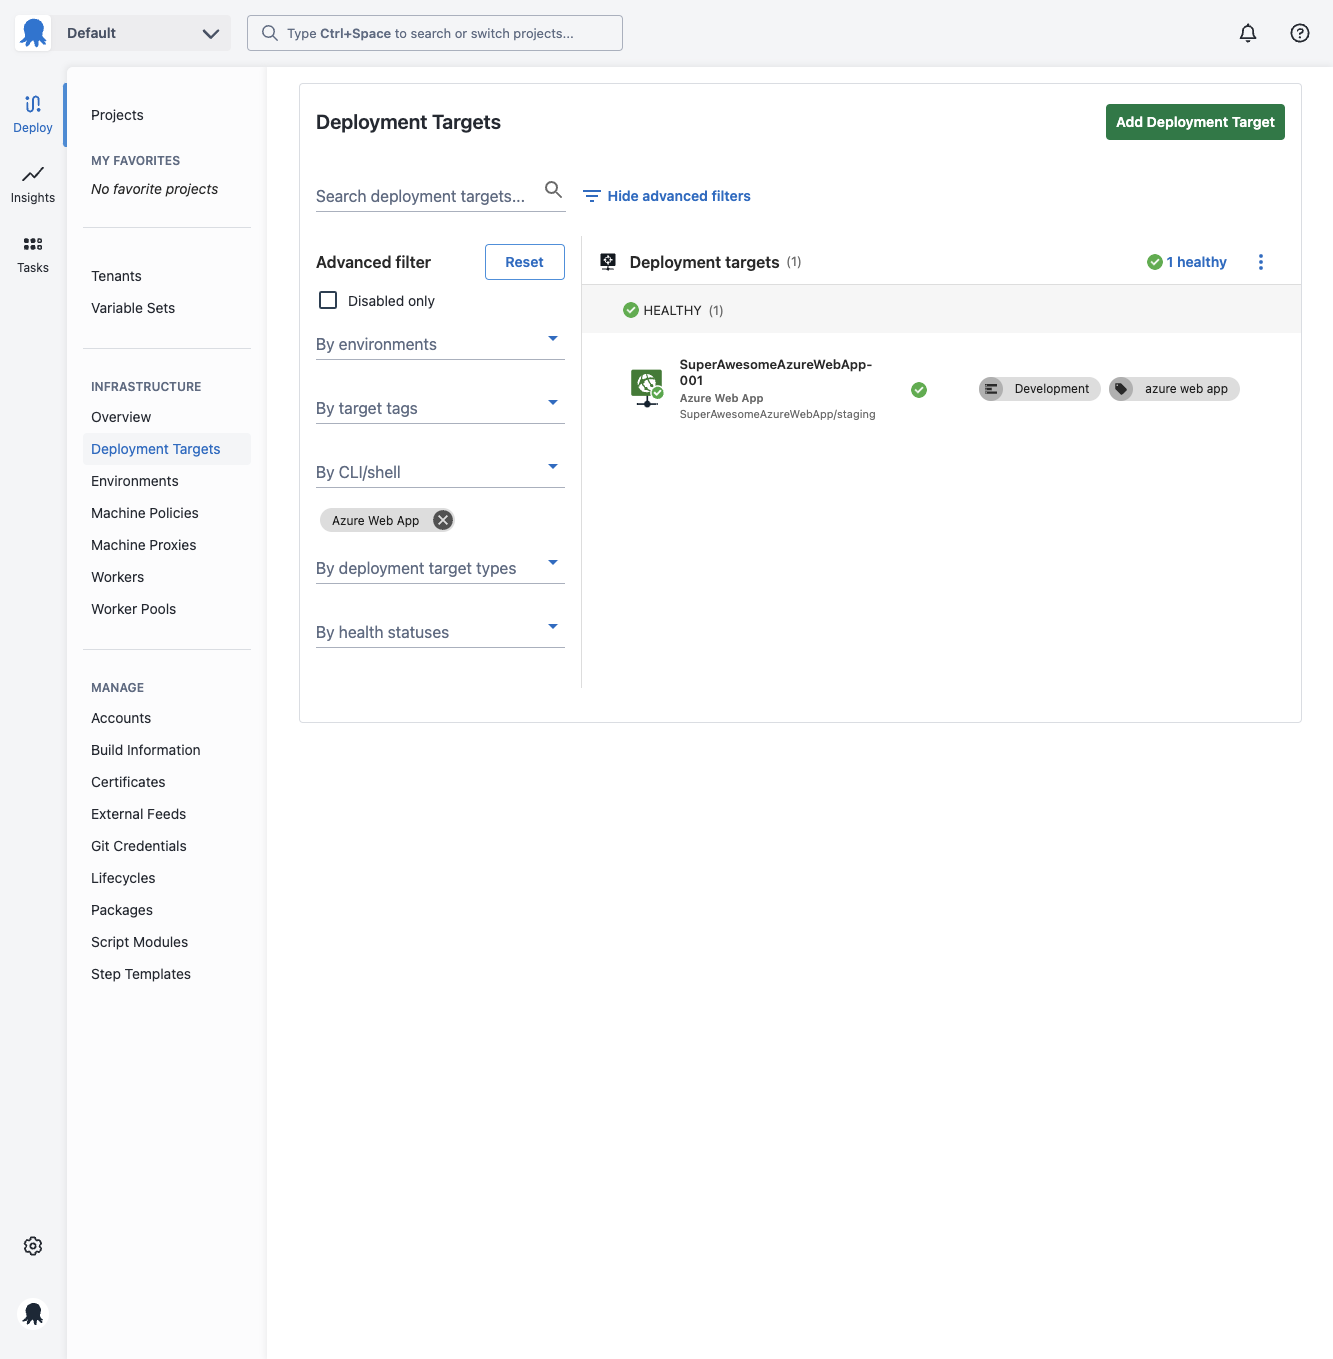
- After clicking Save, your deployment target will be added and go through a health check to ensure Octopus can connect to it.
- If all goes well, you should see your newly created target in your Deployment Targets list, with a status of Healthy.
Creating Web App targets by scripts
Azure Web App targets can also be created via a PowerShell cmdlet within a Deployment Process, this can be especially handy if you are also creating the Azure Web App via a script.
See Managing Resources by script for more information on creating Azure Web Apps via a script.
Troubleshooting
If your Azure Web App target does not successfully complete a health check, you may need to check that your Octopus Server can communicate with Azure. It may be worth checking that your Azure Account is able to complete a Save and Test to ensure Octopus can communicate with Azure. If your Octopus Server is behind a proxy or firewall, you will need to consult with your Systems Administrator to ensure it can communicate with Azure.
Deploying to Web App targets
To learn about deploying to Azure Web App targets, see our documentation about this topic
Help us continuously improve
Please let us know if you have any feedback about this page.
Page updated on Thursday, December 12, 2024