You can use Microsoft Entra ID, formerly known as Azure Active Directory (AAD), to authenticate when logging in to the Octopus Server. To use Microsoft Entra ID authentication with Octopus, you will need to do the following:
- Configure Microsoft Entra ID to trust your Octopus Deploy instance by setting it up as an App in your Microsoft Azure Portal.
- Optionally, map Entra ID Users into Roles so that users can be automatically connected to Octopus Teams.
- Configure your Octopus Deploy instance to trust and use Microsoft Entra ID as an Identity Provider.
If your Octopus database is running in Azure SQL, it’s also possible to configure a Microsoft Entra ID Managed identity for use with your SQL database. See our Using Microsoft Entra ID in Azure SQL section for further information.
Configure Microsoft Entra ID
First, you need to configure your Microsoft Entra ID to trust your instance of Octopus Deploy by configuring an App in your Microsoft Azure Portal.
Configure Octopus Deploy as an App in your Azure Portal
Get the right permissions for your Microsoft Entra ID tenant before starting To configure your instance of Octopus Deploy as an App, you need administrator permissions for the desired Microsoft Entra ID tenant in your subscription.
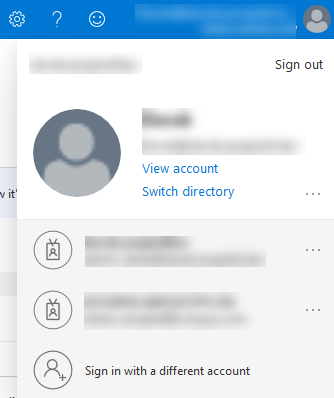
- Log in to the Azure Portal, click on your account positioned at the top-right of the screen, then select your desired directory:
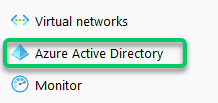
- Select “All services” in the Azure Portal and select Microsoft Entra ID from the Azure menu:
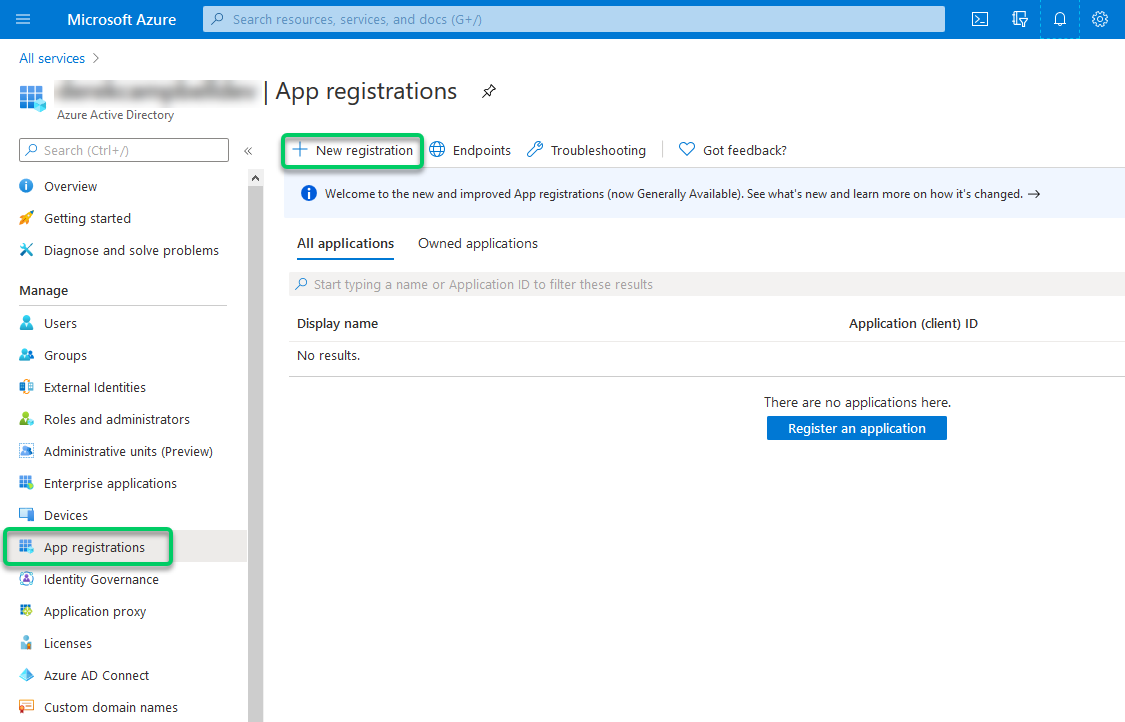
- In the top menu, select Add* then choose App registration:
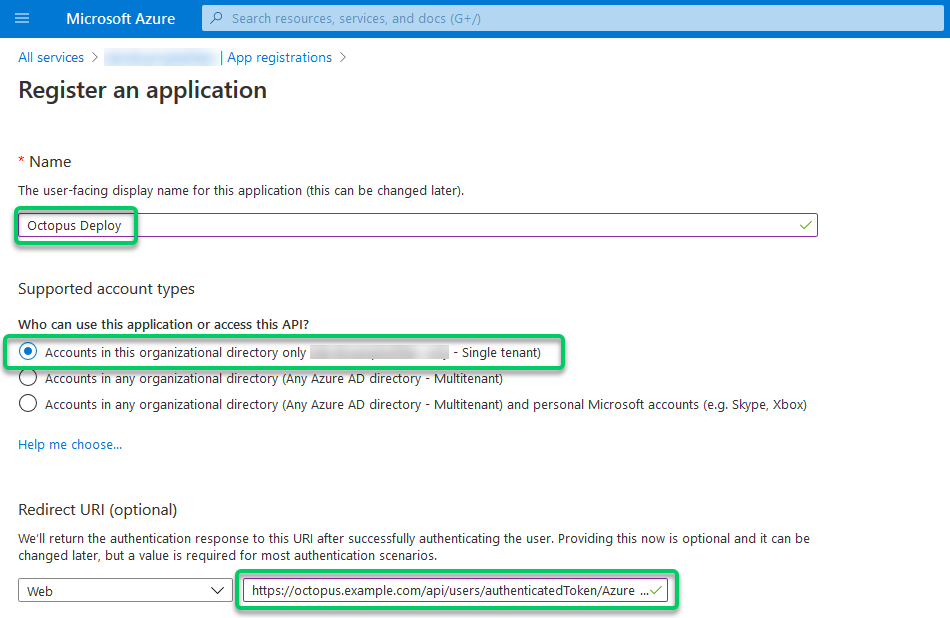
- Choose a Name such as Octopus Deploy, select the correct Supported account type for Single or Multi-Tenant, choose Web from the drop down and enter a value for Redirect URI like
https://octopus.example.com/api/users/authenticatedToken/AzureAD. Then click Register.
- The URL must use HTTPS.
- When users input their credentials, the value you specify for Name will appear at the top of the Azure authentication page.
- The value you specify for Redirect URI should be the URL to your Octopus Server. This address is only linked within your browser, so it only has to be resolvable on your network, not from the public Internet.
- Include
/api/users/authenticatedToken/AzureADat the end of your Octopus URL.
Take care when you add this URL. They are case-sensitive and can be sensitive to trailing slash characters. You cannot use HTTP here and need to use https. You will need to use an SSL certificate from a Certificate Authority, such as LetsEncrypt. You can do this by using Octopus Deploy Let’s Encrypt Integration or one from Active Directory Certificate Services.
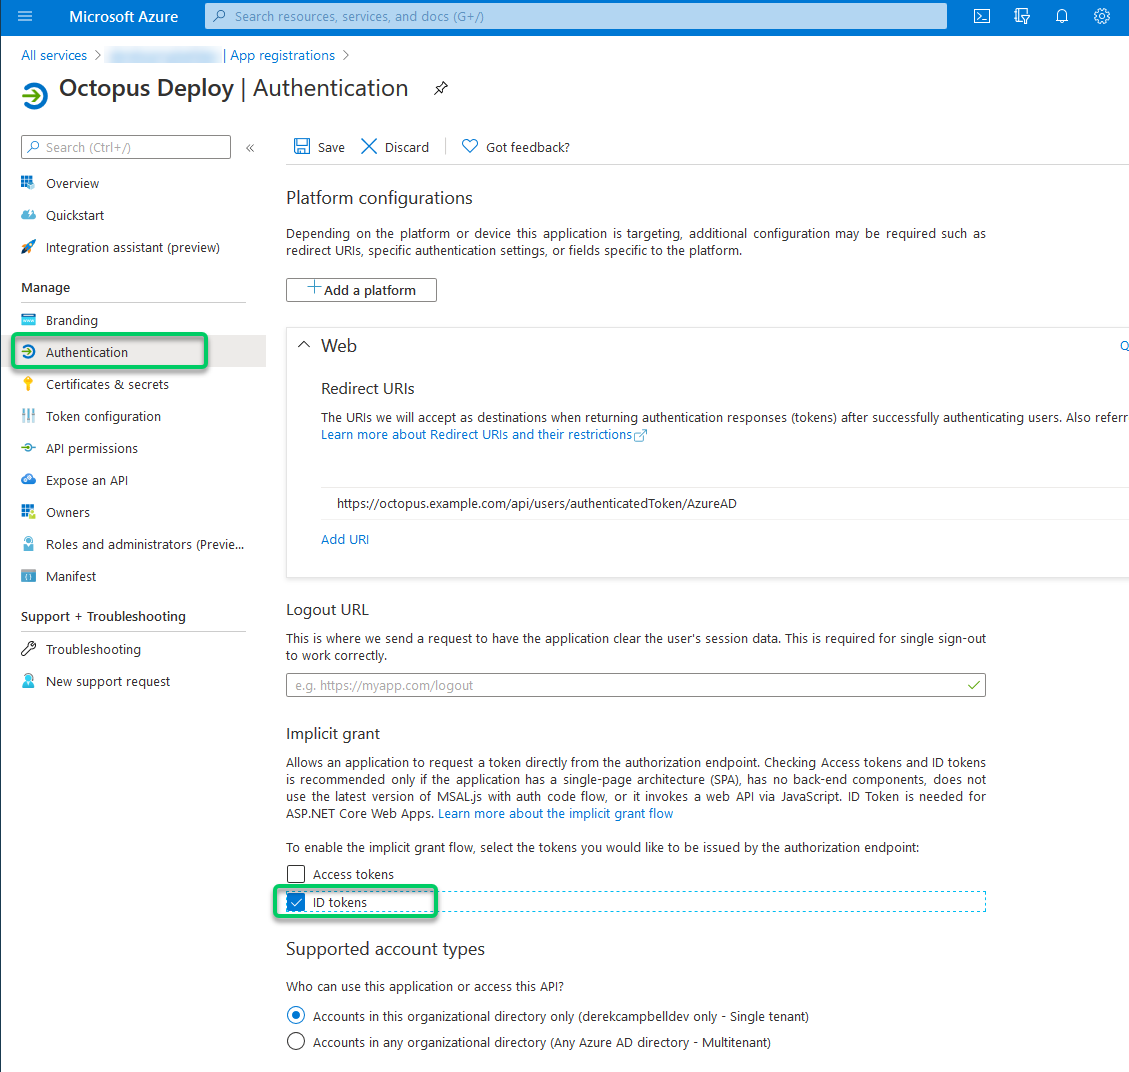
Enable ID Tokens and configure
Support for OAuth code flow with PKCE was introduced in Octopus 2022.2.4498. This step is not required for any newer versions of Octopus. Instead, we suggest following the instructions for generating a client secret below.
- Within your new App registration in Microsoft Entra ID, navigate to Manage > Authentication.
- Ensure the ID Tokens box is enabled:
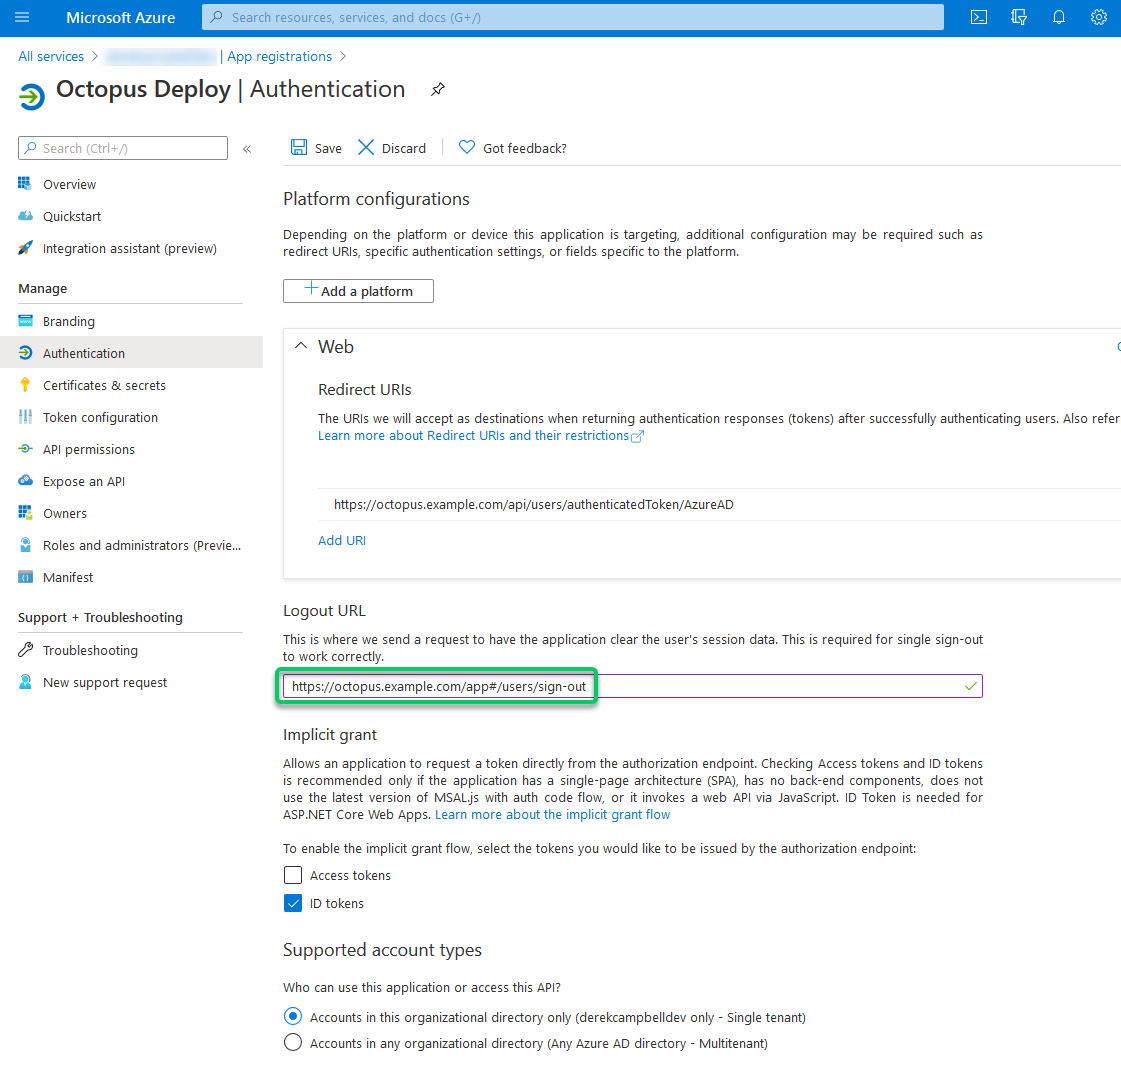
Enable Logout URL if using Single Sign-On (optional)
- Within your new App registration in Microsoft Entra ID, navigate to Authentication.
- Input logout URL and enter
https://octopus.example.com/app#/users/sign-outsubstituting your URL.
Mapping Microsoft Entra ID users into Octopus teams (optional)
If you want to manage user/team membership via Microsoft Entra ID, you must configure Roles for your App. To add Role(s), you can create and assign a new App Role in the Azure Portal or directly edit the App’s manifest.
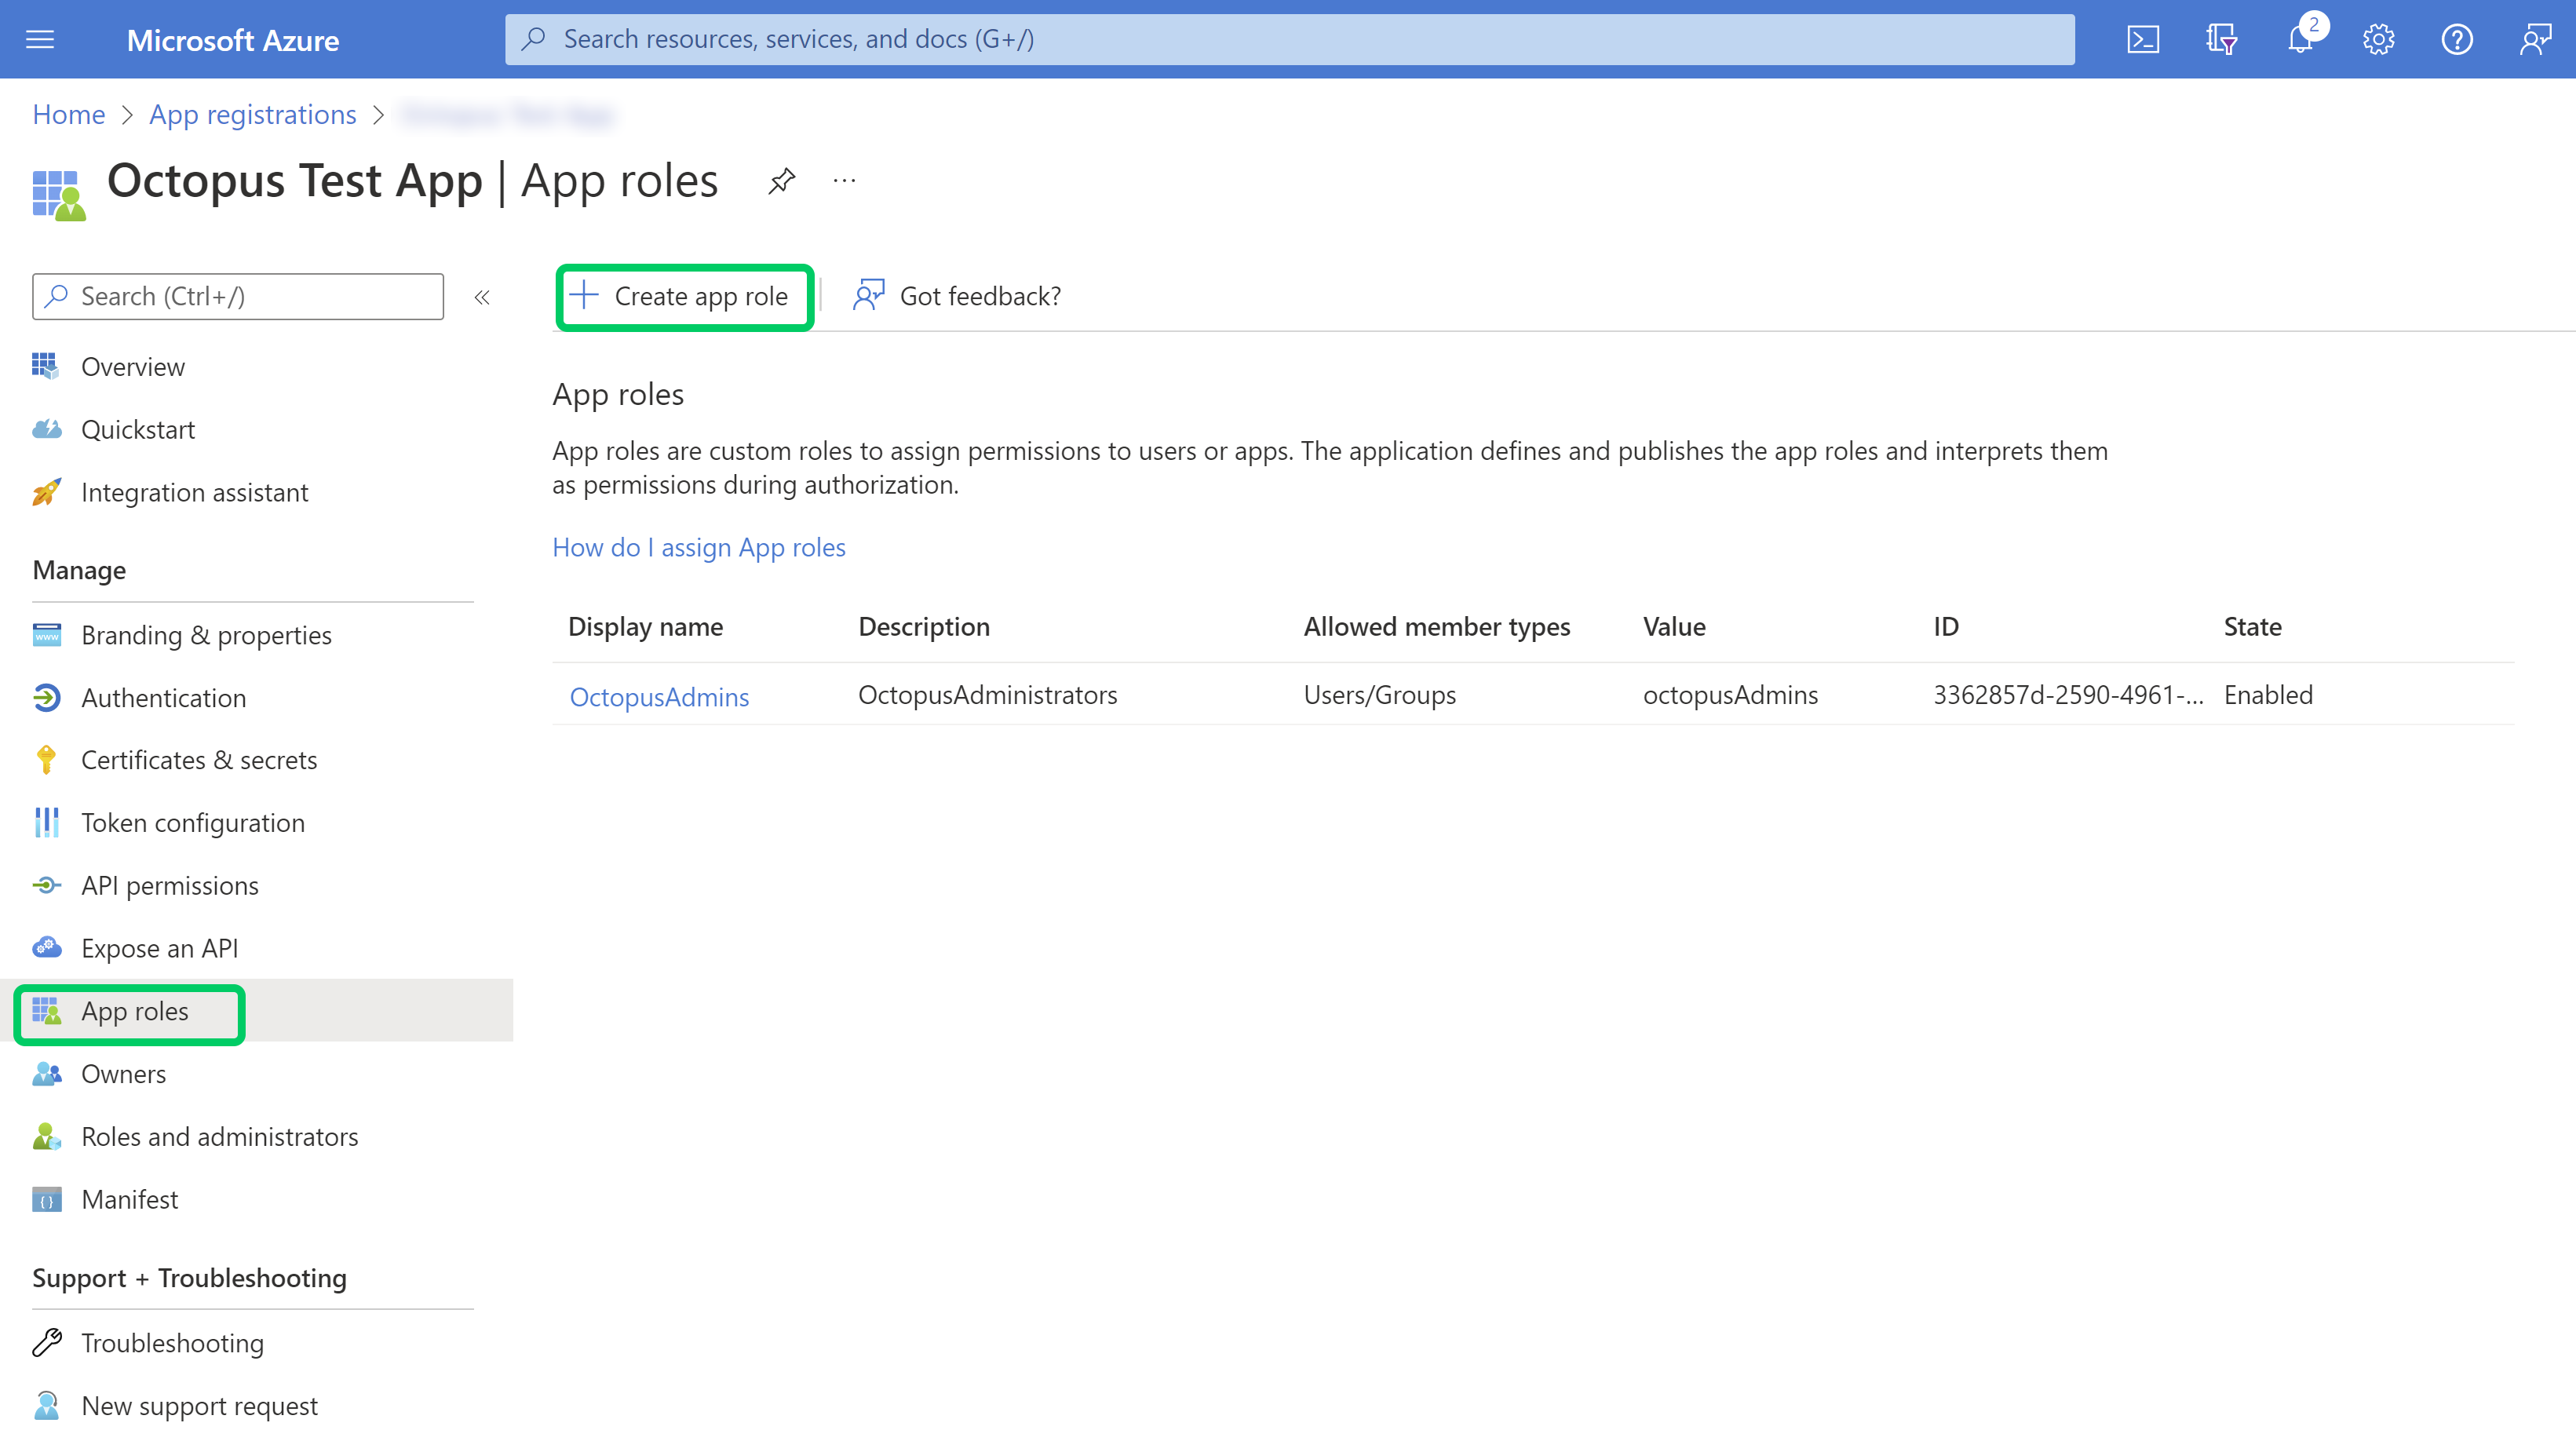
Create and Assign a new Microsoft Entra ID App Role
-
On the left hand side menu, select App roles and click the Create app role button.
-
Enter all required fields and click Apply to create the new app role.
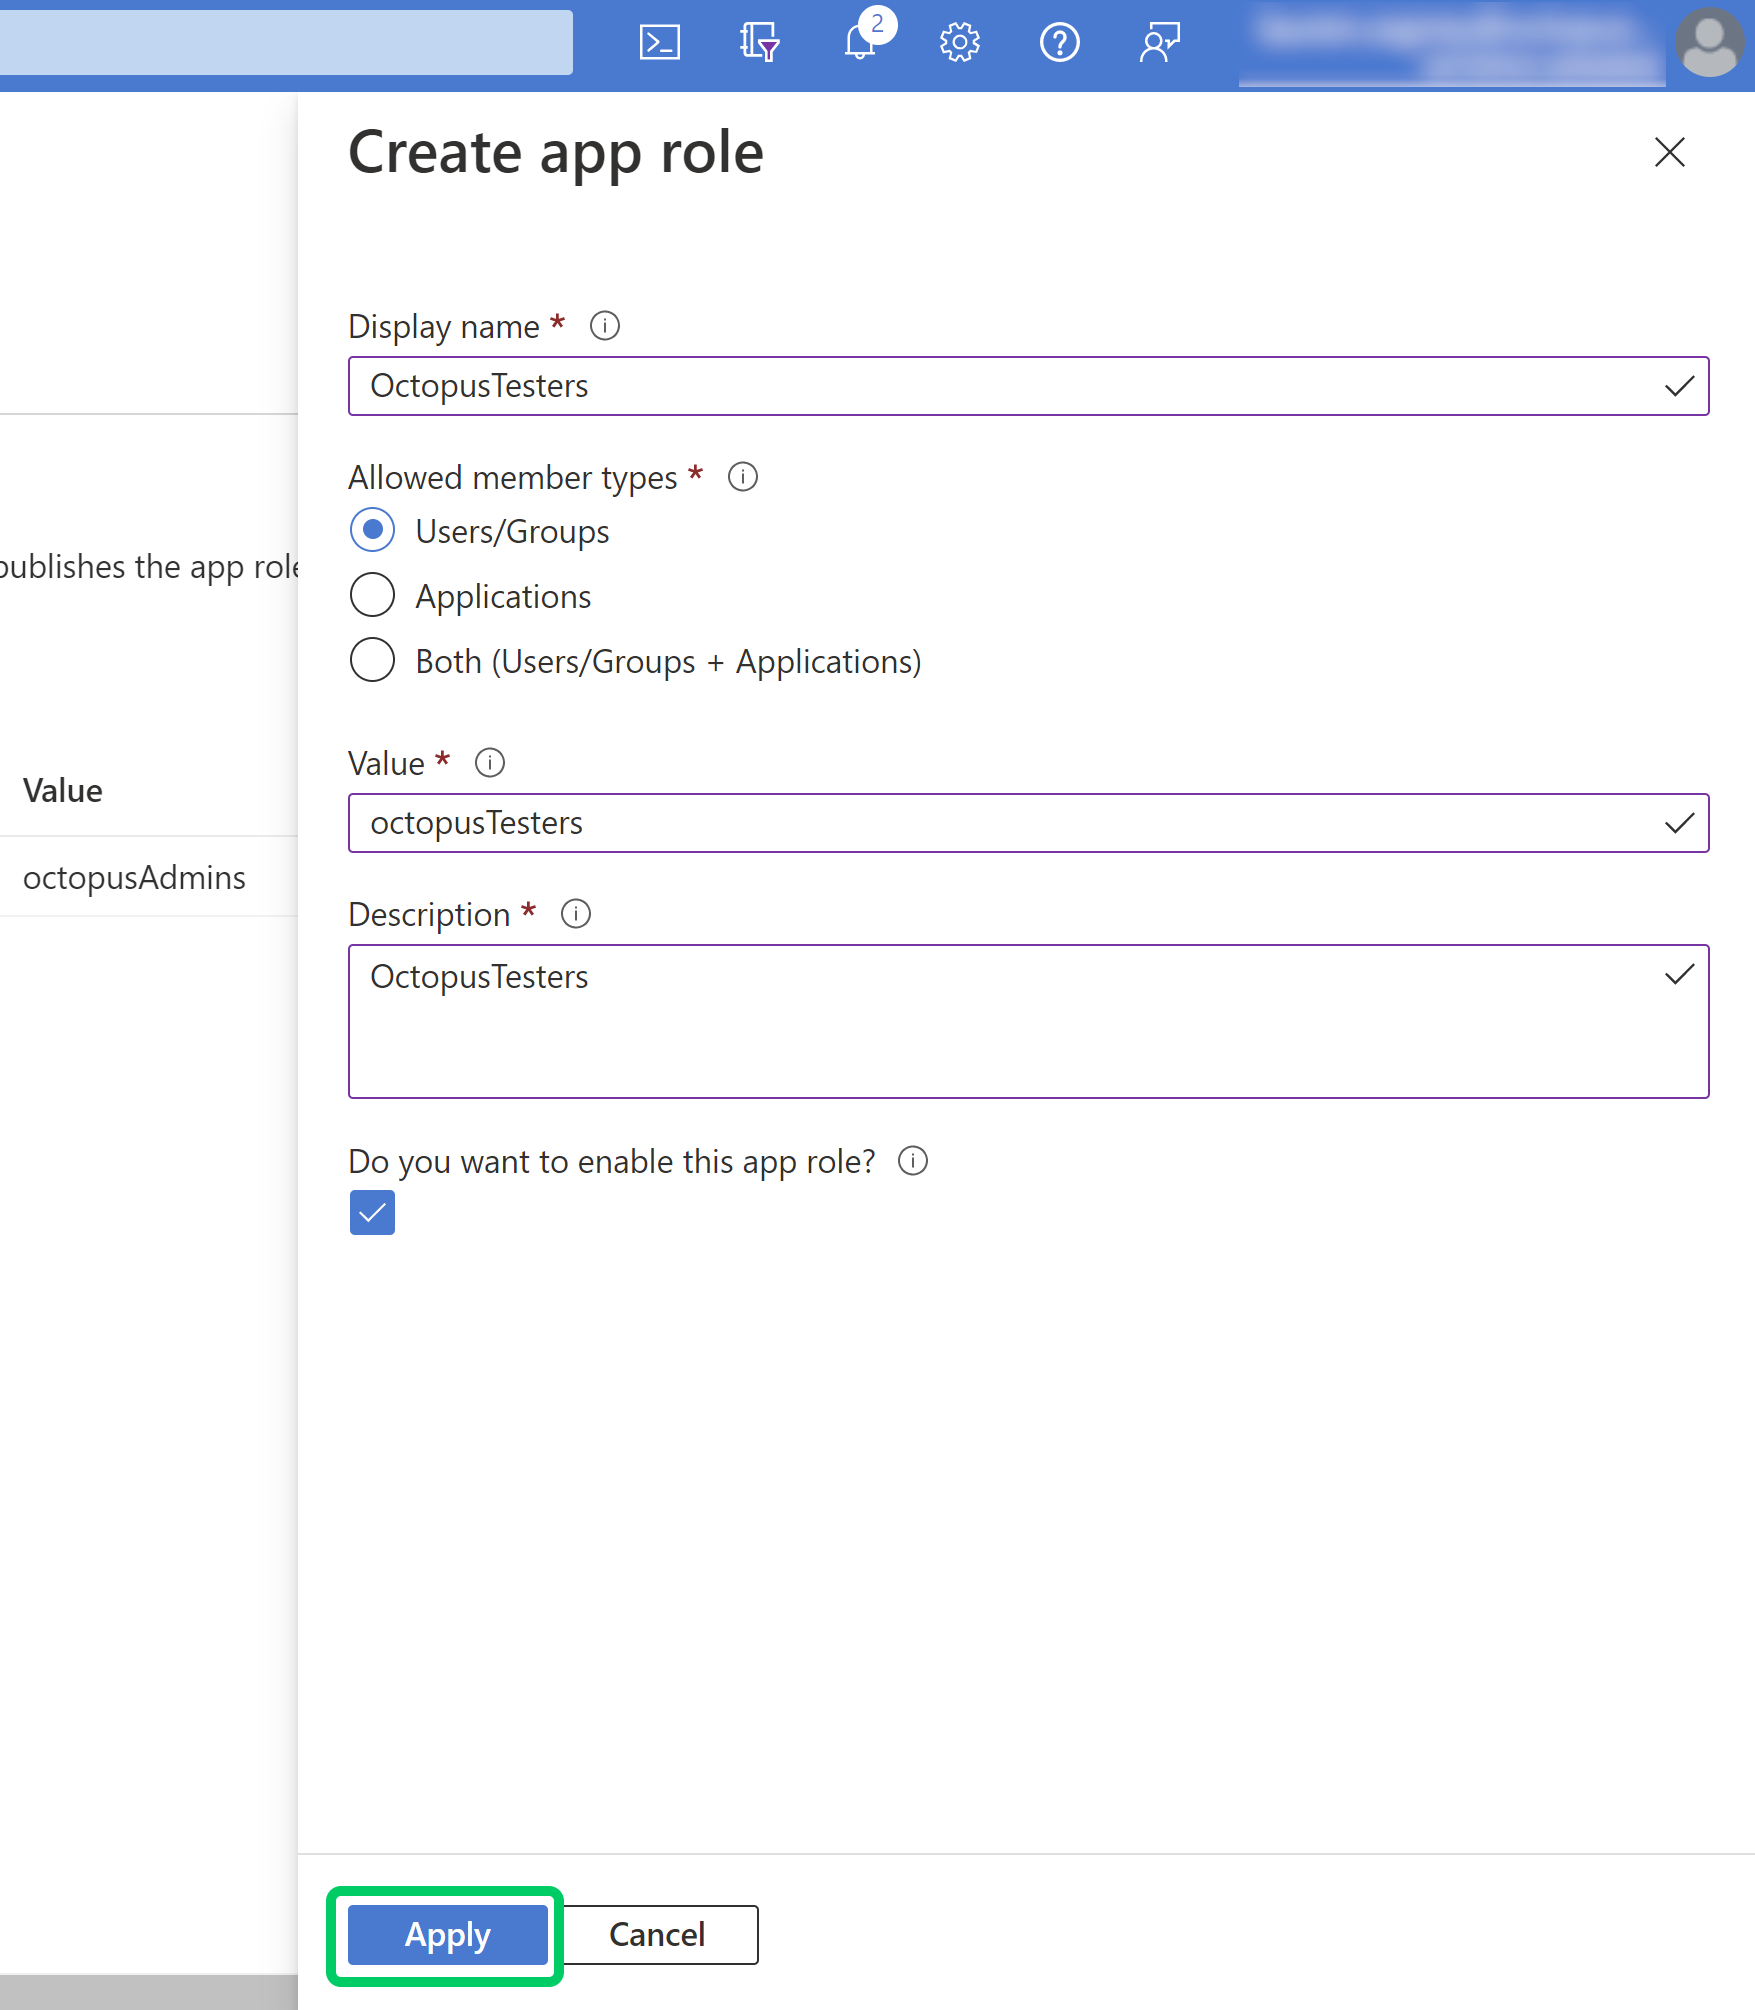
The Value property is the most important field. This value becomes the external Role ID you use later on when adding this Role to a Team in Octopus Deploy.
Edit Microsoft Entra ID App Manifest
- Under the App Registration, select Manifest, and then you can start editing your manifest file as required.
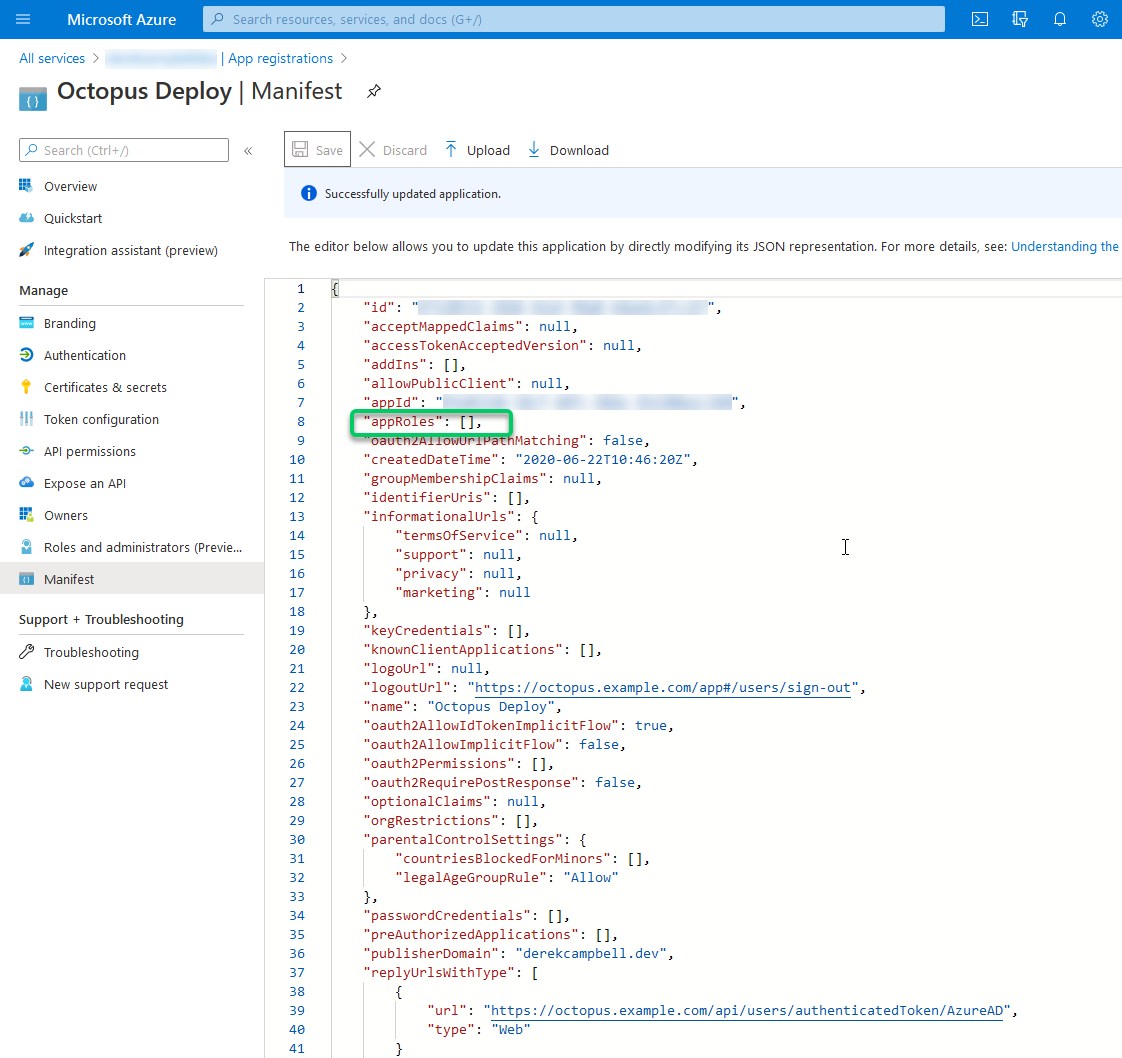
The example below illustrates two roles, one for administrators and one for application testers. You need to create each required group in the Manifest file.
Make sure you replace the NEWGUIDs with a generated GUID (unique per entry). You can find these online and use them as required. An example is the Online GUID / UUID Generator.
{
  "appId": "myAppGuid",
  "appRoles": [
   {
      "id": "NEWGUID1",
      "allowedMemberTypes": ["User"],
      "description": "OctopusAdministrators",
      "displayName": "OctopusAdmins",
      "isEnabled": true,
      "value": "octopusAdmins"
   },
   {
      "id": "NEWGUID2",
      "allowedMemberTypes": ["User"],
      "description": "OctopusTesters",
      "displayName": "OctopusTesters",
      "isEnabled": true,
      "value": "octopusTesters"
   }
  ]
}
After you have completed editing the manifest, select the Save option.
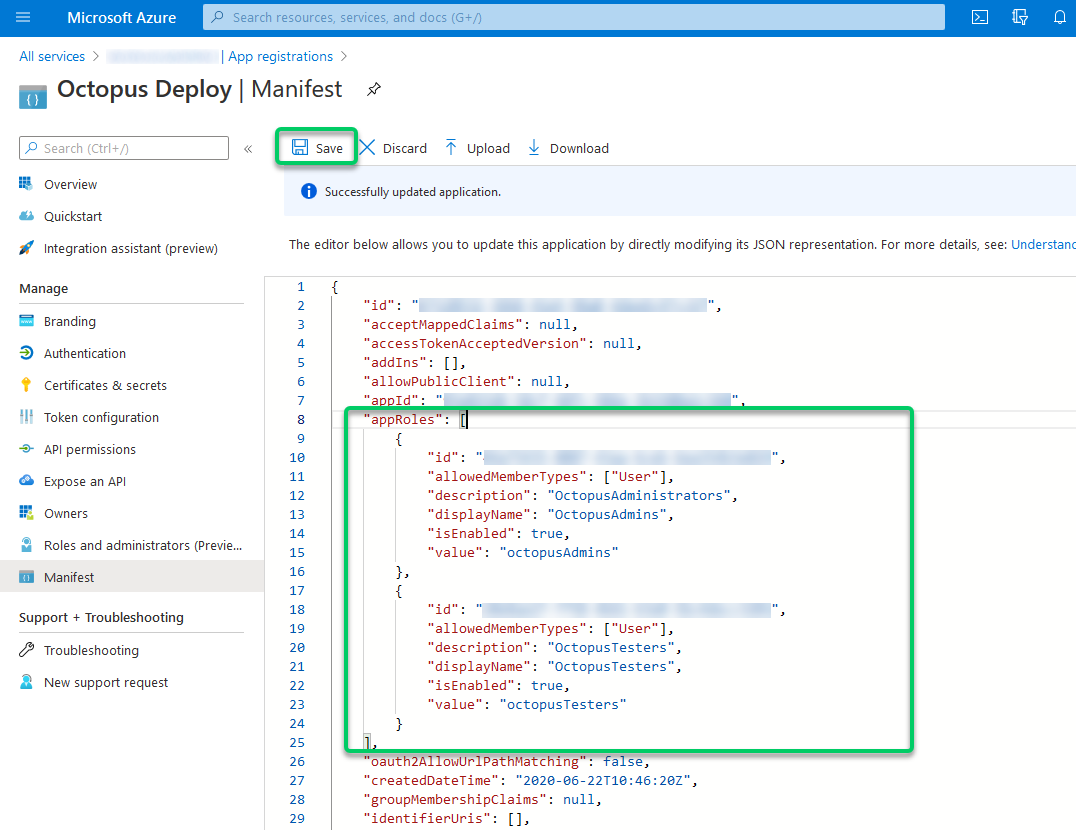
The value property is the most important one. This value becomes the external Role ID you use later on when adding this Role to a Team in Octopus Deploy.
Want a more advanced manifest? For more advanced scenarios, please see the Azure manifest file documentation.
Configure users and groups in Microsoft Entra ID (optional)
After the App Role(s) have been defined, users/groups from Microsoft Entra ID may be mapped into these Roles.
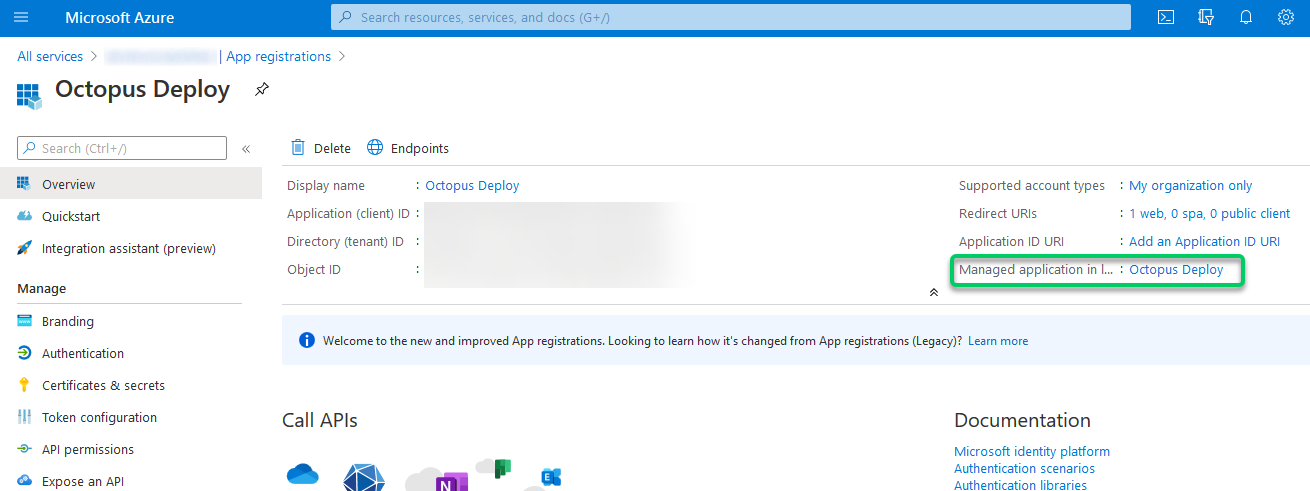
- Under the App Registration, select your App registrations name under Managed application in local directory.
-
Choose Assign users and groups and select Add user/group to create a new role assignment.
-
Select the users you would like to assign roles to. Next, under Select Role, specify one of the AppRoles that you added to the App registration manifest.
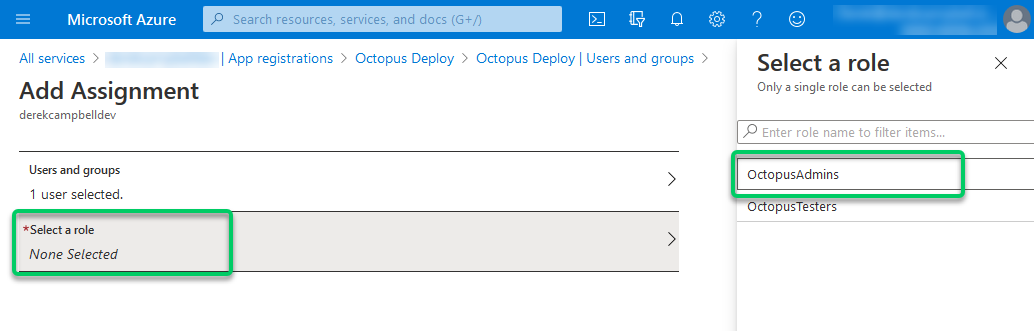
- To save your changes, select the Assign button.
If you have only one role, it will be automatically assigned. If you have multiple roles, a pop-up will appear when you click the Assign button so you can select the role to assign.
Configure Octopus Server
To complete the Octopus configuration, you need three values from the Microsoft Entra ID configuration: the Client ID, Client Secret, and Issuer.
Get the Client ID and Issuer
In the Azure portal, you can see the Application (client) ID and Directory (tenant) ID on your App’s Overview page.

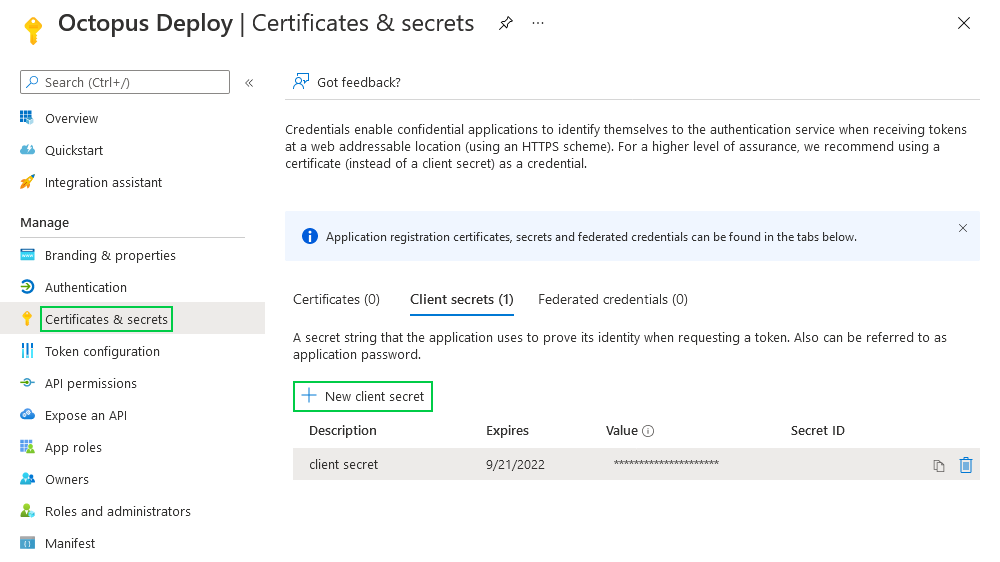
Generate the Client secret
In the Azure portal, navigate to the Certificates & secrets page and click New client secret to generate a new client secret for the App registration.
Setting the Client ID, Client secret and Issuer in Octopus Deploy
Support for OAuth code flow with PKCE was introduced in Octopus 2022.2.4498. If you are using a version older than this, the Client secret setting is not required.
If Microsoft Entra ID is used to synchronize external groups with the ‘group’ role claim type and the user is a member of more than 200 Microsoft Entra ID groups, the client secret field is required.
To configure Octopus to use Microsoft Entra ID authentication, you’ll need:
- The Client ID, which should be a GUID. This is the Application (client) ID in the Azure App Registration Portal.
- The Client secret, which should be a long string value. This is the Value of a client secret in the Azure App Registration Portal.
- The Issuer, which should be a URL like
https://login.microsoftonline.com/GUIDwhere theGUIDis a particular GUID identifying your Microsoft Entra ID tenant. This is the Directory (tenant) ID in the Azure App Registration Portal.
When you have those values, run the following from a command prompt in the folder where you installed Octopus Server:
Octopus.Server.exe configure --azureADIsEnabled=true --azureADIssuer=Issuer --azureADClientId=ClientID --azureADClientSecret=ClientSecret
# e.g.
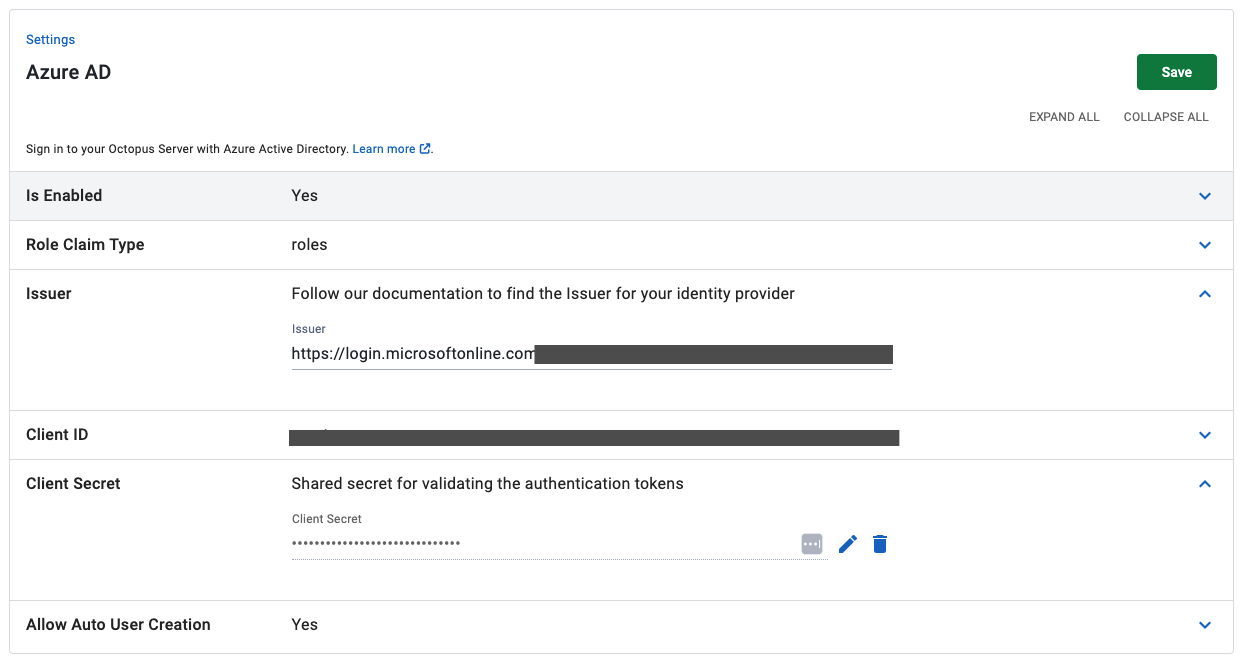
# Octopus.Server.exe configure --azureADIsEnabled=true --azureADIssuer=https://login.microsoftonline.com/12341234-xxxx-xxxx-xxxx-xxxxxxxxxxxx --azureADClientId=43214321-xxxx-xxxx-xxxx-xxxxxxxxxxxx --azureADClientSecret=bCeXXXXXXXXXXXXXXXXXXXXXXXXXXXXXXXXXXAlternatively, these settings can be defined through the user interface by selecting Configuration ➜ Settings ➜ Azure AD and populating the fields Issuer, ClientId, ClientSecret, and IsEnabled. If you want to remove the ClientSecret you can use the delete button shown in the screenshot.
Assign app registration roles to Octopus teams (optional)
If you followed the optional steps to modify the App registration’s manifest to include new roles, you can assign them to Teams in the Octopus Portal.
-
Open the Octopus Portal and select Configuration ➜ Teams.
-
Either create a new Team or choose an existing one.
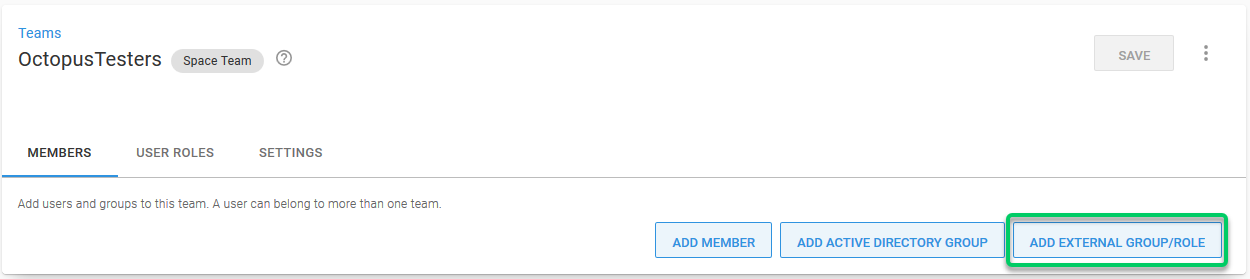
-
Under the Members section, select the option Add External Group/Role.
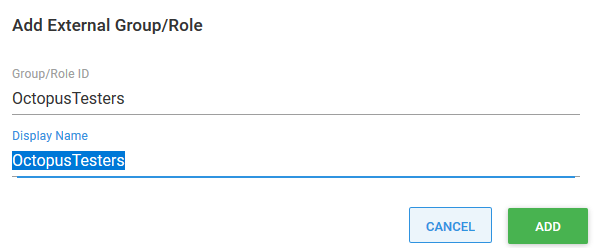
- Enter the details from your App registration’s manifest. In this example, we need to supply
octopusTestersas the Group/Role ID andOctopusTestersas the Display Name.
- Save your changes by clicking the Save button.
Octopus user accounts are still required
Even if you are using an external identity provider, Octopus still requires a user account, so that you can assign those people to Octopus teams and subsequently grant permissions to Octopus resources. Octopus will automatically create a user account based on the profile information returned in the security token, which includes an Identifier, Name, and Email Address.
How Octopus matches external identities to user accounts
When the security token is returned from the external identity provider, Octopus looks for a user account with a matching Identifier. If there is no match, Octopus looks for a user account with a matching Email Address. If a user account is found, the external identifier will be added to the user account for next time. If a user account is not found, Octopus will create one using the profile information in the security token.
Existing Octopus user accounts
If you already have Octopus user accounts and you want to enable Microsoft Entra ID authentication:
- Make sure the Email Address and Username values for Octopus user accounts are both identical.
- Confirm the Octopus user Email Address and Username match the email address configured in Microsoft Entra ID.
This will maximize the chance for your existing users to sign in using Microsoft Entra ID and prevent duplicate Octopus user accounts from being created.
Getting permissions
If you are installing a clean instance of Octopus Deploy you will need to seed it with at least one admin user. This user will have access to create and configure other users as required. To add a user, execute the following command
Octopus.Server.exe admin --username USERNAME --email EMAILThe most important part of this command is the email, as usernames are not necessarily included in the claims from the external providers. When the user logs in the matching logic must be able to align their user record based on the email from the external provider or they will not be granted permissions.
Next steps
Now that you’re using an external identity provider, it is easy to increase your security. You could consider configuring Multi-Factor Authentication, after all, Octopus Deploy has access to your production environments!
You should also consider disabling any authentication providers you aren’t using, like username and password authentication.
Troubleshooting
If you are having difficulty configuring Octopus to authenticate with Microsoft Entra ID, check your server logs for warnings.
Triple-check your configuration
Unfortunately, the security-related configuration is sensitive to everything. Make sure:
- You don’t have any typos or copy-paste errors.
- Remember, things are case-sensitive.
- Remember to remove or add slash characters.
Check the OpenID Connect metadata is working
You can see the OpenID Connect metadata by going to the Issuer address in your browser and adding /.well-known/openid-configuration to the end. In our example, this would be something like https://login.microsoftonline.com/b91ebf6a-84be-4c6f-97f3-32a1d0a11c8a/.well-known/openid-configuration.
Inspect the contents of the security token
When using OAuth code flow with PKCE, the JWT token will not be visible to the end user. To use this debugging method, please remove the client secret and ensure that your configuration lines up with the pre-PKCE method, detailed above.
Sometimes the contents of the security token sent back by Microsoft Entra ID aren’t exactly what Octopus expects; certain claims might be missing or named differently. This will usually result in the Microsoft Entra ID user incorrectly mapping to a different Octopus user than expected. The best way to diagnose this is to inspect the JSON Web Token (JWT), which is sent from Microsoft Entra ID to Octopus via your browser. To inspect the contents of your security token:
- Open your browser’s Developer Tools and enable Network logging, making sure the network logging is preserved across requests.
- In Chrome Dev Tools, this is called “Preserve Log”.
- Attempt to sign into Octopus using Microsoft Entra ID and find the HTTP POST coming back to your Octopus instance from Microsoft Entra ID on a route like
/api/users/authenticatedToken/azureAD. You should see an id_token field in the HTTP POST body. - Grab the contents of the id_token field and paste that into https://jwt.io/, which will decode the token for you.
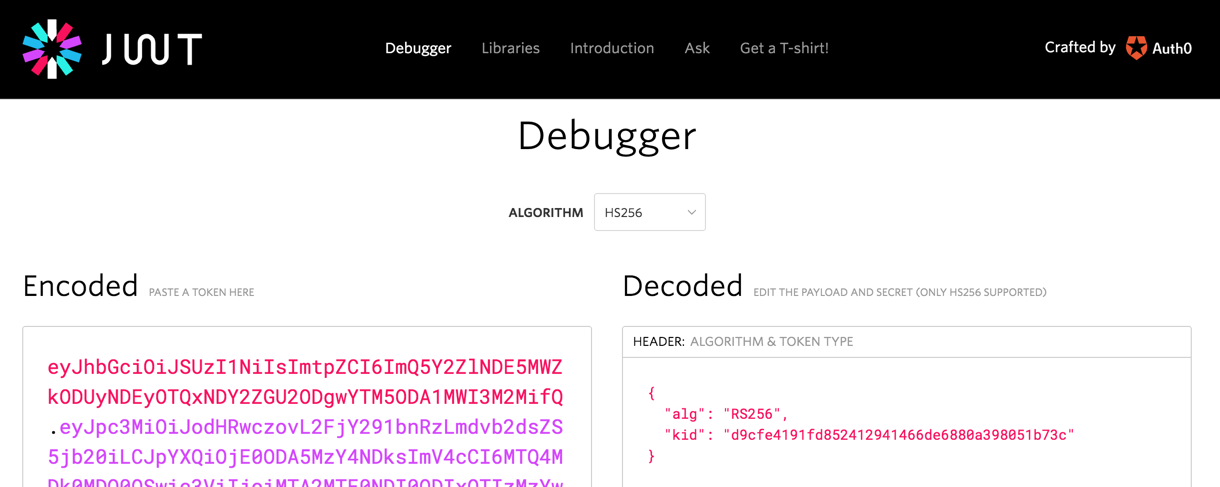
- Octopus uses most of the data to validate the token, but primarily uses the sub, email, and name claims. If these claims are not present, you will likely see unexpected behavior.
EntraID Users with 200+ security groups
If a user has more than 200 security groups assigned, we need to retrieve the user’s security groups using the Graph API, which requires the aio claim to be present in the id token we send to the Graph API.
If this claim is missing, check the following:
- You don’t have any wildcards
*in the Redirect URI. - You have enabled
ID Tokensin the App Registration.
Contact Octopus Support
If you aren’t able to resolve the authentication problems yourself using these troubleshooting tips, please reach out to our support team with:
- The contents of your OpenID Connect Metadata or the link to download it (see above) can be different for each Azure AD App.
- A copy of the decoded payload for some security tokens (see above) may work as expected, and others will not.
- A screenshot of the Octopus User Accounts, including their username, email address, and name.
Help us continuously improve
Please let us know if you have any feedback about this page.
Page updated on Sunday, June 1, 2025