Deployment Slots provide a nice way to implement Blue-Green deployments for Azure Web Apps.
This provides many benefits, including:
- Reduced down-time when deploying.
- When deploying packages with a large number of files, deployment times can be significantly reduced due to not having to compare with existing files (this assumes you are deploying to a clean slot).
- Roll-back can be achieved by simply swapping the slots back.
Deployment Slots are only available to Azure Web Apps running in Standard or Premium App Service plans
Walk-Through
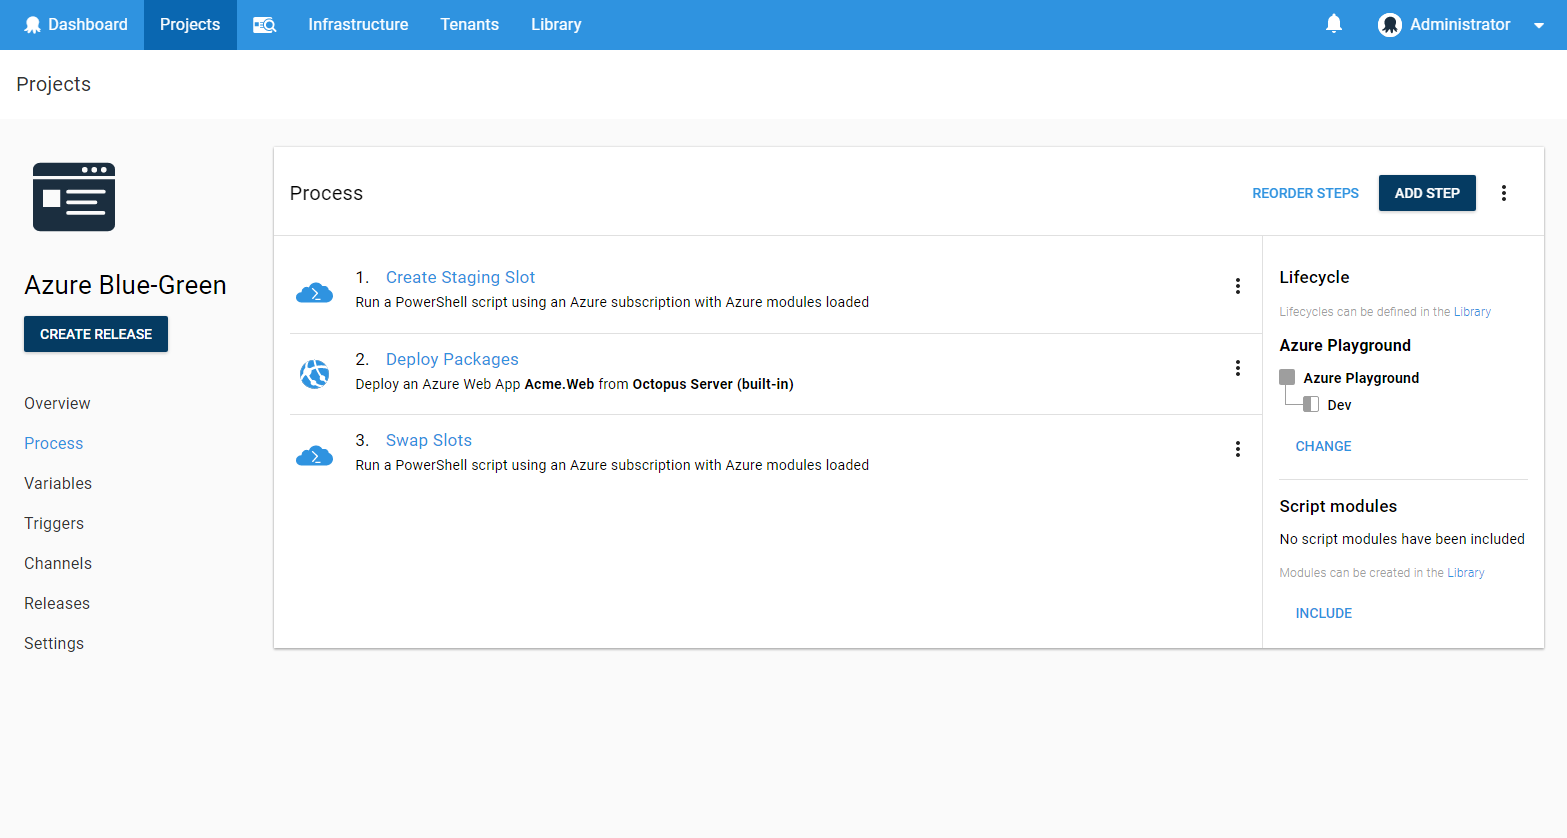
Here we will give an example of how to setup a Blue-Green deployment for an Azure Web App using Deployment Slots. The scripts below assume you have a variable named ‘WebSite’ that contains the name of your Azure Web App and ‘ResourceGroup’ that contains the Azure Resource Group Name.
Step 1: Create an Azure Web App Deployment Target
Follow the steps for Azure Web App targets.
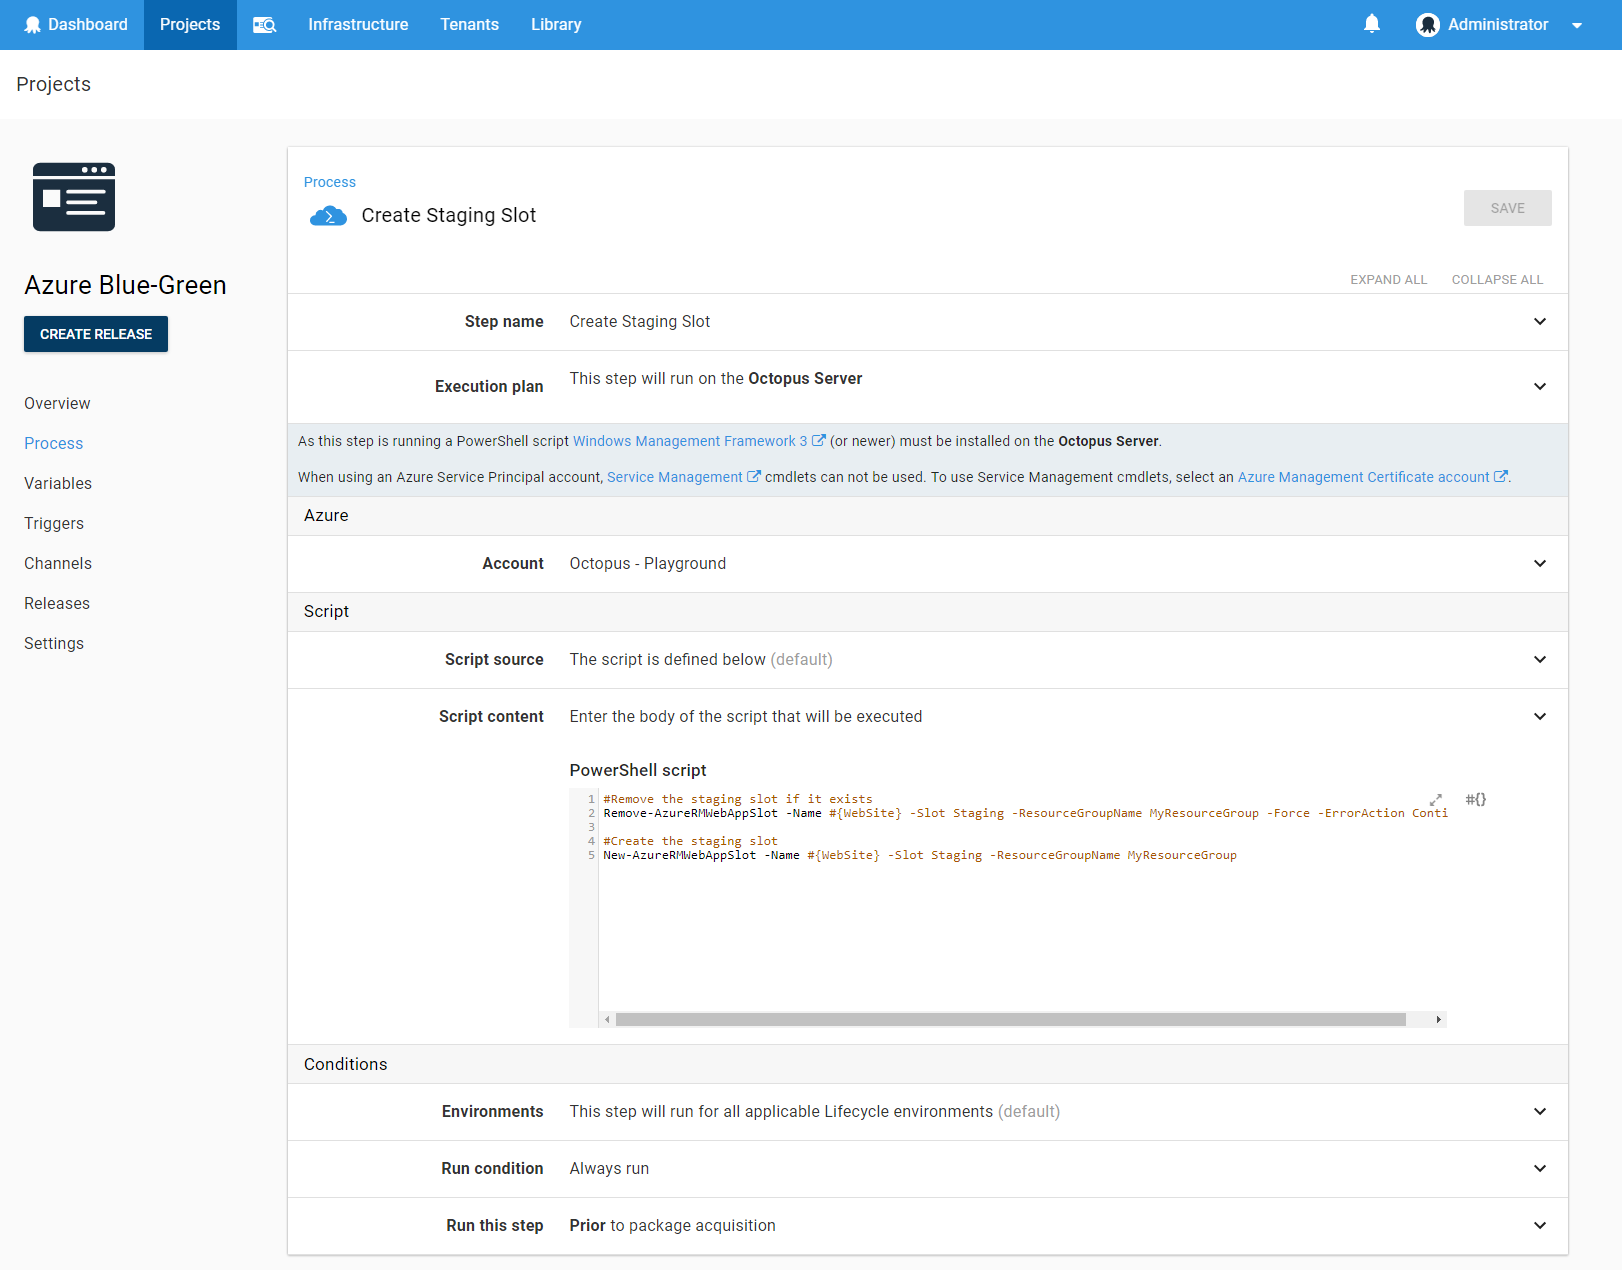
Step 2: Create a staging slot
Create a Run an Azure PowerShell Script step.
Your script should be:
Azure Service Management
#Remove the staging slot if it exists
Remove-AzureWebsite -Name #{WebSite} -Slot Staging -Force

#Create the staging slot
New-AzureWebsite -Name #{WebSite} -Slot Staging
Azure Resource Manager
#Remove the staging slot if it exists
Remove-AzureRMWebAppSlot -Name #{WebSite} -Slot Staging -ResourceGroupName #{ResourceGroup} -Force -ErrorAction Continue

#Create the staging slot
New-AzureRMWebAppSlot -Name #{WebSite} -Slot Staging -ResourceGroupName #{ResourceGroup}
The first line of the script removes the Staging Slot to ensure we are deploying to a clean slot. This can significantly reduce the time taken for deployments with large numbers of files as it avoids having to calculate the set of files which have changed by comparing timestamps or checksums. For deployments with a smaller number of files, this may well not be any quicker.
So your step should look like:
Step 3: Deploy your package
The next step is to deploy your package to the Staging slot. We do this by creating a Deploy an Azure Web App step.
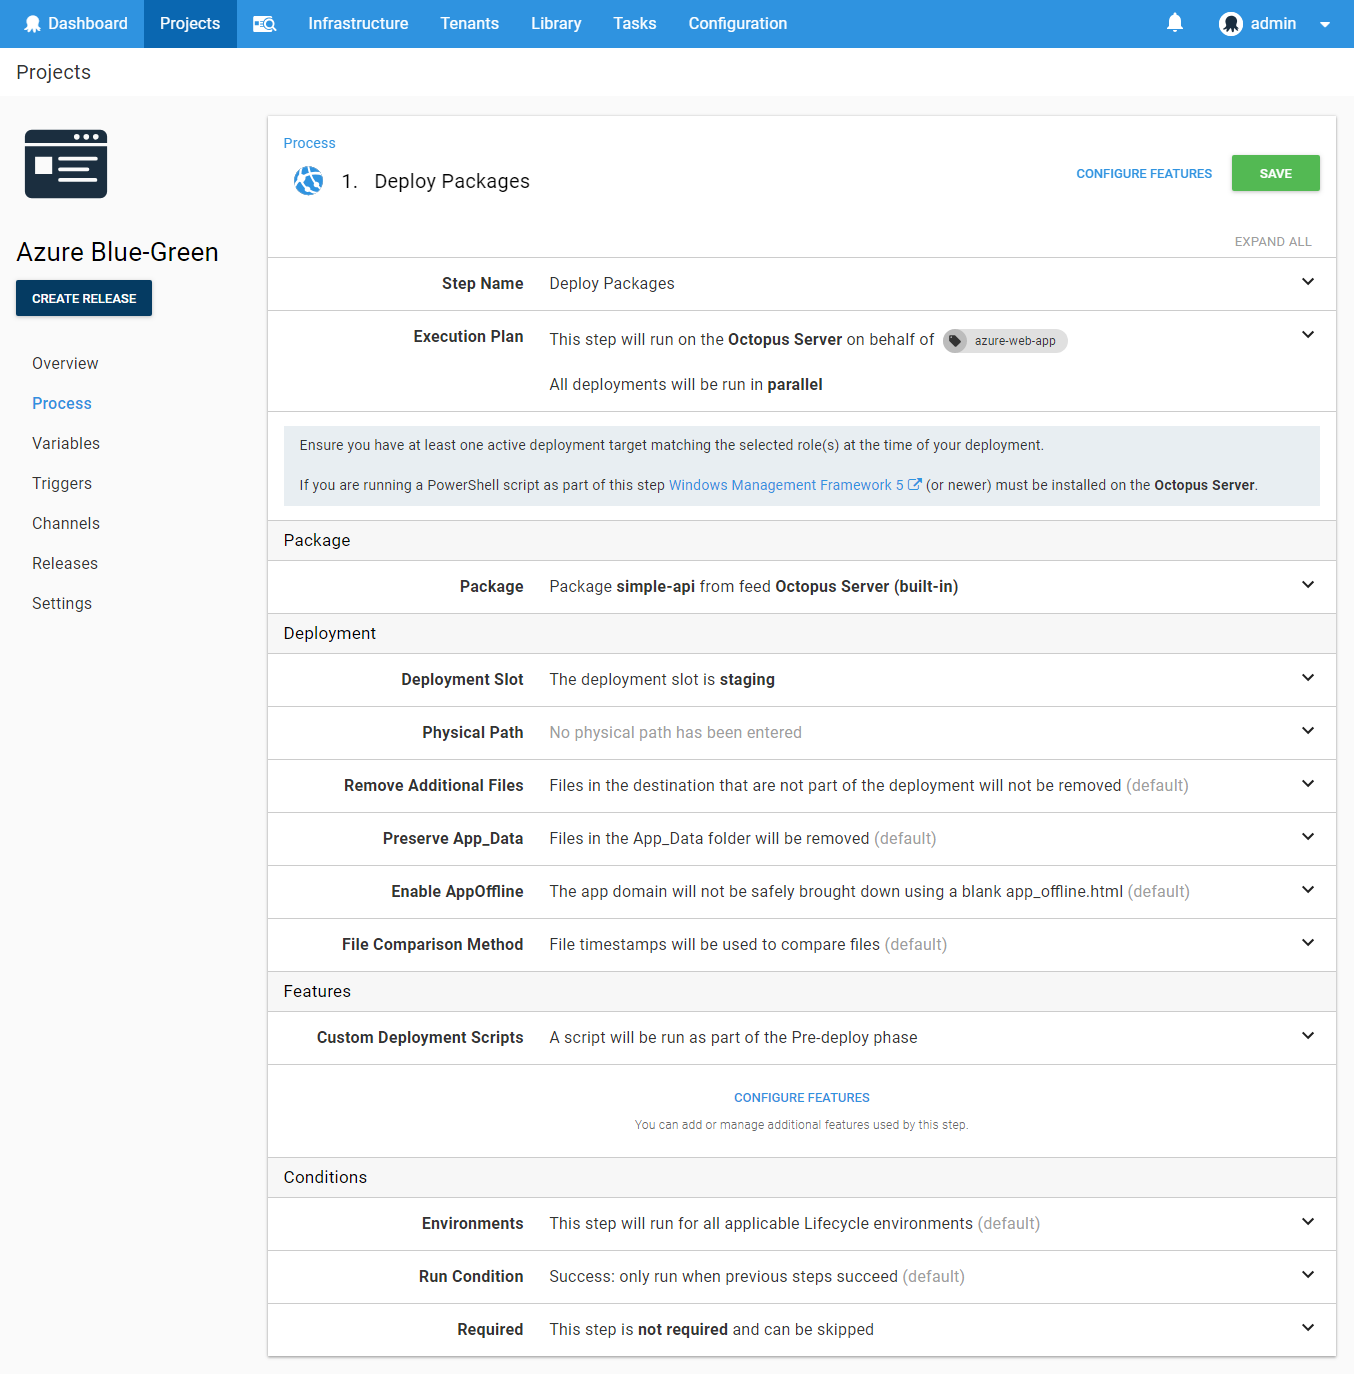
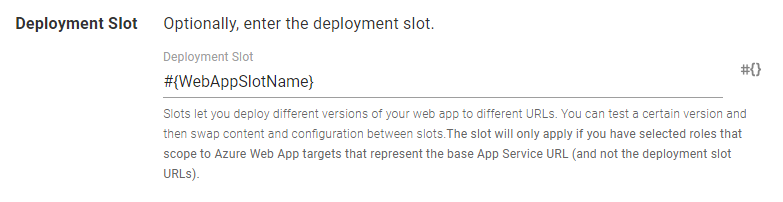
You can enter the name of deployment slot in the Deployment Slot field, or to use a variable for the Slot name, click the “Bind” button, and enter
#{WebAppSlotName}As shown below:
You can choose to specify the slot directly on the deployment target, or directly on the step (if you wish to deploy to multiple different slots on the same Web App Service, for example), however, the slot on the target will take priority.
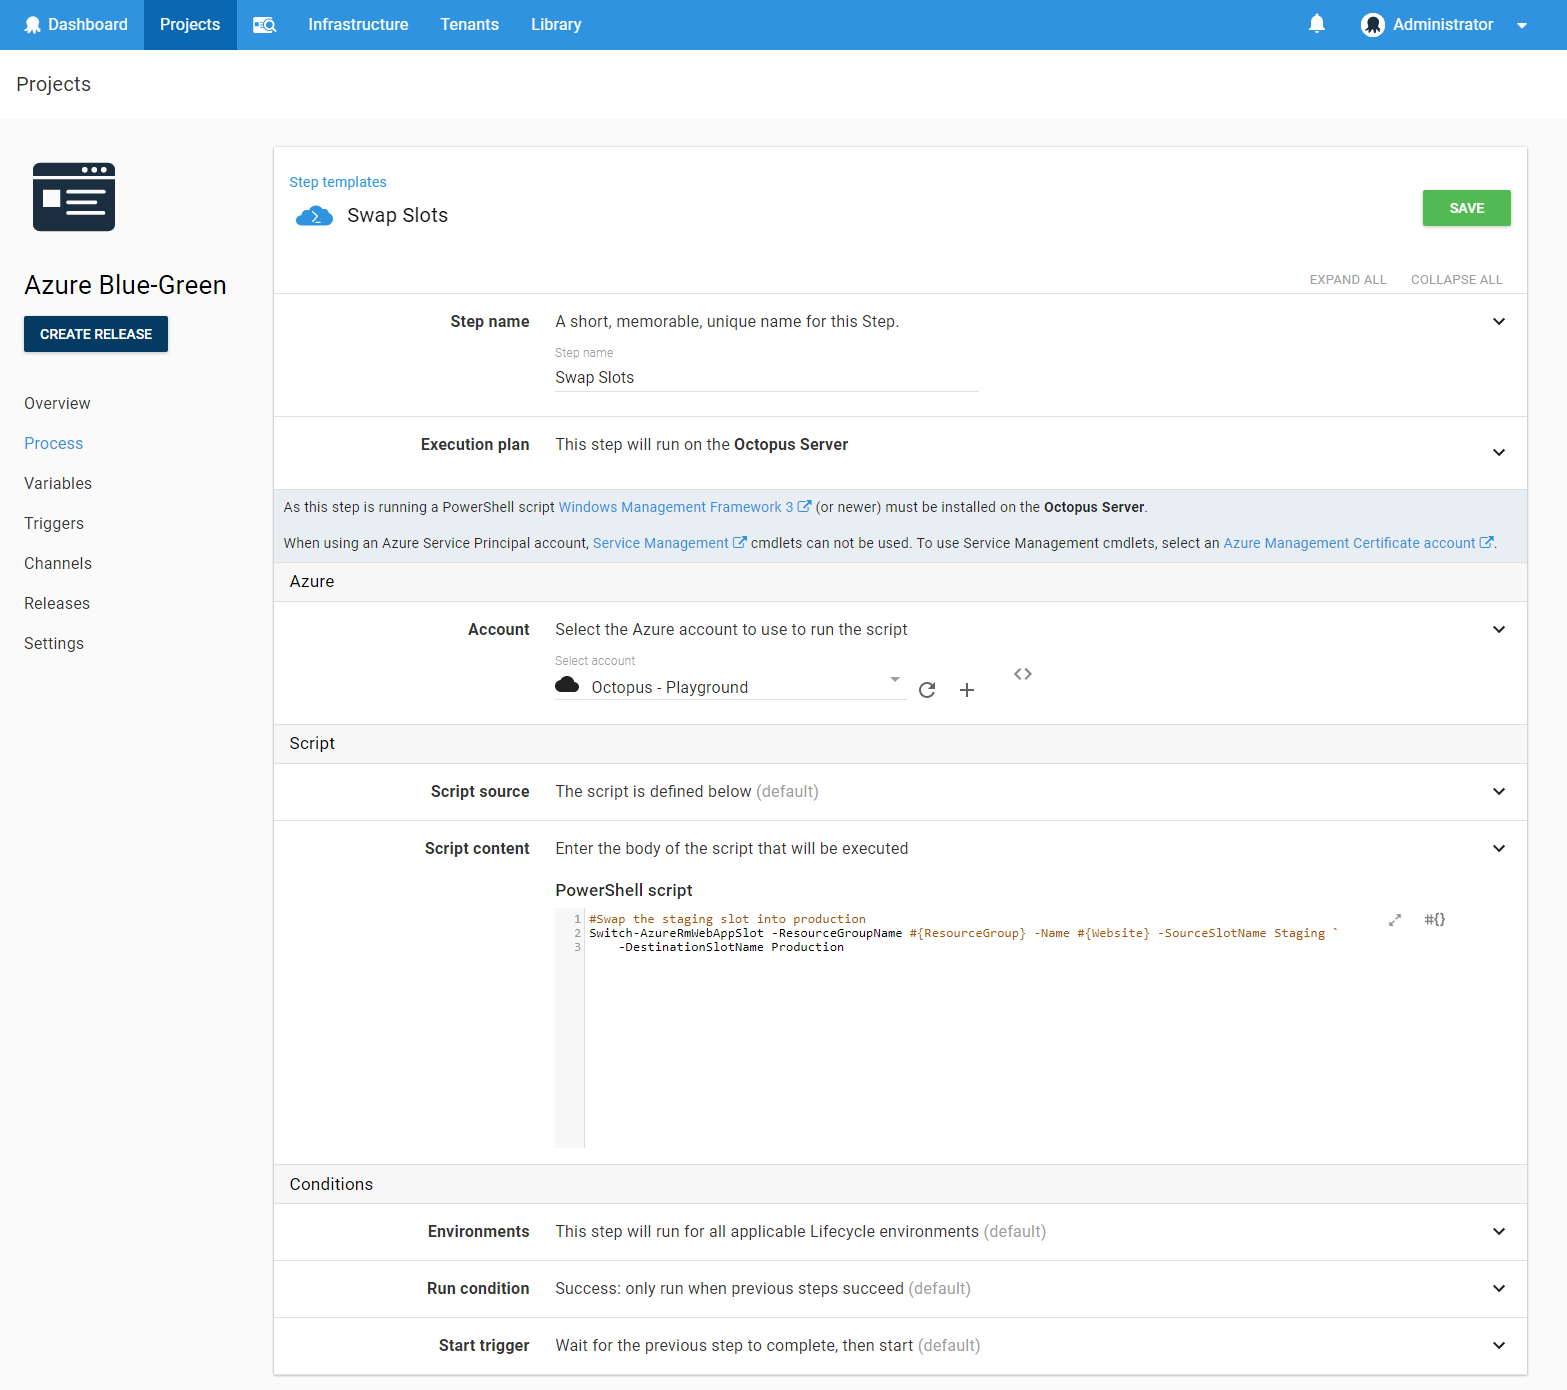
Step 4: Swap the Staging and Production slots
The final step is to create another Azure PowerShell step to swap the Staging and Production slots.
Use the PowerShell:
Azure Service Management
# Swap the staging slot into production
Switch-AzureWebsiteSlot -Name #{WebSite} -Slot1 Staging -Slot2 Production -Force
Azure Resource Management
# Swap the staging slot into production
Switch-AzureRmWebAppSlot -ResourceGroupName #{ResourceGroup} -Name #{Website} -SourceSlotName Staging -DestinationSlotName Production
So your step will appear as:
At this point you should have a working Blue-Green deployment process for your Azure Web App.
Learn more
- Generate an Octopus guide for Azure and the rest of your CI/CD pipeline.
Help us continuously improve
Please let us know if you have any feedback about this page.
Page updated on Wednesday, October 4, 2023