Policies in Octopus are designed to ensure compliance and governance by default, making it easier to enforce deployment controls at scale. This approach allows you to shift compliance left, alleviating the burden of manual audits and enabling you to maintain high standards across your organization. With policies, you can enforce organization-wide compliance across teams and regions, moving governance out of Confluence docs and Slack threads and into the heart of your delivery pipeline.
Using Rego, you can write custom policy checks that align with your requirements, block non-compliant deployments, and access detailed audit logs of policy evaluation events. This method ensures compliance is not an afterthought; it is embedded within every deployment pipeline, providing a seamless and efficient way to uphold governance standards across all activities.
When to use Policies
Policies streamline the enforcement of standards across all deployments by automating compliance checks and governance measures.
Consider implementing policies if:
- You want to ensure that every deployment conforms to predefined standards without manual effort.
- You wish to manage these standards centrally, allowing for consistent application across your organization and easy updating of standards.
While policies may not be necessary in every deployment scenario, they are invaluable if maintaining compliance and security is a priority. By embedding policies into your deployments, you can minimize risks and ensure that all teams are aligned with your organizational standards.
What can you enforce with policies?
Policies give you the flexibility to enforce virtually any standard across your deployments and runbook runs. When an execution starts, Octopus provides detailed information about the deployment or runbook run to the policy engine, allowing you to evaluate it against your requirements.
Common use cases include:
- Requiring specific steps (like manual interventions or approvals) in production deployments
- Ensuring all packages come from approved branches
- Validating that certain steps aren’t skipped or disabled
- Enforcing step ordering requirements
- Checking that deployments meet environment-specific criteria
- Verifying projects and tenants have required tags
By default, policies scope to both deployment processes and runbook runs unless you specify otherwise.
Getting started
All policies are written in Rego and saved as an OCL file under a policies folder in your Platform Hub repository. If you need to setup your Platform Hub repository see Platform Hub. For a comprehensive guide to Rego, please visit the official documentation. If you would like to jump straight to examples that are more representative of the deployment scenario you want to enforce, please visit our examples page.
In our example below, we are writing a policy that checks for the existence of a manual intervention step whenever deployments go to production.
Building your first policy
1. Create your policies file
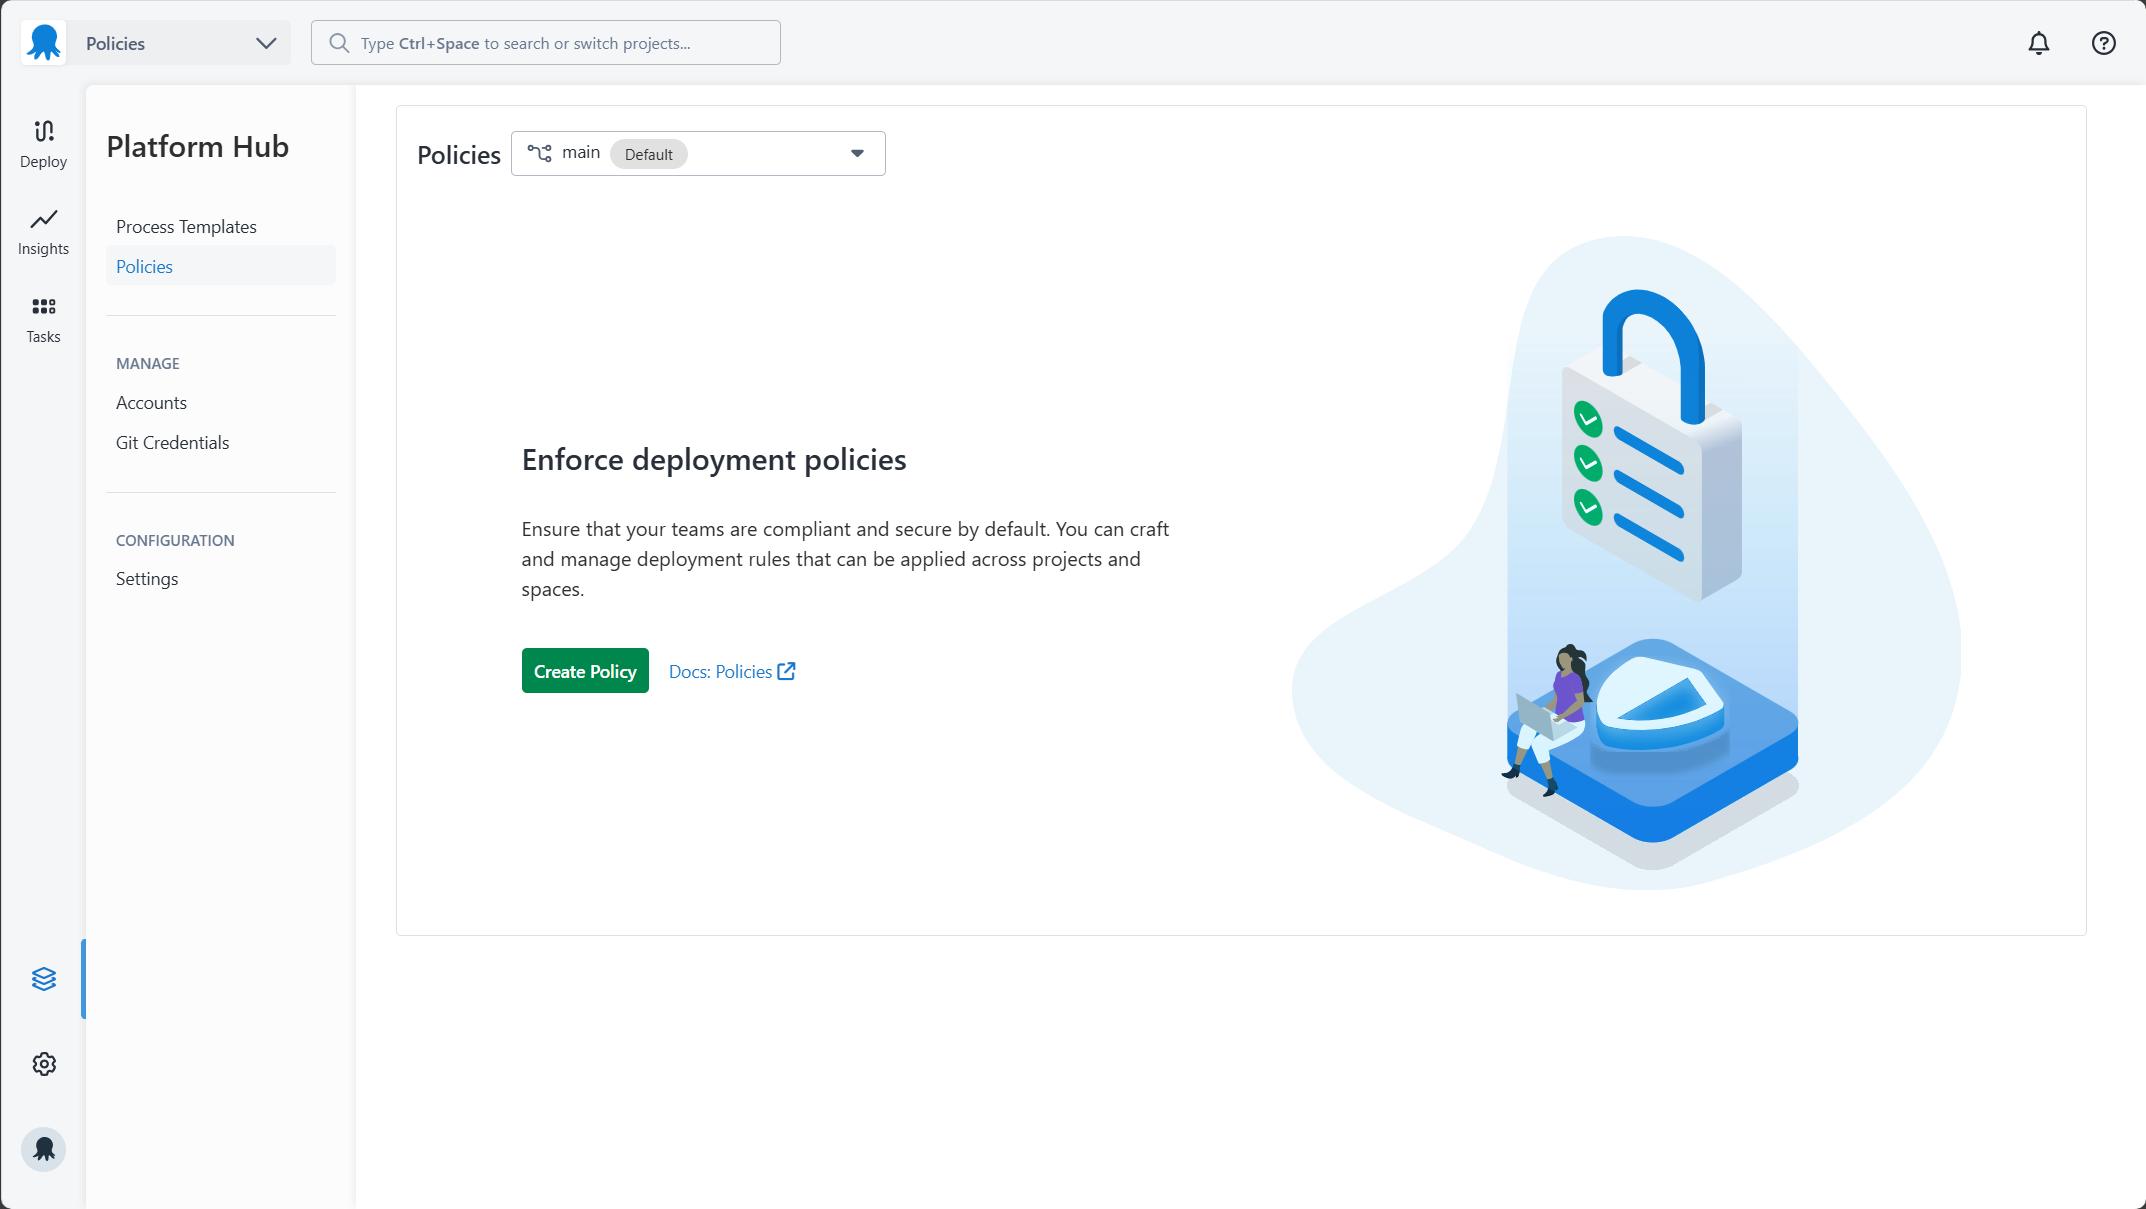
To get started, navigate to the Platform Hub inside of your Octopus instance and click on the Policies section. To create your first policy click the Create Policy button.
2. Give your policy a name
You will be presented with the Create Policy modal. You can then set the name of your policy. Octopus will generate a valid slug for your policy based on the name you provide. You can edit this slug before clicking the Create button.
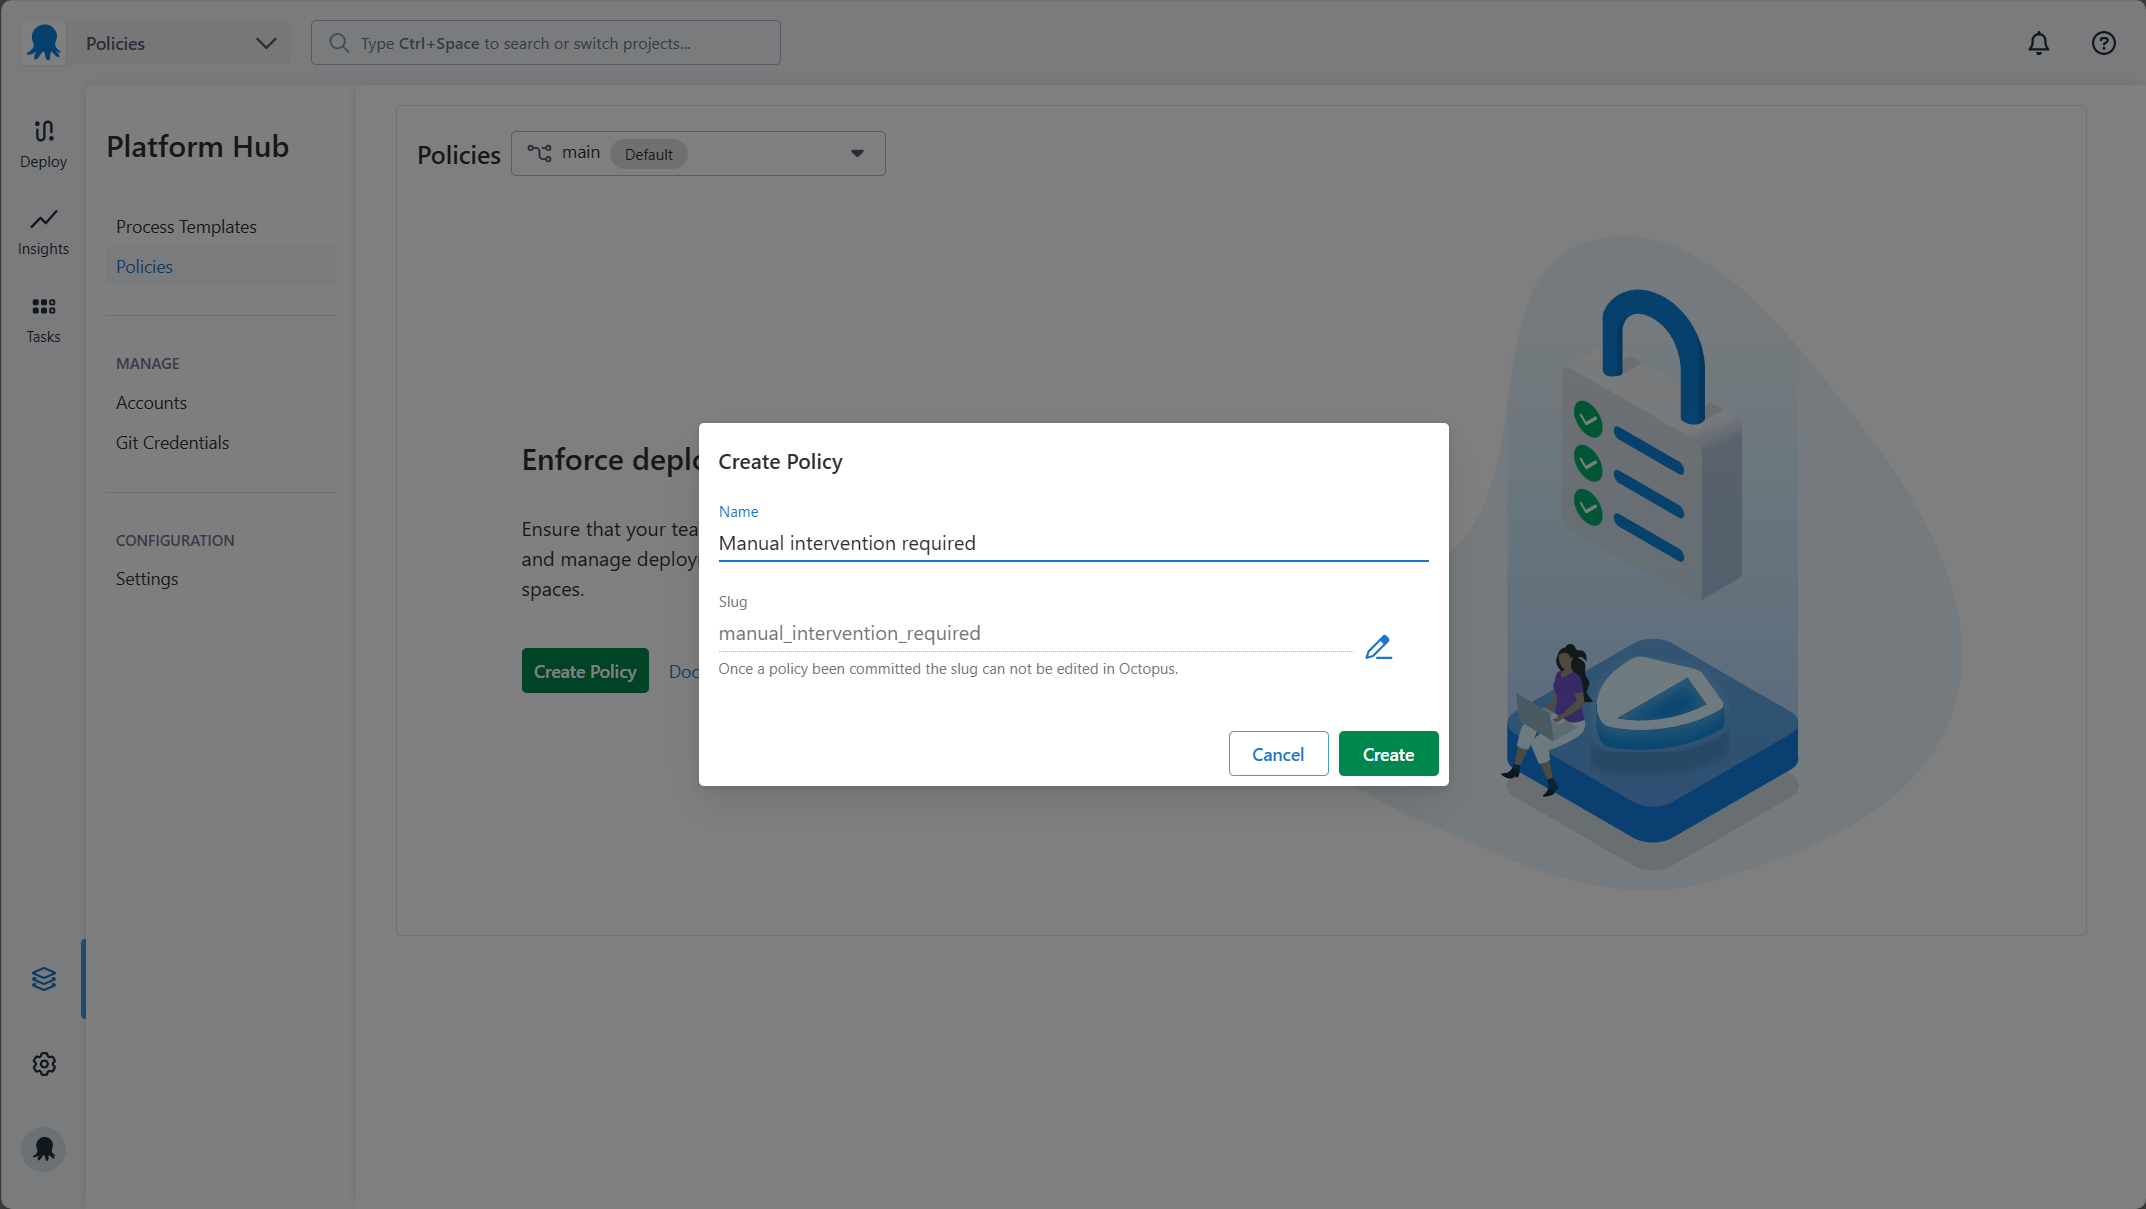
- The slug can not be changed once a policy is created.
3. Update your policy details
This will create the Policy file in your Platform Hub repository and then take you to the edit Policy page, where you can update the following details for your policy.
- Name - a short, memorable, unique name for this policy.
- Description - an optional description.
- Violation Reason - a custom message provided to users when they fail to meet the conditions of a policy.
- Violation Action - determines what happens when a deployment or runbook run doesn’t comply with the policy.
- Scope Rego - Rego to scope whether a policy should be evaluated for a particular deployment or runbook run.
- Conditions Rego - Rego to determine the rules that a deployment or runbook run will be evaluated against.
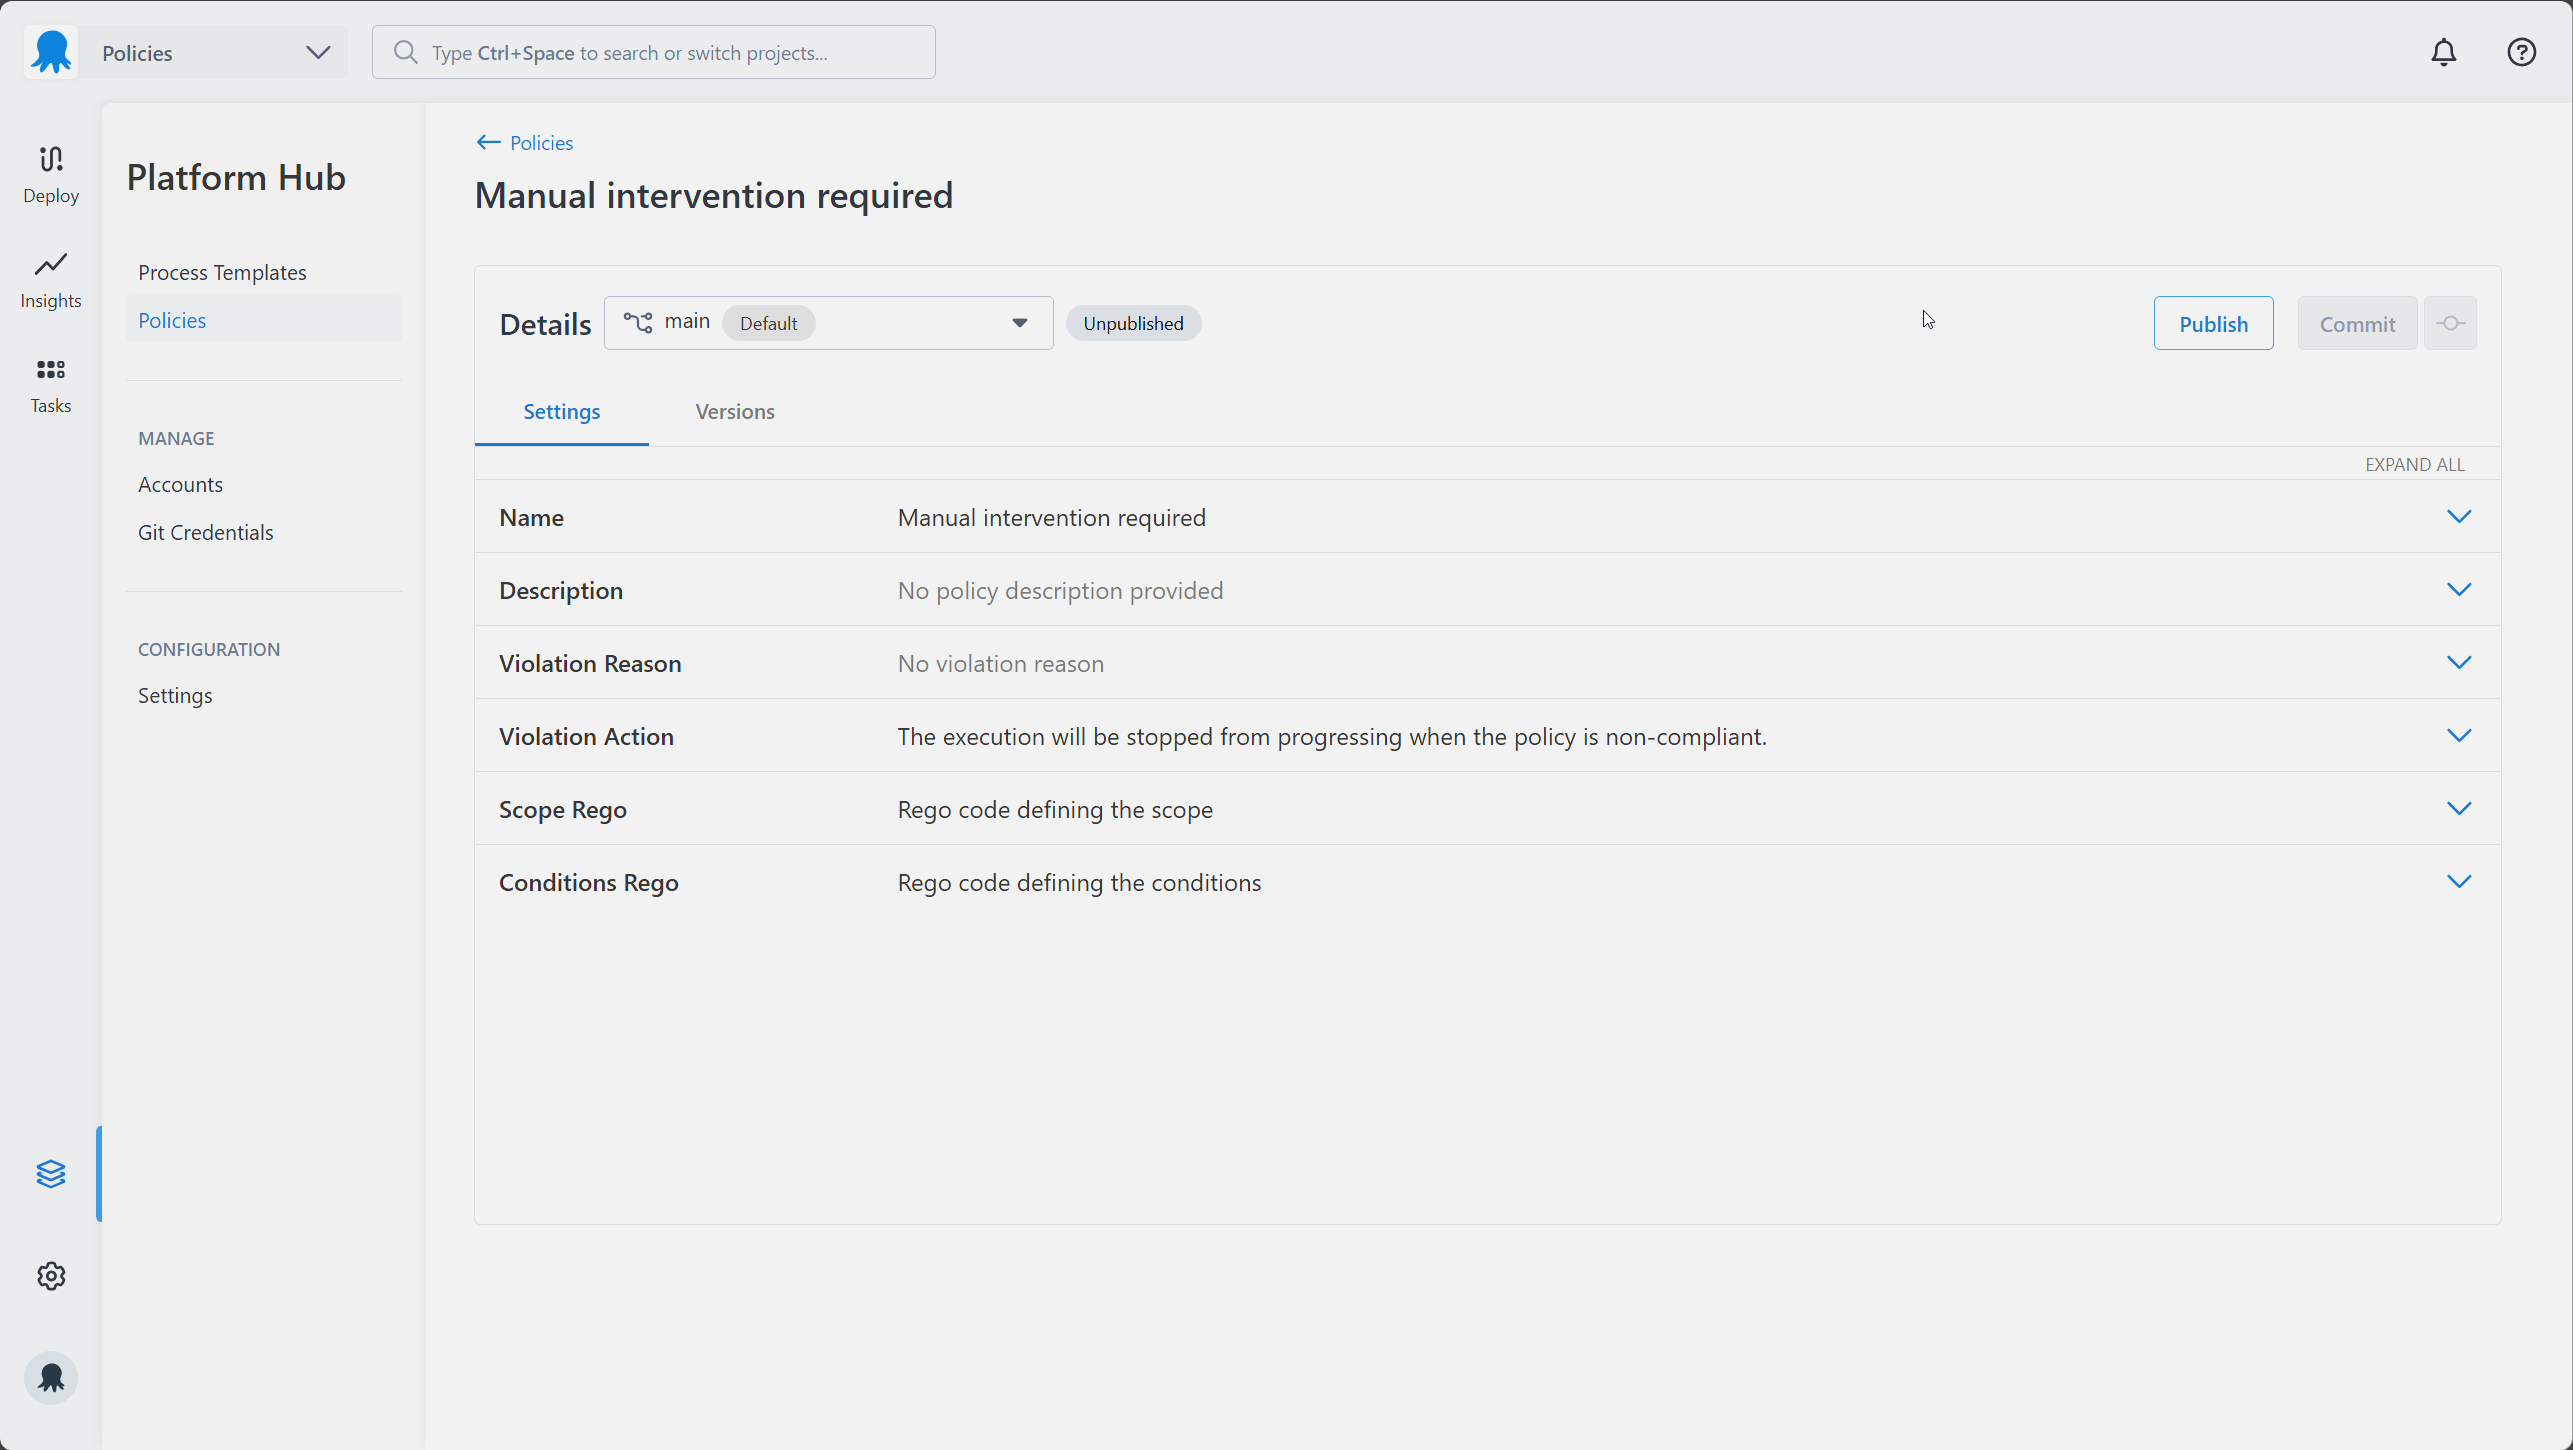
violation_reasoncan be overridden by the value of thereasonproperty defined in the output result of the conditions Rego code.violation_actioncan be overridden by the value of theactionproperty defined in the output result of the conditions Rego code.
Full details of output schema is available on the schema page.
See
4. Define the policy scope
You’ll now need to define the policy’s scope, as Rego in the OCL file. Octopus will provide data about your deployments to the policy engine to use during evaluation. When you are writing your Rego code for scoping or conditions, this input data is available under the value input.VALUE. This scope section of the policy defines the package name, which must match the underlying .ocl file name the policy is stored in. By default, the policy evaluates to false. The scope will evaluate to true if the deployment is going to the Production environment, for the ACME project, and in the Default space - all three conditions must be true at the same time.
For example, Octopus provides the environment details that you are deploying to.
{
    "Environment": {
        "Id": "Environments-1",
        "Name": "Development",
        "Slug": "development",
        "Tags": ["country/australia", "animal/octopus"]
    }
}
To use the environment name in your Rego, you would add the following:
input.Environment.Name = "Development"Our example applies only to deployments and runbook runs to the production environment for the ACME project, in the default space. All Rego code has to have a package defined, which is the policy slug.
package manual_intervention_required

default evaluate := false
evaluate := true if {
    input.Environment.Name == "Production"
    input.Project.Name == "ACME"
    input.Space.Name == "Default"
}
5. Define the policy conditions
After defining your scope, you must specify the policy rules. These rules are written in Rego. Octopus will check the results of your Rego code to determine if a deployment complies with the policy. The result should contain a composite value with the properties allowed and an optional reason and action. In this example, we will set the default rule result to be non-compliant. Any deployment that does not meet the policy rules will be prevented from executing. This conditions section of the policy defines the package name, which must match the slug for your policy. By default, the policy evaluates to false. The condition will evaluate to true if the deployment contains the required steps.
- You cannot rename result, it must be called result.
- The package name must be the same as your policy file name.
package manual_intervention_required

default result := {"allowed": false}
Full details on the data available for policy scoping and conditions can be found under the schema page.
6. Check for a deployment step
After you’ve set the default state, you’ll need to define the policy rules that will update the result state to be true so the deployment can execute. In this example, the deployment must contain at least one manual intervention step. We can do this by checking the step.ActionType is “Octopus.Manual”
package manual_intervention_required

default result := {"allowed": false}

result := {"allowed": true} if {
    some step in input.Steps
    step.ActionType == "Octopus.Manual"
}
After your policy details have been finalized you will need to commit, publish and activate your policy for it to be available for evaluation.
7. Saving a Policy
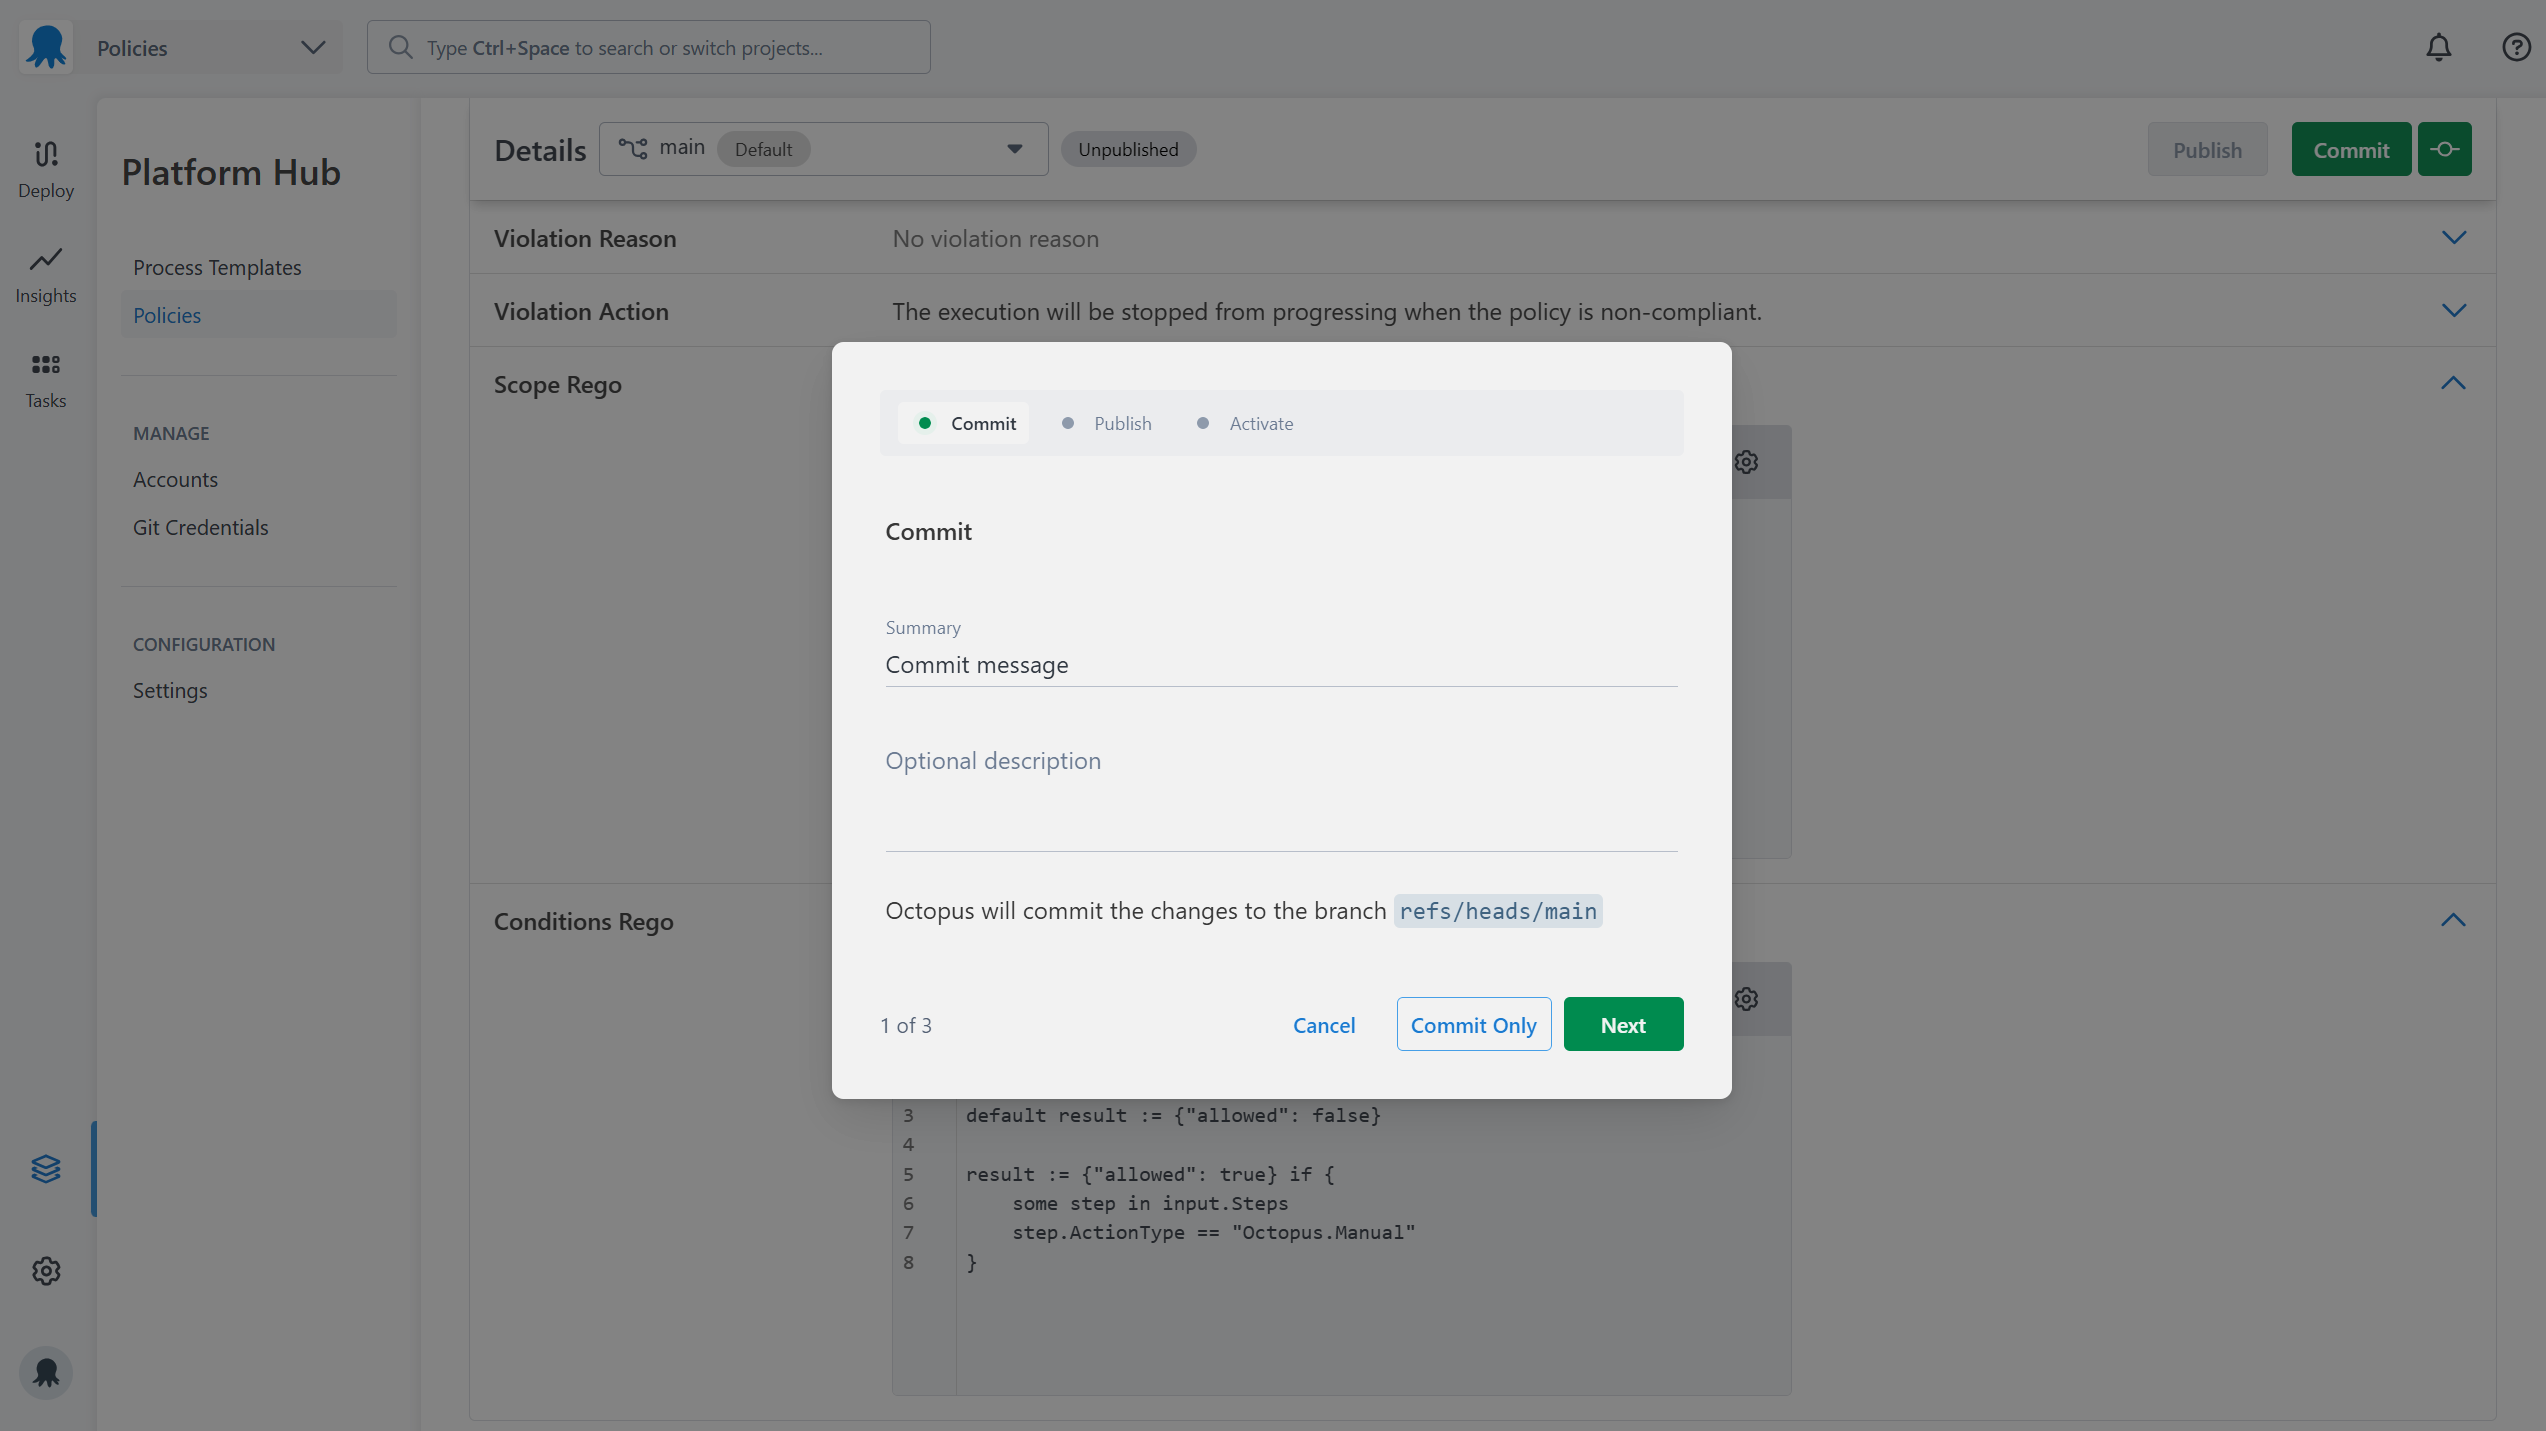
Once you’ve finished making changes to your policy you can commit them to save the changes to your Git repository. You can either Commit with a description or quick commit without one.
8. Publishing a Policy
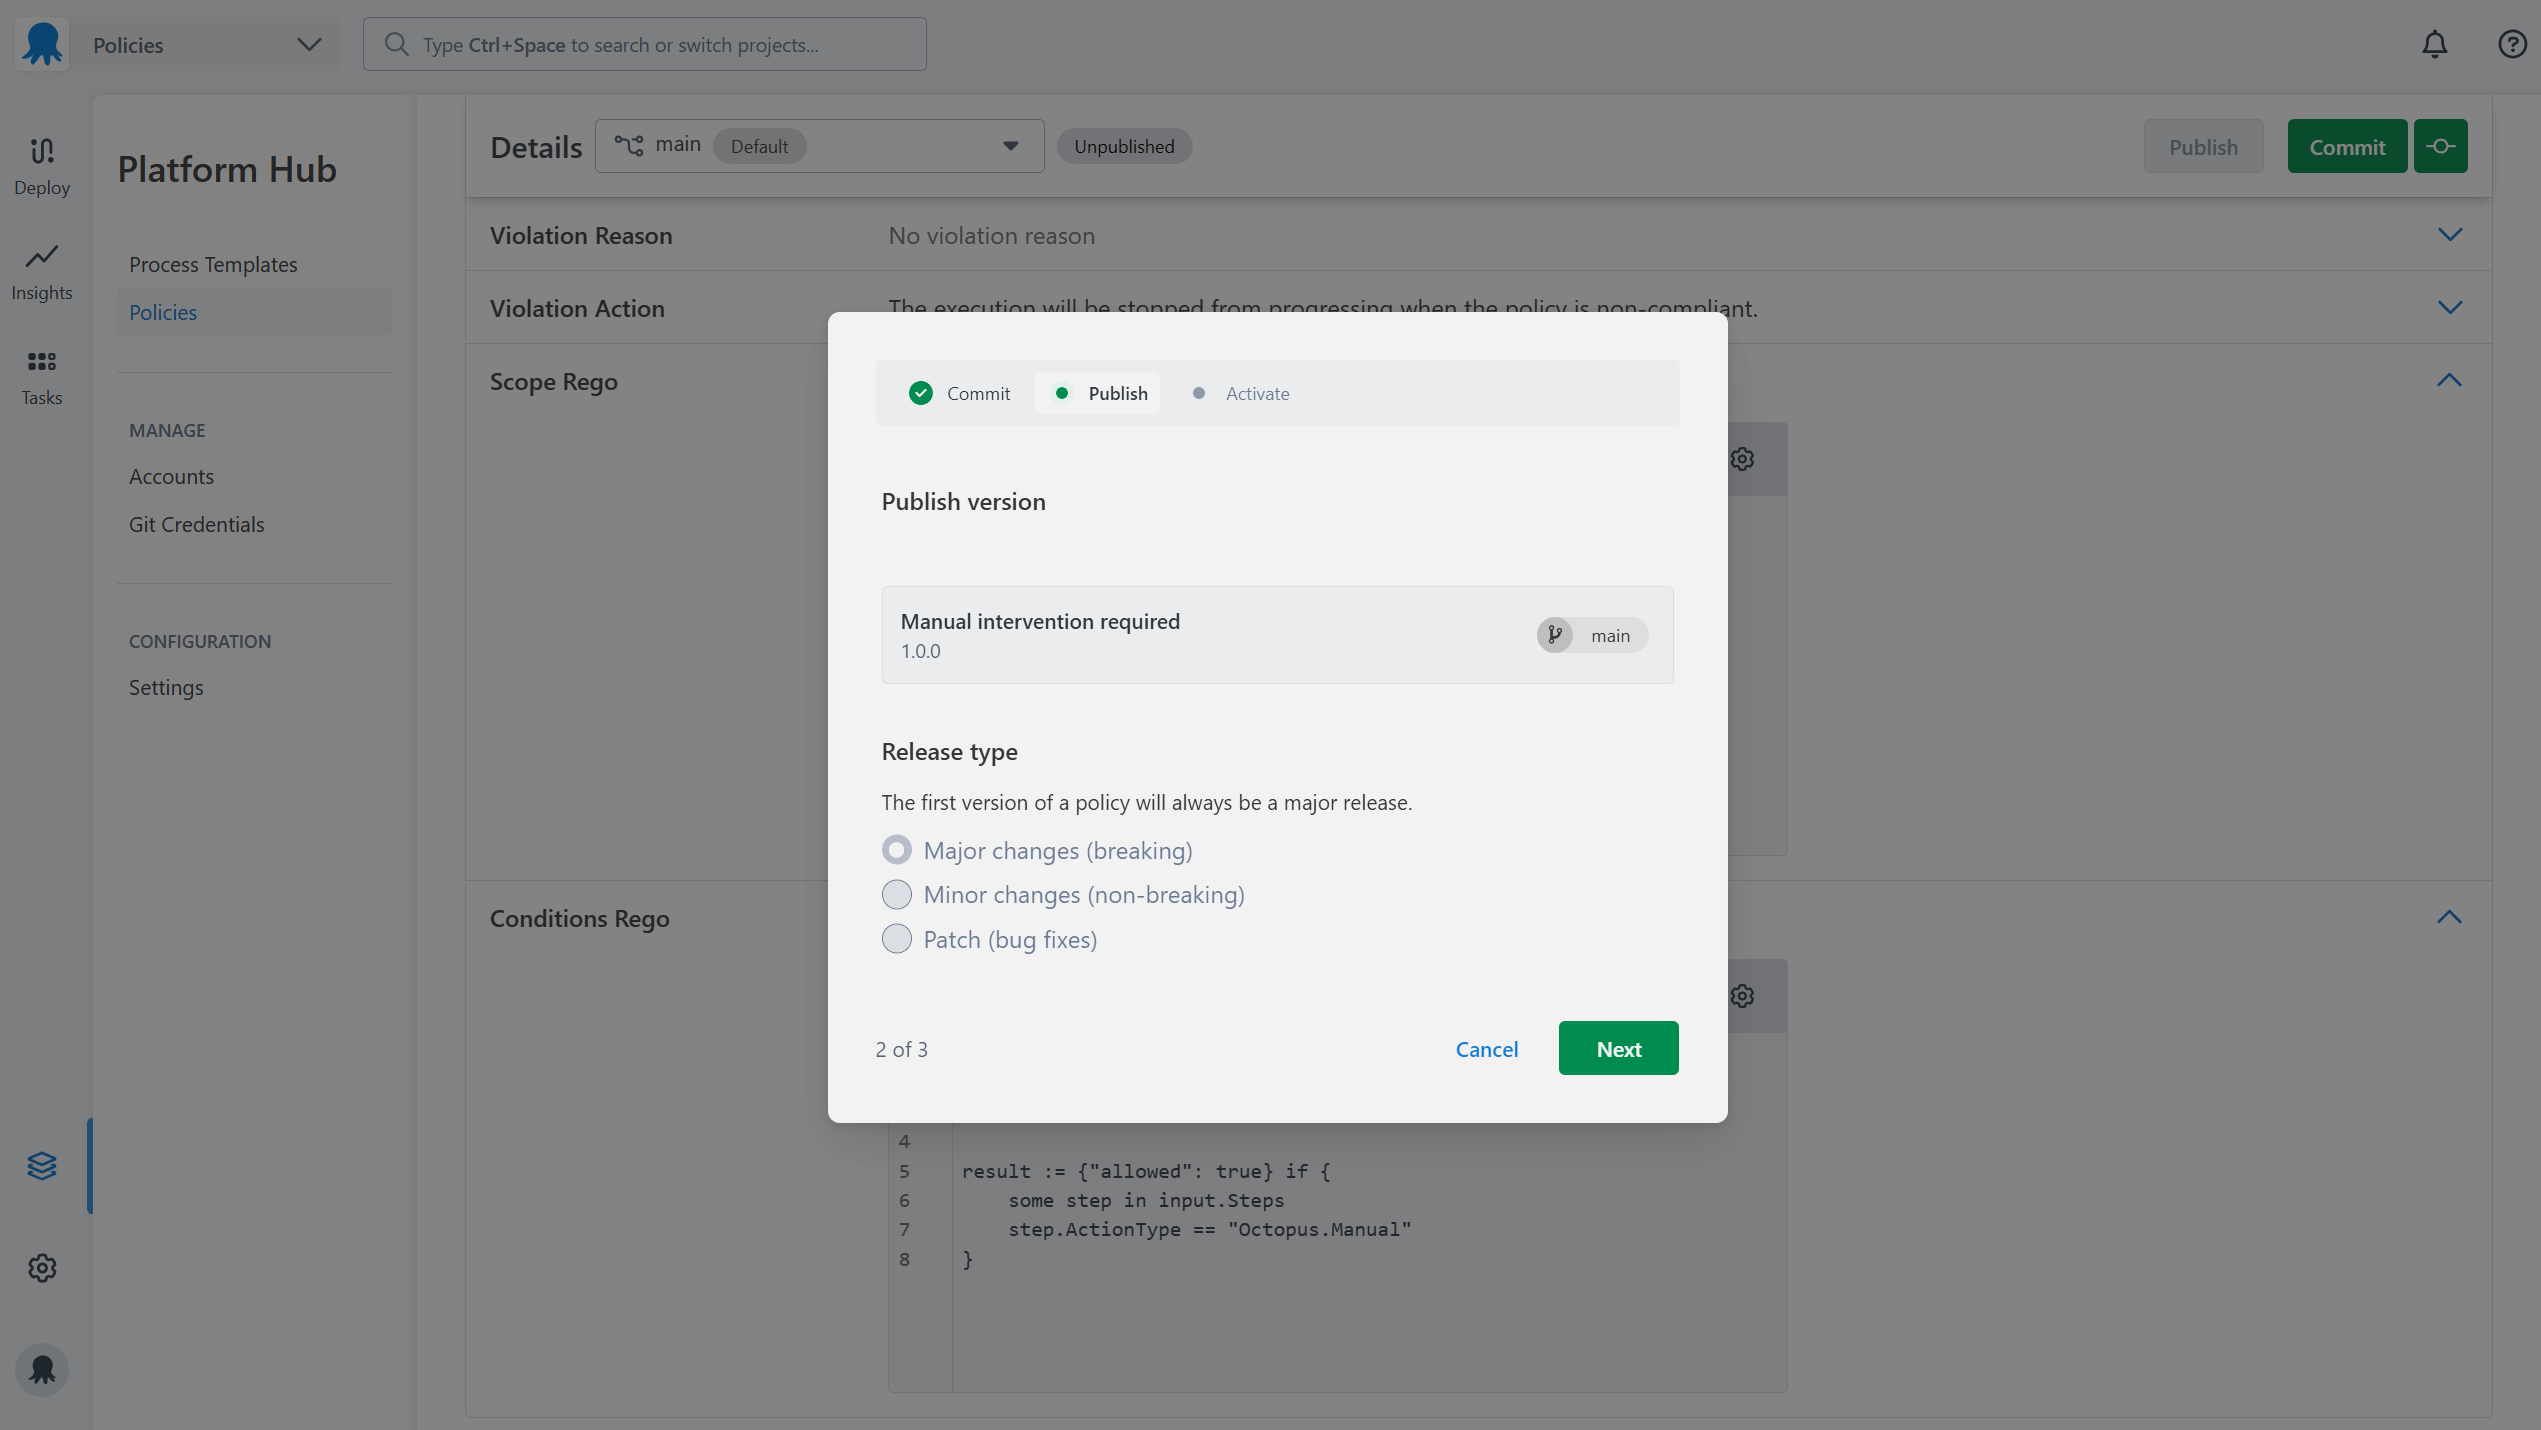
Once you’ve made your changes, you will have to publish the policy to reflect the changes you’ve made. You will have three options to choose from when publishing changes:
- Major changes (breaking)
- Minor changes (non-breaking)
- Patch (bug fixes)
The first time you publish a policy you can only publish a major version
9. Activating a policy
You must activate the policy before it can be evaluated. Policies can be deactivated after they are activated to stop a policy from being evaluated.
Activation settings can be updated anytime, from the Versions tab on the edit policy page

10. Finalize and test your policy
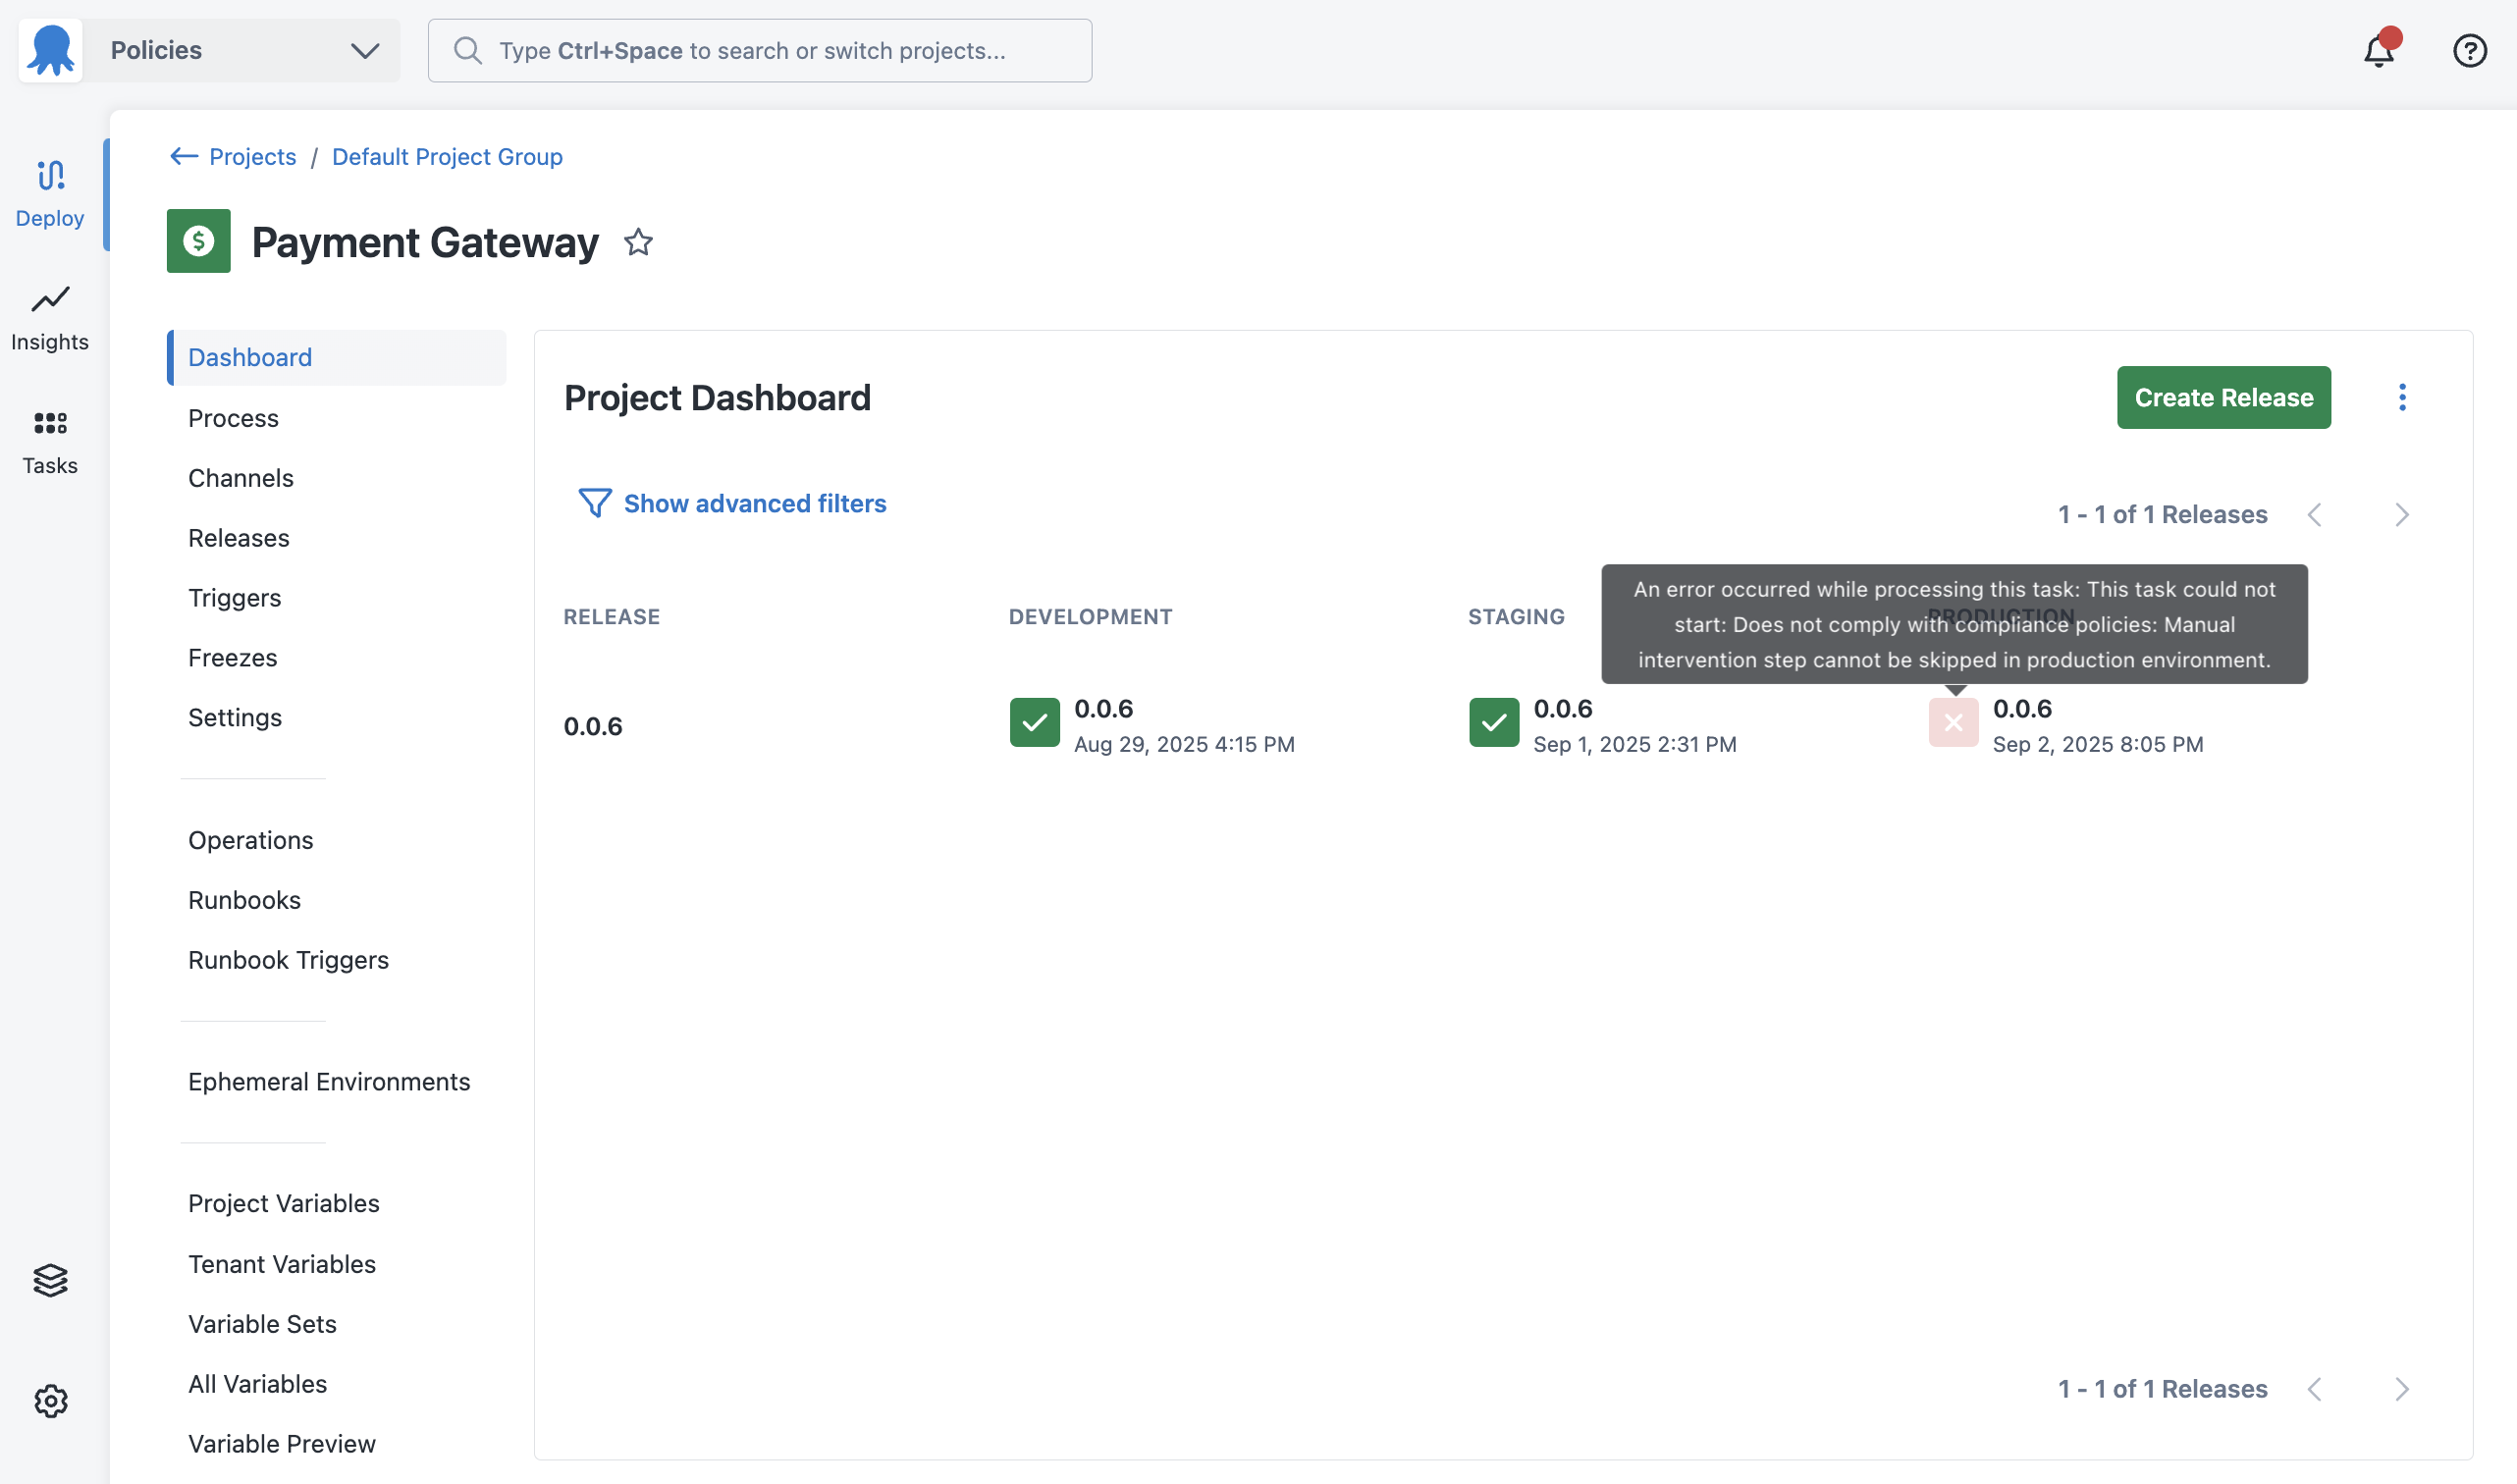
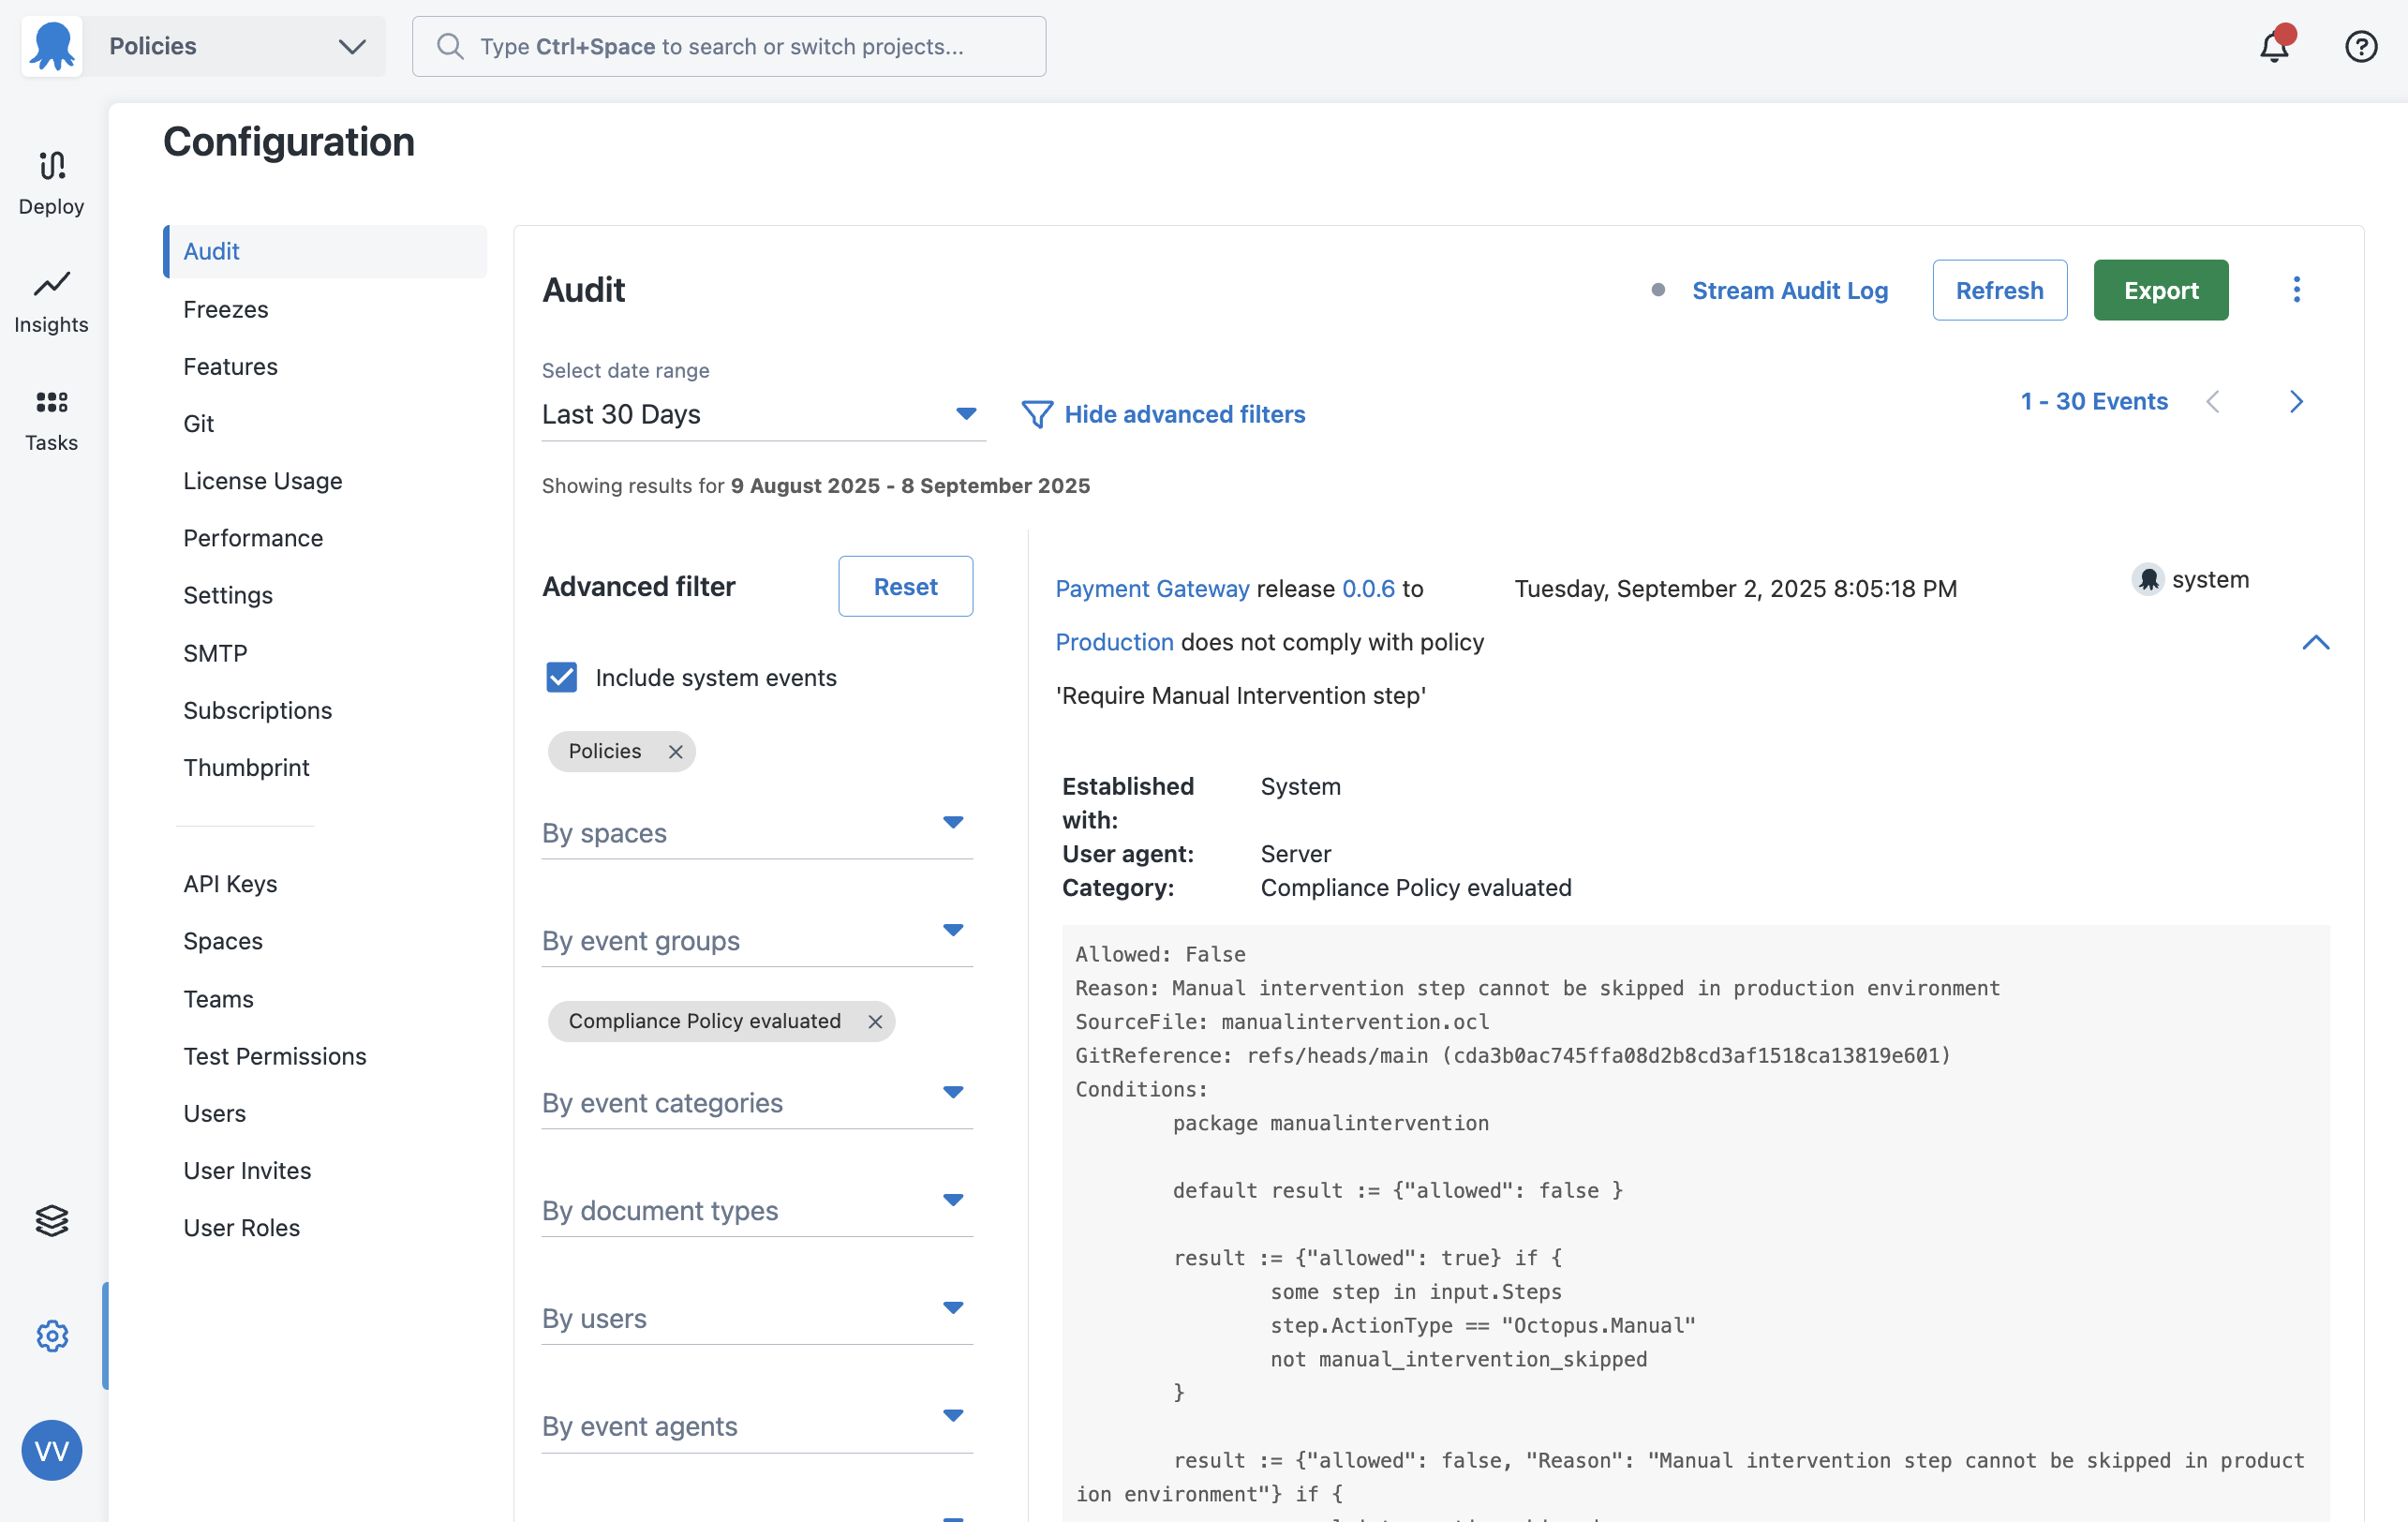
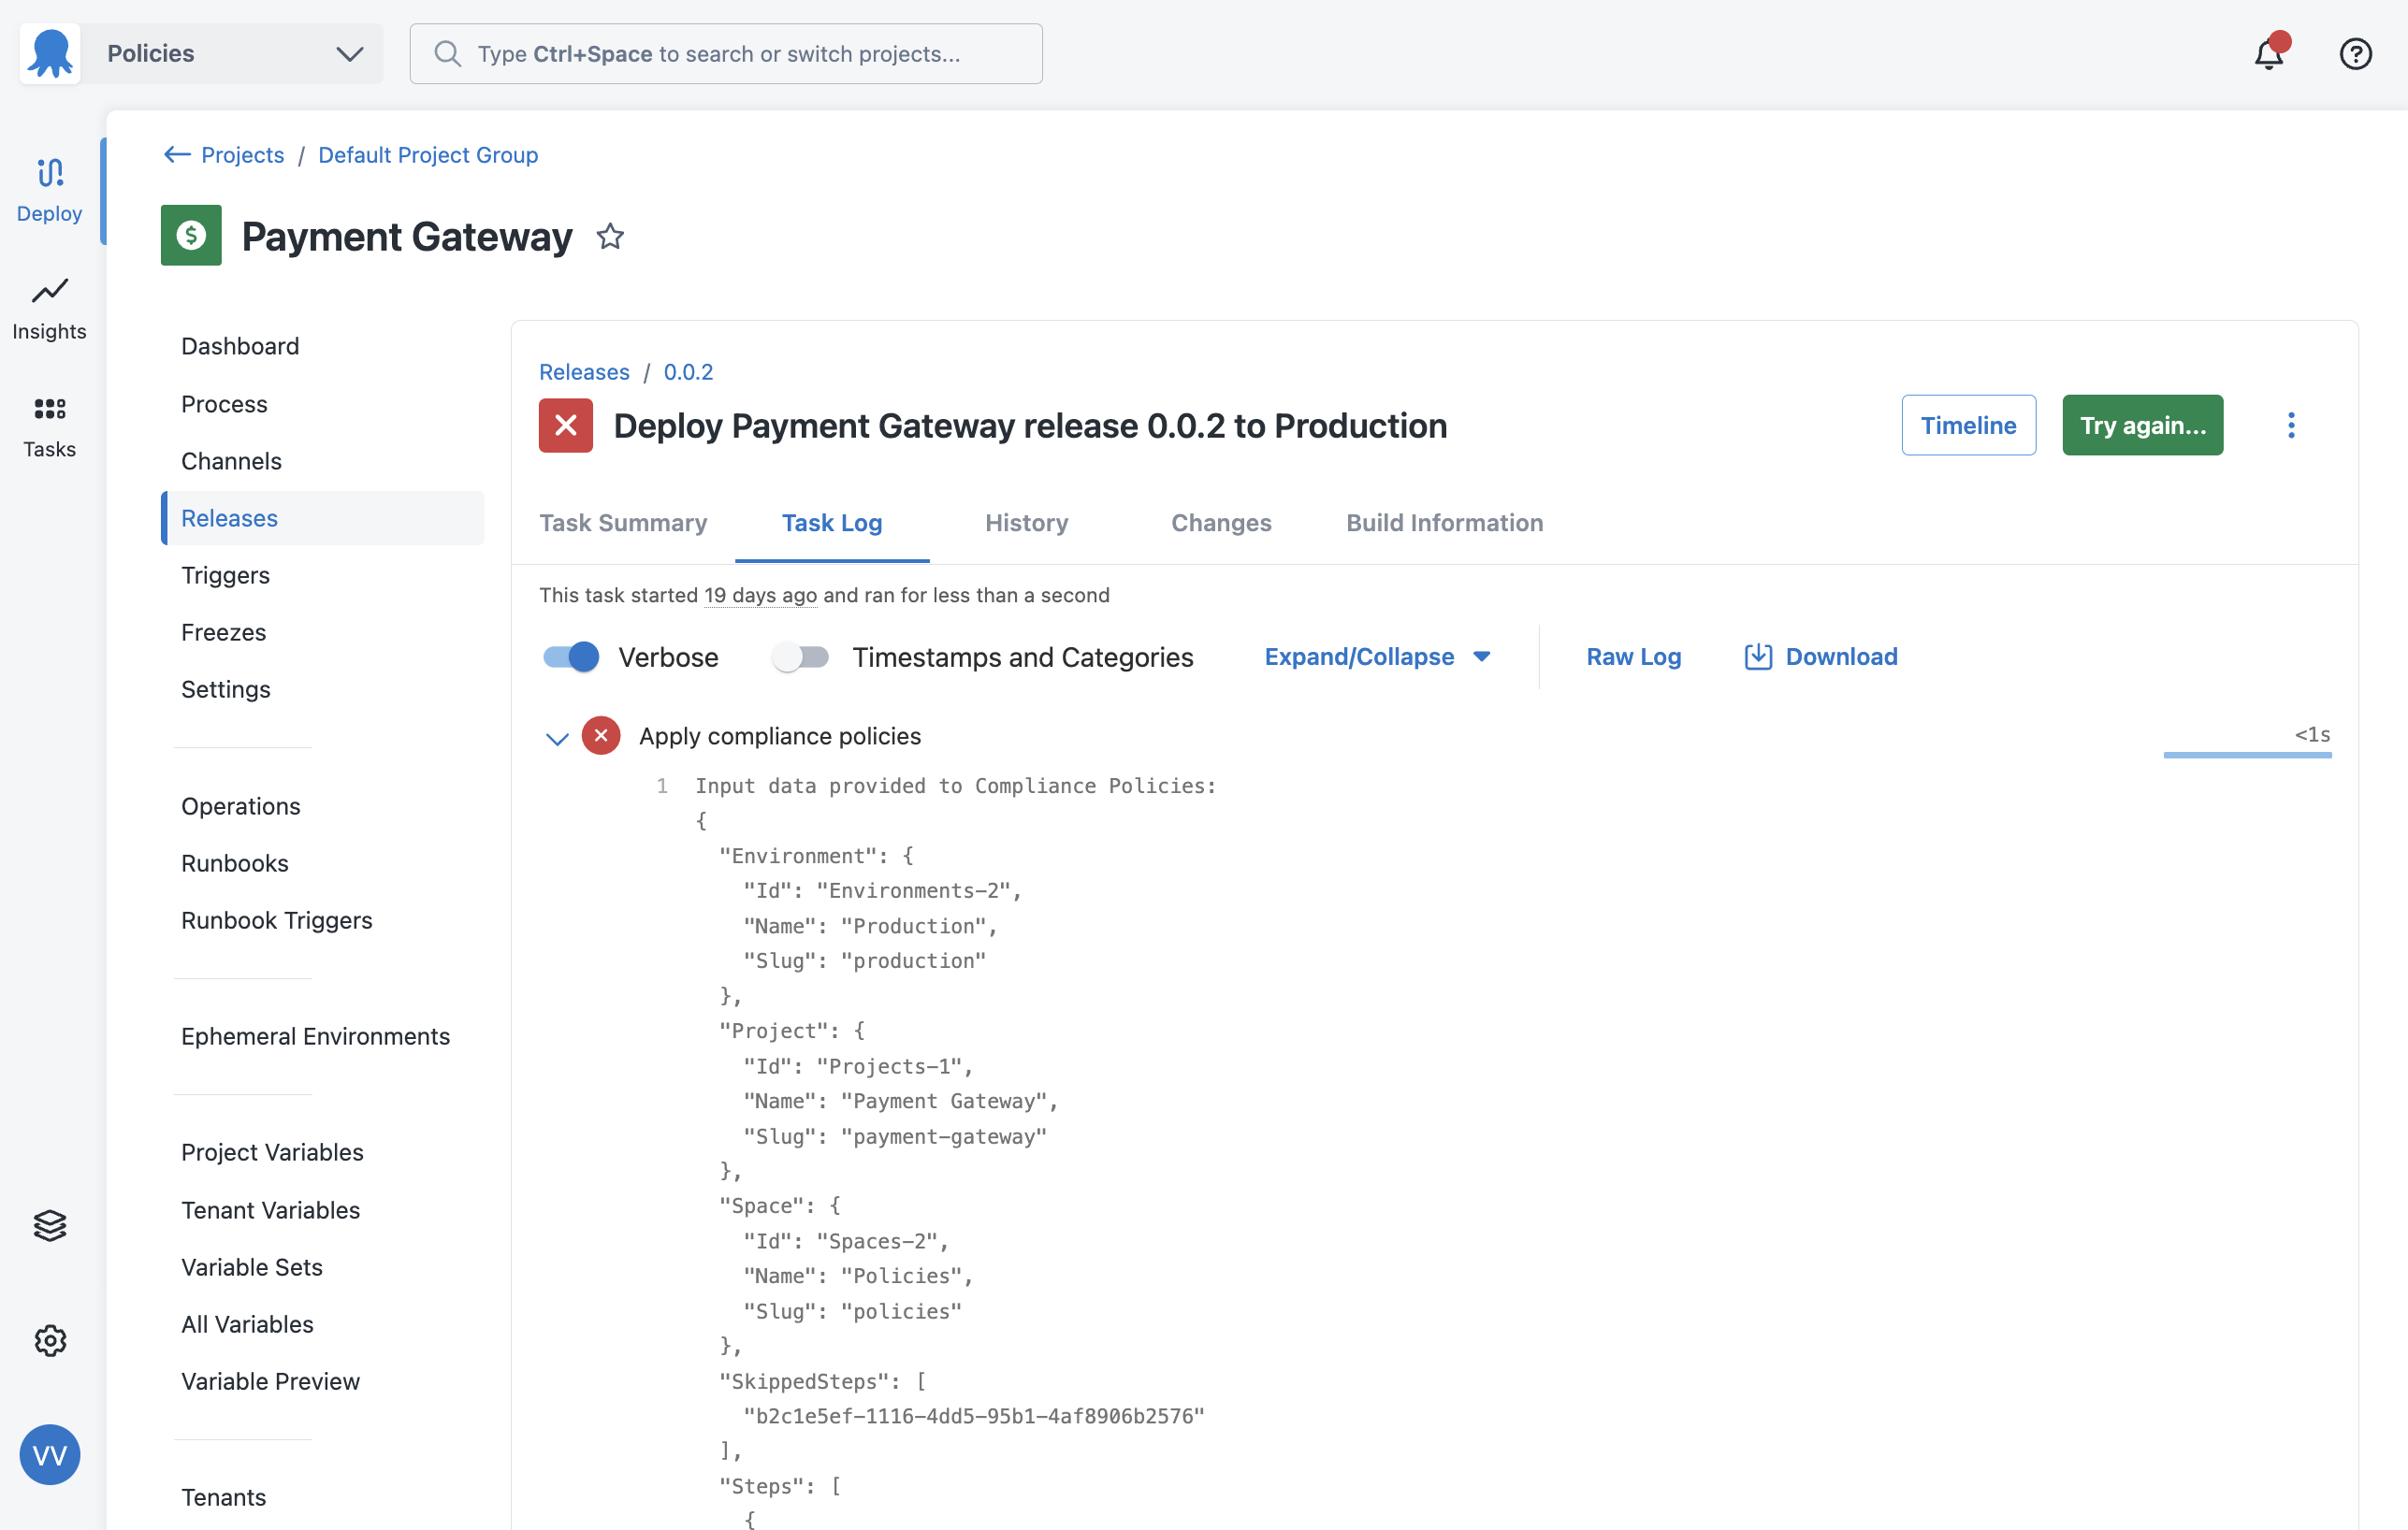
You’ve now defined a basic policy to ensure a manual intervention step is present when deploying to any environment. You can test this policy by customizing the values in the scope block, and then deploying to an environment. If you choose not to include the manual intervention step in your process, you will see errors in the task log and project dashboards when you try to run the deployment. All policy evaluations will appear in the Audit log (Configuration → Audit) with the “Compliance Policy Evaluated” event group filter applied. Audit logs and Server Tasks will only appear for deployments within the policy’s scope.
- If you wish to see more comprehensive examples for other deployment scenarios, please visit the examples page.
- If you wish to see the schema of inputs available for policies, please visit the schemas page.
Policy evaluation information
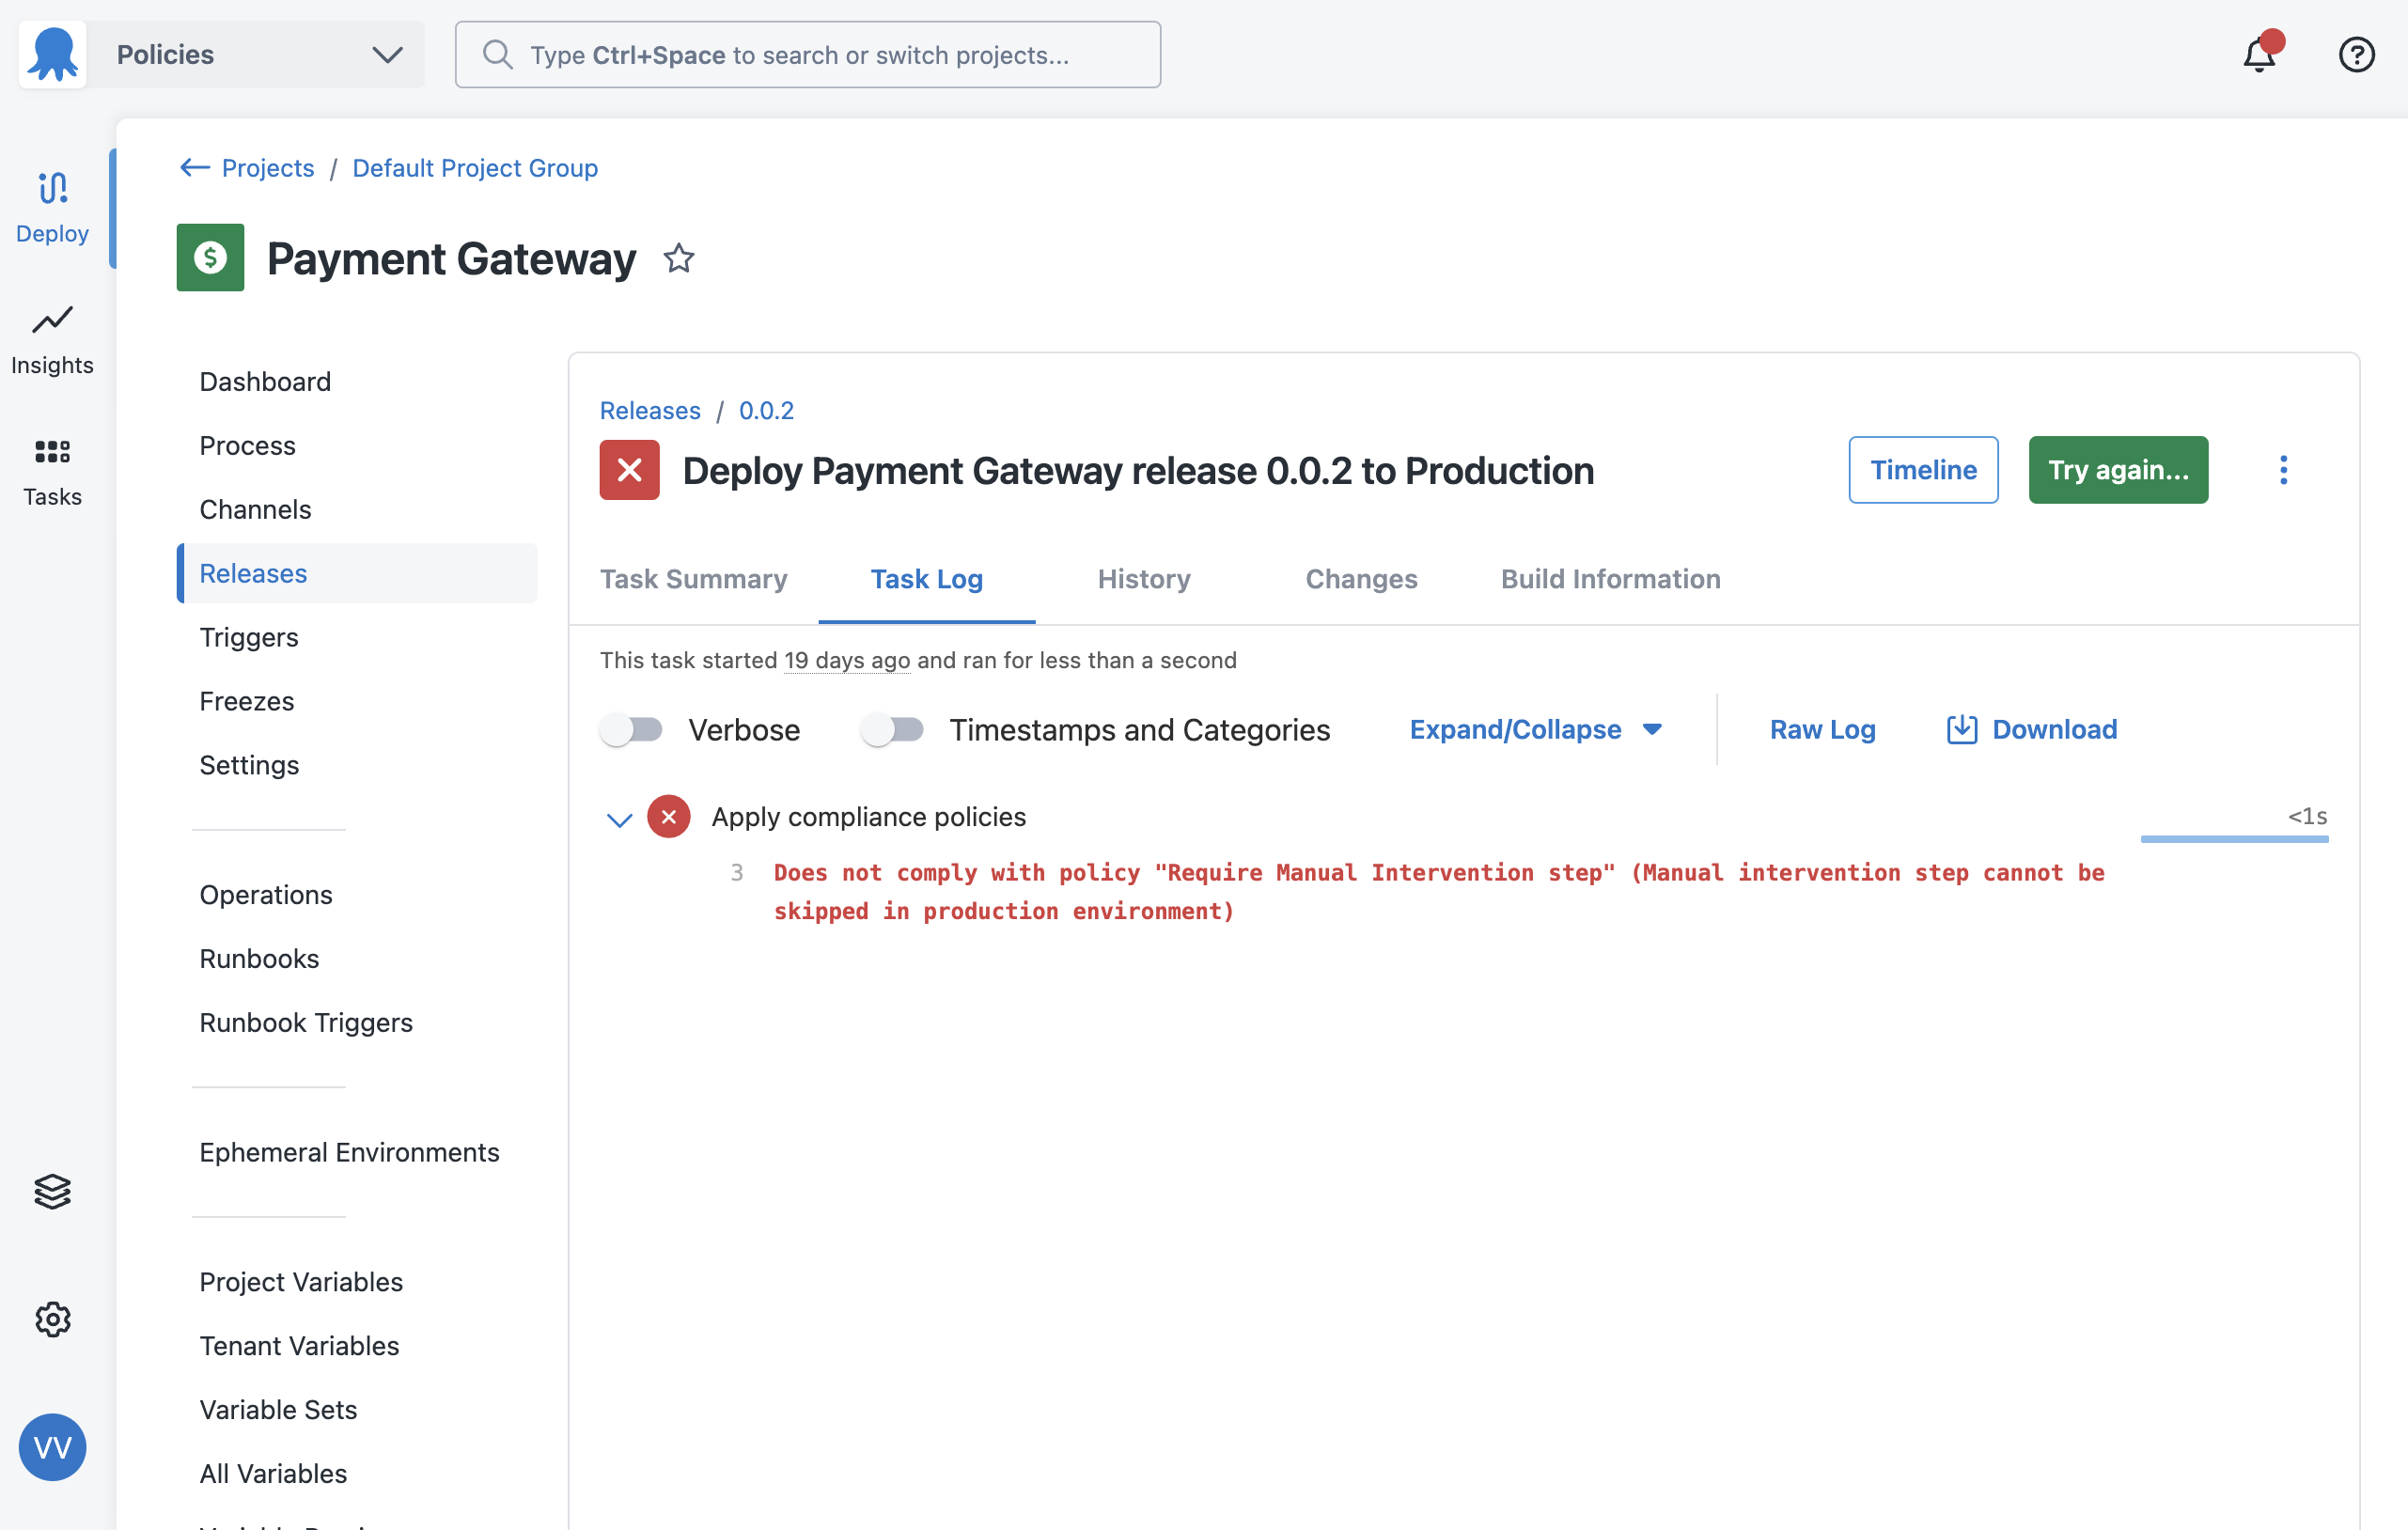
If you want to see what information was provided to the policy engine when it evaluates a deployment, you can do so in the task log. Every deployment, whether they succeeded or failed due to a policy evaluation, will show information in the following places:
-
Task logs
-
Project dashboards
-
Audit records
You can see what information was evaluated at the time of policy evaluation by using the verbose option in the task logs. This is useful if you want to troubleshoot a policy and see if it is evaluating deployments correctly.
Help us continuously improve
Please let us know if you have any feedback about this page.
Page updated on Tuesday, November 25, 2025