
Docker containers and Kubernetes are excellent technologies to have in your DevOps tool-belt. This Beyond Hello World blog series covers how to use them with a real-world application.
- Containerize a real-world web application
- Build a real-world Docker CI/CD pipeline
- Kubernetes for the uninitiated
- Building a real-world Kubernetes CI/CD pipeline
In the last post, I showed you how to containerize the OctoPetShop web application and produce Docker images for it.
In this post, I configure a complete Docker CI/CD pipeline to automate the process. This covers the steps to configure continuous integration with JetBrains’ TeamCity and continuous delivery with Octopus Deploy.
Configure Docker continuous integration with JetBrains’ TeamCity
Continuous integration happens on the build server. The continuous part is usually associated with an event that triggers a build, such as source code commits or a predefined schedule. For our build server, we’ll perform the following tasks:
- Create a project.
- Create a build definition.
- Define the build steps.
Add the Docker build capability to the build agent
Most major build servers can build Docker images either with a built-in step or a downloadable plugin. For this demonstration, I use TeamCity as most of my experience is with Azure DevOps, and I want to expand my horizons.
Rather than create a new virtual machine (VM), install and configure an OS, install the build agent, and finally install Docker, I chose a much nerdier path. JetBrains, maker of TeamCity (amongst other products), provides a Docker image for their build agent. Not only do they have a build agent image, but this image can also run Docker to do Docker builds (I chose option two under Running Builds Which Require Docker in the linked document above).
Hint My first attempt at running this ran into an issue where the agent container couldn’t resolve local DNS entries, but Robin Winslow’s article, Fix Docker’s networking DNS config, showed me a neat trick to fix the problem.
With the DNS issue resolved, the container started up and registered itself to my TeamCity server under the Unauthorized category of agents:
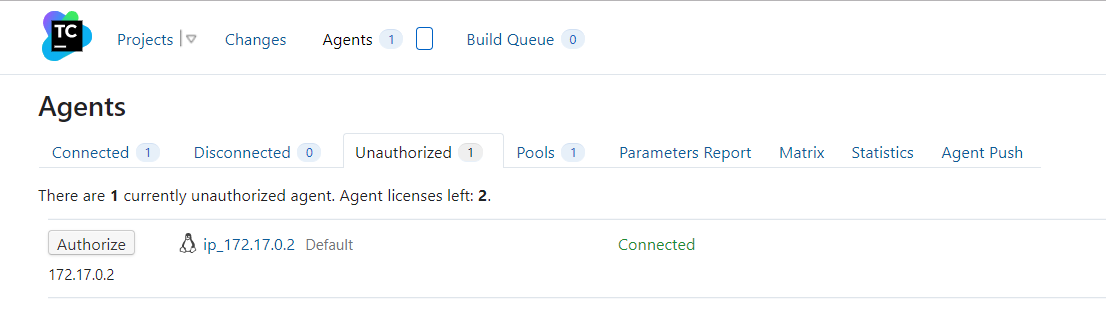
Clicking the Authorize button finalized the connection, and the agent was available to perform builds.
Create a TeamCity project
My first step was to create a new TeamCity project and connect my git repository to it. The OctoPetShop source code is available on GitHub, but I used a local Azure DevOps instance to host mine. This post assumes you already know how to create a project within TeamCity and focuses on the build and deploy process.
Add a connection to Docker Hub
To push your images to Docker Hub, you need to configure a connection to Docker Hub with an authorized user.
For this, navigate to the Connections tab of our OctoPetShop project:
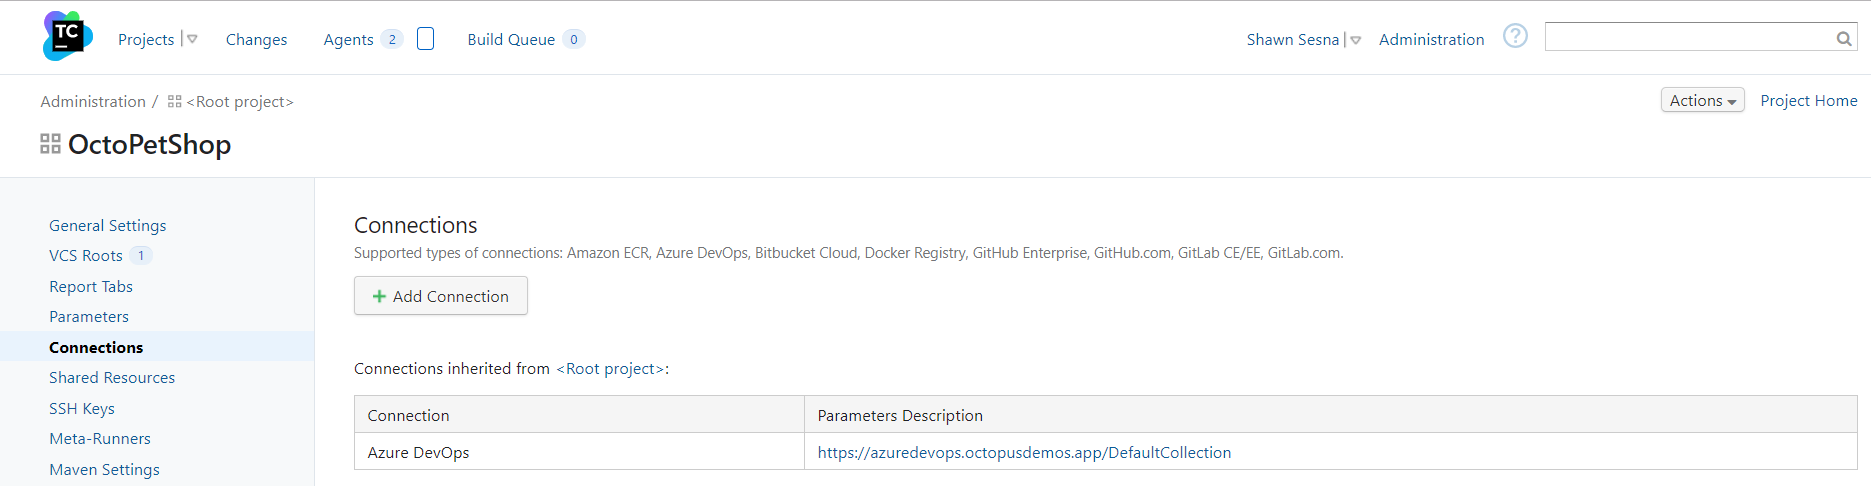
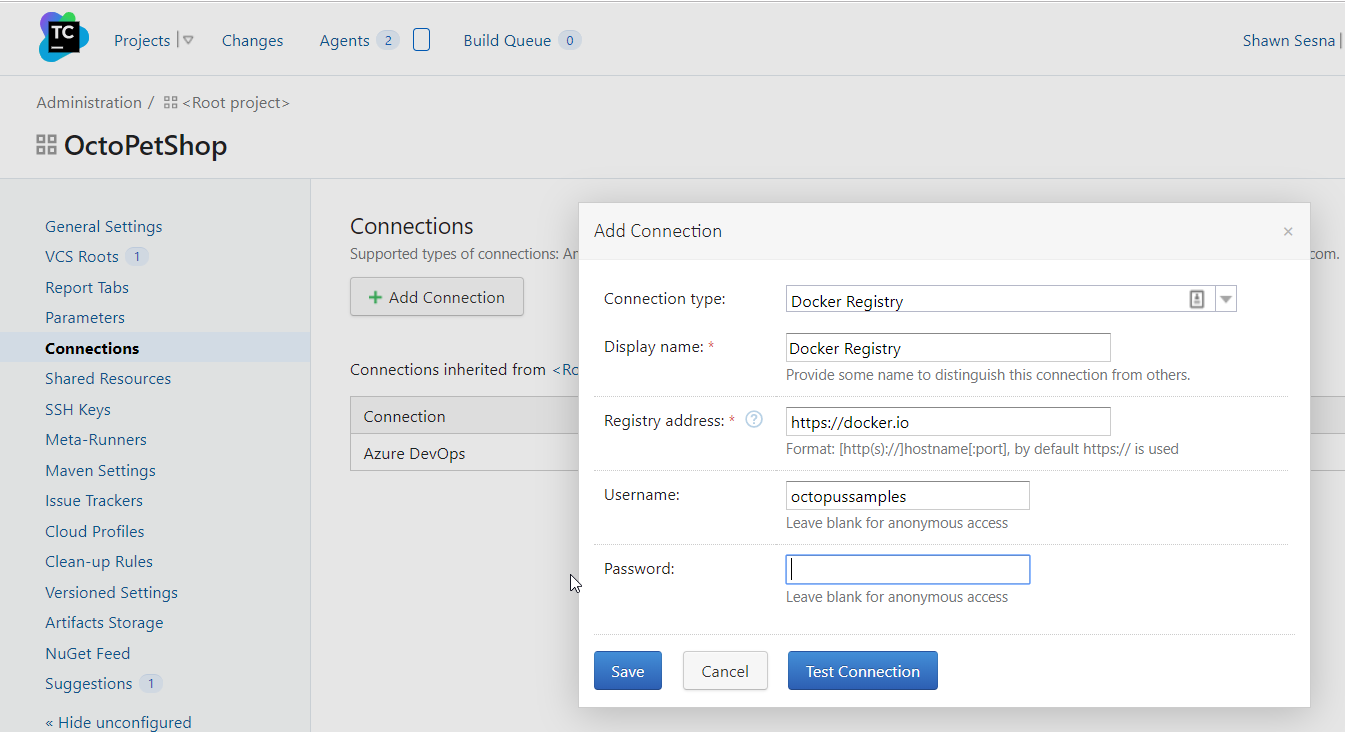
Click Add Connection:
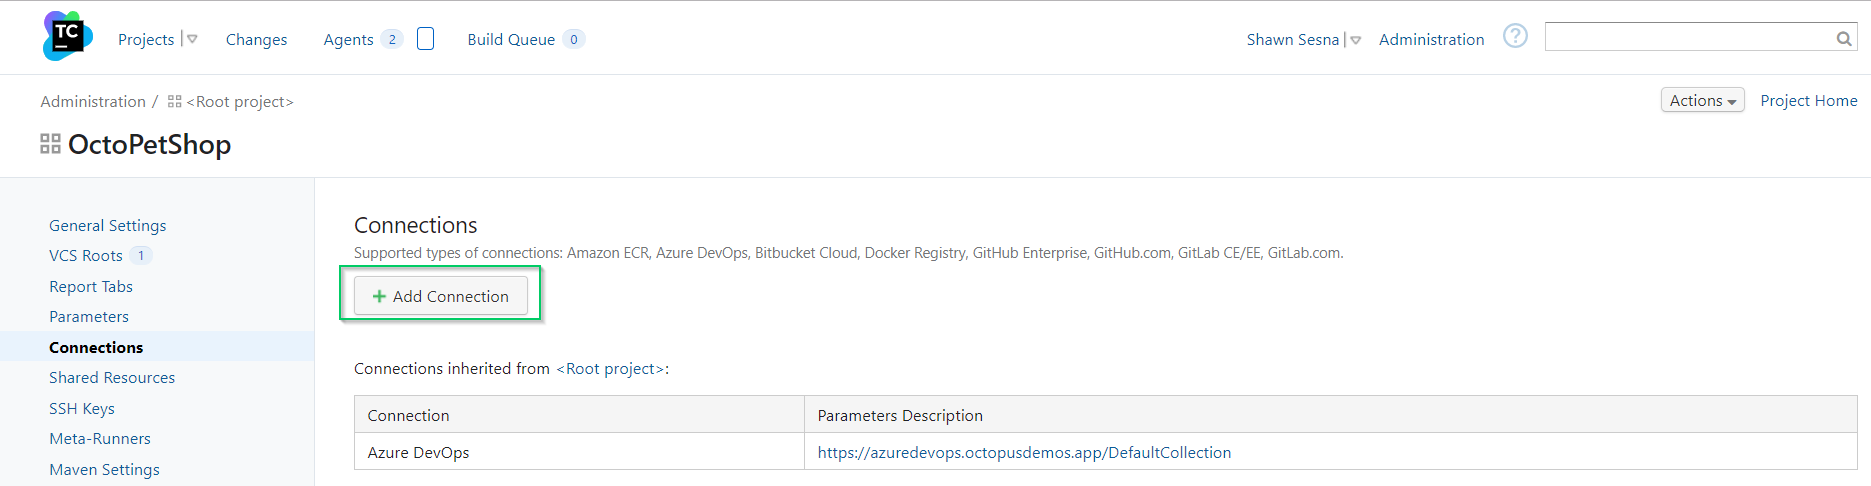
Choose Docker Registry from the dropdown and fill in the username and password. Don’t forget to use Test Connection to make sure your credentials are valid:

With that bit of housekeeping out of the way, you can proceed with your build definition.
Create the build definition
After the project has been created, you can create a new build definition to perform your Docker build operation. This build definition needs to perform the following steps:
- Build the OctoPetShop web front-end.
- Build the OctoPetShop product service.
- Build the OctoPetShop shopping cart service.
- Build the OctoPetShop database DbUp.
- Push the images to Docker Hub for use in deployment.
Add the Docker support Build Feature
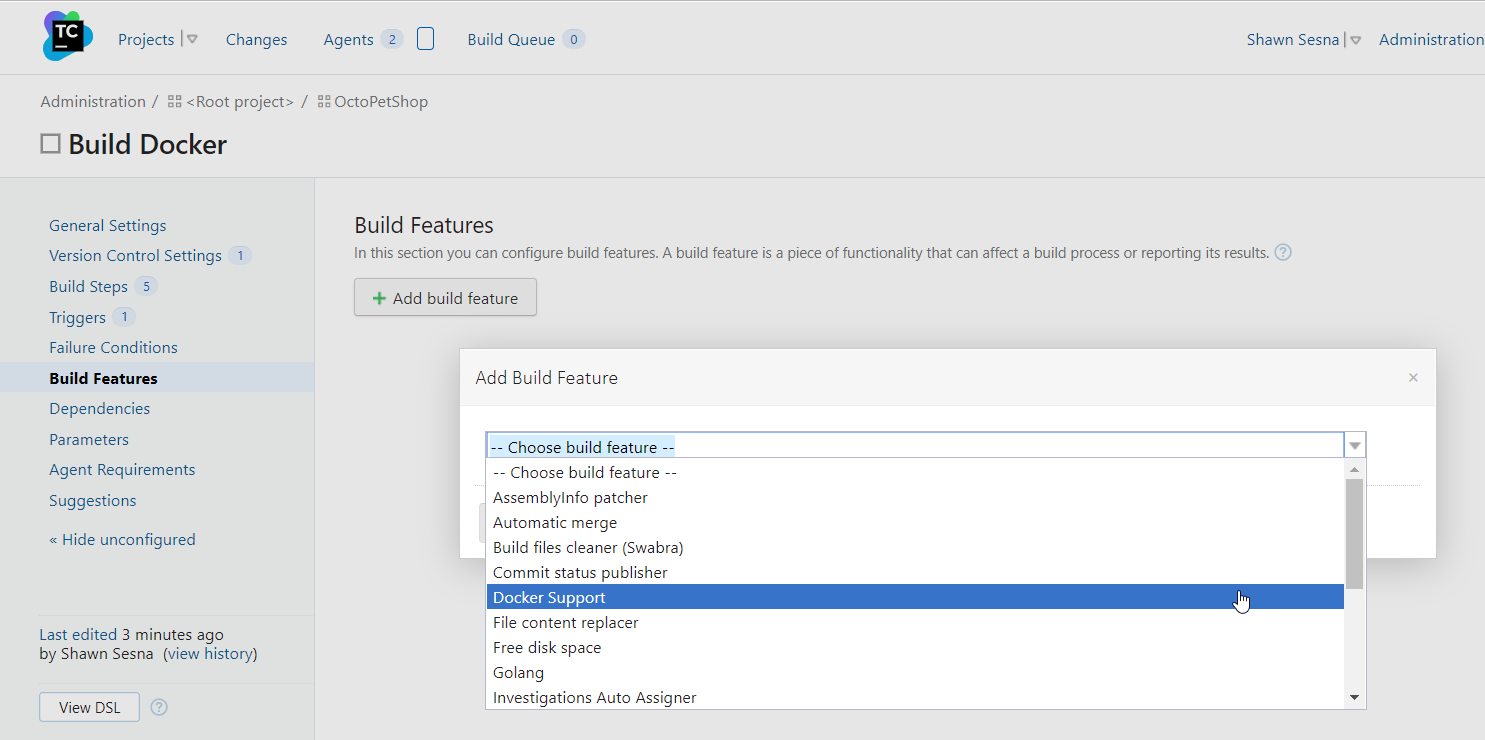
You need to connect your Docker Hub connection to your build definition. To do this, you click on the Build Features tab and Add build feature:

Choose Docker Support from the dropdown menu:
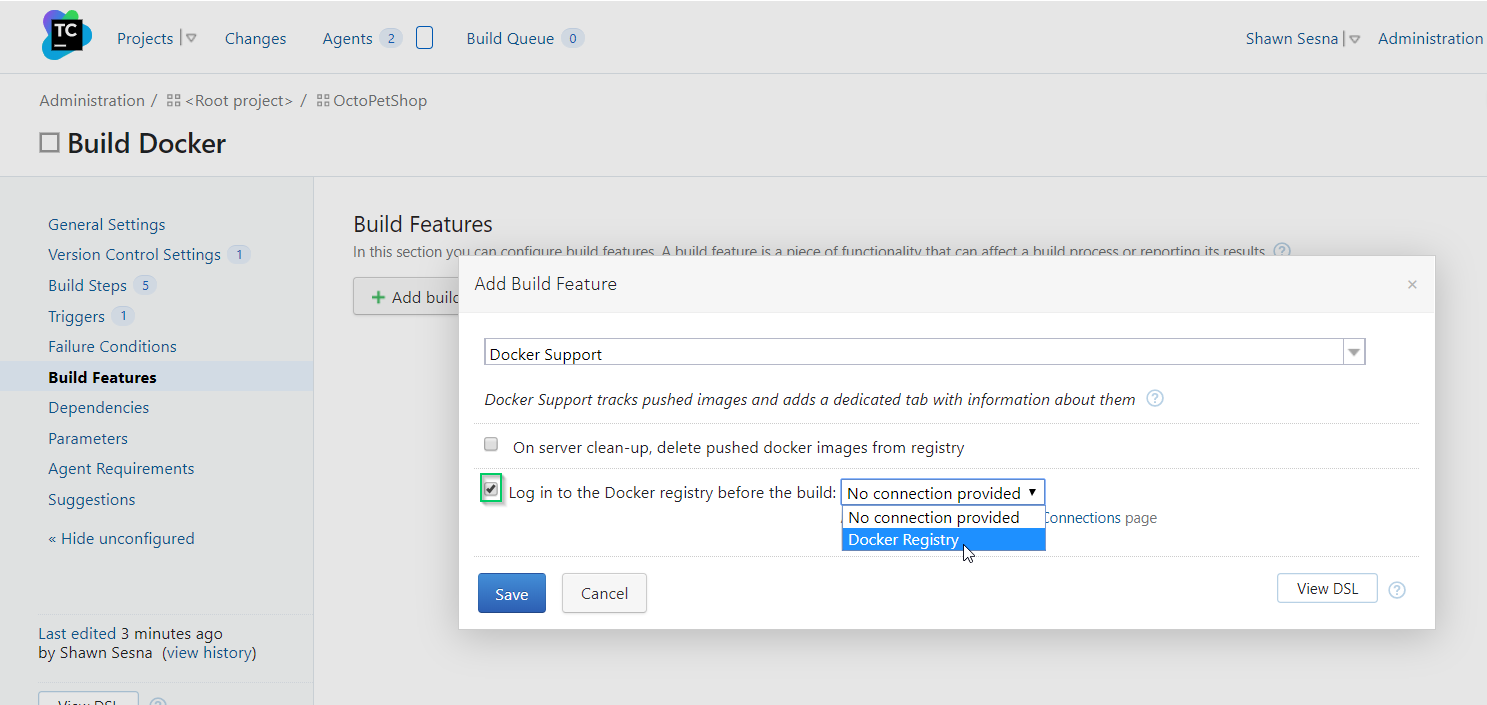
Check Log in to the Docker registry before the build, choose the connection you created for your project, and click Save:
Add build steps
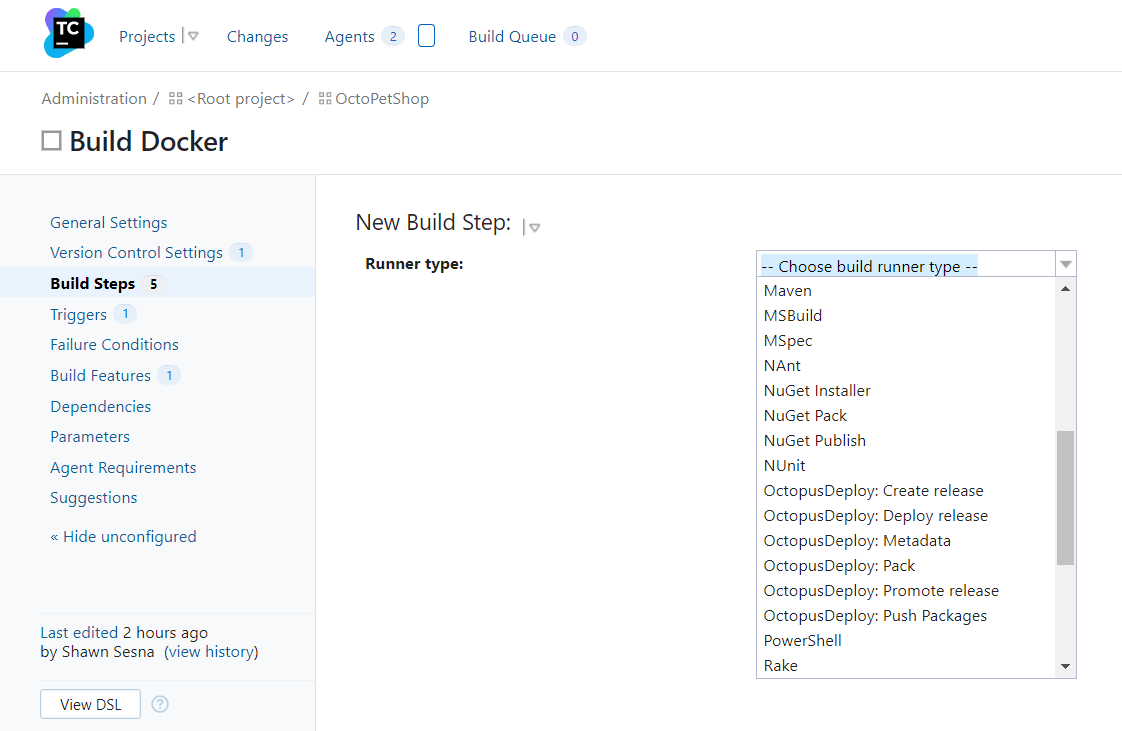
Steps 1 to 4 are almost identical; the only difference is the dockerfile you’ll build. Click on the Build Steps tab, and click the Add build step button:

For the step, fill in the following:
- Runner type:
Docker - Docker command:
build - Path to dockerfile in the repo: i.e.,
Development-Active/OctopusSamples.OctoPetShop.web/dockerfile - Image name:tag: i.e.,
octopusexamples/octopetshop-web:1.0.0.0

For Docker images, it’s considered best practice to tag your image with the DockerId/ImageName:version. It’s not uncommon to omit the version part of the tag, but whenever a new version of an image is uploaded to Docker Hub, it will automatically attach latest as the version if a version number is not specified. Octopus Deploy uses SemVer for package versions, and in this example, I’ve hardcoded 1.0.0.0 as the version number, but you could just as easily use a TeamCity parameter to dynamically assign the version number.
You’ll add three more steps like this one for the product service, the shopping cart service, and the database.
The last step you’ll add pushes your built images (i.e., execute a Docker push command) to Docker Hub. For this step, you fill in the following:
- Runner type:
Docker - Docker command:
push - Image name
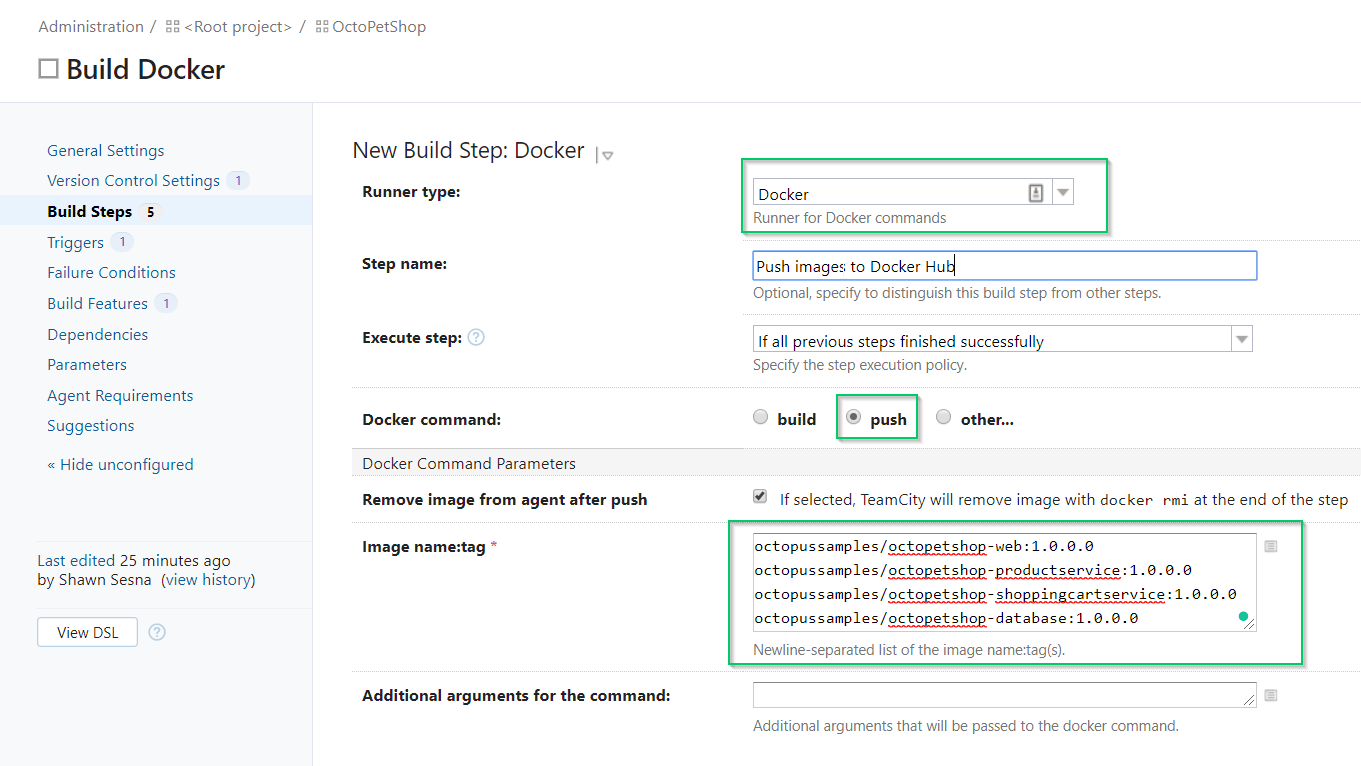
For the push step, you specify all of the images that were built in steps 1 to 4 and push them in a single step. Barring any typos, the build should execute successfully:
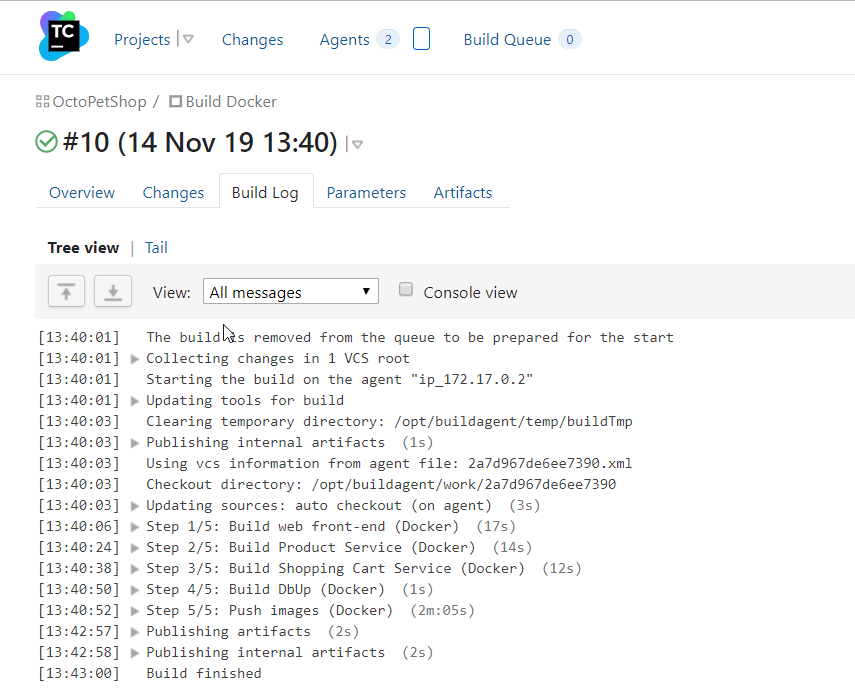
Congratulations! You just finished the CI portion of this article. The only thing left to do is add a trigger so that when someone commits to source control, a build will automatically execute.
Configure Docker continuous delivery with Octopus Deploy
For the continuous delivery portion of this article, you’ll use Octopus Deploy. With Octopus, you will do the following:
- Add Docker Hub as an external feed.
- Create a new project.
- Define our deployment steps.
Add Docker Hub as an external feed
You need to add Docker Hub as an external feed so that Octopus Deploy can pull your images from Docker Hub and deploy them to your server running Docker.
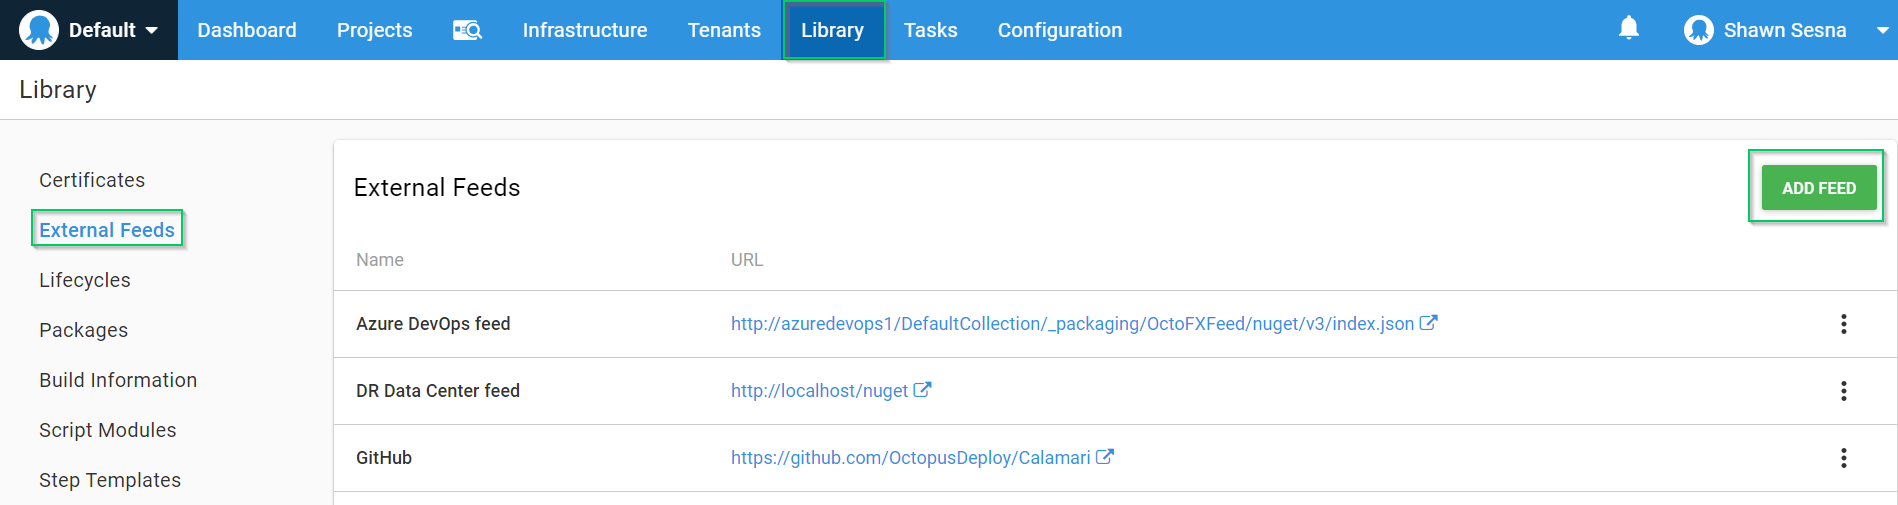
After you’ve logged into Octopus, click on the Library tab:
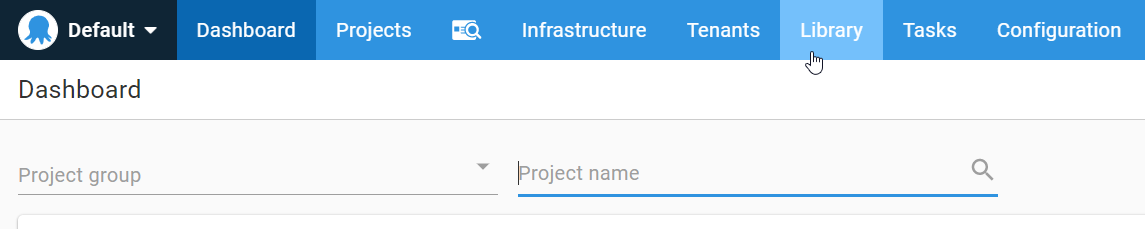
In the Library section, click External Feeds, and click the ADD FEED button:
On the Create Feed form, fill in the following:
- Feed Type:
Docker Container Registry - Name:
Docker Hub - Username:
your-username - Password:
your-password

Test the feed to make sure Octopus can log into Docker Hub:
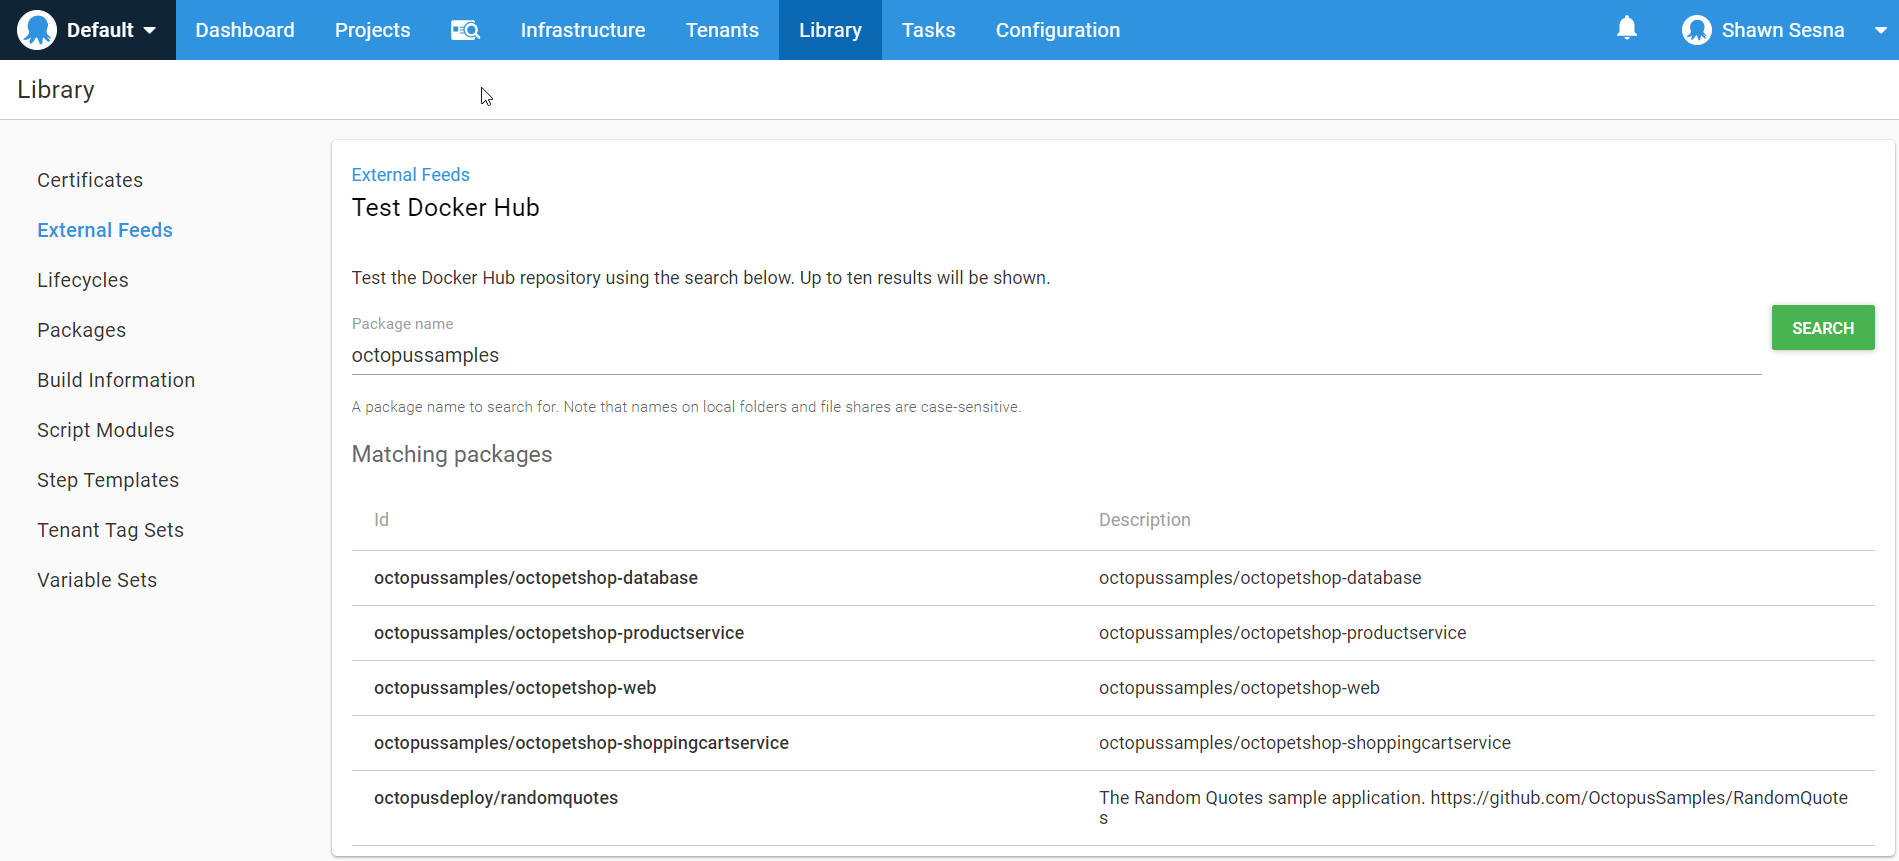
With your external feed configured, you can define our steps.
Create the Octopus Deploy project
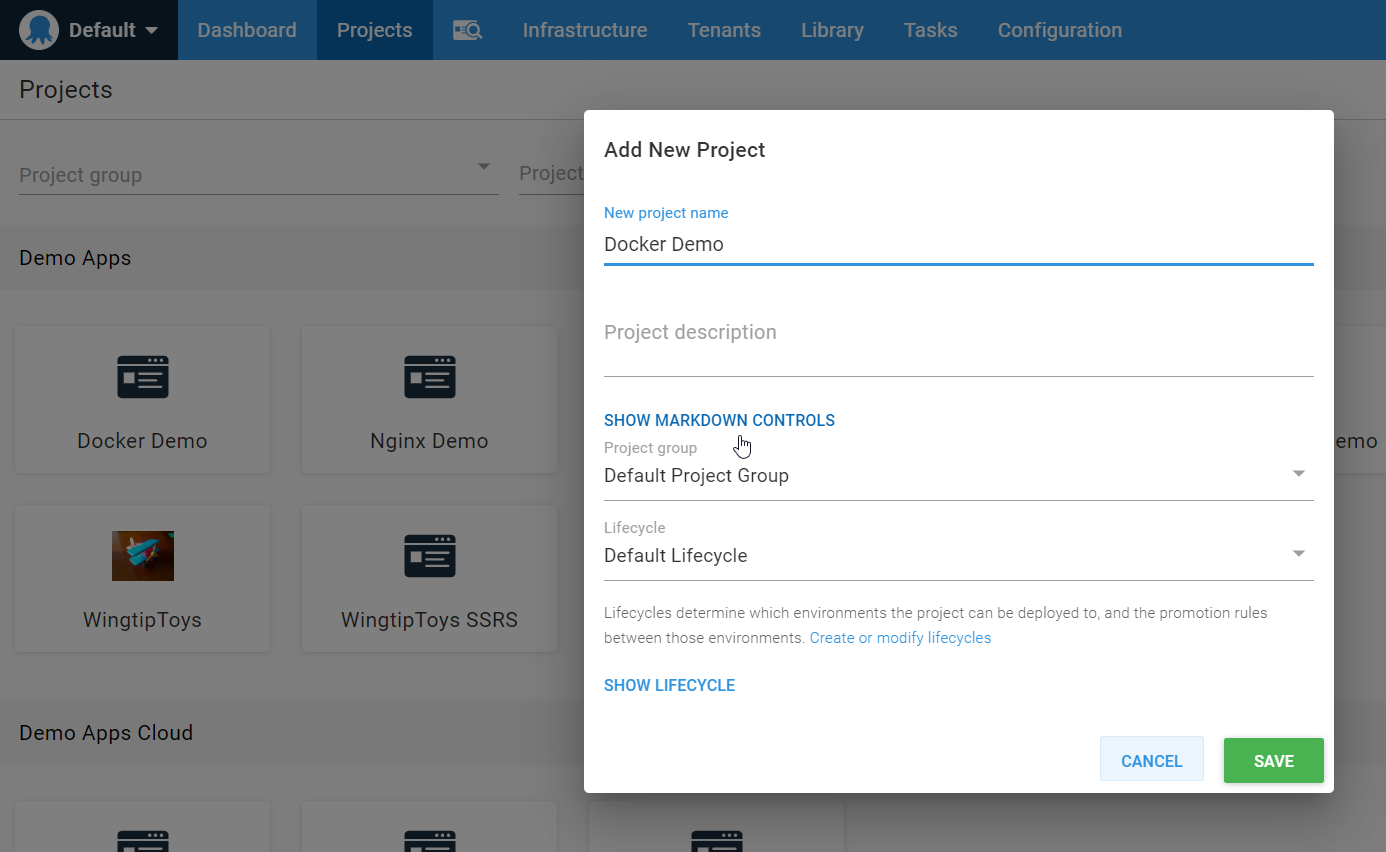
To create a new project, click on the Projects tab, and click the ADD PROJECT button:

Give the project a name, and click SAVE:
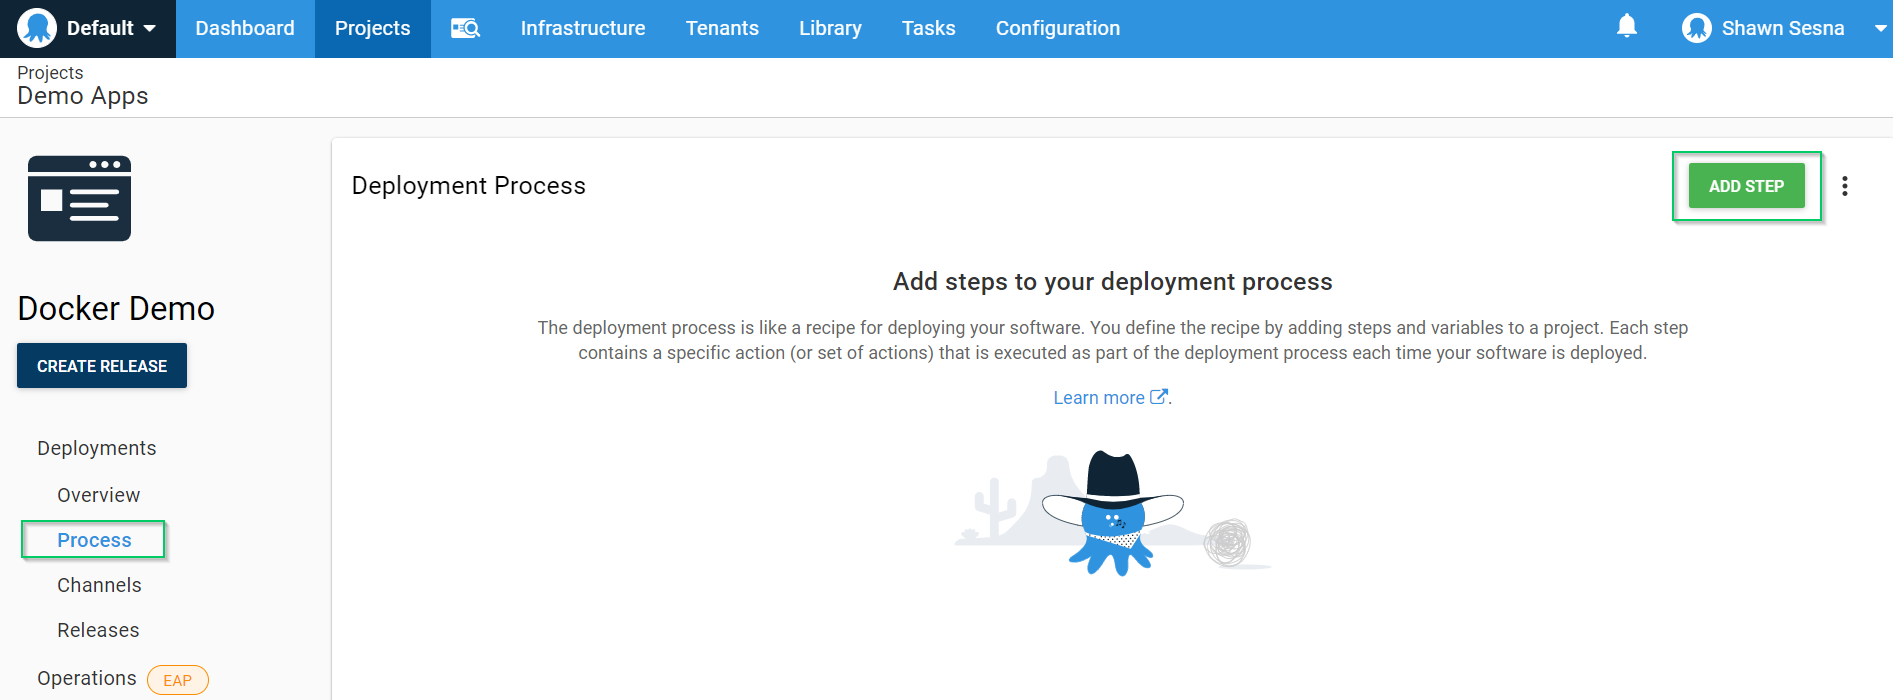
Similar to our build, the steps in Octopus are going to be largely the same, with only minor differences. I’ll walk you through the first step you’ll add to your process and point out the differences in the remaining steps.
On the Process tab of your project, click ADD STEP:
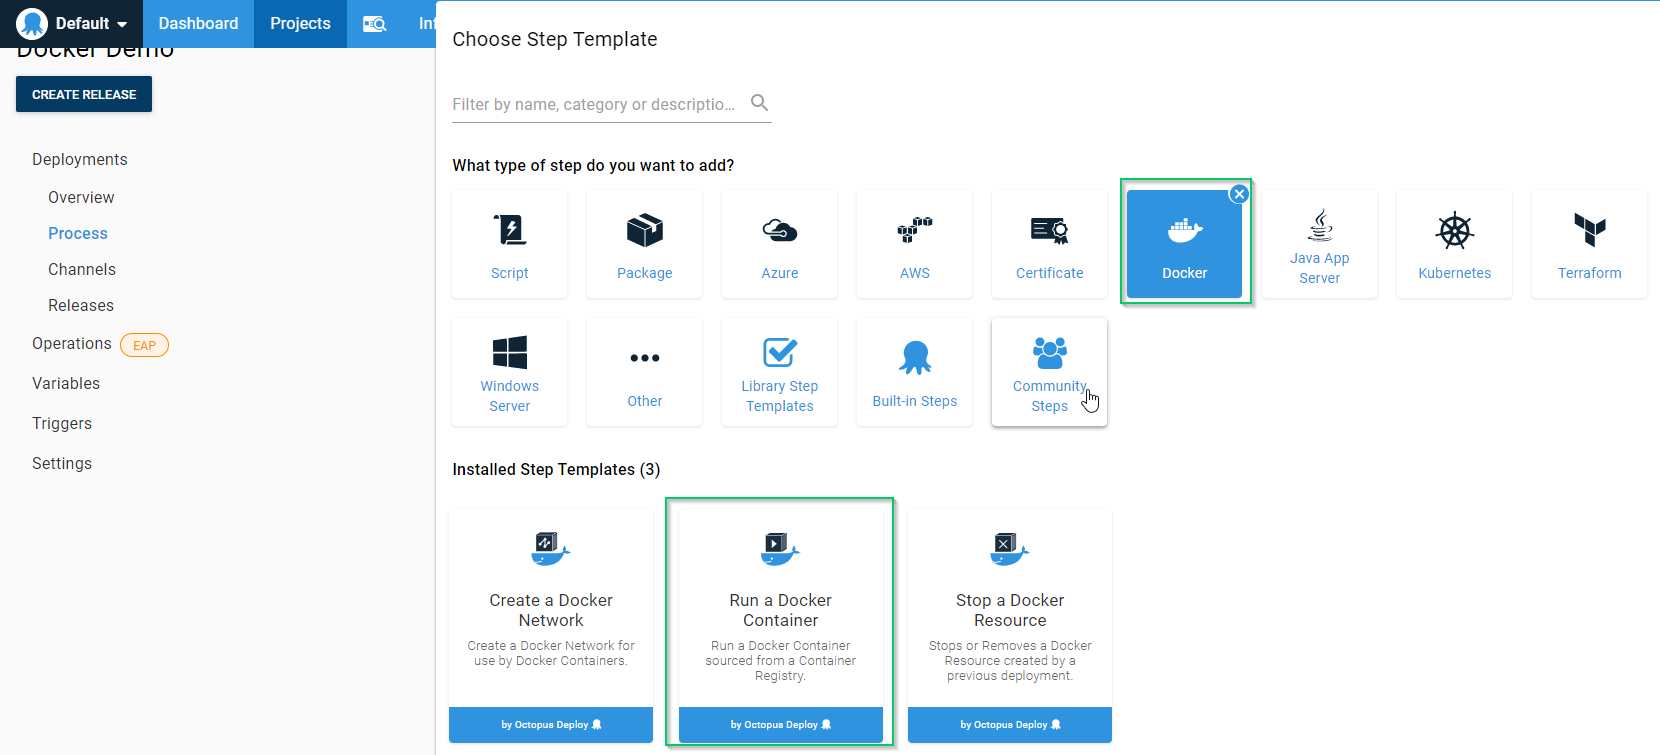
Choose the Docker category and the Run a Docker Container step:
For this demo, use the Microsoft SQL Server 2017 Docker image as your database server. This will be the first container you configure in your deployment.
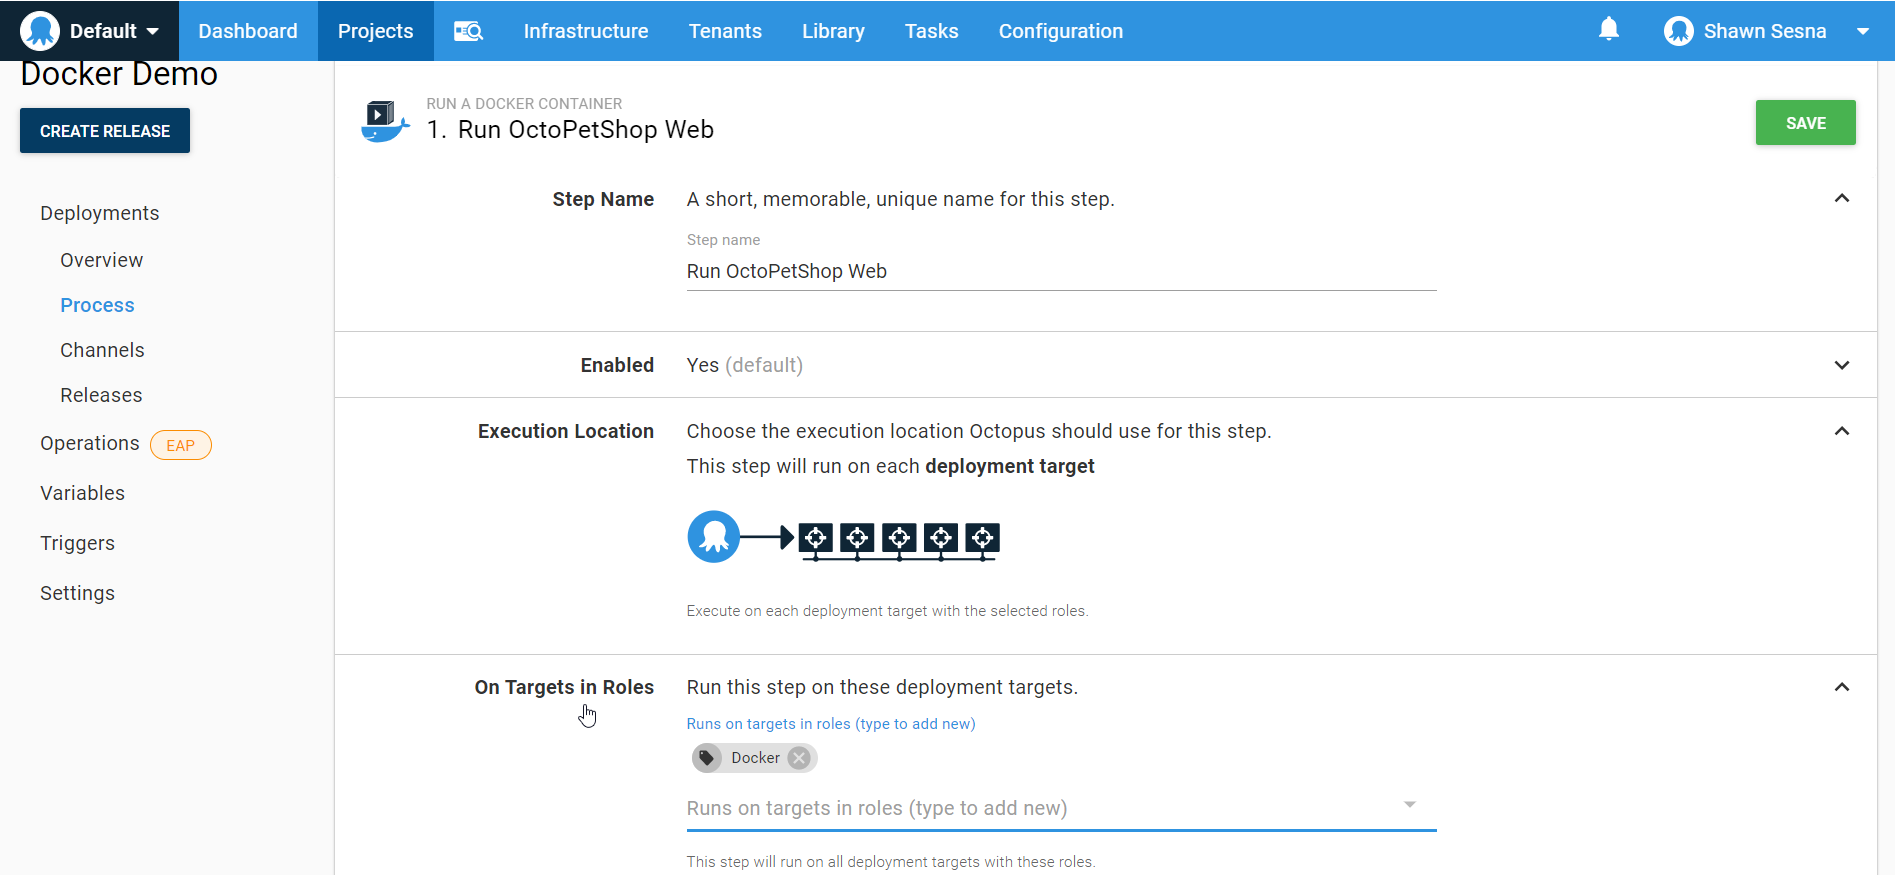
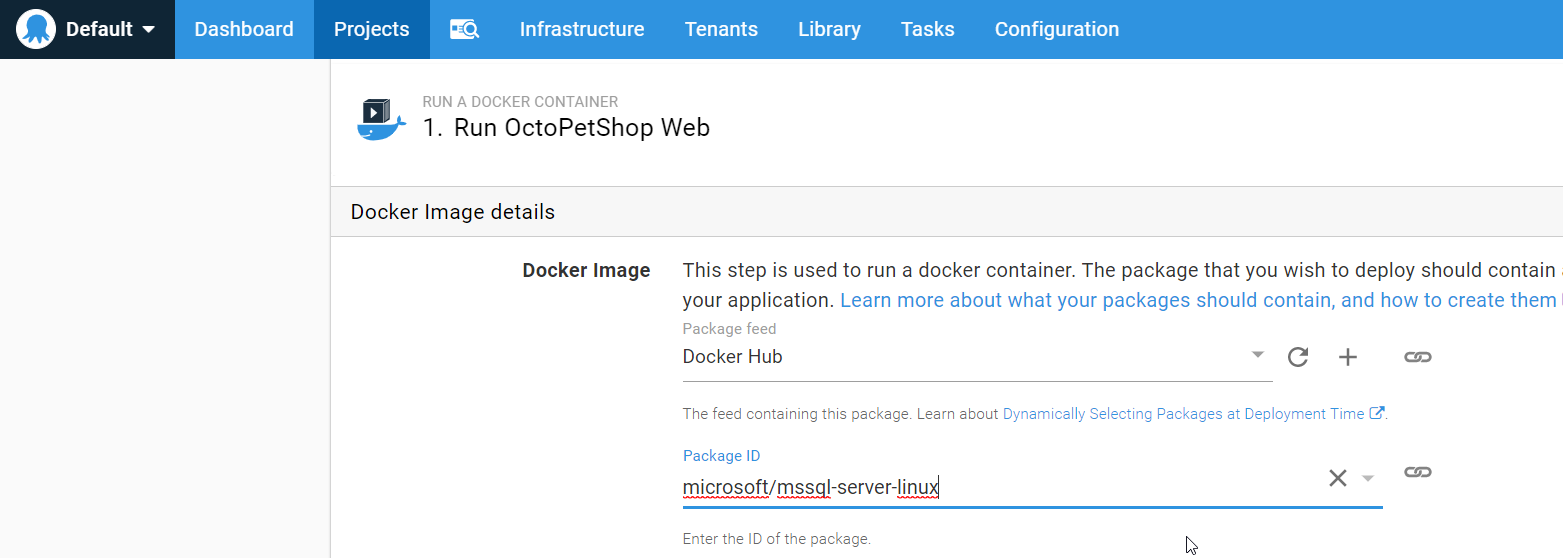
The form for a Docker container step is rather long, so I’ve broken the screenshots into parts. For the first part, give the step a name and the role it will be deploying to. For this demonstration, I’m using a simple role of Docker, but in a Production scenario, the role would be something more meaningful like: OctoPetShop-Web-Container.
Choose our Docker Hub external feed and choose the microsoft/mssql-server-linux image.
Hint
Type mssql in the search box to find the image.
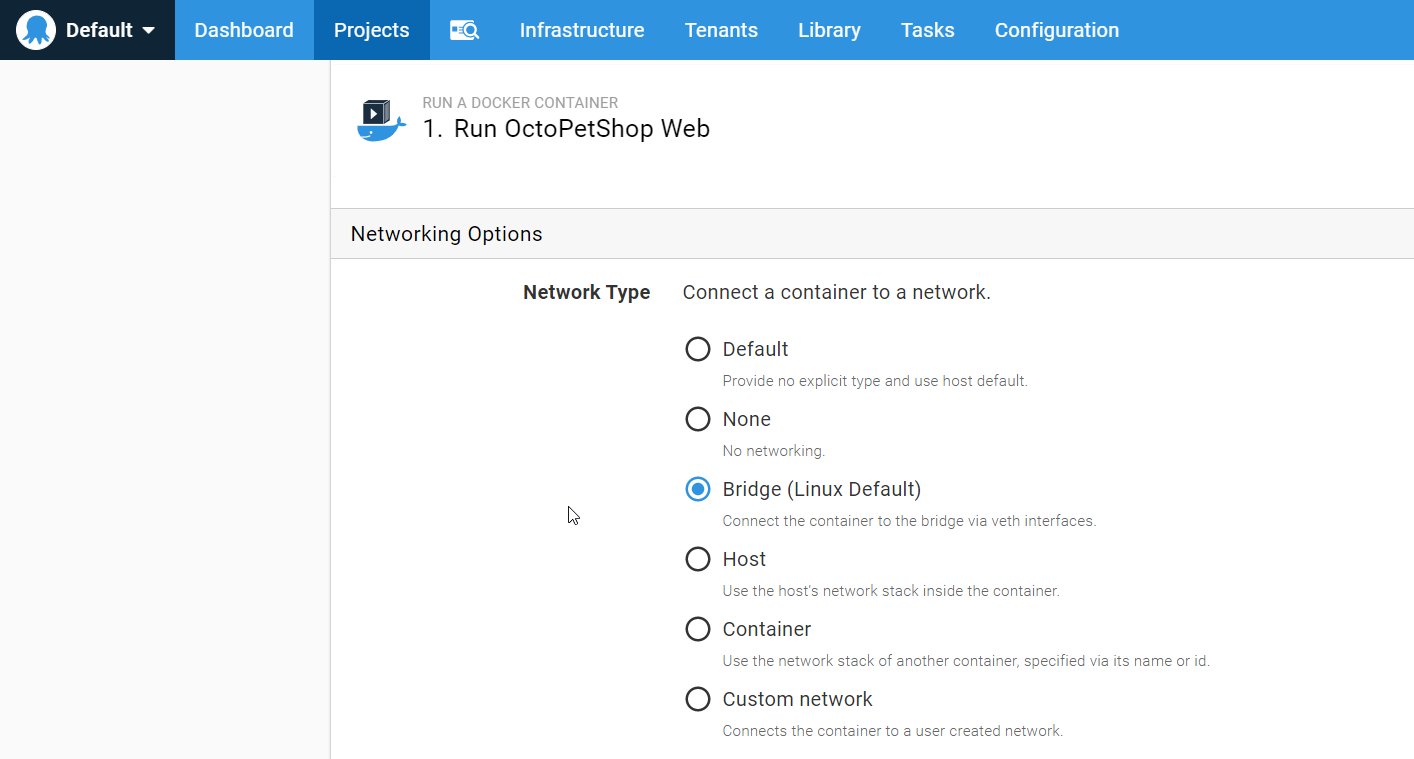
Choose the Network Type of Bridge:
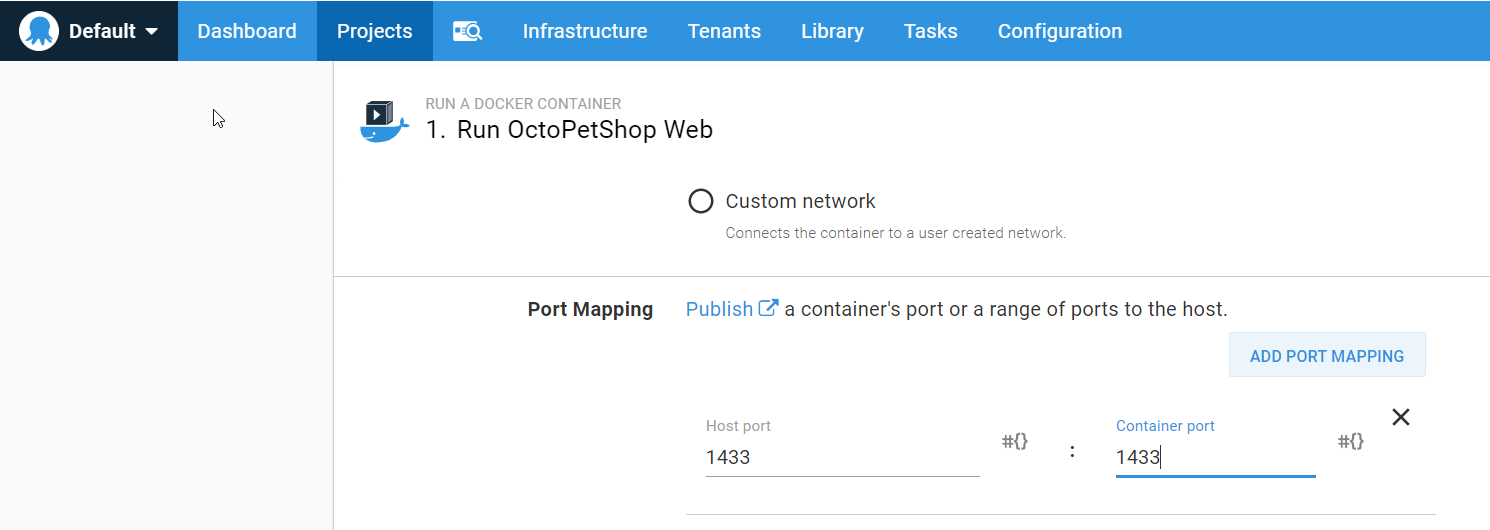
To make your database server accessible, you need to add a port mapping. Specify the default SQL Server port of 1433:
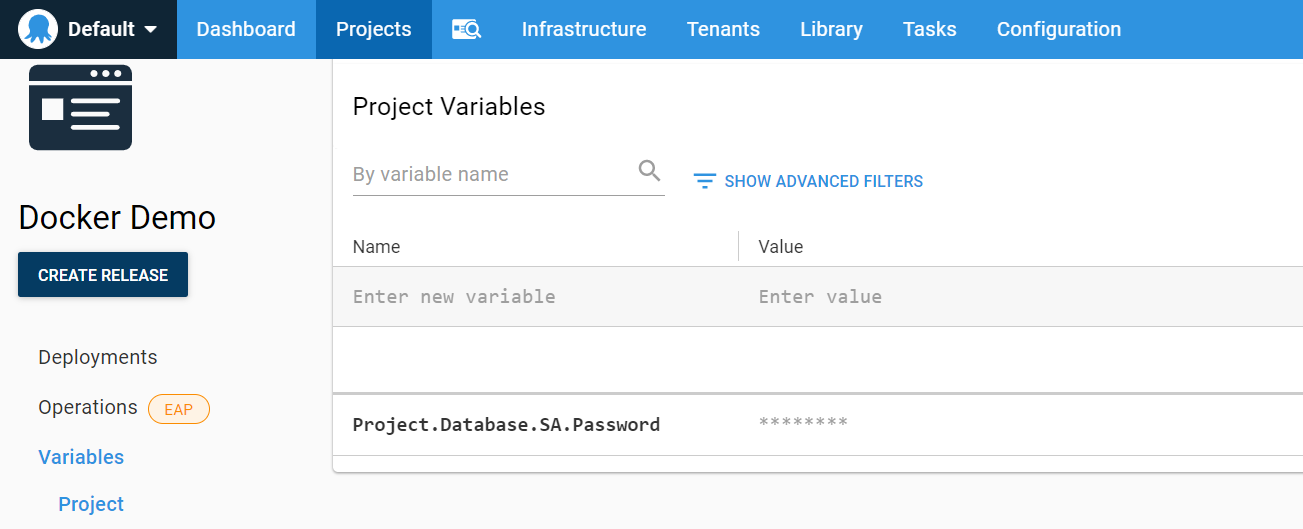
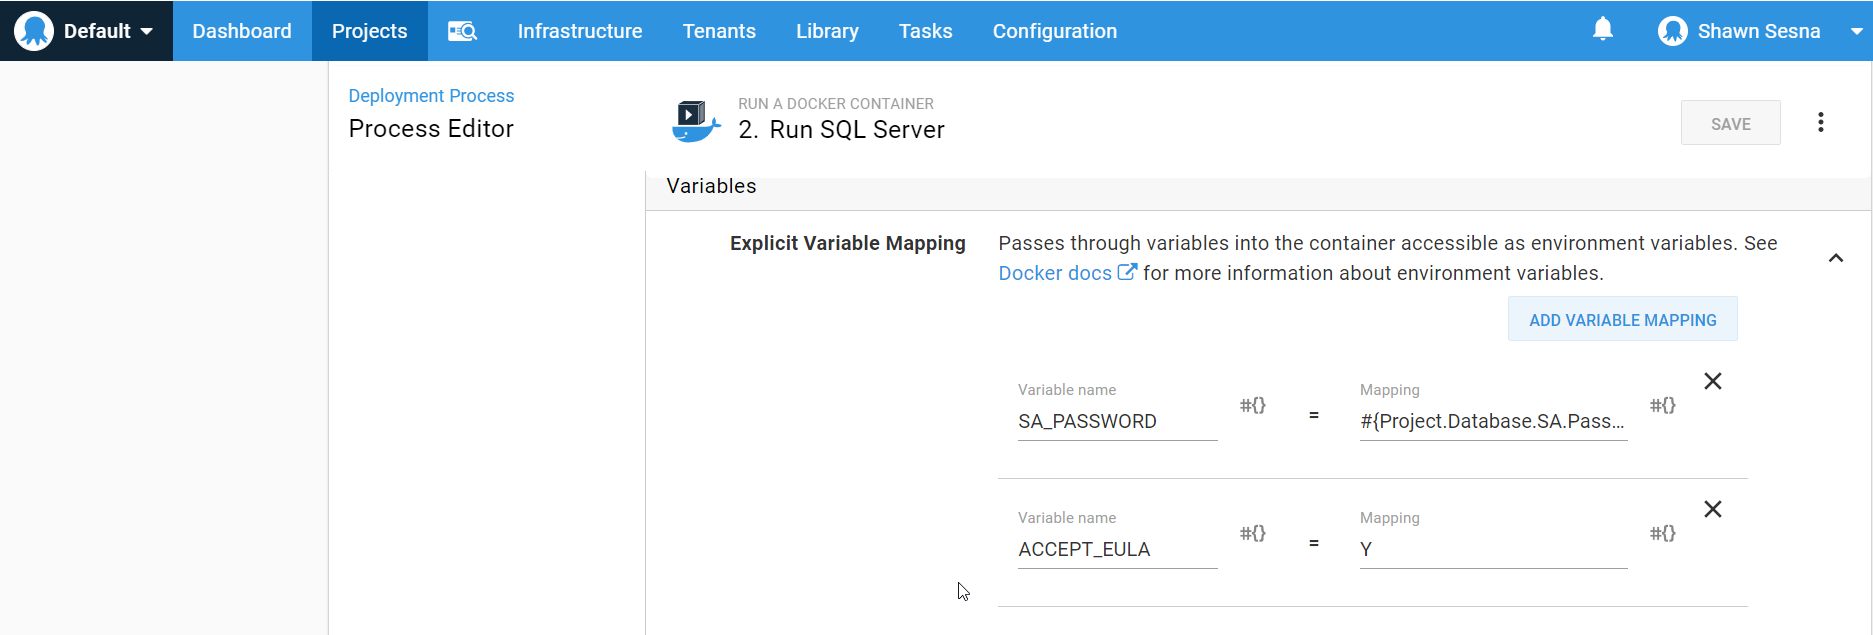
Scroll down to the Variables section and add the following Explicit Variable Mapping. This image needs a couple of environment variables passed to it: SA_PASSWORD and ACCEPT_EULA. Create a Project Variable of type Sensitive for the SA_PASSWORD:
And that’s it for this container. Click SAVE to commit the step to the process.
Here are the details for the remaining containers:
OctoPetShop web
- Docker Image:
octopussamples/octopetshop-web - Network type:
Host - Explicit Variable Mapping:
ProductServiceBaseUrl = http://localhost:5011/ShoppingCartServiceBaseUrl = http://localhost:5012
OctoPetShop product service
- Docker Image:
octopussamples/octopetshop-productservice - Network Type:
Bridge - Port Mapping:
5011:5011 - Explicit Variable Mapping:
OPSConnectionString = "Data Source=#{Octopus.Machine.Hostname}; Initial Catalog=OctoPetShop; User ID=sa; Password=#{Project.Database.SA.Password}
OctoPetShop shopping cart service
- Docker Image:
octopussamples/octopetshop-shoppingcartservice - Network Type:
Bridge - Port Mapping:
5012:5012 - Explicit Variable Mapping:
OPSConnectionString = "Data Source=#{Octopus.Machine.Hostname}; Initial Catalog=OctoPetShop; User ID=sa; Password=#{Project.Database.SA.Password}
OctoPetShop database
- Docker Image:
octopussamples/octopetshop-database - Network Type:
Host - Explicit Variable Mapping:
DbUpConnectionString = "Data Source=#{Octopus.Machine.Hostname}; Initial Catalog=OctoPetShop; User ID=sa; Password=#{Project.Database.SA.Password}
With all of your steps defined, you can create a release and deploy it:
Hint For information on how to set up a Tentacle for Linux, see our documentation.

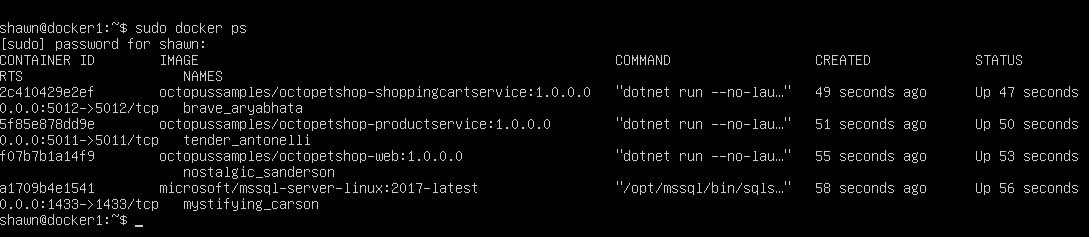
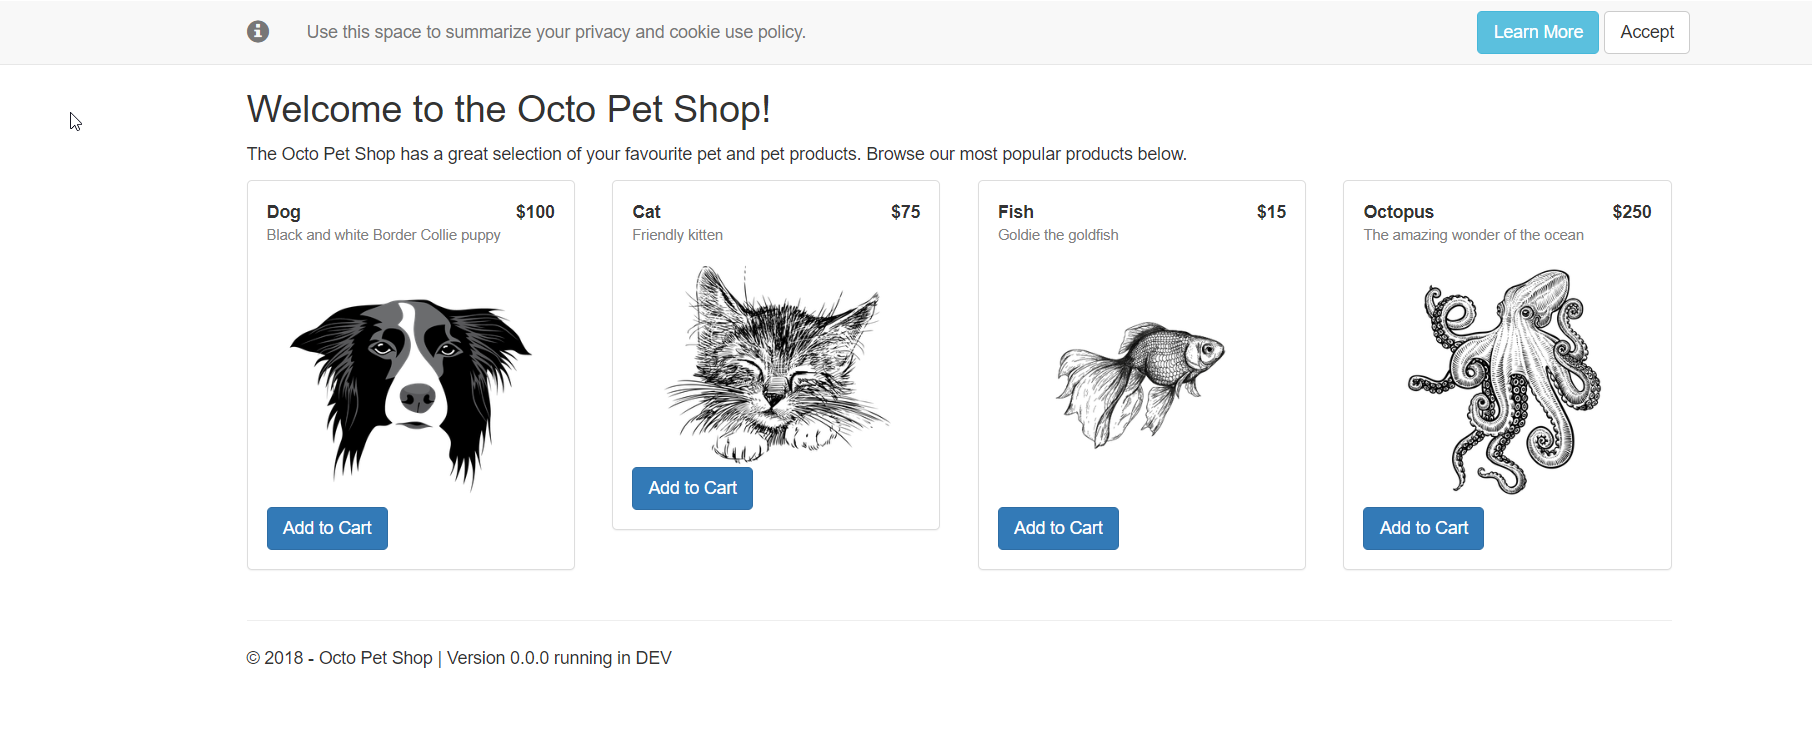
If you navigate to the server you just deployed to, you should see your OctoPetShop application running. As with the previous demos, OctoPetShop redirects to https with a self-signed certificate so you’ll most likely get a warning about it being unsafe. In this case, it’s OK to ignore the warning and continue:
Complete the Docker CI/CD pipeline
So far we’ve done the CI and the CD portions, but you still need to connect them. To fit these pieces together, go back to your TeamCity server.
Install the Octopus Deploy TeamCity plugin
First, navigate to and download the Octopus Deploy plugin.
After that has been downloaded, go to {{Administration,Plugins List}} in the TeamCity server. From here, click on the Upload plugin zip button to add the plugin:

This will add some steps that you can use with your build definition to interact with Octopus Deploy:
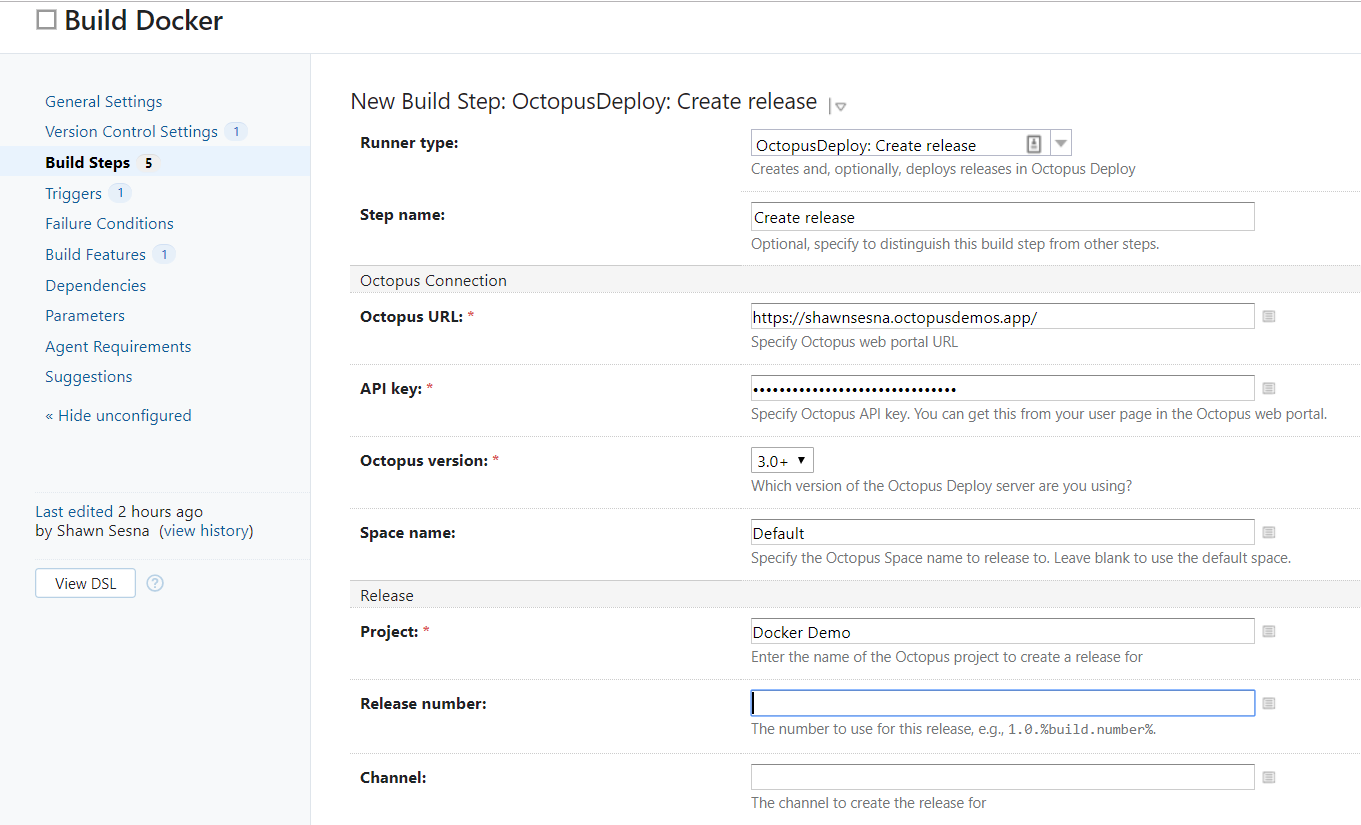
Add Create Release step
Next, add a new step to your build definition, OctopusDeploy: Create release:
Now, when you run a build, it will automatically create a release in Octopus Deploy:
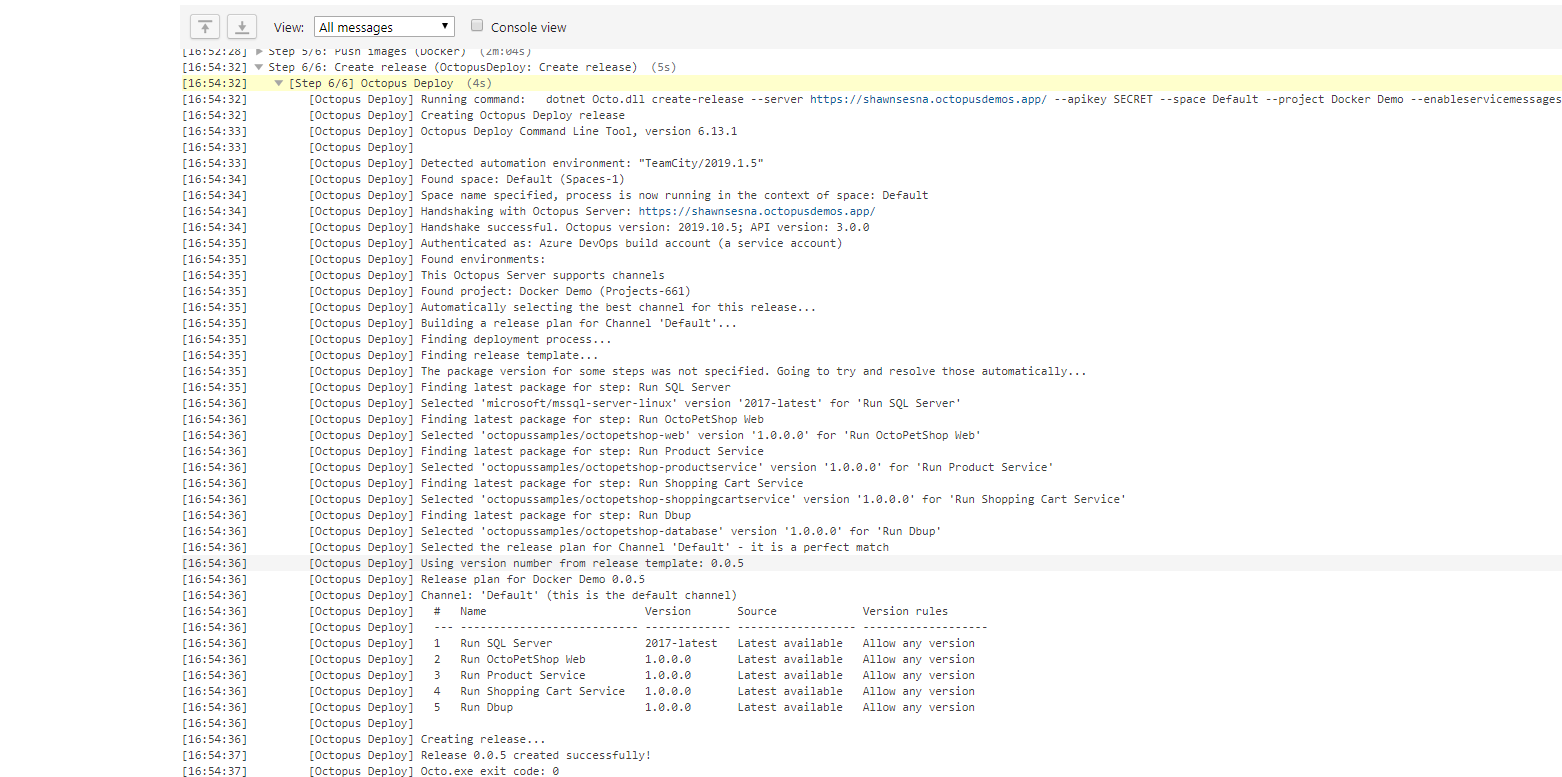

If you wanted to, you could add the automatic deployment of that release to development directly from the build definition.
Conclusion
This post showed it’s possible to create a complete CI/CD pipeline for a real-world application using Docker containers. It covered how to automate a Docker build pipeline with JetBrains TeamCity and how to configure Docker continuous delivery with Octopus Deploy.


