The future has arrived: Octopus Deploy 3.0 has first-class support for Azure Web Apps
Now back to the original blog post…
Lately we have been getting more and more people wanting to deploy their Azure Web Sites from Octopus. The problem is that there is no OOTB functionality for this currently.
Since there currently isn’t a built-in way to do it, one of our users has created a step template (it is available on the Octopus Library site together with a bunch of other useful step templates) that runs a PowerShell script that uses Web Deploy to deploy your application to Azure, with that in mind, I thought I’d write a small(ish) blog post stepping through how to get your ASP.NET application setup and ready to be deployed to Azure using this step template.
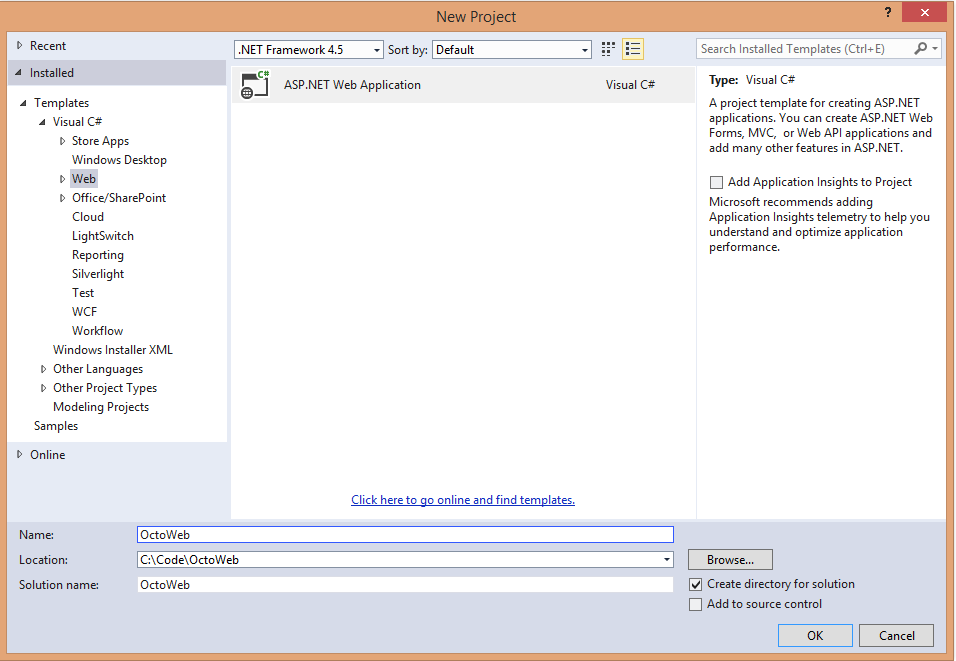
For the purposes of this blog post, I will create a demo ASP.NET MVC application in Visual Studio 2013.
Create your ASP.NET application
First lets select our project type and give it a name
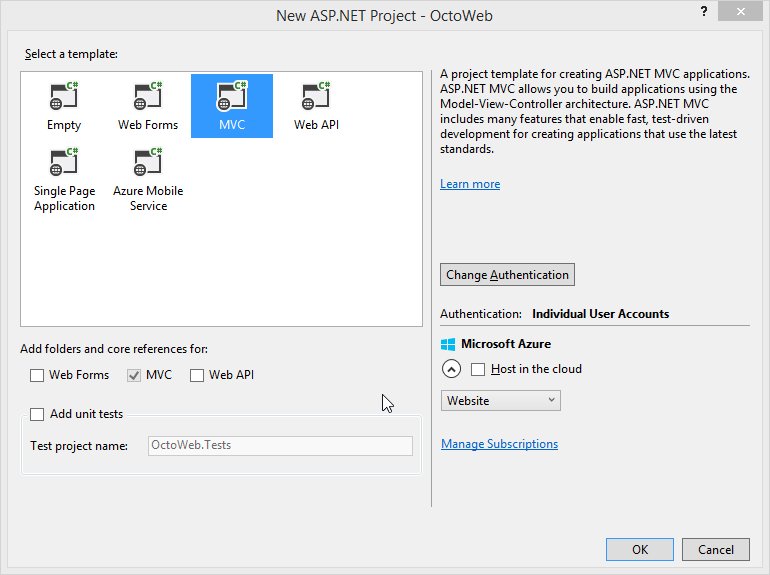
Then specify the template to use, I will just be using the provided MVC template, I will leave the Host in the cloud check box unchecked as I want to use Octopus Deploy to handle my deployments.
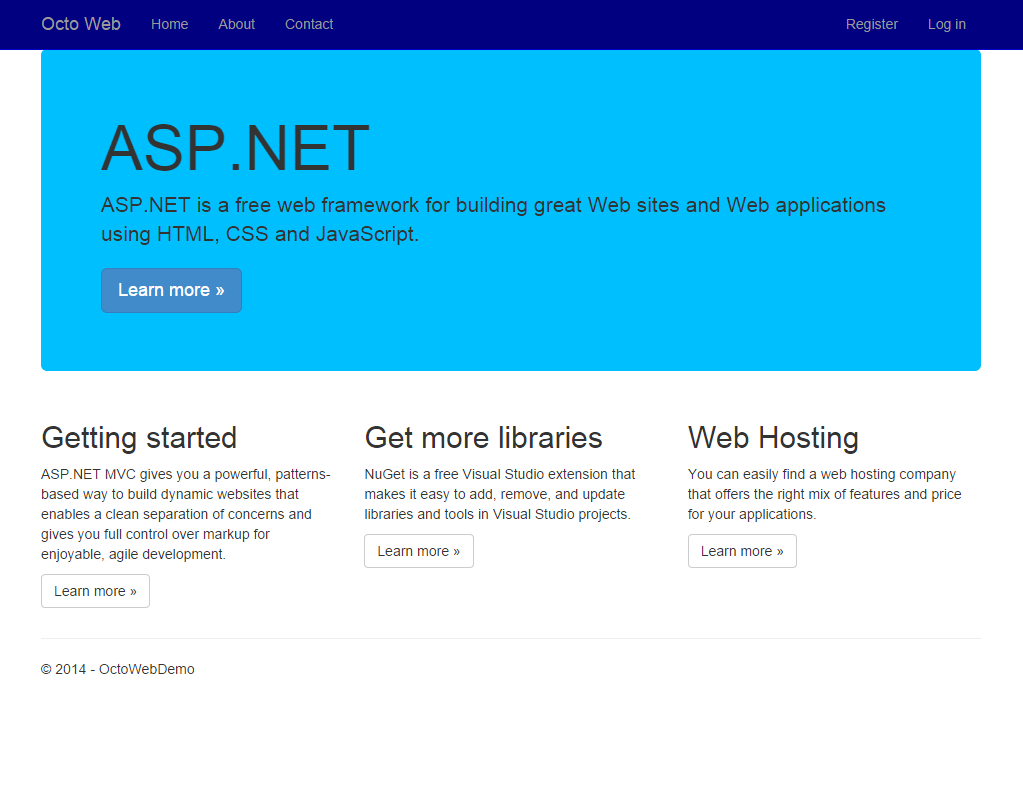
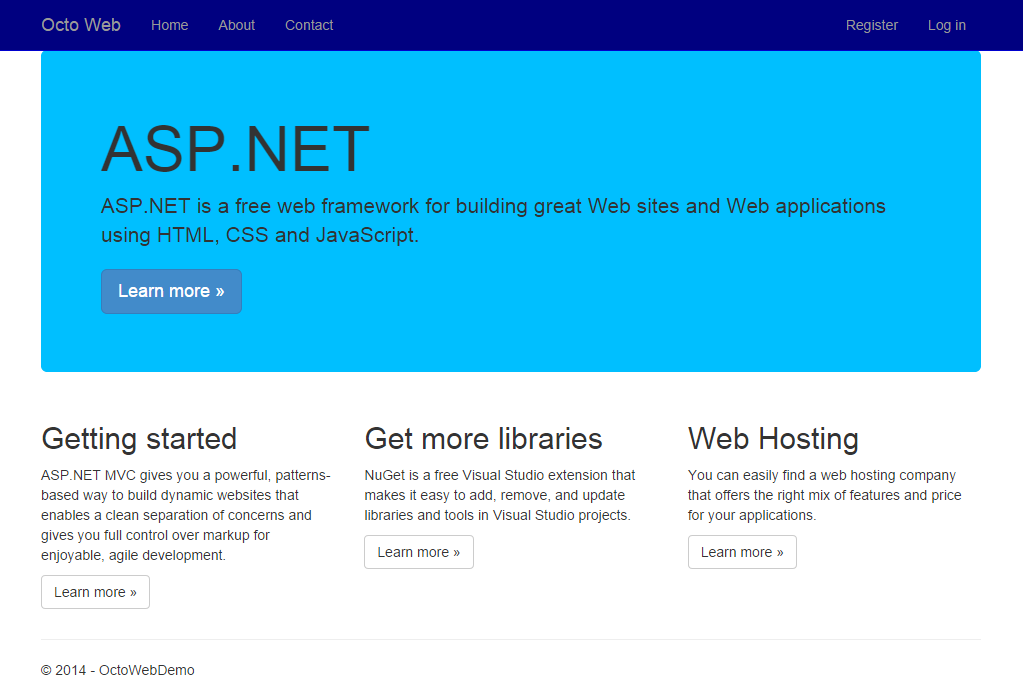
Once the project has been created, press F5 to run up your new and shiny ASP.NET MVC application.
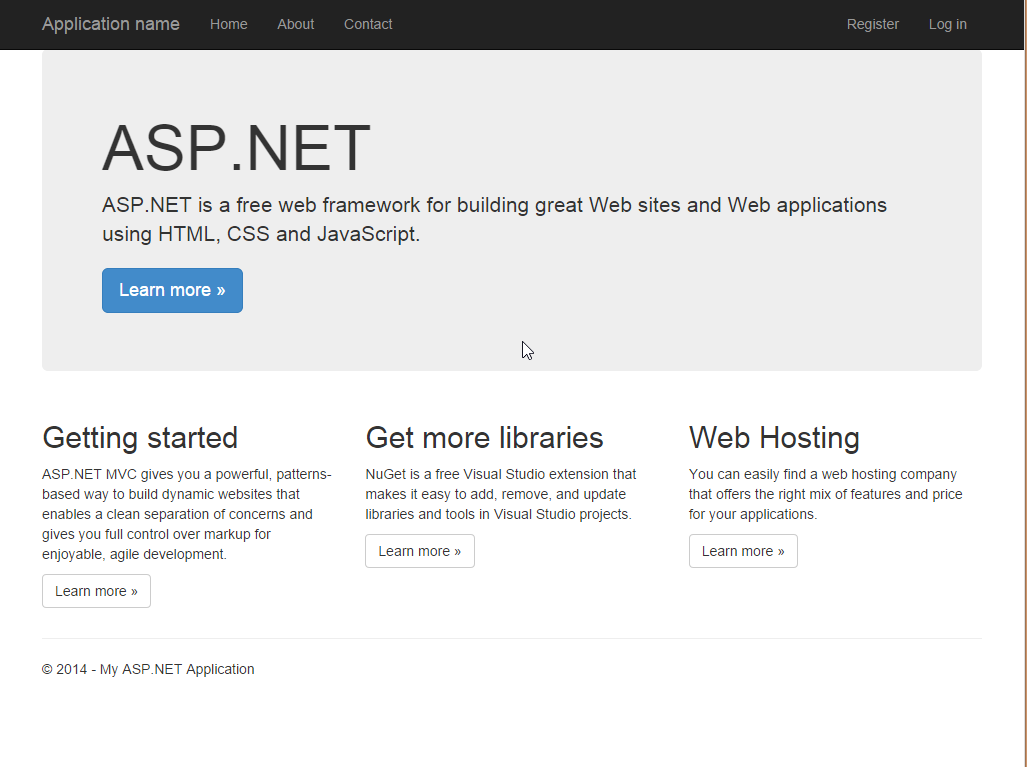
Nothing too exciting, but it gives us a starting point from where we can get our deployment setup and running.
Create the NuGet package
As Octopus Deploy uses NuGet packages when deploying your applications we have created a little utility that will create a NuGet package from the output files created when you build your project.
Side note: the NuGet package that OctoPack creates is slightly different to the NuGet packages that you install from the NuGet Gallery. Our NuGet packages are just a bunch of files and folders that make up the structure of your application.
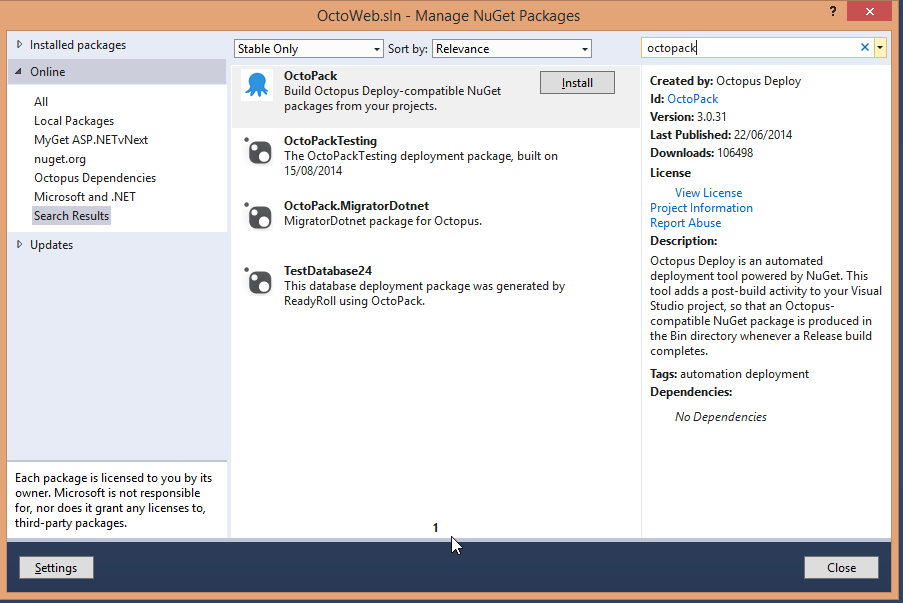
Add OctoPack NuGet package to your project
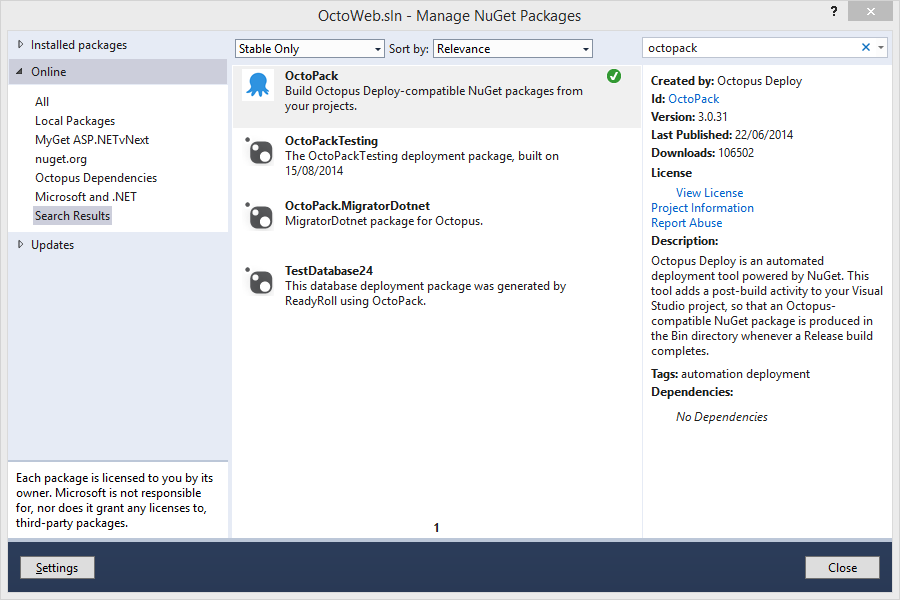
To add OctoPack to our project, right-click your solution and select Manage NuGet Packages for Solution, search for octopack and click the Install button.
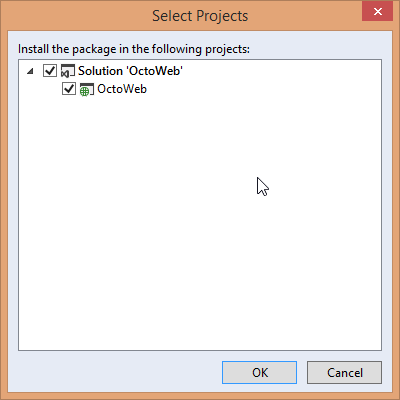
Select the projects to install OctoPack in, in my case, I only have one project so I select it and click Ok.
Build project and generate NuGet package from the command line using MSBuild
Now that OctoPack is installed, we can tell it to generate a NuGet package for us when we build our solution from the command line.
From a command prompt enter:
C:\Code\OctoWeb\OctoWeb>msbuild OctoWeb.sln /t:build /p:RunOctoPack=trueIf everything worked, you should see output similar to the below:
Microsoft (R) Build Engine version 12.0.30723.0
[Microsoft .NET Framework, version 4.0.30319.34014]
Copyright (C) Microsoft Corporation. All rights reserved.
Building the projects in this solution one at a time. To enable parallel build, please add the "
/m" switch.
Build started 23/09/2014 3:25:24 PM.
Project "C:\Code\OctoWeb\OctoWeb\OctoWeb.sln" on node 1 (build target(s)).
ValidateSolutionConfiguration:
Building solution configuration "Debug|Any CPU".
Project "C:\Code\OctoWeb\OctoWeb\OctoWeb.sln" (1) is building "C:\Code\OctoWeb\OctoWeb\OctoWeb\
OctoWeb.csproj" (2) on node 1 (default targets).
...
CopyFilesToOutputDirectory:
OctoWeb -> C:\Code\OctoWeb\OctoWeb\OctoWeb\bin\OctoWeb.dll
OctoPack:
OctoPack: Get version info from assembly: C:\Code\OctoWeb\OctoWeb\OctoWeb\bin\OctoWeb.dll
Using package version: 1.0.0.0
OctoPack: Written files: 101
OctoPack: A NuSpec file named 'OctoWeb.nuspec' was not found in the project root, so the file
will be generated automatically. However, you should consider creating your own NuSpec file
so that you can customize the description properly.
OctoPack: Packaging an ASP.NET web application
OctoPack: Add content files
...
OctoPack: Add binary files to the bin folder
...
OctoPack: Attempting to build package from 'OctoWeb.nuspec'.
OctoPack: Successfully created package 'C:\Code\OctoWeb\OctoWeb\OctoWeb\obj\octopacked\OctoWe
b.1.0.0.0.nupkg'.
OctoPack: Copy file: C:\Code\OctoWeb\OctoWeb\OctoWeb\obj\octopacked\OctoWeb.1.0.0.0.nupkg
OctoPack: OctoPack successful
Done Building Project "C:\Code\OctoWeb\OctoWeb\OctoWeb\OctoWeb.csproj" (default targets).
Done Building Project "C:\Code\OctoWeb\OctoWeb\OctoWeb.sln" (build target(s)).
Build succeeded.
0 Warning(s)
0 Error(s)
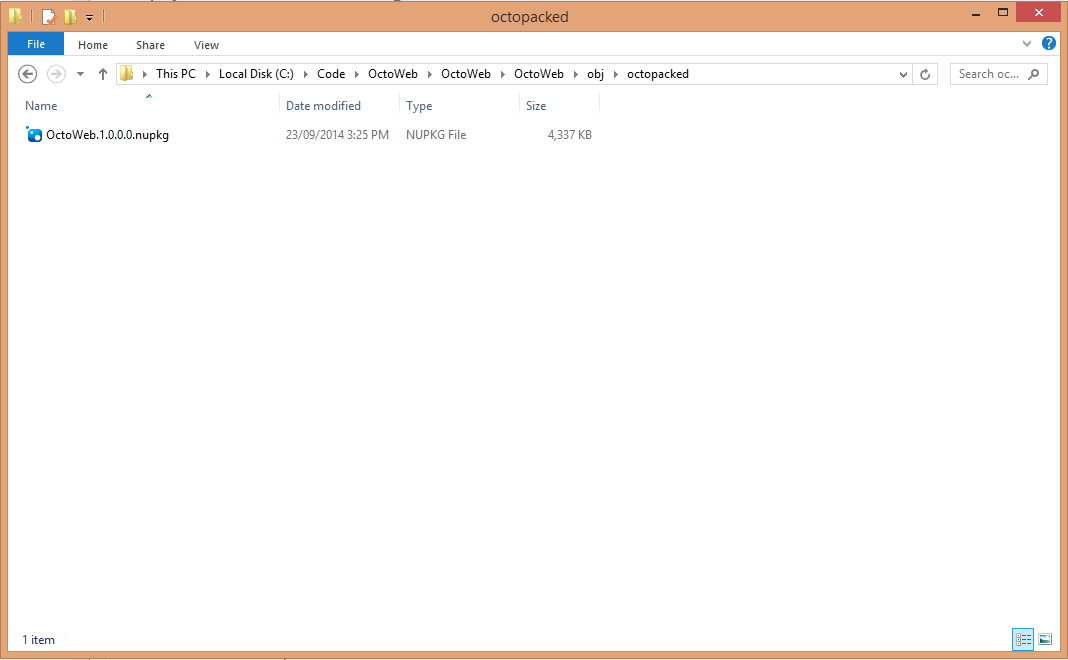
Time Elapsed 00:00:01.86And if you take a look in the folder where OctoPack says it created the NuGet package, you should see that it is, in fact, there.
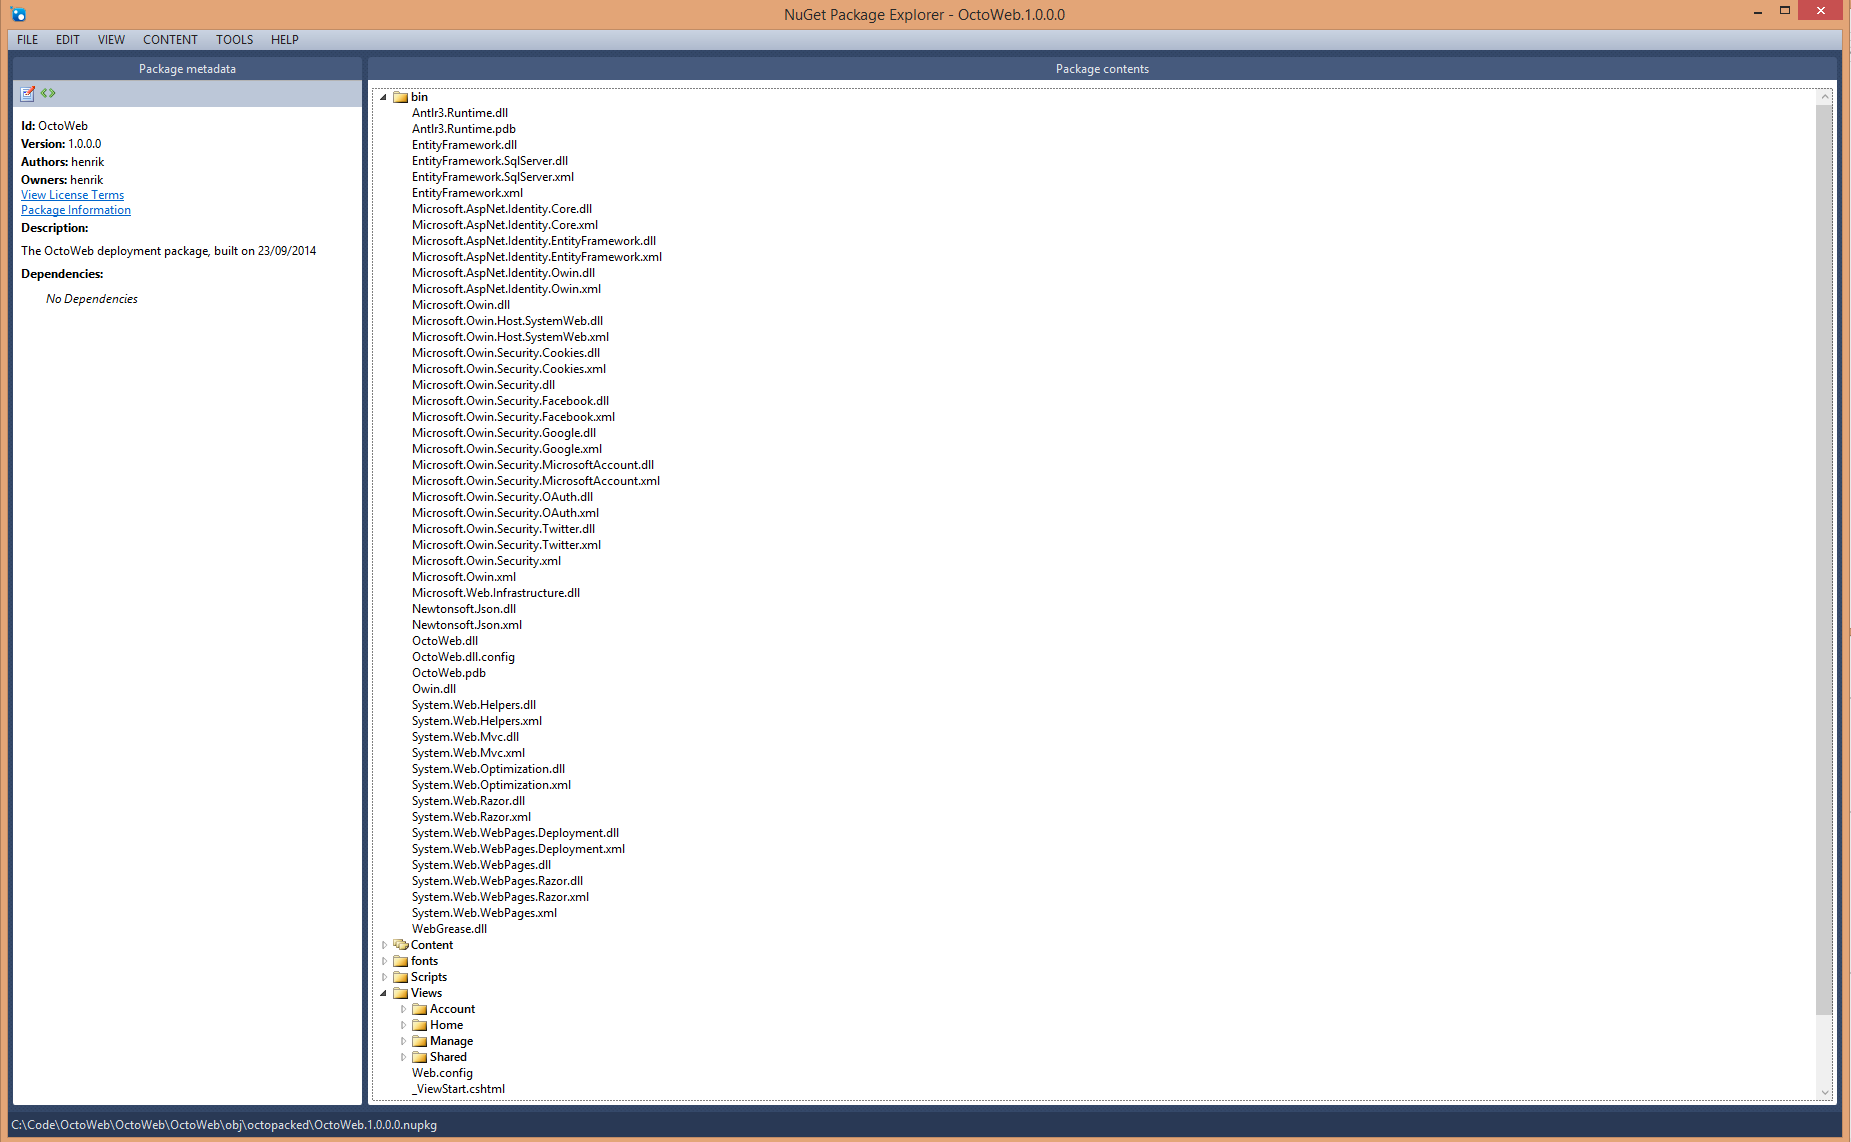
And if you open the generated NuGet package in NuGet Package Explorer, you should see that OctoPack has packed up your web site as it will be deployed to your web server.
If you want OctoPack to copy the created NuGet package to a local folder or file share you can use the following call to msbuild
C:\Code\OctoWeb\OctoWeb>msbuild OctoWeb.sln /t:build /p:RunOctoPack=true /p:OctoPackPublishPackageToFileShare=C:\NuGetor, to publish to the built-in repository in Octopus
C:\Code\OctoWeb\OctoWeb>msbuild OctoWeb.sln /t:build /p:RunOctoPack=true /p:OctoPackPublishPackageToHttp=http://your-octopus-server/nuget/packages /p:OctoPackPublishApiKey=YOUR-API-KEYModify .csproj to generate NuGet package when building your project
If you want to generate the NuGet package and publish it to a local file share every time you build your solution, you can modify your .csproj file and add the following OctoPack tags to the Project Property Group:
<PropertyGroup>
    <Configuration Condition=" '$(Configuration)' == '' ">Debug</Configuration>
    <Platform Condition=" '$(Platform)' == '' ">AnyCPU</Platform>
    ...
    <RunOctoPack>true</RunOctoPack>
    <OctoPackPublishPackageToFileShare>C:\Packages</OctoPackPublishPackageToFileShare>
</PropertyGroup>
or, if you want to publish the NuGet package to a local file share when a debug build is performed and a built-in repository only when a release build is performed:
<PropertyGroup>
    <Configuration Condition=" '$(Configuration)' == '' ">Debug</Configuration>
    <Platform Condition=" '$(Platform)' == '' ">AnyCPU</Platform>
    ...
    <RunOctoPack>true</RunOctoPack>
</PropertyGroup>
<PropertyGroup Condition=" '$(Configuration)|$(Platform)' == 'Debug|AnyCPU' ">
    <OctoPackPublishPackageToFileShare>C:\Packages</OctoPackPublishPackageToFileShare>
</PropertyGroup>
<PropertyGroup Condition=" '$(Configuration)|$(Platform)' == 'Release|AnyCPU' ">
    ...
    <OctoPackPublishPackageToHttp>http://your-octopus-server/nuget/packages</OctoPackPublishPackageToHttp>
    <OctoPackPublishApiKey>API-ABCDEFGMYAPIKEY</OctoPackPublishApiKey>
</PropertyGroup>
Setting up your new Azure Web Site
Now we will setup the Azure Web Site that we will be deploying to.
Login to the Azure Management Portal and create a new web site.
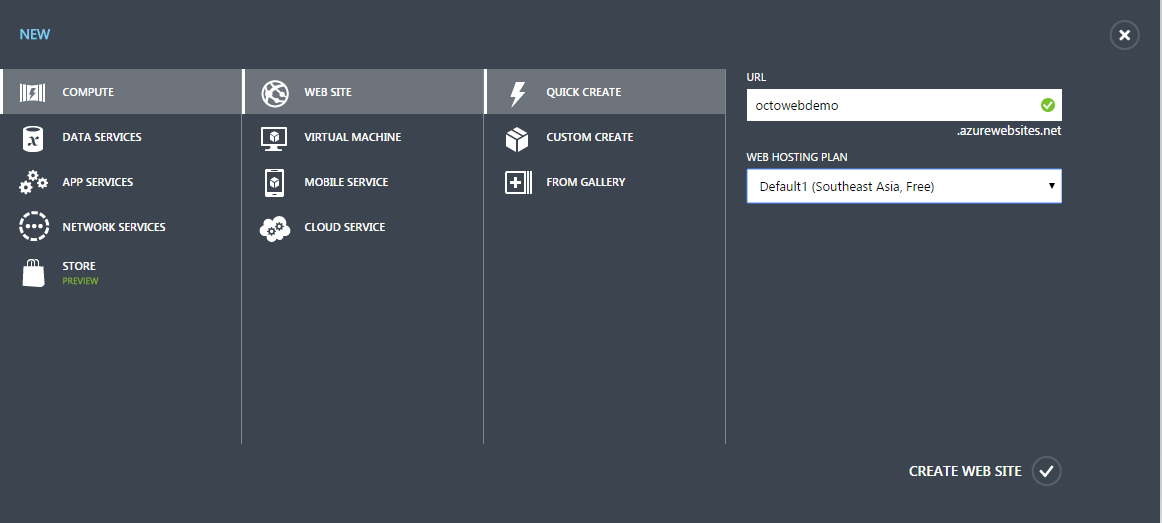
Once the web site has been created,

click it to access the settings for the web site.
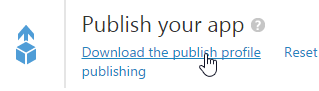
Download the publish profile
From the start page we will download the publish profile settings file to get the values we need to setup our deployment process within Octopus Deploy. So click on the Download the publish profile link to download the settings file required.
Now that we’ve got everything outside of Octopus Deploy setup, we can move on over to your Octopus server to get our project and deployment process setup and ready to deploy your new Azure Web Site.
Add Web Deploy step template to Octopus
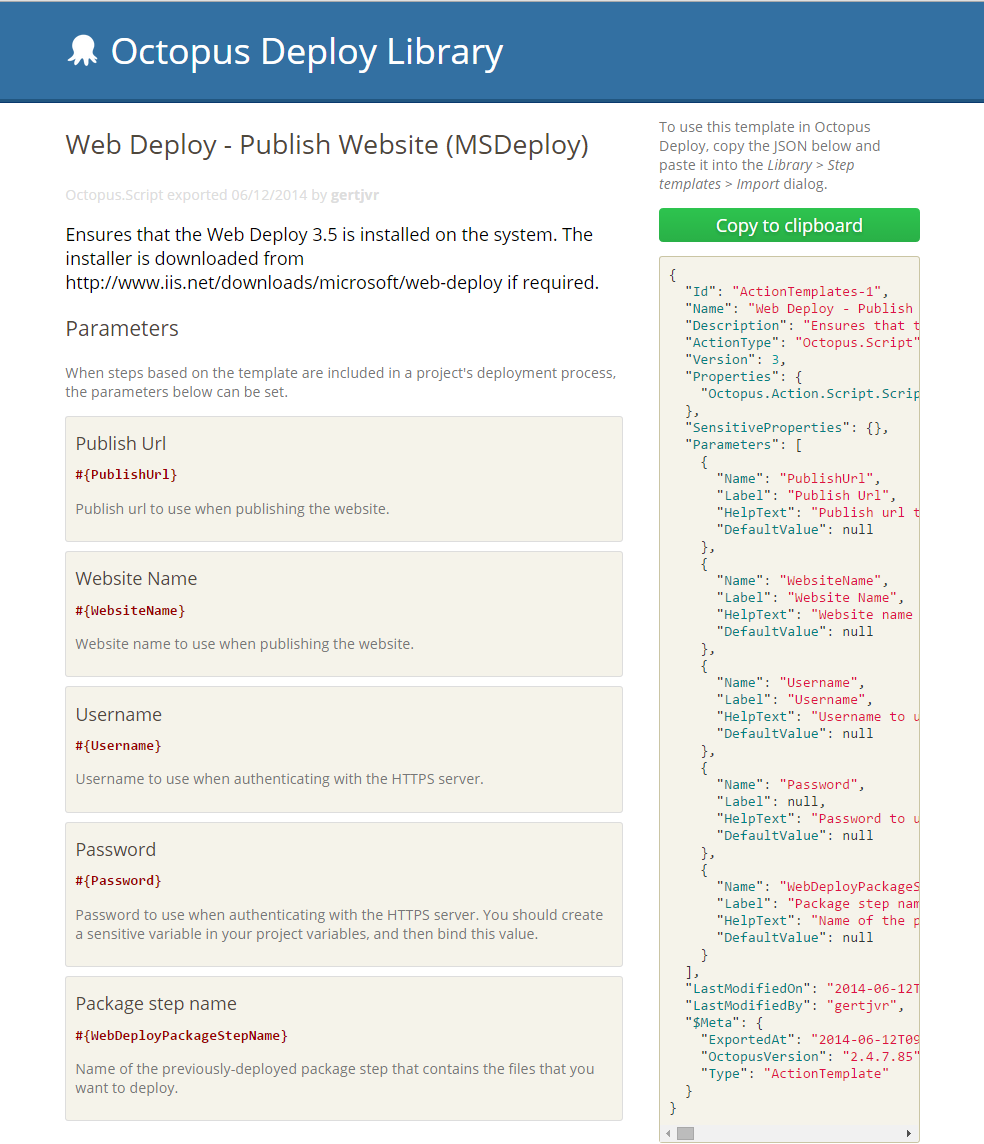
The first thing we need to do, now that we have our web site packaged up into a NuGet package is to import the Web Deploy - Publish Website (MSDeploy) step template from the Octopus Library site.
Get the ‘Web Deploy - Publish Website (MSDeploy)’ step template from the Octopus Library
Once at the Octopus Library site, search for web deploy
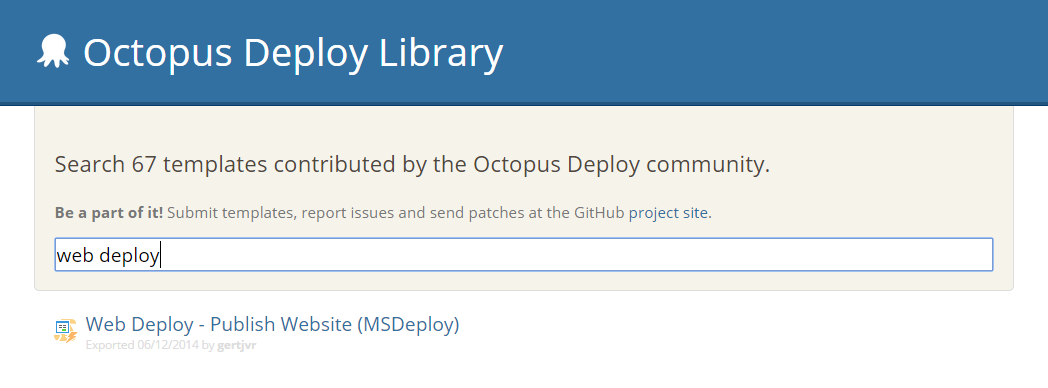
Click the result that is returned and then click the big, green Copy to clipboard button.
Import the step template into Octopus Deploy
Login to your Octopus server and go to Library -> Step Templates. Once on the Step Templates tab, click the Import link

This will display the Import dialog, paste the Web Deploy step template you copied from the Octopus Library site in the text area provided.
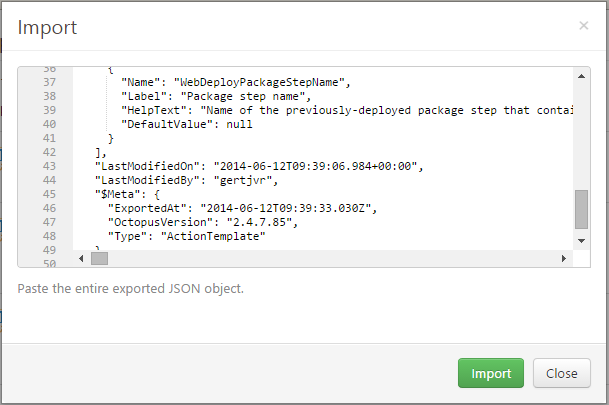
Click the Import button and the step template will be imported
Great, now we’re ready to setup our Project and Deployment process to start deploying our ASP.NET MVC application to Azure Web Sites.
Setting up your Project in Octopus Deploy
The next thing to do is to setup our new Project and define the Deployment Process that we will use to get our ASP.NET MVC application deployed to our Azure Web Site.
Create our Project
Go to Projects -> All Projects, then click the Add Project button on the Project Group where you want your project to go.

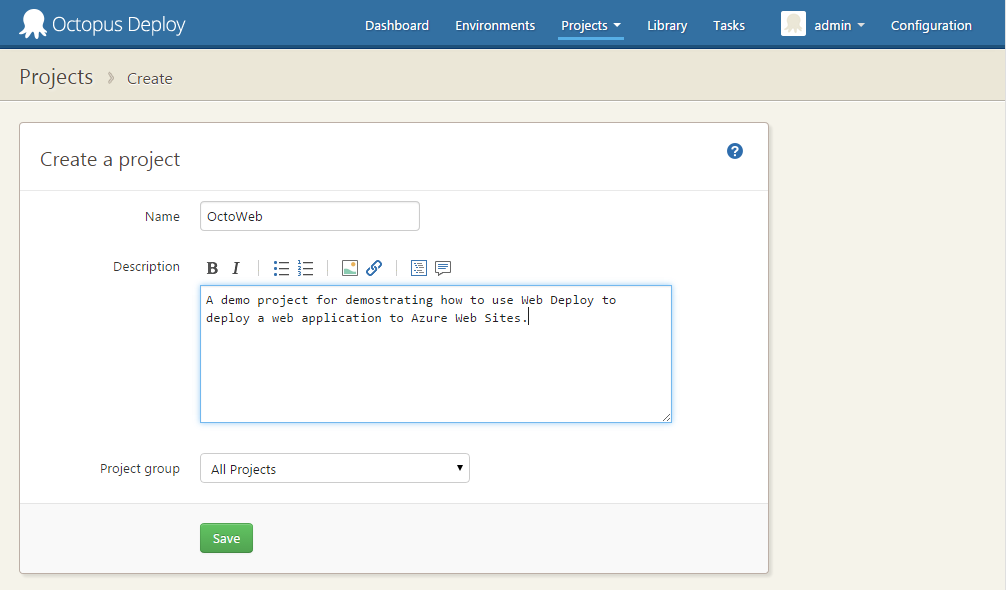
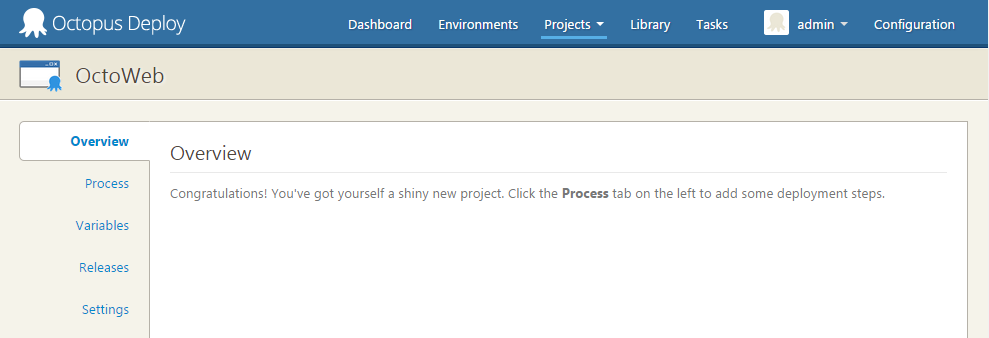
Congratulations, you’ve got yourself a shiny new project!
Define your Project variables
To make it easy to setup your project to deploy multiple environments, we will create project variables that can be scoped to environments, roles and machines.
Open the Variables tab on the project site, then add variables for website name, publish URL, user name and password. We will make the password variable a Sensitive Variable so that we can keep it secret.
Open up the Publish Profile file that you downloaded earlier on, and grab the publishUrl, msdeploySite, userName and userPWD from the publish profile for Web Deploy (e.g. <publishProfile profileName="octowebdemo - Web Deploy">) then fill in the values in the appropriate variable. Then click Save.
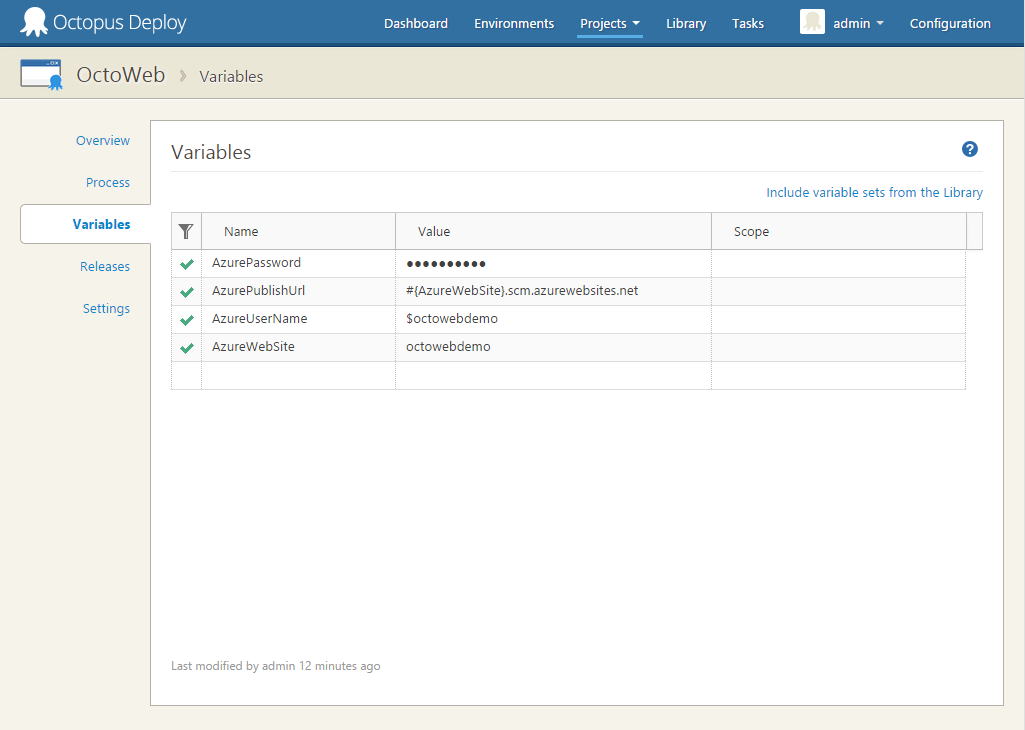
For this demo, I won’t scope the variables as I will only have one environment, one machine and one role.
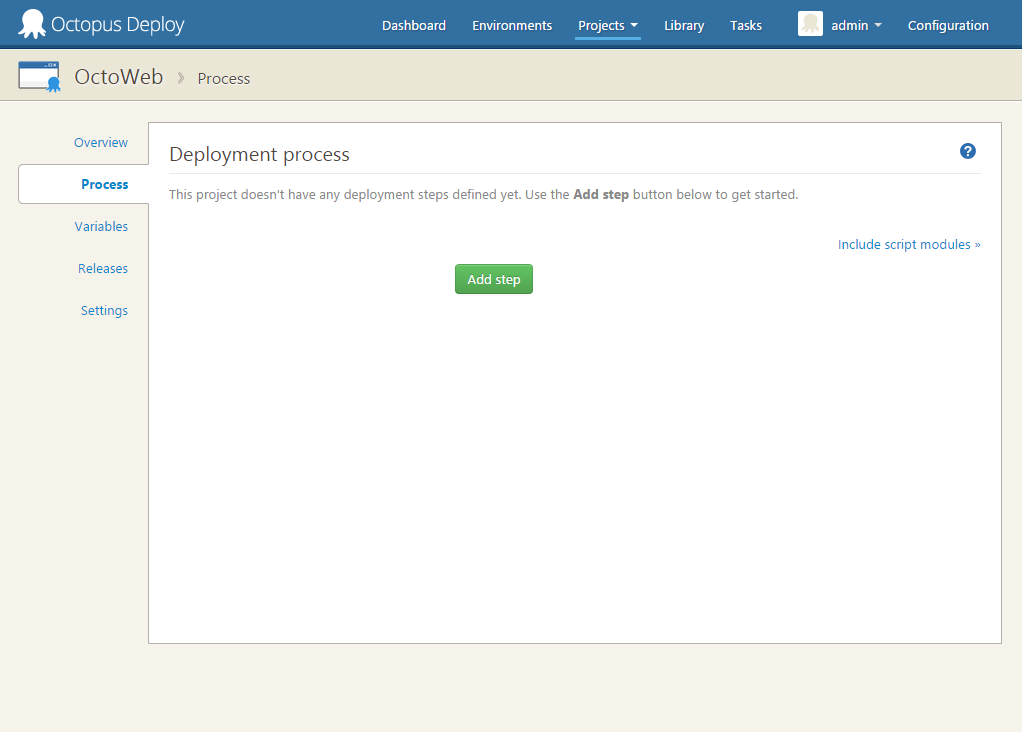
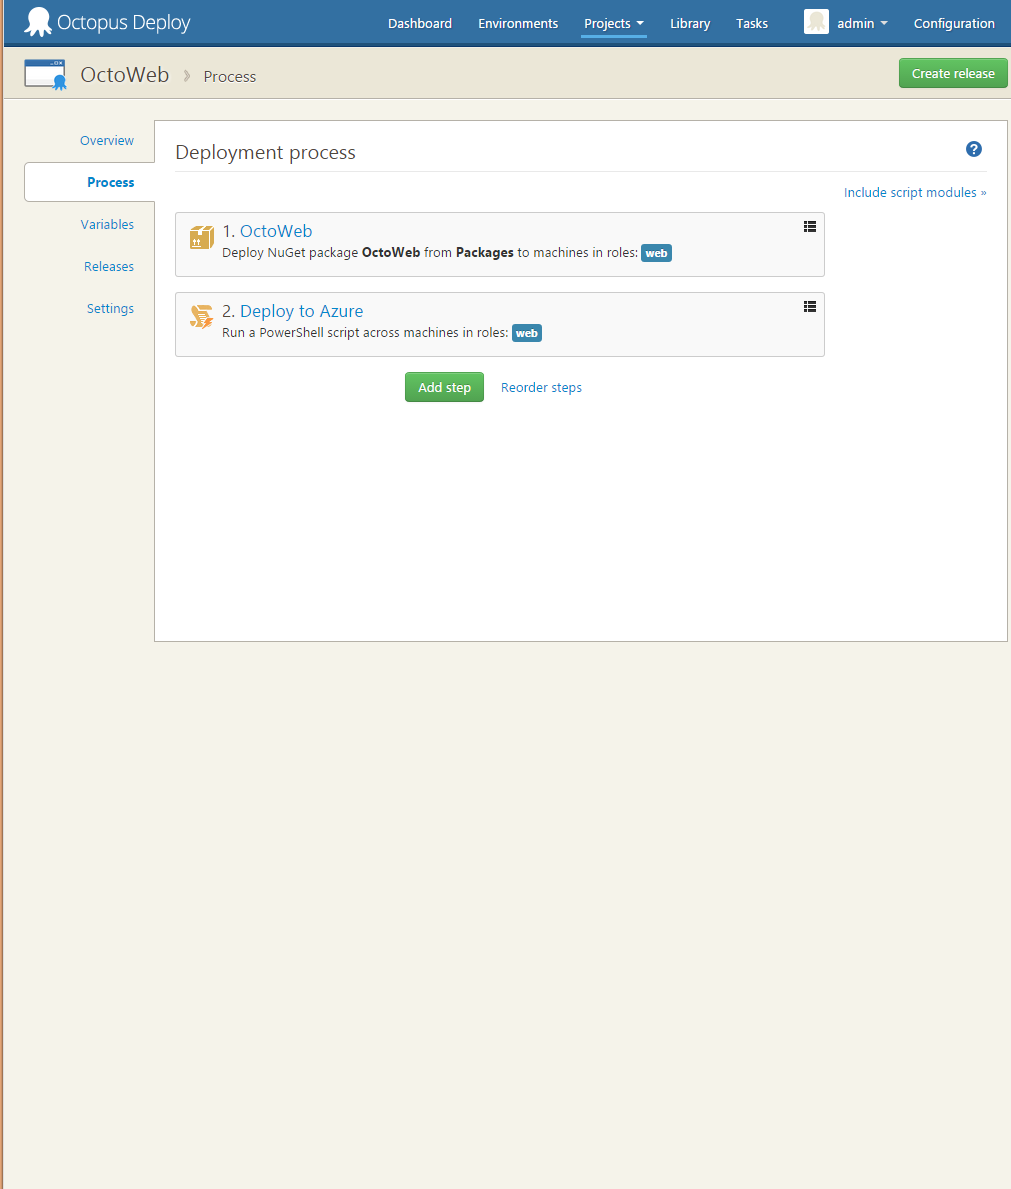
Define your deployment process
Alright, now we’re down to the business end of this whole process.
Now we get to specify the deployment process for our project, it will consist of two steps, a NuGet package step and our imported PowerShell step for Web Deploy.
Optionally You can add another step to ‘warm-up’ the website once it’s been deployed. It just so happens that on the Library site, we have a step template for just that. Search for Test URL and import the step template that is returned.
Open the Process tab on the Project page.
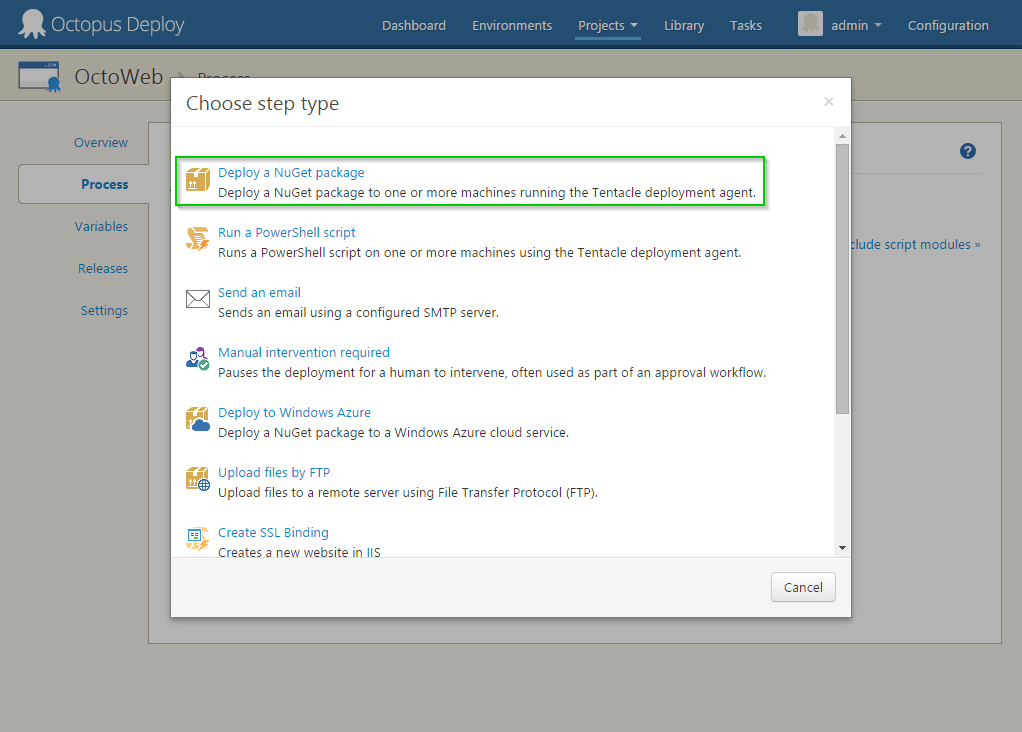
Add the ‘Deploy a NuGet package’ step
Click the Add Step button.
Select the Deploy a NuGet package step.
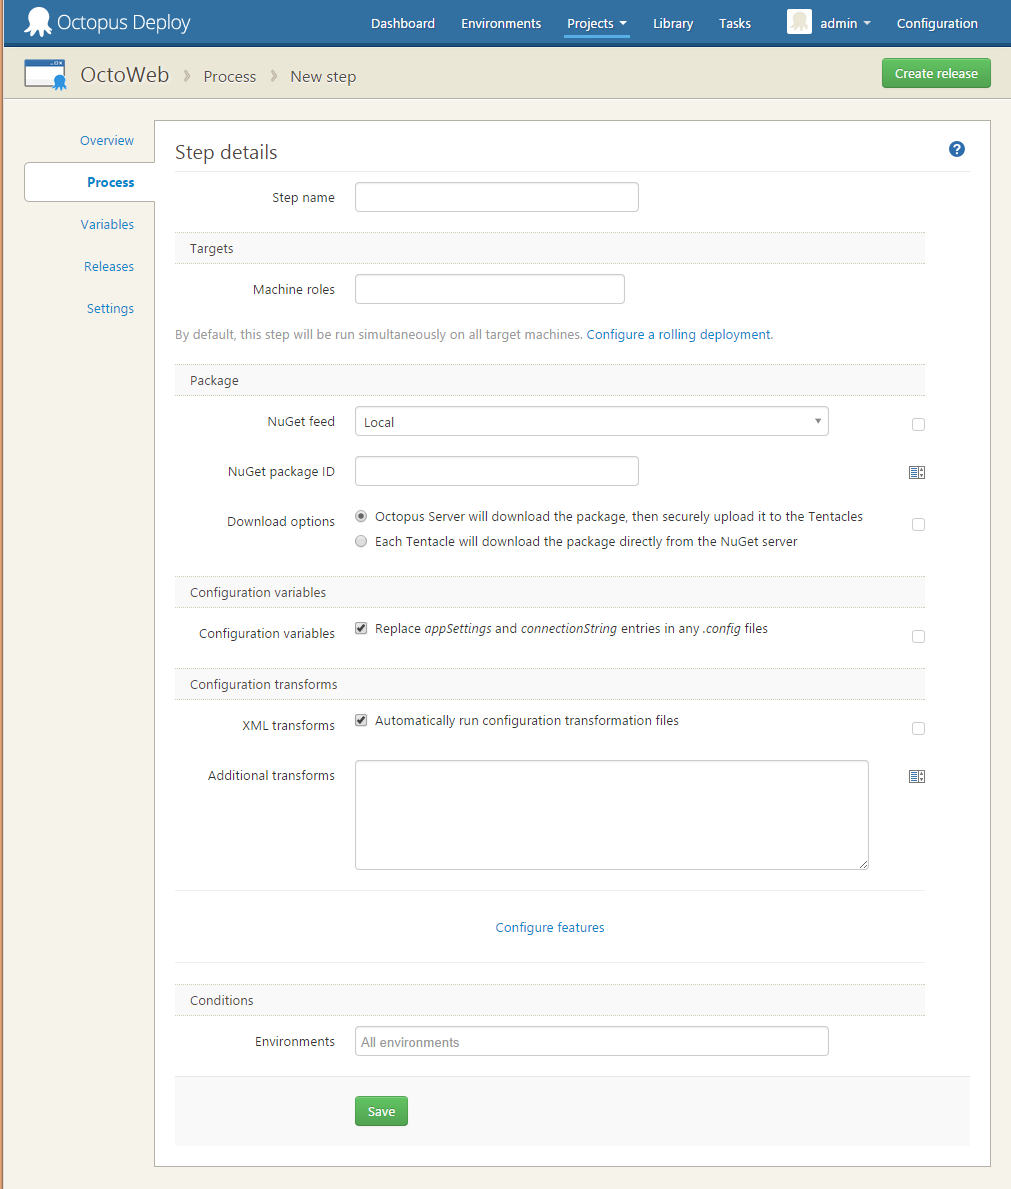
Fill in the necessary details, specifying your web applications NuGet package from the NuGet feed where it has been published (in my case a local folder on disk).
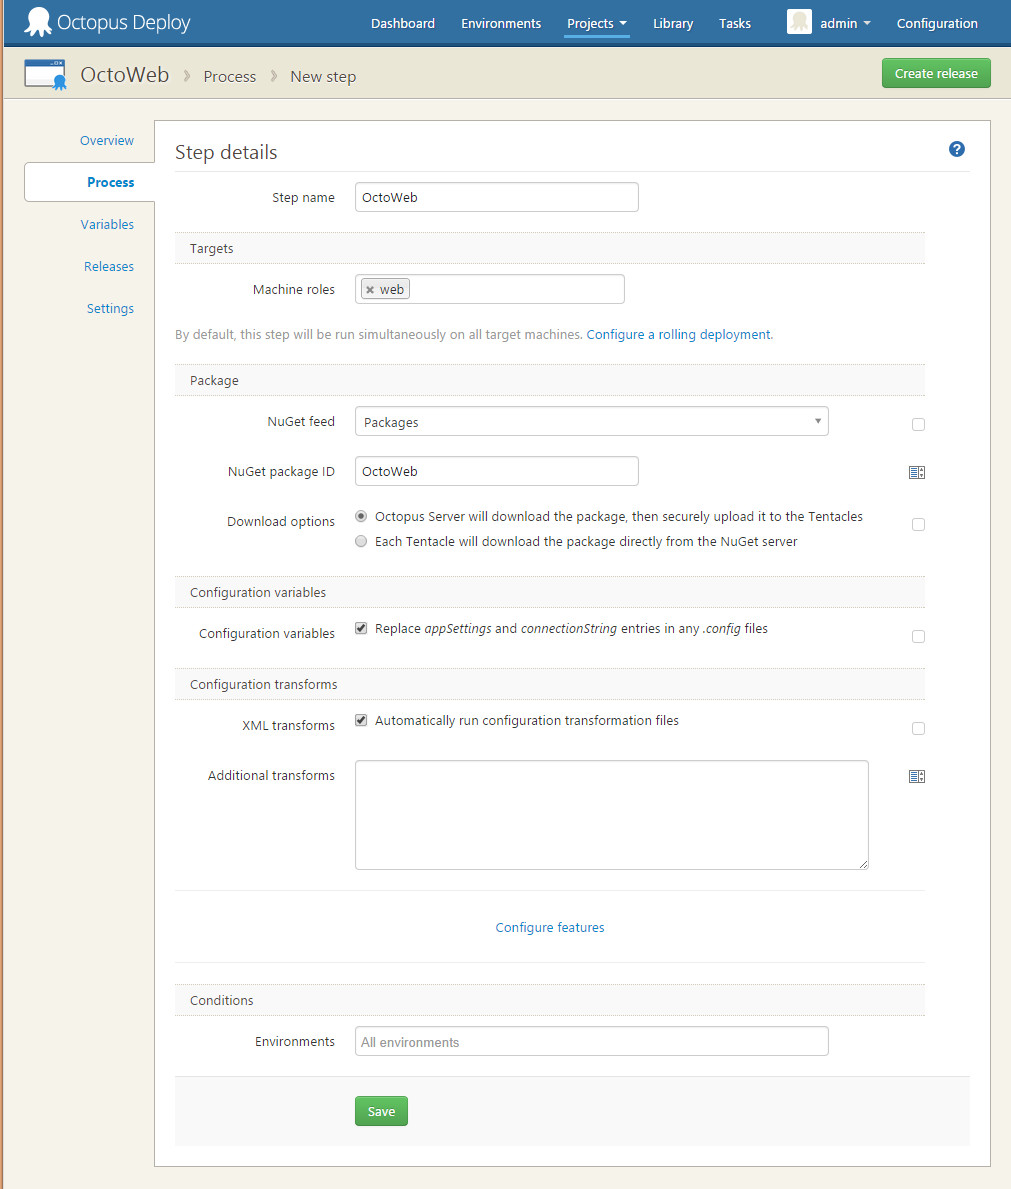
Click Save
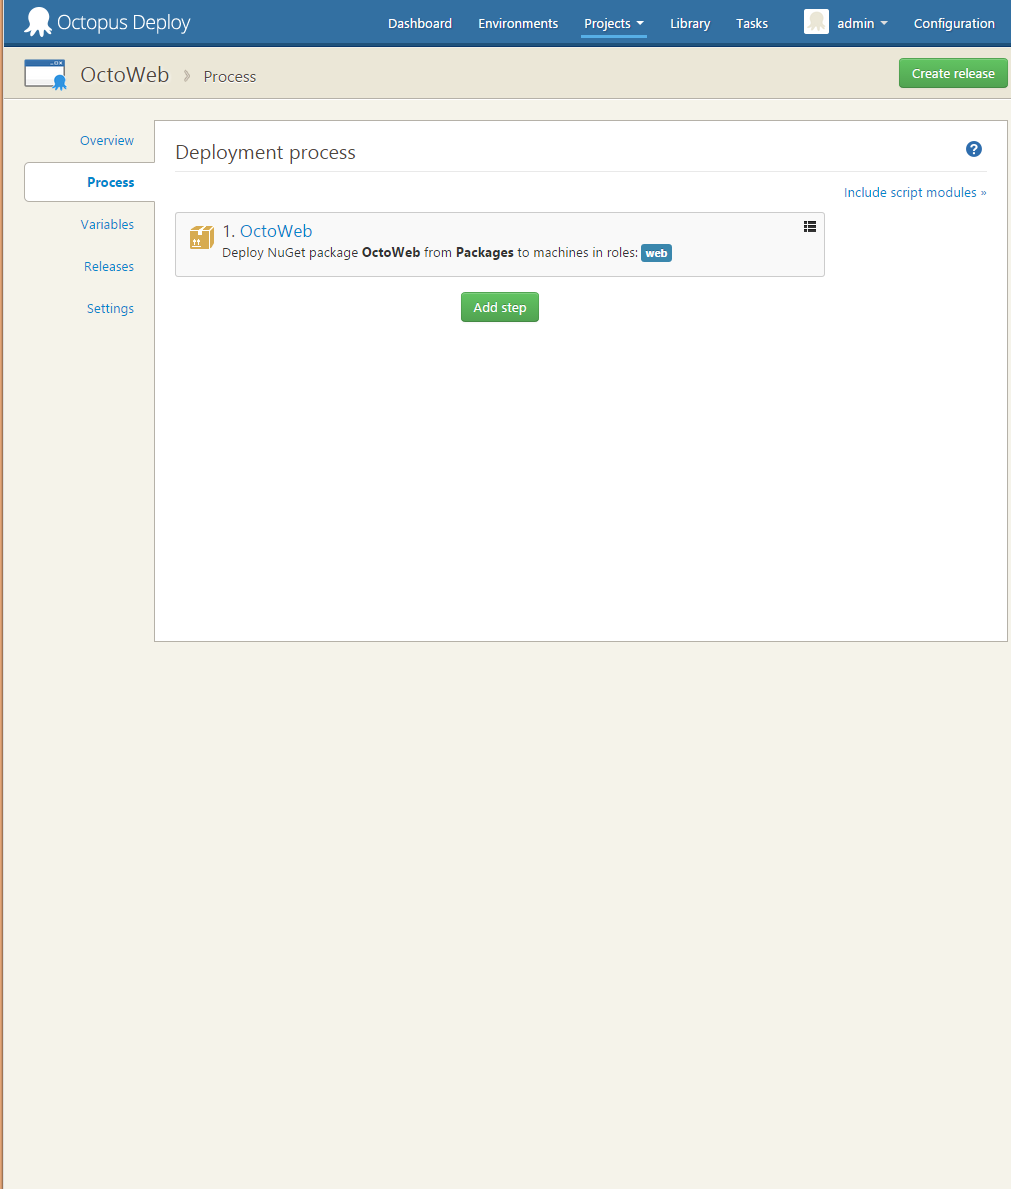
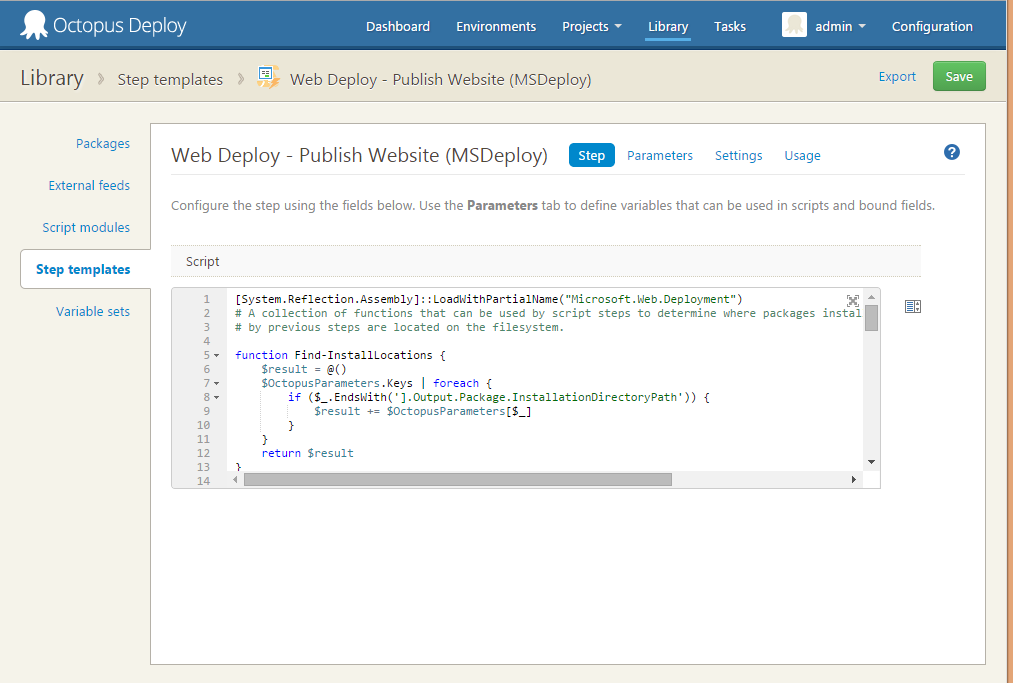
Add the ‘Web Deploy - Publish Website (MSDeploy)’ step
Now it’s time to add our Web Deploy step, click the Add Step button again and select the Web Deploy - Publish Website (MSDeploy)

Fill in the necessary details, using variable bindings to specify the Azure specific details.

The Package Step Name required is the name of the step that has extracted the files that are contained in your NuGet package, this is used to locate the files on disk that needs to be uploaded to your Azure Web Site.
Click Save
That’s it, we’re now ready to create a release and deploy it to Azure.
Create a release
To create a release, click the Create Release button at the top of the Project page.

On the release page, you can choose to specify a different version number to what Octopus Deploy will pre-populate for you (based on the Project setting you have chosen), what version of the NuGet package for your web application to use (I only have 1, so I will use that) and any release notes that should be included with the release.
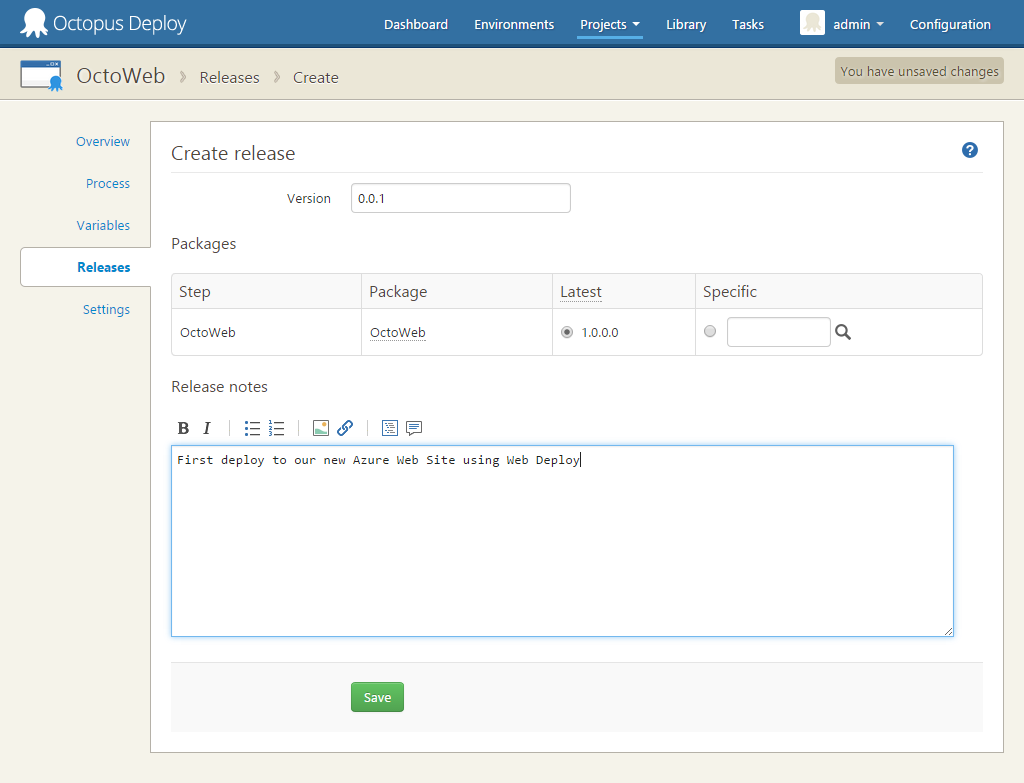
Click Save. This will take you to the Release Overview page.
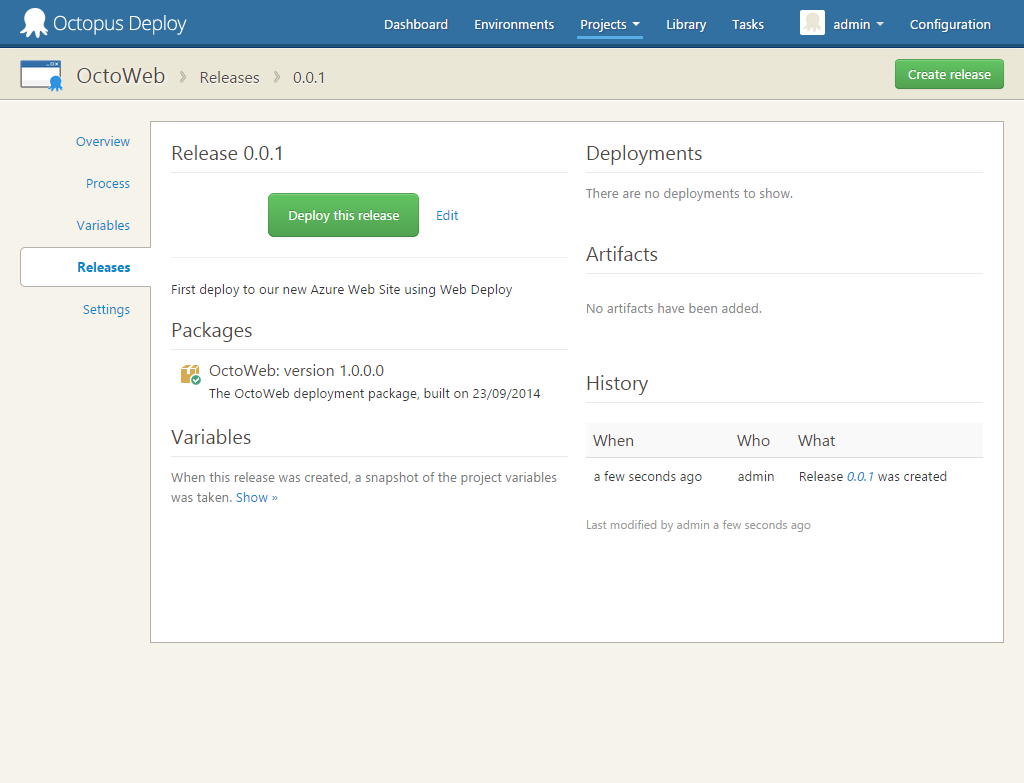
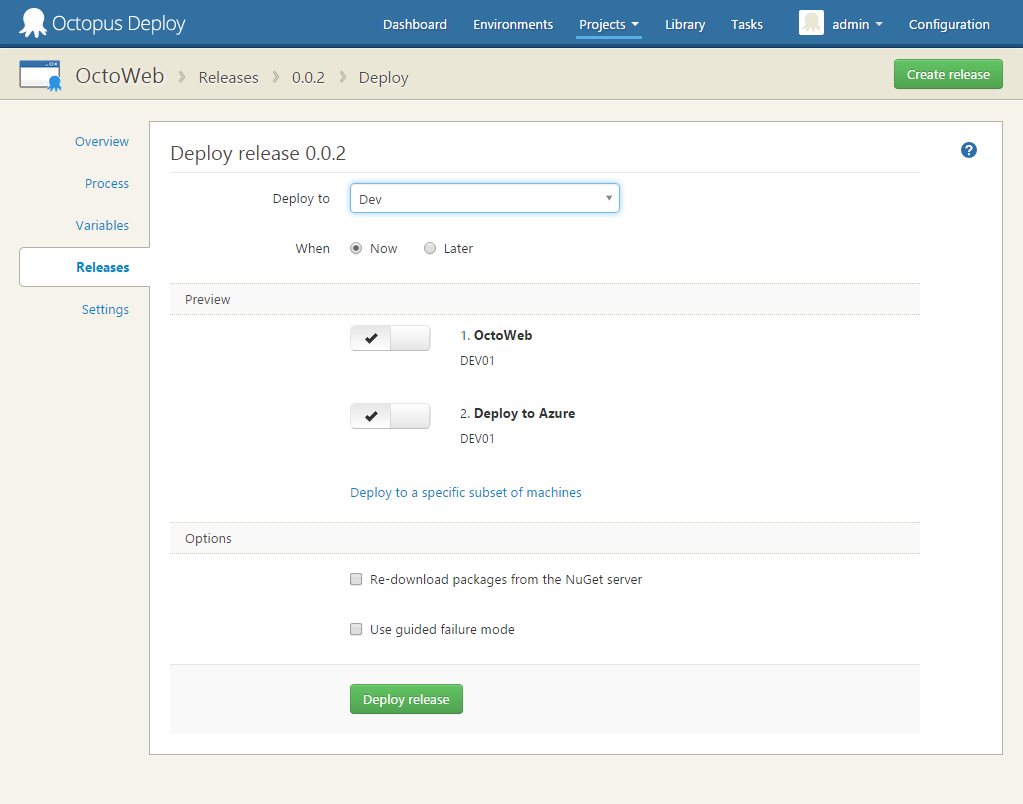
Now we want to deploy this release to our Azure Web Site, so click the Deploy this release button. Select the environment to deploy to. In my case, I only have my Dev environment setup so I will choose this.
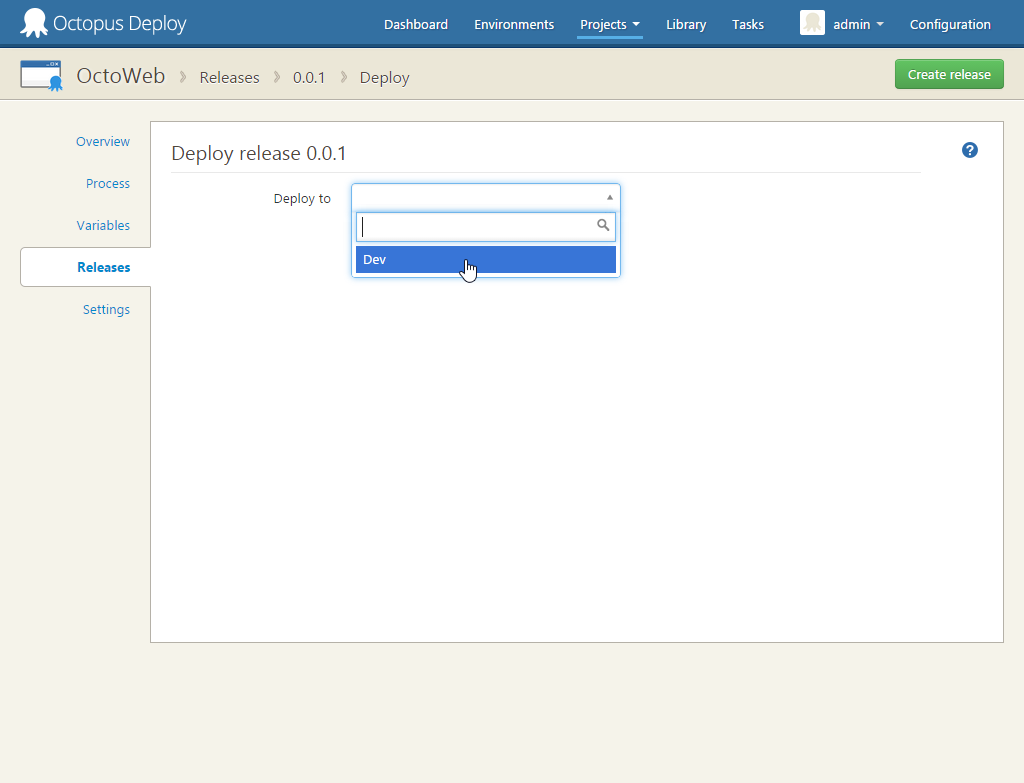
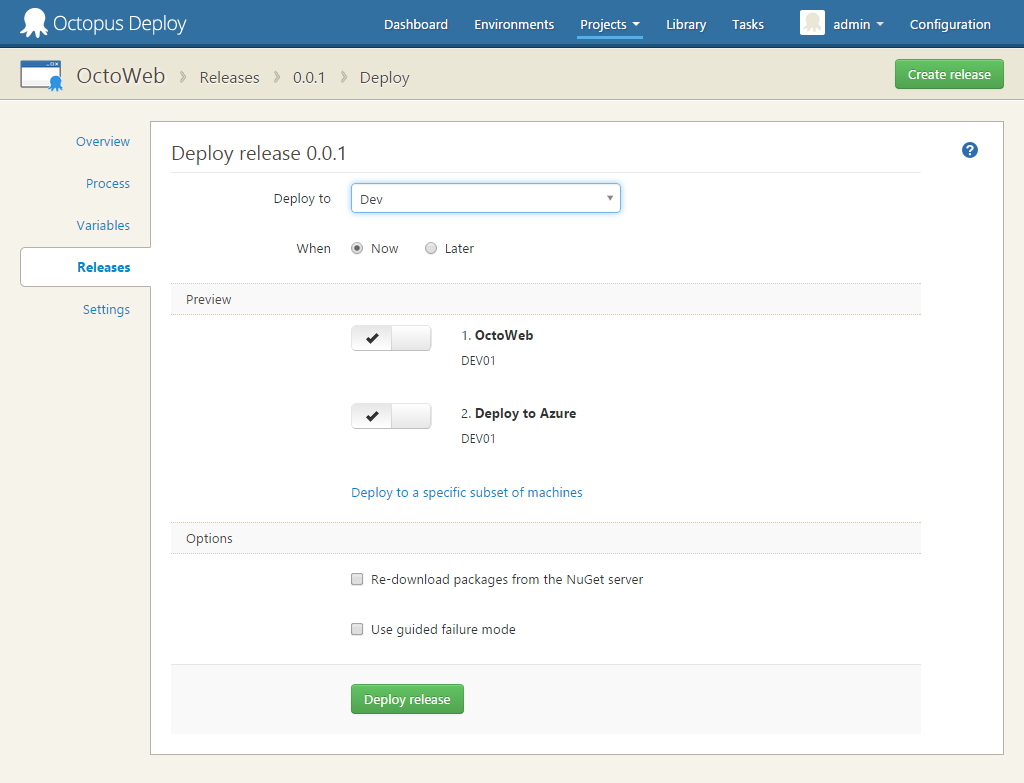
On the deployment page, you can choose to schedule the release for a later date/time, and which steps to deploy (and to what machines).
I will stick with the defaults and just click the Deploy Release button.
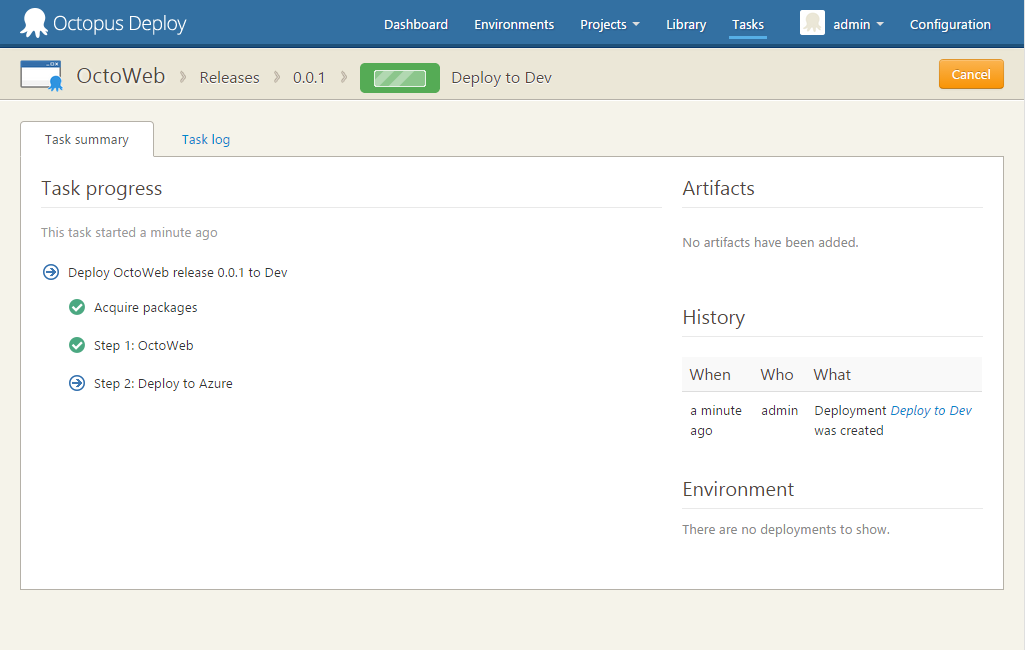
Once the deploy has completed, open a browser and browser to the URL of your web application running in Azure.
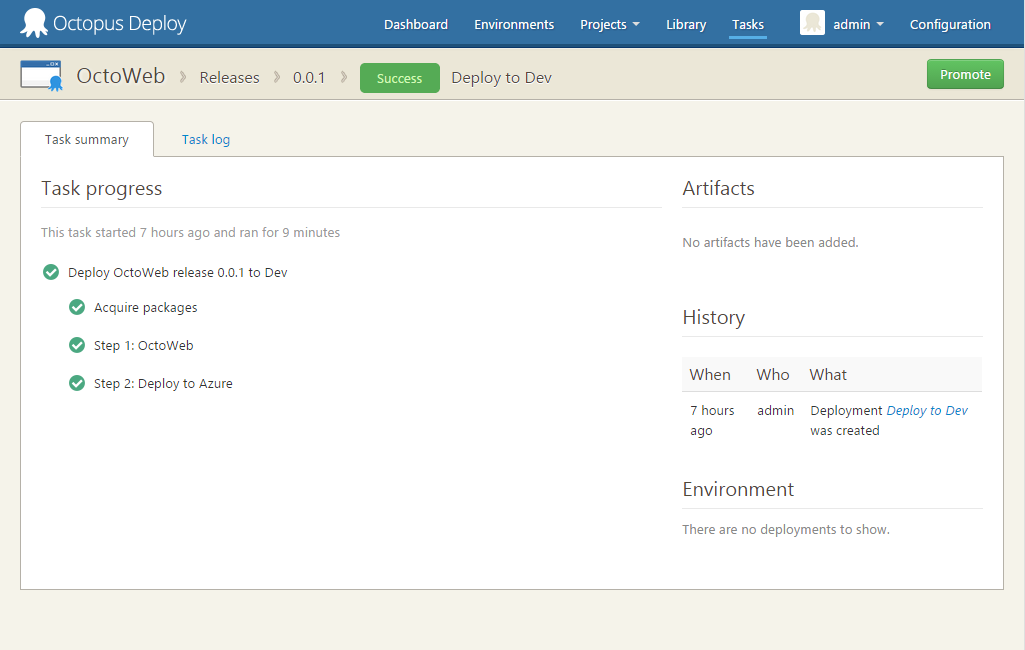

Congratulations, you have just deployed your Azure Web Site from Octopus Deploy using Web Deploy!
Updating and redeploying the application to Azure
Now that we have our application deploying to Azure from Octopus, lets make some modifications to the application and then deploy the new version to Azure.
I will update the application name, and some of the colors used.
Recreate your NuGet package
When recreating the NuGet package from the command line, instead of using the version stored in the [assembly: AssemblyVersion] in the AssemblyInfo.cs file, I will override this by passing the OctoPackPackageVersion parameter to MSBuild.
C:\Code\OctoWeb\OctoWeb>msbuild OctoWeb.sln /t:build /p:RunOctoPack=true /p:OctoPackPackageVersion=1.0.0.1The end result should look similar to the below
  OctoPack: Attempting to build package from 'OctoWeb.nuspec'.
  OctoPack: Successfully created package 'C:\Code\OctoWeb\OctoWeb\OctoWeb\obj\octopacked\OctoWeb.1.0.0.1.nupkg'.
Copy the new NuGet package to the location where Octopus can access it.
Create a new release in Octopus Deploy
In Octopus, go back to the Releases tab and click Create Release. Octopus should now pick up the latest package (v1.0.0.1).
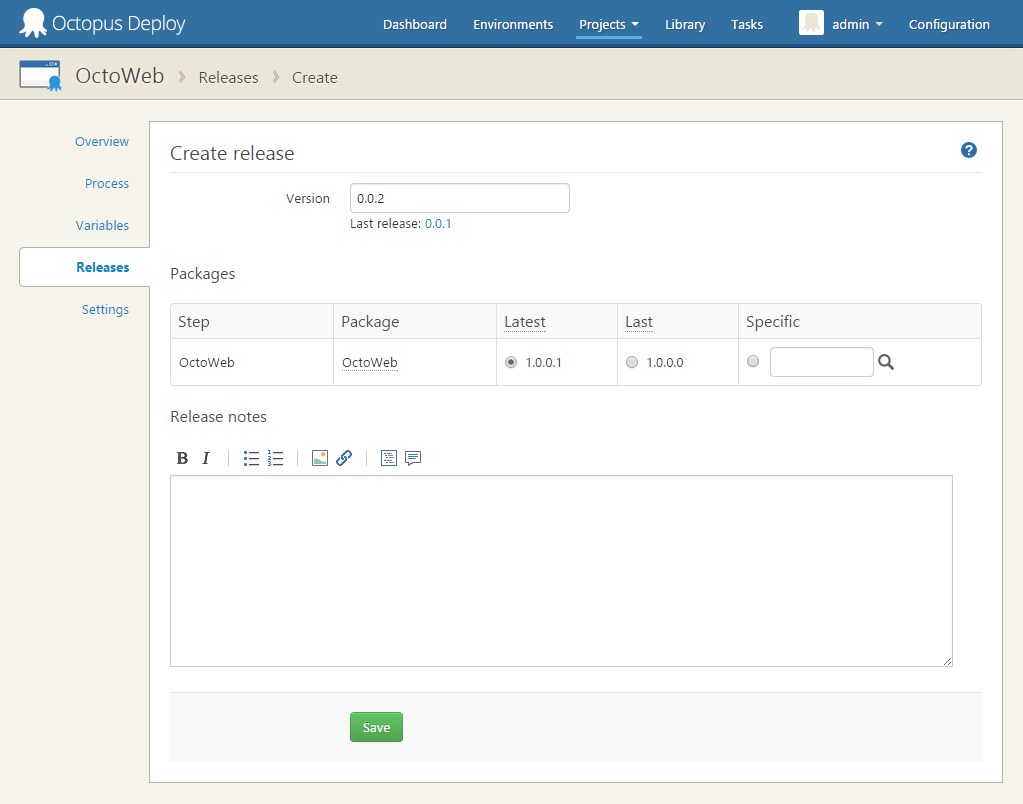
Click Save.
Deploy latest version to Azure Web Sites
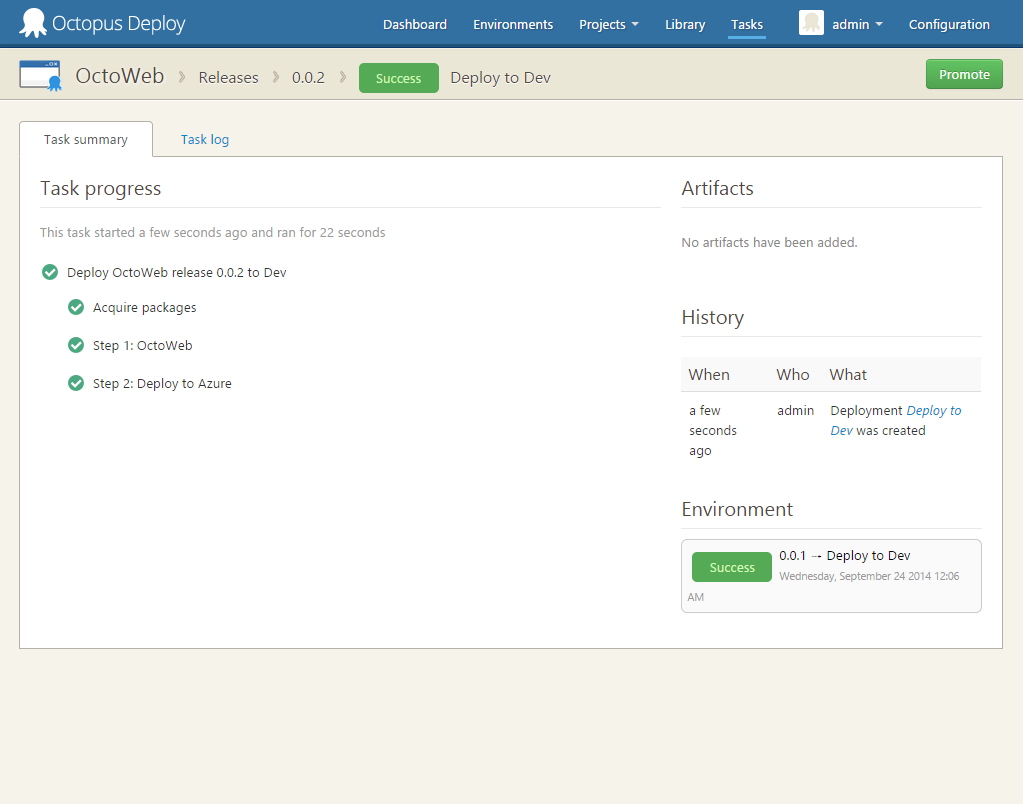
All that is left now is to deploy the new release (0.0.2) to Azure.
Click Deploy this release, pick the environment to deploy to and finally click Deploy Release.
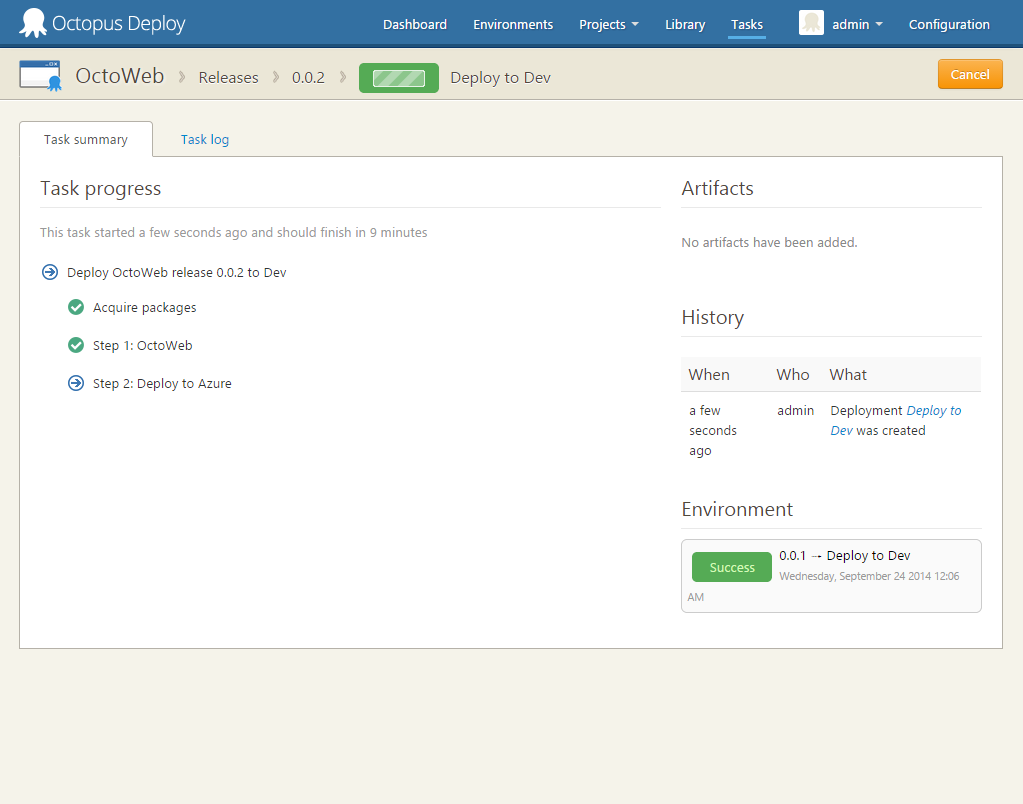
This deploy should be much faster than the initial deploy as it will only upload files that have been changed. And once deploy has finished, the Azure Web Site should be updated with the changes that were made.