
Managing Kubernetes from the command-line can be cumbersome and tedious, especially when you have multiple clusters to manage. To ease this burden, tools have been developed to easily create and manage Kubernetes clusters. Rancher is one example. In this post, I show you how to add your Kubernetes cluster, that is managed by Rancher, to Octopus Deploy as a deployment target you can deploy to.
Getting started with Rancher
Rancher is unique, in that you install it anywhere. Rancher runs within a Docker container and can run anywhere that Docker is installed. This is all you need to get started:
sudo docker run -d --restart=unless-stopped -p 80:80 -p 443:443 rancher/rancherThere are, of course, more advanced installations with high availability and a range of other options, but for testing Rancher, that’s all you need.
When the container is up and running, connect to it with a browser and set the admin password. After setting the password, you’re ready to create a cluster.
Creating clusters
Rancher can work with:
- on-premises infrastructure
- Cloud infrastructure providers:
- Amazon EC2
- Azure
- Digital Ocean
- Linode
- vShere
- Cloud Kubernetes services:
- Amazon Elastic Kubernetes Service (EKS)
- Azure Kubernetes Service (AKS)
- Google Kubernetes Engine (GKE)
For this post, I created two Kubernetes (K8s) clusters to demonstrate the versatility of using Rancher with Octopus Deploy; one on-premises and one using a Cloud Kubernetes service.
The first cluster
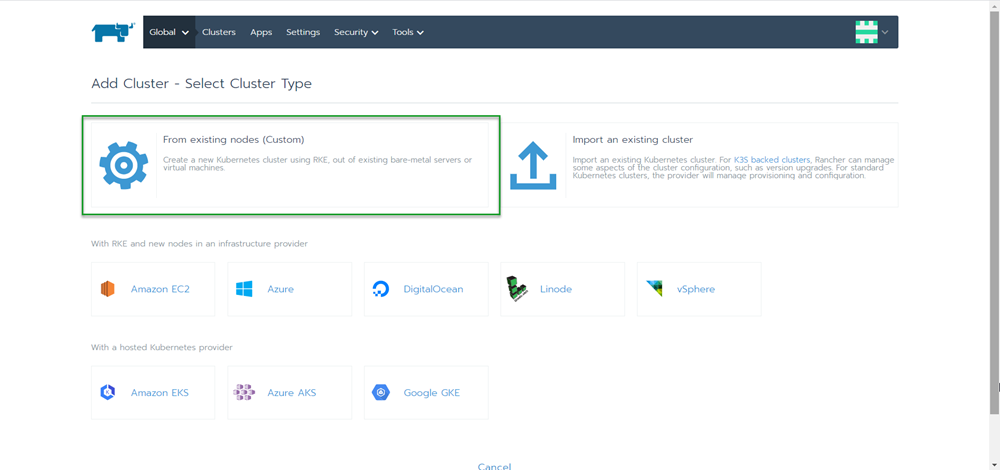
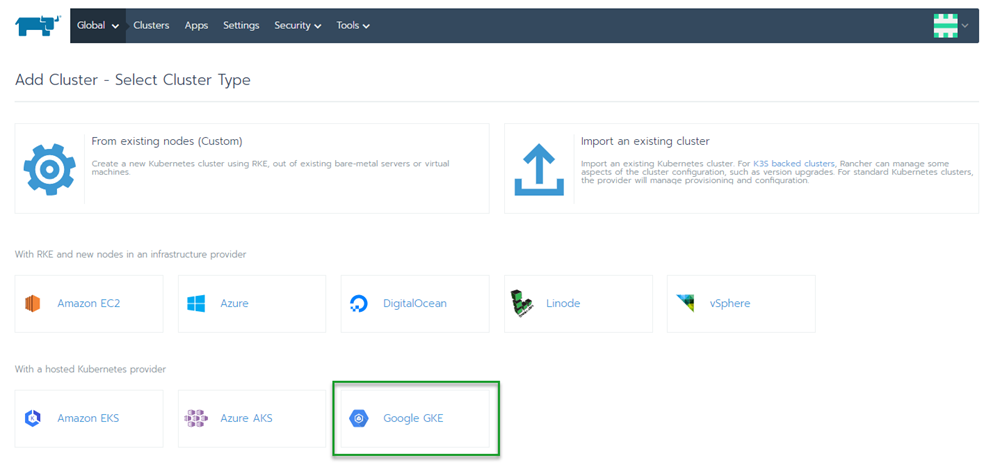
Rancher has made the process of creating a cluster really simple and easy to follow. In the UI, click on Add Cluster.
I created three Ubuntu VMs for my on-premises cluster, so I chose From existing nodes (Custom) for my first cluster:
I gave the cluster a name on the next screen, accepted the defaults, then clicked Next.
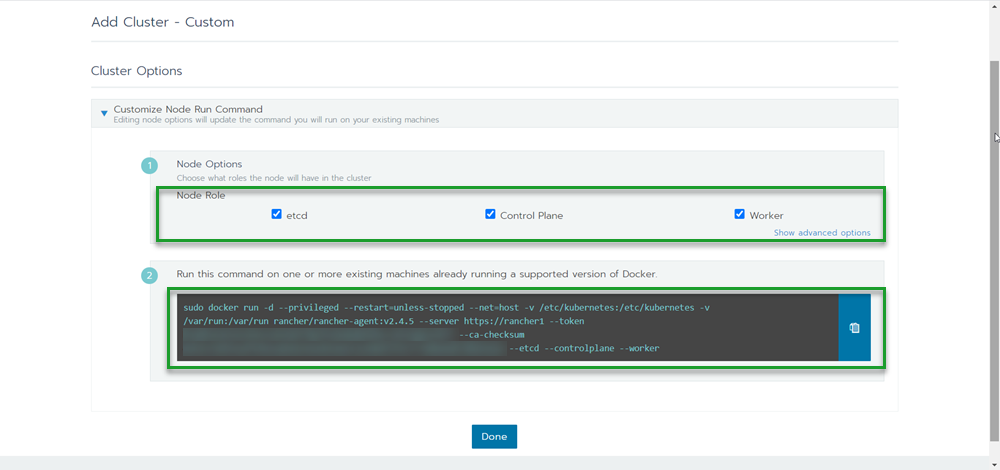
The final screen of the creation process presents us with three check-boxes. Clusters managed by Rancher need to have nodes that serve three roles:
- etcd
- Control Plane
- worker
Checking or unchecking a box updates the command on the screen to run against the members of the cluster. It’s possible to assign a single node with all three roles, but for this post, I chose one role per VM (the image shows all three options selected):
As you run the commands on each node, the screen will show a pop-up indicating how many nodes have been registered to the cluster. When you’ve finished adding nodes, click Done to begin the provisioning process. After the provisioning process has completed, you will have a brand new cluster.
The second cluster
For the second cluster, I chose to use the Cloud Kubernetes Service of GKE:
The creation process for GKE is a bit different than for on-premises:
- Create the Google Service Account with sufficient permissions to create the cluster resources.
- Create a JSON key for the service account, as this is needed for Rancher to authenticate with Google.
- Paste the JSON (or use the Read from a file button), and click Next: Configure Nodes.
Unlike the on-premises setup, creating a cluster on GKE is automated. Using the Service Account, Rancher connects to Google and provisions all the resources for you.
Connect the clusters to Octopus Deploy
Not only does Rancher provide a centralized interface to manage Kubernetes clusters, it also provides a centralized means of communication to the clusters. This means Octopus Deploy can connect to Rancher instead of connecting to the clusters it manages individually.
Authentication
Before we can add our Rancher managed cluster, we must create a means of authenticating to it. This can be accomplished using the Rancher UI to create a key for access.
- Log into Rancher, then click on your Profile in the upper right-hand corner.
- Select API & Keys.
- Click on Add Key.
- Give the API key an expiration and a scope.
- Add a description so you know what this key will be used for, then click Create.
After you click create, you will be shown the API key information. Save this information, as you will not be able to retrieve it later.
Rancher cluster endpoints
You can proxy communication to your clusters through Rancher. Instead of connecting to the individual K8s API endpoints directly, you can use API endpoints within Rancher to issue commands. The format of the URL is: https://<RancherUrl>/k8s/clusters/<ClusterId>.
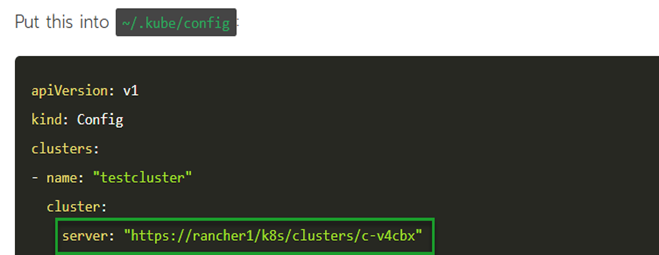
A quick way to find the correct URL is to grab it from the provided Kubeconfig file information. For each cluster you define, Rancher provides a Kubeconfig file that can be downloaded directly from the UI. To find it, select the cluster you need from the Global dashboard, and click the Kubeconfig File button.
The next screen shows the Kubeconfig file which contains the specific URL we need to connect our cluster to Octopus Deploy:
Add the account to Octopus Deploy
For Octopus Deploy to deploy to the cluster, it needs credentials to log in with. In the Octopus Web Portal, navigate to the Infrastructure tab and click Accounts, and we will add the API key token we created in Rancher:
- Click ADD ACCOUNT.
- Select which account type you want to create.
- Enter the values for your selection, then click SAVE.
Now that we’ve created an account, we’re ready to create our Kubernetes targets.
Create a Kubernetes deployment target
With the prep work complete, you can now add your Rancher managed Kubernetes clusters to Octopus Deploy. Adding the target is done in exactly the same way you would add any other Kubernetes target.
- Click {{Infrastructure, Deployment Targets}}.
- Click ADD DEPLOYMENT TARGET.
- Click the KUBERNETES CLUSTER category.
- Then click ADD on the Kubernetes Cluster.
The two most important parts of the Kubernetes deployment target form are:
- Authentication
- Kubernetes Details
Authentication
Select the radio button that corresponds with how you’ve chosen to connect to Rancher. I chose Token.
Kubernetes Details
This is where we use the URL we took from the kubeconfig file in Rancher. For the first cluster, it was https://rancher1/k8s/clusters/c-v4cbx. My cluster is using a self-signed certificate, so I selected Skip TLS verification.
I created three namespaces for my cluster:
- development
- test
- production
Click SAVE and you’re done.
To verify the configuration, you can watch for the initial health check run.
Deploy to the clusters
Deploying to a cluster that is managed through Rancher is the same as deploying to a non-Rancher managed cluster.
To demonstrate, I’ll use the same example process from my Beyond Hello World: Build a real-world Kubernetes CI/CD pipeline post, modified to target the Rancher managed cluster instead.
When I deploy the release, I can see it executed against both the on-premises cluster Rancher-dev and the Google Cloud cluster:
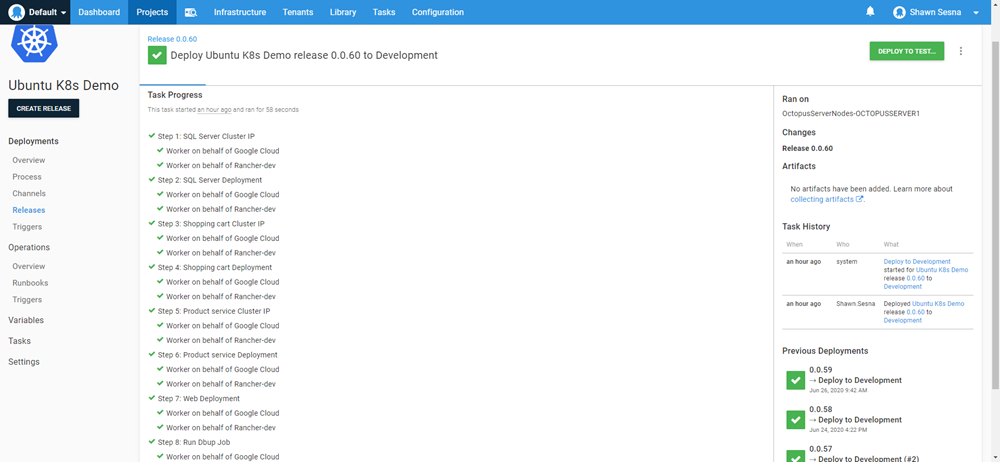
And there you have it, we’ve successfully deployed to Kubernetes clusters managed by Rancher.
Conclusion
In this post, I demonstrated how you can define Kubernetes clusters in Rancher and then integrate Rancher with Octopus Deploy to deploy your projects.
Watch the webinar
Deploying to a Rancher managed Kubernetes cluster with Octopus Deploy
We host webinars regularly. See the webinars page for an archive of past webinars and details about upcoming webinars.
Happy deployments!