
GitHub Actions is a Continuous Integration and Continuous Delivery (CI/CD) tool that uses automated actions to deploy your code. If you store your code in GitHub, GitHub Actions enhances every GitHub repository with CI/CD functionality, making deployments simple.
Many developers want an easy way to get started without the bloat of enterprise tools, and GitHub Actions fits that need.
In this post, I show you how to get started with GitHub Actions, and how to deploy a sample web application to Azure with Octopus.
Before you start
To complete the steps in this post, you need:
- An active Octopus Deploy instance
- A GitHub account
- A Docker Hub account
- An Azure account
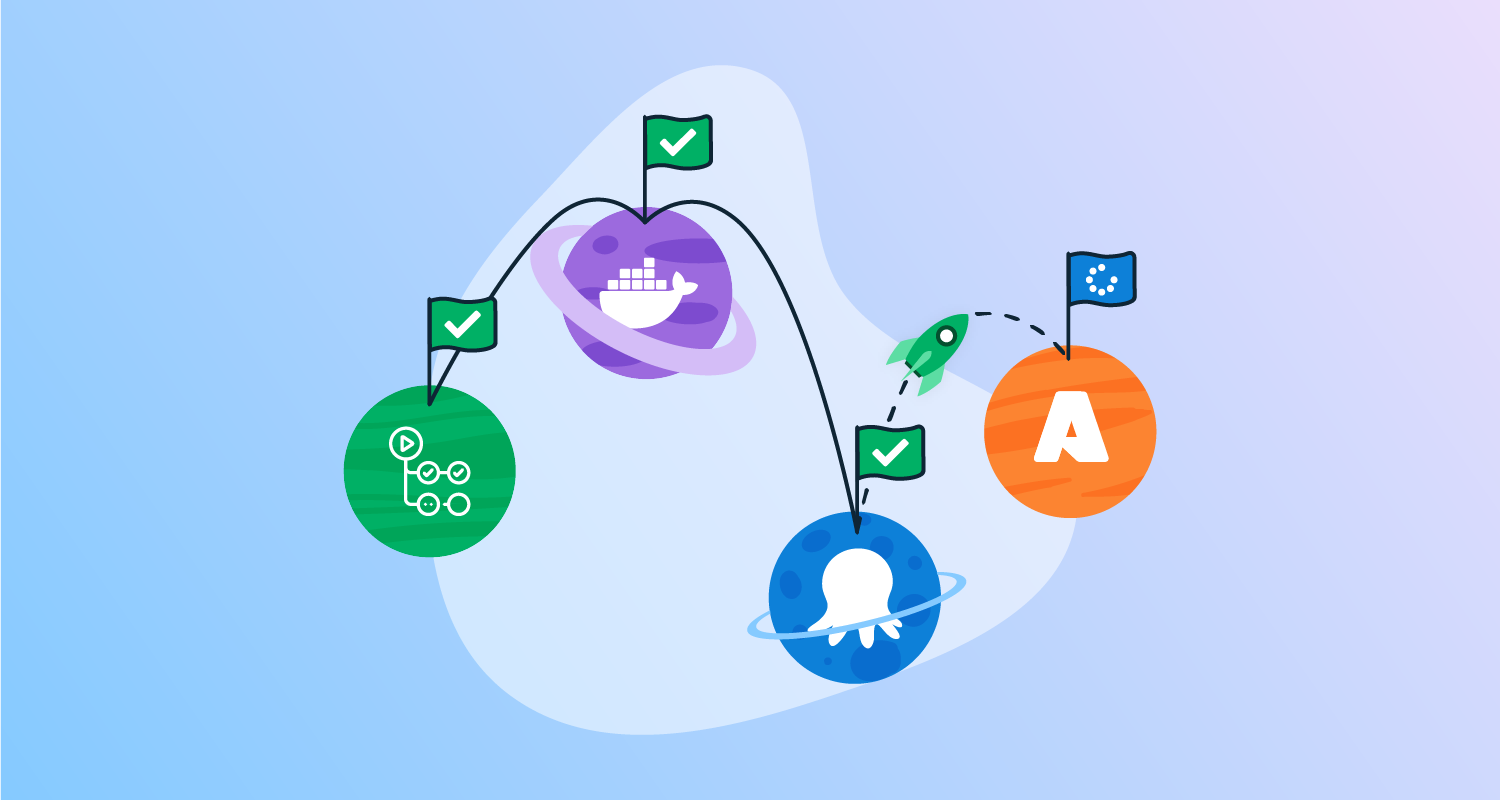
The deployment flow begins with GitHub. GitHub hosts the web application code. GitHub Actions automatically detects changes to the code base, builds the code, and deploys a Docker image to Docker Hub. Octopus Deploy uses this image in an orchestration step to deploy the web application to Azure.
The first step in the process is forking the Random Quotes repository. Random Quotes is a simple web application that generates random historical quotes, to demonstrate GitHub Actions’ functionality.
Next, you need to set up GitHub Actions to automate the build, push and deploy process. To do this, you need to retrieve some credentials from Docker and Octopus.
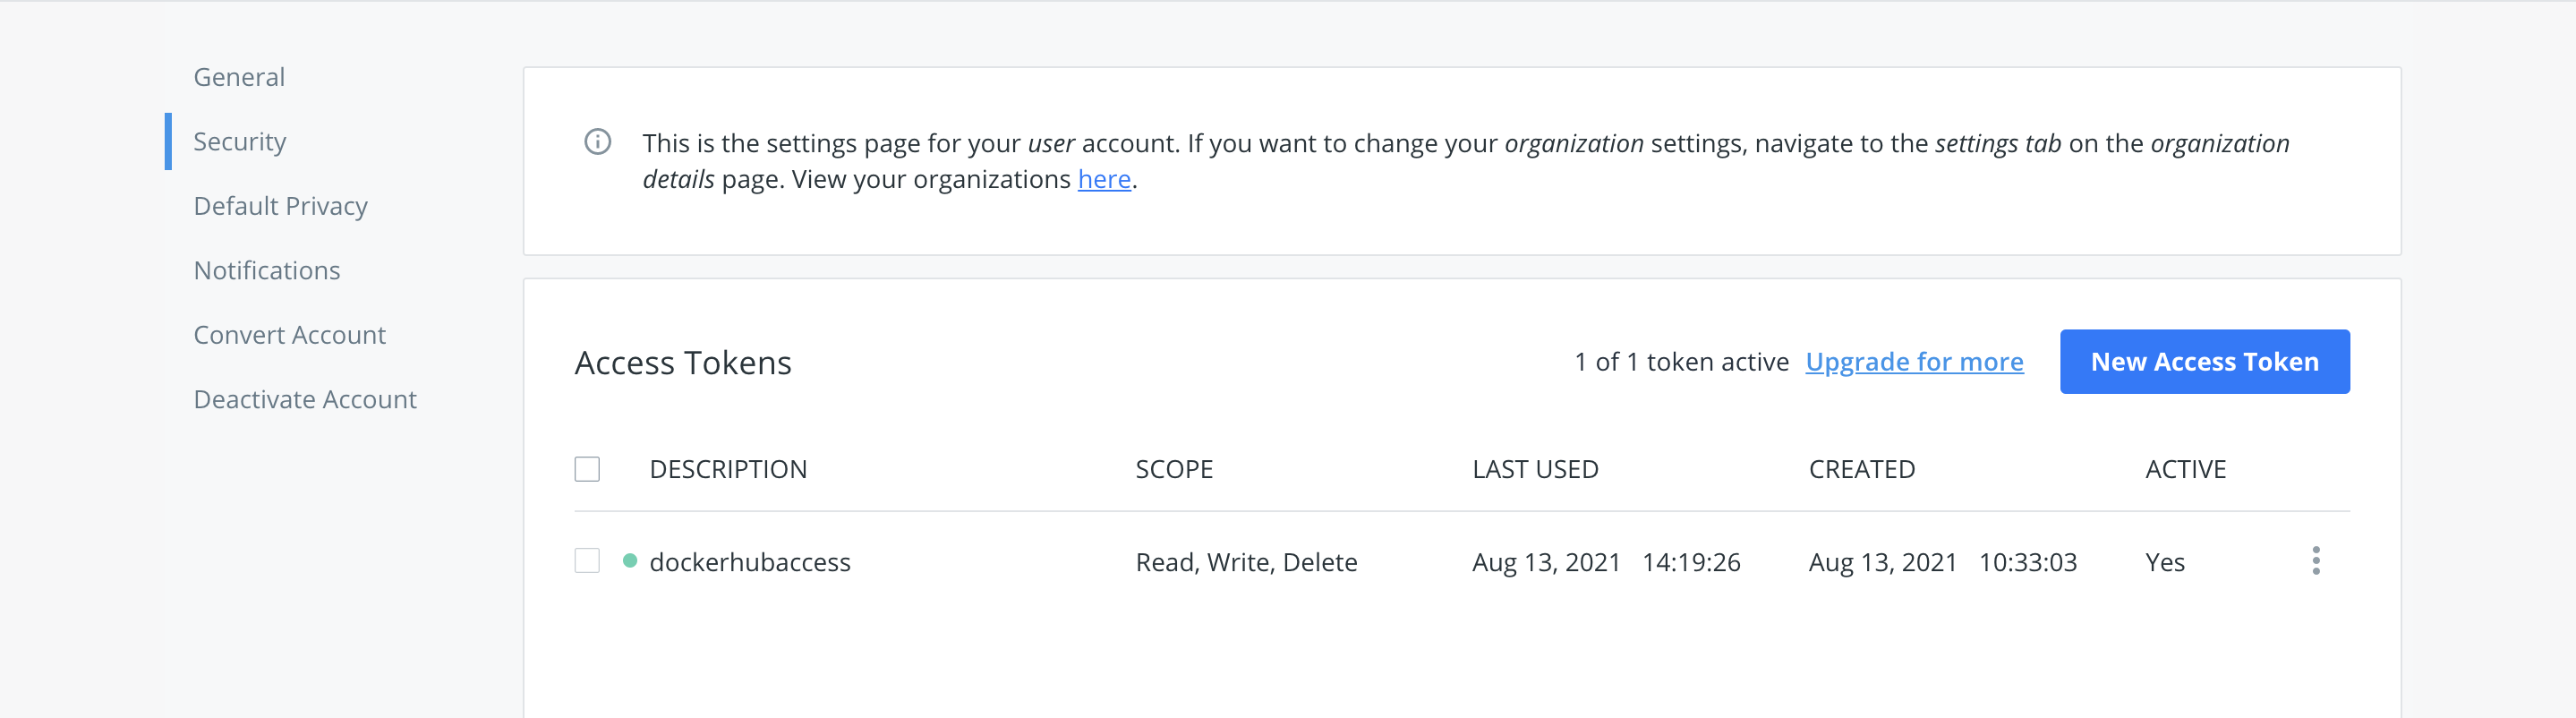
Go to Docker Hub Account, then Account Settings, then Security and create a new access token. Make sure you save this token as you can only view it once.
Go to your Octopus instance, then Profile, then My API keys and create an API key. Save this key value. Take note of your Octopus server URL.

In your forked Random Quotes repository, go to Settings then Secrets, then Actions and add the following repository secrets:
DOCKER_HUB_ACCESS_TOKEN
DOCKER_HUB_USERNAME
OCTOPUS_APIKEY
OCTOPUS_SERVER
Navigate to .GitHub/workflows where you see a node.yml file. This file instructs GitHub on how to deploy the code. Replace the contents of the file with the following code:
name: deploytoazure
on:
push:
branches: [ master ]
jobs:
build:
name: Build
runs-on: ubuntu-latest
steps:
- uses: actions/checkout@v2
- name: Check Out Repo
uses: actions/checkout@v2
- name: Login to Docker Hub
uses: docker/login-action@v1
with:
username: ${{ secrets.DOCKER_HUB_USERNAME }}
password: ${{ secrets.DOCKER_HUB_ACCESS_TOKEN }}
- name: Set up Docker Buildx
id: buildx
uses: docker/setup-buildx-action@v1
- name: Build and push
id: docker_build
uses: docker/build-push-action@v2
with:
context: ./
file: ./Dockerfile
push: true
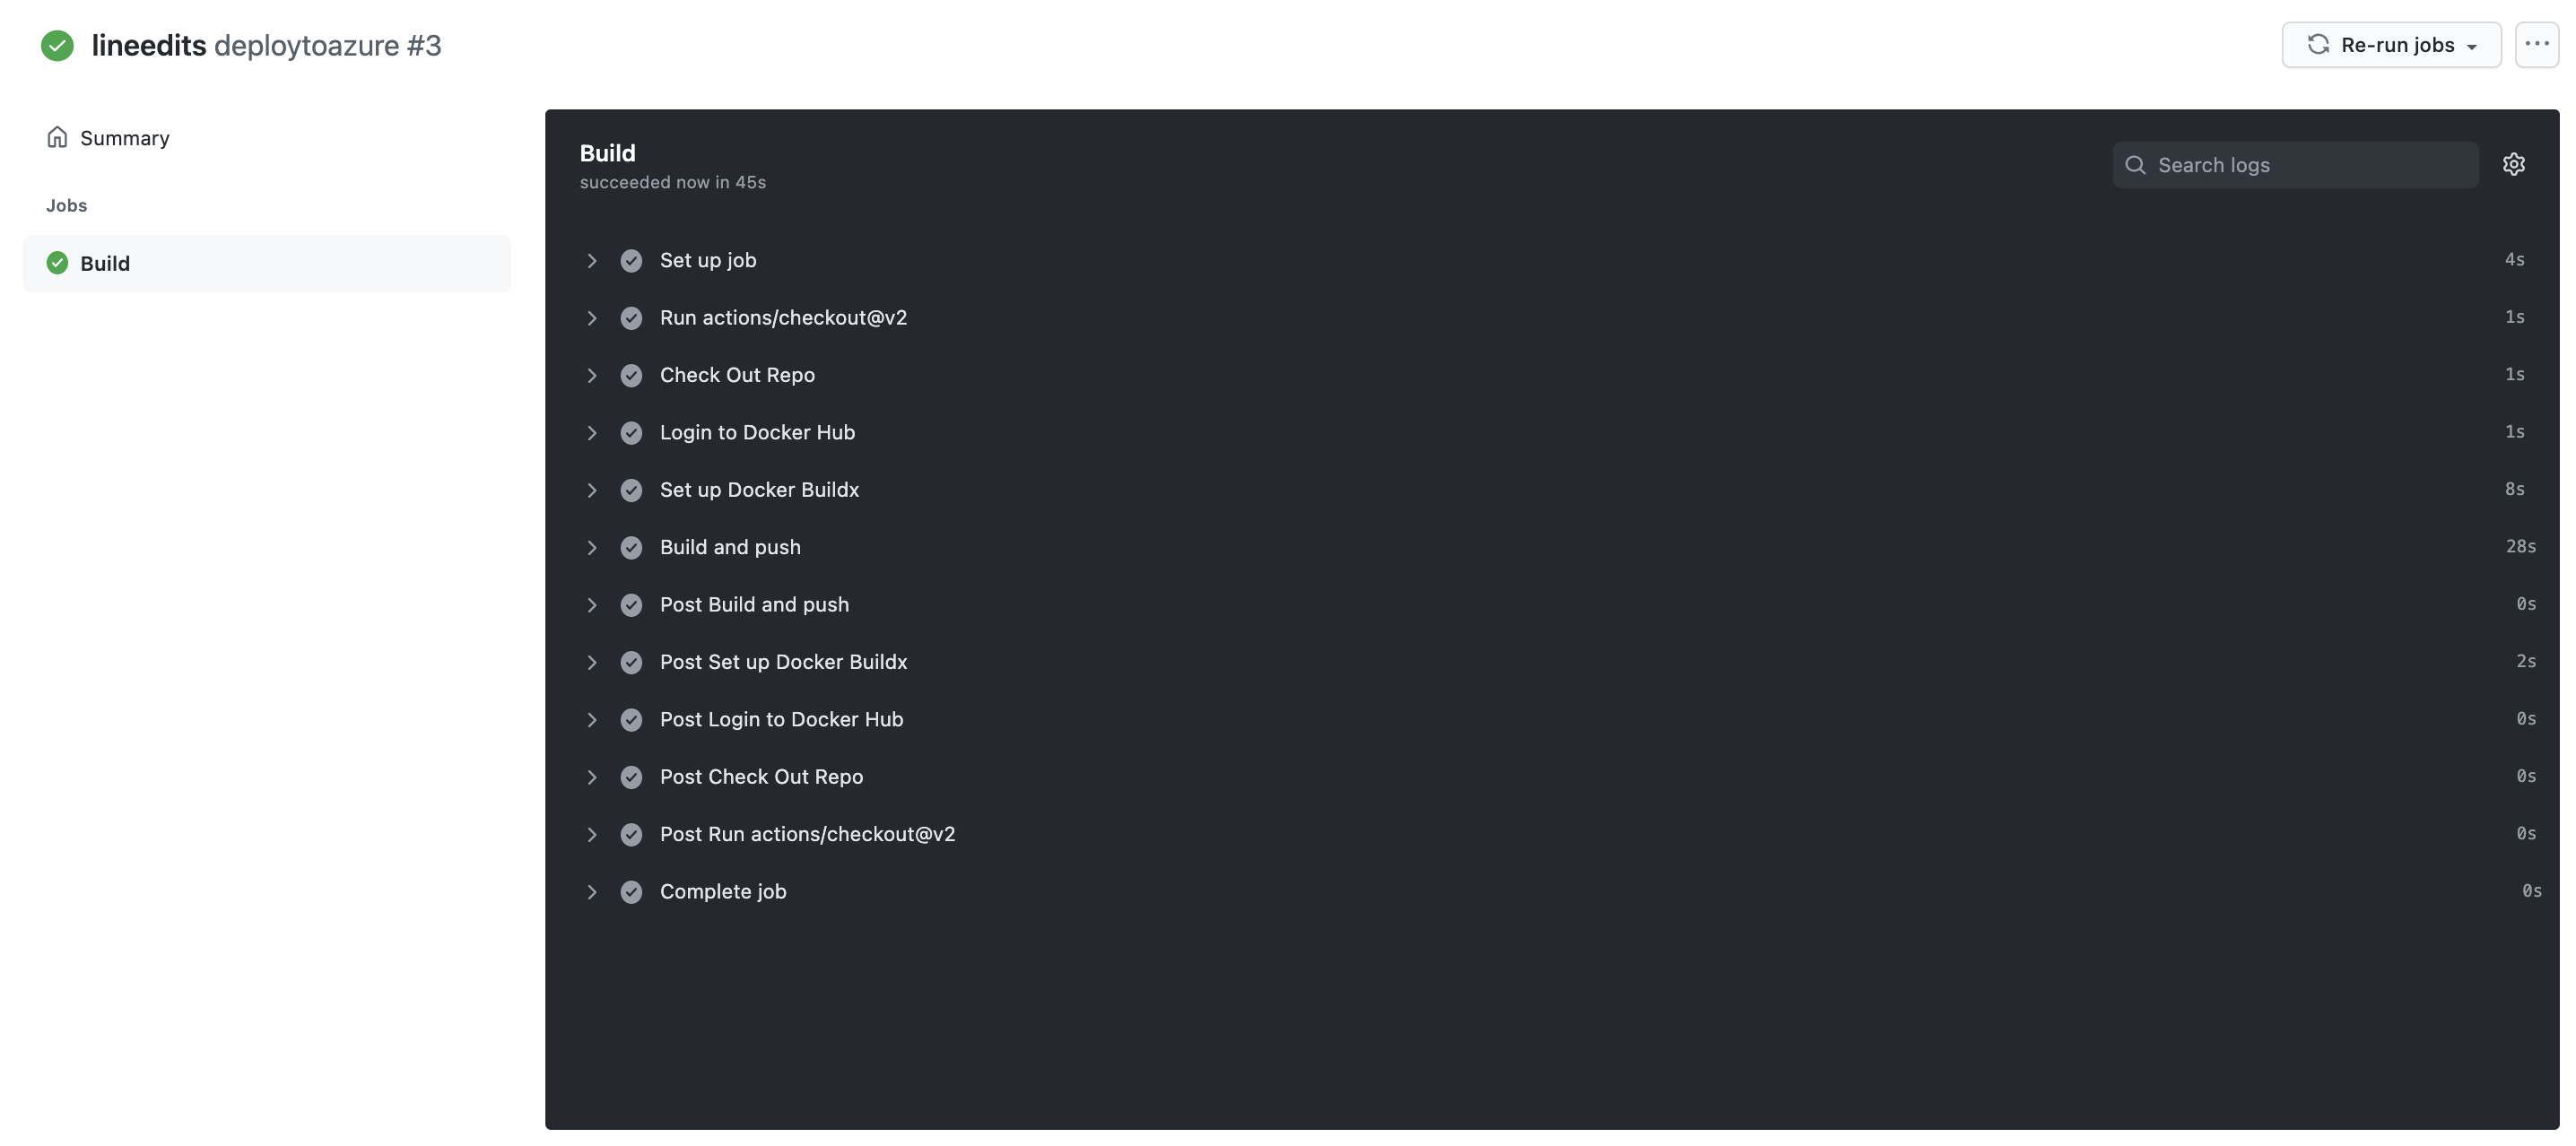
tags: ${{ secrets.DOCKER_HUB_USERNAME }}/randomquotes-js:latestThis code builds and pushes the code as a Docker image to Docker Hub on every new push to main. Go to the GitHub Actions tab to view the steps.
After the build is complete, navigate to Docker Hub to see the image.
Configuring an Azure account
You need to configure an Azure account and web application to act as a target for the deployment from Octopus. Other targets are possible such as AWS or local.
Next, create an account in Azure, by navigating to the Azure portal.
Creating an Azure Service Principal with the Azure Portal
- In the Azure Portal, open the menu
 and navigate to Azure Active Directory, then Properties and copy the value from the Tenant ID field. This is your Tenant ID.
 - Next you need your Application ID.
- If you created an AAD registered application, navigate to Azure Active Directory, then App Registrations, click View all applications, select the app and copy the Application ID. Please note, the Azure UI defaults to the Owned Applications tab. Click the All Applications tab to view all app registrations.
- If you haven’t created a registered app, navigate to Azure Active Directory, then App Registrations, click on New registration and add the details for your app, and click Save. Make note of the Application ID.
- Generate a one-time password by navigating to Certificates & Secrets, then Certificates & Secrets. Add a new Secret, enter a description, and click Save. Make note of the displayed application password for use in Octopus. If you don’t want to accept the default one-year expiry for the password, you can change the expiry date.
You now have the following:
- Tenant ID
- Application ID
- Application Password/secret
Now, you can add the Service Principal Account in Octopus.
Next, you need to configure your resource permissions.
Resource permissions
Resource permissions ensure your registered app has permission to work with your Azure resources.
- In the Azure Portal navigate to Resource groups and select the resource group(s) that you want the registered app to access.
- Next, click the Access Control (IAM) option. Under Role assignments, if your app isn’t listed, click Add role assignment. Select the appropriate role (Contributor is a common option) and search for your new application name. Select it from the search results and then click Save.
Next, you set up an Azure web application and configure its properties.
Web application setup
- If a resource group doesn’t exist, create one by going to Home, then Resource groups, then Create. After it’s created, take note of the Azure subscription ID for the resource group.
- In your Resource group click Create then Web App
- For the publish setting, choose Docker container.
- For the operating system, choose Linux.
- Take note of your Azure app name. This will be the address of your web application:
[webapp-name].azurewebsites.net - Take note of the app service plan and resource group when setting up the application.
In your Octopus instance, go to Library then External feeds and add the Docker container registry feed by entering your Docker credentials. Click Save and test to confirm the connection.
Add the Service Principal account in Octopus
With the following values, you can now add your account to Octopus:
- Application ID
- Tenant ID
- Application Password/Key
- Navigate to Infrastructure, then Account.
- Select ADD ACCOUNT then Azure Subscriptions.
- Give the account the name you want it to be known by in Octopus.
- Give the account a description.
- Add your Azure Subscription ID. This is found in the Azure portal under Subscriptions.
- Add the Application ID, the Tenant ID, and the Application Password/Keyword.
Click SAVE AND TEST to confirm the account can interact with Azure. Octopus then attempts to use the account credentials to access the Azure Resource Management (ARM) API and list the Resource Groups in that subscription. You may need to whitelist the IP Addresses for the Azure Data Center you’re targeting. See deploying to Azure via a Firewall for more details.
A newly created Service Principal may take several minutes before the credential test passes. If you’ve double checked your credential values, wait 15 minutes then try again.
Adding deployment targets
With Octopus, you can deploy software to Windows servers, Linux servers, Microsoft Azure, AWS, Kubernetes clusters, cloud regions, or an offline package drop. Wherever you’re deploying your software, these machines and services are known as your deployment targets. Octopus organizes your deployment targets (the VMs, servers, and services where you deploy your software) into environments.
- Go to Infrastructure, then Deployment Targets.
- Select an Azure Web App.
- Enter a Display Name.
- Fill out the Environment and Target roles.
- Select the Azure account and web app created earlier.
Creating the project environment
Create a project by navigating to Projects, then Add Project. These steps assume a project named docker.
Add an environment named Production by going to Infrastructure, then Environments, then Add Environment.
Navigate to the project you created. Under Variables, add the following variables with their values:
app-service-planresource-groupwebapp-name
In the process step, add an Azure script step.
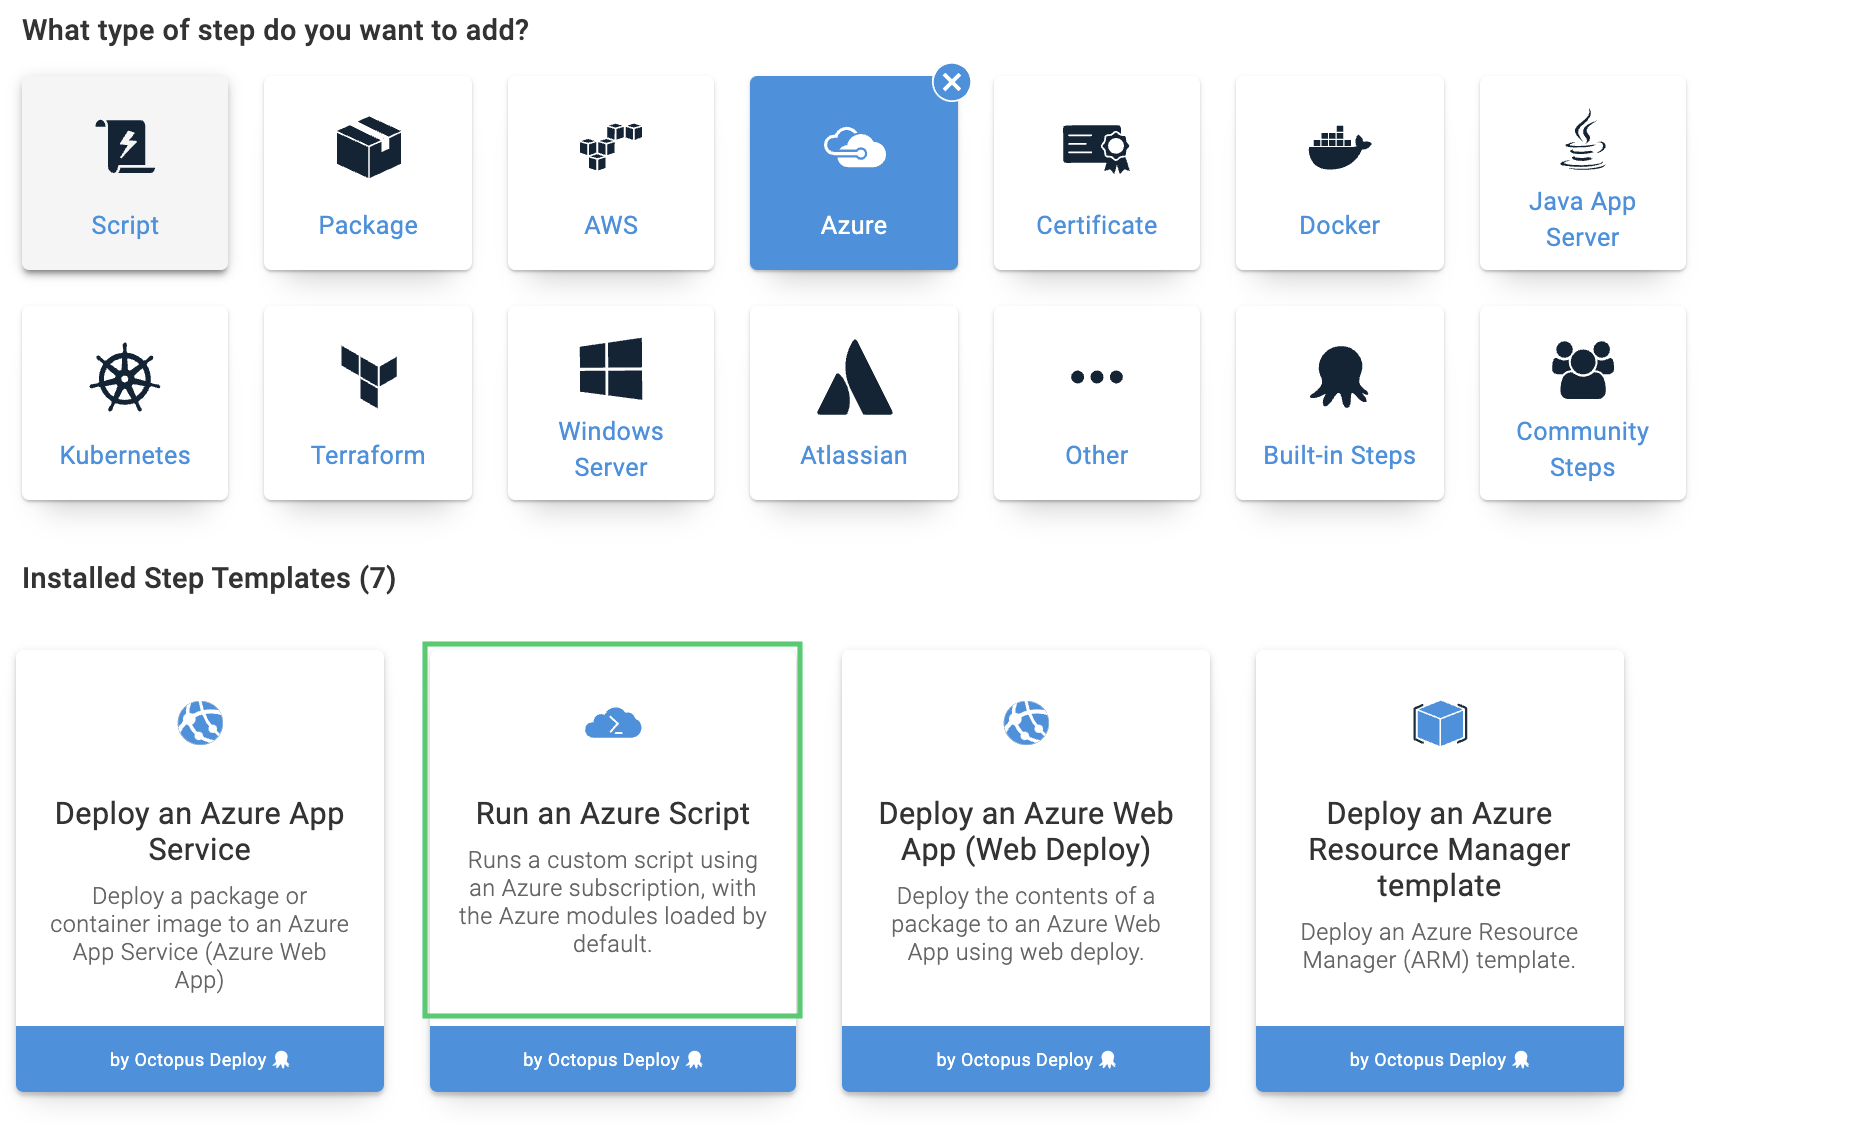
Add the Azure account you configured earlier and copy the following code into the script step:
$pi = $OctopusParameters["Octopus.Action.Package[randomquotes-js].PackageId"]
$pv = $OctopusParameters["Octopus.Action.Package[randomquotes-js].PackageVersion"]
$dockerImage = "${pi}:${pv}"
$ImageName = $OctopusParameters["Octopus.Action.Package[randomquotes-js].Image"]
$RegistryUrl = $OctopusParameters["Octopus.Action.Package[randomquotes-js].Registry"]
az webapp create --resource-group $OctopusParameters["resource-group"] --plan $OctopusParameters["app-service-plan"] --name $OctopusParameters["webapp-name"] --deployment-container-image-name $dockerImage
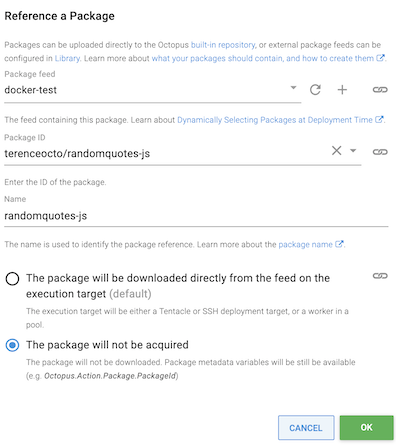
az webapp config container set --name $OctopusParameters["webapp-name"] --resource-group $OctopusParameters["resource-group"] --docker-custom-image-name $ImageName --docker-registry-server-url $RegistryUrlAdd a referenced package under the script step by navigating to the Docker feed and searching for the Random Quotes package. Check The package will not be acquired to reference the package in the script. Click OK. Click Save to save the process step.
You want to ask GitHub Actions to automatically build the Docker image, push it to Docker Hub, create a release, and deploy it in the GitHub code. The update will happen on every commit to main. Update node.yml to the following:
name: deploytoazure

on:
  push:
    branches: [ master ]
jobs:

  build:
    name: Build
    runs-on: ubuntu-latest
    steps:
      - uses: actions/checkout@v2

      - name: Install Octopus CLI
        uses: OctopusDeploy/install-octopus-cli-action@v1.1.1
        with:
          version: latest

      - name: Check Out Repo
        uses: actions/checkout@v2

      - name: Login to Docker Hub
        uses: docker/login-action@v1
        with:
          username: ${{ secrets.DOCKER_HUB_USERNAME }}
          password: ${{ secrets.DOCKER_HUB_ACCESS_TOKEN }}

      - name: Set up Docker Buildx
        id: buildx
        uses: docker/setup-buildx-action@v1

      - name: Build and push
        id: docker_build
        uses: docker/build-push-action@v2
        with:
          context: ./
          file: ./Dockerfile
          push: true
          tags: ${{ secrets.DOCKER_HUB_USERNAME }}/randomquotes-js:latest

      - name: sleep
        run: sleep 60

      - name: create Octopus release
        run: octo create-release --project docker --version 0.0.i --server=${{ secrets.OCTOPUS_SERVER }} --apiKey=${{ secrets.OCTOPUS_APIKEY }}

      - name: deploy Octopus release
        run: octo deploy-release --project docker --version=latest --deployto Production --server=${{ secrets.OCTOPUS_SERVER }} --apiKey=${{ secrets.OCTOPUS_APIKEY }}
The changes install the Octopus Deploy CLI onto the machine to run commands on behalf of your Octopus Deploy instance. On every push to Docker, the script waits 60 seconds and then creates a new deployment for Azure.
Commit the changes and navigate to the actions tab to confirm the deployments.

Navigate to Octopus Deploy Projects, then Releases to see the latest deployments.

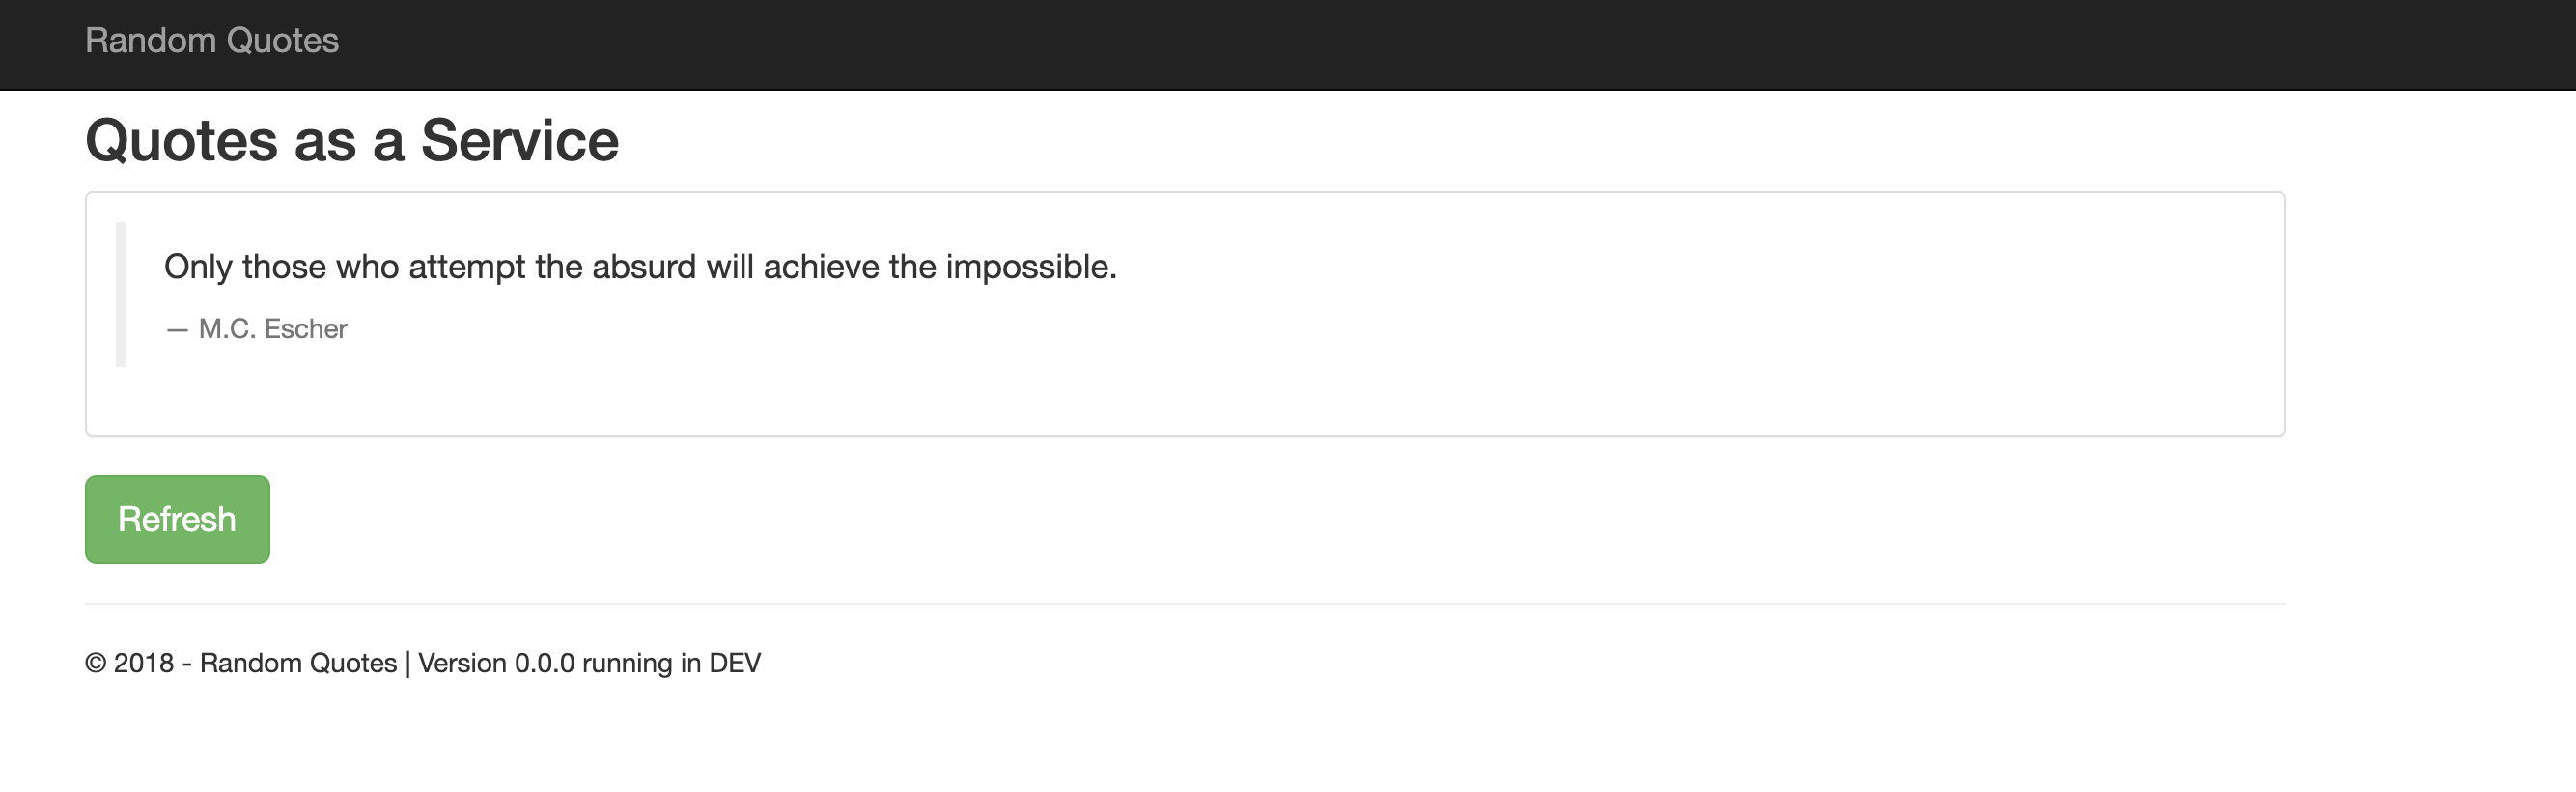
Go to [webapp-name].azurewebsites.net to see your web application:
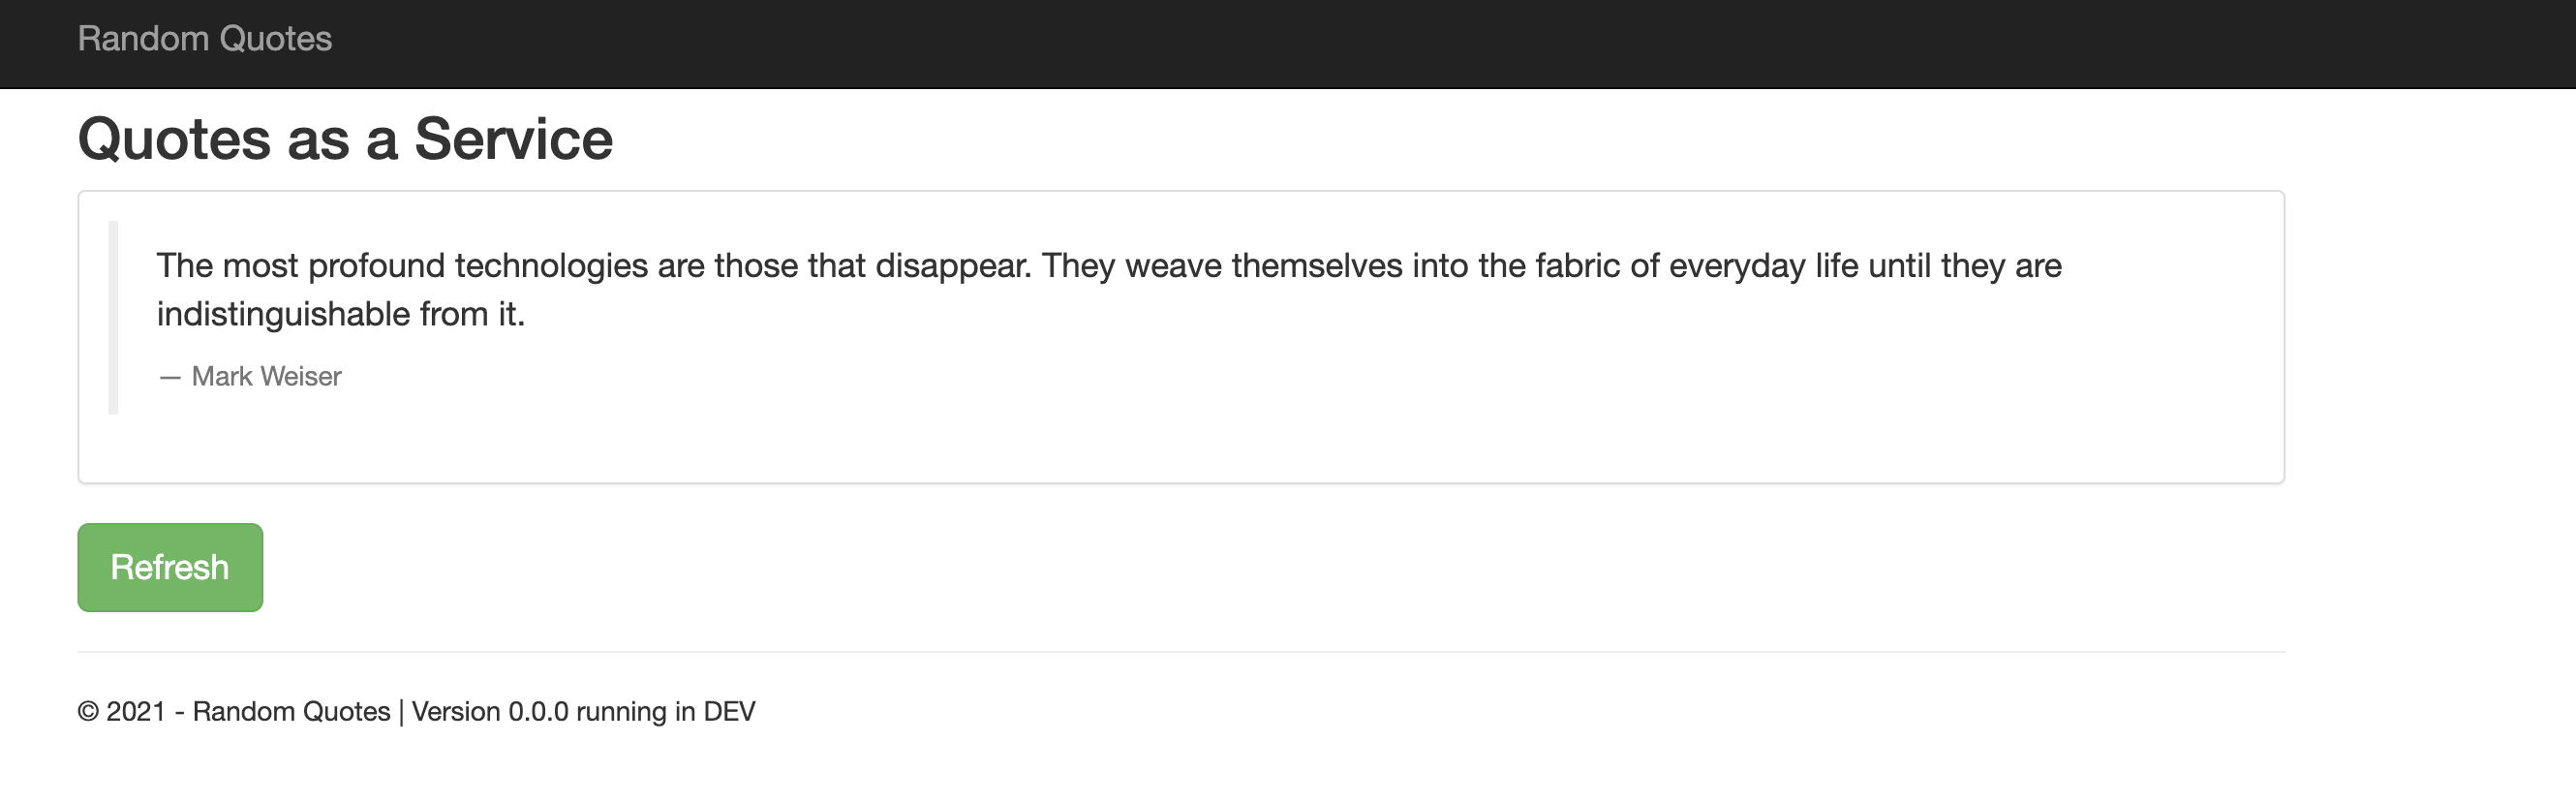
Make a change to confirm that the deployment is automatically updated. In GitHub, edit the file:
RandomQuotes-JS/source/www/index.html
Change the year to 2021 and commit the code to GitHub. The commit and push will trigger the GitHub Actions build. After the deployment is complete, navigate to your web app where the year has changed.
Conclusion
GitHub Actions is a CI/CD platform that enhances all GitHub projects with CI/CD capabilities. GitHub Actions makes it easy for developers to deploy their GitHub projects. Octopus Deploy works with GitHub Actions to provide a dedicated continuous delivery tool for managing deployments. The CI/CD process can be connected to a cloud target, such as Microsoft Azure or Amazon Web Services, to give the application a deployment target.
This tutorial set up a continuous delivery flow with Octopus Deploy, GitHub Actions, Docker, and Azure. GitHub automatically detects changes to the code, triggers a build, and pushes to Docker. Octopus Deploy then creates a new release and deploys the Azure Web Application.
Try our free GitHub Actions workflow tool to help you quickly generate customizable workflows for your GitHub Actions deployments.
For more on Continuous Integration (CI) and build servers, check out our CI blog series. Explore the DevOps engineer’s handbook to learn more about DevOps and CI/CD.
Happy deployments!