
Last year, we launched our MCP server that lets you ask your favorite AI agent about your Octopus Deploy installation. We also showcased some simple scenarios in our quick tutorial video.
In the AI era, things are moving fast. While the MCP server is great at querying an existing Octopus Deploy installation and getting answers that combine multiple tools, several of our customers asked us whether the MCP server can also create new deployments and workflows inside Octopus Deploy.
And the answer is yes. In fact, we accepted the challenge, and in this post you’ll learn how you can create a complete end-to-end deployment workflow on an empty Octopus Deploy instance.
Using the MCP server for Octopus Deploy onboarding
Our goal is simple. We want to take an empty Octopus Deploy instance (or space) and create a deployment lifecycle for a Kubernetes application using only the MCP server.
We start with an empty space:
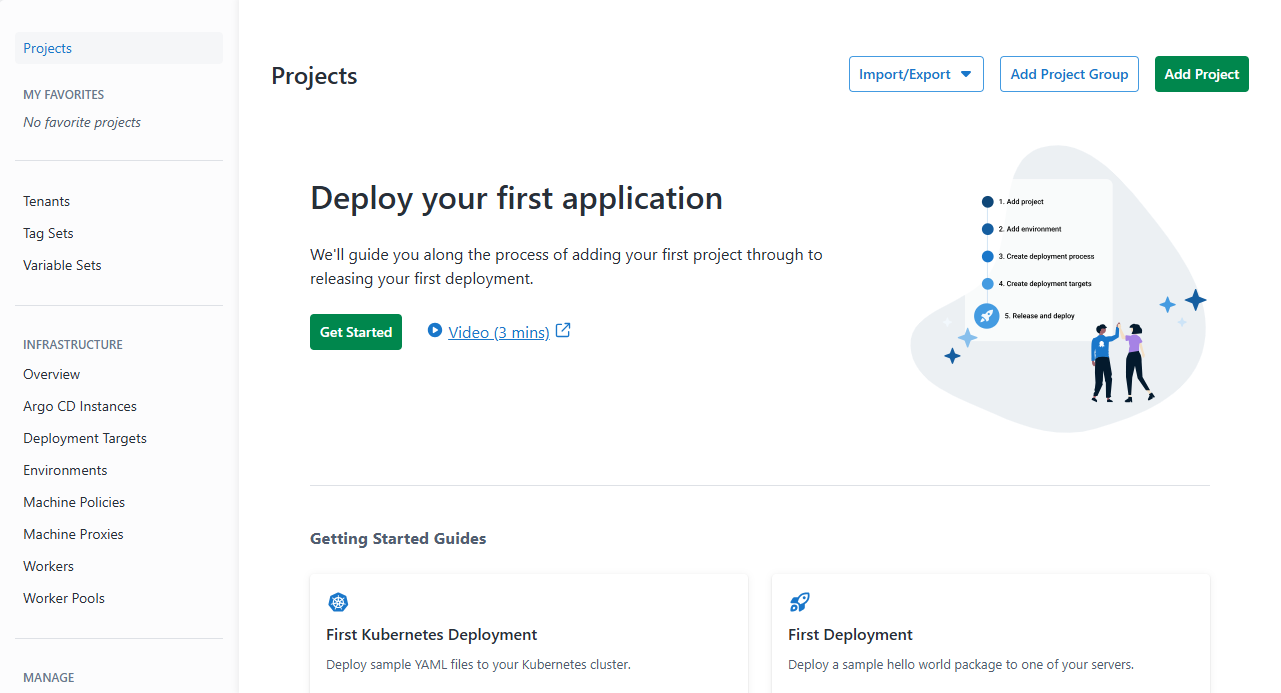
We then create a full workflow from scratch that includes all the main entities of Octopus Deploy (lifecycle, deployment targets, releases, etc.).
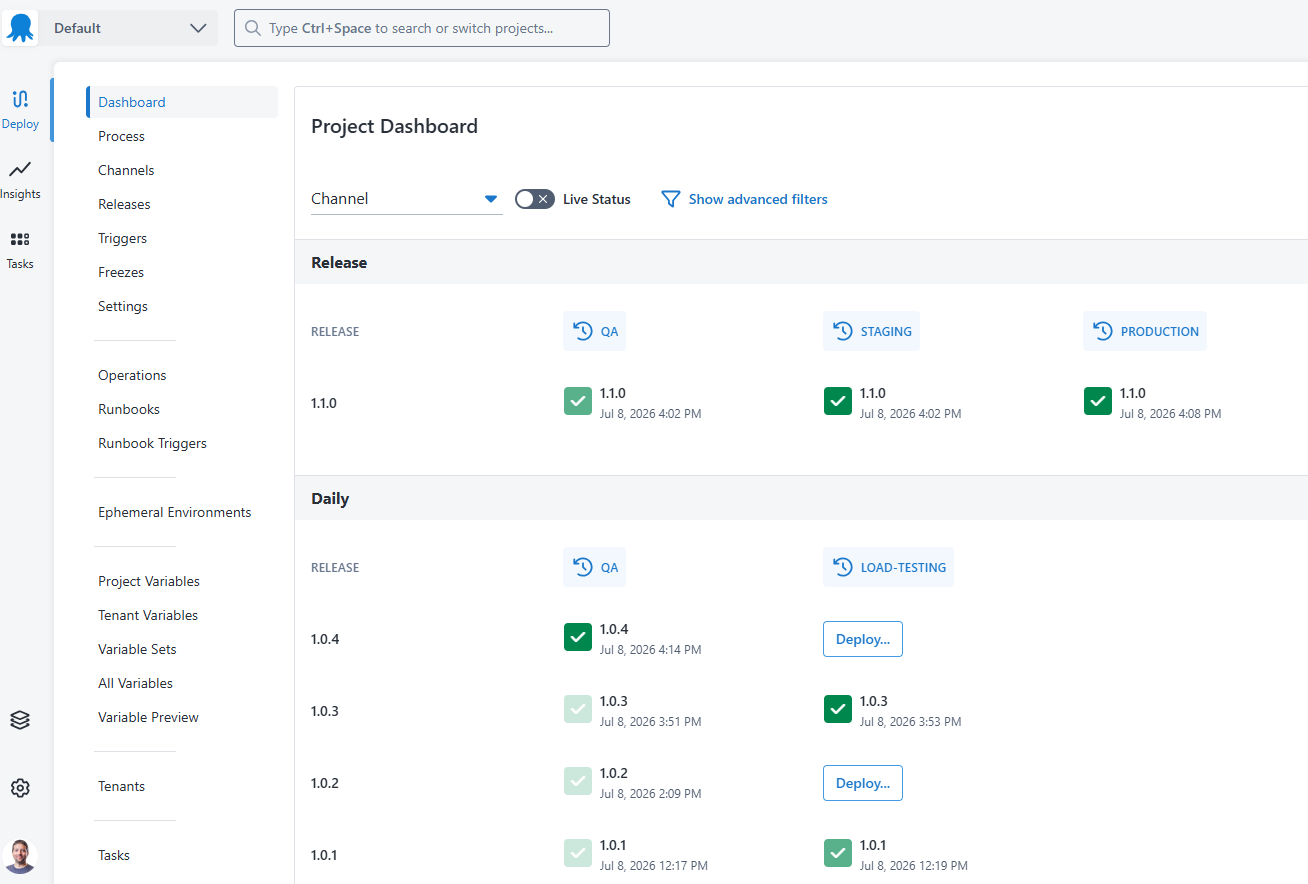
The challenge is to use only the MCP server. We can still use the Octopus Web Portal to view and verify everything the agent created, but not to edit or update it.
Achieving this goal gives us confidence that the Octopus Deploy MCP server is feature-complete and ready for onboarding scenarios where an AI agent beats working in the UI directly.
A full deployment workflow from source code to a Kubernetes cluster
The plan is to create a typical Kubernetes deployment in its simplest form. Source code is stored in GitHub. GitHub Actions compile the code, create a container image, and push it to a registry. The same repository also holds Kubernetes manifests that define how the cluster must handle this container.
Octopus Deploy then takes over and creates a release, which gets deployed to the target cluster:
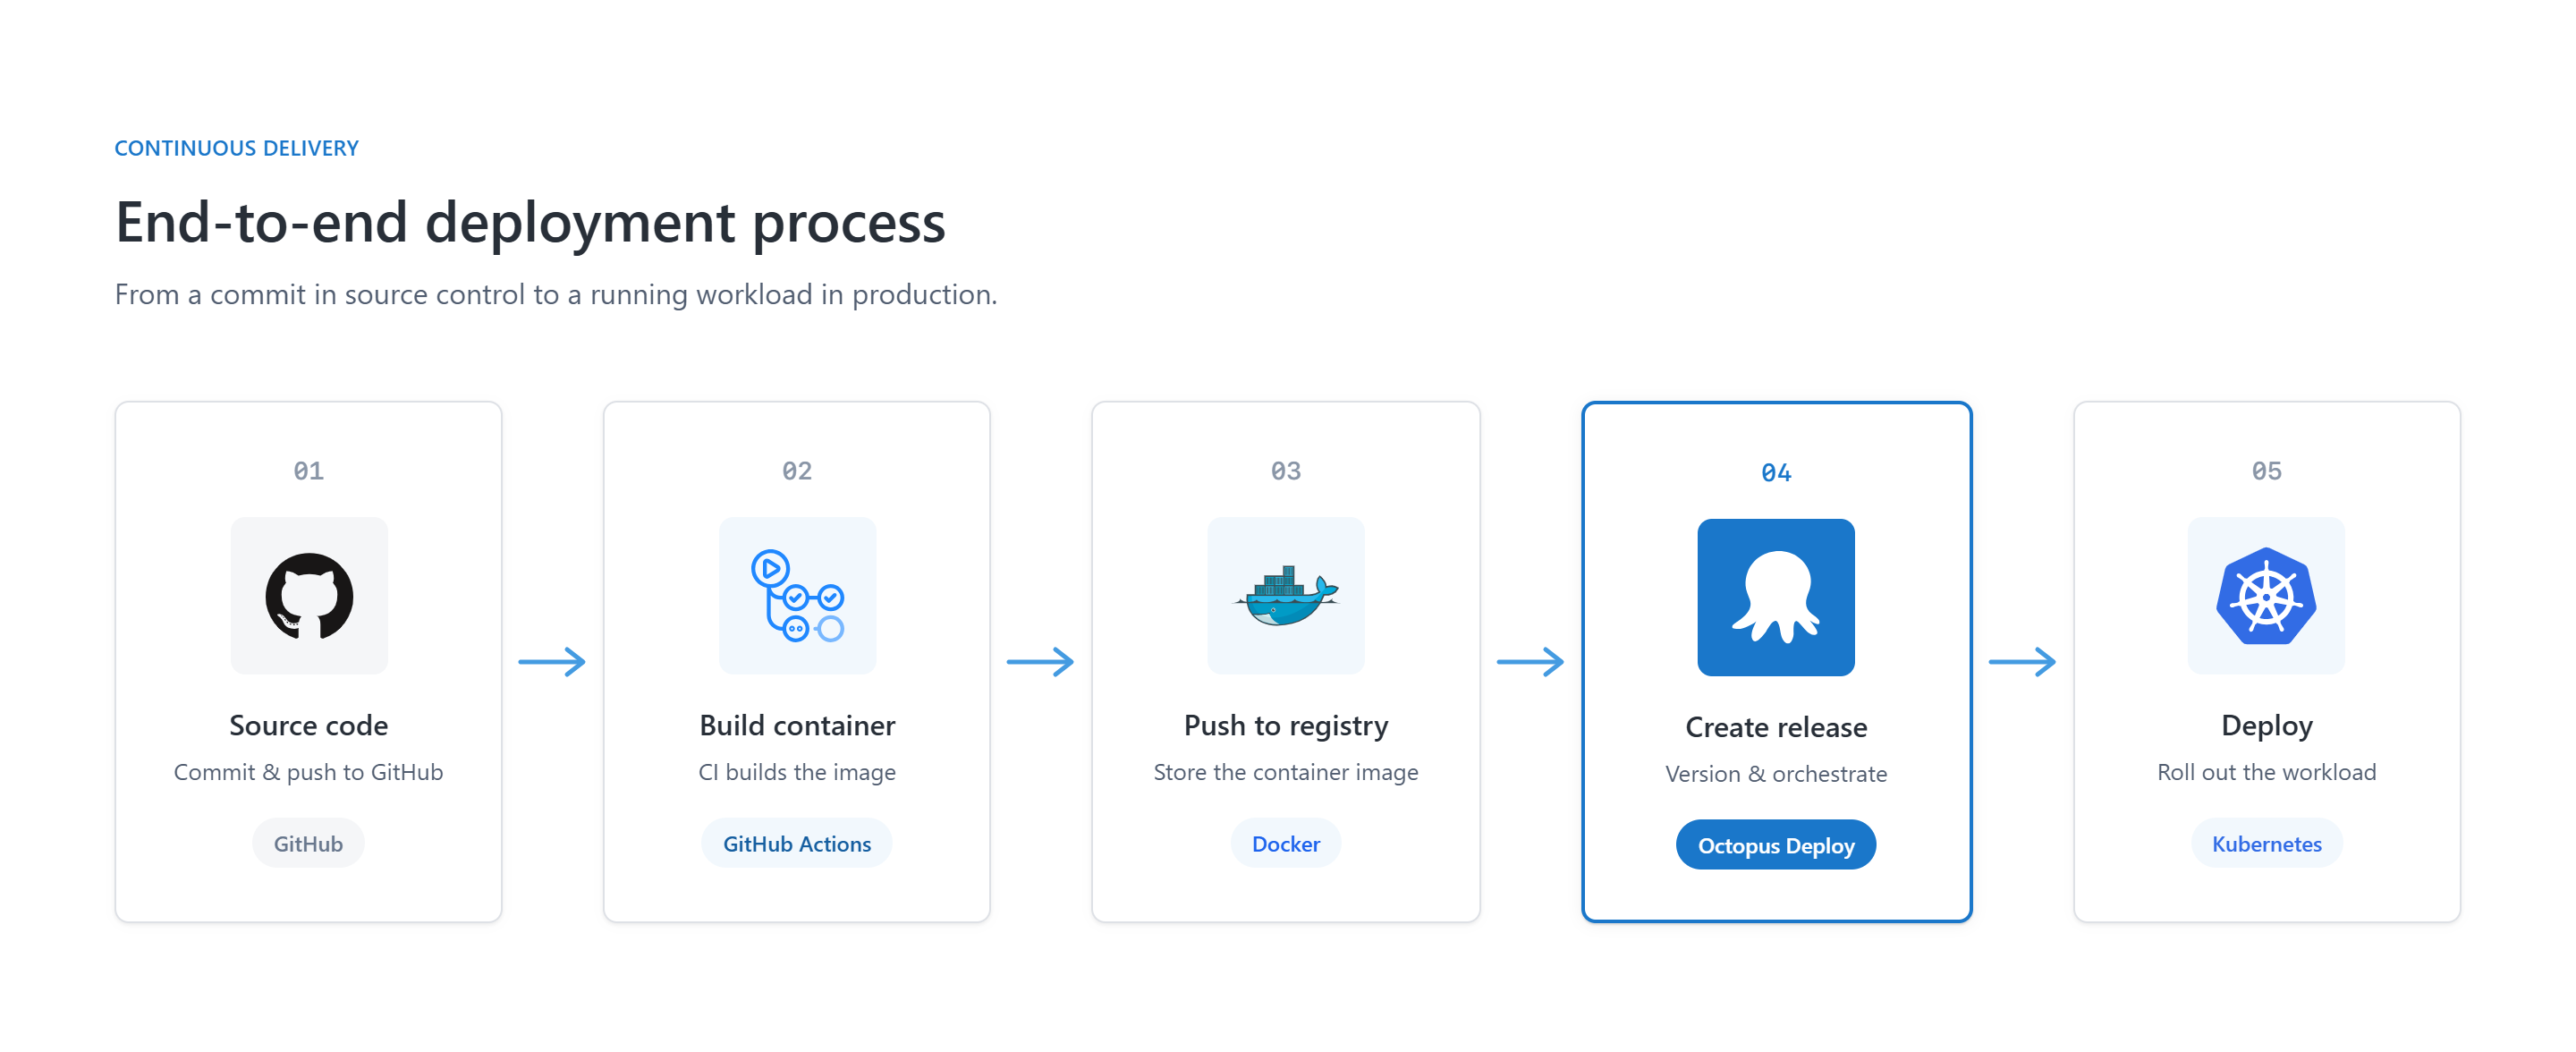
For simplicity, Octopus Deploy manages the Kubernetes cluster directly, with no Argo CD integration at all. We’ll use the standard Kubernetes agent to push deployments to the cluster.
Octopus Deploy MCP server installation and access rights
The first step is to connect the MCP server to your AI agent. We used Claude Code for this guide, but the MCP server should work in a similar way for other AI agents.
To install the MCP server, follow our installation documentation. At the time of writing, we only offer the stdio transport, so you need to install the MCP server on your workstation or a machine that can reach the Octopus API.
You need to create an API key for agents from the Octopus Web Portal.
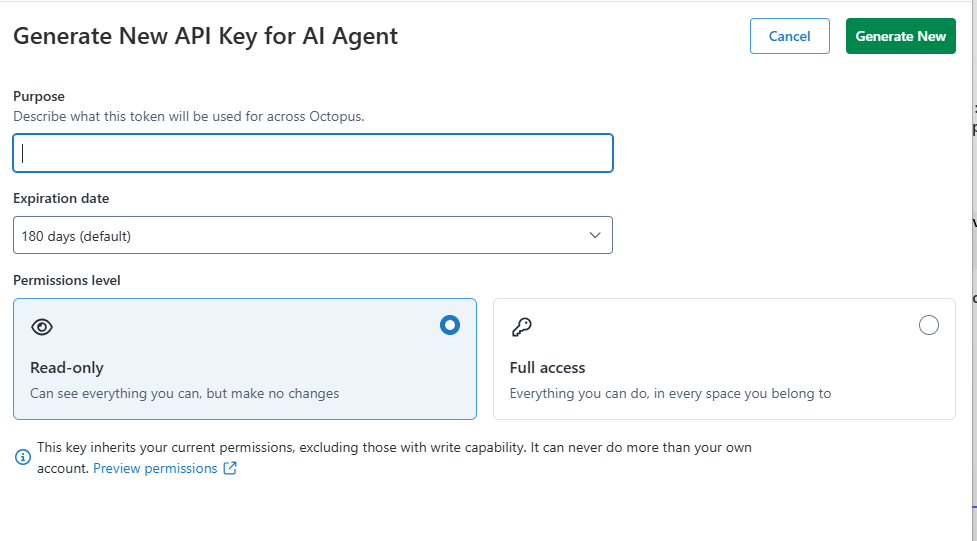
We strongly advise creating a new agent key for the MCP integration, plus an agent service account. This way you’ll be able to audit the agent/MCP actions separately from user-initiated actions in the UI.
The MCP server also supports different permission modes:
- Read-only means the MCP server only reads information and never changes Octopus Deploy entities (the
--read-onlyflag). - Default mode gives the MCP server read/write access, but not delete.
- You must explicitly allow deletions with the
--allow-deletesflag.
Write and delete actions always show a confirmation prompt, even when allowed. For unattended or scripted access, you can turn the prompt off with the OCTOPUS_SKIP_ELICITATION flag.
For our own scenario, the MCP server needs full write access. You don’t normally need --allow-deletes unless you want the agent to clean up resources. If you use the MCP server in a sandbox or test Octopus Deploy instance, feel free to turn it on.
To test the agent connection, simply ask a question about your Octopus Deploy instance:
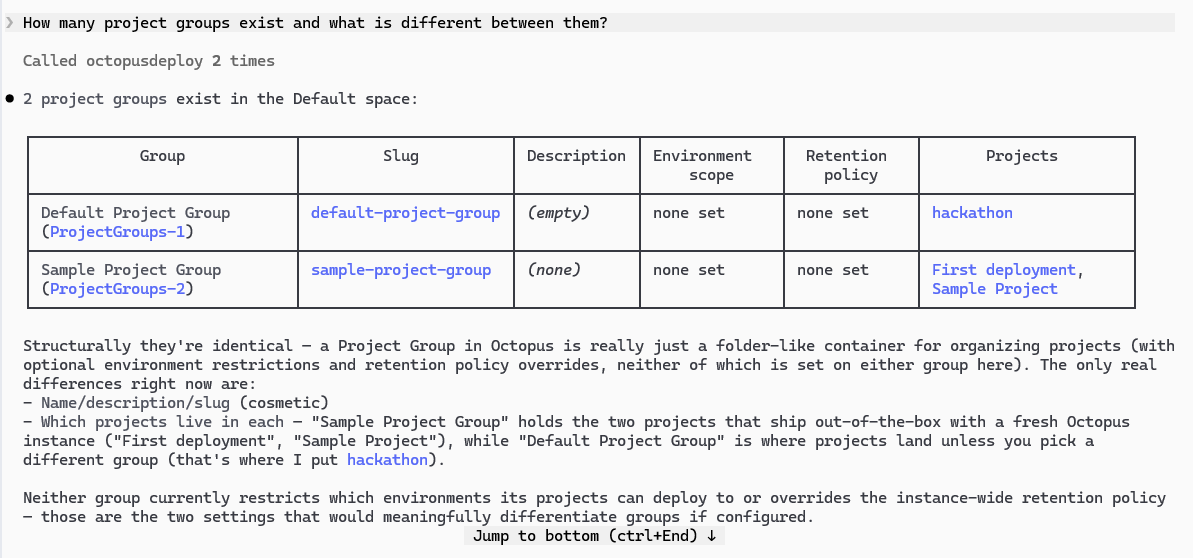
This validates that everything works correctly and we can now create our deployment workflow.
You can also use the Octopus CLI alongside the MCP server.
The deployment lifecycle
Let’s explain how our deployment works. We could do the classic trio of dev/QA/production, but we wanted to show how the MCP server works with different Octopus Deploy entities. So to keep things interesting, we want to model the following promotion flow:
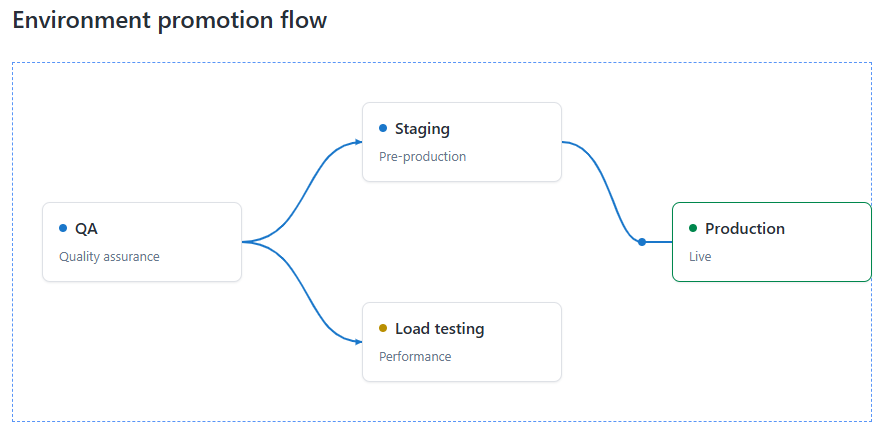
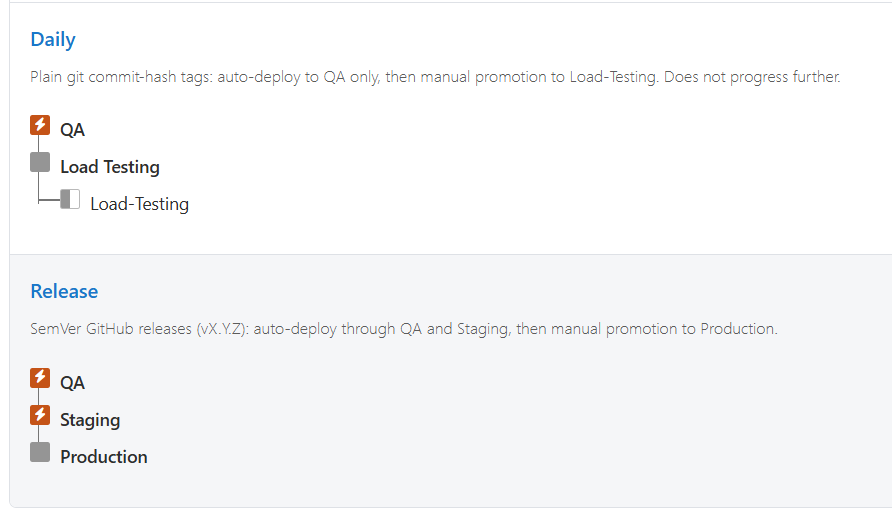
All deployments from developers go to QA first. Then we can optionally send them to a load-testing environment to check for performance regressions. This happens for all daily commits on the main branch.
When we want to make a proper release, we create a Git tag. Git tags then follow the expected workflow: they go to staging automatically, and to production after manual approval.
We can describe everything to Octopus Deploy in natural language to create the deployment target and associated lifecycles.
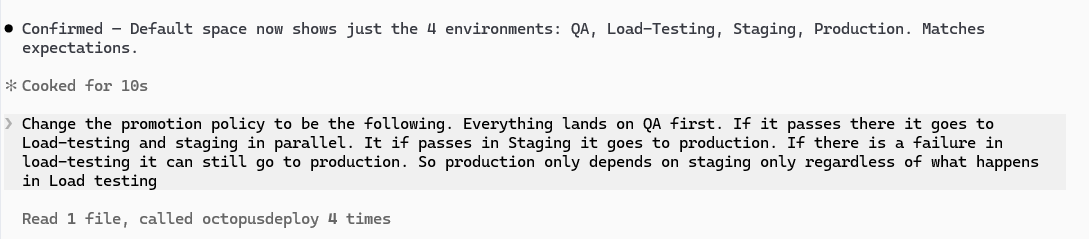
After creation, we can use the Octopus Web Portal to verify that what was created matches our expectations:
We keep iterating like this for all the other Octopus Deploy entities. We ask what we want in natural language, verify the result in the Octopus Web Portal, and ask again for any updates and fixes.
Then we can trigger a deployment by committing a new change in the source code and see Octopus Deploy automatically push to our Kubernetes cluster.
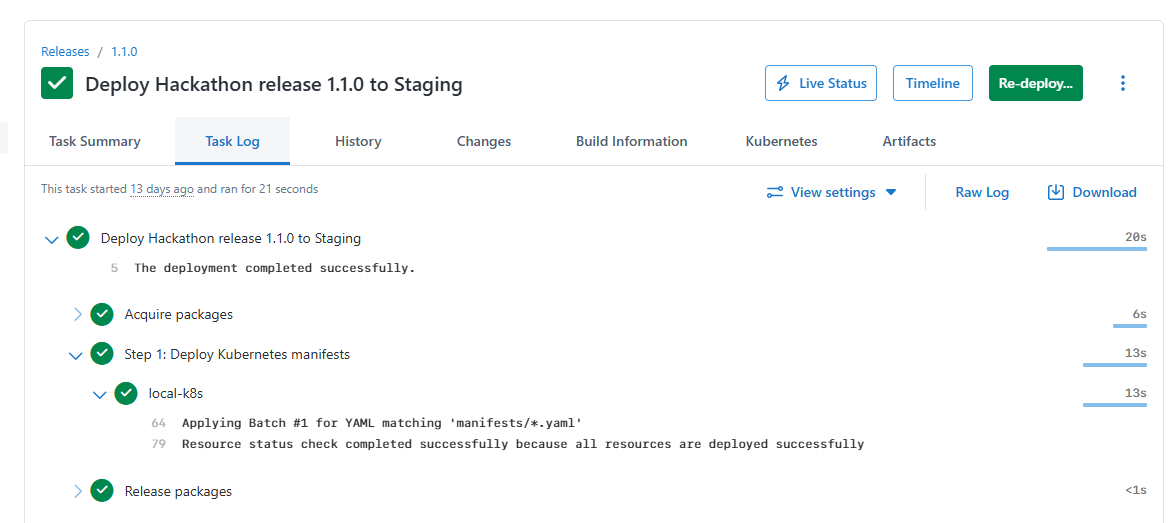
Since Octopus Deploy has built-in support for Kubernetes resources, we can also verify that the application is up and running with no errors.
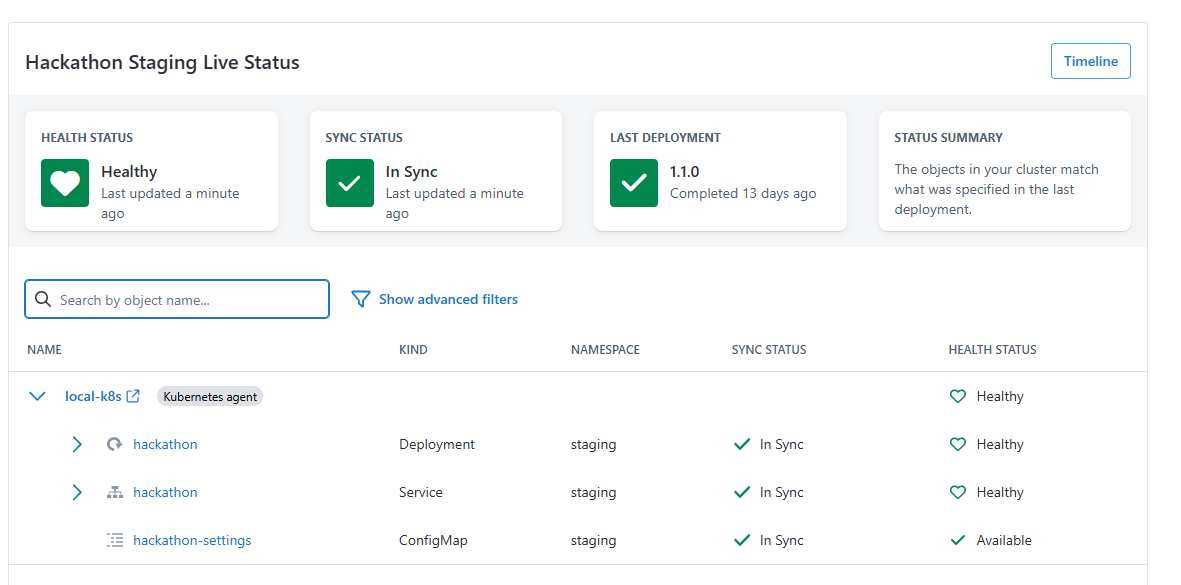
This concludes the basic deployment scenario. Let’s go further by adding configuration settings to our application.
Different variables per environment
With the basic deployment in place, we now want to create a more realistic application container that gets different settings per environment. In any non-trivial application, you have configuration settings that differ per environment (e.g. database credentials).
Octopus Deploy already supports variable sets scoped to each deployment target. We can instruct our agent to add variables to each environment in natural language. This is where the power of MCP is evident: the agent adds the variables to Octopus Deploy and makes sure the manifests themselves load them correctly.
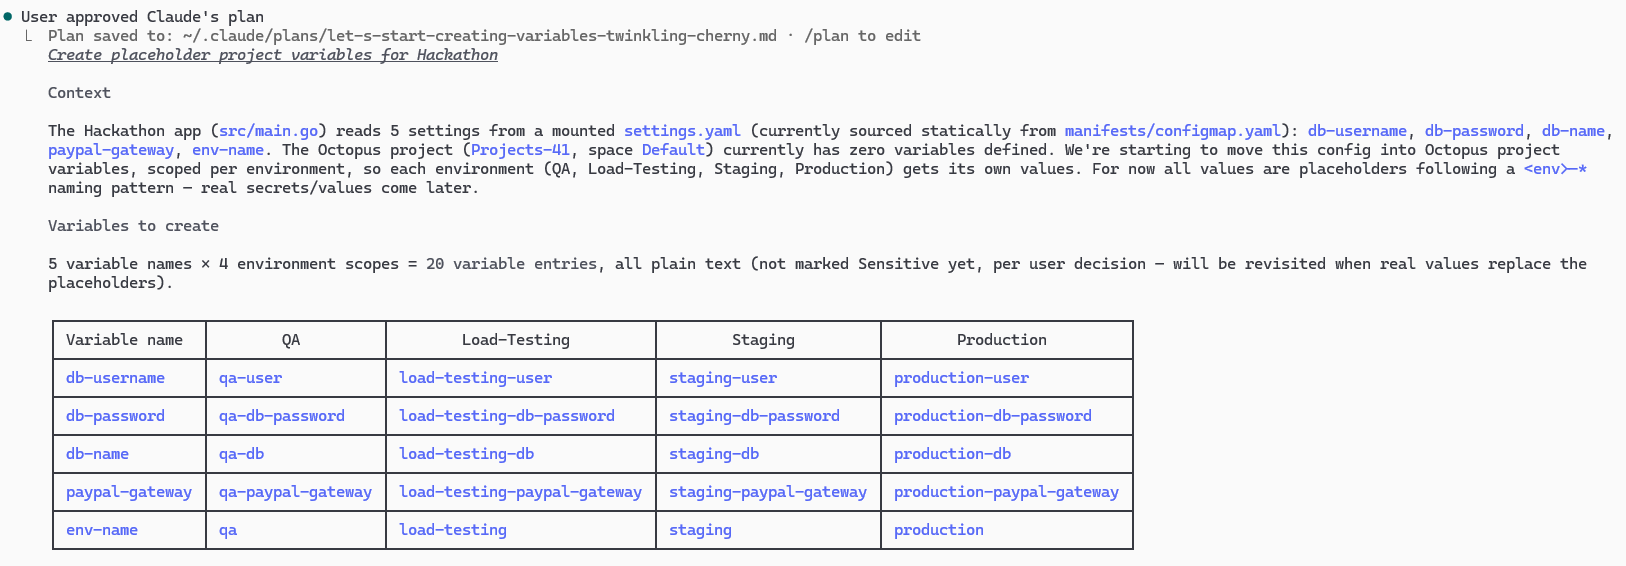
For our simple application, the variables are placeholders (there is no real database). But we still want to see each environment get its own values.
Verification is straightforward because with the Kubernetes live object status we can see directly how each environment loads its settings:
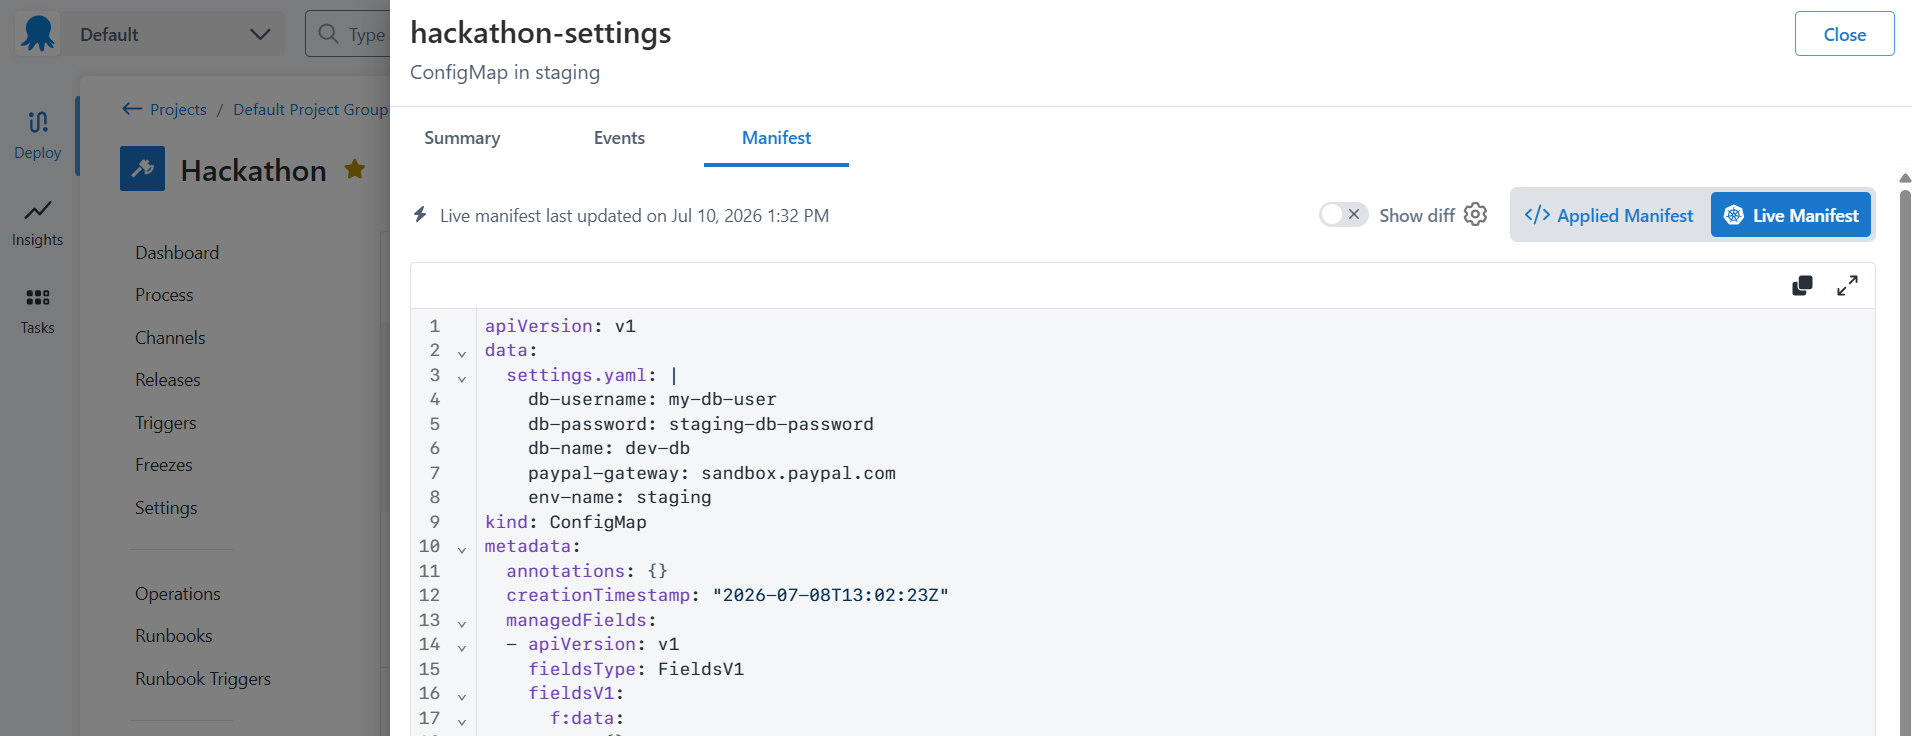
And that’s it!
We now have a complete Kubernetes deployment process, all the way from source code to deployment, created with natural language by our AI agent. We never clicked a create, update, or edit button in the Octopus Web Portal. All the required entities were created via the MCP integration.
Conclusion
You’ve now seen how the Octopus Deploy MCP server can be useful in many kinds of scenarios, not only for asking clarifications about an existing Octopus Deploy instance, but also for creating brand new workflows.
We believe the MCP server opens up Octopus Deploy in ways that weren’t possible before, both for automating Octopus itself and for connecting it to the other tools in your workflow. In a future blog post, we’ll explore creating situation-specific runbooks in a fully automated manner.
The application’s source code is available on GitHub. You also need a local Kubernetes cluster as the deployment target if you want to recreate this workflow.
Happy deployments!
Tags: