Kubernetes (K8s) has become one of the most widely used platforms for hosting Docker containers. Kubernetes offers advanced orchestration features, networking capabilities, integrated security, user management, high availability, volume management, a wide ecosystem of supporting tools, and much more.
One supporting tool is Helm, which provides package management functionality for Kubernetes. Applications deployed by Helm are defined in charts, and Jenkins provides a Helm chart to deploy a Jenkins instance to Kubernetes.
In this post, you learn how to install a Jenkins instance with Helm and connect agents to perform build tasks.
Prerequisites
To follow along with this post you need a Kubernetes cluster and the Helm client.
All major cloud providers offer hosted Kubernetes clusters:
If you want to run a development Kubernetes cluster on your local PC, kind lets you create and destroy clusters for testing. The post Creating test Kubernetes clusters with Kind provides instructions on running Kubernetes locally.
You must also have the Helm client installed. The Helm documentation provides installation instructions.
Adding the Jenkins chart repository
Jenkins Helm charts are provided from https://charts.jenkins.io. To make this chart repository available, run the following commands:
helm repo add jenkins https://charts.jenkins.io
helm repo update
Deploying a simple Jenkins instance
To deploy a Jenkins instance with the default settings, run the command:
helm upgrade --install myjenkins jenkins/jenkinsThe helm upgrade command is typically used to upgrade an existing release. However, the --install argument ensures the release is created if it does not exist. This means helm upgrade --install creates and updates a release, removing the need to juggle installation and upgrade commands depending on whether or not the release exists.
The name of the release is myjenkins, and the final argument jenkins/jenkins defines the chart to be installed.
The output looks something like this:
$ helm upgrade --install myjenkins jenkins/jenkins

Release "myjenkins" does not exist. Installing it now.
NAME: myjenkins
LAST DEPLOYED: Tue Oct 19 08:13:11 2021
NAMESPACE: default
STATUS: deployed
REVISION: 1
NOTES:
1. Get your 'admin' user password by running:
  kubectl exec --namespace default -it svc/myjenkins -c jenkins -- /bin/cat /run/secrets/chart-admin-password && echo
2. Get the Jenkins URL to visit by running these commands in the same shell:
  echo http://127.0.0.1:8080
  kubectl --namespace default port-forward svc/myjenkins 8080:8080

3. Login with the password from step 1 and the username: admin
4. Configure security realm and authorization strategy
5. Use Jenkins Configuration as Code by specifying configScripts in your values.yaml file, see documentation: http:///configuration-as-code and examples: https://github.com/jenkinsci/configuration-as-code-plugin/tree/master/demos

For more information on running Jenkins on Kubernetes, visit:
https://cloud.google.com/solutions/jenkins-on-container-engine

For more information about Jenkins Configuration as Code, visit:
https://jenkins.io/projects/jcasc/


NOTE: Consider using a custom image with pre-installed plugins
The first command listed in the notes returns the password for the admin user:
$ kubectl exec --namespace default -it svc/myjenkins -c jenkins -- /bin/cat /run/secrets/chart-admin-password && echoThe second command listed in the notes establishes a tunnel to the service in the Kubernetes cluster.
In Kubernetes, a service is a resource that configures the cluster’s network to expose one or more pods. The default service type is ClusterIP, which exposes pods via a private IP address. It’s this private IP address we tunnel into in order to gain access to the Jenkins web UI.
A Kubernetes pod is a resource that hosts one or more containers. This means the Jenkins instance is running as a container inside a pod:
$ kubectl --namespace default port-forward svc/myjenkins 8080:8080
Forwarding from 127.0.0.1:8080 -> 8080
Forwarding from [::1]:8080 -> 8080
After the tunnel is established, open http://localhost:8080 on your local PC and you’ll be directed to the Jenkins instance in the Kubernetes cluster. Login with the username admin and the password returned by the first command.
You now have a functional, if basic, Jenkins instance running in Kubernetes.
Exposing Jenkins through a public IP address
Accessing Jenkins through a tunnel is useful for debugging, but not a great experience for a production server. To access Jenkins through a publicly available IP address, you must override the default configuration defined in the chart. There are hundreds of values that can be defined, and the complete list is available by running the command:
helm show values jenkins/jenkinsConfiguring the service exposing the Jenkins pod as a LoadBalancer is the easiest way to access Jenkins publicly.
A service of type LoadBalancer exposes pods via a public IP address. Exactly how that public IP address is created is left to the cluster. For example, hosted Kubernetes platforms like EKS, AKS, and GKE create a network load balancer to direct traffic into the K8s cluster.
Note that LoadBalancer services require additional configuration when using a local test Kubernetes cluster, such as those clusters created by kind. Refer to the kind documentation for more information.
To configure the service as a LoadBalancer, you create a file called values.yaml with the following contents:
controller:
  serviceType: LoadBalancer
You then upgrade the Helm release using the values defined in values.yaml with the command:
helm upgrade --install -f values.yaml myjenkins jenkins/jenkinsThe output is changed subtly with the addition of new instructions to return the service’s public IP:
$ helm upgrade --install -f values.yaml myjenkins jenkins/jenkins
Release "myjenkins" has been upgraded. Happy Helming!
NAME: myjenkins
LAST DEPLOYED: Tue Oct 19 08:45:23 2021
NAMESPACE: default
STATUS: deployed
REVISION: 4
NOTES:
1. Get your 'admin' user password by running:
  kubectl exec --namespace default -it svc/myjenkins -c jenkins -- /bin/cat /run/secrets/chart-admin-password && echo
2. Get the Jenkins URL to visit by running these commands in the same shell:
  NOTE: It may take a few minutes for the LoadBalancer IP to be available.
        You can watch the status of by running 'kubectl get svc --namespace default -w myjenkins'
  export SERVICE_IP=$(kubectl get svc --namespace default myjenkins --template "{{ range (index .status.loadBalancer.ingress 0) }}{{ . }}{{ end }}")
  echo http://$SERVICE_IP:8080/login

3. Login with the password from step 1 and the username: admin
4. Configure security realm and authorization strategy
5. Use Jenkins Configuration as Code by specifying configScripts in your values.yaml file, see documentation: http:///configuration-as-code and examples: https://github.com/jenkinsci/configuration-as-code-plugin/tree/master/demos

For more information on running Jenkins on Kubernetes, visit:
https://cloud.google.com/solutions/jenkins-on-container-engine

For more information about Jenkins Configuration as Code, visit:
https://jenkins.io/projects/jcasc/


NOTE: Consider using a custom image with pre-installed plugins
Using the new instructions in step 2, run the following command to get the service’s public IP address or hostname:
kubectl get svc --namespace default myjenkins --template "{{ range (index .status.loadBalancer.ingress 0) }}{{ . }}{{ end }}"I have deployed Jenkins to an EKS cluster, and this is the result of the command for my infrastructure:
$ kubectl get svc --namespace default myjenkins --template "{{ range (index .status.loadBalancer.ingress 0) }}{{ . }}{{ end }}"
a84aa6226d6e5496882cfafdd6564a35-901117307.us-west-1.elb.amazonaws.com
To access Jenkins, open http://service_ip_or_hostname:8080.
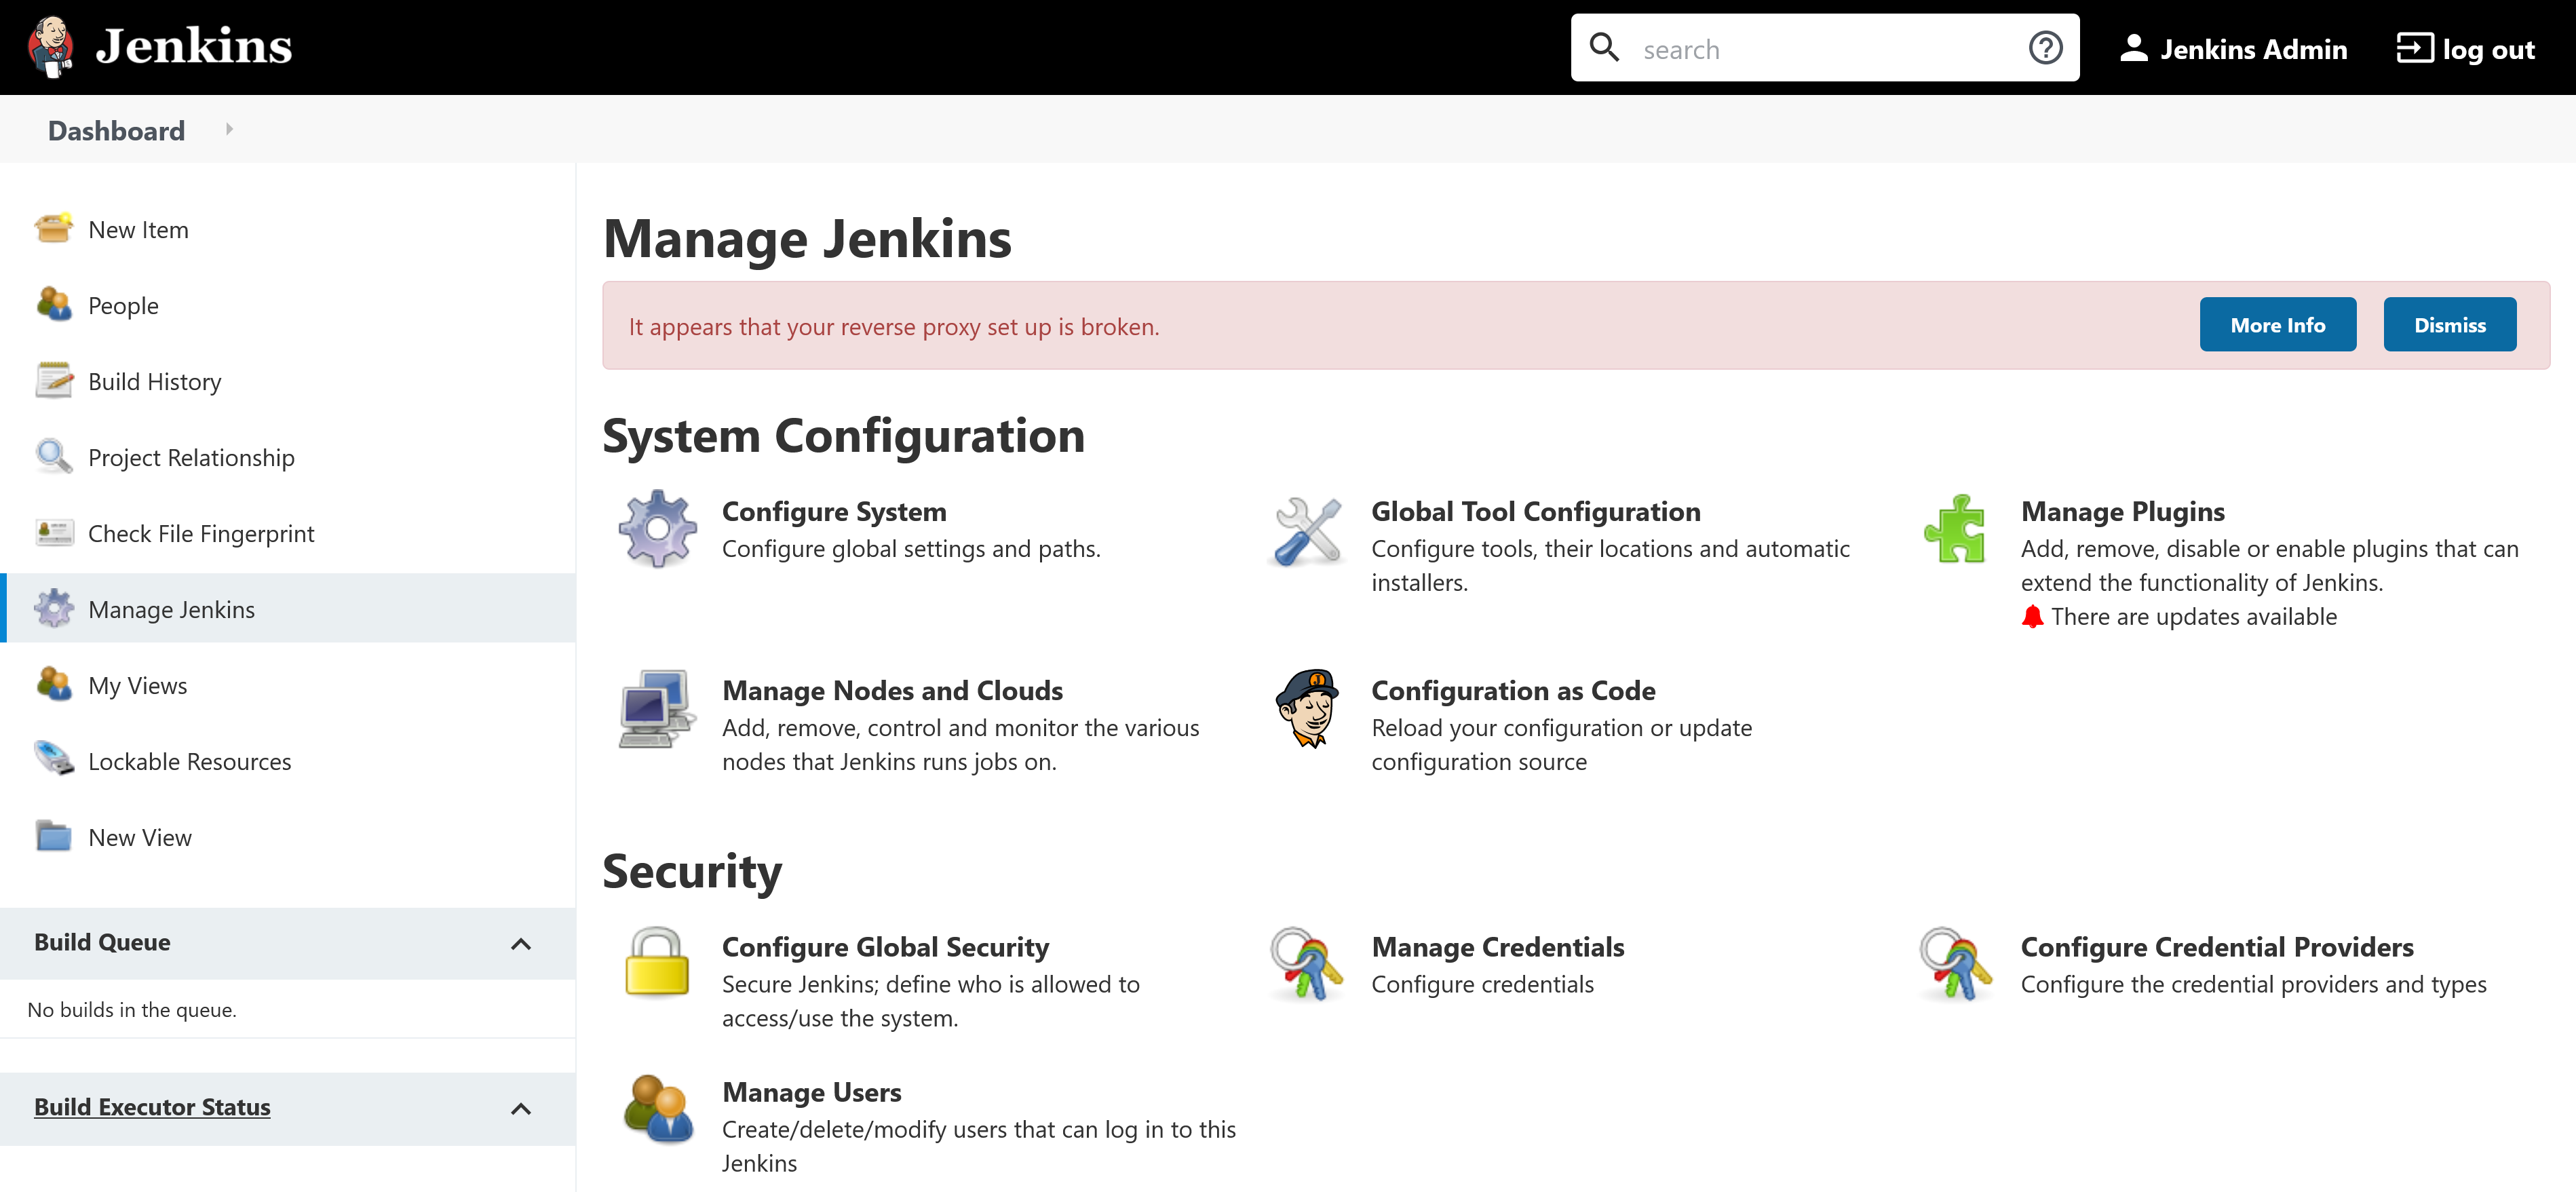
You may notice that Jenkins reports the following error when you access it via its public IP address:
It appears that your reverse proxy set up is broken.
This can be resolved by defining the public URL in the controller.jenkinsUrl property, replacing a84aa6226d6e5496882cfafdd6564a35-901117307.us-west-1.elb.amazonaws.com with the IP address or hostname of your Jenkins instance:
controller:
  jenkinsUrl: http://a84aa6226d6e5496882cfafdd6564a35-901117307.us-west-1.elb.amazonaws.com:8080/
Installing additional plugins
List any additional plugins to be installed in the controller.additionalPlugins array:
controller:
    additionalPlugins:
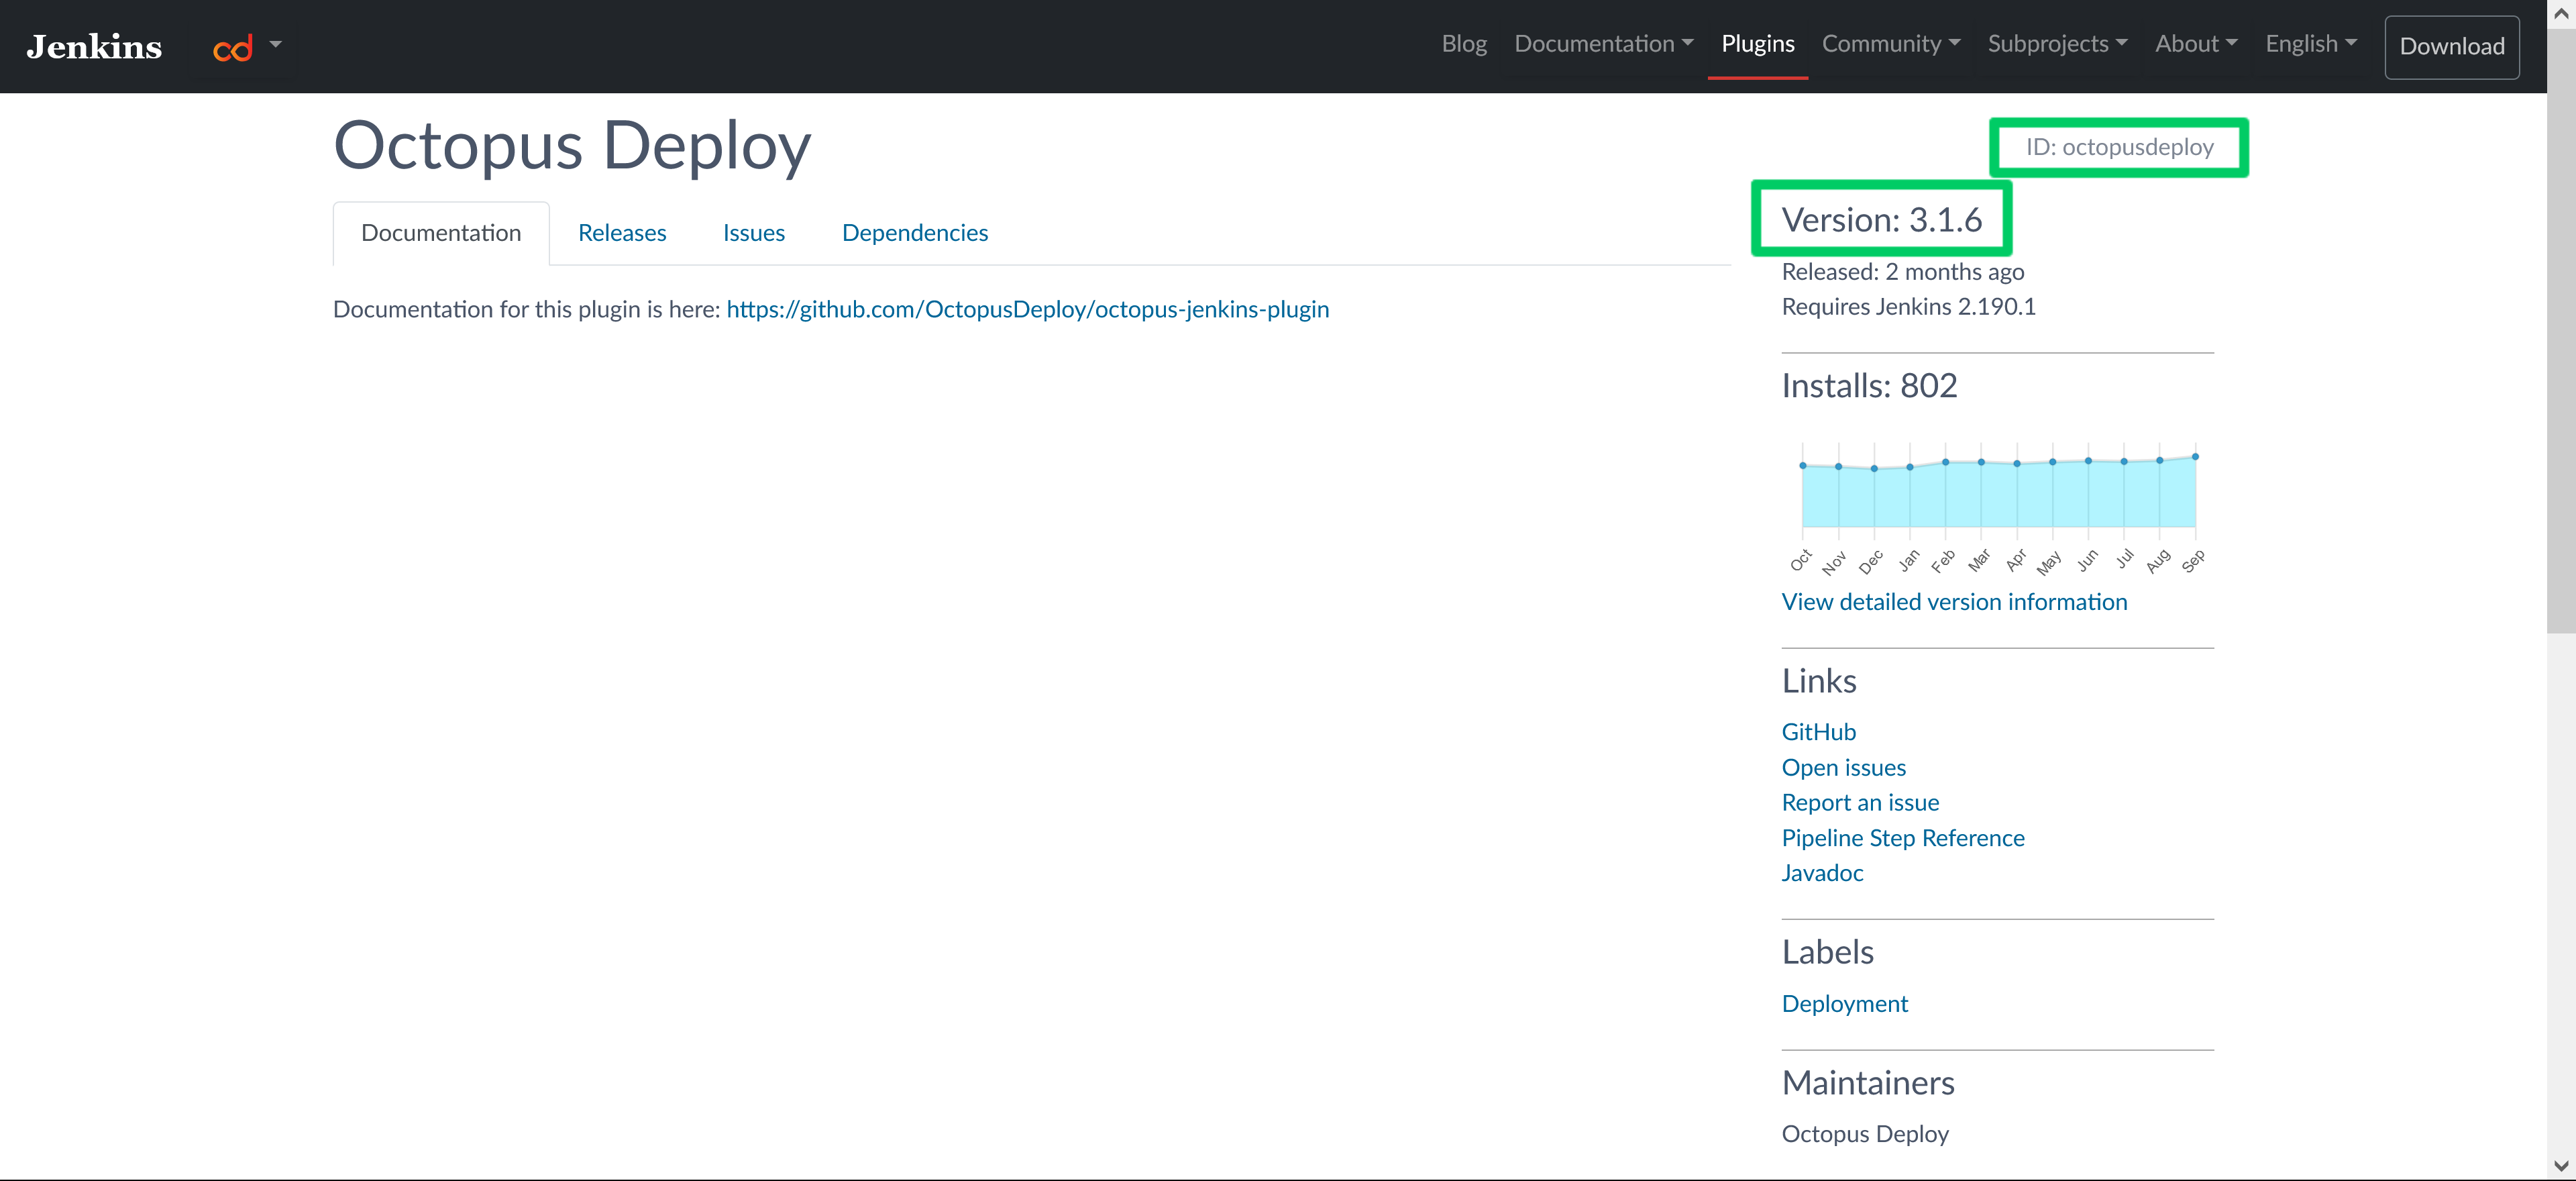
    - octopusdeploy:3.1.6
The plugin ID and version are found on the Jenkins plugin website:

This approach is convenient, but the downside is the Jenkins instance is required to contact the Jenkins update site to retrieve them as part of the first boot.
A more robust approach is to download the plugins as part of a custom image, which ensures the plugins are baked into the Docker image. It also allows additional tools to be installed on the Jenkins controller. The previous post has details on building and publishing custom Docker images.
Note that the custom Docker image must have the following plugins installed in addition to any custom plugins. These plugins are required for the Helm chart to function properly:
- kubernetes
- workflow-aggregator
- git
- configuration-as-code
Here is an example Dockerfile including the mandatory plugins:
FROM jenkins/jenkins:lts-jdk11
USER root
RUN apt update && \
    apt install -y --no-install-recommends gnupg curl ca-certificates apt-transport-https && \
    curl -sSfL https://apt.octopus.com/public.key | apt-key add - && \
    sh -c "echo deb https://apt.octopus.com/ stable main > /etc/apt/sources.list.d/octopus.com.list" && \
    apt update && apt install -y octopuscli
RUN jenkins-plugin-cli --plugins octopusdeploy:3.1.6 kubernetes:1.29.2 workflow-aggregator:2.6 git:4.7.1 configuration-as-code:1.52
USER jenkins
To use the custom image, you define it in the values.yml with the following properties. This example uses the custom Jenkins image pushed to my DockerHub account:
controller:
  image: "docker.io/mcasperson/myjenkins"
  tag: "latest"
  installPlugins: false
You can find an example Dockerfile installing tools for Java, DotNET Core, PHP, Python, Ruby, and Go in the jenkins-complete-image repository.
Jenkins Configuration as Code
Jenkins Configuration as Code (JCasC) is a plugin providing an opinionated method for configuring Jenkins through YAML files. This provides an alternative to writing Groovy scripts directly referencing the Jenkins API, which is powerful, but requires administrators to be comfortable writing code.
JCasC is defined under the controller.JCasC.configScript property. The child keys under configScript have names of your choosing consisting of lowercase letters, numbers, and hyphens, and serve as a way to summarize the block of text they define.
The value assigned to these keys are multi-line strings, which in turn define a JCasC YAML file. The pipe (|) character provides a convenient method for defining a multi-line string, but is otherwise not significant.
The end result gives the appearance of a continuous YAML document. Just keep in mind that the content appearing after the pipe character is simply a multi-line text value that happens to also be YAML.
The example below configures the number of executors available to the Jenkins controller, with the JCasC YAML defined under an exaggerated key called this-is-where-i-configure-the-executors to reinforce the fact that these keys can have any name:
controller:
  JCasC:
    configScripts:
      this-is-where-i-configure-the-executors: |
        jenkins:
          numExecutors: 5
For comparison, the same configuration can also be achieved with the following Groovy script saved as /usr/share/jenkins/ref/init.groovy.d/executors.groovy in a custom Docker image:
import jenkins.model.*
Jenkins.instance.setNumExecutors(5)
Even this simple example highlights the benefits of JCasC:
- Each JCasC property is documented at http://jenkinshost/configuration-as-code/reference (replace
jenkinshostwith the hostname of your own Jenkins instance), whereas writing a Groovy script requires knowledge of the Jenkins API. - JCasC configuration is vanilla YAML, which is much more approachable than scripts written in Groovy.
- JCasC is opinionated, providing a consistent approach for common configuration. Groovy scripts can solve the same problem multiple ways, meaning scripts with more than a few lines of code require the expertise of a software engineer to be understood.
For all the benefits though, JCasC is not a complete replacement for setting system properties or running Groovy scripts. For example, JCasC will not support the ability to disable CSRF, meaning this option is only exposed via system properties.
Backing up Jenkins volumes
Volumes in Kubernetes are a little more complicated than those found in regular Docker because K8s volumes tend to be hosted outside of the node that run the pod. This is because pods can be relocated between nodes, and so need to access volumes from any node.
To complicate matters, unlike Docker volumes, only specialized Kubernetes volumes can be shared between pods. These shared volumes are referred to as ReadWriteMany volumes. Typically though, a Kubernetes volume is only used by a single pod, and are referred to as ReadWriteOnce volumes.
The Jenkins Helm chart configures a ReadWriteOnce volume to host the Jenkins home directory. Because this volume can only be accessed by the pod it’s mounted in to, all backup operations must be performed by that pod.
Fortunately, the Helm chart offers comprehensive backup options, with the ability to perform backups and save them to cloud storage providers.
However, you can orchestrate simple, cloud agnostic backups with two commands.
The first command executes tar inside the pod to backup the /var/jenkins_home directory to the /tmp/backup.tar.gz archive. Note that the pod name myjenkins-0 is derived from the Helm release name myjenkins:
kubectl exec -c jenkins myjenkins-0 -- tar czf /tmp/backup.tar.gz /var/jenkins_homeThe second command copies the backup archive from the pod to your local machine:
kubectl cp -c jenkins myjenkins-0:/tmp/backup.tar.gz ./backup.tar.gzAt this point backup.tar.gz can be copied to a more permanent location.
Adding Jenkins agents
In addition to installing Jenkins on a Kubernetes cluster, you can also dynamically create Jenkins agents in the cluster. These agents are created when new tasks are scheduled in Jenkins and are automatically cleaned up after the tasks are completed.
The default settings for agents are defined under the agent property in the values.yaml file. The example below defines an agent with the Jenkins label default, created in pods prefixed with the name default, and with CPU and memory limits:
agent:
  podName: default
  customJenkinsLabels: default
  resources:
    limits:
      cpu: "1"
      memory: "2048Mi"
More specialized agents are defined under the additionalAgents property. These pod templates inherit the values from those defined in the agent property.
The example below defines a second pod template changing the pod name and Jenkins labels to maven and specifying a new Docker image jenkins/jnlp-agent-maven:latest:
agent:
  podName: default
  customJenkinsLabels: default
  resources:
    limits:
      cpu: "1"
      memory: "2048Mi"
additionalAgents:
  maven:
    podName: maven
    customJenkinsLabels: maven
    image: jenkins/jnlp-agent-maven
    tag: latest
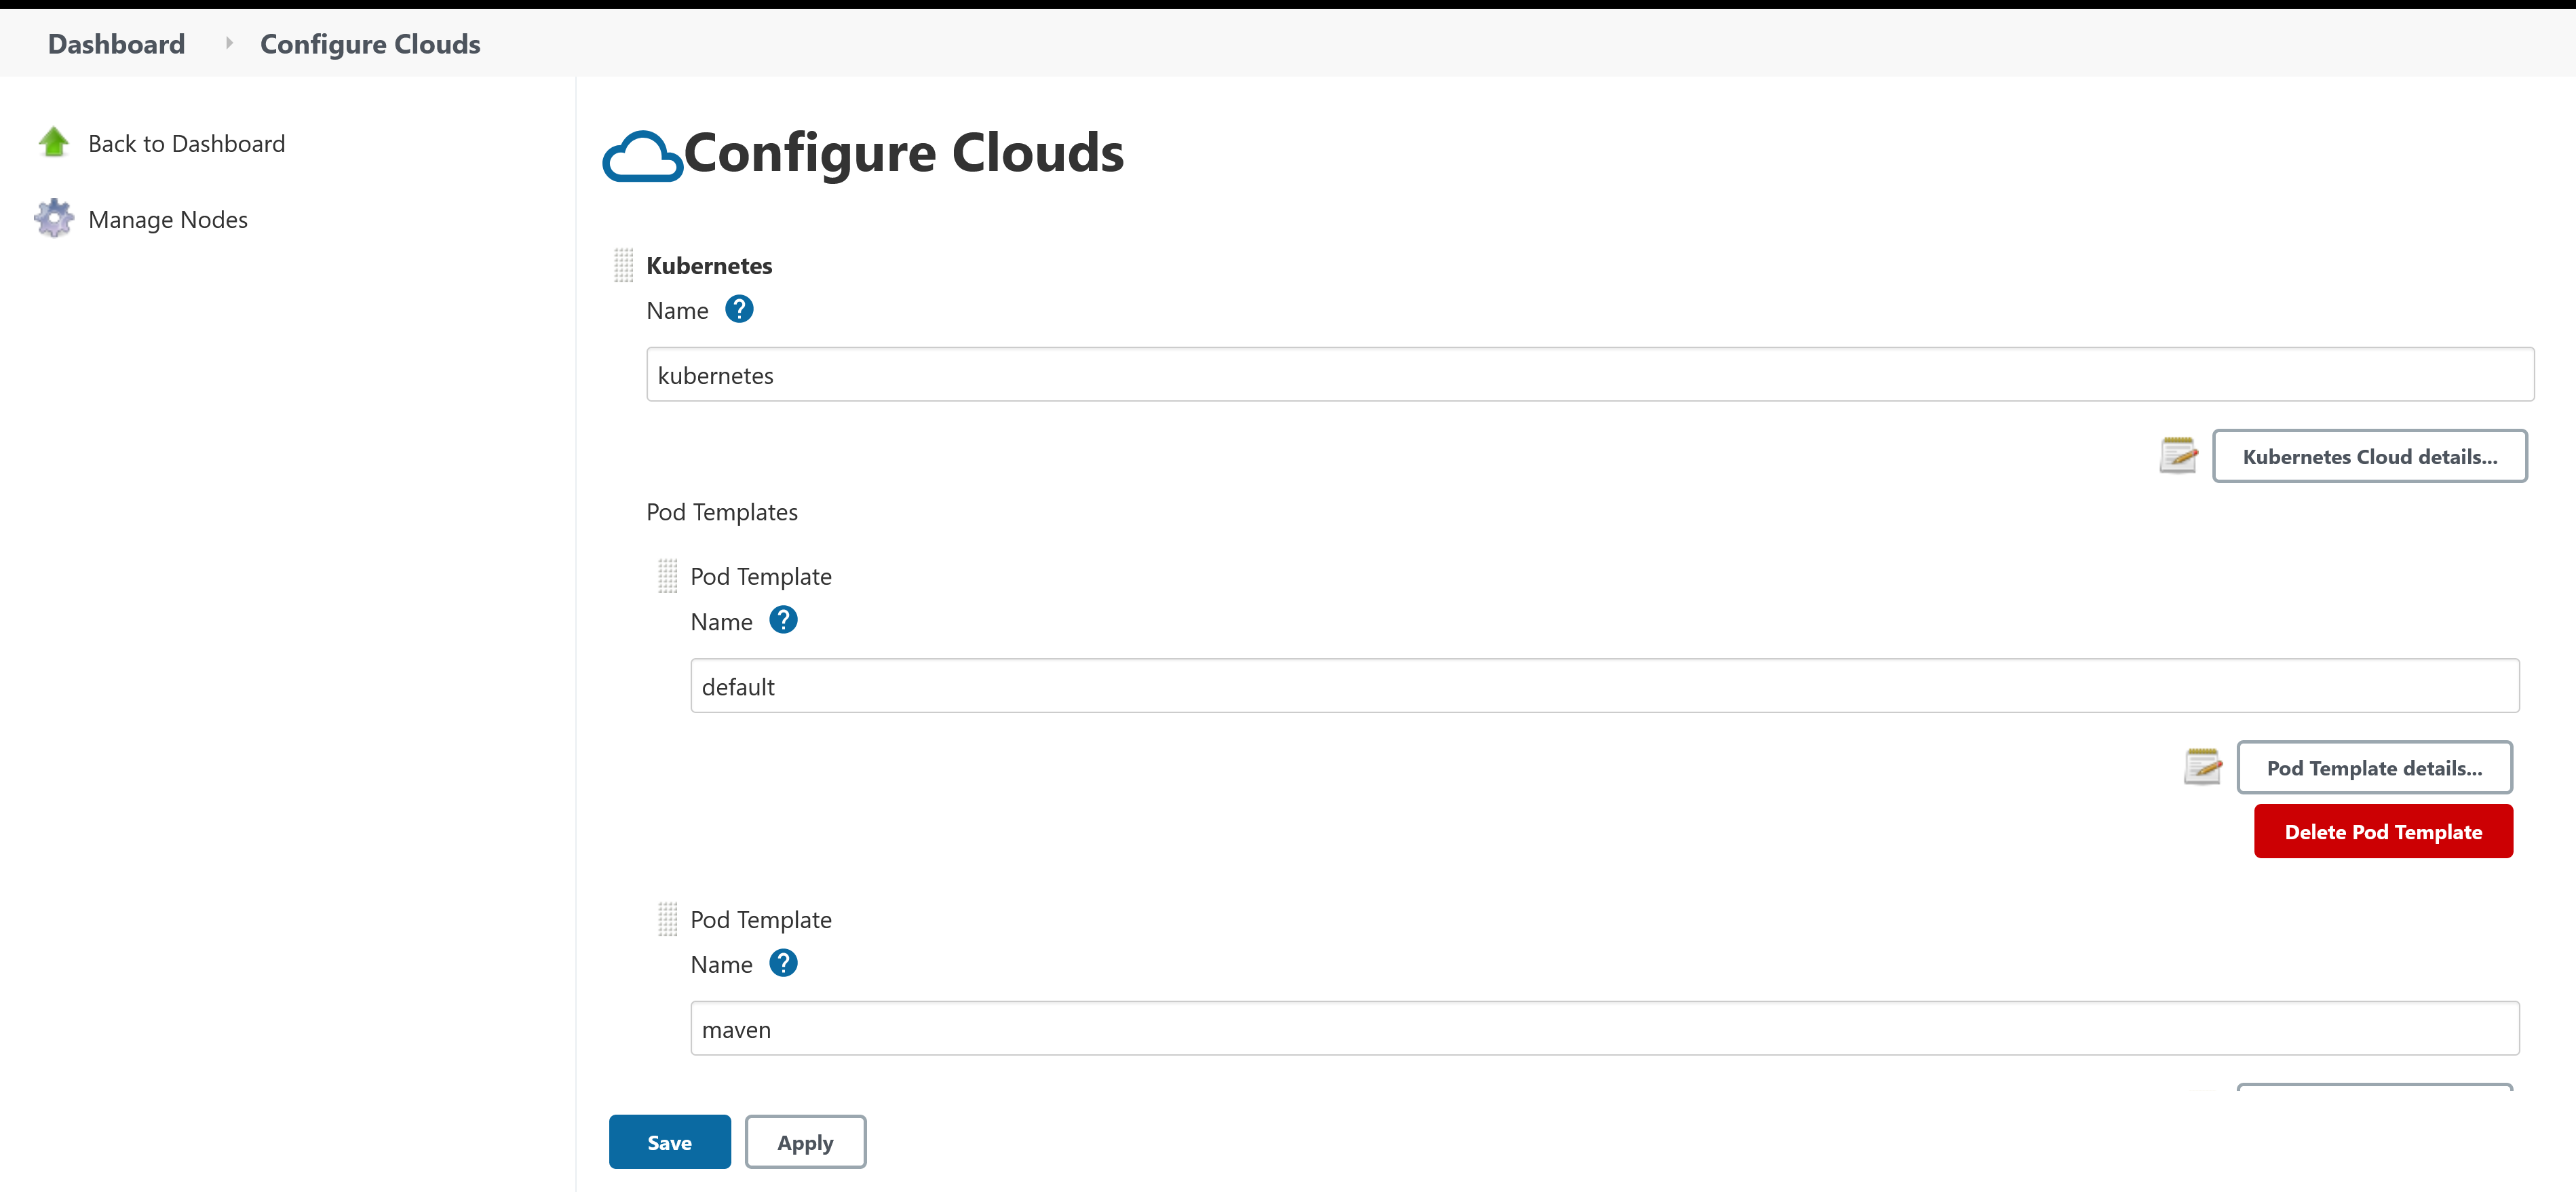
To find the agent definitions, navigate to Manage Jenkins, then Manage Nodes and Clouds, and finally Configure Clouds.

To use the agents to execute a pipeline, define the agent block like this:
pipeline {
  agent {
      kubernetes {
          inheritFrom 'maven'
      }
  }
  // ...
}
For example, this pipeline for a Java application uses the maven agent template:
pipeline {
  // This pipeline requires the following plugins:
  // * Pipeline Utility Steps Plugin: https://wiki.jenkins.io/display/JENKINS/Pipeline+Utility+Steps+Plugin
  // * Git: https://plugins.jenkins.io/git/
  // * Workflow Aggregator: https://plugins.jenkins.io/workflow-aggregator/
  // * Octopus Deploy: https://plugins.jenkins.io/octopusdeploy/
  // * JUnit: https://plugins.jenkins.io/junit/
  // * Maven Integration: https://plugins.jenkins.io/maven-plugin/
  parameters {
    string(defaultValue: 'Spaces-1', description: '', name: 'SpaceId', trim: true)
    string(defaultValue: 'SampleMavenProject-SpringBoot', description: '', name: 'ProjectName', trim: true)
    string(defaultValue: 'Dev', description: '', name: 'EnvironmentName', trim: true)
    string(defaultValue: 'Octopus', description: '', name: 'ServerId', trim: true)
  }
  tools {
    jdk 'Java'
  }
  agent {
      kubernetes {
          inheritFrom 'maven'
      }
  }
  stages {
    stage('Environment') {
      steps {
          echo "PATH = ${PATH}"
      }
    }
    stage('Checkout') {
      steps {
        // If this pipeline is saved as a Jenkinsfile in a git repo, the checkout stage can be deleted as
        // Jenkins will check out the code for you.
        script {
            /*
              This is from the Jenkins "Global Variable Reference" documentation:
              SCM-specific variables such as GIT_COMMIT are not automatically defined as environment variables; rather you can use the return value of the checkout step.
            */
            def checkoutVars = checkout([$class: 'GitSCM', branches: [[name: '*/master']], userRemoteConfigs: [[url: 'https://github.com/mcasperson/SampleMavenProject-SpringBoot.git']]])
            env.GIT_URL = checkoutVars.GIT_URL
            env.GIT_COMMIT = checkoutVars.GIT_COMMIT
            env.GIT_BRANCH = checkoutVars.GIT_BRANCH
        }
      }
    }
    stage('Dependencies') {
      steps {
        // Download the dependencies and plugins before we attempt to do any further actions
        sh(script: './mvnw --batch-mode dependency:resolve-plugins dependency:go-offline')
        // Save the dependencies that went into this build into an artifact. This allows you to review any builds for vulnerabilities later on.
        sh(script: './mvnw --batch-mode dependency:tree > dependencies.txt')
        archiveArtifacts(artifacts: 'dependencies.txt', fingerprint: true)
        // List any dependency updates.
        sh(script: './mvnw --batch-mode versions:display-dependency-updates > dependencieupdates.txt')
        archiveArtifacts(artifacts: 'dependencieupdates.txt', fingerprint: true)
      }
    }
    stage('Build') {
      steps {
        // Set the build number on the generated artifact.
        sh '''
          ./mvnw --batch-mode build-helper:parse-version versions:set \
          -DnewVersion=\\${parsedVersion.majorVersion}.\\${parsedVersion.minorVersion}.\\${parsedVersion.incrementalVersion}.${BUILD_NUMBER}
        '''
        sh(script: './mvnw --batch-mode clean compile', returnStdout: true)
        script {
            env.VERSION_SEMVER = sh (script: './mvnw -q -Dexec.executable=echo -Dexec.args=\'${project.version}\' --non-recursive exec:exec', returnStdout: true)
            env.VERSION_SEMVER = env.VERSION_SEMVER.trim()
        }
      }
    }
    stage('Test') {
      steps {
        sh(script: './mvnw --batch-mode -Dmaven.test.failure.ignore=true test')
        junit(testResults: 'target/surefire-reports/*.xml', allowEmptyResults : true)
      }
    }
    stage('Package') {
      steps {
        sh(script: './mvnw --batch-mode package -DskipTests')
      }
    }
    stage('Repackage') {
      steps {
        // This scans through the build tool output directory and find the largest file, which we assume is the artifact that was intended to be deployed.
        // The path to this file is saved in and environment variable called JAVA_ARTIFACT, which can be consumed by subsequent custom deployment steps.
        script {
            // Find the matching artifacts
            def extensions = ['jar', 'war']
            def files = []
            for(extension in extensions){
                findFiles(glob: 'target/**.' + extension).each{files << it}
            }
            echo 'Found ' + files.size() + ' potential artifacts'
            // Assume the largest file is the artifact we intend to deploy
            def largestFile = null
            for (i = 0; i < files.size(); ++i) {
                if (largestFile == null || files[i].length > largestFile.length) {
                    largestFile = files[i]
                }
            }
            if (largestFile != null) {
                env.ORIGINAL_ARTIFACT = largestFile.path
                // Create a filename based on the repository name, the new version, and the original file extension.
                env.ARTIFACTS = "SampleMavenProject-SpringBoot." + env.VERSION_SEMVER + largestFile.path.substring(largestFile.path.lastIndexOf("."), largestFile.path.length())
                echo 'Found artifact at ' + largestFile.path
                echo 'This path is available from the ARTIFACTS environment variable.'
            }
        }
        // Octopus requires files to have a specific naming format. So copy the original artifact into a file with the correct name.
        sh(script: 'cp ${ORIGINAL_ARTIFACT} ${ARTIFACTS}')
      }
    }
    stage('Deployment') {
      steps {
        octopusPushPackage(additionalArgs: '', packagePaths: env.ARTIFACTS.split(":").join("\n"), overwriteMode: 'OverwriteExisting', serverId: params.ServerId, spaceId: params.SpaceId, toolId: 'Default')
        octopusPushBuildInformation(additionalArgs: '', commentParser: 'GitHub', overwriteMode: 'OverwriteExisting', packageId: env.ARTIFACTS.split(":")[0].substring(env.ARTIFACTS.split(":")[0].lastIndexOf("/") + 1, env.ARTIFACTS.split(":")[0].length()).replace("." + env.VERSION_SEMVER + ".zip", ""), packageVersion: env.VERSION_SEMVER, serverId: params.ServerId, spaceId: params.SpaceId, toolId: 'Default', verboseLogging: false, gitUrl: env.GIT_URL, gitCommit: env.GIT_COMMIT, gitBranch: env.GIT_BRANCH)
        octopusCreateRelease(additionalArgs: '', cancelOnTimeout: false, channel: '', defaultPackageVersion: '', deployThisRelease: false, deploymentTimeout: '', environment: params.EnvironmentName, jenkinsUrlLinkback: false, project: params.ProjectName, releaseNotes: false, releaseNotesFile: '', releaseVersion: env.VERSION_SEMVER, serverId: params.ServerId, spaceId: params.SpaceId, tenant: '', tenantTag: '', toolId: 'Default', verboseLogging: false, waitForDeployment: false)
        octopusDeployRelease(cancelOnTimeout: false, deploymentTimeout: '', environment: params.EnvironmentName, project: params.ProjectName, releaseVersion: env.VERSION_SEMVER, serverId: params.ServerId, spaceId: params.SpaceId, tenant: '', tenantTag: '', toolId: 'Default', variables: '', verboseLogging: false, waitForDeployment: true)
      }
    }
  }
}
You can confirm that the agent is created in the cluster during the task execution by running:
kubectl get podsIn the example below, the pod java-9-k0hmj-vcvdz-wknh4 is in the process of being created to execute the example pipeline above:
$ kubectl get pods
NAME                                     READY   STATUS              RESTARTS   AGE
java-9-k0hmj-vcvdz-wknh4                 0/1     ContainerCreating   0          1s
myjenkins-0                              2/2     Running             0          49m
Conclusion
Hosting Jenkins and its agents in a Kubernetes cluster allows you to create a scalable and responsive build platform, creating and destroying agents on the fly to handle elastic workloads. And thanks to the Jenkins Helm chart, installing Jenkins and configuring the nodes requires only a few lines of YAML.
In this post you learned how to:
- Deploy Jenkins to Kubernetes
- Expose Jenkins on a public IP address
- Install additional plugins as part of the installation process
- Configure Jenkins through JCasC
- Backup the Jenkins home directory
- Create Kubernetes agents that are created and destroyed as needed
Check out our other posts about installing Jenkins:
Try our free Jenkins Pipeline Generator tool to create a Pipeline file in Groovy syntax. It’s everything you need to get your Pipeline project started.
Watch our Jenkins Pipeline webinar
Getting started with Jenkins Pipeline and Octopus Deploy
We host webinars regularly. See the webinars page for details about upcoming events, and live stream recordings.
Read the rest of our Continuous Integration series.
Happy deployments!


