
This post is part of a series that demonstrates a sample deployment pipeline with Jenkins, Docker, and Octopus:
- From JAR to Docker
- From local builds to Continuous Integration
- From Continuous Integration to Kubernetes deployments
- From Continuous Integration to release management
- From release management to operations

In the previous blog post, we used Octopus to build a Kubernetes cluster in AWS using EKS, and then deployed the Docker image created by Jenkins as a Kubernetes deployment and service.
However, we still don’t have a complete deployment pipeline solution, as Jenkins is not integrated with Octopus, leaving us to manually coordinate builds and deployments.
In this blog post, we’ll extend our Jenkins build to call Octopus and initiate a deployment when our Docker image has been pushed to Docker Hub. We will also create additional environments, and manage the release from a local development environment to the final production environment.
Install the Jenkins plugins
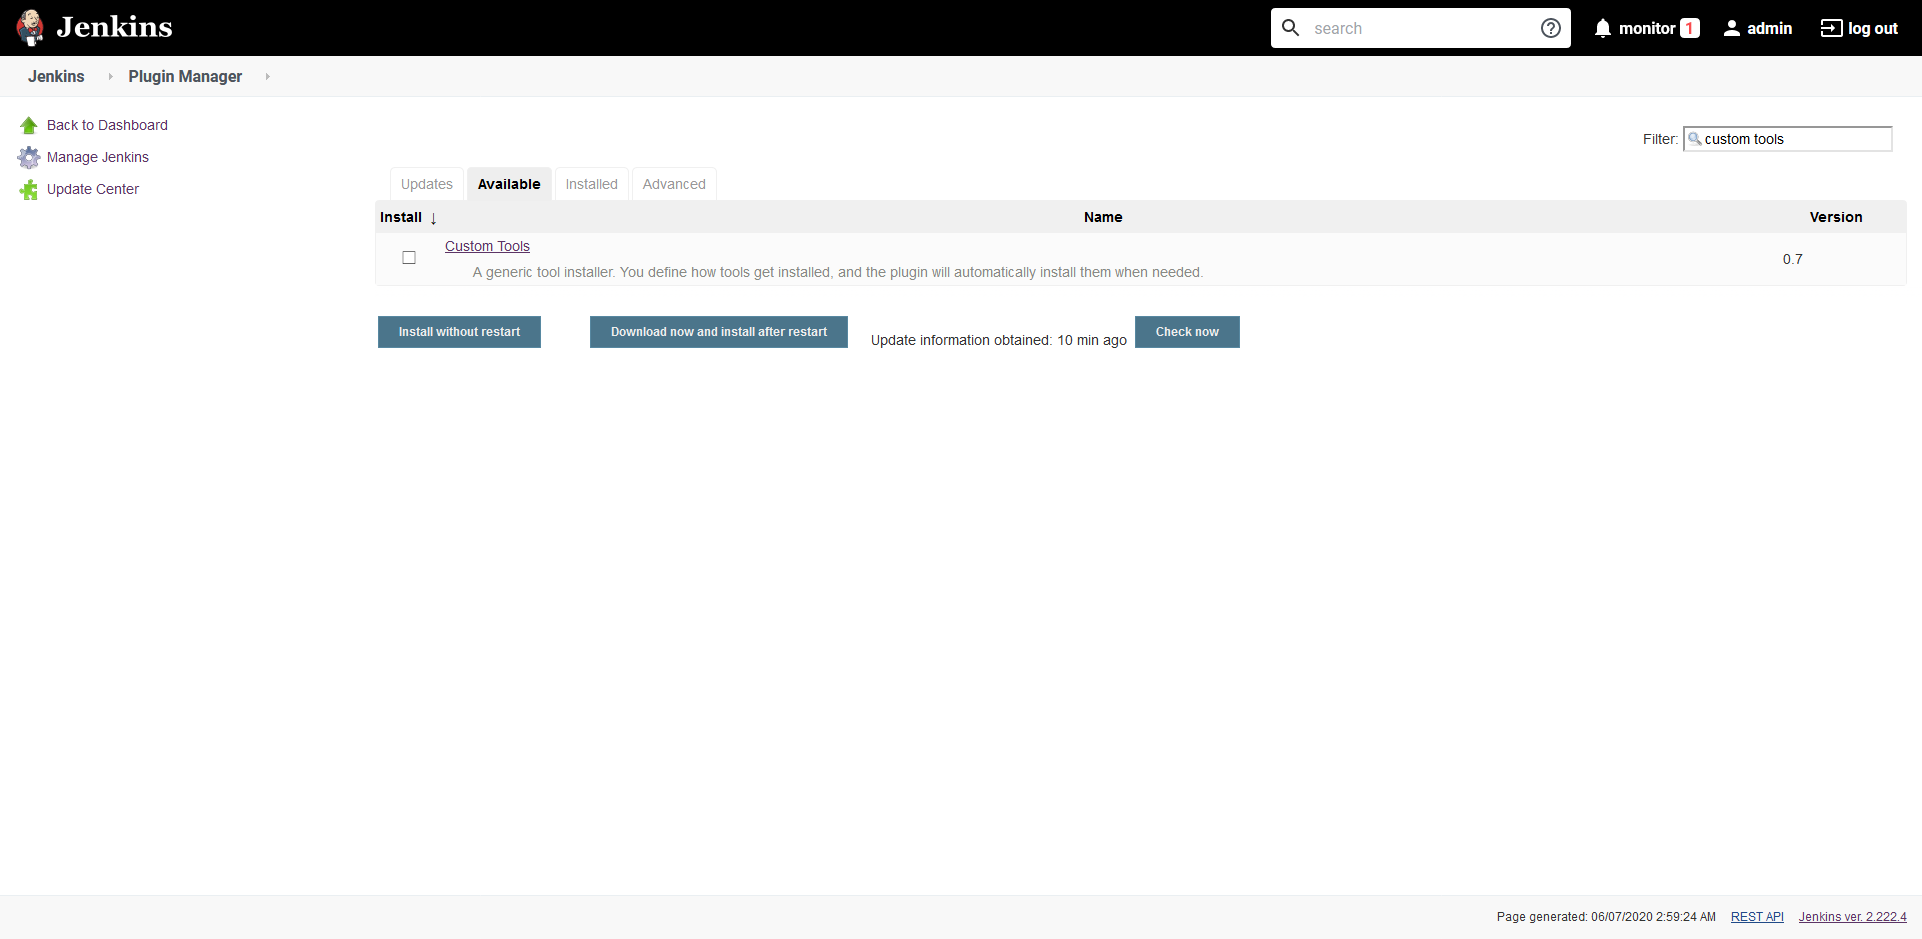
Octopus provides a plugin for Jenkins that exposes integration steps in both freestyle projects and pipeline scripts. This plugin is installed by navigating to {{ Manage Jenkins, Manage Plugins }}. From here, you can search for “Octopus” and install the plugin.
The Octopus plugin uses the Octopus CLI to integrate with the Octopus Server. We can install the CLI manually on the agent, but for this example we’ll use the Custom Tools plugin to download the Octopus CLI and push it to the agent:
Configure the Octopus Server and tools
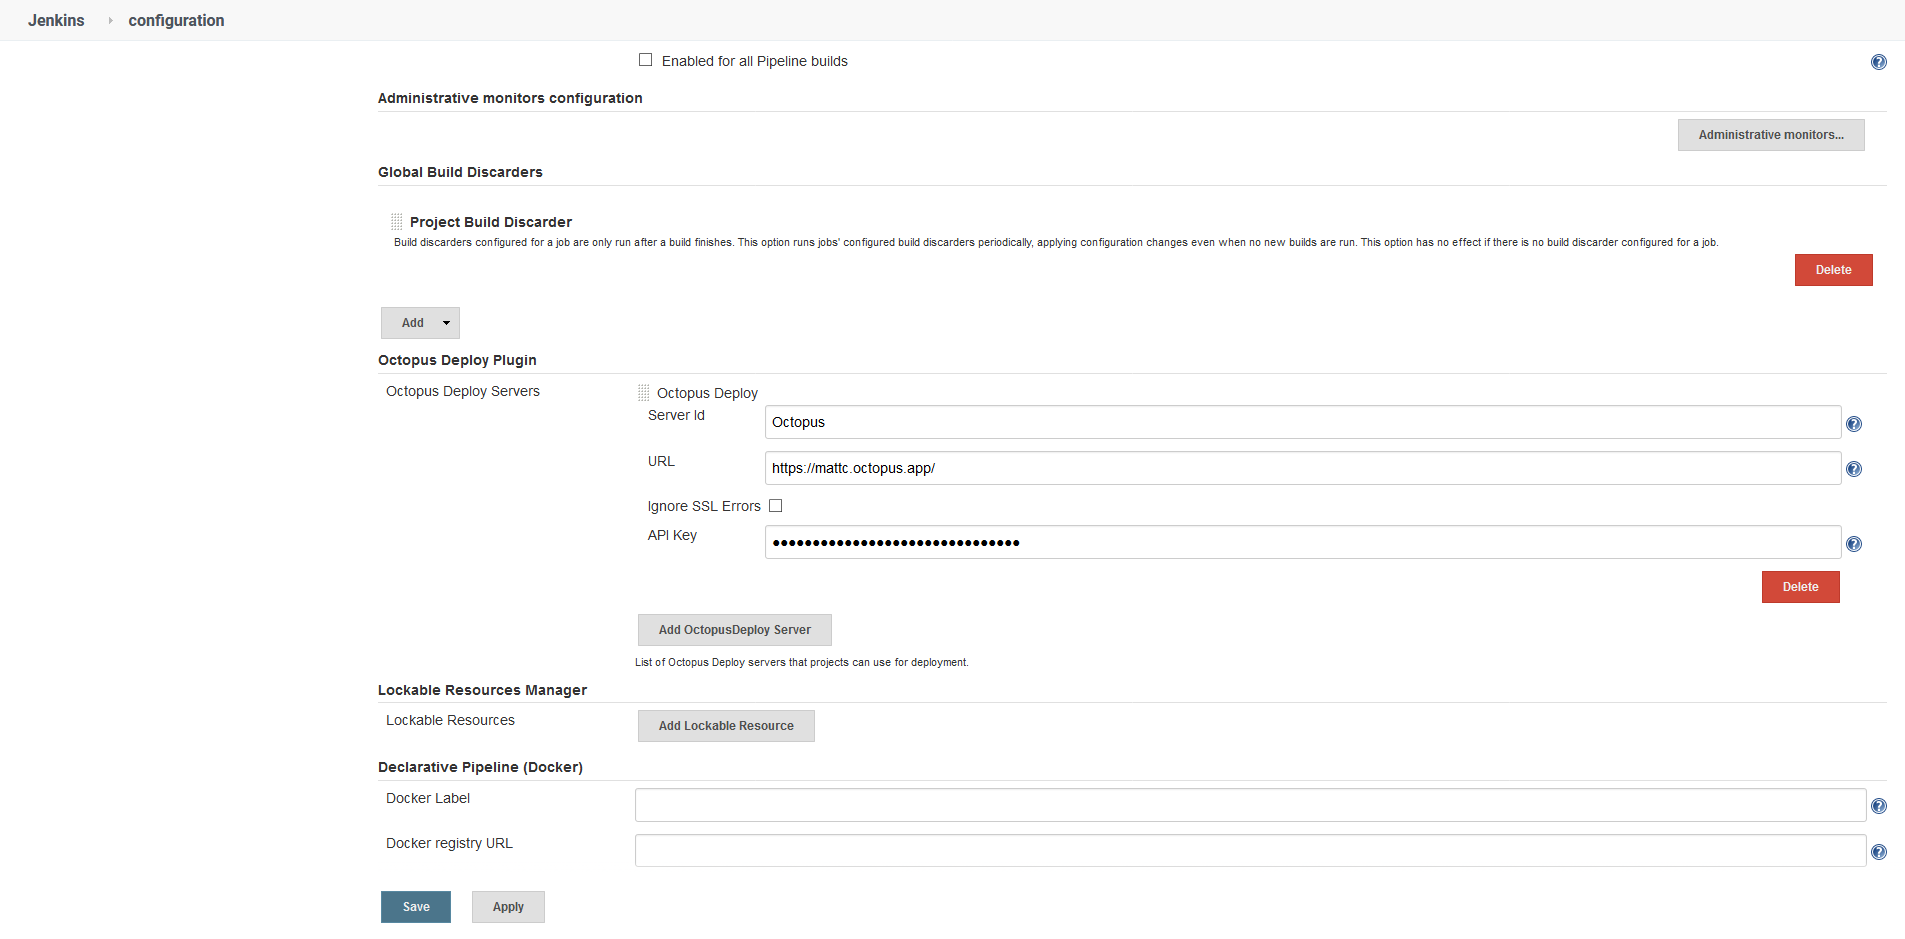
We add the Octopus Server, our pipeline will connect with, by navigating to {{ Manage Jenkins, Configure System }}:
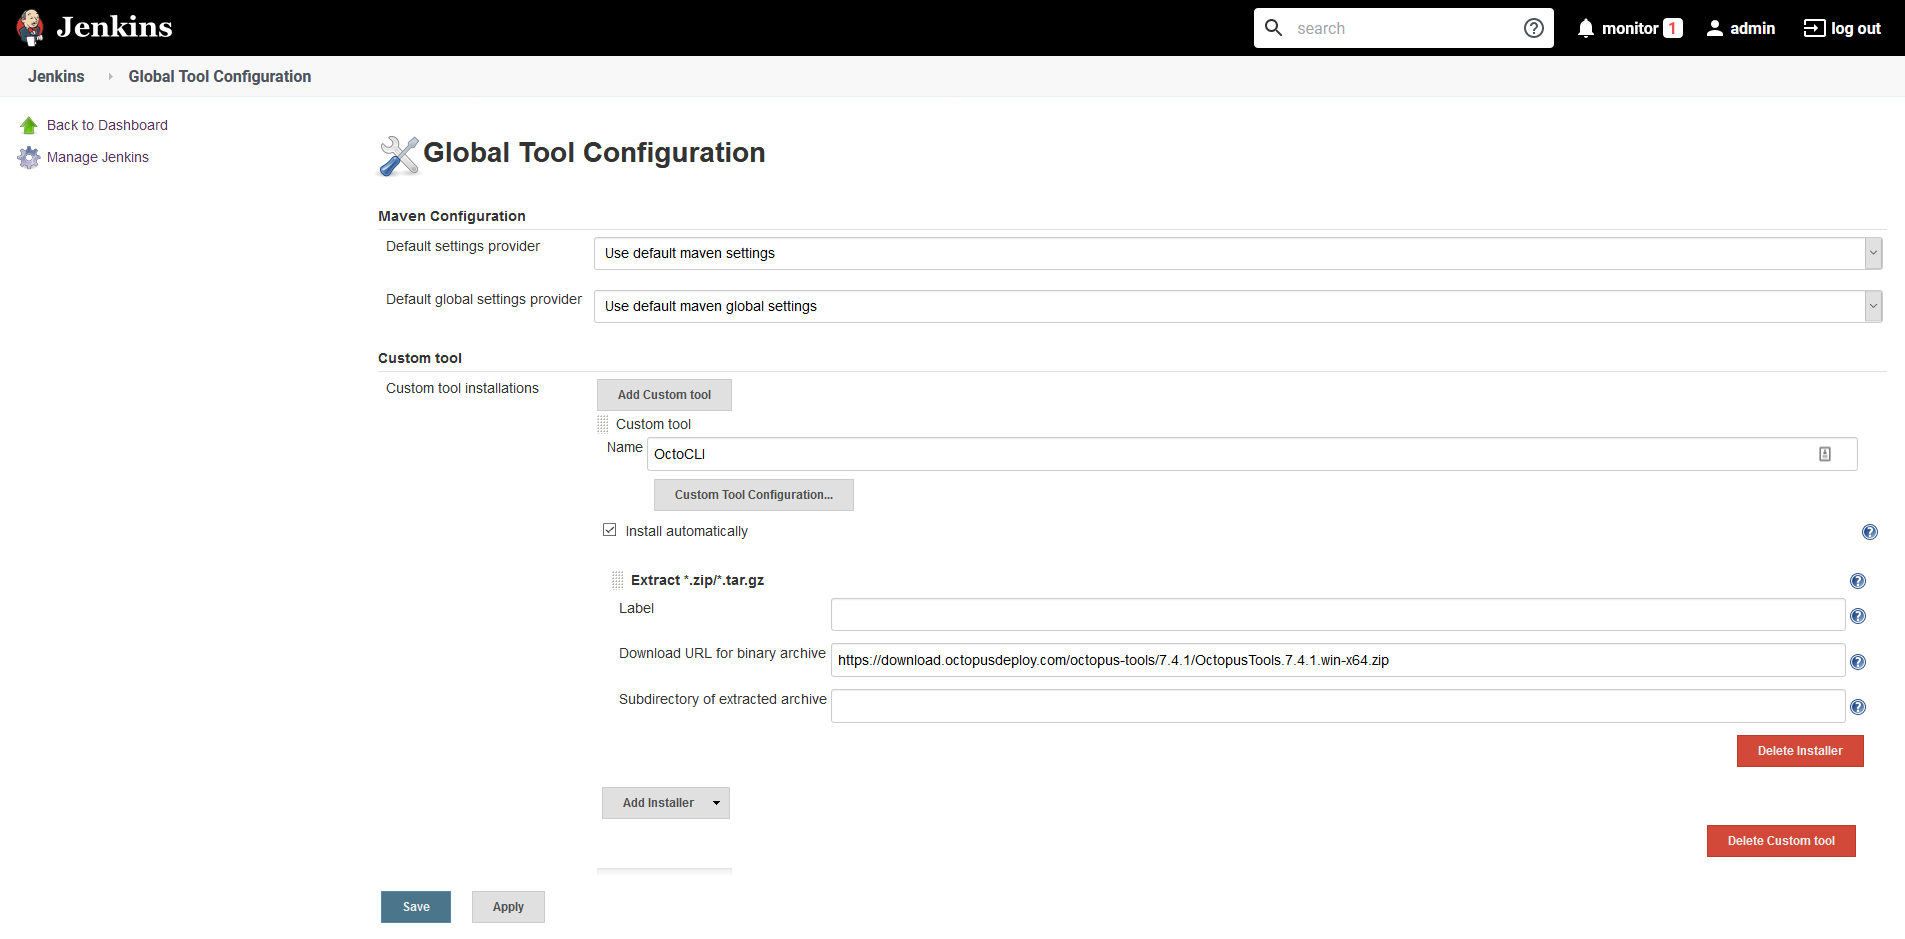
We then need to define a custom tool under {{ Manage Jenkins, Global Tool Configuration }}. The custom tool has the name OctoCLI, and because in my case the agent is running on Windows, the Octopus CLI will be downloaded from https://download.octopusdeploy.com/octopus-tools/7.4.1/OctopusTools.7.4.1.win-x64.zip. For the latest version of the CLI, and for binaries supporting other operating systems, see the Octopus download page:
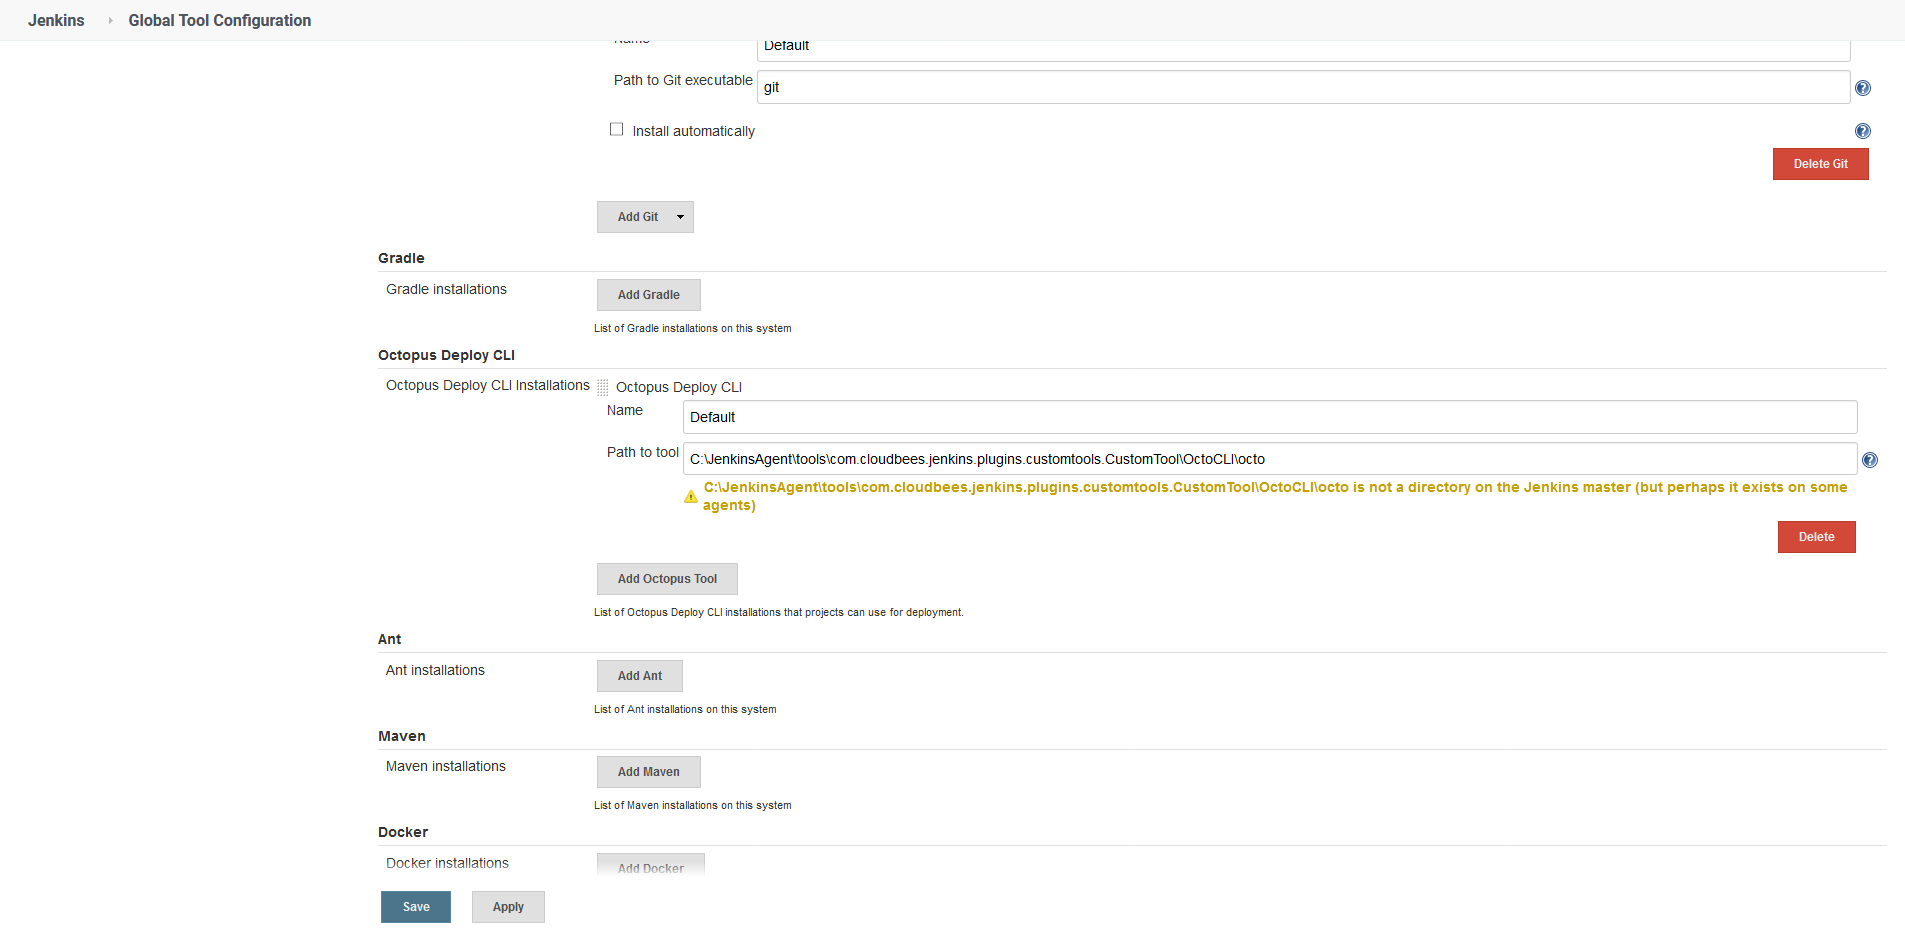
Further down on the Global Tool Configuration page we define the path to the Octopus CLI. The custom tools plugin installs the Octopus CLI to the directory <jenkins home>/tools/com.cloudbees.jenkins.plugins.customtools.CustomTool/OctoCLI, where <jenkins home> is the home directory of the Jenkins server or the agent performing the build. In my case, the agent home directory is C:\JenkinsAgent, so the Octopus CLI will be available from C:\JenkinsAgent\tools\com.cloudbees.jenkins.plugins.customtools.CustomTool\OctoCLI\octo. The name of the tool is left as Default:
With these tools configured we can update the pipeline script to initiate a deployment in Octopus after the Docker image has been pushed to Docker Hub.
Update the Jenkins pipeline
Our existing pipeline was configured to build and push the Docker image to Docker Hub. We will retain those steps, and add additional steps to install the Octopus CLI as a custom tool and then create and deploy a release in Octopus after the Docker image has been pushed. Let’s look at the complete pipeline:
pipeline {
    agent {
        label 'docker'
    }
    parameters {
        string(defaultValue: 'Spaces-1', description: '', name: 'SpaceId', trim: true)
        string(defaultValue: 'Petclinic', description: '', name: 'ProjectName', trim: true)
        string(defaultValue: 'Dev', description: '', name: 'EnvironmentName', trim: true)
        string(defaultValue: 'Octopus', description: '', name: 'ServerId', trim: true)
    }
    stages {
        stage ('Add tools') {
            steps {
                tool('OctoCLI')
            }
        }
        stage('Building our image') {
            steps {
                script {
                    dockerImage = docker.build "mcasperson/petclinic:$BUILD_NUMBER"
                }
            }
        }
        stage('Deploy our image') {
            steps {
                script {
                    // Assume the Docker Hub registry by passing an empty string as the first parameter
                    docker.withRegistry('' , 'dockerhub') {
                        dockerImage.push()
                    }
                }
            }
        }
        stage('deploy') {
            steps {
                octopusCreateRelease deployThisRelease: true, environment: "${EnvironmentName}", project: "${ProjectName}", releaseVersion: "1.0.${BUILD_NUMBER}", serverId: "${ServerId}", spaceId: "${SpaceId}", toolId: 'Default', waitForDeployment: true
            }
        }
    }
}
This pipeline has some new settings to support integration with Octopus.
We start by defining common parameters. These parameters will be referenced when we create and deploy a release in Octopus, and they provide a nice way to decouple the Octopus details from any specific instance, while also providing sensible default values:
    parameters {
        string(defaultValue: 'Spaces-1', description: '', name: 'SpaceId', trim: true)
        string(defaultValue: 'Petclinic', description: '', name: 'ProjectName', trim: true)
        string(defaultValue: 'Dev', description: '', name: 'EnvironmentName', trim: true)
        string(defaultValue: 'Octopus', description: '', name: 'ServerId', trim: true)
    }
In order for the custom tools plugin to extract the Octopus CLI in the agent’s home directory, we need to call tool('OctoCLI'):
        stage ('Add tools') {
            steps {
                tool('OctoCLI')
            }
        }
The final stage makes a call to octopusCreateRelease to both create a release and deploy it to the first environment in Octopus. By default, Octopus will create the deployment with the latest version of the packages referenced in the deployment steps, which means that we will deploy the Docker image that Jenkins uploaded to Docker Hub in the previous stage:
        stage('deploy') {
            steps {
                octopusCreateRelease deployThisRelease: true, environment: "${EnvironmentName}", project: "${ProjectName}", releaseVersion: "1.0.${BUILD_NUMBER}", serverId: "${ServerId}", spaceId: "${SpaceId}", toolId: 'Default', waitForDeployment: true
            }
        }
With these changes to the pipeline we rerun the project in Jenkins, and from the console logs we can see that Jenkins has successfully triggered a deployment in Octopus:
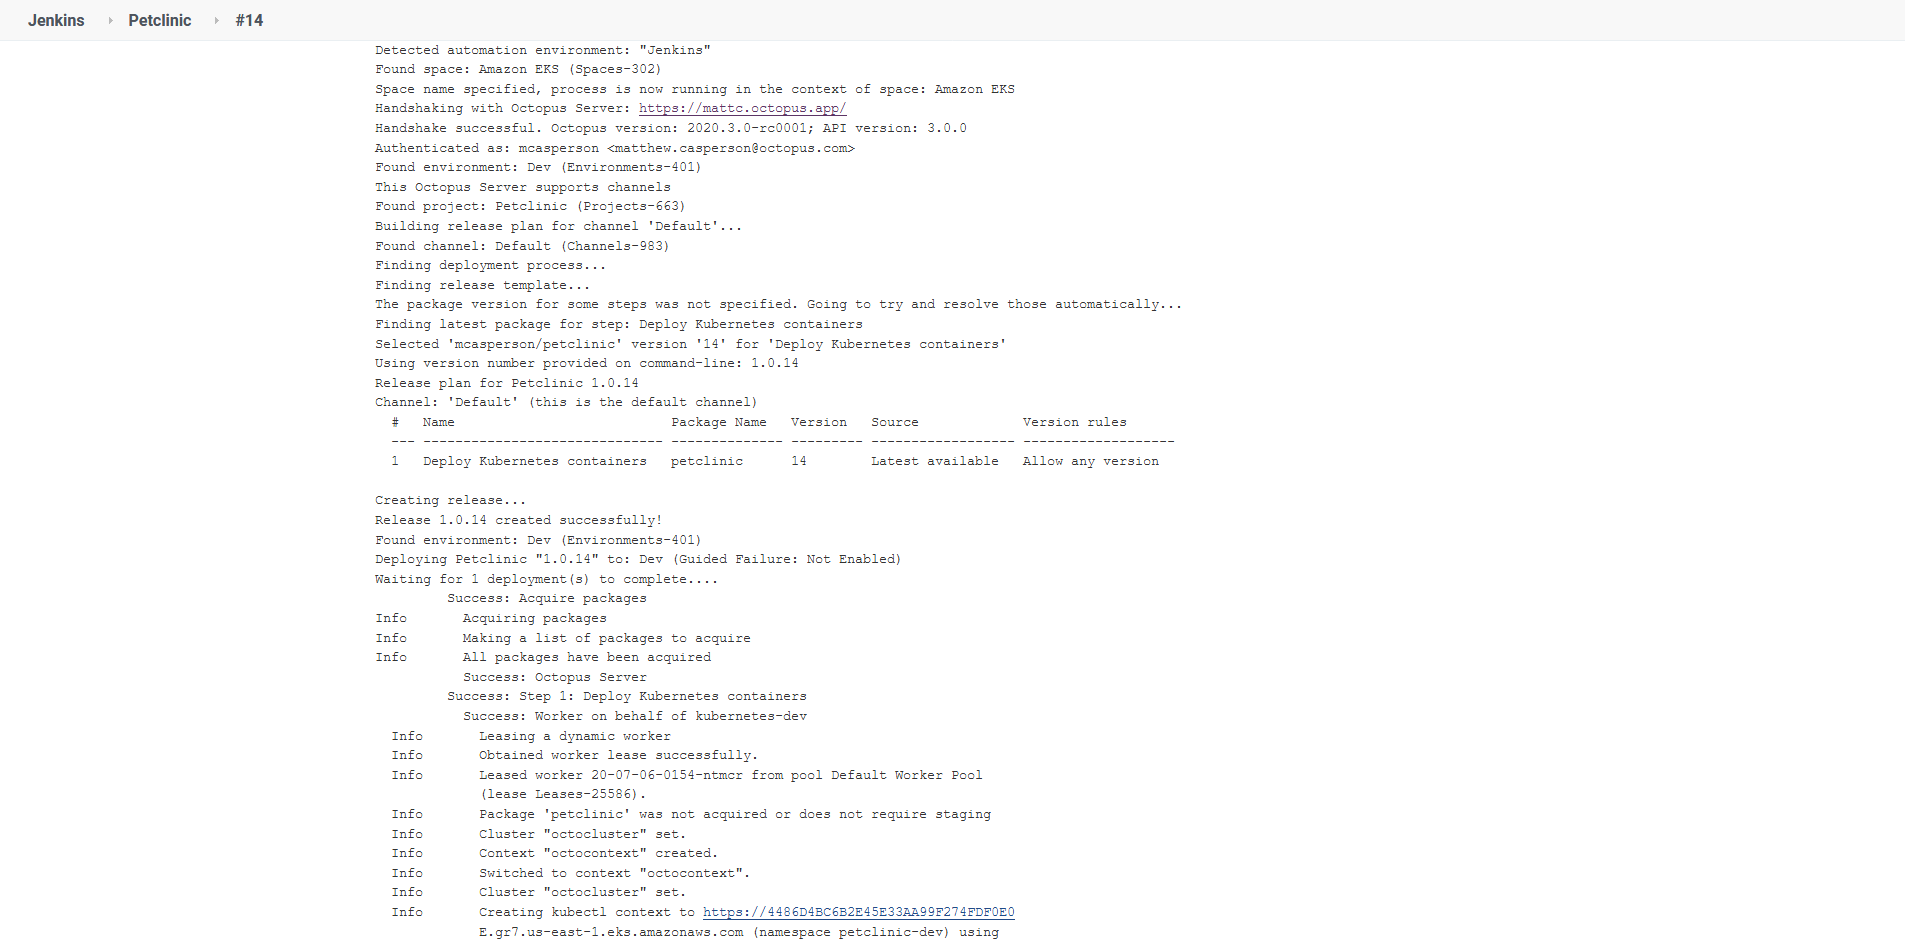
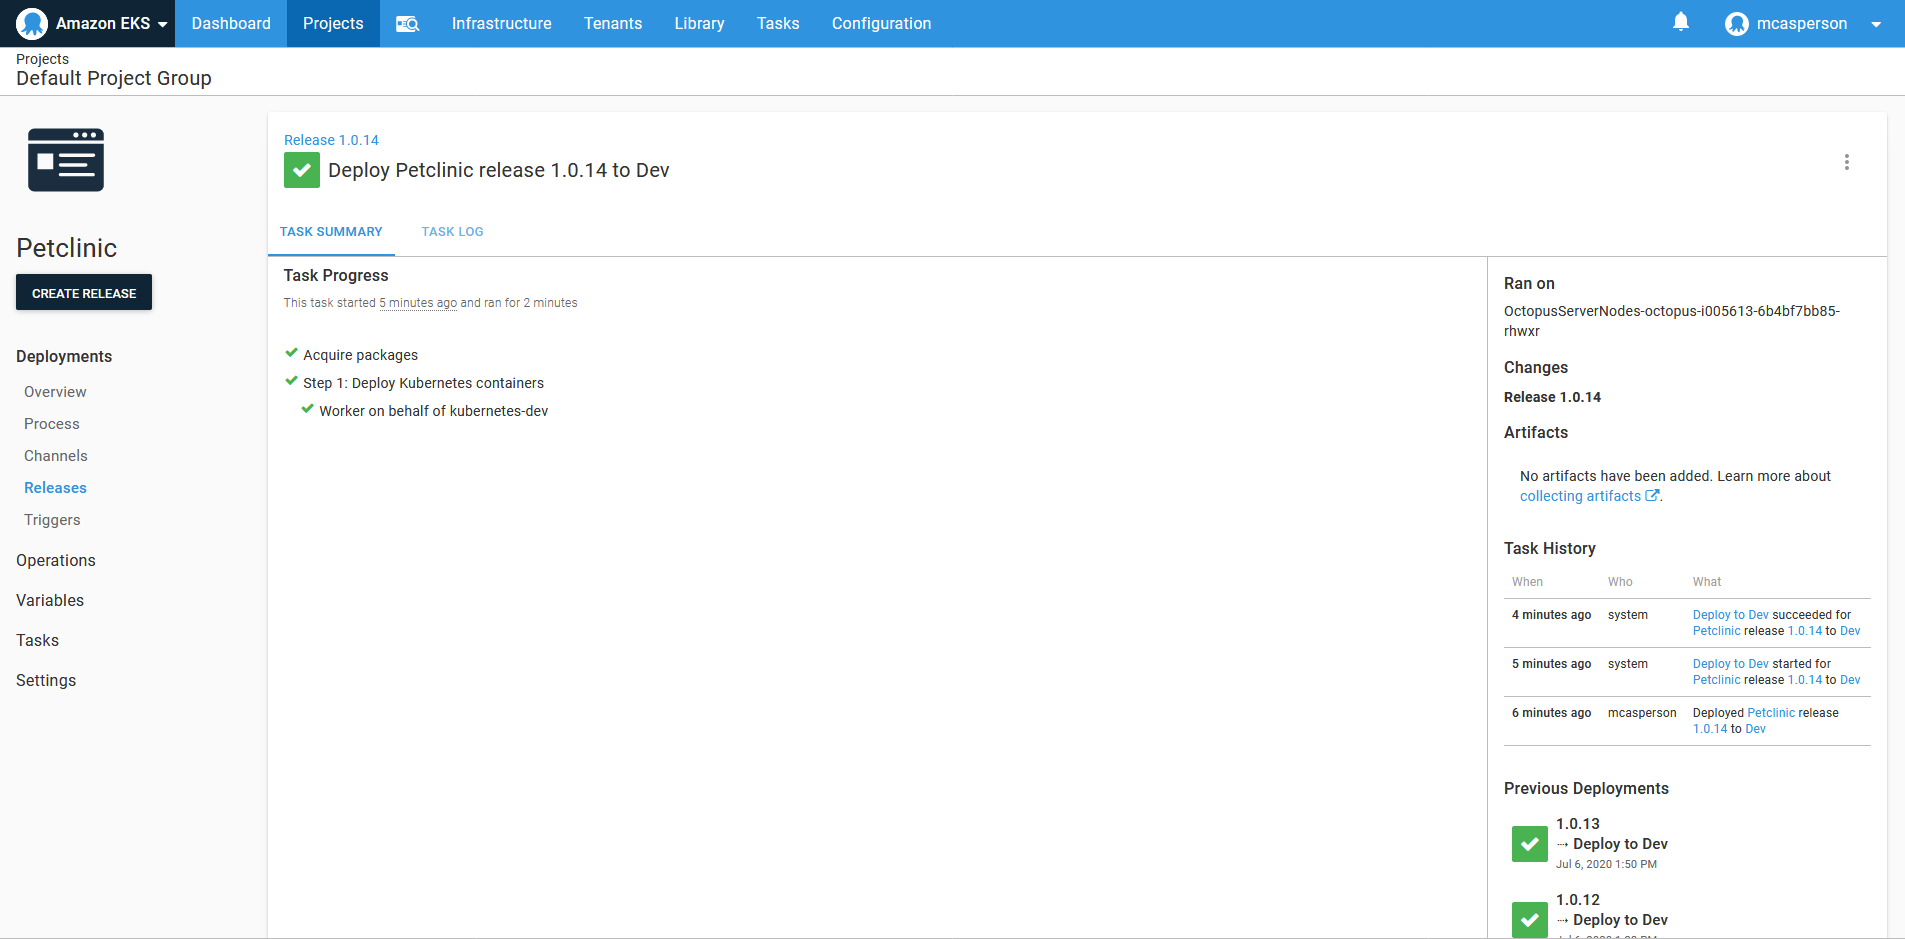
Here is the corresponding deployment in Octopus:
Continuous Deployment vs Continuous Delivery
Over the years, the CD half of the acronym CI/CD has settled on two definitions:
- Continuous Deployment, which means a completely automatic deployment pipeline where each commit goes to production, assuming all tests and other automated requirements are met.
- Continuous Delivery, which means each commit could go to production through an automated, but not necessarily automatic, deployment pipeline. The decision to promote through environments (or not) is still made by a human.
While Continuous Deployment, by its very definition, removes all the friction from a deployment process, there are many valid reasons to implement Continuous Delivery. For example, you may need to orchestrate deployments with other teams, product owners may need to sign off new features, regulatory requirements may demand that production infrastructure not be modified by developers without some review process, or you may simply want to retain the ability to manually test and verify a release before it goes to production.
If you read blog posts on best practices concerning CI/CD, you may be left with the impression that Continuous Deployment is something that you must strive to implement. While the practices that allow for a true Continuous Deployment pipeline will have value, most of the development teams we talk to report that Continuous Delivery works for them.
For this blog, we will create a Continuous Delivery pipeline that manages releases to multiple environments through the Octopus dashboard.
Add the environments
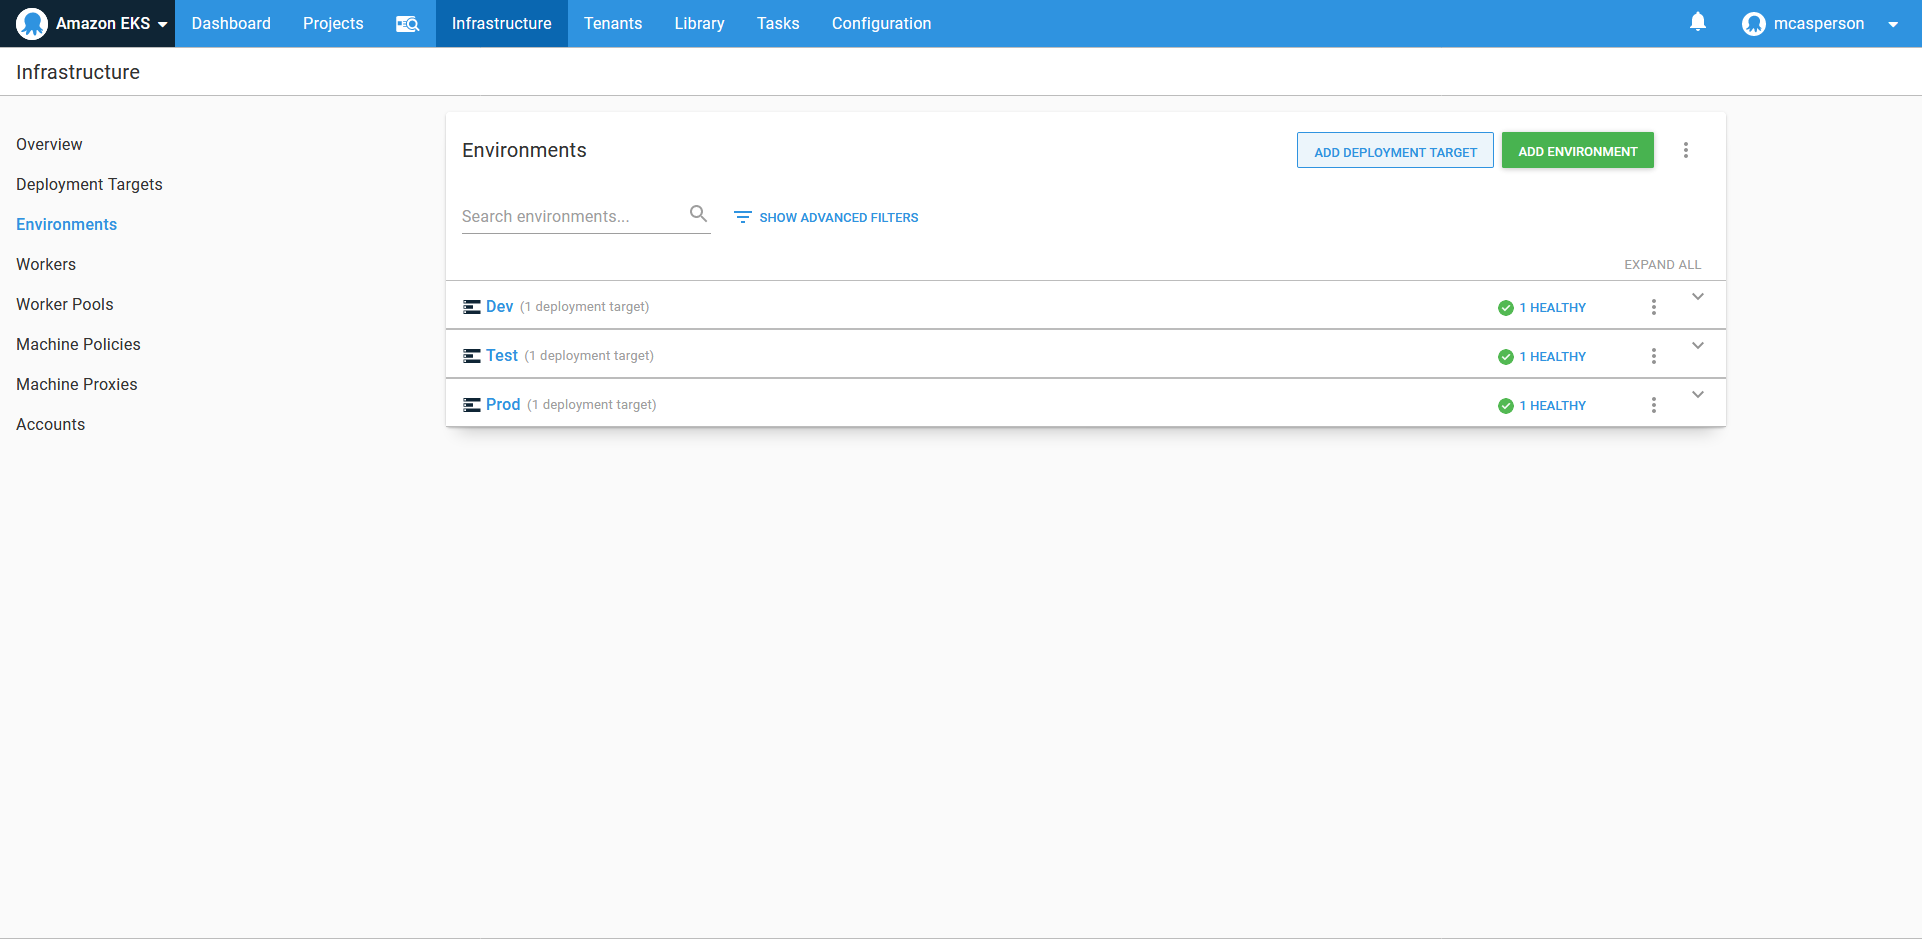
We only have the one environment in Octopus called Dev. However, a typical workflow will promote a deployment through multiple environments on the way to production. To implement this, we need to create more environments in Octopus which we will call Test and Prod:
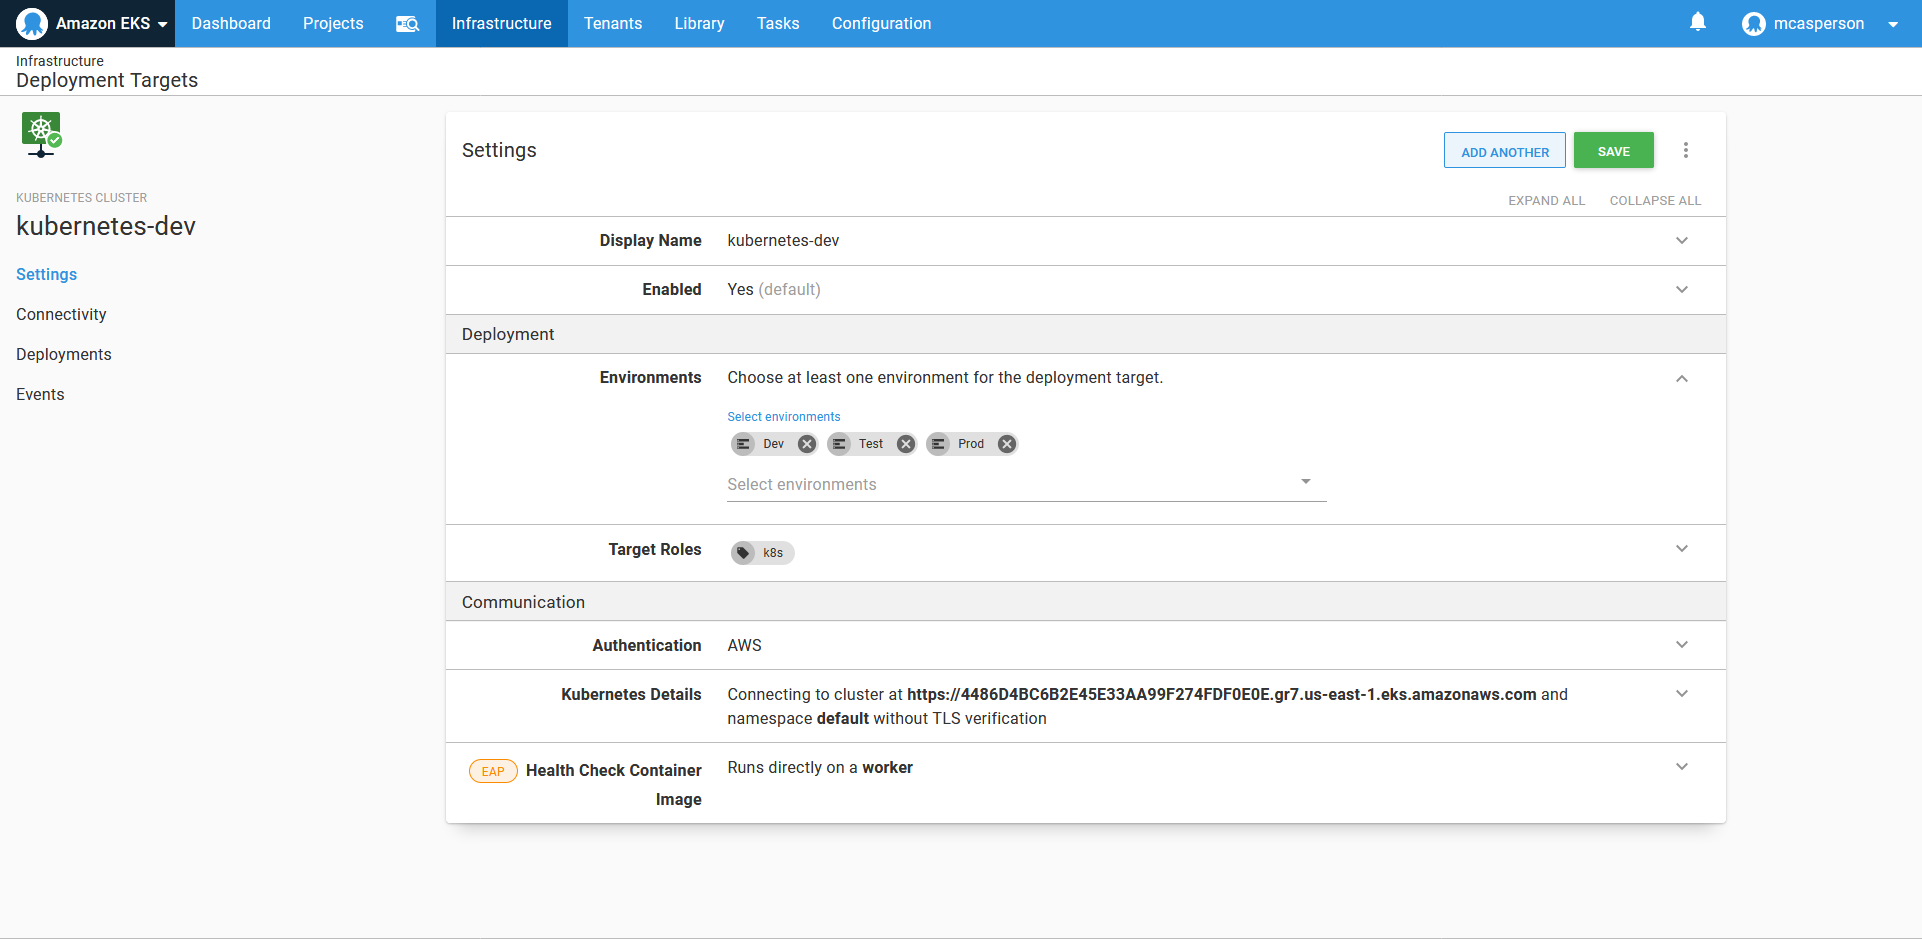
We need to ensure our Kubernetes target is placed within these new environments as well:
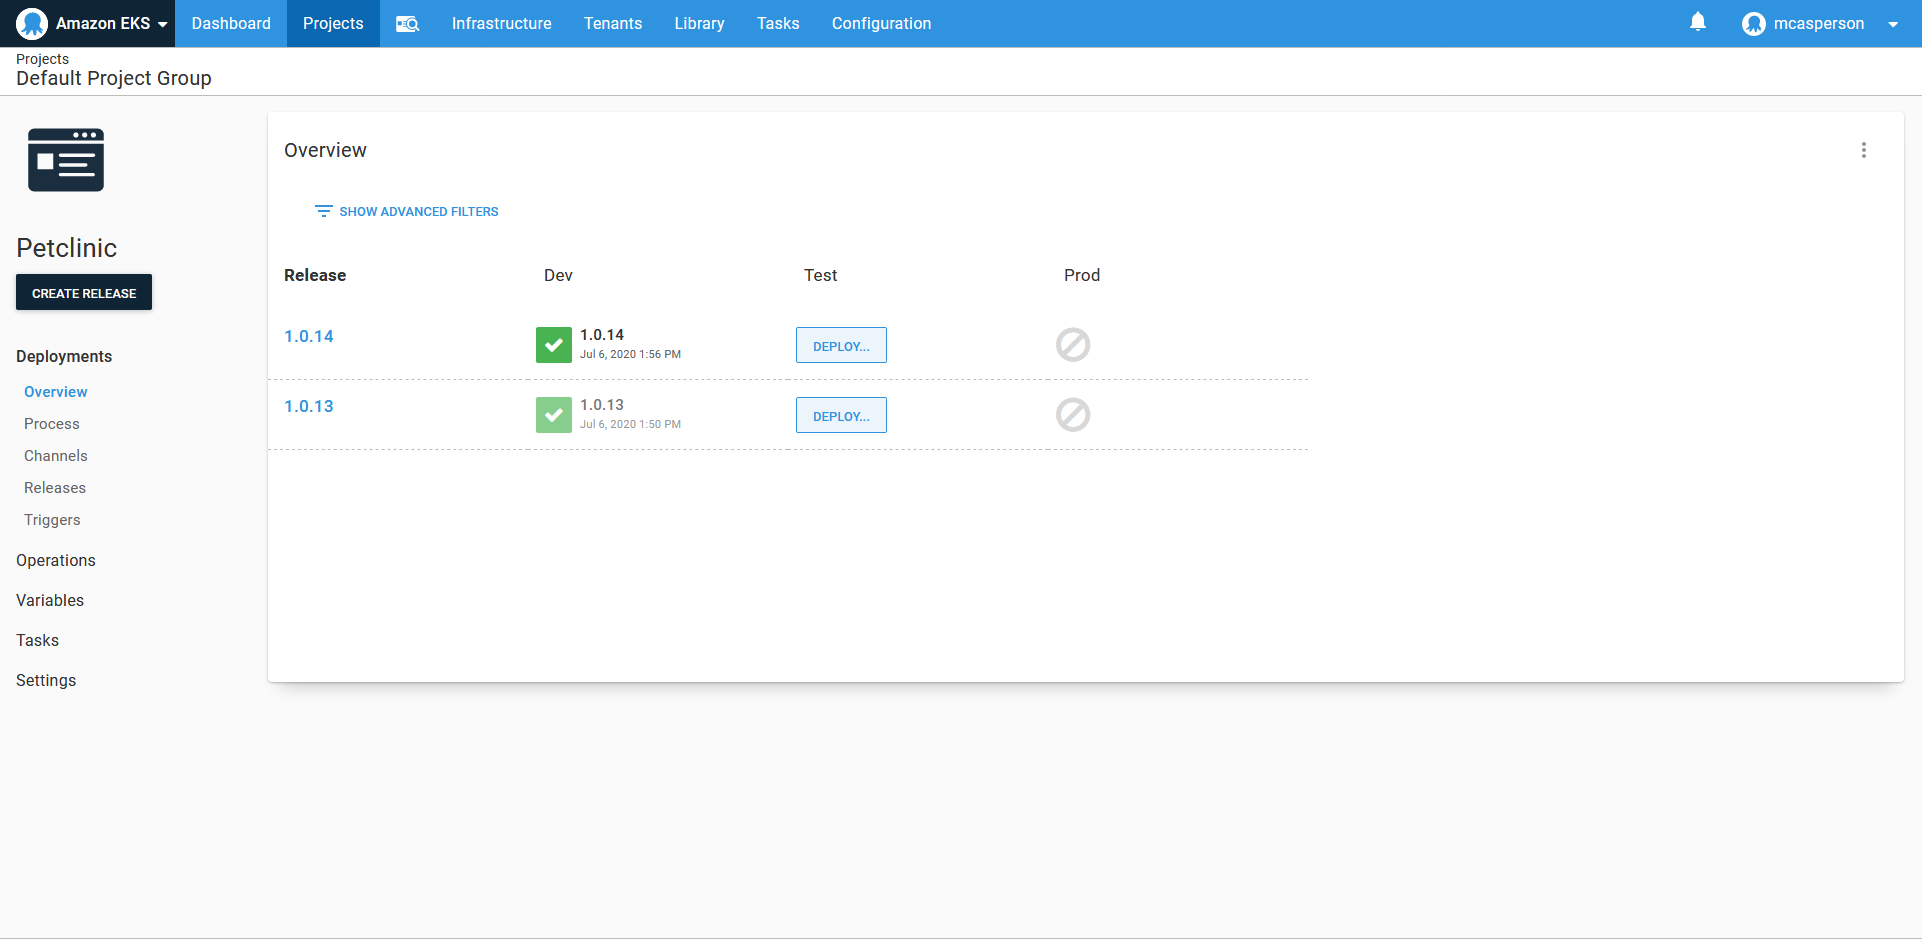
We now have the ability to promote releases from the Dev environment to the Test environment through the Octopus dashboard:
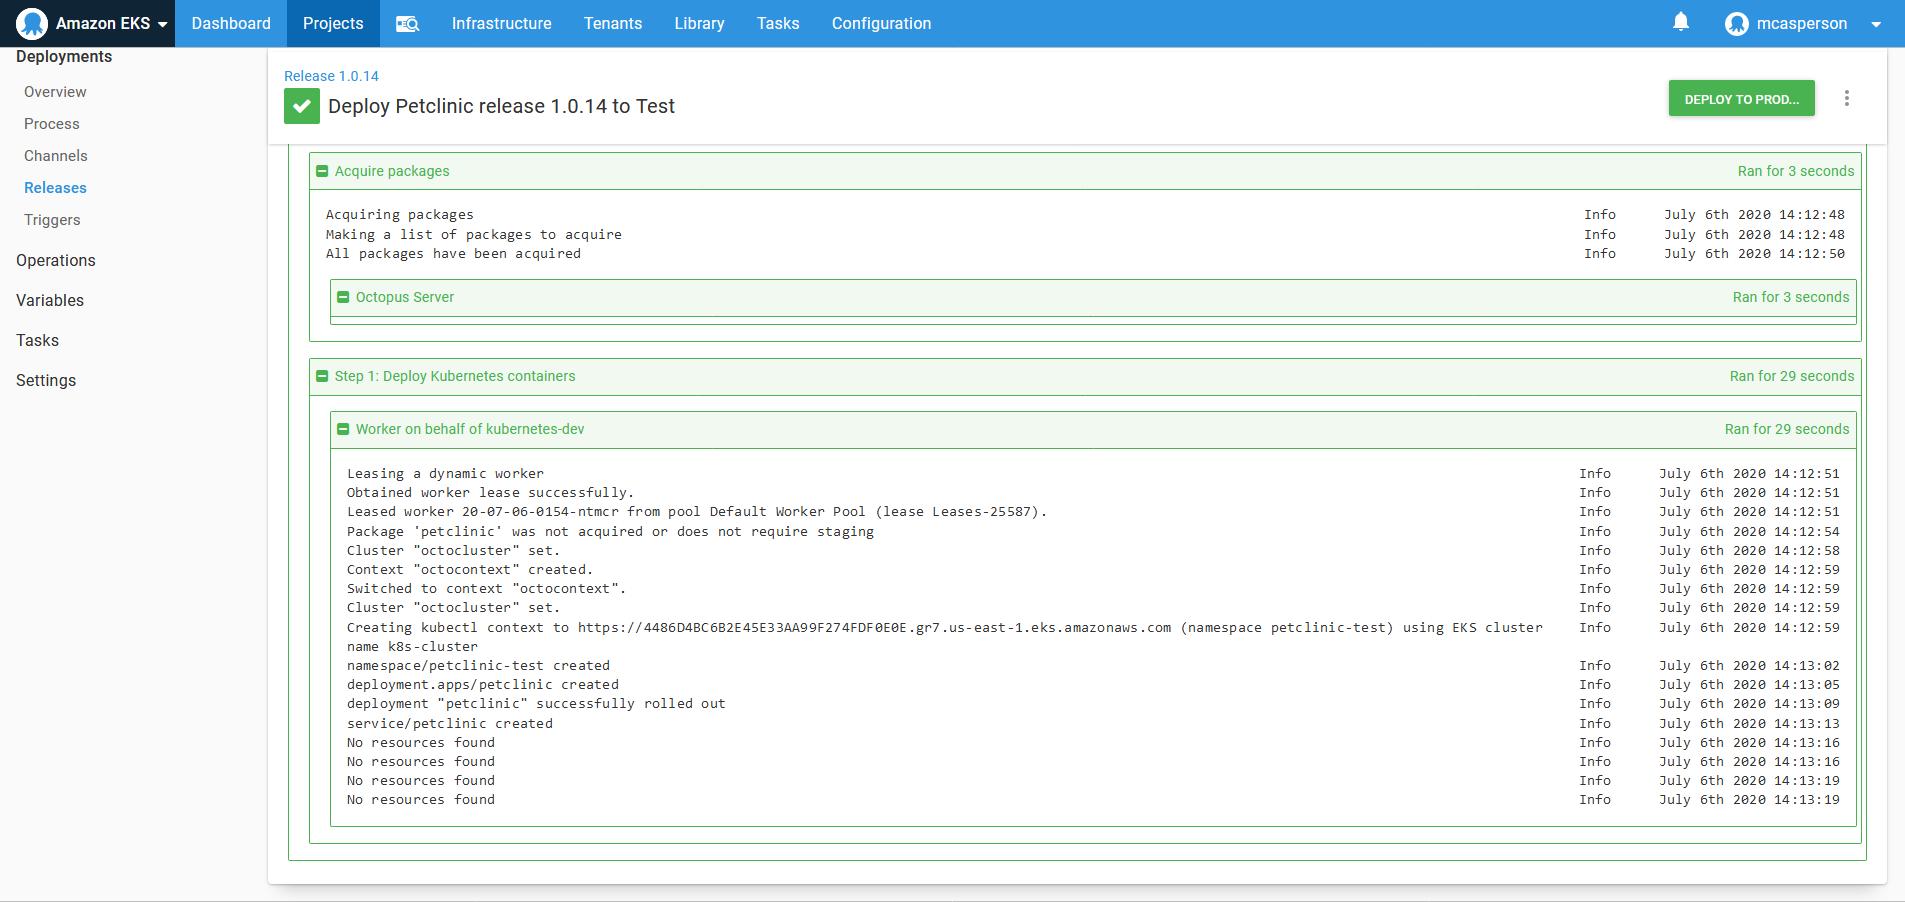
Promoting the release to the Test environment, we can see our Kubernetes resources being created in the petclinic-test namespace. If you recall from the previous blog post, we configured our Kubernetes steps to deploy to a namespace called petclinic-#{Octopus.Environment.Name | ToLower}, which is why deployments to a new environment have been placed in a new namespace:
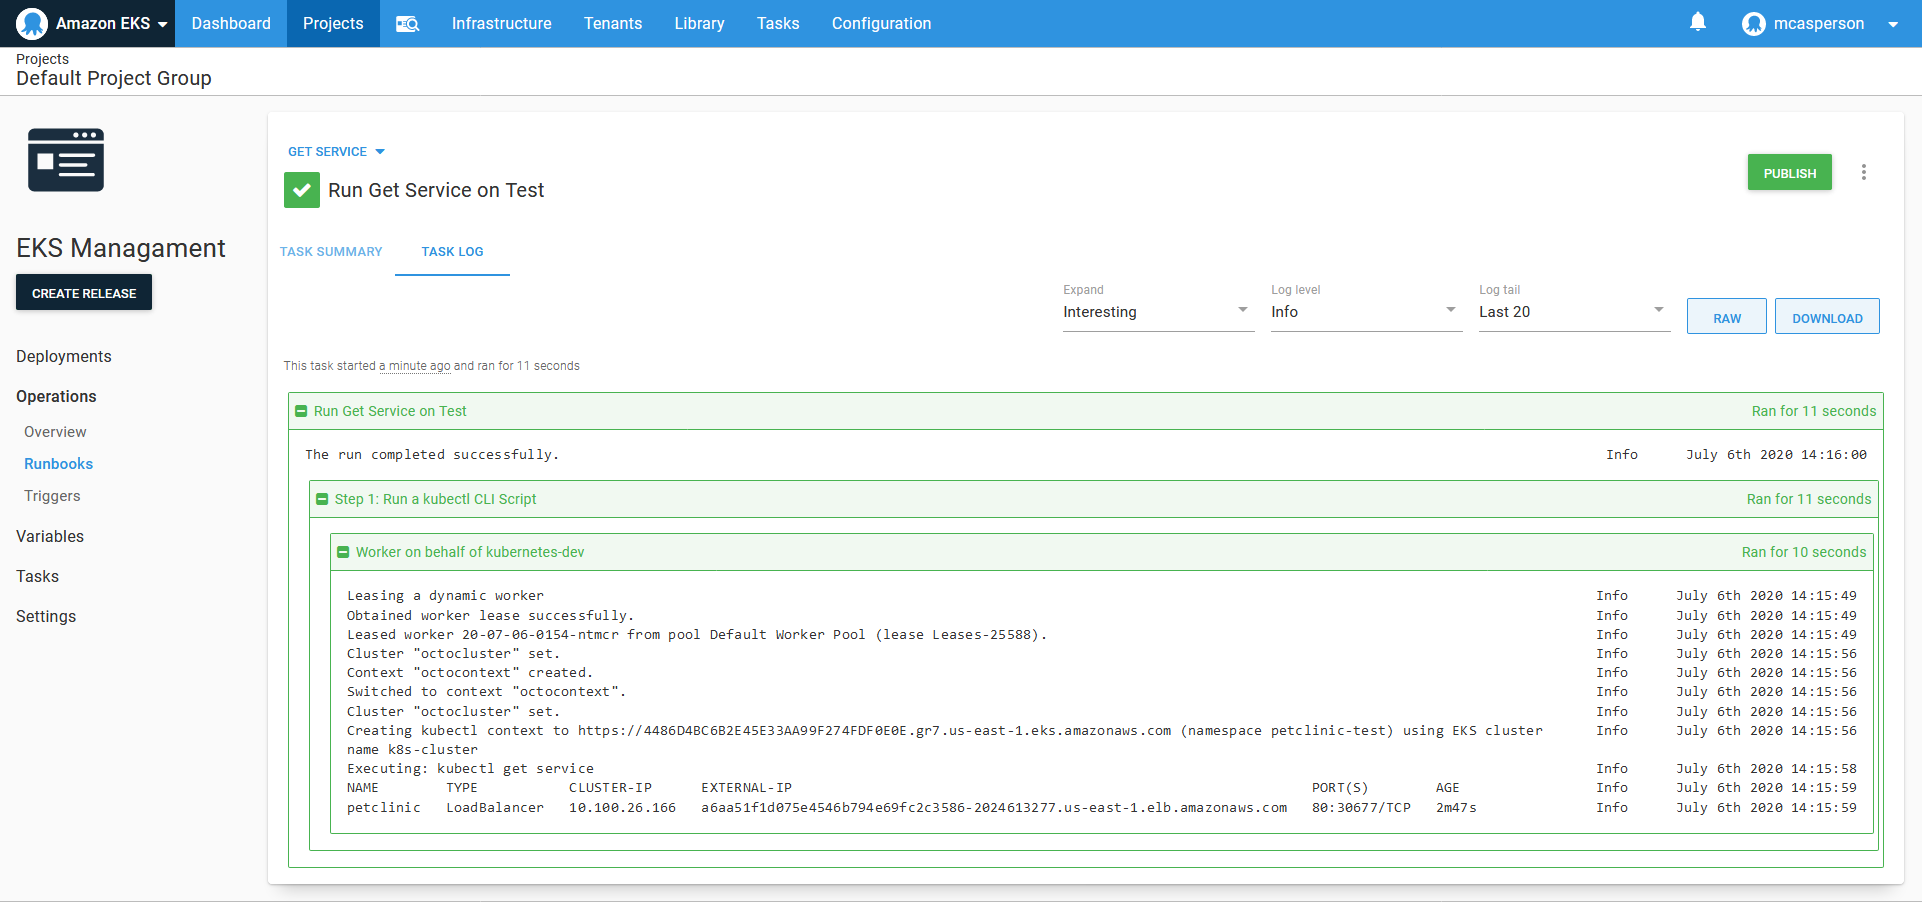
To prove this, we can rerun the runbook Get Service in the Test environment. We can see that a new load balancer host name has been created for the new service resource:
And with that, we have a complete deployment pipeline.
Conclusion
In this post, we triggered a deployment in Octopus after Jenkins finished building and pushing the Docker image. This means we have implemented Continuous Integration with Jenkins testing, building, and publishing the Docker image, and Continuous Delivery with Octopus providing automatic deployment to a development environment, with an automated process ready to be manually triggered in other environments.
We can now promote a change from the application source code to production with a few simple button clicks. Those responsible for release management need no special tools other than a web browser. Each build and deployment is tracked, audited, and summarized in the Jenkins and Octopus dashboards.
But those who have seen their code put in customers’ hands know that while nothing inspires more confidence than the first 10 minutes of a production deployment, the following hours and days are hard. Database backups need to be managed, operating system updates need to be scheduled, logs need to be collected to diagnose support issues, and some good, old-fashioned turning-it-off-and-on-again will need to be performed.
In the next blog post, we’ll show examples of these maintenance processes implemented in runbooks to complete the final stage of our pipeline: operations.
Explore the DevOps engineer’s handbook to learn more about DevOps and CI/CD.