AI in DevOps faces an interesting problem.
According to Octopus Deploy’s AI Pulse report, 44% of developers say they’re frustrated with AI outputs that are “almost right, but not quite.”
You’ve likely experienced it yourself: a large language model generates a deployment config missing a critical variable, or suggests a step that works in staging but breaks in production. Which is why many engineers will use AI to whip up a script. Fewer will let it configure a production pipeline unsupervised.
So far in the Easy Mode series, we’ve walked through how to use the Octopus AI Assistant for specific, bounded tasks, from adding manual interventions to setting environment-scoped variables.
Each post focused on a task where you could verify the result before it hit production. This post continues that pattern. We’ll cover how to create projects and what to do if you need to rollback a change you are not satisfied with.
What the AI Assistant does (and what we’re building)
If this is your first easy mode article, it is worth explaining what the Octopus AI assistant is and exactly what we will be building.
The Octopus AI assistant is a Chrome extension that integrates AI directly into Octopus Deploy. It can answer questions about your instance, help you build projects, and guide you through configuration, all without leaving the browser tab you are already in.
A common question users often have is “Does Octopus use my data for training?” to get that out of the way, the extension does NOT train AI models on your data.
Demo: Creating a project with the AI Assistant
In this walkthrough, we will create a project using the Octopus AI assistant and simulate responding to a request to revert a change.
Prerequisites
In order to follow along with this portion of the tutorial, you will need the following:
- An Octopus Cloud account: If you don’t have one, you can sign up for a free trial.
- The Octopus AI Assistant Chrome extension: You can install it from the Chrome Web Store.
Upon installation, you should see a new icon in the bottom right.
Create a project
With the extension installed, the next step is to create a project.
Paste the following prompt into the Octopus AI Assistant and run it:
Create a Script project called "15. Git backed Project".Upon hitting enter, the Octopus AI assistant will process your request and generate the OpenTofu code required. This is important because using OpenTofu makes your results much more deterministic.
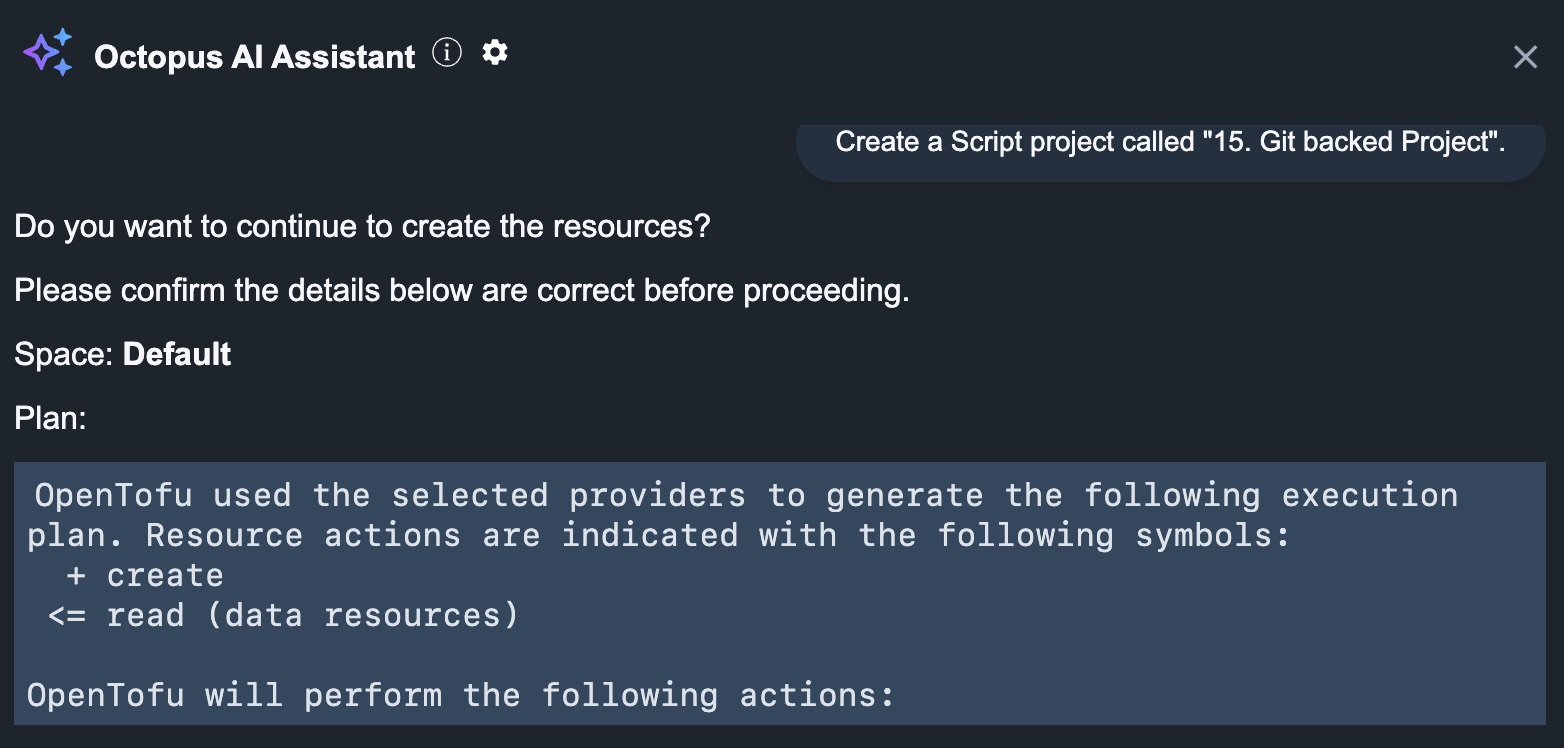
Many engineers have expressed doubts when using generative AI, as the results tend to vary. Generating the OpenTofu required to fulfill your requests helps the assistant achieve greater accuracy, as there is only one way to create a project via the OpenTofu provider.
Additionally, if you were to do this manually, it would take anywhere from a couple of minutes to a few minutes, depending on how many projects you intend to create and whether you need to modify an existing OpenTofu module.
Your safety net: Version-controlled projects
So far, the Octopus AI assistant has created your project. The obvious question is: what if something is wrong?
Thankfully, Octopus Deploy lets you back any project with a Git repository. When you enable this, every change to that project, whether you made it or the assistant did, becomes a Git commit.
To set this up, go to your project settings and connect a Git repository. Once connected, Octopus stores your project configuration in a .octopus folder in that repo. Deployment processes, variables, triggers, all of it lives in version-controlled files.
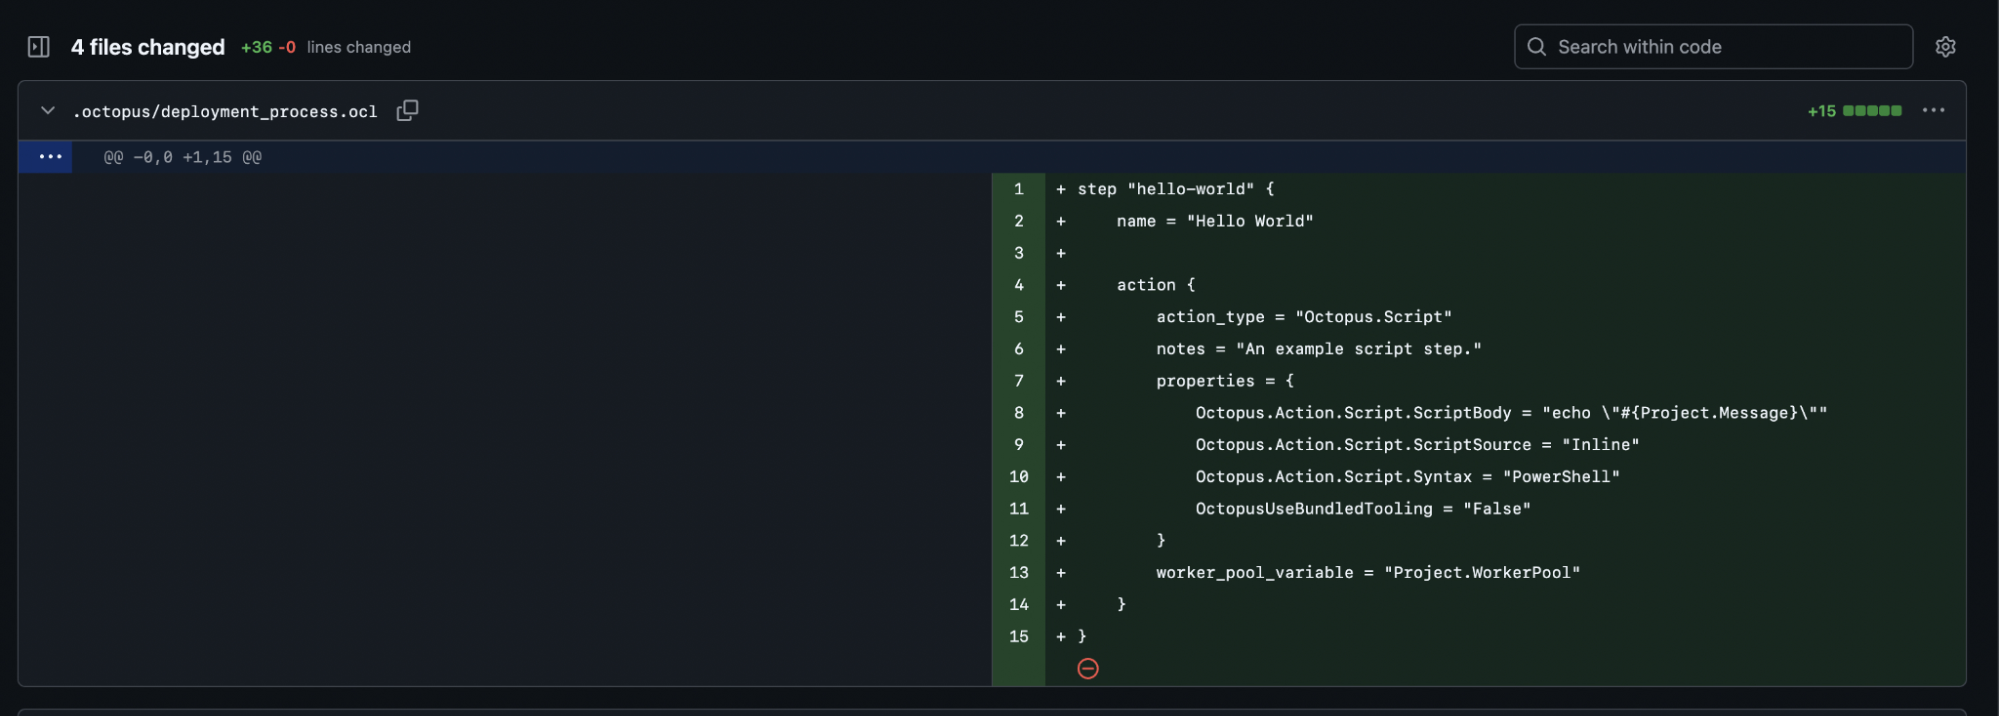
Now look at what happens after the AI assistant creates your project. Open the Git history for the repo. You’ll see the commits the assistant generated, and you can inspect exactly what it configured.
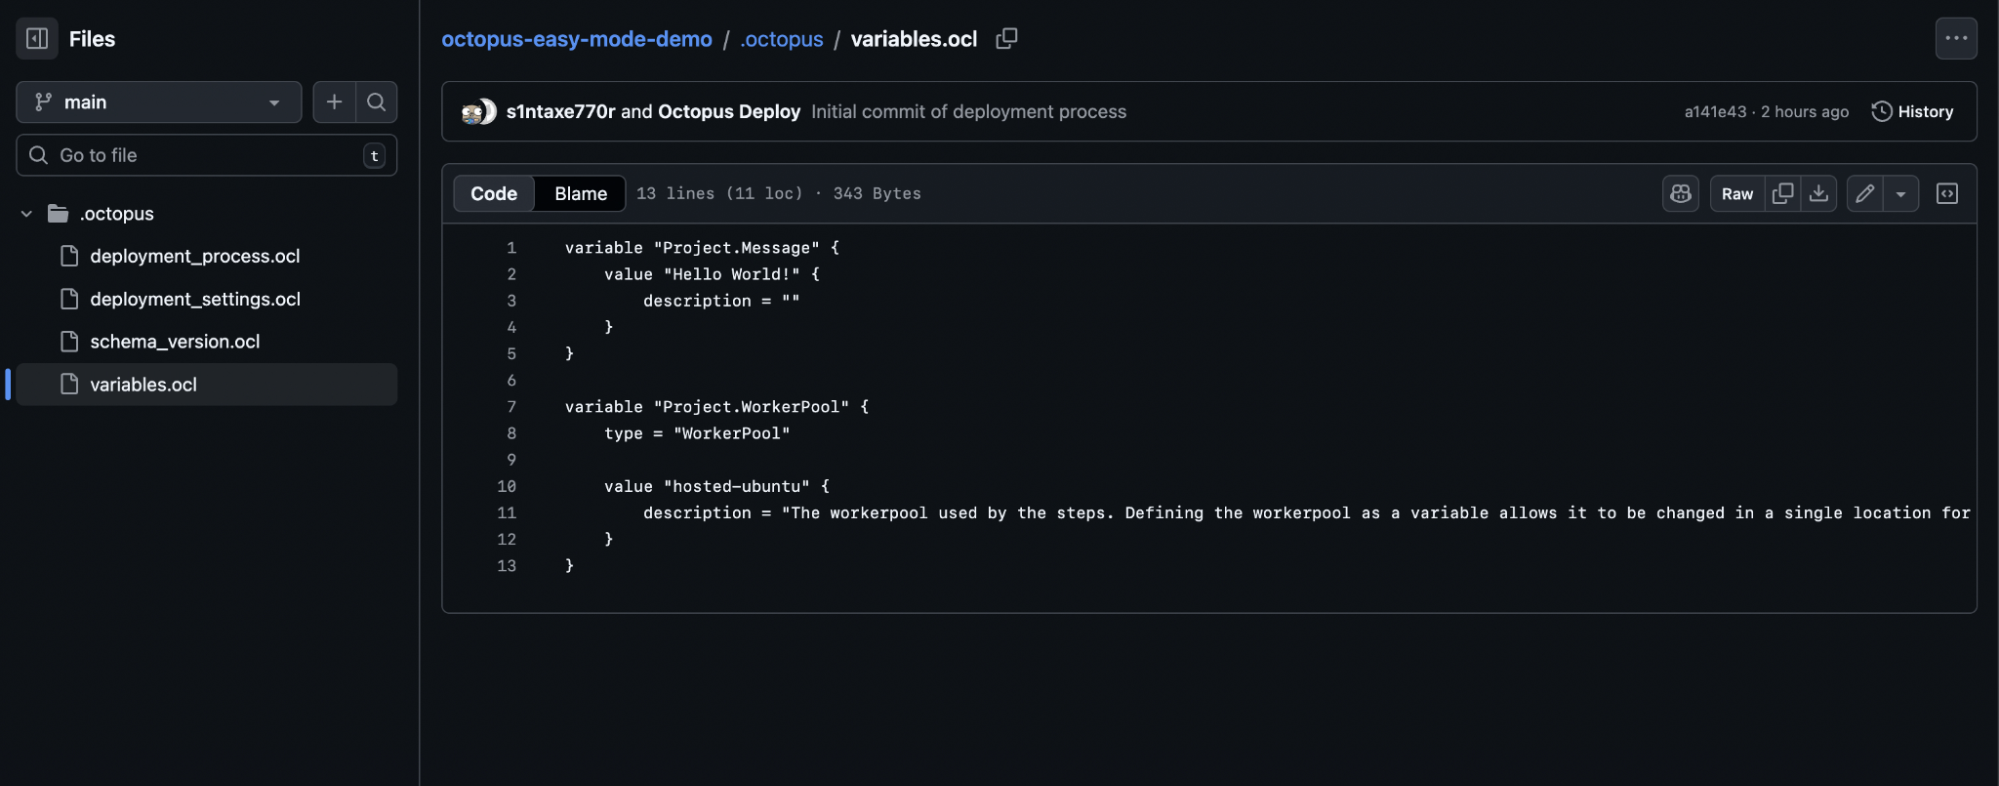
Clicking into any commit gives you the full diff, and if something looks off, you have two options: fix it in the next commit or revert to a known-good state. This is the same workflow you already use for application code.
This matters because you can use the assistant with more confidence, because changes are auditable, and because relying on a config-as-code approach means there is only one way to do things.
Tips for getting the most out of AI-Assisted setup
At this stage, if you’re looking to try out an AI-Assisted workflow, here are some quick tips on how to get better returns on your new workflow:
- Write short, specific prompts: The more detail you pack into a single prompt, the longer the assistant takes to process it. Keep prompts scoped to a single task.
- Include platform and environment details: The assistant produces better results when you tell it what you’re deploying to. Specify the target (Kubernetes, Azure App Service, AWS ECS), name your environments, and indicate your preferred deployment strategy (rolling, blue/green, canary) if applicable.
- Plan to customize after generation: The assistant handles straightforward project scaffolding well. Complex variable scoping, multi-tenant configurations, and custom scripts are better handled manually after the initial setup. Use the AI to get the structure in place, then fine-tune. Git tracks everything either way.
Beyond project creation, the AI Assistant can also help with troubleshooting failed deployments and surfacing best-practice recommendations.
Build Fast, Ship Safe
In this post, we used the Octopus AI Assistant to create a project from a prompt and then backed it with Git via Config as Code.
While the conversation around AI in DevOps evolves, having the ability to use it on your own terms is what makes the Octopus AI assistant a good choice for teams looking to dip their toes in the water.
If you want to try this yourself, install the Octopus AI Assistant Chrome extension and give it a shot.
Happy deployments!


