Have you ever wanted to learn Octopus, but don’t have the time to read the documentation? If so, this blog series is for you.
In this series, you’ll find out how to get started with Octopus using copy-and-paste prompts to create fully functional (if sometimes mocked) deployment pipelines.
You can complete the exercise in each post in just a few minutes.
Prerequisites
- An Octopus Cloud account. If you don’t have one, you can sign up for a free trial.
- The Octopus AI Assistant Chrome extension. You can install it from the Chrome Web Store.
The Octopus AI Assistant will work with an on-premises Octopus instance, but it requires more configuration. The cloud-hosted version of Octopus doesn’t need extra configuration. This means the cloud-hosted version is the easiest way to get started.
Creating the project
Paste the following prompt into the Octopus AI Assistant and run it:
Create a Script project called "01. Basic Script App".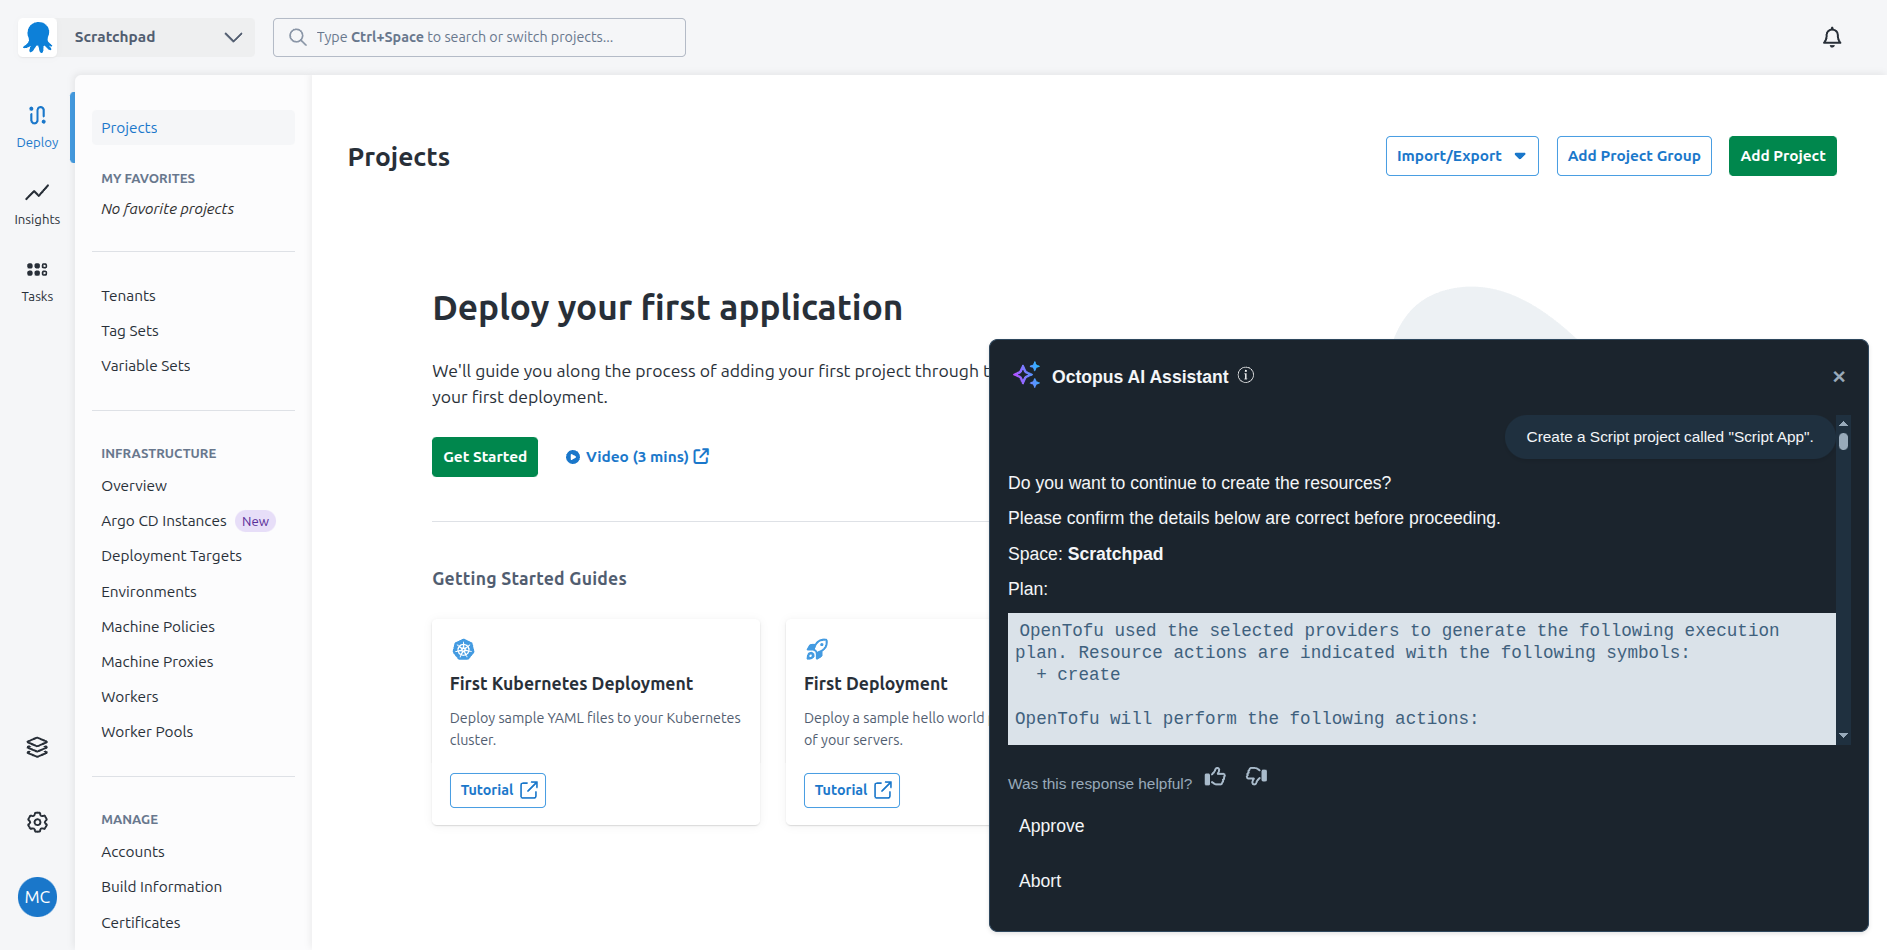
The Octopus AI Assistant will prompt you to approve the changes before applying them to your Octopus instance.
And that’s it!
You can now create a release and deploy it through the environments.
What just happened?
You used the Octopus AI Assistant to create a new project called “Script App” in your Octopus instance. This project is supported by:
- A set of environments representing the progression of the application to production.
- A lifecycle that defines how releases progress through the environments.
- A deployment process that contains a single script step that prints
Hello, World!to the deployment log. - Project release versioning based on the date and time of the release creation.
- A Worker Pool variable that defines the worker pool to be used by the script step.
What’s next?
The next step is to customize the deployment so that each environment displays a different message.