What is Jenkins?
Jenkins is an open-source automation server used for Continuous Integration (CI) and Continuous Delivery (CD) in software development. It automates software’s build and testing phases, allowing developers to detect problems early in their applications.
Jenkins supports various version control tools and can be extended with numerous plugins, making it adaptable to different project needs. As a Java-based application, Jenkins is platform-independent, allowing it to run on any operating system with Java runtime installed. This flexibility extends to various environments, including cloud-based setups.
Jenkins is available under the MIT license. It has over 20,000 stars on GitHub, more than 700 contributors, and is estimated to have over 1 million active users.
You can get Jenkins from the official repo.
This is part of an extensive series of guides about CI/CD.
Understanding core Jenkins concepts
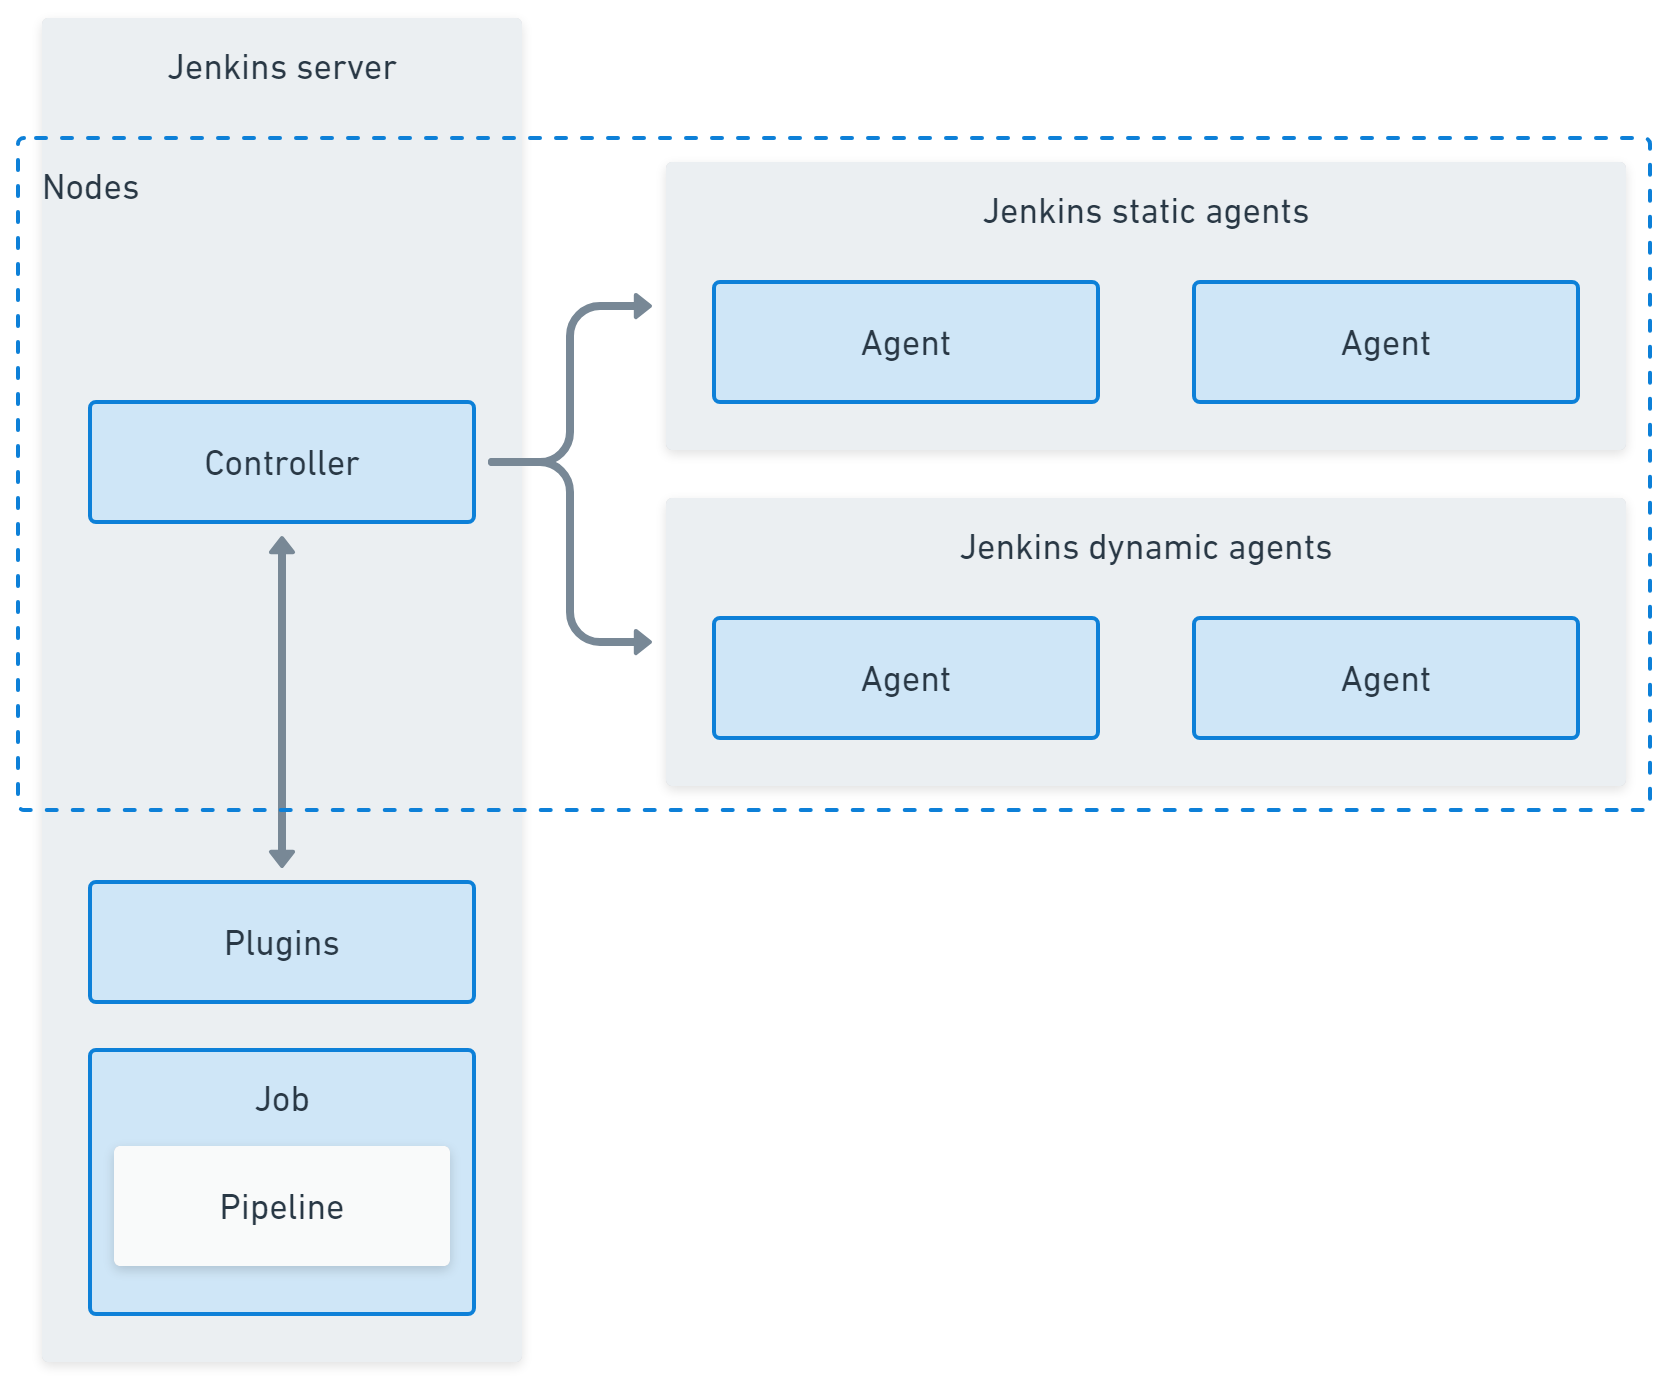
Jenkins node
In Jenkins, a node is any machine that is part of the Jenkins environment that can execute pipelines or jobs.The controller and agents are all nodes. By splitting work across nodes Jenkins can divide the workload between machines and enlist different operating systems and capabilities where they are needed.
Jenkins controller (formerly master)
The Jenkins controller serves as the central management hub in a Jenkins environment. It is responsible for loading plugins, orchestrating builds, distributing them to agents, and maintaining project configuration. It also handles scheduling and dispatches tasks to Jenkins agents. The controller also serves as the UI for managing Jenkins jobs, plugins, and configurations.
Jenkins agent (formerly slave)
Jenkins agents are lightweight, distributed workers that execute tasks the controller assigns. They run jobs, perform testing, and send results to the controller. Agents can be configured on different operating systems, enabling diverse execution environments reflecting production settings. Using Jenkins agents helps distribute the workload across multiple machines, optimizing resource use.
Jenkins plugins
Jenkins plugins extend the platform’s functionality, enabling integration with various external tools and services. Plugins are available for version control, build tools, cloud providers, and more. They aid in customizing Jenkins to fit organizational technology stacks and development needs. However, managing plugins requires careful attention to compatibility and updates.
Jenkins job (formerly project)
A Jenkins project, or job, represents an automated task within Jenkins, like builds or tests. Projects are configured individually, specifying the source code repository and build trigger settings. They determine how, when, and where builds should take place, integrating into software workflows. Using Jenkins projects, developers can automate tasks such as documentation generation and deployment processes.
Jenkins pipeline
A Jenkins pipeline is a suite of plugins for implementing Continuous Delivery pipelines in Jenkins. It provides a syntax used to define workflows as code, allowing scripts to version control alongside the application source code. Pipelines can be used to define environments and development stages at various levels of complexity.
What Is Jenkins Used For?
Here’s a look at some of the main use cases for Jenkins.
Deploying code into production
Jenkins automates the transition of code from repository to production. It ensures code is built and tested, meeting predefined quality metrics before deployment. Jenkins orchestrates this process, linking source control management, build tools, and deployment artifacts, reducing manual intervention and human error.
Through its automated pipelines, Jenkins facilitates rapid deployment cycles and continuous updates, leading to increased agility in software development. By integrating with various tools and platforms, Jenkins supports a range of deployment strategies and environments, improving delivery speed while maintaining stability across releases.
Enabling task automation
Jenkins automates build processes, testing suites, and deployment tasks, allowing teams to focus on feature development rather than operational overhead. This leads to improved productivity and reduced time-to-market.
Jenkins supports automation through its flexible architecture, accommodating diverse tools and workflows suited to various tasks. By leveraging Continuous Integration and Continuous Delivery practices, teams can automatically integrate and evaluate code changes, fostering a more agile and error-resistant development cycle.
Increasing code coverage
Jenkins improves code quality by automating testing and increasing code coverage during development. Automated test execution ensures code is continually reviewed and validated against requirements. By integrating with testing frameworks, Jenkins enables continuous feedback loops, helping discover potential issues early in the cycle.
Through its reporting capabilities, Jenkins provides insights into code coverage metrics, helping teams target improvement areas. Consistent testing reduces defects, ensures compliance with coding standards, and contributes to a healthier codebase.
Simplifying audits
Jenkins simplifies audits by providing detailed logs and reports of build processes, showing how code transitions from development to release. These logs are a transparent audit trail, making compliance checks and performance evaluations straightforward. Jenkins records vital build data, enabling easy access during inspections.
Audit logs help organizations meet regulatory requirements and ensure coding practices align with corporate policies. Jenkins’ ability to document each step of the build process supports clear accountability, aiding in troubleshooting and compliance.
What are the key limitations of Jenkins?
While Jenkins is a popular choice for CI, it has several limitations that prompt developers to seek alternatives, especially in more complex DevOps environments with full Continuous Delivery or Continuous Deployment pipelines.
Single server architecture
Jenkins operates using a single-server architecture, meaning all the core processing happens on one server, whether it’s a physical machine, virtual server, or container. This architecture creates a bottleneck in large-scale environments where multiple teams or projects need to run CI and CD tasks simultaneously.
Because Jenkins does not support server-to-server federation, it can’t distribute the workload across multiple machines or servers automatically. As a result, if too many tasks are scheduled, the server’s resources (CPU, memory, etc.) can become overwhelmed, leading to slower build times, delays, or even server crashes.
This limitation often leads to what’s called “Jenkins sprawl,” where organizations create multiple standalone Jenkins instances to spread the workload. While this might alleviate the resource constraint on a single server, managing multiple isolated Jenkins servers can become chaotic, as there’s no centralized control or coordination. This makes Jenkins less suited for large, enterprise-grade environments.
Not container native
Jenkins was developed before the widespread adoption of containers and Kubernetes, meaning its architecture does not inherently align with container-native principles. While Jenkins does support Docker containers and can run jobs inside containers, this support is more of an add-on rather than a built-in, optimized feature.
Integrating Jenkins with container orchestration platforms like Kubernetes requires additional configurations. It lacks the deep native support found in tools designed specifically for containerized environments, such as Tekton or Argo CD. For example, Jenkins struggles with managing dynamic scaling in containerized environments.
In modern cloud-native applications, services must scale up or down based on demand. However, Jenkins doesn’t have a solid mechanism to automatically scale its agents or controllers in response to changing workloads. This can result in underutilization of resources during low-demand periods or resource shortages during peak times.
Difficult to implement in production environments
Setting up and maintaining Jenkins in production environments can be labor-intensive and complex, particularly when dealing with advanced pipelines for Continuous Integration and Continuous Delivery. Creating Jenkins pipelines involves writing scripts, usually in Jenkinsfiles, which can be defined using either declarative or scripted syntax.
These pipelines are typically written in Groovy, a programming language that is not as commonly used as others like Python or JavaScript, making it harder for teams to work with. Developers unfamiliar with Groovy may face a steep learning curve, slowing pipeline creation and troubleshooting.
Jenkins pipelines can also become complex, especially when dealing with large projects that require multiple build steps, testing frameworks, deployment environments, and integration with third-party services. Debugging these pipelines is not straightforward, as errors can occur at different stages, requiring a deep understanding of Jenkins and the underlying scripting language.
Complicated plugin management
Jenkins has an extensive plugin ecosystem with nearly 2,000 plugins available for various tasks, such as integrating with version control systems, cloud platforms, build tools, and other services.
While this plugin library provides flexibility, finding and selecting the appropriate plugins can be overwhelming, and managing existing plugins can be difficult in large deployments. Many Jenkins plugins have dependencies, meaning one plugin requires the installation of other plugins.
Over time, plugin versions may become incompatible with each other, leading to build failures or system instability. In some cases, plugins may be deprecated or no longer maintained by their creators, leaving organizations vulnerable to security risks or loss of functionality.
Installing Jenkins with Docker
Below is a tutorial on how to install Jenkins using Docker in a Windows environment.
Prerequisites
- Docker installed: Make sure Docker is installed and running on your Windows system. You can download Docker Desktop from Docker’s official website and follow the installation instructions.
- Docker configuration: Ensure Docker is set to use Linux containers, as Jenkins runs best in a Linux environment. This setting can be adjusted in Docker Desktop’s settings.
Step 1: Pull the Jenkins Docker image
First, you need to pull the Jenkins image from the Docker Hub repository. Open a terminal (Command Prompt or PowerShell) and execute:
docker pull jenkins/jenkins:ltsThe :lts tag specifies the Long Term Support version of Jenkins, ensuring a stable and reliable release.
Step 2: Create a Docker network (optional)
To manage multiple Docker containers easily, you can create a custom Docker network. This step is optional but recommended if you plan to run Jenkins alongside other containers, such as a database.
docker network create jenkins-networkStep 3: Run Jenkins in a Docker container
Now, you can start a Jenkins container. This command sets up a Jenkins container with a mapped port and persistent storage:
docker run -d --name jenkins-container \
  -p 8080:8080 -p 50000:50000 \
  --network jenkins-network \
  -v jenkins_home:/var/jenkins_home \
jenkins/jenkins:lts-d: Runs the container in detached mode (in the background).--name jenkins-container: Assigns a name to the container.-p 8080:8080: Maps port 8080 on the local machine to port 8080 on the container (Jenkins UI).-p 50000:50000: Maps port 50000 for Jenkins agent communications.--network jenkins-network: Connects the container to the custom network created earlier (optional).-v jenkins_home:/var/jenkins_home: Creates a persistent volume namedjenkins_hometo store Jenkins data.
Step 4: Access Jenkins
Once the container is up and running, access Jenkins using a web browser:
http://localhost:8080
Step 5: Retrieve the initial admin password
To complete the Jenkins setup, you need the initial admin password, which is located in the Docker container’s logs. Retrieve it using:
docker exec jenkins-container cat /var/jenkins_home/secrets/initialAdminPasswordCopy the password and paste it into the Jenkins setup page to continue.
Step 6: Complete the Setup
Perform the following steps:
- Install suggested plugins: Once logged in, Jenkins will prompt you to install plugins. You can either choose the suggested plugins or select specific ones that suit your requirements.
- Create admin user: Follow the prompts to create an admin user and finalize the setup.
Step 7: Manage Jenkins data persistence
Docker automatically stores Jenkins data in a volume (jenkins_home). This ensures your configurations, jobs, and plugins persist even if the container is removed. To back up or migrate Jenkins data, you can manage this volume using Docker commands:
docker volume ls
docker volume inspect jenkins_home
You should now have a running Jenkins instance, ready for CI/CD configuration and job automation.
Installing Jenkins on Kubernetes
Many DevOps teams use Kubernetes to manage containers at scale. When using Jenkins for large-scale projects, it can be useful to deploy Jenkins on Kubernetes. This lets you automatically scale Jenkins as needed and manage resource use.
To deploy Jenkins on Kubernetes, you need to follow a few steps. These involve setting up the Kubernetes environment, creating required configurations, and deploying Jenkins. Below is a step-by-step guide to getting Jenkins up and running on your Kubernetes cluster. Instructions are adapted from the official Jenkins documentation.
Create a namespace
Namespaces in Kubernetes provide a way to separate environments and resources. It’s a best practice to create a separate namespace for DevOps tools like Jenkins:
kubectl create namespace devops-toolsThis command creates a devops-tools namespace that will be used to host Jenkins and other related resources.
Create a service account with Kubernetes admin permissions
Jenkins requires administrative permissions to manage resources within the Kubernetes cluster. You can create a service account with admin privileges by defining a YAML file for the ClusterRole and ServiceAccount:
---
apiVersion: rbac.authorization.k8s.io/v1
kind: ClusterRole
metadata:
  name: jenkins-admin
rules:
  - apiGroups: [""]
resources: ["*"]
verbs: ["*"]
---
apiVersion: v1
kind: ServiceAccount
metadata:
  name: jenkins-admin
  namespace: devops-tools
---
apiVersion: rbac.authorization.k8s.io/v1
kind: ClusterRoleBinding
metadata:
  name: jenkins-admin
roleRef:
  apiGroup: rbac.authorization.k8s.io
  kind: ClusterRole
  name: jenkins-admin
subjects:
  - kind: ServiceAccount
name: jenkins-admin
namespace: devops-tools
Save this configuration in a file called serviceAccount.yaml and apply it using the following command:
kubectl apply -f serviceAccount.yamlThis creates the jenkins-admin service account, a cluster role with full permissions, and binds the role to the service account.
Create local persistent volume for persistent Jenkins data on pod restarts
Jenkins requires persistent storage to retain data between pod restarts.
- You can define a persistent volume and persistent volume claim using the following YAML:
---
kind: StorageClass
apiVersion: storage.k8s.io/v1
metadata:
  name: local-storage
provisioner: kubernetes.io/no-provisioner
volumeBindingMode: WaitForFirstConsumer
---
apiVersion: v1
kind: PersistentVolume
metadata:
  name: jenkins-pv-volume
  labels:
    type: local
spec:
  storageClassName: local-storage
  Capacity:
storage: 10Gi
accessModes:
    - ReadWriteOnce
local:
    path: /mnt
nodeAffinity:
required:
  nodeSelectorTerms:
  - matchExpressions:
    - key: kubernetes.io/hostname
      operator: In
      values:
        - worker-node01
---
apiVersion: v1
kind: PersistentVolumeClaim
metadata:
  name: jenkins-pv-claim
  namespace: devops-tools
spec:
  storageClassName: local-storage
  accessModes:
    - ReadWriteOnce
resources:
requests:
storage: 3Gi- Replace
worker-node01with your actual worker node hostname, which can be retrieved using:
kubectl get nodes- After saving the configuration in a file named
volume.yaml, apply it using:
kubectl create -f volume.yamlThis will create a persistent volume that Jenkins can use to store its data.
Create a deployment YAML and deploy it
Next, you need to deploy Jenkins using a deployment YAML file. This file defines how Jenkins will be deployed and what resources it will consume:
apiVersion: apps/v1
kind: Deployment
metadata:
  name: jenkins
  namespace: devops-tools
spec:
  replicas: 1
  selector:
matchLabels:
  app: jenkins-server
template:
metadata:
  labels:
    app: jenkins-server
spec:
  serviceAccountName: jenkins-admin
  containers:
    - name: jenkins
      image: jenkins/jenkins:lts
      resources:
        limits:
          memory: "2Gi"
          cpu: "1000m"
        requests:
          memory: "500Mi"
          cpu: "500m"
      ports:
        - name: httpport
          containerPort: 8080
        - name: jnlpport
          containerPort: 50000
      volumeMounts:
        - name: jenkins-data
          mountPath: /var/jenkins_home
  volumes:
    - name: jenkins-data
      persistentVolumeClaim:
          claimName: jenkins-pv-claim
Save this configuration in a file called deployment.yaml and apply it:
kubectl apply -f deployment.yamlThis will deploy Jenkins in the devops-tools namespace, with the appropriate persistent volume attached.
Create a service YAML and deploy it
To expose Jenkins to the outside world, you need to create a service that will map external requests to the Jenkins pod:
apiVersion: v1
kind: Service
metadata:
  name: jenkins-service
  namespace: devops-tools
spec:
  selector:
    app: jenkins-server
type: NodePort
  ports:
- port: 8080
  targetPort: 8080
  nodePort: 32000
Save this as service.yaml and apply it:
kubectl apply -f service.yamlThis service exposes Jenkins on port 32000 of all Kubernetes node IPs. You can access Jenkins by visiting http://<node-ip>:32000.
Access Jenkins
To access Jenkins, you’ll need the initial admin password, which can be retrieved from the pod logs:
kubectl logs <jenkins-pod-name> --namespace=devops-toolsAlternatively, you can directly extract the password using:
kubectl exec -it <jenkins-pod-name> cat /var/jenkins_home/secrets/initialAdminPassword -n devops-toolsOnce you log in, follow the setup wizard to install plugins and create an admin user.
Notable Jenkins alternatives
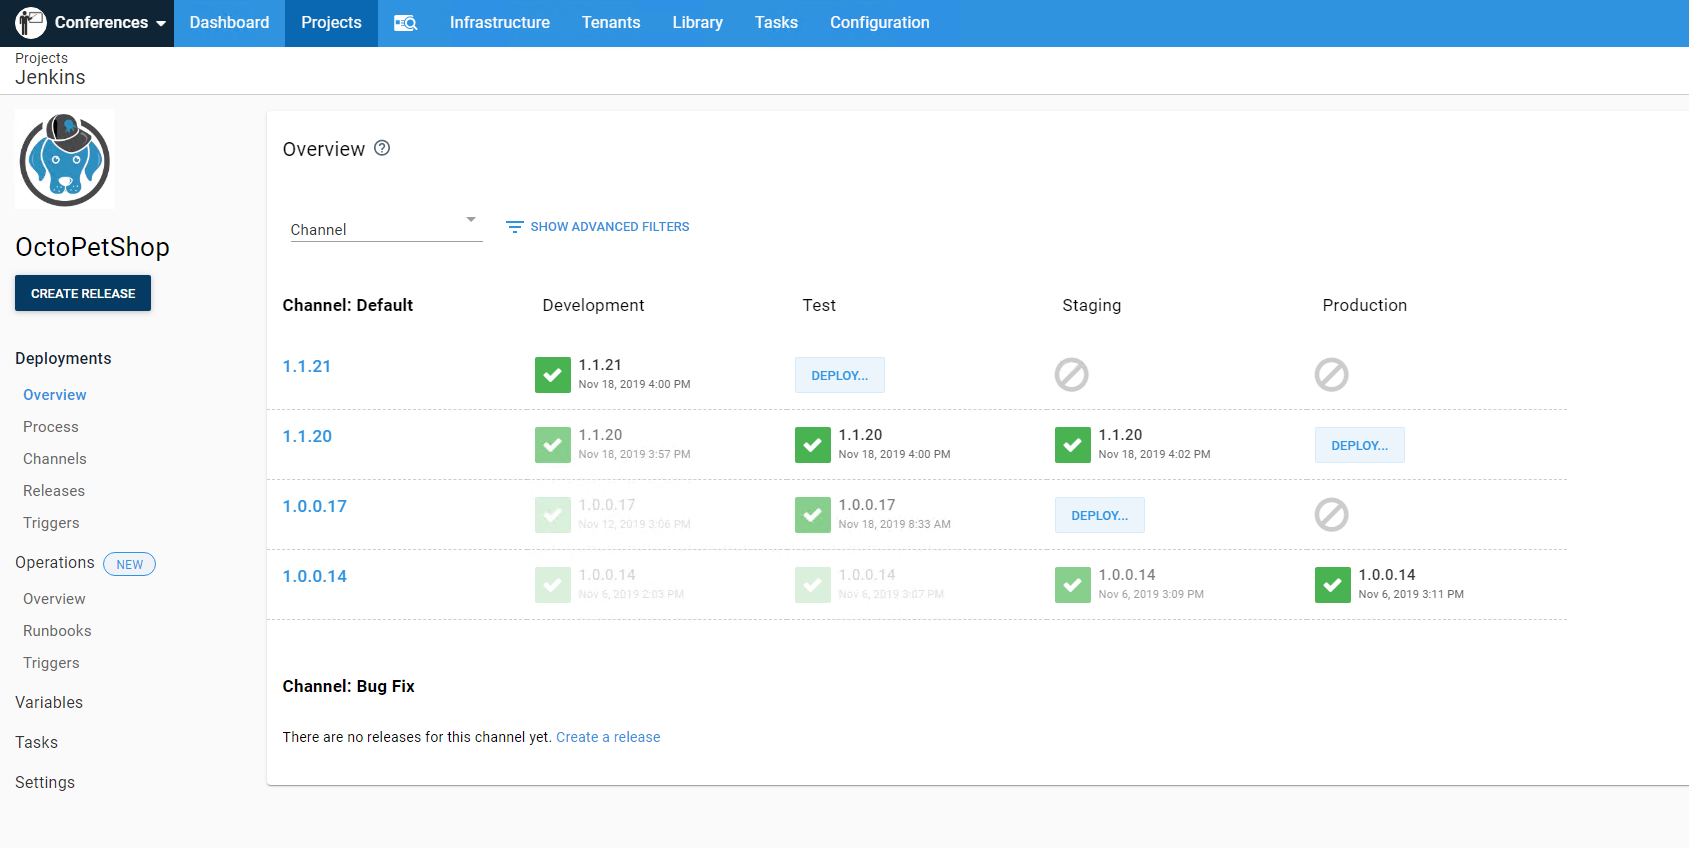
1. Octopus
Octopus Deploy is a sophisticated, best-of-breed Continuous Delivery (CD) platform for modern software teams. It offers powerful release orchestration, deployment automation, and runbook automation while handling the scale, complexity, and governance expectations of even the largest organizations with the most complex deployment challenges.
License: Commercial
Features of Octopus:
- Reliable risk-free deployments: Octopus lets you use the same deployment process across all environments. This means you can deploy to production with the same confidence you deploy to everywhere else. Built-in rollback support also makes it easy to revert to previous versions.
- Deployments at scale: Octopus is the only CD tool with built-in multi-tenancy support. Deploy to two, ten, or thousands of customers without duplicating the deployment process.
- One platform for DevOps automation: Runbooks automate routine and emergency operations tasks to free teams for more crucial work. They can also be used to provide safe self-service operations to other teams.
- Streamlined compliance: Full auditing, role-based access control and single-sign on (SSO) as standard to make audits a breeze and to provide accountability, peace of mind, and trust.
2. Codefresh
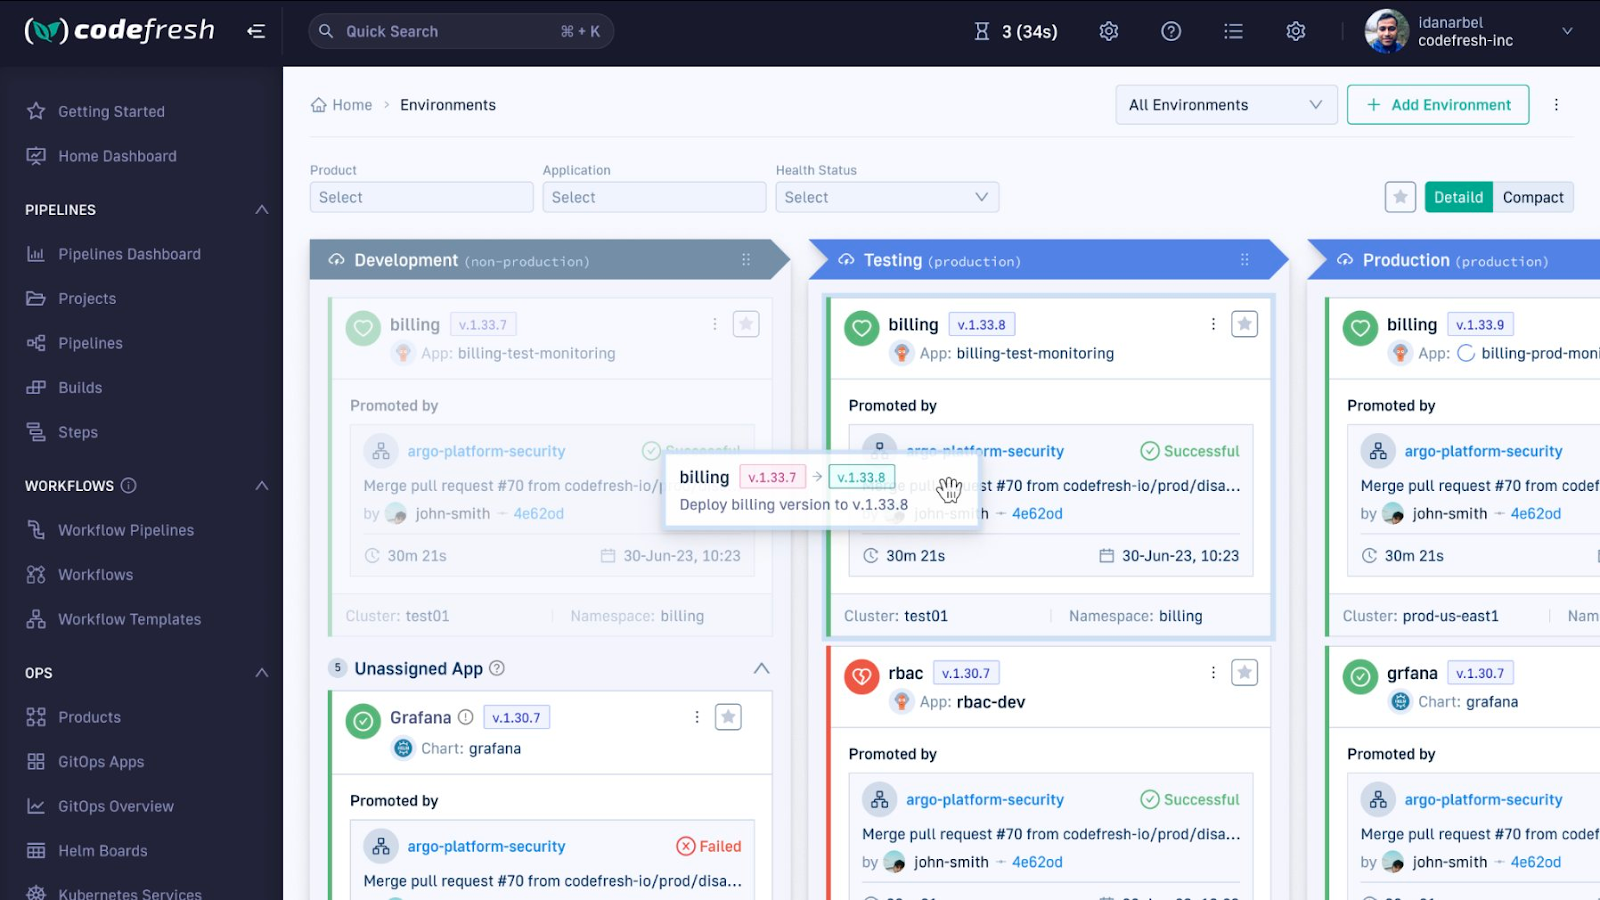
Codefresh is a CI/CD platform for cloud-native applications that integrates features like Kubernetes-native pipelines, GitOps, and observability tools, enabling teams to build, test, and deploy faster and with more control.
License: Commercial
Features of Codefresh:
- Pipeline caching: Speeds up builds with multi-layer caching and parallel testing.
- DRY pipelines: Reduces pipeline duplication by sharing pipelines across multiple repositories.
- Container-native step marketplace: Provides built-in steps and the ability to run custom steps in containers.
- Enhanced observability: Offers dashboards to track changes, providing insights for troubleshooting.
- GitOps support: Integrates with Argo CD for seamless GitOps and progressive delivery with canary and blue/green deployments.
![]()
Source: Codefresh
3. GitHub Actions
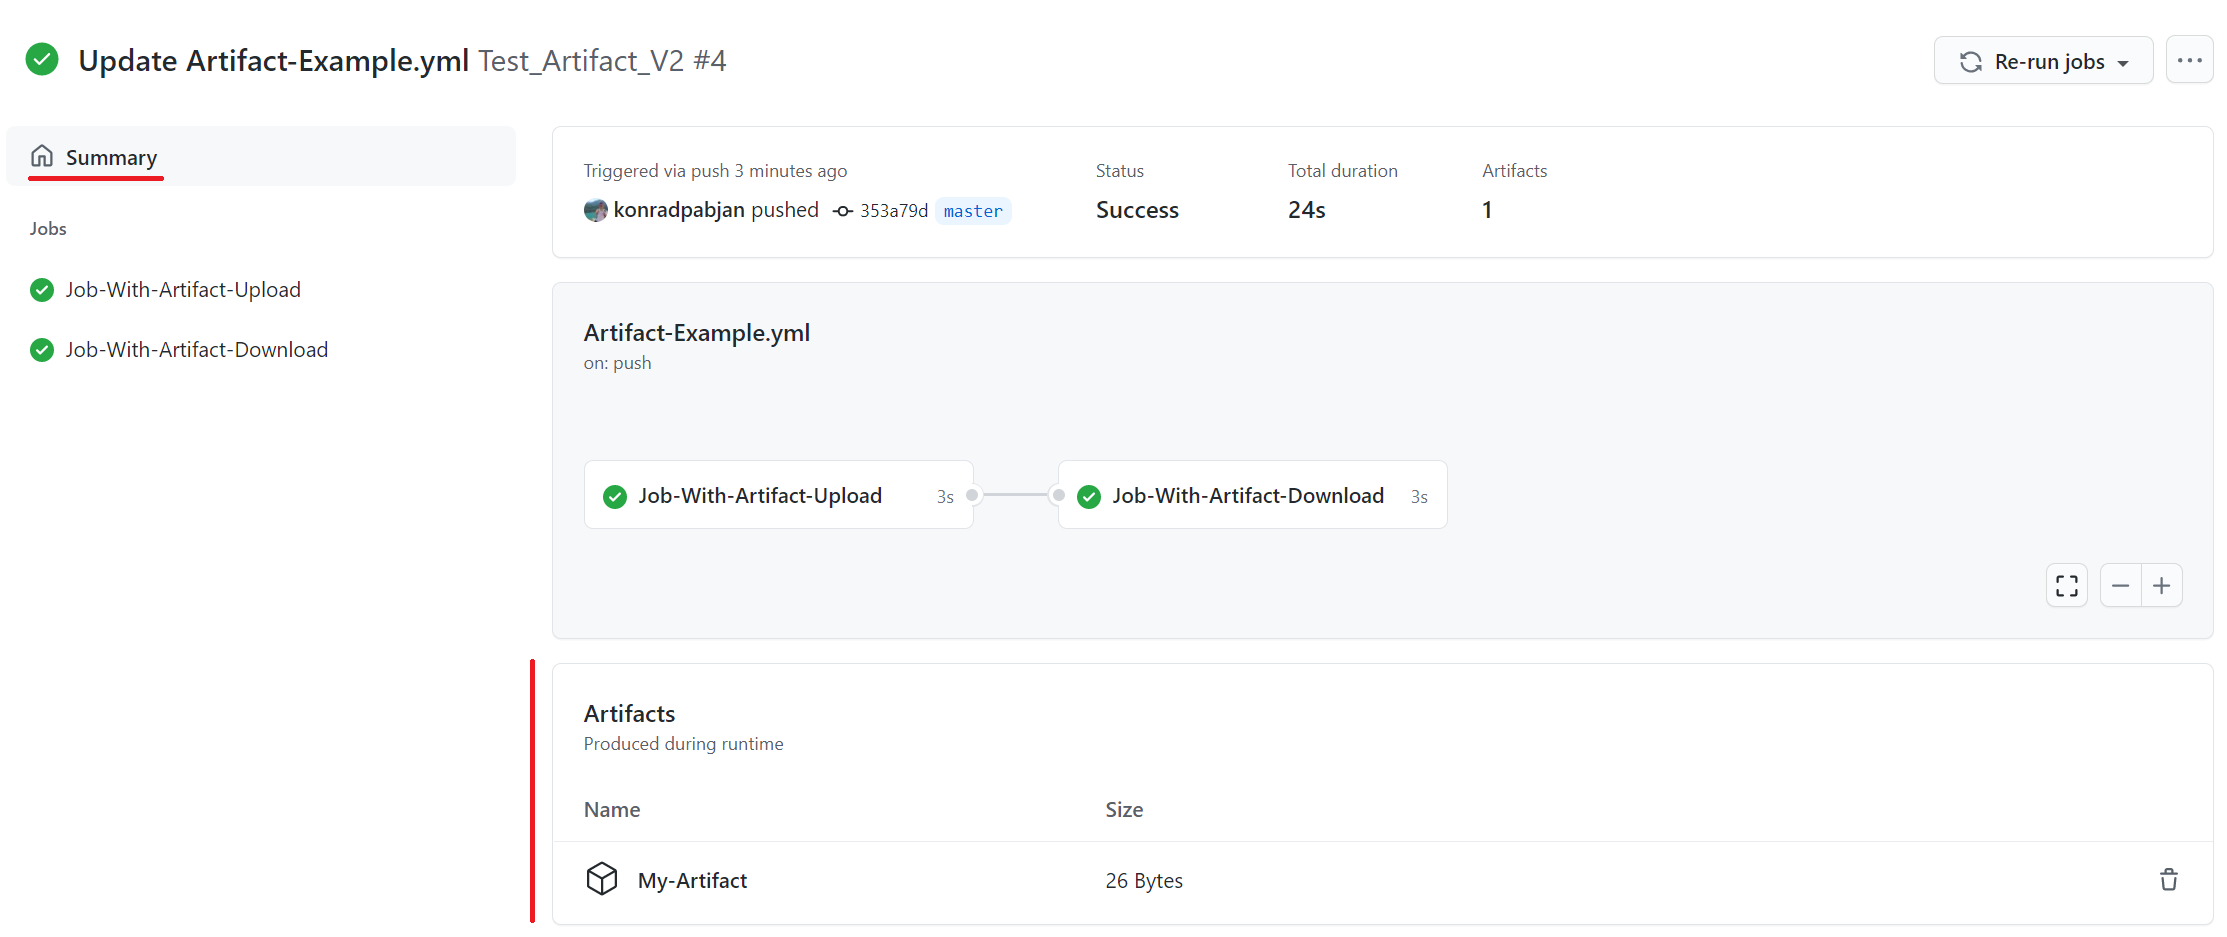
GitHub Actions is an automation tool integrated directly into GitHub, which simplifies workflows from code development to deployment. It allows developers to automate tasks like building, testing, and deploying code within the GitHub platform. Users can automate software workflows triggered by various GitHub events such as pushes, pull requests, or issue comments.
License: MIT
Repo: github.com/actions/starter-workflows
GitHub stars: 8k+
Contributors: 300+
Features of GitHub Actions:
- Event-driven workflows: Automates tasks based on GitHub events like code commits, pull requests, and releases.
- Cross-platform builds: Can test and deploy across major operating systems, including Linux, macOS, and Windows, using hosted or self-hosted runners.
- Matrix builds: Simultaneously tests across multiple operating systems, languages, or configurations to save time.
- Multi-language support: Compatible with popular programming languages like Python, Java, Node.js, Ruby, Go, and more.
- Built-in secret management: Helps securely store and manage sensitive information like API keys within workflows.
![]()
Source: GitHub Actions
4. GitLab CI/CD
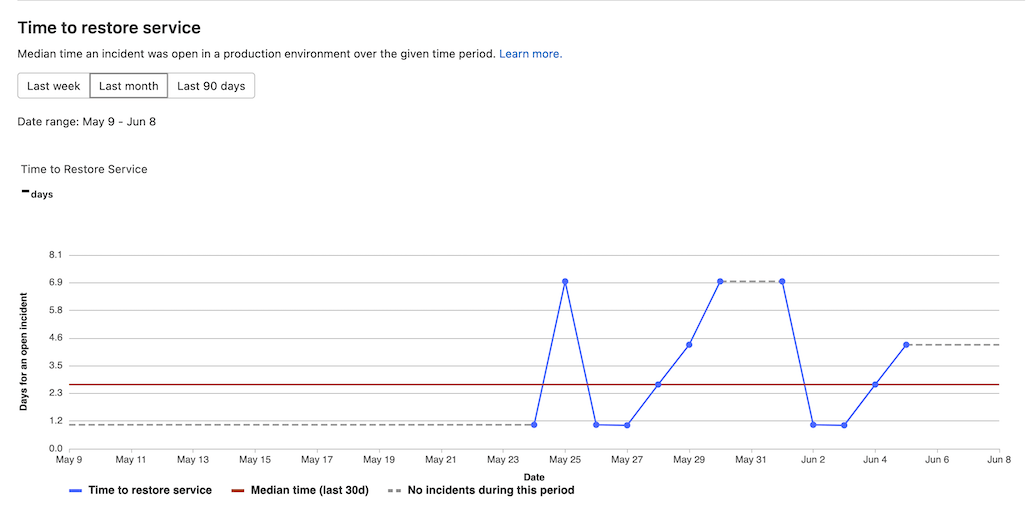
GitLab CI/CD is an end-to-end automation tool that allows developers to build, test, package, and deploy software securely from code commit to production. By integrating CI/CD into a single platform, GitLab provides visibility into the entire development lifecycle, enabling teams to release code faster with less manual intervention.
License: MIT
Features of GitLab CI/CD:
- Automated pipelines: Offers pre-built pipeline templates that can be customized or built from scratch to automate code building, testing, packaging, and deployment.
- In-context testing: Automatically triggers unit, performance, and security tests on every code change and merge request, with results shared directly in the same request.
- Security integration: Helps shift security left with built-in security scans and compliance checks starting from the code commit stage.
- Scalability: Supports advanced features like merge trains, parent-child pipelines, and multiple deployment environments for both small projects and large-scale enterprise setups.
- Progressive delivery: Supports implementing canary and blue/green deployments with feature flags and automatic rollbacks in case of critical alerts.
![]()
Source: GitLab CI/CD
5. TeamCity
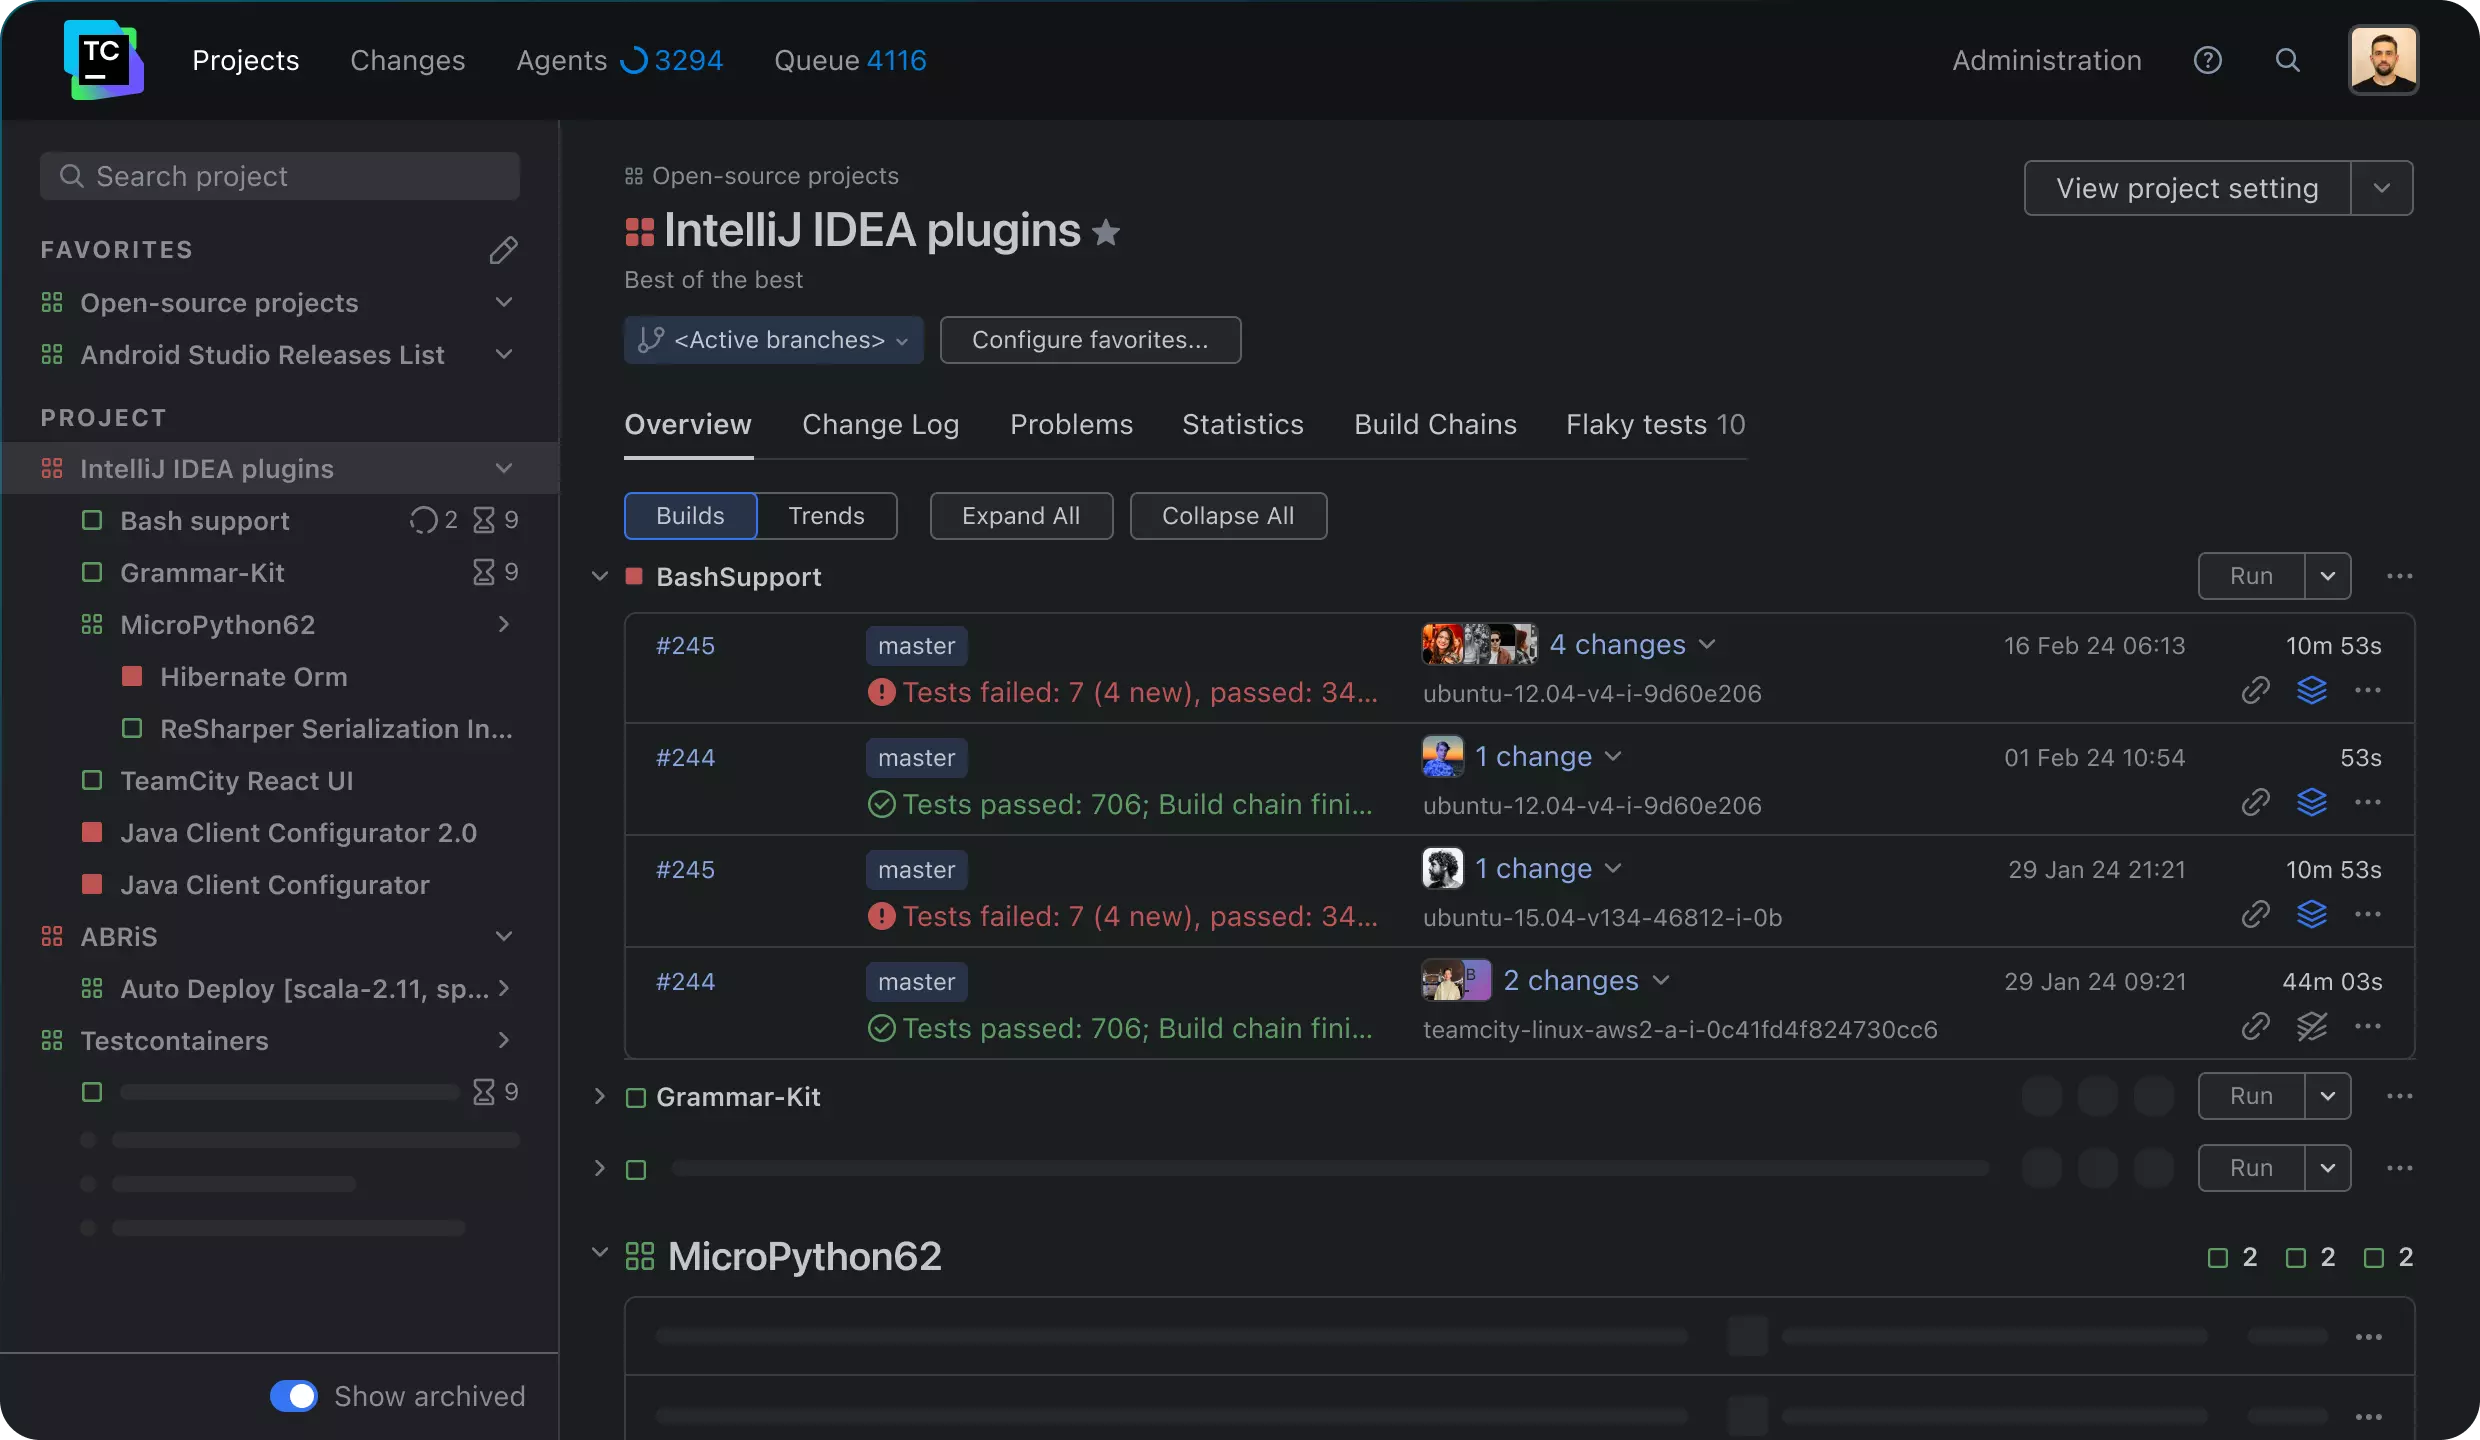
TeamCity is a CI/CD tool for DevOps teams. It supports a range of technologies and workflows, helping teams automate building, testing, and deploying code at scale. TeamCity accelerates delivery times and enhances collaboration across projects.
License: Open Source Development License
Features of TeamCity:
- Self-optimizing build pipelines: Automatically reuses build steps, leverages caches, and optimizes build chains to speed up pipelines.
- Scalability: Supports thousands of concurrent builds with a multi-node setup, allowing seamless scaling from small projects to large enterprise workloads.
- Real-time feedback: Provides immediate insights into build issues and test results, enabling faster identification of problems and reduced feedback loops.
- Configuration as code: Allows build pipelines to be configured via a web UI or with a typed DSL, ensuring easy reuse and management as projects grow.
- Visual pipeline editor: Simplifies pipeline configuration through an intuitive interface, while maintaining the ability to handle complex CI/CD processes.
![]()
Source: JetBrains
6. Bamboo
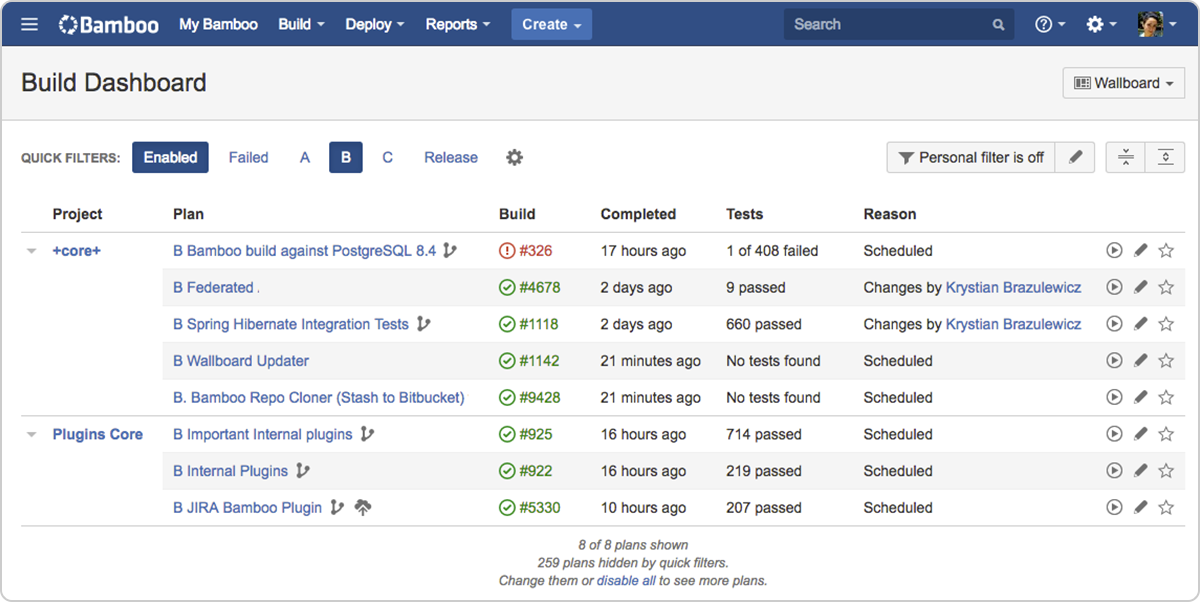
Bamboo is a CI/CD tool for software teams that automates the build, test, and deployment process. Its features ensure scalability, resilience, and seamless integrations. Bamboo integrates tightly with Bitbucket, Jira, and other tools to provide traceability from code commits to production.
License: Commercial, academic, and starter licenses
Features of Bamboo:
- Automated workflows: Simplifies the CI/CD process from code to deployment, enabling agile development with minimal manual intervention.
- Built-in disaster recovery: Ensures high availability and resilience, keeping teams productive even during system failures.
- Scalable performance: Scales as the organization grows, maintaining performance across increasing workloads.
- Seamless Integrations: Connects with Bitbucket, Jira, Docker, and AWS CodeDeploy for a unified development and deployment experience.
- Incident management: Integrates with Opsgenie to assist response teams in investigating and resolving incidents quickly.
![]()
Source: Bamboo
7. CircleCI
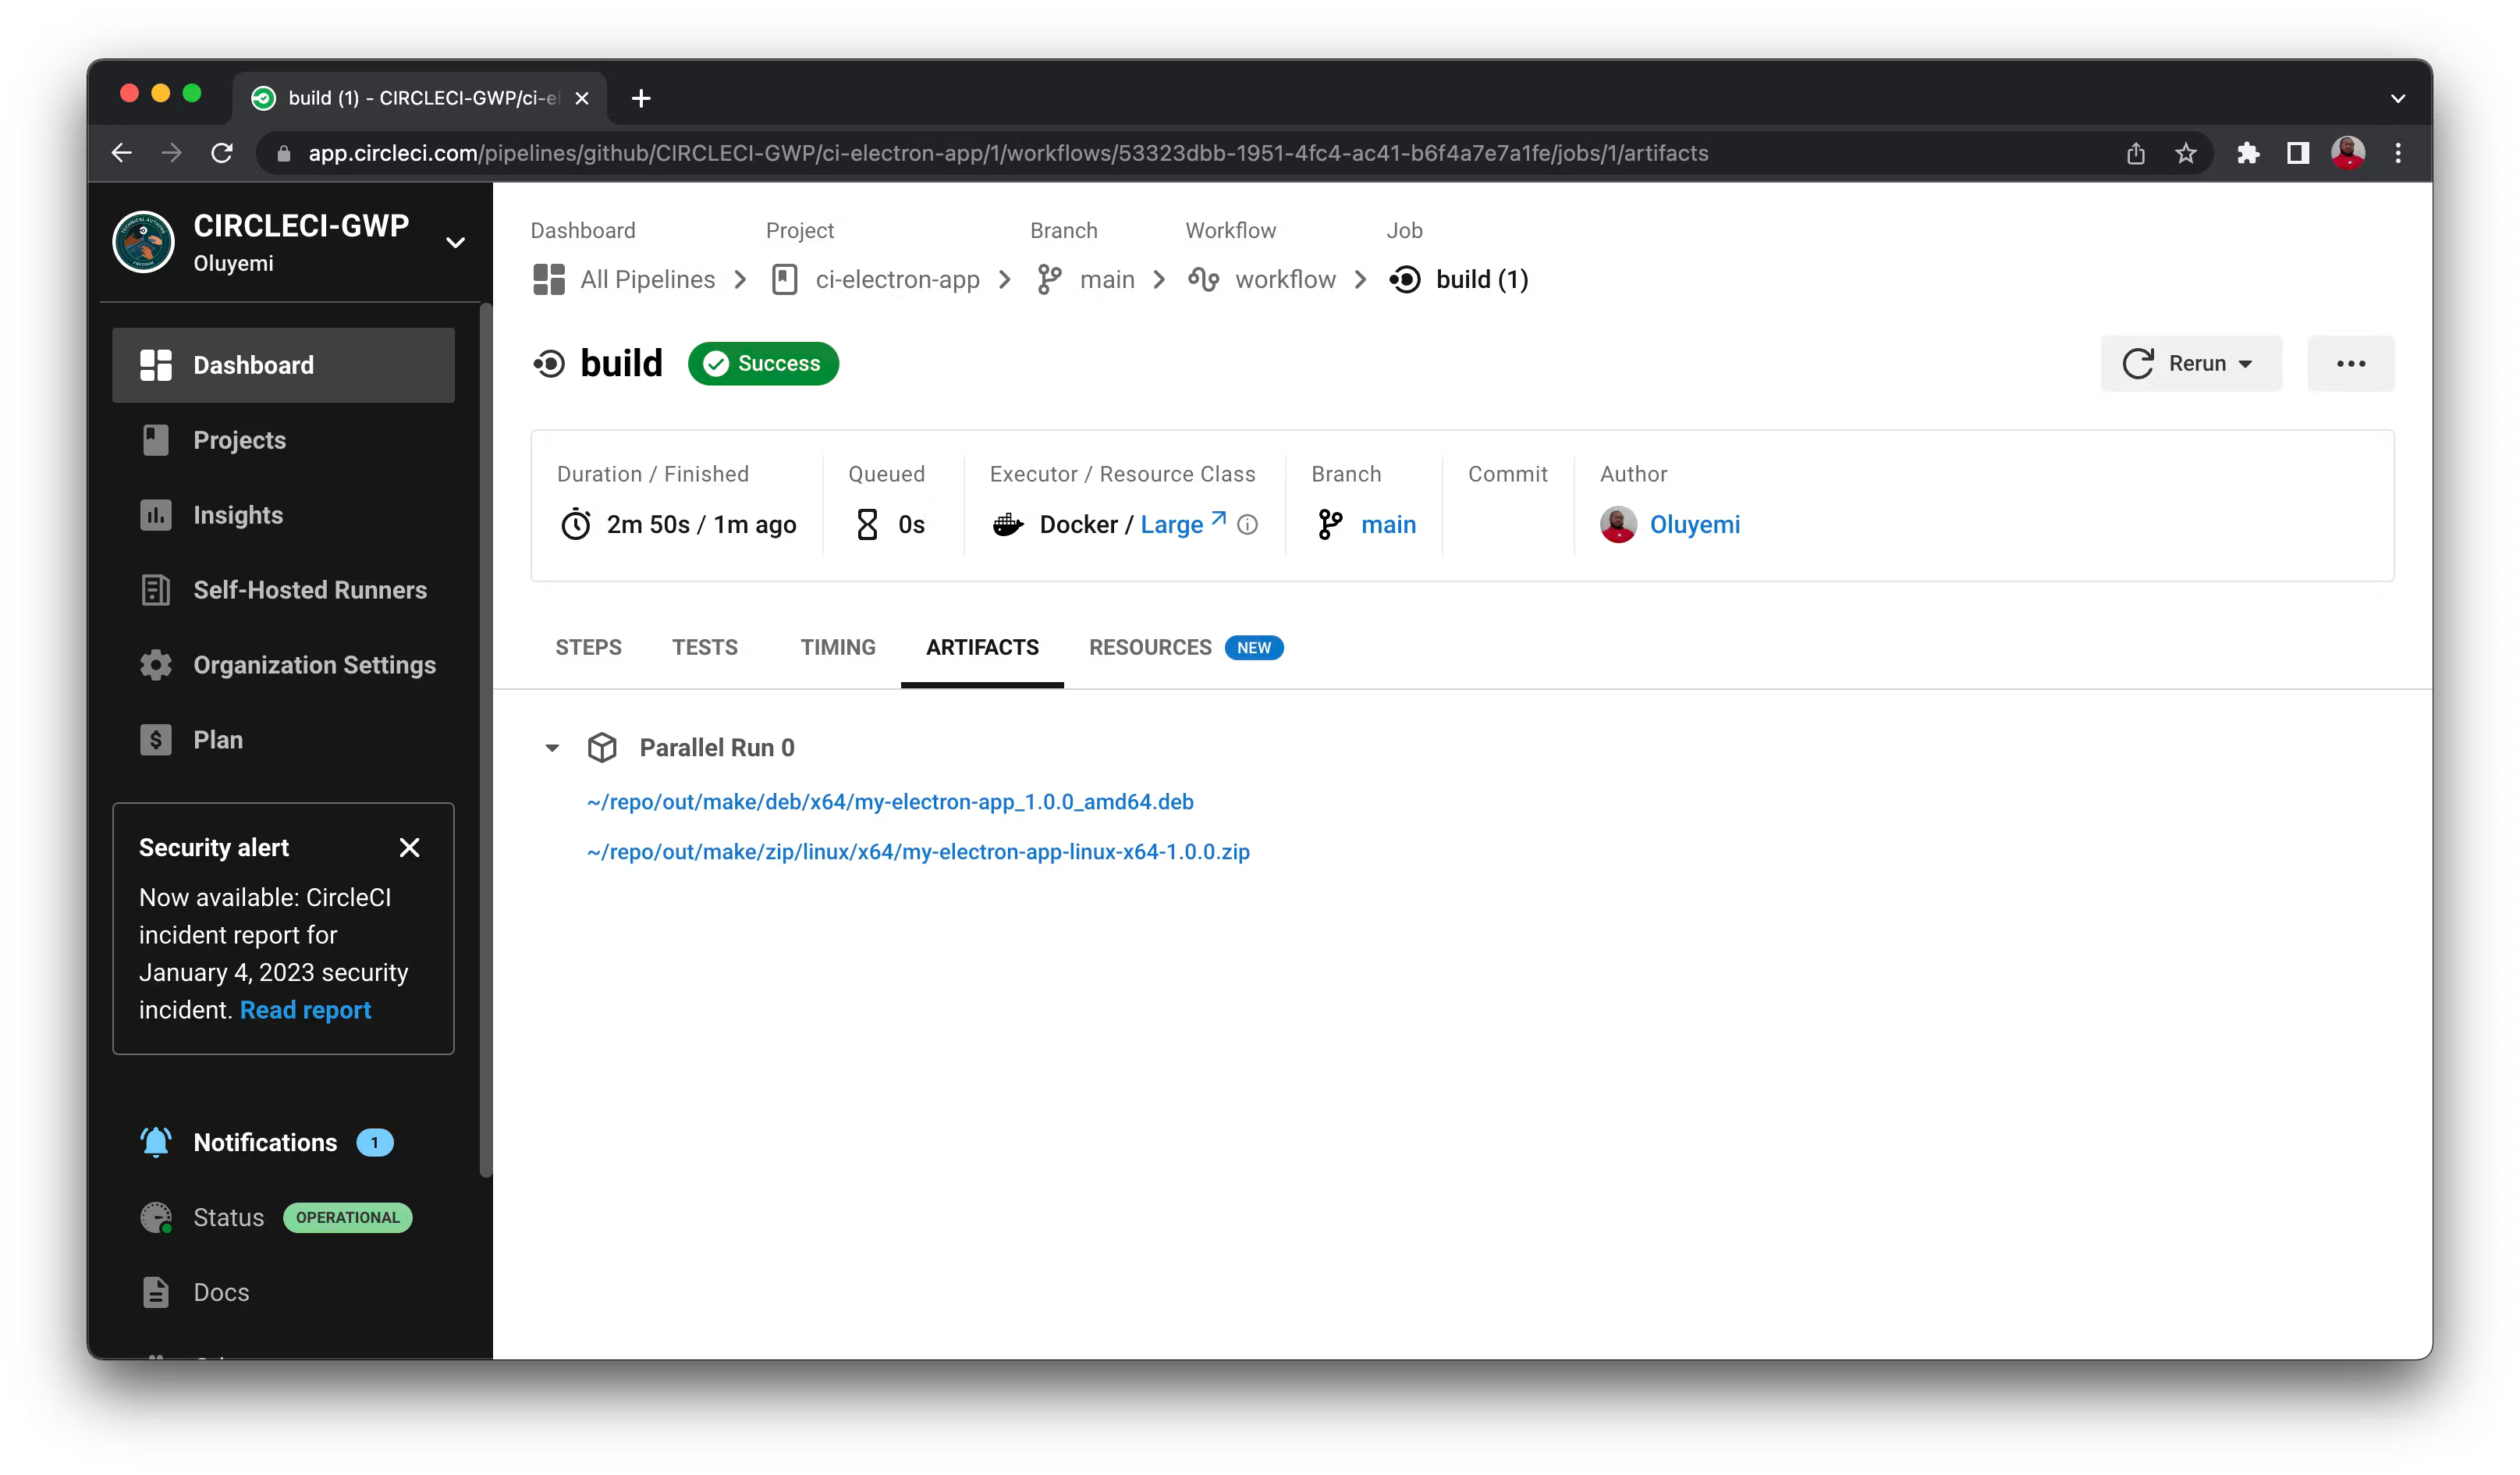
CircleCI is a CI/CD platform that helps development teams automate the process of building, testing, and deploying code. It supports multiple environments, including Linux, macOS, Windows, and Android, both in the cloud and on proprietary servers.
License: MIT
Repo: github.com/circleci/circleci-docs
GitHub stars: <1K
Contributors: 800+
Features of CircleCI:
- Cross-platform support: Runs on Linux, macOS, Windows, Android, and iOS environments, offering flexibility for various development stacks.
- Parallelism and caching: Optimizes build times with sophisticated caching strategies, Docker layer caching, and parallelism to run jobs faster.
- Orbs: Reusable configuration packages that simplify deployment workflows and integrations with third-party services.
- Automated testing and notifications: Automatically runs tests for every code change and integrates with tools like Slack and email for real-time success or failure notifications.
- SSH debugging: Allows developers to SSH into failed jobs for real-time debugging and troubleshooting.
![]()
Source: CircleCI
8. CloudBees
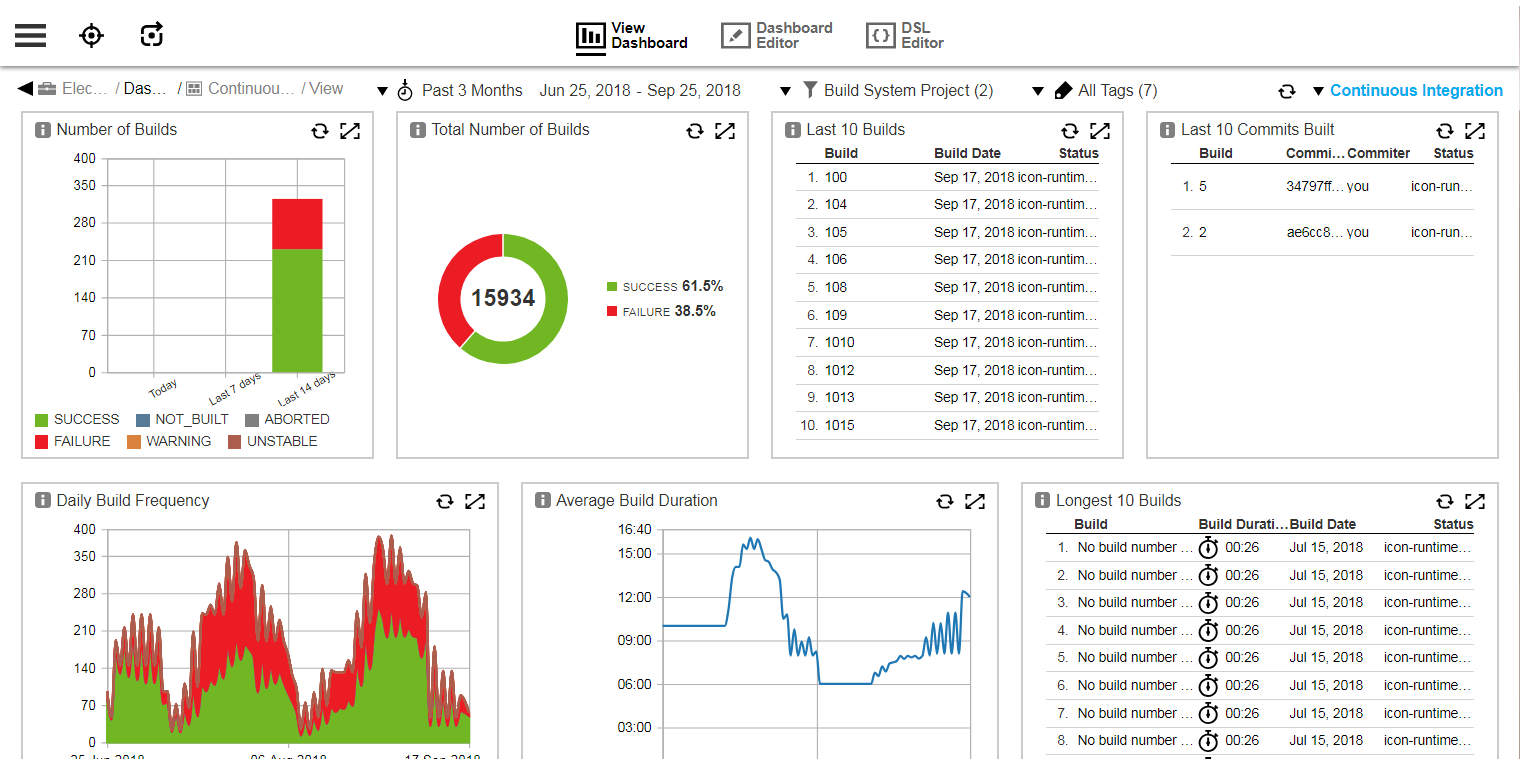
CloudBees CI is an enterprise-grade Continuous Integration platform built on Jenkins. It extends Jenkins with enhanced security, scalability, and centralized management, making it suitable for complex environments.
License: Support for GPL-3.0
Features of CloudBees CI:
- Enterprise-scale Jenkins: Scales Jenkins across large organizations without over-provisioning, distributing workloads efficiently for faster build times.
- Centralized management: Helps centrally monitor and manage all Jenkins controllers through a unified dashboard.
- Security: Ensures compliance with built-in security features, including secure Jenkins versions, role-based access controls, and templated pipeline configurations.
- Plugin management: Offers a secure plugin management system with the CloudBees Assurance Program (CAP) and Beekeeper Upgrade Assistant, ensuring verified and up-to-date plugins.
- Hybrid cloud support: Deploys in both on-premises and cloud environments, supporting hybrid cloud strategies with integrated DevSecOps and Kubernetes orchestration.
![]()
Source: CloudBees
Conclusion
Jenkins remains a widely adopted tool for CI/CD, primarily valued for its flexibility and large ecosystem of plugins. However, it has some limitations, particularly in handling modern, large-scale, and cloud-native environments, prompting some development teams to look for alternatives. Despite Jenkins’ adaptability, other tools may be better suited for use cases ranging from simple CI setups to more complex, multi-stage CD pipelines.
See Additional Guides on Key CI/CD Topics
Together with our content partners, we have authored in-depth guides on several other topics that can also be useful as you explore the world of CI/CD.
Continuous Delivery
Authored by Octopus
- [Guide] Continuous Delivery: Origins, 5 principles, and 7 key capabilities
- [Guide] Continuous Integration versus Continuous Deployment [2025 guide]
- [Ebook] The importance of Continuous Delivery
- [Product] Octopus Deploy | Continuous Delivery and deployment platform
Platform Engineering
Authored by Octopus
GitHub Actions
Authored by Octopus
- [Guide] GitHub Actions: Complete 2025 Guide With Quick Tutorial
- [Guide] Secrets In GitHub Actions
- [Ebook] Measuring Continuous Delivery and DevOps
- [Product] Octopus Deploy | Continuous Delivery and Deployment Platform
Help us continuously improve
Please let us know if you have any feedback about this page.


