Benefits of deploying Docker on a Linux system
Deploying Docker on a Linux system involves several key steps to ensure the Docker Engine and its components are correctly installed and configured.
There are three ways to deploy Docker on Linux:
- Install using the apt repository: This method installs Docker directly from Docker’s official repository, ensuring you always get the latest stable release and security patches. It also makes future updates easier since Docker packages are managed by Ubuntu’s package manager.
- Install from a package: Installing from a package gives you full control over the exact version you deploy. This approach is useful when you need to pin Docker to a specific release for compatibility or reproducibility in production environments.
- Install using the convenience script: The convenience script provides the fastest way to install Docker with a single command. It is mainly intended for testing and development, as it installs the latest version without customization or upgrade management.
Deploying Docker on a Linux system offers distinct advantages due to the native compatibility between Docker and the Linux kernel. Since Docker uses Linux features like cgroups and namespaces to run containers, Linux provides the most efficient and stable environment for containerized workloads. This results in better performance, lower overhead, and fewer compatibility issues compared to running Docker on other operating systems.
Here are the key benefits of running Docker on Linux:
- Native container support: Docker relies on Linux kernel features for isolation and resource management, which means it runs natively without needing a virtual machine or compatibility layer.
- Lower resource overhead: Without the need for emulation or intermediate layers, Docker on Linux consumes fewer resources, leading to better performance and faster container startup times.
- Broad distro compatibility: Most Linux distributions are fully compatible with Docker, allowing developers to choose an environment that matches their deployment target.
- Stronger community and ecosystem: The Linux and Docker communities overlap significantly, offering support, shared best practices, and well-maintained tools optimized for Linux.
- Better security integration: Linux allows tighter integration with Docker security tools like SELinux, AppArmor, and seccomp for enforcing policies and limiting container capabilities.
- Production-readiness: The vast majority of cloud providers and enterprise environments run Docker containers on Linux, making it the industry-standard setup for production deployments.
This is part of a series of articles about software deployment.
3 ways to install Docker Engine on Ubuntu
Prerequisites
Before installing Docker Engine on Ubuntu, ensure your system meets the following requirements:
- You must be running a 64-bit version of Ubuntu. Supported versions include:
- Ubuntu Oracular 24.10
- Ubuntu Noble 24.04 (LTS)
- Ubuntu Jammy 22.04 (LTS)
- Docker Engine supports multiple architectures: x86_64 (amd64), armhf, arm64, s390x, and ppc64le.
- If you’re using a derivative distribution like Linux Mint, note that it is not officially supported, even though it may work.
Uninstall any existing Docker-related packages that could conflict with the official Docker Engine installation. Use the following command:
for pkg in docker.io docker-doc docker-compose docker-compose-v2 podman-docker containerd runc; do sudo apt-get remove $pkg; done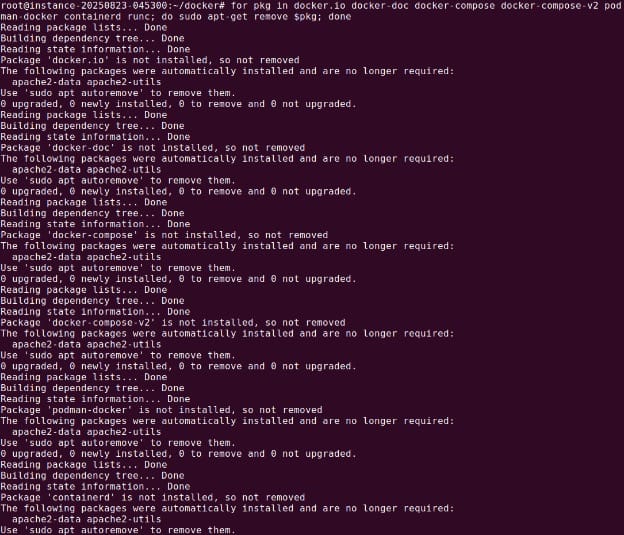
Be aware of firewall considerations:
- Exposed container ports may bypass firewall rules managed by
ufworfirewalld. - Only use
iptables-nftoriptables-legacyfor compatibility with Docker. - Add custom rules to the
DOCKER-USERchain to avoid interference.
1. Install using the apt repository
To install Docker from Docker’s official apt repository, set up the Docker repository:
sudo apt-get update
sudo apt-get install ca-certificates curl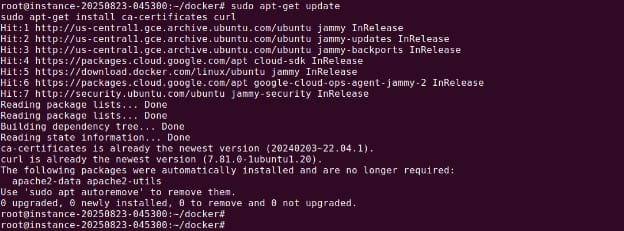
sudo install -m 0755 -d /etc/apt/keyrings
sudo curl -fsSL https://download.docker.com/linux/ubuntu/gpg -o /etc/apt/keyrings/docker.asc
sudo chmod a+r /etc/apt/keyrings/docker.asc
Add the Docker repository to apt sources:
echo \
  "deb [arch=$(dpkg --print-architecture) signed-by=/etc/apt/keyrings/docker.asc] https://download.docker.com/linux/ubuntu \
  $(. /etc/os-release && echo "${UBUNTU_CODENAME:-$VERSION_CODENAME}") stable" | \
  sudo tee /etc/apt/sources.list.d/docker.list > /dev/null
sudo apt-get update
Install the Docker packages:
sudo apt-get install docker-ce docker-ce-cli containerd.io docker-buildx-plugin docker-compose-plugin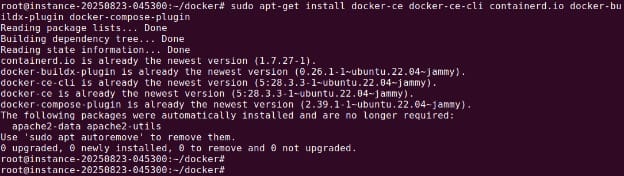
Verify the installation:
sudo docker run hello-world
This command runs a test container to confirm Docker is installed correctly.
2. Install from a package
If you prefer to manually install Docker without using the apt repository:
-
Visit Docker’s Ubuntu packages and select your Ubuntu version.
-
Navigate to
pool/stable/and download the.debpackages for your architecture: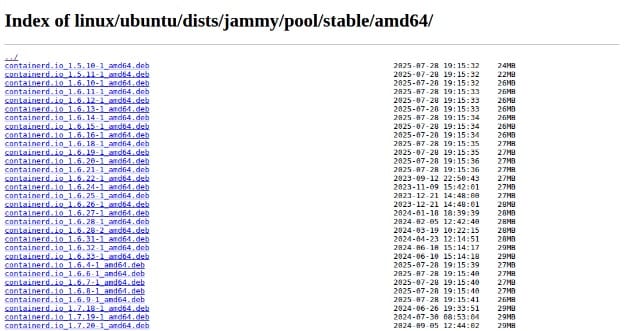
containerd.io_<version>_<arch>.deb docker-ce_<version>_<arch>.deb docker-ce-cli_<version>_<arch>.deb docker-buildx-plugin_<version>_<arch>.deb docker-compose-plugin_<version>_<arch>.deb -
Install the downloaded packages:
sudo dpkg -i ./containerd.io_<version>_<arch>.deb \ ./docker-ce_<version>_<arch>.deb \ ./docker-ce-cli_<version>_<arch>.deb \ ./docker-buildx-plugin_<version>_<arch>.deb \ ./docker-compose-plugin_<version>_<arch>.deb -
Start Docker (if not started automatically):
sudo service docker start -
Verify the installation:
sudo docker run hello-world
3. Install using the convenience script
For quick installations in development environments, Docker provides an install script.
Download and run the script:
curl -fsSL https://get.docker.com -o get-docker.sh
sudo sh get-docker.sh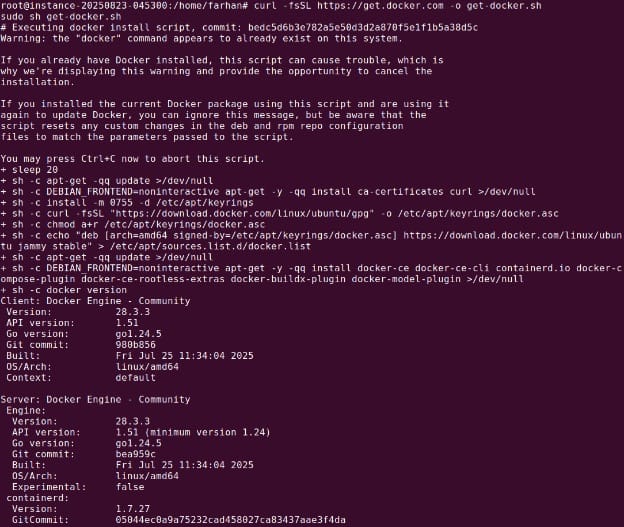
Optionally, preview what the script will do:
sudo sh get-docker.sh --dry-run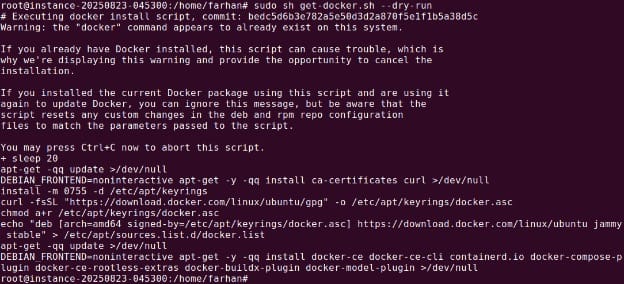
Note: This script installs the latest stable version. It is not suitable for production use. It does not support custom configuration or upgrades. It should be used only in trusted, disposable environments.
To install pre-releases, use:
curl -fsSL https://test.docker.com -o test-docker.sh
sudo sh test-docker.sh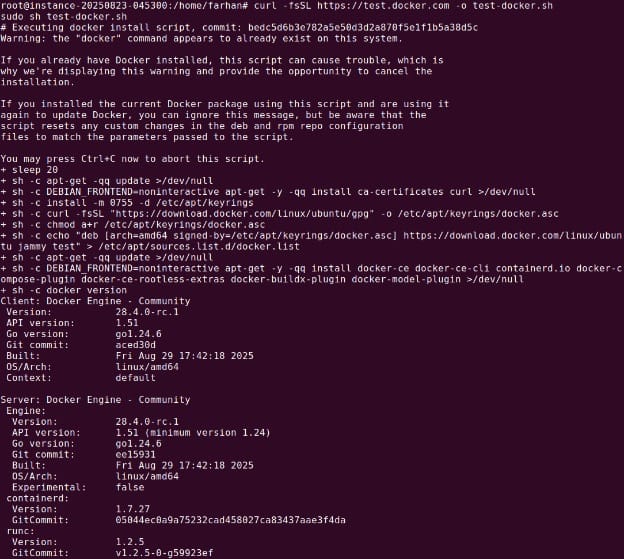
Uninstall Docker Engine from Ubuntu
To remove Docker and all related packages:
sudo apt-get purge docker-ce docker-ce-cli containerd.io docker-buildx-plugin docker-compose-plugin docker-ce-rootless-extras
To delete all Docker data:
sudo rm -rf /var/lib/docker
sudo rm -rf /var/lib/containerd
To clean up the repository and key:
sudo rm /etc/apt/sources.list.d/docker.list
sudo rm /etc/apt/keyrings/docker.asc
Note: Configuration files must be deleted manually if you’ve modified them.

Tony Kelly is a DevOps marketing leader who drives innovation and awareness of the latest trends in Continuous Delivery.
Post-installation steps for Docker Engine on Linux
After installing Docker Engine on a Linux host, you can optionally apply the following configurations to improve usability and system behavior.
Manage Docker as a non-root user
By default, Docker requires sudo to run commands, since the Docker daemon runs as root and binds to a Unix socket. To avoid using sudo every time, add your user to the docker group:
sudo groupadd docker
sudo usermod -aG docker $USER
Then, log out and log back in to refresh your group membership. If you’re on a virtual machine, restarting it might be necessary. You can also apply the group changes immediately with:
newgrp dockerAfter that, verify access without sudo:
docker run hello-world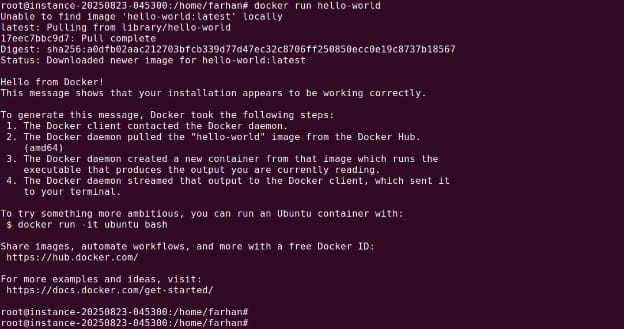
If you see a permissions error related to ~/.docker/config.json, it may be due to having previously run Docker with sudo. Fix it by resetting ownership and permissions:
sudo chown "$USER":"$USER" /home/"$USER"/.docker -R
sudo chmod g+rwx "$HOME/.docker" -R
Warning: Adding users to the docker group grants them root-level access to the system.
Configure Docker to start on boot with systemd
On Debian and Ubuntu, Docker is configured to start on boot by default. For other distributions using systemd, you can enable Docker and containerd services manually:
sudo systemctl enable docker.service
sudo systemctl enable containerd.service
To switch off automatic startup:
sudo systemctl disable docker.service
sudo systemctl disable containerd.service
For advanced configurations, such as adding proxy settings or changing the Docker runtime directory, you can customize the systemd unit files.
Configure default logging driver
By default, Docker uses the json-file logging driver, which stores logs in JSON format on the host. These logs can grow over time and consume disk space. To prevent this, consider one of the following:
- Enable log rotation for the
json-filedriver. - Use the
locallogging driver, which has rotation enabled by default. - Switch to a driver that forwards logs to an external log aggregator.
Adjusting the logging setup helps manage disk usage and supports centralized log management in larger environments.
Best practices for deploying Docker on Linux
Here are some additional steps to take when deploying Docker in a Linux environment.
1. Harden the host first
Harden your Linux host before deploying Docker to mitigate common attack vectors. Start by applying the principle of least privilege: only install essential packages, and regularly patch the operating system. Switch off unnecessary listening services, restrict inbound ports with firewall rules, and consider using tools such as Lynis or OpenSCAP for host security checks. Secure SSH by switching off root login and using key-based authentication.
Also, implement file integrity monitoring and auditing to detect unauthorized changes. Enable SELinux or AppArmor enforcement modes if your distribution supports them, as these add mandatory access controls. Consider running the host within a virtual machine to add another layer of isolation for potential threats targeting the base operating system.
2. Configure the Docker daemon safely
Hardening the Docker daemon itself addresses risks at the container engine layer. Configure the daemon to use user namespaces, reducing the impact if a container escape occurs, by mapping container users to less-privileged host users. Enable logging drivers and configure audit logs for tracking container events and API access. Run the Docker Engine with minimal capabilities enabled and consider setting resource limitations (CPU, memory, disk I/O) for each container to contain abuse or runaway processes.
Restrict Docker’s API endpoints by binding only to localhost or a dedicated management network, never exposing the API to the public internet. Store sensitive Docker configuration files such as /etc/docker/daemon.json with strict permissions. Where possible, use hardware-supported features such as seccomp profiles to limit system calls available to containers, reducing the attack surface of your Docker runtime environment.
3. Lock down Docker Engine access
Limit who can control Docker by tightening access to the Docker group and socket file (/var/run/docker.sock). Only trusted administrators should have group membership, as this access is equivalent to root privileges. Monitor group membership changes using file system auditing or alerting tools to catch unapproved modifications. Also, review permissions on the Docker socket regularly and avoid mounting it into containers, which gives containers full control over the host.
Use network controls and firewalls to restrict remote access to Docker services. If you require remote API access, secure communications with TLS certificates and enforce client authentication. Combine these controls with regular credential and access audits to ensure your Docker Engine and associated management tools are only accessible by authorized personnel.
4. Runtime security flags you should use
Deploy containers with restrictive security flags to mitigate runtime risks. Use the --read-only flag to prohibit file system writes, limiting the ability for compromised containers to alter binaries or config files. Explicitly drop all Linux capabilities not needed by the container with the --cap-drop=ALL flag, then selectively add only essential capabilities using --cap-add. Enable seccomp and AppArmor or SELinux profiles when running containers to further constrain system call and filesystem access.
In addition, run containers with a non-root user by specifying the --user flag, reducing privileges inside the container and limiting the scope of potential attacks. For even greater isolation, set networking options to restrict outbound connections or employ user-defined network namespaces. Always review and document the security flags you use, making them a standard part of container deployment manifests and CI/CD pipelines.
5. Network with isolation by default
Docker gives each container a default network bridge, but best practice is to segment application networks for isolation and security. Create dedicated user-defined bridge networks for each group of containers that need to communicate, and avoid connecting unrelated services to the same network. Use network policies and firewall rules to restrict ingress and egress traffic, only opening required ports between services and to the public internet.
Additionally, when possible, enable encrypted communications between containers using Docker’s overlay networks or third-party service meshes. Deploy container-aware networking plugins or service proxies for advanced segmentation, monitoring, and intrusion detection. Network isolation by default prevents lateral movement if one container is breached, significantly improving your infrastructure’s overall security posture.
Help us continuously improve
Please let us know if you have any feedback about this page.