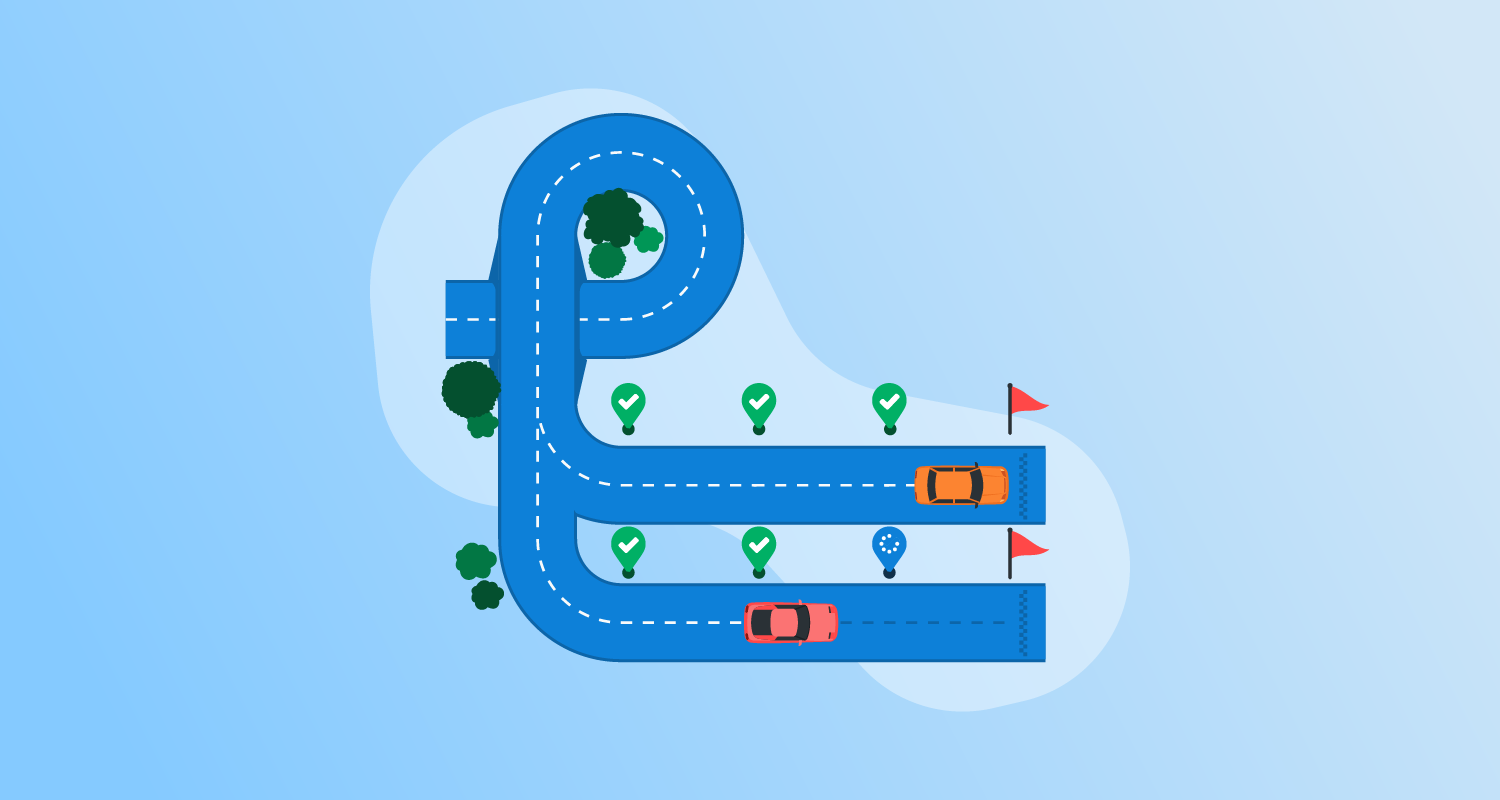
How can you deploy Docker images on GCP?
Google Cloud Platform (GCP), today commonly known as Google Cloud, provides multiple services for running Docker images, each designed for different levels of abstraction and control. At the highest level, Cloud Run offers a fully managed, serverless environment that hides infrastructure complexity, while at the lowest level, Compute Engine gives direct control over virtual machines where Docker can be installed manually. Between these extremes, App Engine Flex and Google Kubernetes Engine (GKE) provide varying degrees of orchestration and customization.
The right option depends on workload requirements. If you need fast deployment with minimal setup, Cloud Run is the most efficient. For applications requiring Kubernetes-native orchestration, GKE is the standard. Compute Engine works best when workloads demand full control of the VM or require legacy support. App Engine Flex is suited for developers who want managed scaling but need custom runtimes. Choosing the right service balances flexibility, operational effort, and scalability needs.
This is part of a series of articles about software deployment.
4 options for deploying Docker images on Google Cloud
Cloud Run
Cloud Run is a fully managed compute platform that allows you to run stateless containers directly from Docker images. It abstracts server management entirely, enabling you to deploy applications that scale automatically from zero to thousands of instances based on traffic. Cloud Run is ideal for microservices, REST APIs, data processing tasks, and web applications that require quick scaling and minimal operational overhead.
With Cloud Run, developers push container images to Google Container Registry or Artifact Registry and deploy applications with just a few commands or clicks. It provides HTTPS endpoints out of the box, built-in traffic splitting for gradual rollouts, and integration with IAM for secure access control. Pricing is based purely on actual compute resources used, giving cost transparency and efficiency for both low- and high-traffic applications.
When to use: Use Cloud Run when you need rapid deployment of stateless workloads without managing infrastructure.
Key considerations:
- Limited to stateless applications
- Cold starts may affect latency for infrequent traffic
- Regional service; location choice impacts latency and compliance
- Scaling is automatic but not fine-grained beyond request-based scaling
Google Kubernetes Engine (GKE)
Google Kubernetes Engine (GKE) is a managed Kubernetes service that automates deploying, managing, and scaling containerized applications using Docker images. With GKE, organizations get the flexibility to run highly available, production-grade Kubernetes clusters on Google’s infrastructure. GKE simplifies cluster maintenance, automated upgrades, autoscaling, monitoring, and logging, making it well-suited for complex, multi-container workloads that need orchestration.
GKE supports declarative configuration via YAML manifests, using Kubernetes native tools for deployments and rollbacks. Integration with Google Cloud services like Cloud Load Balancing, persistent disks, and IAM ensures applications are secure and scalable. GKE is particularly advantageous for organizations with existing Kubernetes expertise or those looking for deep customization and control across their containerized environments.
When to use: Use GKE when you need Kubernetes-native orchestration with fine-grained control over scaling, networking, and workload distribution.
Key considerations:
- Requires Kubernetes expertise to operate effectively
- Provides strong multi-container orchestration and service discovery
- Supports both stateless and stateful workloads
- More operational overhead than Cloud Run or App Engine Flex
Compute Engine
Compute Engine is Google Cloud’s Infrastructure as a Service (IaaS) offering that provides customizable virtual machines (VMs). It offers control over infrastructure components, including CPU type, memory size, and attached disks, allowing you to install Docker manually and manage containers at the VM level. Compute Engine is best for scenarios where applications require specialized operating systems, network configurations, or low-level system access.
While running Docker containers on Compute Engine gives maximum control, it also passes infrastructure management responsibilities to the user. Tasks such as patching, scaling, and load balancing must be handled manually or automated with scripts and tools. Compute Engine is suitable for legacy applications being containerized, workloads with specific hardware requirements, or cases where migration dependencies prevent adoption of managed services.
When to use: Use Compute Engine when applications need full VM control, custom OS configurations, or support for non-standard dependencies.
Key considerations:
- Highest operational responsibility (patching, scaling, networking)
- Useful for legacy applications not designed for managed services
- Supports GPU/TPU and specialized hardware
- Manual scaling unless automated with scripts or tools
App Engine Flex
App Engine Flexible Environment (App Engine Flex) enables developers to deploy applications in Docker containers with automatic scaling and built-in load balancing. Unlike App Engine Standard, Flex supports custom runtime environments using Docker images, allowing for a wider range of programming languages and runtime dependencies. It abstracts much of the infrastructure management but still offers more configurability than fully managed serverless options.
App Engine Flex continuously monitors your application and automatically deploys new instances during updates or increased load, reducing downtime. It includes integrated logging, monitoring, and traffic splitting features for managed rollouts. App Engine Flex is ideal for applications needing custom runtimes, more memory, or persistent disks—without requiring the user to manage the underlying VMs directly.
When to use: Use App Engine Flex when you want managed scaling and load balancing but still need custom runtimes or dependencies packaged in Docker.
Key considerations:
- Supports both standard runtimes and custom Docker images
- Longer startup times compared to Cloud Run
- Instances run on VMs, so scaling granularity is coarser
- Limited direct VM access for advanced customization
Tutorial #1: build and push a Docker image with Cloud Build
This tutorial walks you through building a Docker image and pushing it to Artifact Registry using Cloud Build. You’ll do it two ways: straight from a Dockerfile, and via a cloudbuild.yaml config. Instructions are adapted from the Google Cloud documentation.
Prerequisites for Cloud Build
- A Google Cloud project with billing enabled
- APIs enabled: Cloud Build, Compute Engine, Artifact Registry
- Google Cloud CLI installed and initialized
Run this command:
gcloud initOr if you already have gcloud installed:
gcloud components updateIf you use an external IdP, sign in to the CLI with your federated identity before running gcloud init.
You need project roles that allow building and pushing images (for example: Artifact Registry Administrator, Cloud Build Editor, Logs Viewer, Service Account User, Service Usage Admin, Storage Bucket Viewer, Storage Object Creator).
Prepare source files
Create a minimal script and Dockerfile.
mkdir quickstart-docker
cd quickstart-docker
Create quickstart.sh:
#!/bin/sh
echo "Hello, world! The time is $(date)."
Make it executable:
chmod +x quickstart.shCreate Dockerfile:
FROM alpine
COPY quickstart.sh /
CMD ["/quickstart.sh"]
What this does:
- Uses the small
alpinebase image. - Copies your script into the container’s root.
- Sets the container’s default command to run the script.
Create an Artifact Registry repository
Create a Docker repository to store the image (region: us-west2):
gcloud artifacts repositories create quickstart-docker-repo \
    --repository-format=docker \
    --location=us-west2 \
    --description="Docker repository"
Verify:
gcloud artifacts repositories list
Why this step matters: Cloud Build will push the built image to this repository.
Build an image using a Dockerfile
Get your project ID:
gcloud config get-value projectBuild and push in one step (run from the directory with your Dockerfile):
gcloud builds submit --region=us-west2 \
    --tag us-west2-docker.pkg.dev/PROJECT_ID/quickstart-docker-repo/quickstart-image:tag1
How it works: gcloud builds submit uploads your source, runs a Docker build based on the Dockerfile, and pushes the resulting image to Artifact Registry.
Note: If your PROJECT_ID contains a colon, replace it with a forward slash in the image URL.
Expected end of output:
DONE
...
IMAGES                                                                           STATUS
us-west2-docker.pkg.dev/PROJECT_ID/quickstart-docker-repo/quickstart-image:tag1  SUCCESS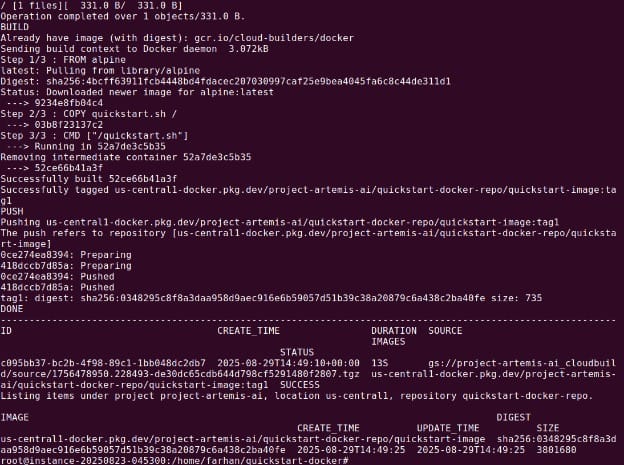
Build the same image using a build config file
Create cloudbuild.yaml next to your Dockerfile and script:
steps:
  - name: 'gcr.io/cloud-builders/docker'
    script: |
      docker build -t us-west2-docker.pkg.dev/$PROJECT_ID/quickstart-docker-repo/quickstart-image:tag1 .
    automapSubstitutions: true
images:
  - 'us-west2-docker.pkg.dev/$PROJECT_ID/quickstart-docker-repo/quickstart-image:tag1'
Start the build:
gcloud builds submit --region=us-west2 --config cloudbuild.yaml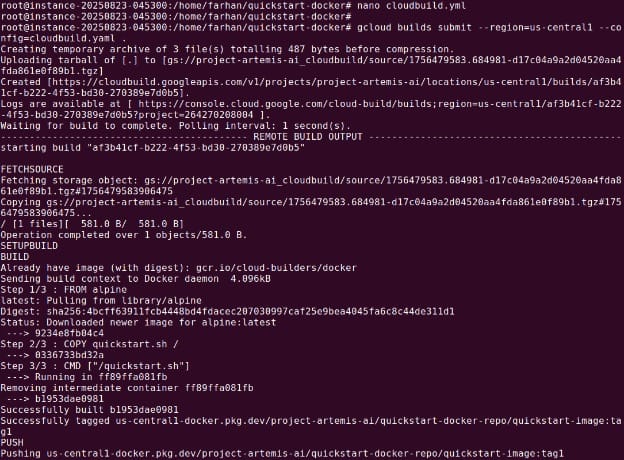
What this does:
- Runs the official Docker builder image.
- Builds your image and tags it with your project ID via
$PROJECT_IDsubstitution. - Declares the image to publish, so Cloud Build pushes it to Artifact Registry after a successful build.
You should see a SUCCESS status and the pushed image reference.
View build details
- Open the Cloud Build page in the Google Cloud console.
- If needed, choose Region: us-west2.
- You’ll see two builds (one per method). Click a build to view details.
- Under Build Summary, open Build Artifacts to inspect the pushed image and download logs.
This step confirms build status, logs, and the exact image URI pushed.
Clean up
Delete the repository to avoid charges:
- Open the Artifact Registry page in the console.
- Select your project and open it.
- Select
quickstart-docker-repoand click Delete.
This removes the repository and its images.
Tony Kelly is a DevOps marketing leader who drives innovation and awareness of the latest trends in Continuous Delivery.
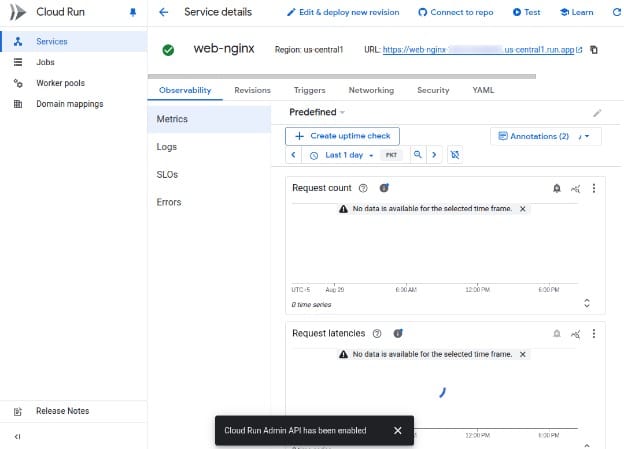
Tutorial #2: deploying Docker container images to Cloud Run
This tutorial explains how to deploy an existing Docker container image to a Cloud Run service. You can create a new service or deploy a new revision to an existing one. Instructions are adapted from the Cloud Run documentation.
Prerequisites for Cloud Run
Make sure you have the following IAM roles:
- Cloud Run Developer (
roles/run.developer) for deploying the service - Service Account User (
roles/iam.serviceAccountUser) for the service identity - Artifact Registry Reader (
roles/artifactregistry.reader) for accessing the image repository
If deploying across projects, you may also need Service Account Token Creator (roles/iam.serviceAccountTokenCreator).
Your container image can be stored in Artifact Registry, Docker Hub, or another registry configured via an Artifact Registry remote repository. Google recommends using Artifact Registry for performance and reliability.
Deploying a new service
To deploy a container image as a new service on Google Cloud Run:
- In the Google Cloud console, go to Cloud Run and choose Deploy container.
- Select either Deploy one revision from an existing container image (manual) or Continuously deploy from a source repository (automated).
- Enter a unique service name and select the region.
- Configure scaling options (minimum instances or manual scaling) and ingress settings.
- Under Authentication, choose between Allow unauthenticated invocations (public) or Require authentication (private).
- Optionally configure CPU/memory limits, concurrency, environment variables, VPC connections, Cloud SQL connections, or secrets.
- Click Create to deploy. Once finished, you’ll get a stable HTTPS endpoint for your service.
Deploying a new revision
To deploy a new revision of an existing service from a container image:
- In Cloud Run, open the existing service and choose Edit and deploy new revision.
- Provide the new container image URL if updating it.
- Adjust configuration as needed (CPU, memory, concurrency, autoscaling).
- Decide whether to route all traffic to the new revision immediately or roll it out gradually.
- Click Deploy to complete the update.
Deploying images from other projects or registries
For cross-project images, grant the Cloud Run service agent Artifact Registry Reader access in the image’s project.
For external registries, use an Artifact Registry remote repository to deploy images from sources like GitHub Container Registry or JFrog Artifactory.
Deploying multiple containers (sidecars)
Cloud Run supports up to 10 containers per instance, including an ingress container and sidecars. Sidecars share the same network namespace and can communicate via localhost. You can also share in-memory volumes.
Common sidecar use cases include logging agents, proxies (e.g., Envoy, Nginx), authentication filters, and outbound connection proxies.
In multi-container deployments, you can set startup order and define health checks to ensure dependent containers start in sequence.
Verification and cleanup
After deployment, test the endpoint. For private services, authenticate requests as described in the private services guide. If the service is no longer needed, delete it from the Cloud Run console to avoid charges.
Help us continuously improve
Please let us know if you have any feedback about this page.