Why deploy Node.js apps to Azure?
Node.js is an open-source, cross-platform runtime environment for executing JavaScript code outside the browser. Built on Chrome’s V8 JavaScript engine, it enables developers to use JavaScript for server-side scripting and backend development.
Deploying a Node.js application to Azure typically involves using Azure App Service, a fully managed platform for building, deploying, and scaling web apps. Azure makes it possible to deploy, manage, and scale Node.js applications, with a range of tools and services that align well with the Node.js ecosystem, enabling fast development and reliable production deployments.
Key benefits of deploying Node.js apps to Azure include:
- Integration with DevOps tools: Azure offers built-in support for CI/CD using GitHub Actions, Azure DevOps, and other tools, allowing automation of build, test, and deployment pipelines.
- Scalability and load balancing: Azure App Service and Azure Kubernetes Service (AKS) allow horizontal scaling of Node.js applications to handle growing traffic without changing code.
- Managed runtime and infrastructure: Services like Azure App Service manage the underlying infrastructure, offering automatic OS patching, load balancing, and built-in monitoring.
- Support for containers and microservices: Node.js apps can be containerized and deployed via Azure Container Instances or AKS, supporting microservices architectures with integrated service discovery and orchestration.
- Integrated monitoring and diagnostics: Azure Monitor and Application Insights provide real-time metrics, logging, and performance monitoring tailored to Node.js applications.
- Global reach and high availability: With a global network of data centers, Azure enables low-latency access and redundancy across regions for highly available deployments.
- Flexible database and storage options: Node.js apps on Azure can connect to a variety of storage backends, including Azure Cosmos DB, Azure SQL Database, and Blob Storage, with SDK support and managed scalability.
This is part of a series of articles about software deployment.
Tutorial: deploy a Node.js web app with Azure App Service
This tutorial walks through the steps for deploying a basic Node.js application built with Express to Azure App Service using Visual Studio Code. It covers setting up the local development environment, deploying the app, and managing the deployment lifecycle. Instructions are adapted from the Azure documentation.
1. Prerequisites
Before starting, ensure you have:
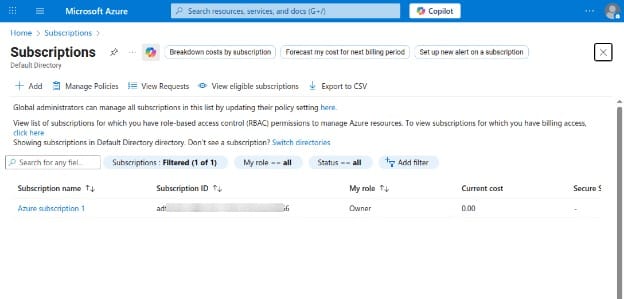
-
An active Azure subscription (you can sign up for free)
-
Node.js LTS version installed (
node --version)
-
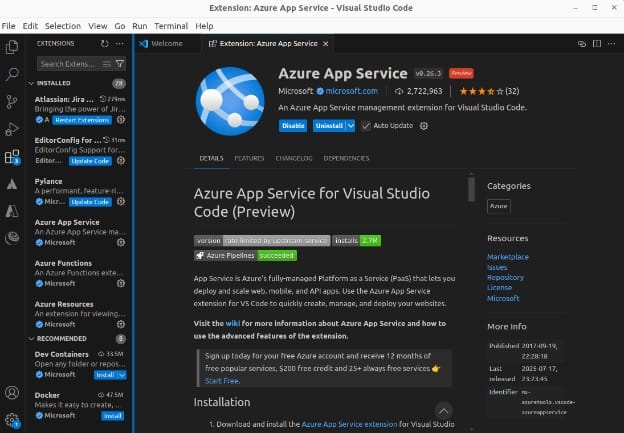
Visual Studio Code installed
-
Azure App Service extension installed in Visual Studio Code
2. Create the Node.js app
Generate a basic Express app using the express generator:
npx express-generator myExpressApp --view ejs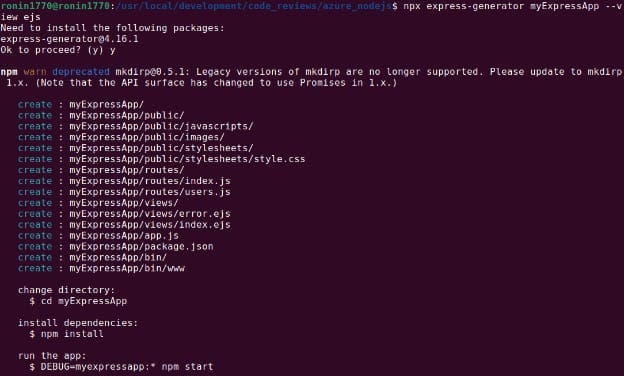
cd myExpressApp
npm install
npm audit fix --force
Start the development server with:
DEBUG=myexpressapp:* npm start
Navigate to http://localhost:3000 in your browser to confirm the app is running locally.

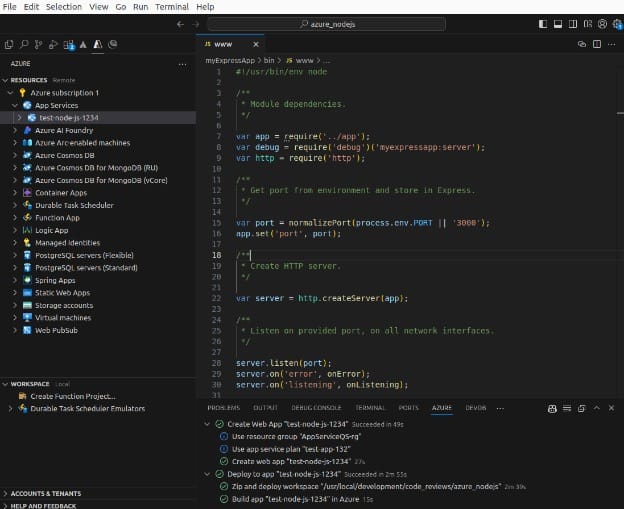
3. Deploy to Azure
Ensure the app uses the PORT environment variable, which the express generator does by default in bin/www.
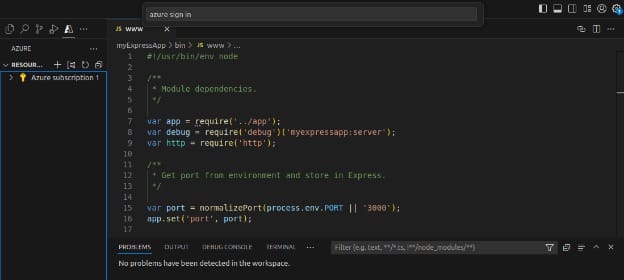
Open the project folder in Visual Studio Code:
code .In Visual Studio Code, follow these instructions:
-
In the activity bar, select the Azure icon. Sign in to your Azure account.
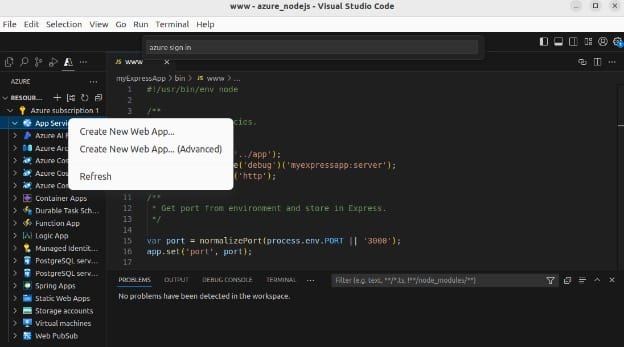
-
In the App Service explorer, right-click App Services and choose Create new web app… advanced.
-
Provide:
- A unique app name
- New resource group (e.g.,
AppServiceQS-rg) - Preferred Node.js LTS version
- Windows OS
- Location (e.g., West Europe)
- New App Service plan (e.g.,
AppServiceQS-plan) with F1 Free pricing tier - Skip Application Insights for now
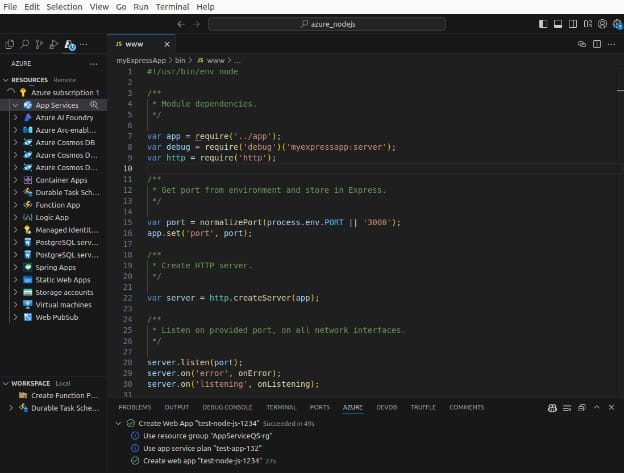
-
When prompted, allow the workspace to always deploy to this app.
-
After resources are created, configure build automation by right-clicking the app in the App Service explorer → Application settings → Add new setting.
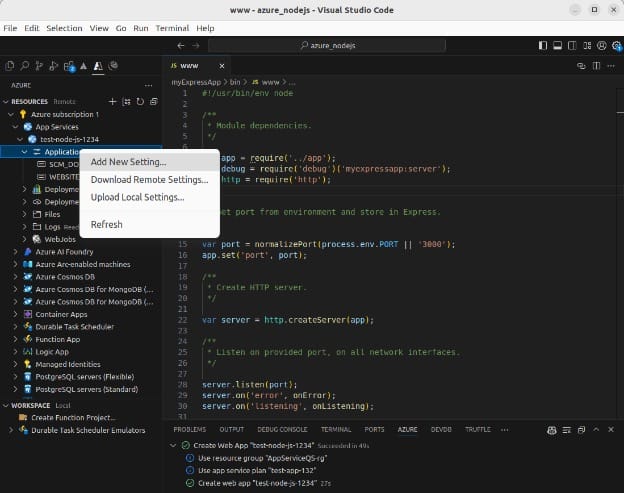
Set Key:
SCM_DO_BUILD_DURING_DEPLOYMENT, Value:true.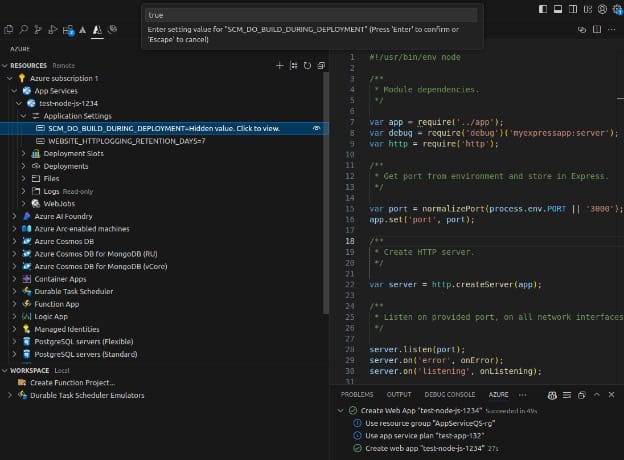
-
Deploy the app by selecting Deploy to web app again.
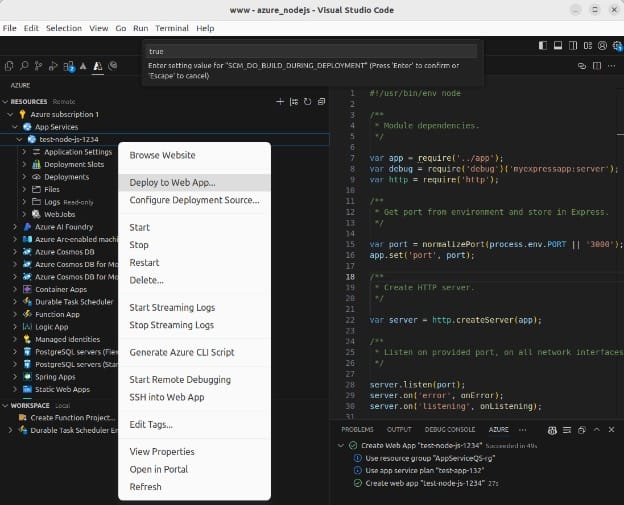
Once deployment completes, select Browse website to view the running app.
4. Update and redeploy
To deploy updates:
- Modify the code (e.g., update
views/index.ejs) - Save the changes
- Redeploy using Deploy to web app
Changes will be reflected after the deployment completes.
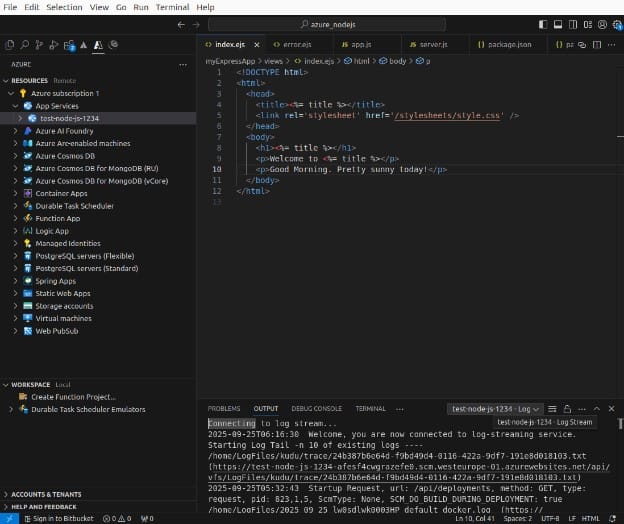
5. Stream logs
To view real-time logs, right-click the app in the App Service explorer → Start streaming logs.
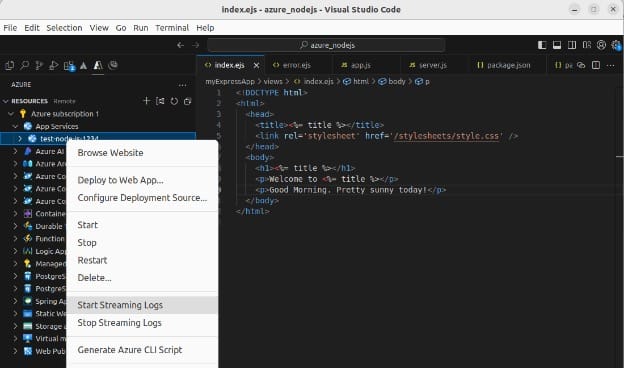
If prompted, restart the app. Console output (e.g., console.log()) appears in the output window.
6. Clean up resources
To delete the resources created:
- In the Azure extension, expand Resource groups
- Right-click the group (e.g.,
AppServiceQS-rg) → Delete - Confirm by entering the resource group name
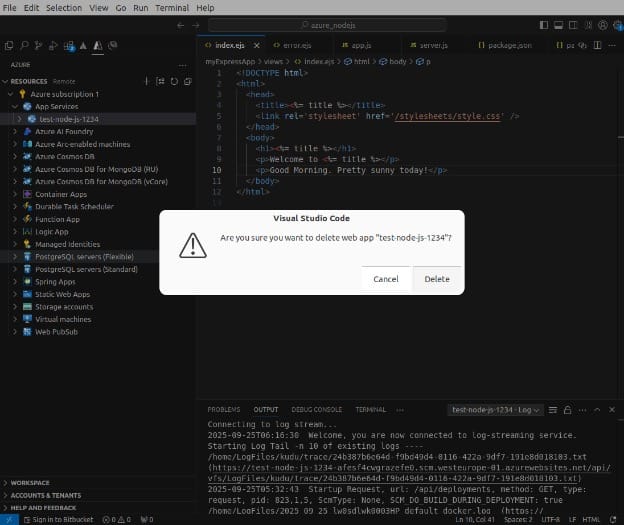
This removes all associated Azure resources.
Configuring a Node.js app for Azure App Service
Azure has several recommendations for configuring Node.js applications before deploying them to Azure App Service. Below we summarize the most important guidelines.
Manage dependencies
App Service automatically runs npm install --production when deploying from Git or using a Zip package with build automation enabled. This restores only production dependencies. If you deploy via FTP/S, you must upload all required node_modules manually.
Set Node.js version
You can view the current runtime version with:
az webapp config show --resource-group <resource-group-name> --name <app-name> --query linuxFxVersionTo list available versions:
az webapp list-runtimes --os linux | grep NODETo set a specific version, run:
az webapp config set --resource-group <resource-group-name> --name <app-name> --linux-fx-version "NODE|14-lts"Although you can configure this at the App Service level, the Node.js version should also be defined in package.json to keep environments consistent.
Configure port binding
App Service assigns an internal port through the PORT environment variable. Your app must listen on this port:
const port = process.env.PORT || 3000;
app.listen(port, () => console.log(`Listening on ${port}`));
Customize build automation
For Git or Zip deployments, App Service can run pre- and post-build steps. You can define environment variables such as:
az webapp config appsettings set --name <app-name> --resource-group <resource-group-name> --settings PRE_BUILD_COMMAND="echo pre-step"
az webapp config appsettings set --name <app-name> --resource-group <resource-group-name> --settings POST_BUILD_COMMAND="echo post-step"
Custom scripts in package.json (e.g., build, build:azure) are also executed automatically during deployment.
Startup configuration
By default, the container looks for entry points like server.js, app.js, or bin/www. It can also use PM2 for process management. To explicitly configure the startup file:
az webapp config set --resource-group <resource-group-name> --name <app-name> --startup-file "pm2 start server.js --no-daemon"Alternatively, you can run with npm start if a start script is defined in package.json, or specify a custom shell script.
Debugging and environment variables
Remote debugging in Visual Studio Code is supported when using PM2. Environment variables set in App Service can be accessed in code with process.env.<VAR_NAME>, for example:
process.env.NODE_ENVUsing build tools
If your app depends on tools like Gulp, Grunt, or Bower, you need a custom deployment script. Generate one with kuduscript and extend the deploy.sh file to run required tasks after npm install.
HTTPS and proxies
Since TLS termination happens at the load balancer, you should check X-Forwarded-Proto headers in your app to detect secure requests. In Express, this requires enabling trust proxy:
app.set('trust proxy', 1);Logging and monitoring
Enable container logging with:
az webapp log config --name <app-name> --resource-group <resource-group-name> --docker-container-logging filesystem
az webapp log tail --name <app-name> --resource-group <resource-group-name>
For full monitoring, integrate Application Insights directly from the Azure portal. It collects metrics, exceptions, and usage data without code changes.
Best practices for deploying Node.js on Azure
Consider the following practices to improve the performance of Node.js applications in Azure environments.
1. Choose the right compute service
Azure offers several compute options tailored for different types of Node.js workloads. Azure App Service is suitable for most web applications due to its simplicity, managed environment, and support for deployment slots, autoscaling, and built-in monitoring. Azure Kubernetes Service (AKS) provides a container orchestration layer suitable for complex, distributed applications that need granular control over networking, scaling policies, and resource limits.
For container-based applications that don’t need full Kubernetes complexity, Azure Container Apps offers serverless containers with built-in Dapr integration for microservices. Azure Functions is best suited for small, event-driven tasks such as processing queue messages or responding to HTTP events. Evaluate your application’s architecture and scale needs before choosing a compute service, as this decision impacts cost, maintainability, and performance.
2. Use proper Node.js versions and builds
Always use an active long-term support (LTS) version of Node.js to ensure stability, compatibility with npm packages, and ongoing security updates. Define the Node.js version in your package.json file under the engines field and mirror that in the Azure App Service configuration to prevent version mismatches during deployment.
For applications with front-end assets or transpilation steps (e.g., TypeScript, webpack), include a build script in package.json. Enable build automation during deployment by setting SCM_DO_BUILD_DURING_DEPLOYMENT=true in app settings. This ensures that the correct production build is generated even if source files are pushed without precompiled assets.
3. Manage configuration values and secrets securely
Configuration values such as API keys, database credentials, and feature flags should never be committed to source control. Instead, store them in Azure App Service application settings or securely manage them with Azure Key Vault. These settings are exposed to your Node.js app as environment variables and accessed via process.env.
For apps that interact with other Azure services (e.g., Cosmos DB, Blob Storage), use Managed Identity to authenticate without hardcoded credentials. Managed Identity integrates directly with Azure services and Key Vault, offering token-based access control and eliminating the need for secret rotation.
4. Automate deployments with CI/CD
Set up a Continuous Integration and Deployment (CI/CD) pipeline using tools like GitHub Actions or Azure DevOps to automate build, test, and deployment steps. Define pipeline stages in YAML to ensure repeatable and versioned workflows. A typical pipeline includes linting, running unit tests, building assets, and deploying to staging or production environments.
Azure provides native integration with both GitHub and Azure Repos, enabling push-to-deploy capabilities and deployment approvals. Use deployment slots in Azure App Service to perform blue-green deployments or staging validations before swapping to production, minimizing downtime and risk.
5. Optimize for performance and scalability
Take advantage of Node.js’s event-driven model by writing non-blocking code using asynchronous patterns (async/await, Promises). Avoid blocking the event loop with heavy computations; offload such tasks to background workers or use services like Azure Functions.
Enable HTTP compression (gzip or Brotli) to reduce response sizes, and implement caching headers for static resources. Use express middleware like helmet to improve security and compression for gzip support.
Configure autoscaling in Azure App Service or AKS to automatically adjust the number of instances based on CPU usage or HTTP traffic. Monitor app health and usage with Azure Monitor and Application Insights to detect memory leaks, slow dependencies, or unhandled exceptions. Use these insights to iteratively improve your app’s performance and reliability.
Help us continuously improve
Please let us know if you have any feedback about this page.