What is NGINX?
NGINX is a high-performance, open-source web server that also functions as a reverse proxy, load balancer, and HTTP cache. Initially developed by Igor Sysoev in 2004, it was created to solve the C10k problem, handling 10,000 or more simultaneous client connections. NGINX achieves this with an event-driven, asynchronous architecture.
PHP and NGINX are commonly used together to serve dynamic web applications, forming part of the popular LEMP (Linux, NGINX, MySQL, PHP) stack. While NGINX excels at serving static content and acting as a reverse proxy, it does not inherently process PHP code. This is where PHP-FPM (FastCGI Process Manager) comes into play.
How PHP and NGINX work together:
- Client request: A user’s browser sends a request for a PHP page to the NGINX web server.
- NGINX as reverse proxy: NGINX receives the request and, recognizing it as a PHP file, forwards the request to PHP-FPM using the FastCGI protocol.
- PHP-FPM processing: PHP-FPM, running as a separate service, receives the request, processes the PHP script, and generates the HTML output.
- Response to NGINX: PHP-FPM sends the generated HTML back to NGINX.
- NGINX to client: NGINX then sends the HTML response back to the user’s browser.
This is part of a series of articles about software deployment.
Why run PHP with NGINX and what is PHP-FPM?
Running PHP with NGINX is not as straightforward as with Apache, because NGINX does not have a built-in PHP interpreter. Instead, NGINX relies on an external process manager to handle PHP execution. This design avoids embedding PHP directly into the web server, resulting in better performance, lower memory usage, and improved separation of responsibilities. NGINX focuses on handling HTTP requests and static content, while PHP execution is delegated to a dedicated backend.
PHP-FPM (FastCGI Process Manager) is the most common solution for running PHP with NGINX. It manages pools of worker processes that execute PHP scripts, allowing efficient use of system resources under high load. PHP-FPM provides advanced features like adaptive process spawning, per-pool configuration, slow request logging, and granular security controls. This makes it well-suited for scaling PHP applications and maintaining predictable performance even when handling large numbers of concurrent requests.
How PHP and NGINX work together
When serving PHP-based websites, NGINX and PHP-FPM work in a complementary setup. NGINX handles incoming HTTP requests, manages static files, and forwards PHP-related requests to PHP-FPM for processing. This separation of responsibilities improves performance, scalability, and maintainability.
- Request handling: NGINX receives all HTTP requests from clients. It directly serves static files such as images, CSS, and JavaScript without involving PHP.
- PHP request forwarding: For .php files, NGINX passes the request to PHP-FPM using the FastCGI protocol.
- Script execution: PHP-FPM processes the PHP code, executes any application logic, and interacts with databases or other services.
- Response delivery: PHP-FPM returns the generated HTML or JSON response to NGINX, which then sends it back to the client.
- Performance optimization: Offloading static content to NGINX reduces PHP load, while PHP-FPM’s process pools ensure fast and parallel script execution.
- Security benefits: PHP-FPM runs as a separate user or process pool, isolating PHP code execution from the web server and reducing the impact of potential vulnerabilities.

Tony Kelly is a DevOps marketing leader who drives innovation and awareness of the latest trends in Continuous Delivery.
Tutorial: how to configure PHP-FPM with NGINX
The following tutorial will show you how to set up a web server running PHP-FPM and NGINX.
1. Install PHP-FPM
NGINX cannot run PHP scripts directly; it must pass them to a PHP processor such as PHP-FPM. On Ubuntu, install PHP-FPM with:
sudo apt install php-fpm -y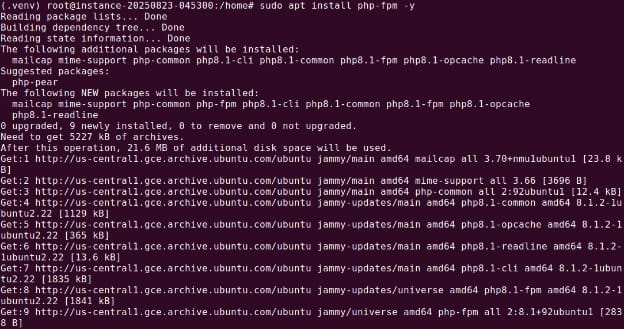
After installation, confirm it is running:
sudo service status php8.1-fpm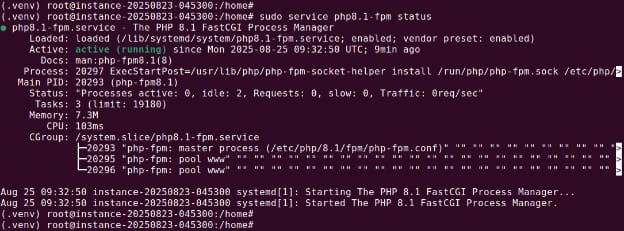
This ensures the FastCGI Process Manager is active and ready to handle PHP requests.
2. Configure a PHP-FPM pool
PHP-FPM uses pools to manage worker processes. Each pool can run under a specific user, with its own resource limits and PHP settings.
Pool configurations are stored in /etc/php/<version>/fpm/pool.d/. You can modify the default www.conf or create a new file for a specific application. For example:
sudo groupadd drupal_user
sudo useradd -g drupal_user drupal_user
sudo nano /etc/php/8.1/fpm/pool.d/drupal_pool.confHere is an example configuration:
[drupal_site]
user = drupal_user
group = drupal_user
listen = /var/run/php8.1-fpm-drupal.sock
listen.owner = www-data
listen.group = www-data
pm = dynamic
pm.max_children = 50
pm.start_servers = 5
pm.min_spare_servers = 8
pm.max_spare_servers = 10
pm.process_idle_timeout = 20s
php_admin_value[disable_functions] = exec,passthru,shell_exec,system
php_admin_flag[allow_url_fopen] = off
Restart PHP-FPM to apply changes:
sudo service php8.1-fpm restart3. Configure NGINX to use PHP-FPM
Edit your NGINX server block (e.g., /etc/nginx/sites-available/default) so that .php requests are passed to PHP-FPM via the FastCGI interface.
Example configuration:
server {
    listen 80;
    server_name example.com;
    root /usr/local/example;

    index index.php index.html index.htm;

    location / {
        try_files $uri $uri/ =404;
    }

    location ~ \.php$ {
        include snippets/fastcgi-php.conf;
        fastcgi_pass unix:/run/php/php8.1-fpm.sock;
        fastcgi_param SCRIPT_FILENAME $document_root$fastcgi_script_name;
        include fastcgi_params;
    }

    location ~ /\.ht {
        deny all;
    }
}
Test the configuration for syntax errors:
sudo nginx -t
Restart NGINX if the test passes:
sudo service nginx restart4. Test the setup
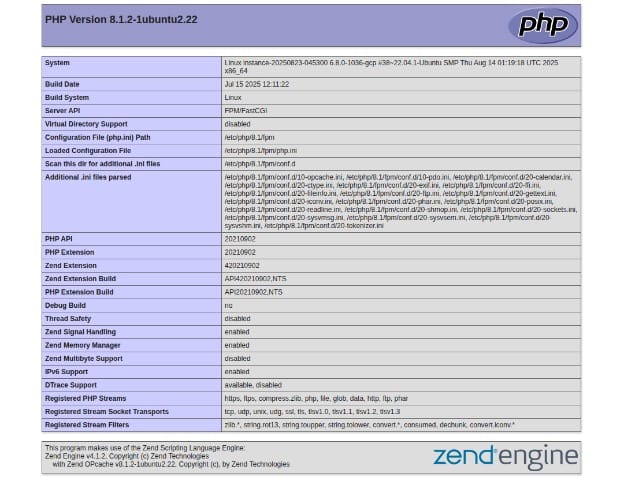
Create a simple PHP file in your web root to verify PHP-FPM is serving pages correctly:
echo "<?php phpinfo(); ?>" | sudo tee /var/www/html/info.phpOpen http://<server-ip>/info.php in a browser. The page should display PHP configuration details, confirming that NGINX is using PHP-FPM.
Best practices for running PHP with NGINX
Here are some useful practices to keep in mind when using NGINX for PHP code.
1. Keep software updated and patched
Running outdated versions of NGINX, PHP, or PHP-FPM increases the risk of security breaches and performance degradation. New releases often fix known vulnerabilities, address stability issues, and introduce performance optimizations.
Administrators should establish a regular update schedule and use package managers like apt or yum to install updates promptly. For environments where uptime is critical, test updates in a staging environment before deploying them to production to avoid compatibility issues. Where possible, automate security updates for minor versions to reduce administrative overhead while maintaining system security.
2. Separate static and dynamic content handling
NGINX excels at serving static files such as HTML, images, stylesheets, and JavaScript directly from disk without invoking PHP-FPM. This separation ensures that PHP workers focus exclusively on executing dynamic scripts, while NGINX handles all static file delivery. To achieve this, configure location blocks in your NGINX server configuration that point directly to the static asset directories.
Additionally, set appropriate caching headers (e.g., Cache-Control and Expires) for static content to reduce unnecessary requests from clients. For high-traffic websites, consider using a dedicated CDN to offload static asset delivery entirely, further reducing the load on the main server.
3. Enable and configure caching
Caching is one of the most effective ways to improve performance in a PHP-FPM and NGINX setup. By enabling FastCGI caching in NGINX, you can store the output of PHP scripts and serve it directly for subsequent requests without reprocessing the same logic. This dramatically reduces CPU and memory usage on the PHP-FPM side.
Fine-tune caching parameters, such as cache keys, expiration times, and conditions for bypassing the cache (e.g., for logged-in users or dynamic dashboards). In some cases, application-level caching (e.g., using Redis or Memcached) may complement FastCGI caching by storing frequently accessed data in memory. Always monitor cache hit ratios to ensure caching is providing the intended benefits without serving stale or outdated content.
4. Use HTTPS with HTTP/2
Encrypting all web traffic with HTTPS protects sensitive information from interception and tampering. NGINX can be configured to serve TLS certificates from trusted authorities such as Let’s Encrypt, providing strong encryption without additional cost. HTTP/2 support should be enabled alongside HTTPS to take advantage of features like multiplexing, header compression, and server push, which reduce page load times.
Avoid using outdated SSL/TLS protocols and weak cipher suites; instead, follow modern best practices such as using TLS 1.2 or higher. Regularly test your HTTPS configuration with tools like SSL Labs’ SSL Server Test to verify strong encryption and identify any misconfigurations.
5. Log and monitor PHP-FPM and NGINX activity
Logging and monitoring are essential for diagnosing issues and maintaining optimal performance. NGINX’s access logs provide details about incoming requests, while error logs capture failed requests and configuration problems. PHP-FPM has its own set of logs, including slow request logs, which can highlight performance bottlenecks in your application code.
To gain deeper insights, integrate these logs with a centralized logging system like ELK Stack (Elasticsearch, Logstash, Kibana) or use monitoring solutions like Prometheus and Grafana to visualize metrics such as request rates, latency, and resource usage. Establish alerting rules for anomalies, such as high error rates or increased response times, to address issues before they impact users.
Help us continuously improve
Please let us know if you have any feedback about this page.