How NGINX and Node.js work together
NGINX is an open-source web server that also functions as a reverse proxy, load balancer, and HTTP cache. It achieves high performance and scalability by using an event-driven, asynchronous architecture.
NGINX is commonly used in conjunction with Node.js applications to improve performance, scalability, and security. While Node.js handles dynamic requests and server-side logic, NGINX provides capabilities for serving static content, acting as a reverse proxy, handling SSL termination, and performing load balancing.
NGINX acts as a reverse proxy, sitting in front of your Node.js application. It receives client requests and forwards them to the Node.js server(s). This setup allows NGINX to handle various tasks before the request reaches Node.js, such as:
- Load balancing: Distributing incoming traffic across multiple Node.js instances to ensure high availability and efficient resource use.
- SSL termination: Handling SSL/TLS encryption, offloading this CPU-intensive task from the Node.js application and ensuring secure HTTPS connections.
- Request routing: Directing requests to specific Node.js instances or other backend services based on URL paths or other criteria.
- Serving static files: NGINX is optimized for serving static assets (HTML, JavaScript, CSS, images, etc.). By configuring NGINX to serve these files directly, you offload this responsibility from Node.js, improving performance and reducing server load.
NGINX can have several important impacts on your Node.js application performance:
- Caching: NGINX can cache responses to frequently requested content, reducing the need for Node.js to re-process requests and speeding up delivery to clients.
- Gzip compression: NGINX can compress static content before sending it to clients, reducing bandwidth usage and improving page load times.
- Rate limiting: NGINX can be configured to limit the number of requests a client can make within a certain timeframe, helping to prevent abuse and protect your Node.js application from denial-of-service attacks.
This is part of a series of articles about software deployment
Quick start tutorial: setting up NGINX with Node.js
To run a Node.js application behind NGINX, you need to configure NGINX as a reverse proxy. This setup improves performance, simplifies SSL handling, and allows for better request routing. Here’s how to do it:
1. Install NGINX
Start by installing NGINX on your server.
For Ubuntu/Debian:
sudo apt update
sudo apt install nginx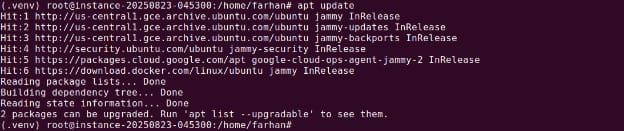

For CentOS/RHEL:
sudo yum install nginxOnce installed, start NGINX:
sudo systemctl start nginxVerify if nginx is running using the following command:
sudo systemctl status nginx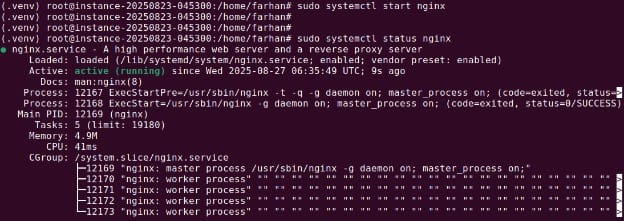
You can check that NGINX is running by navigating to your server’s IP address in a browser. You should see the default NGINX welcome page.
2. Configure NGINX as a reverse proxy
Next, configure NGINX to forward incoming requests to your Node.js app.
Navigate to the NGINX config directory:
cd /etc/nginx/sites-available/Create a new config file for your app:
sudo nano api_js.confAdd the following configuration, replacing your_domain_or_IP with your server’s domain or IP address:
server {
    listen 80;
    server_name api.super-worker-app.com;
    location / {
        proxy_pass http://localhost:5000;
        proxy_http_version 1.1;
        proxy_set_header Upgrade $http_upgrade;
        proxy_set_header Connection upgrade;
        proxy_set_header Host $host;
        proxy_cache_bypass $http_upgrade;
    }
}
This tells NGINX to forward all traffic received on port 80 to the Node.js application running on localhost:5000.
3. Enable the configuration
Create a symbolic link to enable the config:
sudo ln -s /etc/nginx/sites-available/api_js.conf /etc/nginx/sites-enabled/Check the configuration for syntax errors:
sudo nginx -t
If the test passes, restart NGINX:
sudo systemctl restart nginxOnce complete, your Node.js app will be accessible via port 80 through NGINX. This setup allows NGINX to manage client connections while Node.js handles application logic.

Tony Kelly is a DevOps marketing leader who drives innovation and awareness of the latest trends in Continuous Delivery.
Advanced NGINX configuration options with Node.js
When moving beyond a basic reverse proxy, NGINX can be tuned to improve both the security and scalability of Node.js applications. Two common approaches are SSL termination and load balancing.
SSL termination
NGINX can terminate HTTPS connections, removing the encryption overhead from Node.js servers. This allows Node.js to handle application logic without being slowed down by SSL/TLS operations. A typical configuration looks like this:
server {
    listen 443 ssl;
    server_name api.super-worker-app.com;
    ssl_certificate /etc/letsencrypt/certificate/ssl.crt;
    ssl_certificate_key /etc/letsencrypt/certificate/ssl_certificate.key;
    # SSL settings
    ssl_protocols TLSv1.2 TLSv1.3;
    ssl_prefer_server_ciphers on;
    ssl_ciphers 'ECDHE-ECDSA-AES128-GCM-SHA256:ECDHE-RSA-AES128-GCM-SHA256:ECDHE-ECDSA-AES256-GCM-SHA384:ECDHE-RSA-AES256-GCM-SHA384:ECDHE-ECDSA-CHACHA20-POLY1305:ECDHE-RSA-CHACHA20-POLY1305:DHE-RSA-AES128-GCM-SHA256:DHE-RSA-AES256-GCM-SHA384';
    ssl_session_cache shared:SSL:15m;
    ssl_session_timeout 15m;
    location / {
        proxy_pass http://localhost:5000;
        proxy_set_header Host $host;
        proxy_set_header X-Real-IP $remote_addr;
        proxy_set_header X-Forwarded-For $proxy_add_x_forwarded_for;
        proxy_set_header X-Forwarded-Proto $scheme;
    }
}
This configuration listens on port 443, applies secure protocols and ciphers, and forwards requests to the backend Node.js servers.
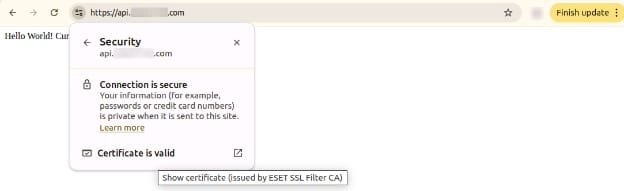
Note: You can also use Let’s Encrypt to automate the process. Let’s assume our Node.js app just prints out hello world and current. Let’s access it via browser as shown below:
Load balancing
When a single Node.js instance is not enough, NGINX can distribute requests across multiple servers. The upstream directive defines a pool of Node.js servers, and the proxy_pass directive sends traffic to that pool:
http {
    upstream node_app_servers {
        # Round robin is used by default
        server api1.super_js_app.com;
        server api2.super_js_app.com;
    }
    server {
        listen 80;
        server_name super_js_app.com;
        location / {
            proxy_pass http://localhost:5000;
            proxy_set_header Host $host;
            proxy_set_header X-Real-IP $remote_addr;
            proxy_set_header X-Forwarded-For $proxy_add_x_forwarded_for;
            proxy_set_header X-Forwarded-Proto $scheme;
        }
    }
}
Here, NGINX automatically spreads requests between api1.super_js_app.com and api2.super_js_app.com using round robin. Other algorithms can be used depending on traffic needs.

Best practices for using NGINX and Node.js
Here are some useful practices to consider when working with Node.js and NGINX.
1. Serve static assets directly from NGINX
Offload static files such as images, stylesheets, and JavaScript to NGINX instead of routing them through Node.js. NGINX is optimized for serving static content efficiently and can reduce load on your Node.js application.
To do this, configure a location block pointing to the directory that holds your static files:
location /static/ {
root /var/www/your-app;
try_files uri uri/ =404;
}
This setup ensures that NGINX serves static resources directly while forwarding API requests to Node.js.
2. Enable modern TLS + HTTP/2
For production deployments, always use TLS with modern protocols and enable HTTP/2 for improved performance. HTTP/2 allows multiplexing, header compression, and faster load times over secure connections.
Add the following to your SSL server block:
listen 443 ssl http2;
ssl_protocols TLSv1.2 TLSv1.3;
ssl_ciphers 'EECDH+AESGCM:EDH+AESGCM:AES256+EECDH:AES256+EDH';
ssl_prefer_server_ciphers on;
Ensure you use certificates from a trusted authority and regularly update your TLS settings based on current best practices.
On Ubuntu you can validate using the following command:
openssl s_client -connect <YOUR-DOMAIN>:4433. Turn on compression
Enable gzip compression in NGINX to reduce response size and speed up content delivery. This is especially useful for text-based assets like HTML, CSS, and JavaScript.
In your configuration, add:
gzip on;
gzip_types text/plain text/css application/json application/javascript text/xml application/xml application/xml+rss text/javascript;
gzip_min_length 256;
Avoid compressing already compressed formats like images and archives, and use compression selectively to minimize CPU overhead.
4. Use microcaching for dynamic-but-cacheable content
Microcaching stores responses for short durations (e.g., 1–10 seconds), helping absorb traffic spikes without risking stale data. This is suitable for content that changes frequently but doesn’t need to be regenerated on every request.
Example:
proxy_cache_path /tmp/nginx_cache levels=1:2 keys_zone=microcache:10m max_size=100m inactive=60s;
proxy_cache_key "$scheme$request_method$host$request_uri";
location /api/ {
    proxy_pass http://localhost:3000;
    proxy_cache microcache;
    proxy_cache_valid 200 1s;
    proxy_cache_use_stale error timeout updating http_500 http_502 http_503 http_504;
}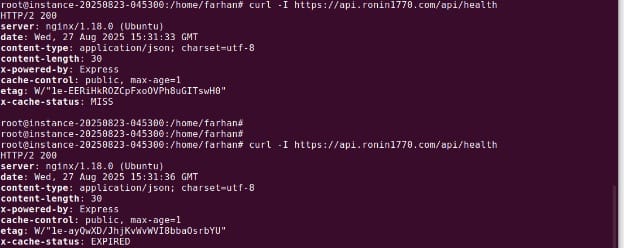
This can dramatically reduce load on the Node.js backend while preserving responsiveness.
5. Tune timeouts and buffers for slow clients
Slow clients can tie up server resources. NGINX allows fine-tuning timeouts and buffer sizes to handle these connections efficiently without impacting Node.js.
Adjust these parameters in your server block:
client_body_timeout 10s;
client_header_timeout 10s;
keepalive_timeout 30s;
send_timeout 10s;
client_max_body_size 2M;
client_body_buffer_size 128k;
You can use following command on Ubuntu / Debian to simulate header timeout:
{ printf "GET /api/health HTTP/1.1\r\nHost: api.example.com"; sleep 12; printf "\r\n\r\n"; } \
| openssl s_client -connect api.example.com:443 -servername api.example.com -quiet
These settings help free up resources and protect against slowloris-style attacks by closing connections that exceed configured thresholds.
Help us continuously improve
Please let us know if you have any feedback about this page.