Why should you run Jenkins on AWS?
Jenkins is an open-source automation server that allows developers to automate code building, testing, and deployment processes through customizable pipelines. Jenkins supports integration with a range of tools and plugins, including cloud environments like Amazon Web Services (AWS).
Jenkins can be effectively integrated with AWS to enable scalability and resilience for Continuous Integration/Continuous Delivery (CI/CD) pipelines. AWS makes it possible to scale and optimize Jenkins for high-performance CI/CD workloads, allowing teams to adapt resources dynamically as their needs grow.
Here are the key benefits of deploying Jenkins on AWS:
- Scalability on demand: AWS makes it easy to scale Jenkins agents horizontally using EC2 Auto Scaling or container services like ECS and EKS. This ensures build capacity matches workload demands without manual intervention.
- High availability: Deploying Jenkins in a highly available architecture using AWS services like Elastic Load Balancing and Amazon RDS reduces single points of failure, improving uptime and reliability.
- Cost efficiency: With pay-as-you-go pricing and support for spot instances, AWS enables cost-optimized Jenkins deployments. Resources can be right-sized and shut down when idle to reduce operational expenses.
- Integrated security: Jenkins on AWS benefits from built-in security features like IAM roles, VPCs, and AWS Secrets Manager to protect credentials, control access, and meet compliance requirements.
- Simplified infrastructure management: Infrastructure as code tools like AWS CloudFormation and Terraform simplify Jenkins deployment, updates, and rollback processes, enabling infrastructure automation alongside application delivery.
- Native integration with AWS services: Jenkins plugins support integration with services like CodeCommit, CodeBuild, S3, and CloudWatch, allowing tighter alignment between CI/CD workflows and the AWS ecosystem.
- Global availability: AWS’s global presence allows Jenkins to be deployed close to development teams and customers, reducing latency and supporting distributed development environments.
This is part of a series of articles about software deployment
Tutorial: Deploying Jenkins on AWS
This tutorial will walk you through the steps of deploying a Jenkins server on an Amazon EC2 instance. Instructions are adapted from the Jenkins documentation.
Prerequisites
Before you begin, make sure you have:
- An AWS account: Sign up if you don’t already have one.
- An EC2 key pair: Used for SSH access to the EC2 instance. You can create one in the next step.
- An IAM user with programmatic access: This user must have permission to launch and manage EC2 instances, as required for the Jenkins EC2 plugin to function correctly.
Step 1: Create a key pair using amazon EC2
A key pair is used to securely connect to your EC2 instance via SSH:
- Open the Amazon EC2 console.
- In the left navigation pane, under Network & Security, choose Key Pairs.
- Click Create key pair.
- Fill in:
- Key pair name: e.g.,
jenkins-key - File format: Choose
.pemfor OpenSSH (Linux/macOS) or.ppkfor PuTTY (Windows).
- Key pair name: e.g.,
- Click Create key pair. The private key file will download automatically.
Important: Save this private key file in a safe location. This is the only time AWS allows you to download it.
If you’re using macOS or Linux, set file permissions to prevent SSH errors:
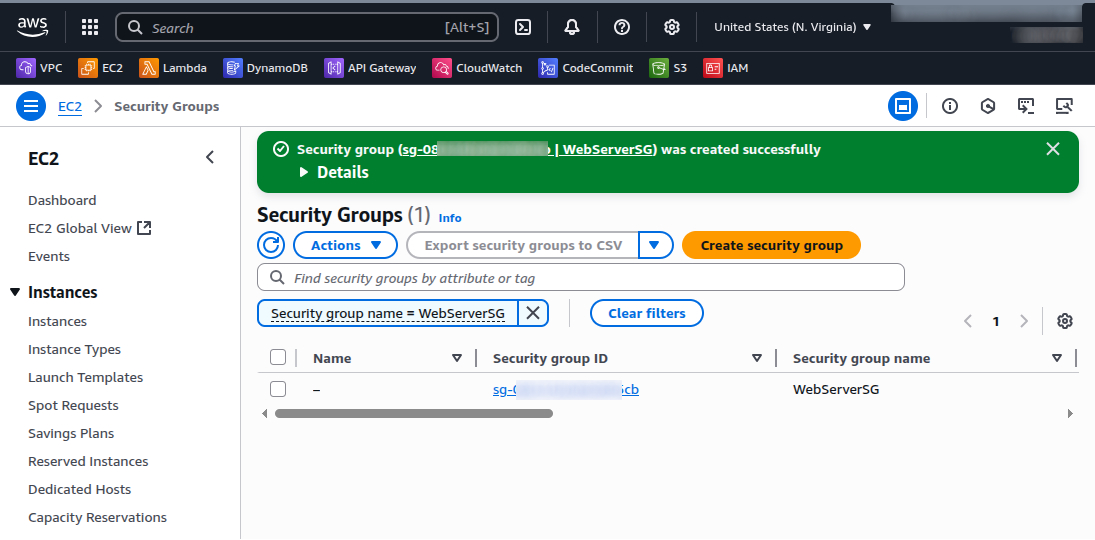
`chmod 400 jenkins-key.pem`Step 2: Create a security group for your Amazon EC2 instance
A security group defines inbound and outbound traffic rules for your EC2 instance:
-
Go to the EC2 Dashboard, then choose Security Groups from the left menu.
-
Click Create security group.
-
Configure:
- Security group name: e.g.,
WebServerSG - Description: e.g.,
Security group for Jenkins - VPC: Use the default VPC or your custom VPC.
- Security group name: e.g.,
-
Add the following Inbound rules:
- SSH (Port 22):
- Type: SSH
- Source: Custom, your IP address (e.g.,
203.0.113.25/32)
- HTTP (Port 80):
- Type: HTTP
- Source: Anywhere (
0.0.0.0/0)
- Custom TCP (Port 8080):
- Type: Custom TCP
- Port range:
8080 - Source: Anywhere (
0.0.0.0/0)
Important: Allowing
0.0.0.0/0for SSH is insecure in production environments. - SSH (Port 22):
-
Click Create security group.
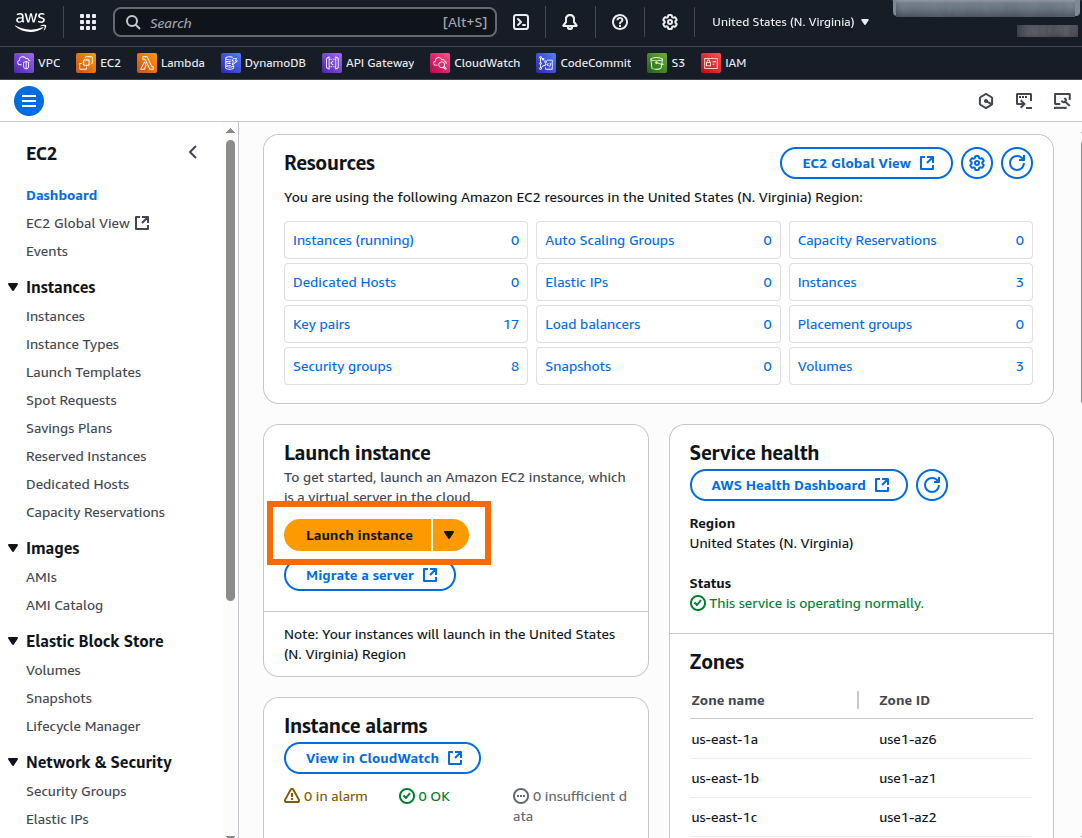
Step 3: Launch an Amazon EC2 instance
With your key pair and security group ready, you can now create the EC2 instance to host Jenkins.
-
From the EC2 Dashboard, click Launch instance.
-
Configure instance details:
- Name:
JenkinsServer - Amazon Machine Image (AMI): Choose Amazon Linux AMI (HVM) (Free tier eligible).
- Instance type: Select t2.micro (Free tier eligible).
- Name:
-
Under Key pair (login), select the key pair you created earlier (e.g., jenkins-key).
-
Under Network settings, choose:
- Firewall (security group): Select Existing security group and choose
WebServerSG.
- Firewall (security group): Select Existing security group and choose
-
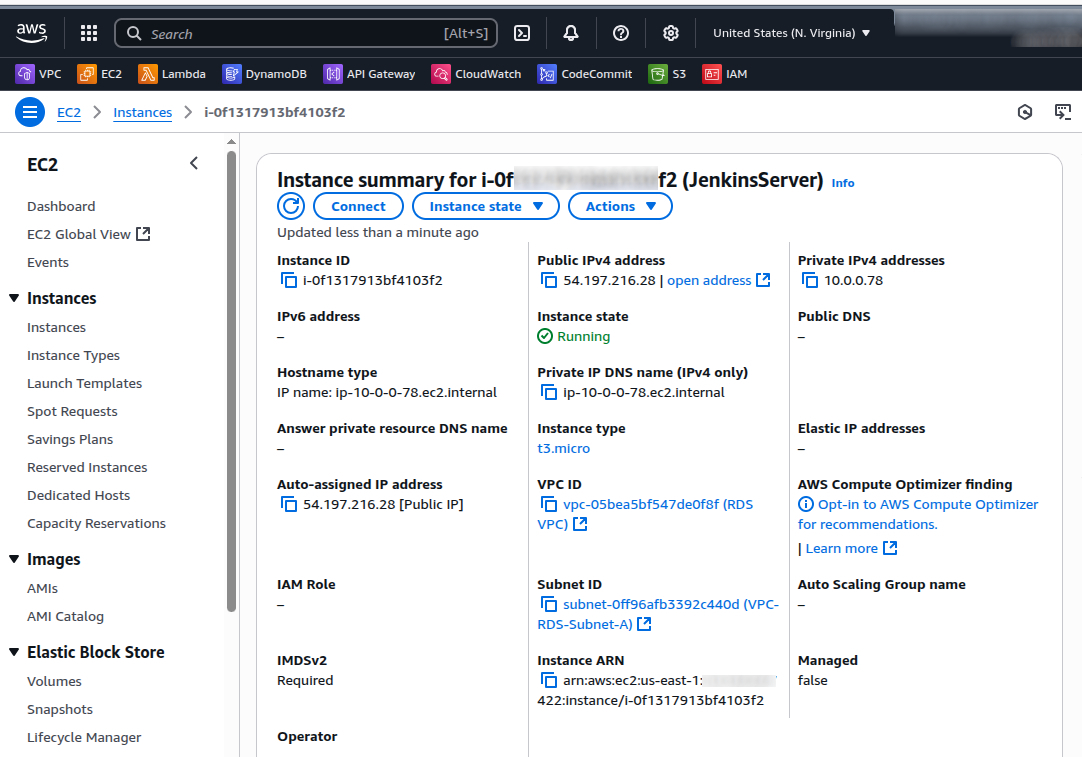
Click Launch instance.
Once launched, go to Instances, wait until the Status shows “running,” and note the Public IPv4 DNS or IP address.
Step 4: Install and configure Jenkins
With your EC2 instance running, connect to it and install Jenkins.
Connect to your Linux instance
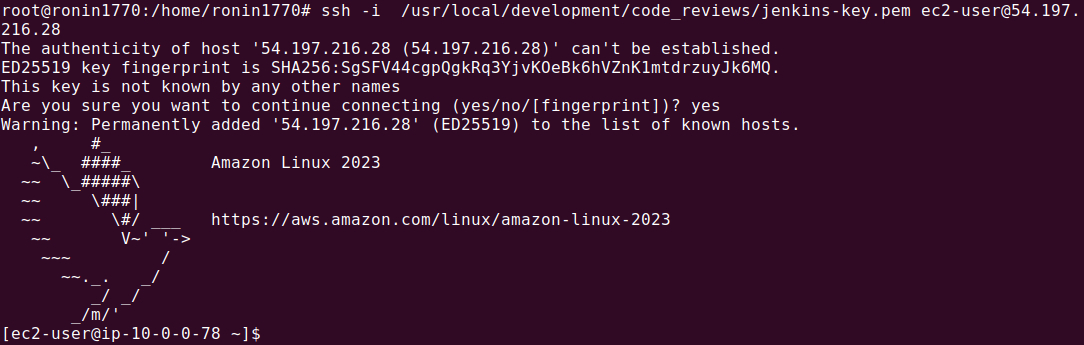
Use OpenSSH to connect to the Linux instance with Linux Terminal, macOS Terminal or Windows PowerShell (with OpenSSH):
ssh -i /path/to/jenkins-key.pem ec2-user@<public_dns_name>Replace <public_dns_name> with your instance’s actual public DNS.
Example:
ssh -i ~/Downloads/jenkins-key.pem ec2-user@ec2-54-211-20-45.compute-1.amazonaws.comWhen prompted with:
The authenticity of host can't be established...
Are you sure you want to continue connecting (yes/no)?
Type yes.
Download and install Jenkins
Run the following commands on your EC2 instance:
# Update the OS
sudo yum update -y

# Add Jenkins repo`
sudo wget -O /etc/yum.repos.d/jenkins.repo https://pkg.jenkins.io/redhat-stable/jenkins.repo

# Import Jenkins signing key`
sudo rpm --import https://pkg.jenkins.io/redhat-stable/jenkins.io-2023.key

# Upgrade packages
sudo yum upgrade -y

# Install Java
sudo yum install java-17-amazon-corretto -y

# Install Jenkins
sudo yum install jenkins -y

# Enable Jenkins on boot
sudo systemctl enable jenkins

# Start Jenkins service
sudo systemctl start jenkins

# Check Jenkins status
sudo systemctl status jenkins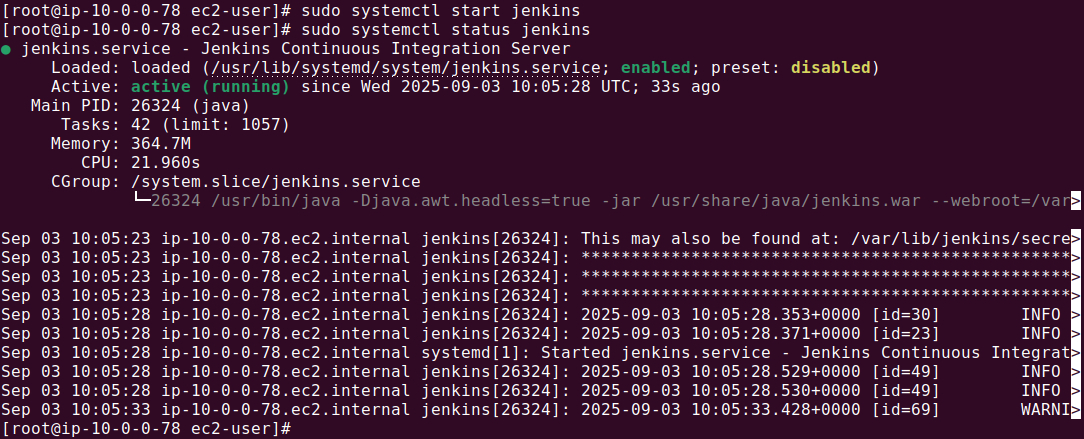
Access Jenkins and initial configuration
Open a browser and go to: http://<your_public_dns>:8080
Example: http://ec2-54-211-20-45.compute-1.amazonaws.com:8080
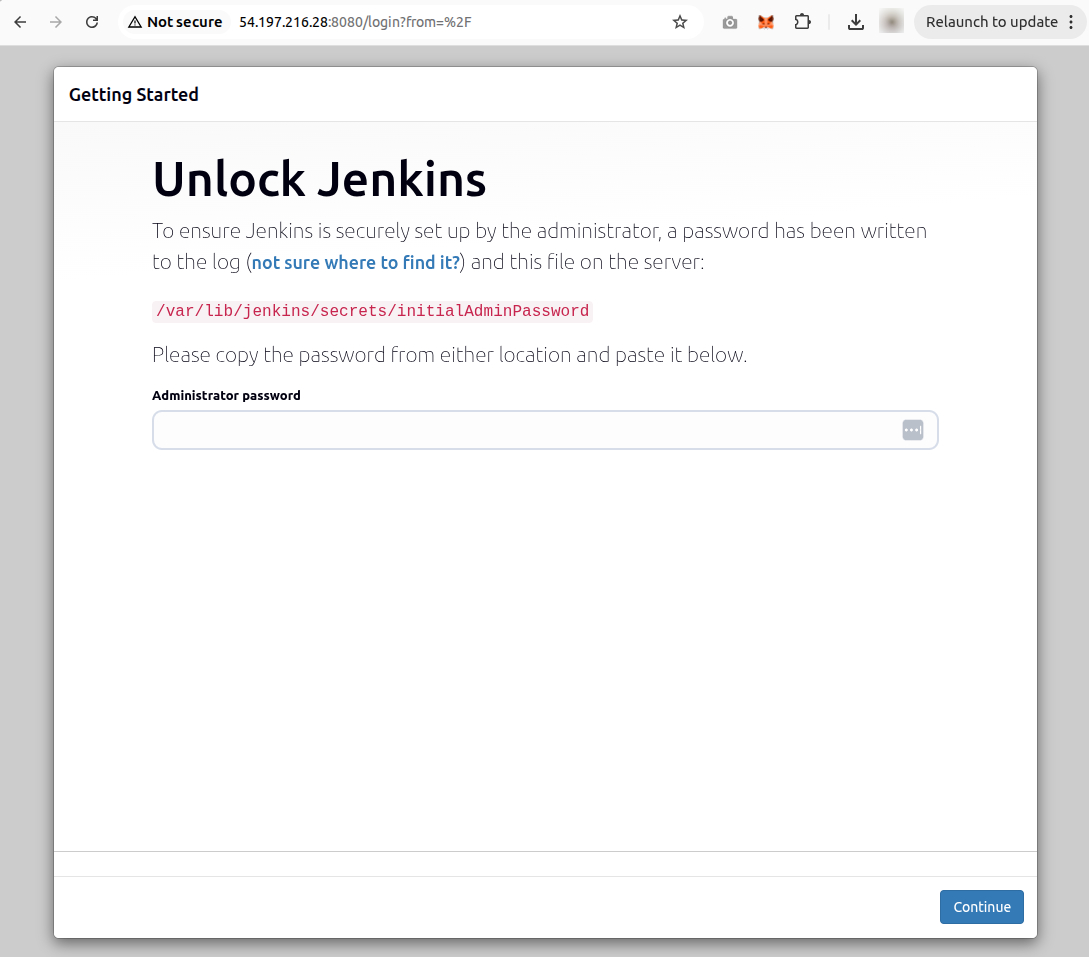
You will see the Unlock Jenkins screen.
To retrieve the initial admin password:
sudo cat /var/lib/jenkins/secrets/initialAdminPassword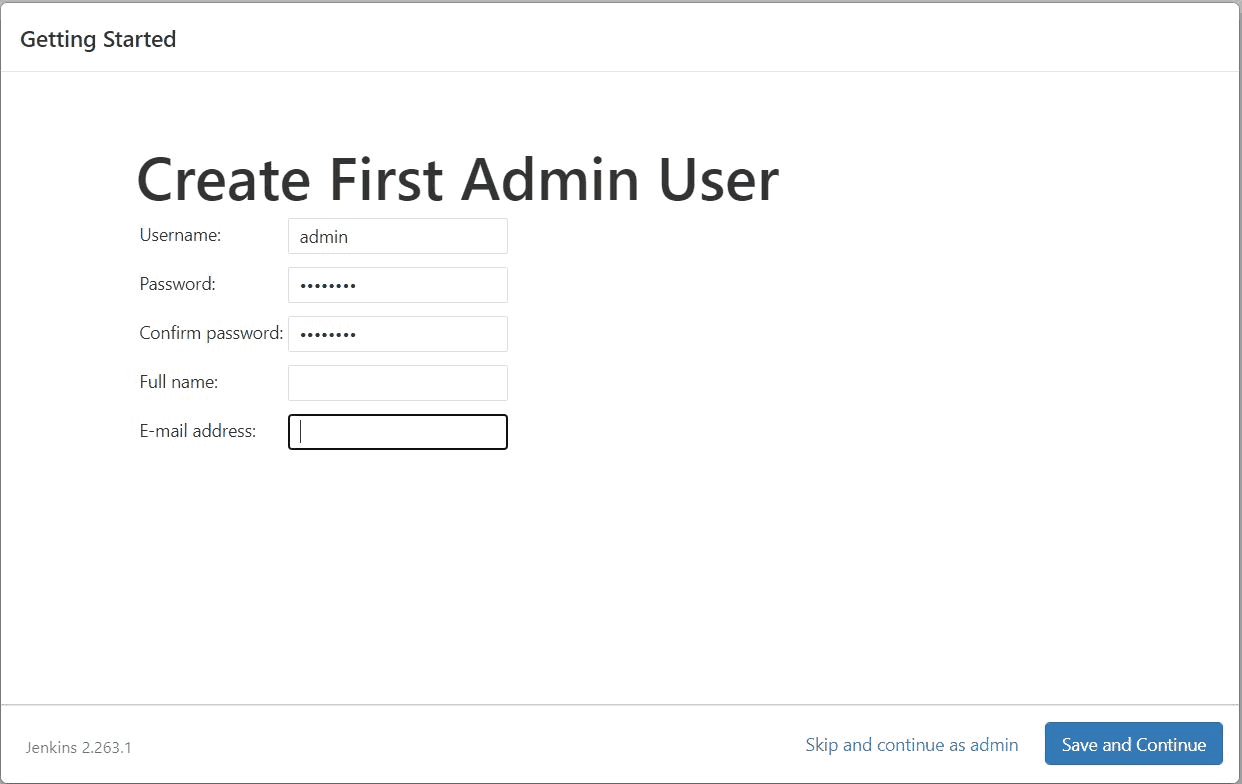
Copy and paste the password into the web form to unlock Jenkins.
- On the Customize Jenkins screen, choose Install suggested plugins.
- Create your first admin user.
- Click Save and Finish, then Start using Jenkins.
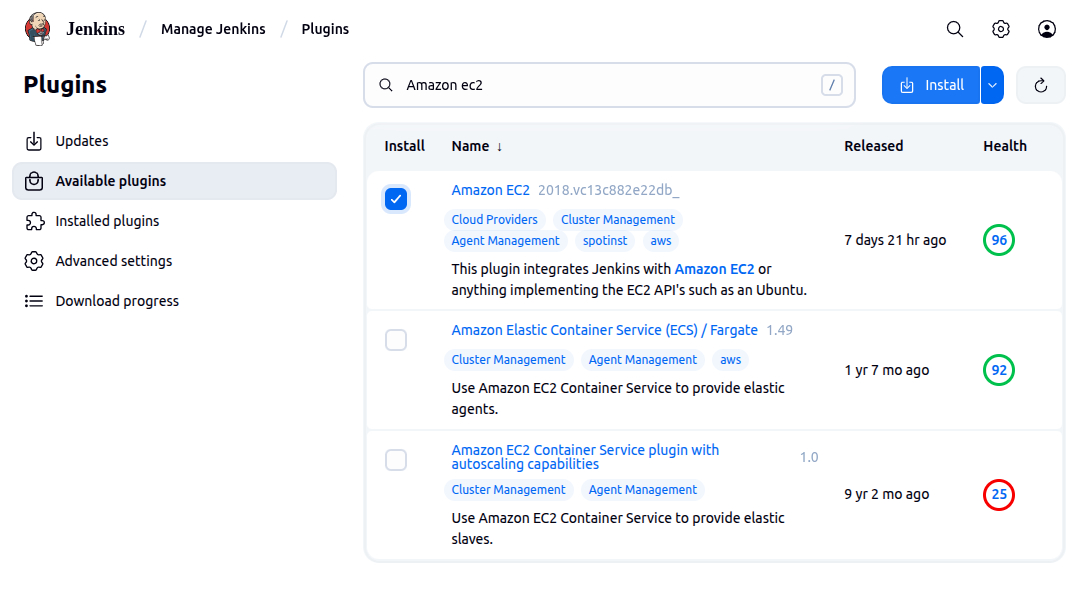
Install and configure Amazon EC2 plugin
To automatically scale Jenkins agents using EC2:
- Go to Manage Jenkins > Manage Plugins.
- Click the Available tab, search for Amazon EC2 plugin.
- Select it and click Install without restart.
- After installation, return to the Jenkins dashboard.
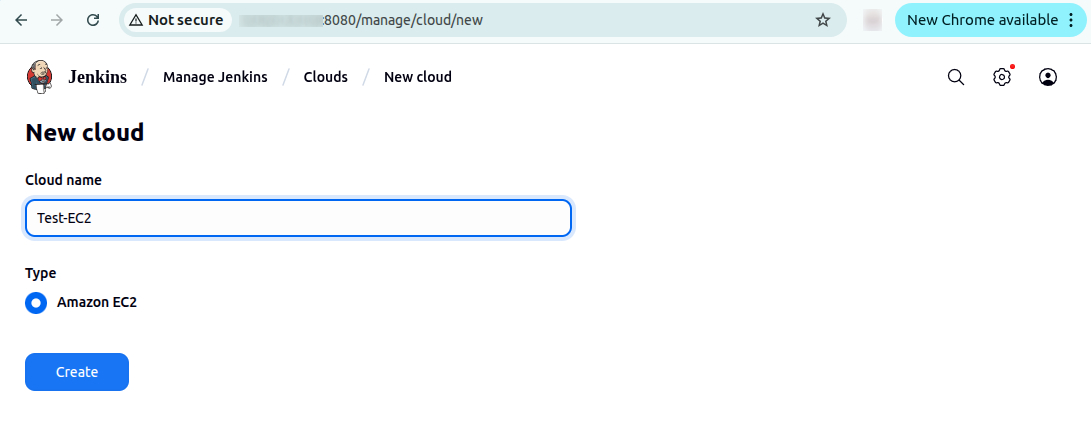
Configure the EC2 plugin for Jenkins agents
- Navigate to Manage Jenkins > Configure Nodes and Clouds.
- Click Clouds > Add a new cloud > Amazon EC2.
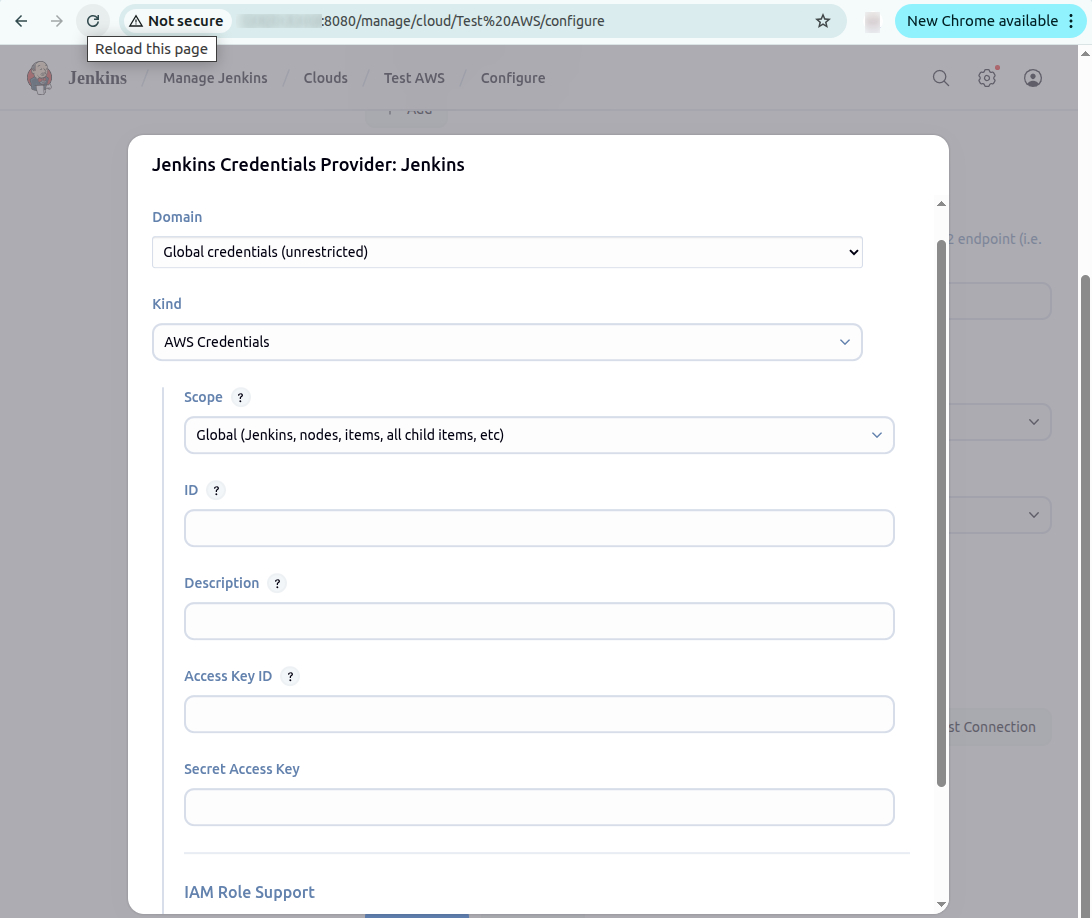
Add AWS credentials:
- Under Amazon EC2 Credentials, click Add.
- In the Jenkins Credentials Provider window:
- Kind: AWS Credentials
- Enter the Access Key ID and Secret Access Key of your IAM user.
- Click Add to save the credentials.

Set EC2 cloud details:
- Choose your AWS region (e.g.,
us-east-1). - Click Add for the EC2 Key Pair’s Private Key:
- Kind: SSH Username with private key
- Username:
ec2-user - Under Private Key, choose Enter directly and paste the entire contents of your
.pemfile.
- Click Add.
Test and save the configuration:
- Scroll down to Test Connection and ensure it returns “Success.”
- Click Save at the bottom of the page.
You are now ready to use Amazon EC2 instances as Jenkins build agents.
Best practices for running Jenkins on AWS
Here are some of the ways that you can make the most of AWS with Jenkins.
1. Enable AWS Single Sign-On (SSO) with SAML
Integrating Jenkins with AWS SSO using the SAML 2.0 protocol provides centralized identity management, reducing the risk of credential sprawl and simplifying user provisioning. To enable this, install the SAML plugin in Jenkins and configure it to use AWS SSO as the identity provider (IdP).
From the AWS SSO console, create a custom SAML 2.0 application and assign users or groups. Export the IdP metadata and input it into the Jenkins SAML plugin settings under Manage Jenkins > Configure Global Security. You’ll also need to map AWS SSO user attributes (like email or groups) to Jenkins user fields for proper role assignment.
For fine-grained access control, define Role-Based Strategy in Jenkins and map group claims from AWS SSO to Jenkins roles (e.g., admins, developers). This setup ensures that access is managed consistently across your AWS and Jenkins environments.
2. Store artifacts and logs in S3
Persisting Jenkins build artifacts and logs in Amazon S3 provides durable, scalable storage that decouples from your EC2 instance lifecycle. Use the AWS S3 plugin in Jenkins or integrate the AWS CLI into your pipeline steps to upload .jar, .zip, .tar, or other output files directly to a designated S3 bucket.
Example script step:
`aws s3 cp target/my-app.jar s3://jenkins-artifacts-bucket/builds/my-app.jar`For logs, configure Jenkins to write logs to a custom directory and periodically sync this directory to S3 using cron jobs or post-build actions. Alternatively, configure CloudWatch Agent on the EC2 instance to forward logs to Amazon CloudWatch Logs, enabling real-time monitoring, alerting, and long-term log retention without relying on Jenkins’ internal logging system.
3. Use multi-branch pipelines and organization folders
The Multi-branch Pipeline plugin automatically detects branches and pull requests from your source control system and creates corresponding Jenkins jobs. This ensures every branch follows the same CI/CD logic without manual job setup.
Define a Jenkinsfile in each branch to specify build logic. Jenkins scans the repository, discovers branches, and triggers builds based on webhook events or periodic polling. This approach minimizes job duplication and improves maintainability.
Organization folders extend this concept to entire repositories or GitHub organizations. They allow Jenkins to automatically discover and manage repositories under a namespace, applying consistent credentials and configuration. Enable GitHub or Bitbucket integration to authenticate and manage these folders efficiently.
4. Use spot or reserved EC2 instances for agents
To reduce compute costs, configure Jenkins to use EC2 Spot Instances for Jenkins agents via the Amazon EC2 plugin. Create a node template in Jenkins with spot pricing enabled and define spot instance parameters, such as maximum price, AMI ID, instance type, and subnet.
Configure multiple templates with fallback options to handle spot instance termination or unavailability. Use CloudWatch Events or lifecycle hooks to gracefully shut down agents when AWS reclaims the instance.
For predictable, always-on workloads like a Jenkins controller or long-lived agents, consider using Reserved Instances (RIs). Purchase one-year or three-year RIs for your instance types in regions where Jenkins runs to achieve up to 72% cost savings over on-demand pricing.
5. Backup Jenkins configuration and metadata
Jenkins stores all critical data in the /var/lib/jenkins directory on the EC2 instance. Regular backups of this directory are essential to recover from failures, corruption, or accidental deletions. Key items to back up include:
- Job definitions
- Pipeline configurations
- Plugin settings
- Credentials
- Build history
Automate backups using cron jobs that compress the Jenkins home directory and upload it to S3:
`tar -czf jenkins-backup-$(date +%F).tar.gz /var/lib/jenkins`
`aws s3 cp jenkins-backup-$(date +%F).tar.gz s3://jenkins-backups/`
Alternatively, use plugins like ThinBackup or Backup plugin to manage backups from the Jenkins UI. For infrastructure-level protection, enable AWS Backup with an assigned backup vault and plan that includes the Jenkins EC2 instance and EBS volumes. Always test restore procedures in a staging environment to verify integrity.
Help us continuously improve
Please let us know if you have any feedback about this page.