Lifecycles give you control over the way releases of your software are promoted between your environments. You can also use them to automate deployments and set retention policies.
Lifecycles are managed from the library page by navigating to Deploy ➜ Lifecycles:
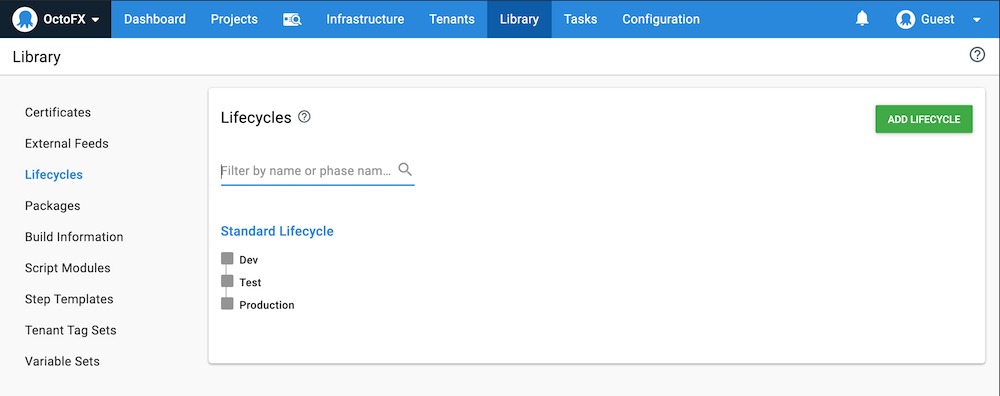
Octopus automatically creates a default lifecycle for you that contains a phase for each environment that you’ve created in Octopus Deploy. When you deploy your software it passes through the phases of the lifecycle in order.
Lifecycles enable a number of advanced deployment workflow features:
- Control the order of promotion: for example, to prevent a release from being deployed to production if it hasn’t been deployed to staging.
- Automate deployment to specific environments: for example, automatically deploy to test as soon as a release is created.
- Retention policies: specify the number of releases to keep depending on how far they have progressed through the lifecycle.
Lifecycles don’t apply to Runbooks. Learn more about the differences between Runbooks and Deployments.
Phases
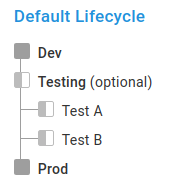
A phase represents a stage in your deployment lifecycle. You deploy to phases in order, and you can choose how releases move between phases. For example, you can configure a lifecycle so that there must be a successful deployment to the Development phase before you can proceed to the Testing phase. You can also have a completely optional phase. This allows you to release to an environment in the next phase without being required to deploy to any in the optional phase.
Phases can also include multiple environments. This can be useful where you have more than one Testing environment.
No phases
When no phases are defined in a lifecycle, Octopus will use a default convention to control which environments may be deployed to, and in which order. The default convention forces releases to be deployed to each environment in the order that they are defined on the environments page.
When you add a new environment to Octopus, it will automatically be included in the list of environments available to the default convention. To prevent Octopus from applying the default convention, define your own phases or restrict your lifecycle to specific environments.
Phases with environments
It’s possible to add one or multiple environments to a phase. When a phase has environments added to it, this defines which ones can be deployed to during this phase of the lifecycle.
Tenants and automatic-environments
When adding an environment to a phase, you can choose whether you want deployments to begin automatically once the release enters the phase, or if you want users to manually queue the deployment. For manual deployments, users can choose the desired tenants for deployment before the release begins (i.e. untenanted deployment, deployment to all tenants, or deployment to specific tenants). However, as deployments begin as soon as the release enters the next phase for environments set to automatic, users cannot choose which tenants to deploy to. Below outlines the behavior for a deployment to an automatic-environment:
- If tenanted deployments are allowed, attempt to enqueue a new deployment for each tenant connected to the automatic-environment(s), taking the following into consideration:
- Filter the tenants by any Tenant filter defined on the Channel for the Release being considered for deployment.
- Further, filter the tenants based on promotion rules (e.g. deploy to UAT before Production for this tenant)
- If untenanted deployments are allowed, attempt to enqueue the untenanted deployment to the automatic-environment(s).
Phases without environments
When a phase is defined without any environments added to it, this phase of the lifecycle will deploy to all the environments that haven’t been explicitly added to the lifecycle in previous phases.
Any future environments you define will also be deployed to as part of this phase of the Lifecycle.
Phases with priority
When a phase is defined as a priority, deployments to the phase will be created as a priority task unless otherwise specified. When creating a deployment via UI, the priority checkbox will be selected by default.
From version 2025.2.7584, Priority Lifecycle Phase and Deployment with Priority will require an Enterprise license.
Create a new lifecycle
-
From the Lifecycle page, click on the ADD LIFECYCLE button.
-
Give the Lifecycle a name and add a description.
-
Define the Retention Policy.
Retention policies define how long releases are kept for, and how long extracted packages and files are kept on Tentacles. The default for both is to keep all. Learn more about Retention Policies.
-
Click ADD PHASE to define the phases of the lifecycle.
-
Give the phase a name.
-
Click ADD ENVIRONMENT to define which environments can be deployed to during this phase of the lifecycle.
You can add one or multiple environments, or leave the default Any Environments option selected. Note, if you choose to use Any Environments, this phase of the Lifecycle will deploy to all the environments that haven’t been explicitly added to the Lifecycle in previous phases. Any future environments you define will also be deployed to as part of this phase of the Lifecycle.
-
By default, users must manually queue the deployment to the environment, if you would like the deployment to occur automatically as soon as the release enters the phase, select Deploy automatically….
If you have a project set up with a built-in package repository trigger (formerly Automatic release creation) and set your first phase and environment to automatically deploy, pushing a package to the internal library will trigger both a release and a deployment to that environment.
-
Set the Required to progress option. This determines how many environments must be deployed to before the next phase can be activated. The options are:
-
All must complete.
-
A minimum of x must complete. If you choose this option, and, for example, have 5 environments in the phase and choose 2, then 2 of the 5 environments must be deployed to before the next phase can be activated.
-
Optional. This lets you skip a phase when it is reached in the Lifecycle. This allows you to release to environments in the next phase without being required to deploy to any in the optional phase. The standard Lifecycle progression rules apply that determine when an optional phase is deployable. Optional phases may be useful for scenarios such as the provision of a
Testingphase that can optionally be deployed to, but isn’t crucial to progressing on toProduction.Automatic deployments not evaluated for Optional phases Optional phases do not execute automatic deployments. If you want to deploy releases automatically to any environments in a phase, use one of the other Required to progress options.
If you want to be able to deploy to any environment at any time, then simply create a single-phase that has Required to progress set to
All must completeand includes all your environments. -
-
Each phase of the Lifecycle can have its own retention policy defined. Set the retention policy for the phase if you don’t want it to inherit the retention policy defined for the entire Lifecycle.
-
Add as many additional phases as you need.
-
Click SAVE.
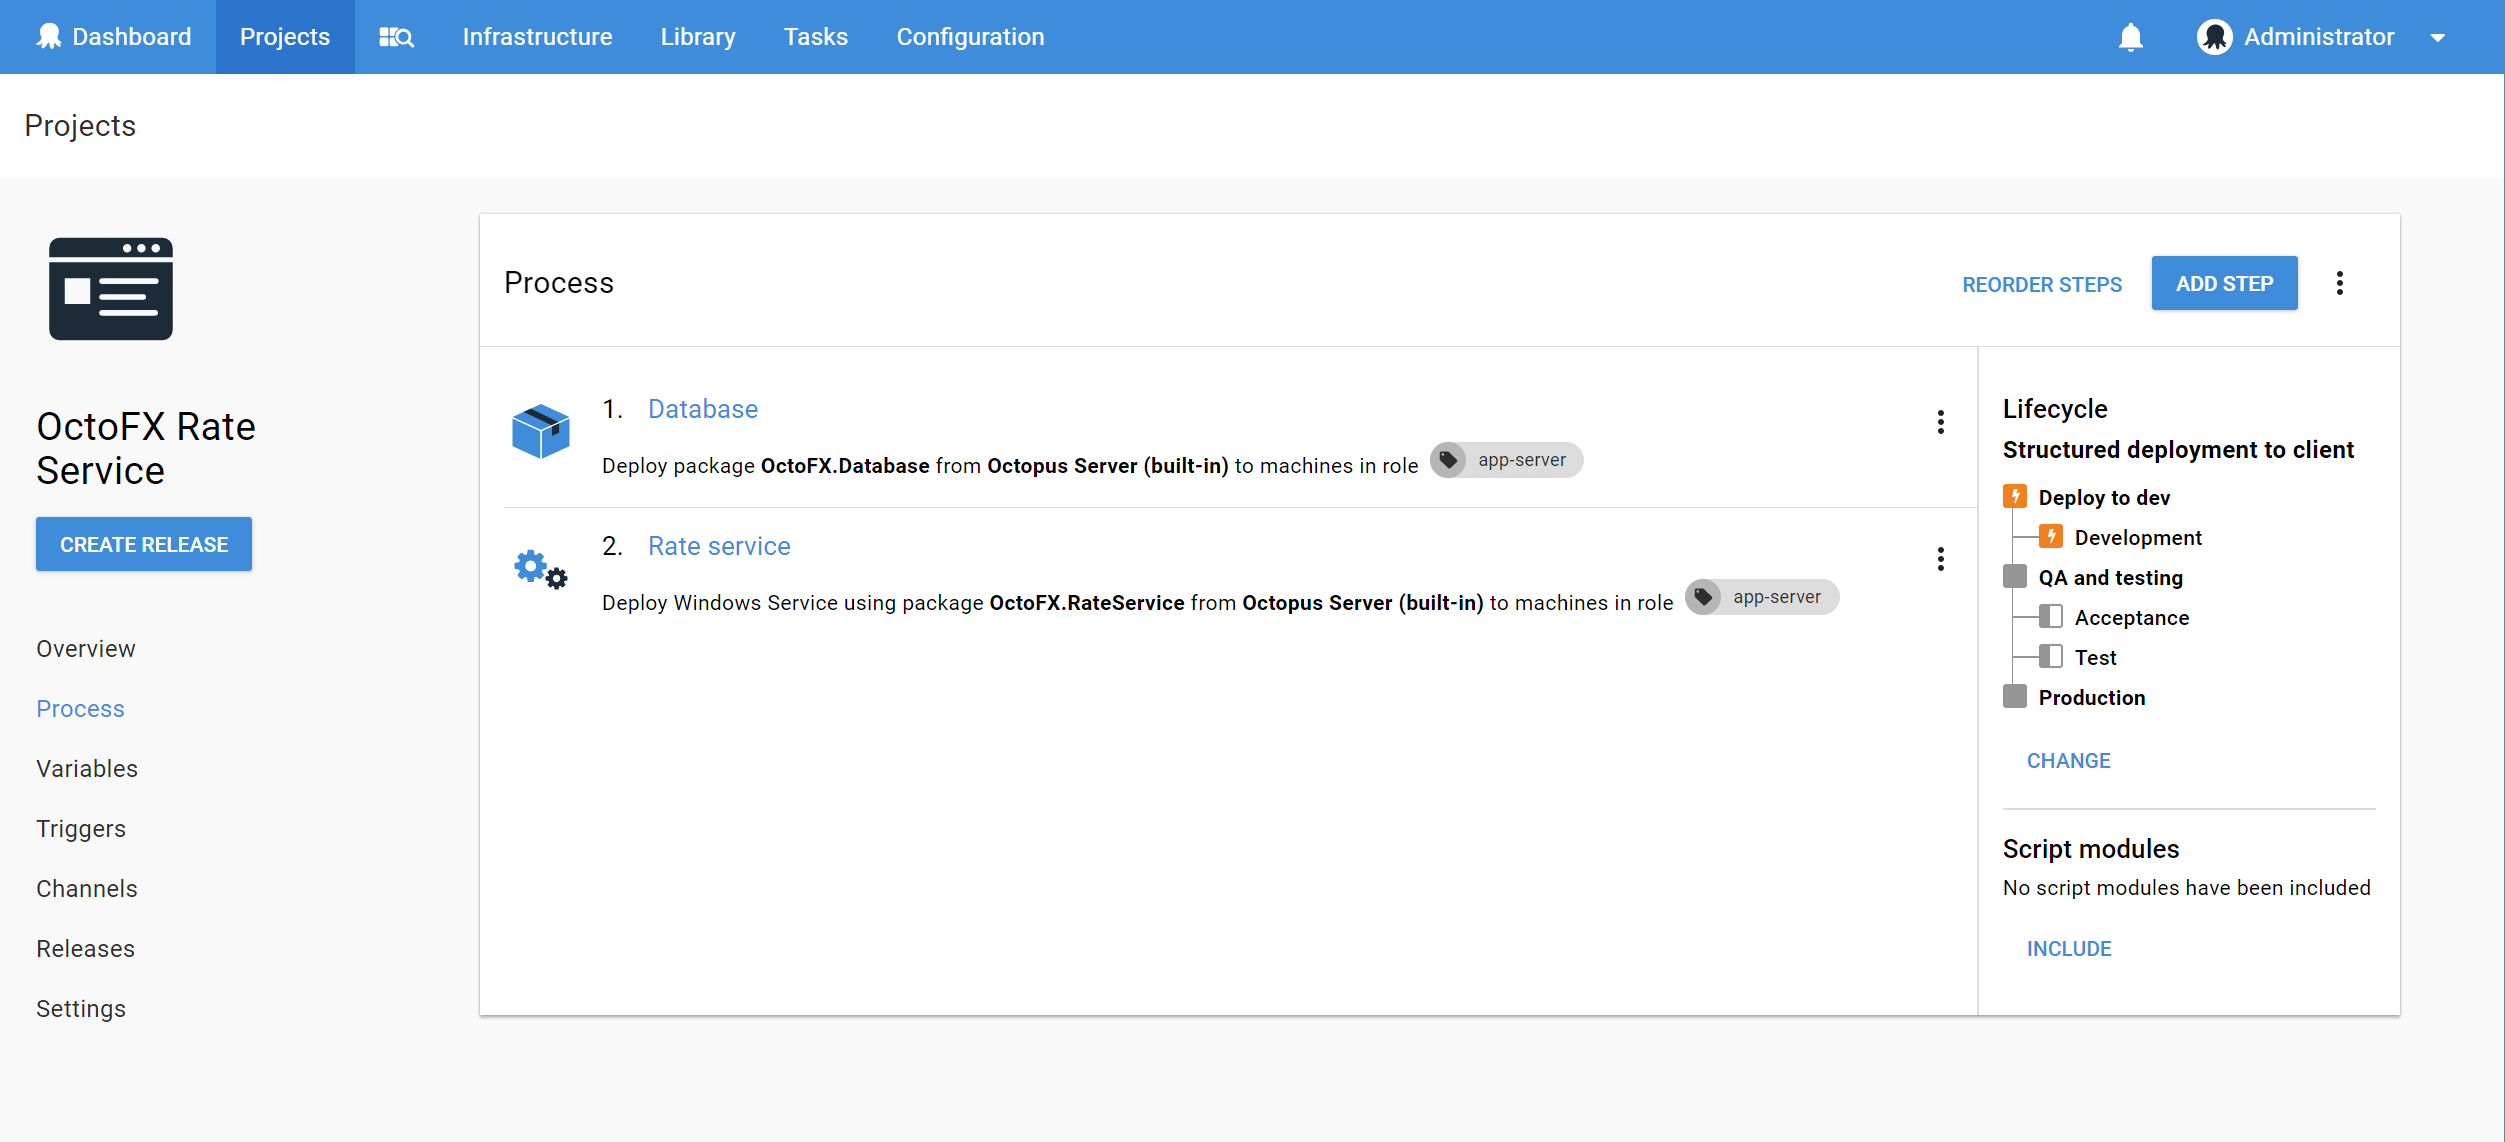
After you have defined your lifecycles, they become available to your projects. Projects can be deployed to any environment in their lifecycle.
Default lifecycle
Octopus creates a default lifecycle for you. To view it, navigate to Library ➜ Lifecycles, and it will be in the list named Default Lifecycle:
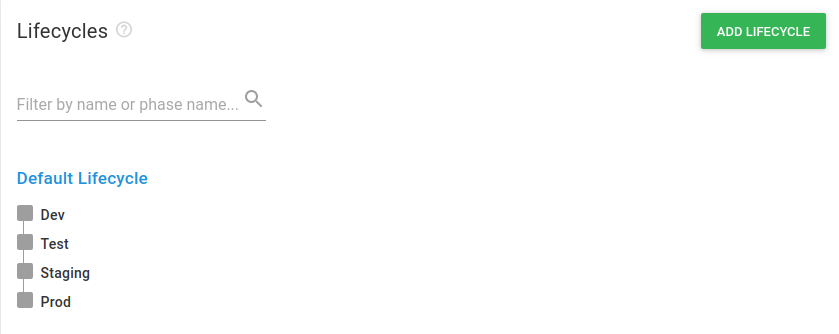
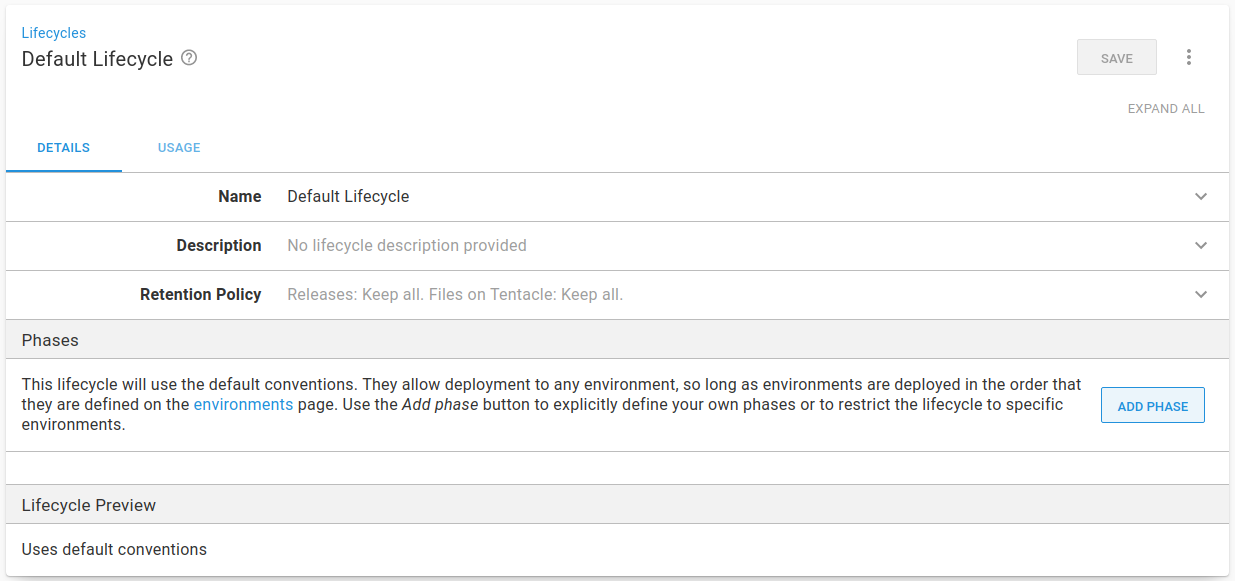
The phases shown are created implicitly by the default lifecycle. By convention, the default lifecycle will create one phase per environment. They appear in the same order the environments are listed on the environments page. To view the default conventions applied, click on the lifecycle and the information appears in the Phases section :
Update the default lifecycle
The default lifecycle handles most cases for small or straightforward configurations.
When you create a new environment, it’s automatically included in the default lifecycle. This also means that if you reorder the environments, the order of the phases will also change to match. These conventions can be helpful, but can sometimes lead to performance problems.
Try to keep the number of environments in Octopus under ten. Having fewer environments keeps the number of phases in the default lifecycle low.
We recommend updating the default lifecycle to define the phases you need. This makes configuring and maintaining your Octopus Server easier.
In the next section, we look at configuring the default lifecycle to add your own phases.
Adding a phase to the default lifecycle
You can define your own phases for the default lifecycle. This helps to prevent having too many phases being added automatically. To add a new phase, in the default lifecycle, Click ADD PHASE. Here, we are creating a phase named Development and adding the Dev environment to the phase:
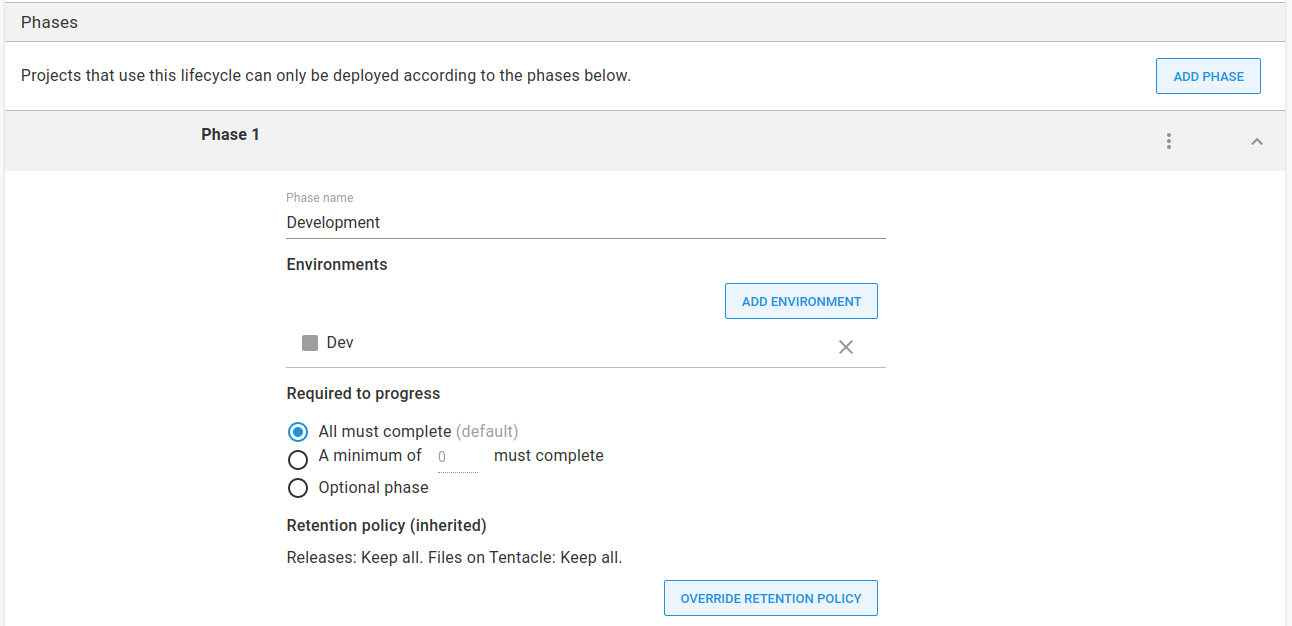
This phase has the default option to manually deploy to the environment set. The Required to progress and Retention policy are also set to the default values.
Phase names usually match the environment it contains. While this is a good practice, it’s not a rule.
You can repeat this process to create extra phases. In this example, we are creating a phase for Testing, Staging, and Production.
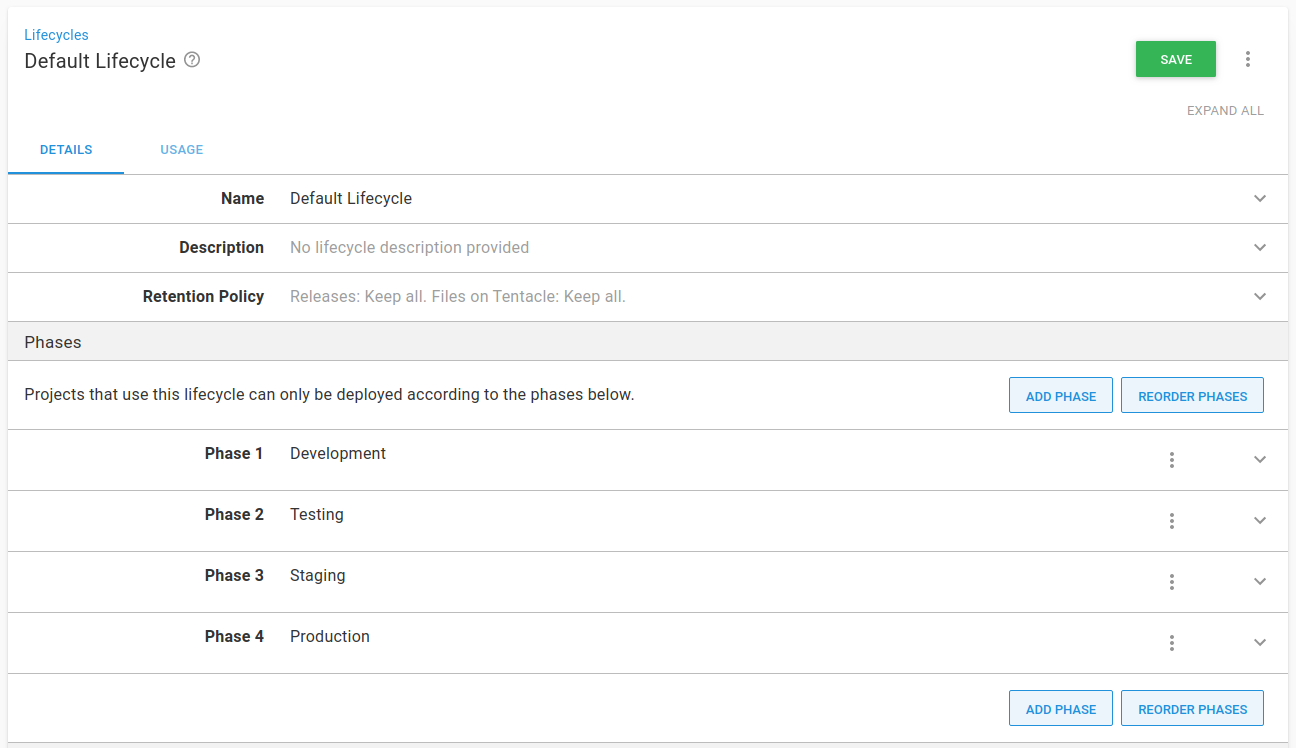
This allows you to explicitly configure the default lifecycle for deploying your software.
Examples
In this section, we cover some lifecycle examples and their included phases.
Hotfix lifecycle
A hotfix lifecycle is useful when you have a critical bug-fix that needs to be deployed quickly. In this scenario, lower environments such as Development and Testing are skipped.
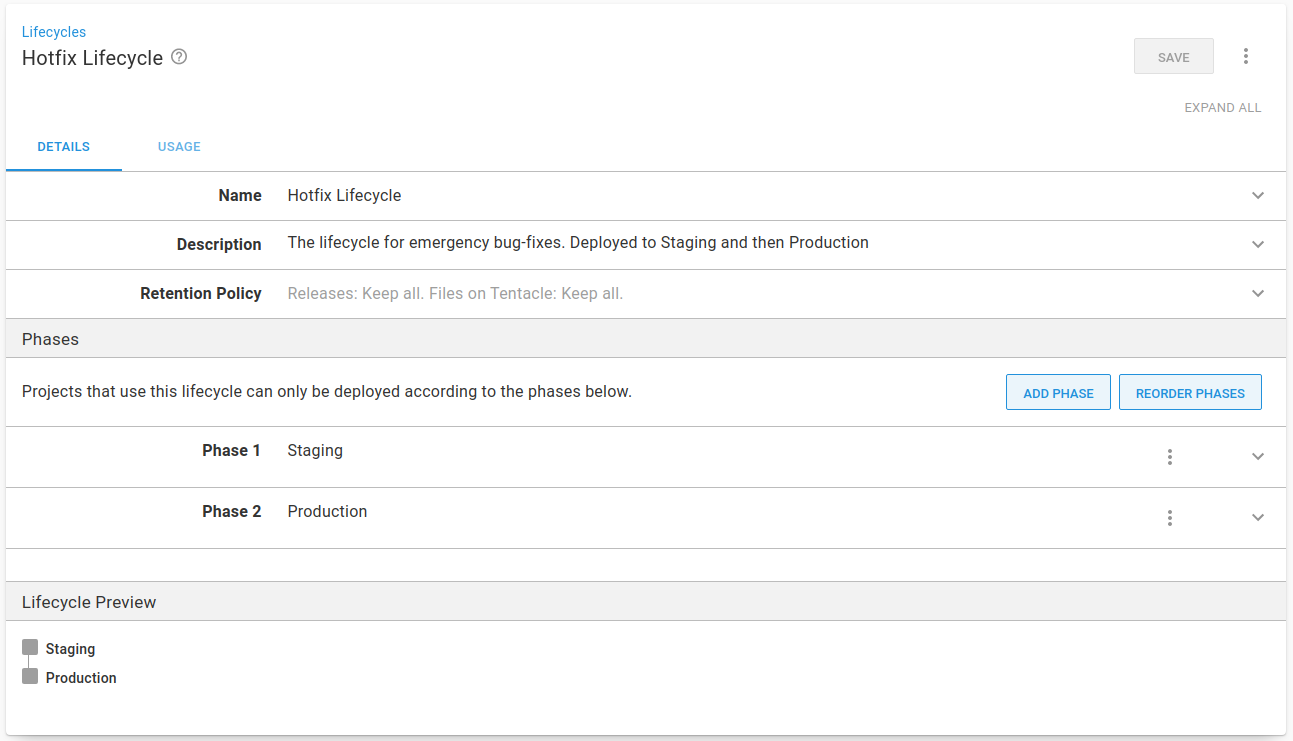
It’s recommended to follow good deployment practices and validate any changes before pushing them to production. To match this, a hotfix lifecycle usually has just two phases, Staging and Production. Software with the bug fix is validated in Staging and then promoted to Production. Your lifecycle may be different to reflect how you decide to handle hotfixes.
Maintenance lifecycle
Octopus 2019.10 introduced Runbooks as an alternative to having a maintenance lifecycle. They allow you to automate routine maintenance and emergency operations tasks.
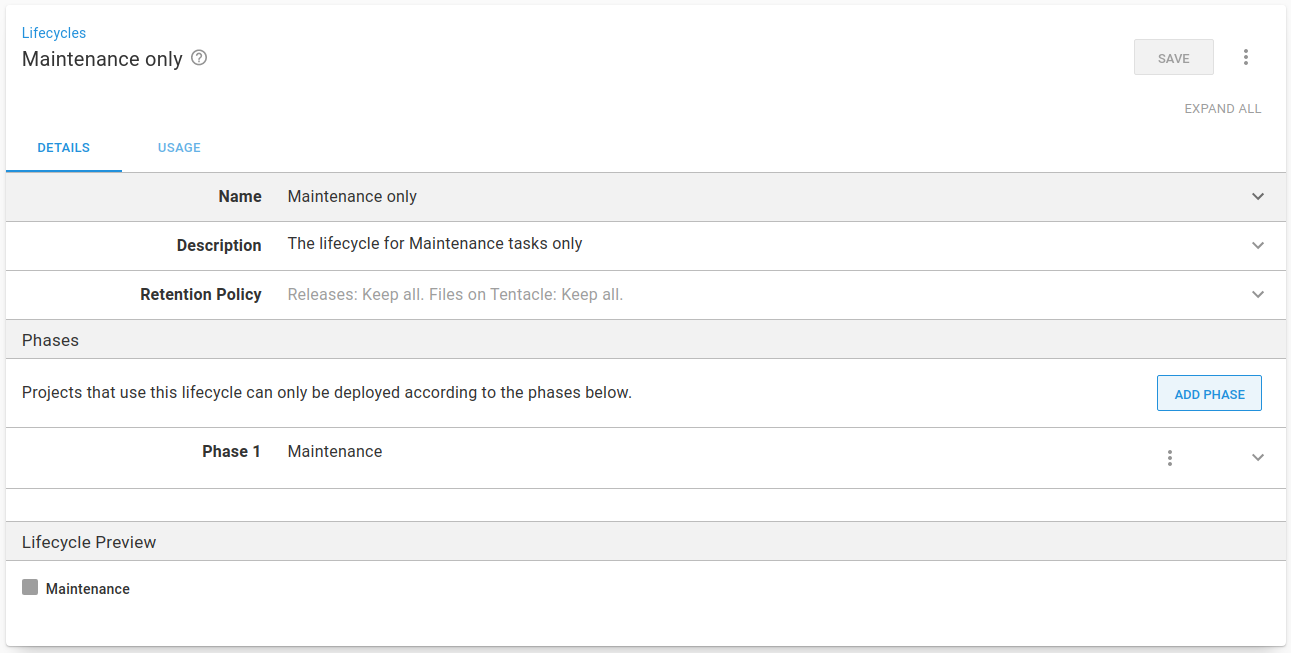
A Maintenance lifecycle can be used for projects that run maintenance tasks such as backups or software upgrades. This lifecycle can be used for any tasks that you want to run regularly with the same benefits that Octopus provides for your application deployments.
It typically consists of just one phase and one environment, also called Maintenance. You can include this environment in all deployment targets you want to run these tasks against. You can also split them up into the Development, Testing, Staging, and Production environments if you want to run the tasks for targets in those environments at different times.
Removing lifecycles
For projects using Config as Code, it’s up to you to take care to avoid deleting any lifecycles required by your deployments. See our core design decisions for more information.
Recommendations
When configuring your lifecycles, here are some tips to consider:
- Update the default lifecycle to define the phases you need. This makes configuring and maintaining your Octopus Server easier.
- Keep the number of environments under ten to keep the phases added by the default lifecycle low.
- Create a lifecycle for any projects which need a different promotion flow between environments. Remember to define phases for the lifecycle.
- Set specific retention policies for your lifecycles. This will prevent keeping releases and files forever, reducing disk and database usage.
Help us continuously improve
Please let us know if you have any feedback about this page.
Page updated on Tuesday, February 18, 2025